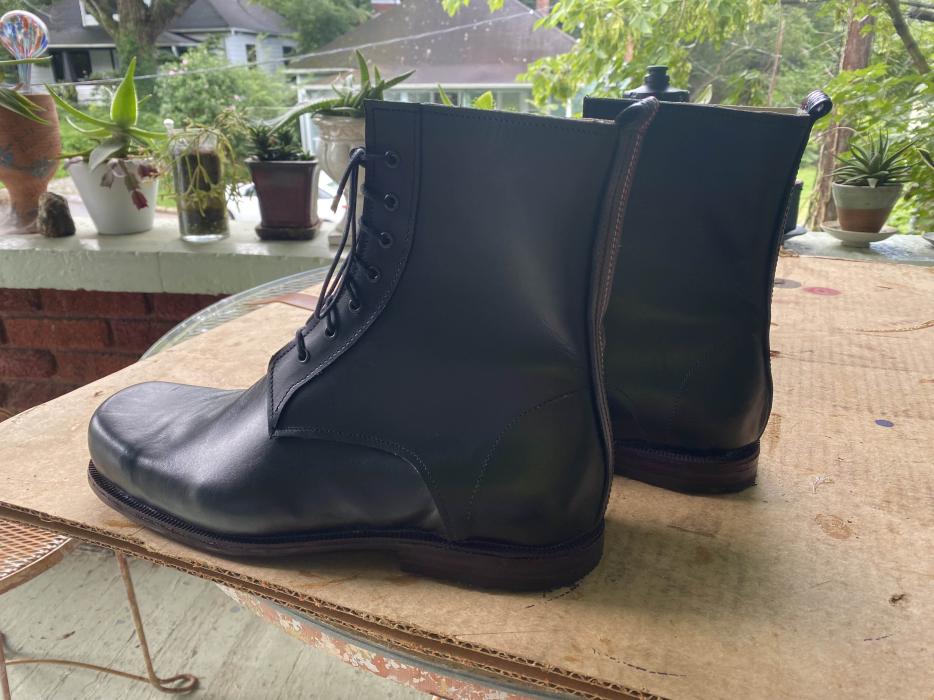
Sensing a theme yet? ![]() The second pair of shoes I ever made (2023) were derby boots for my partner, on a last with a super cool and really annoying flared square toe. I wanted to try doing the same boot on my own machines at home without guidance…lol I forgot some steps. This is an incredibly belated holiday gift for my partner’s brother, who has the same size feet apparently (tried on the original pair and said they fit great). So I think he’ll be understanding of some mistakes for something hand made with love.
The second pair of shoes I ever made (2023) were derby boots for my partner, on a last with a super cool and really annoying flared square toe. I wanted to try doing the same boot on my own machines at home without guidance…lol I forgot some steps. This is an incredibly belated holiday gift for my partner’s brother, who has the same size feet apparently (tried on the original pair and said they fit great). So I think he’ll be understanding of some mistakes for something hand made with love.
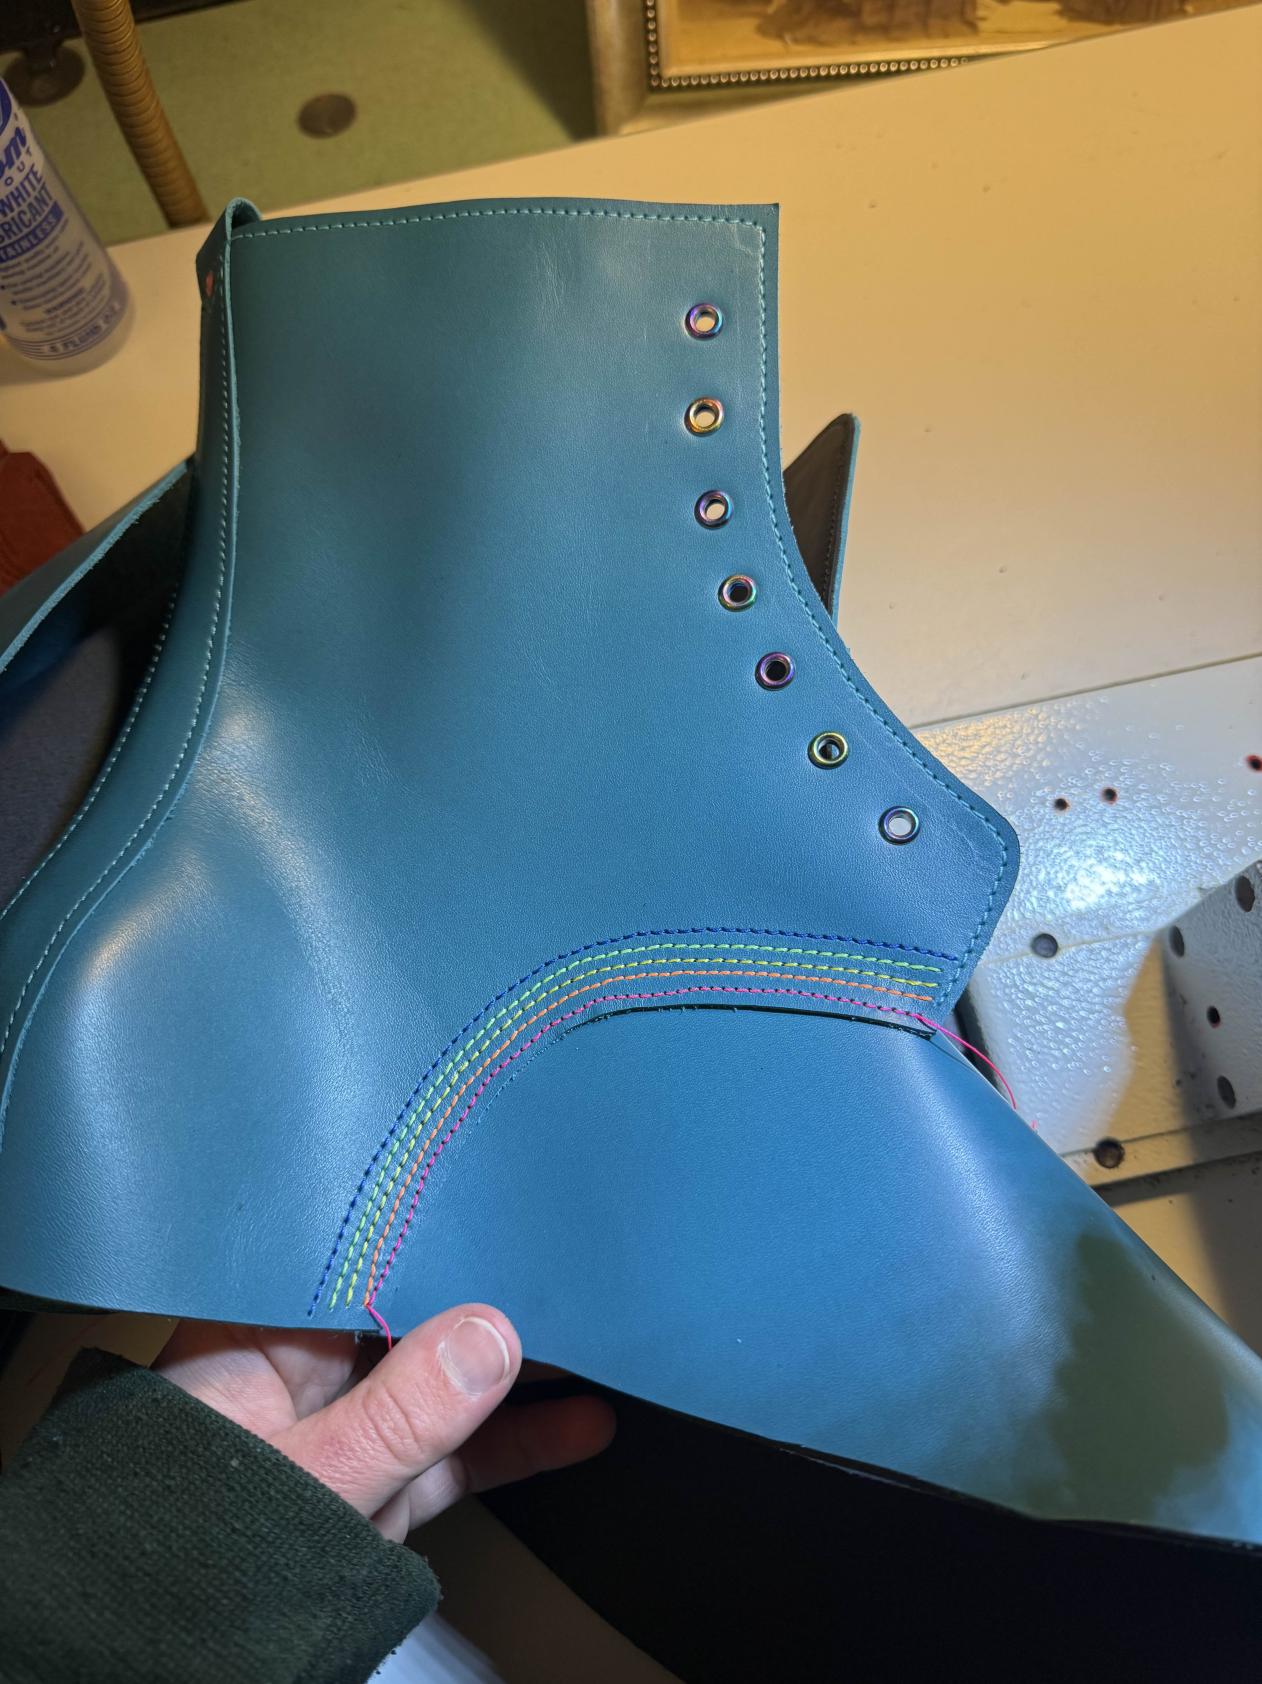
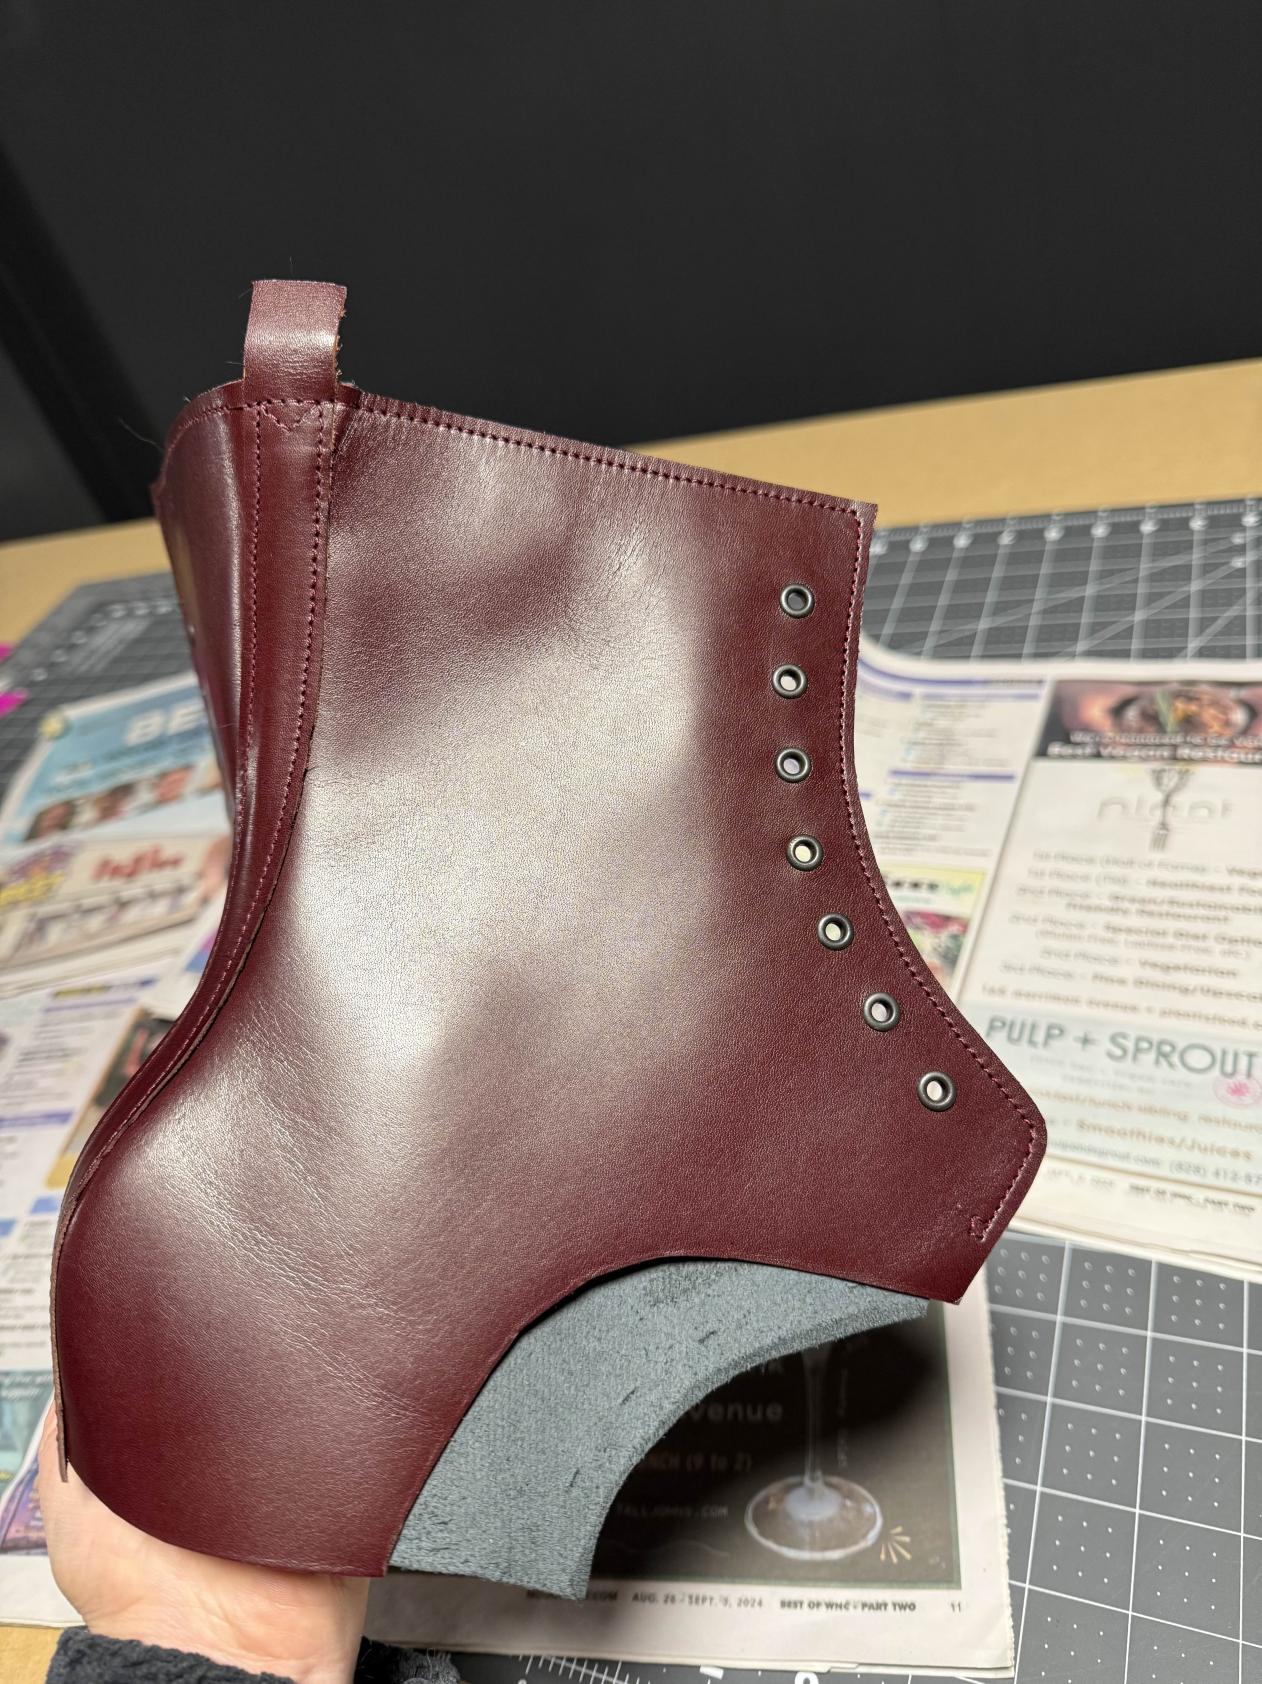
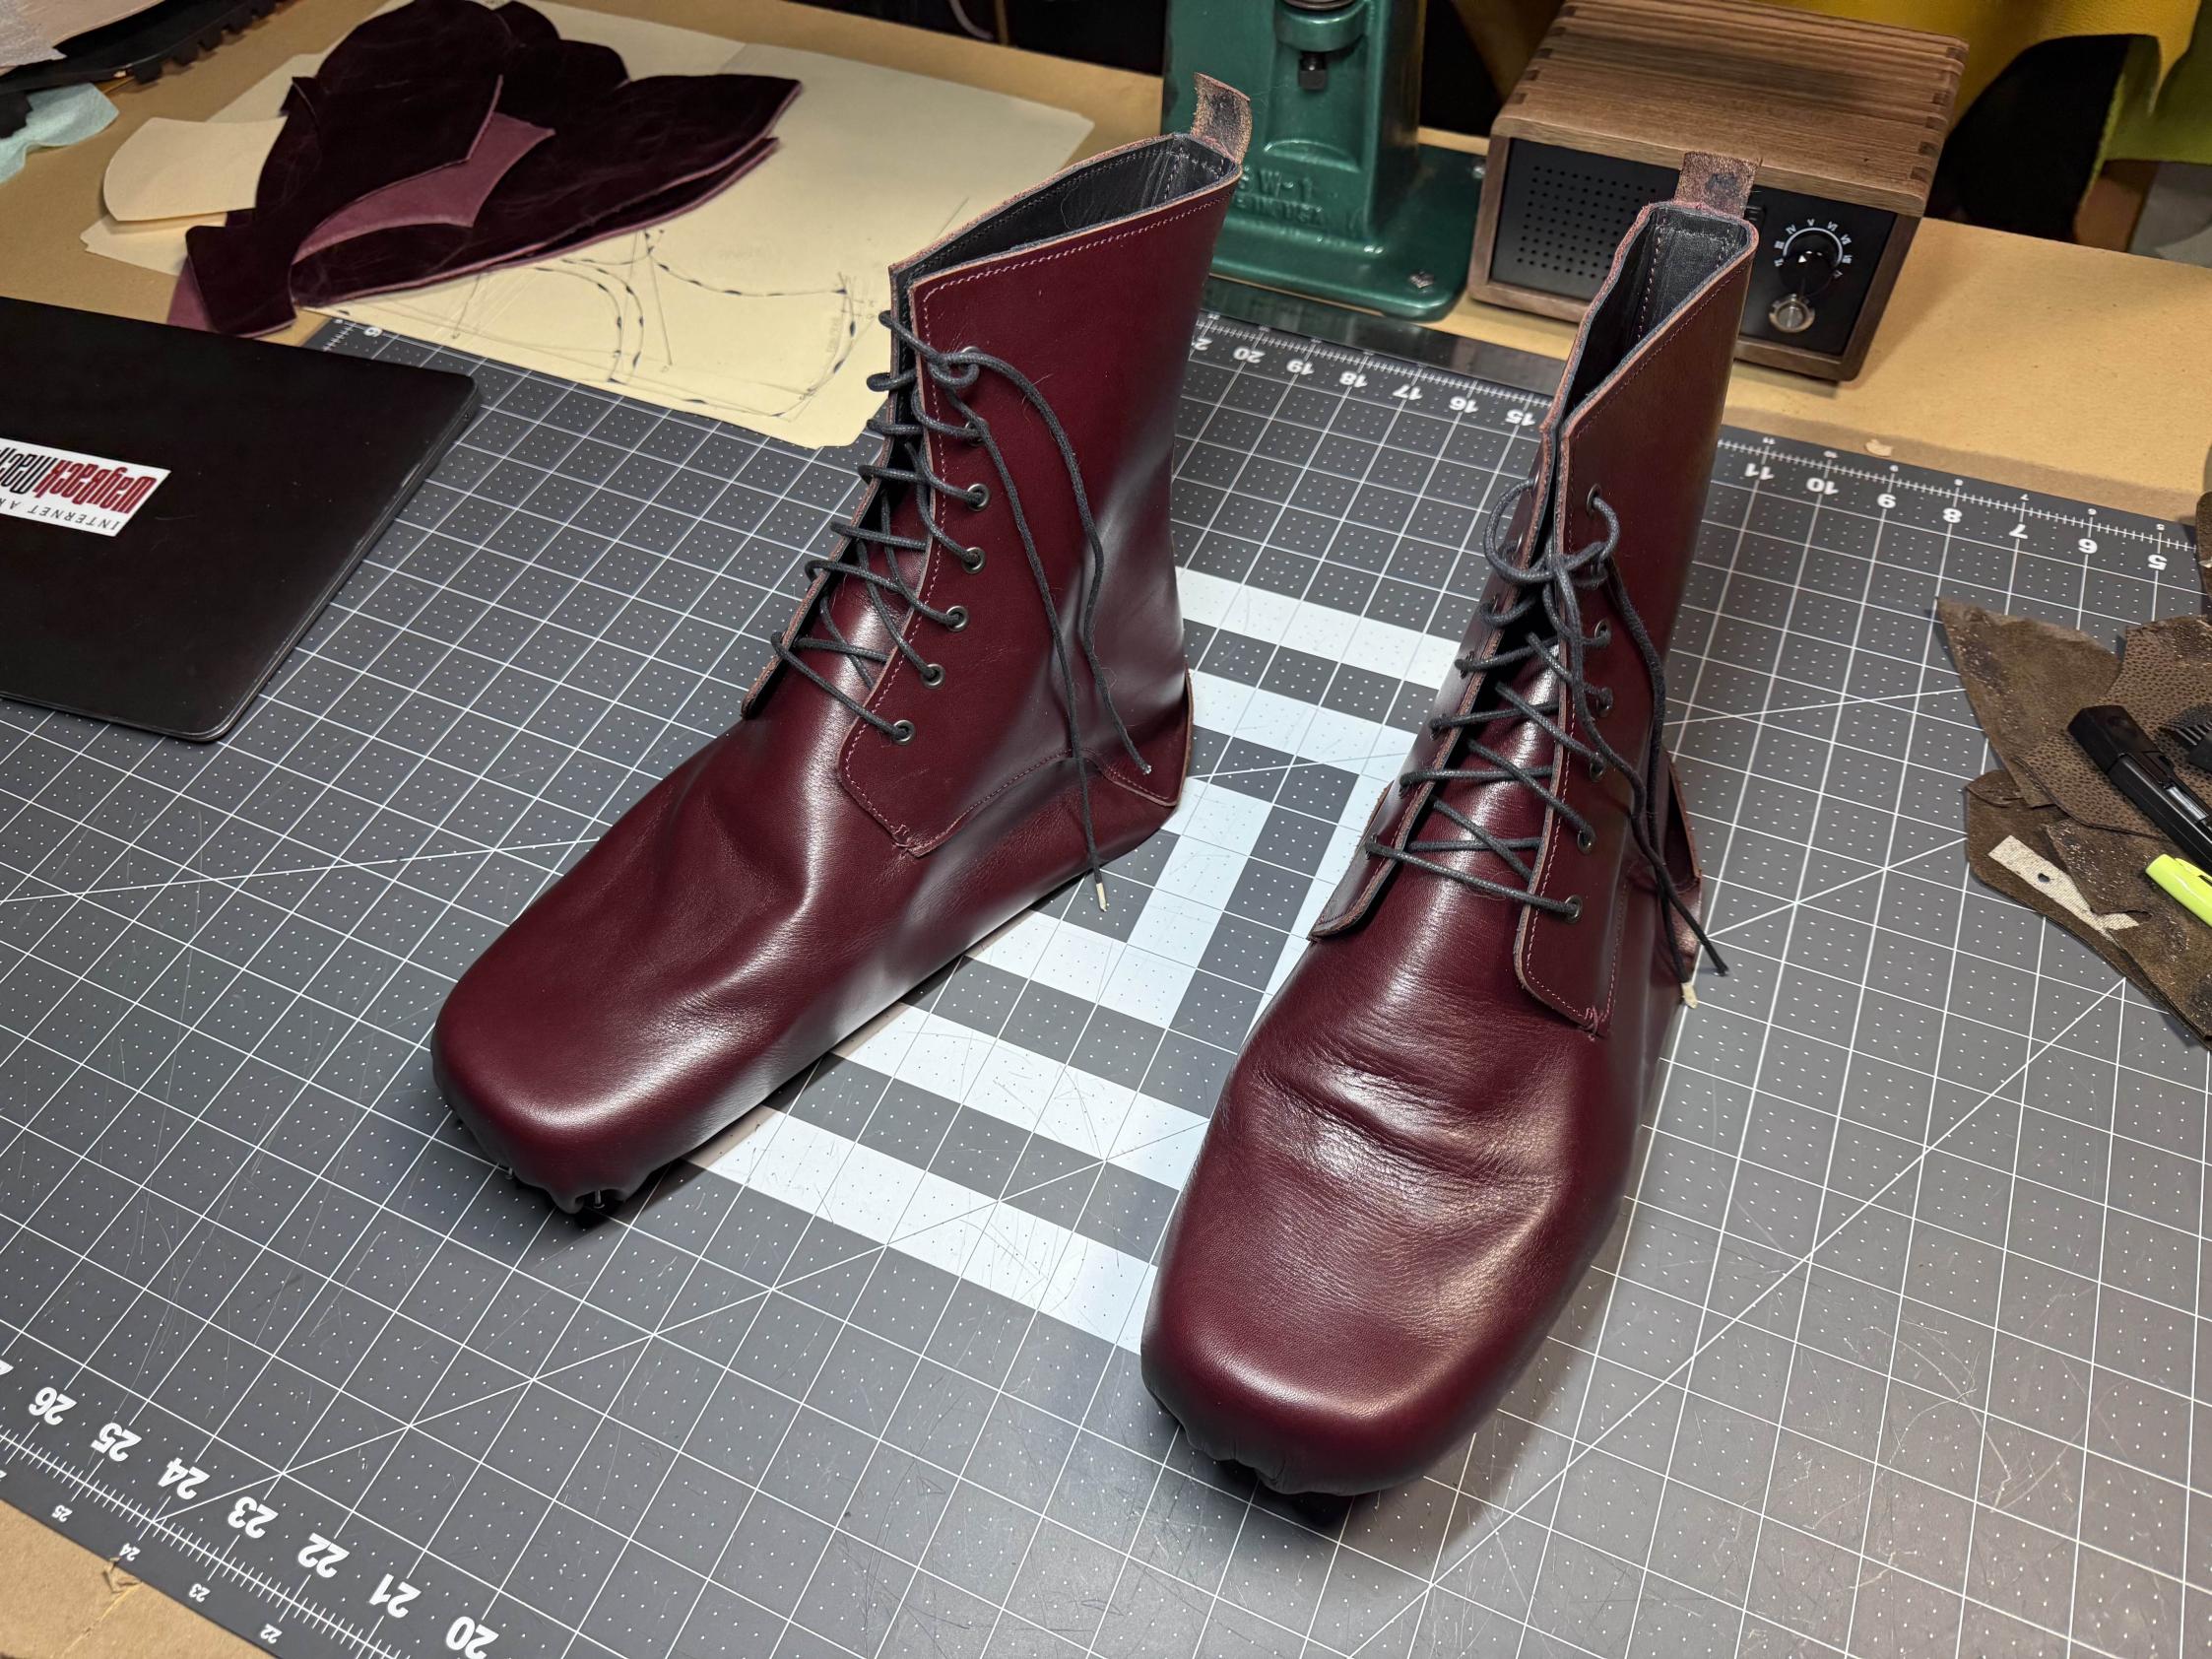
I have some more leather from that same retired tanner I made the bat boots with, but this is oxblood. I like a clean modern look, so I left off some details from the first version, namely eyelet plackets and a decorative heel stitch. First fuck up, I forgot to put reinforcement tape where the eyelets go.
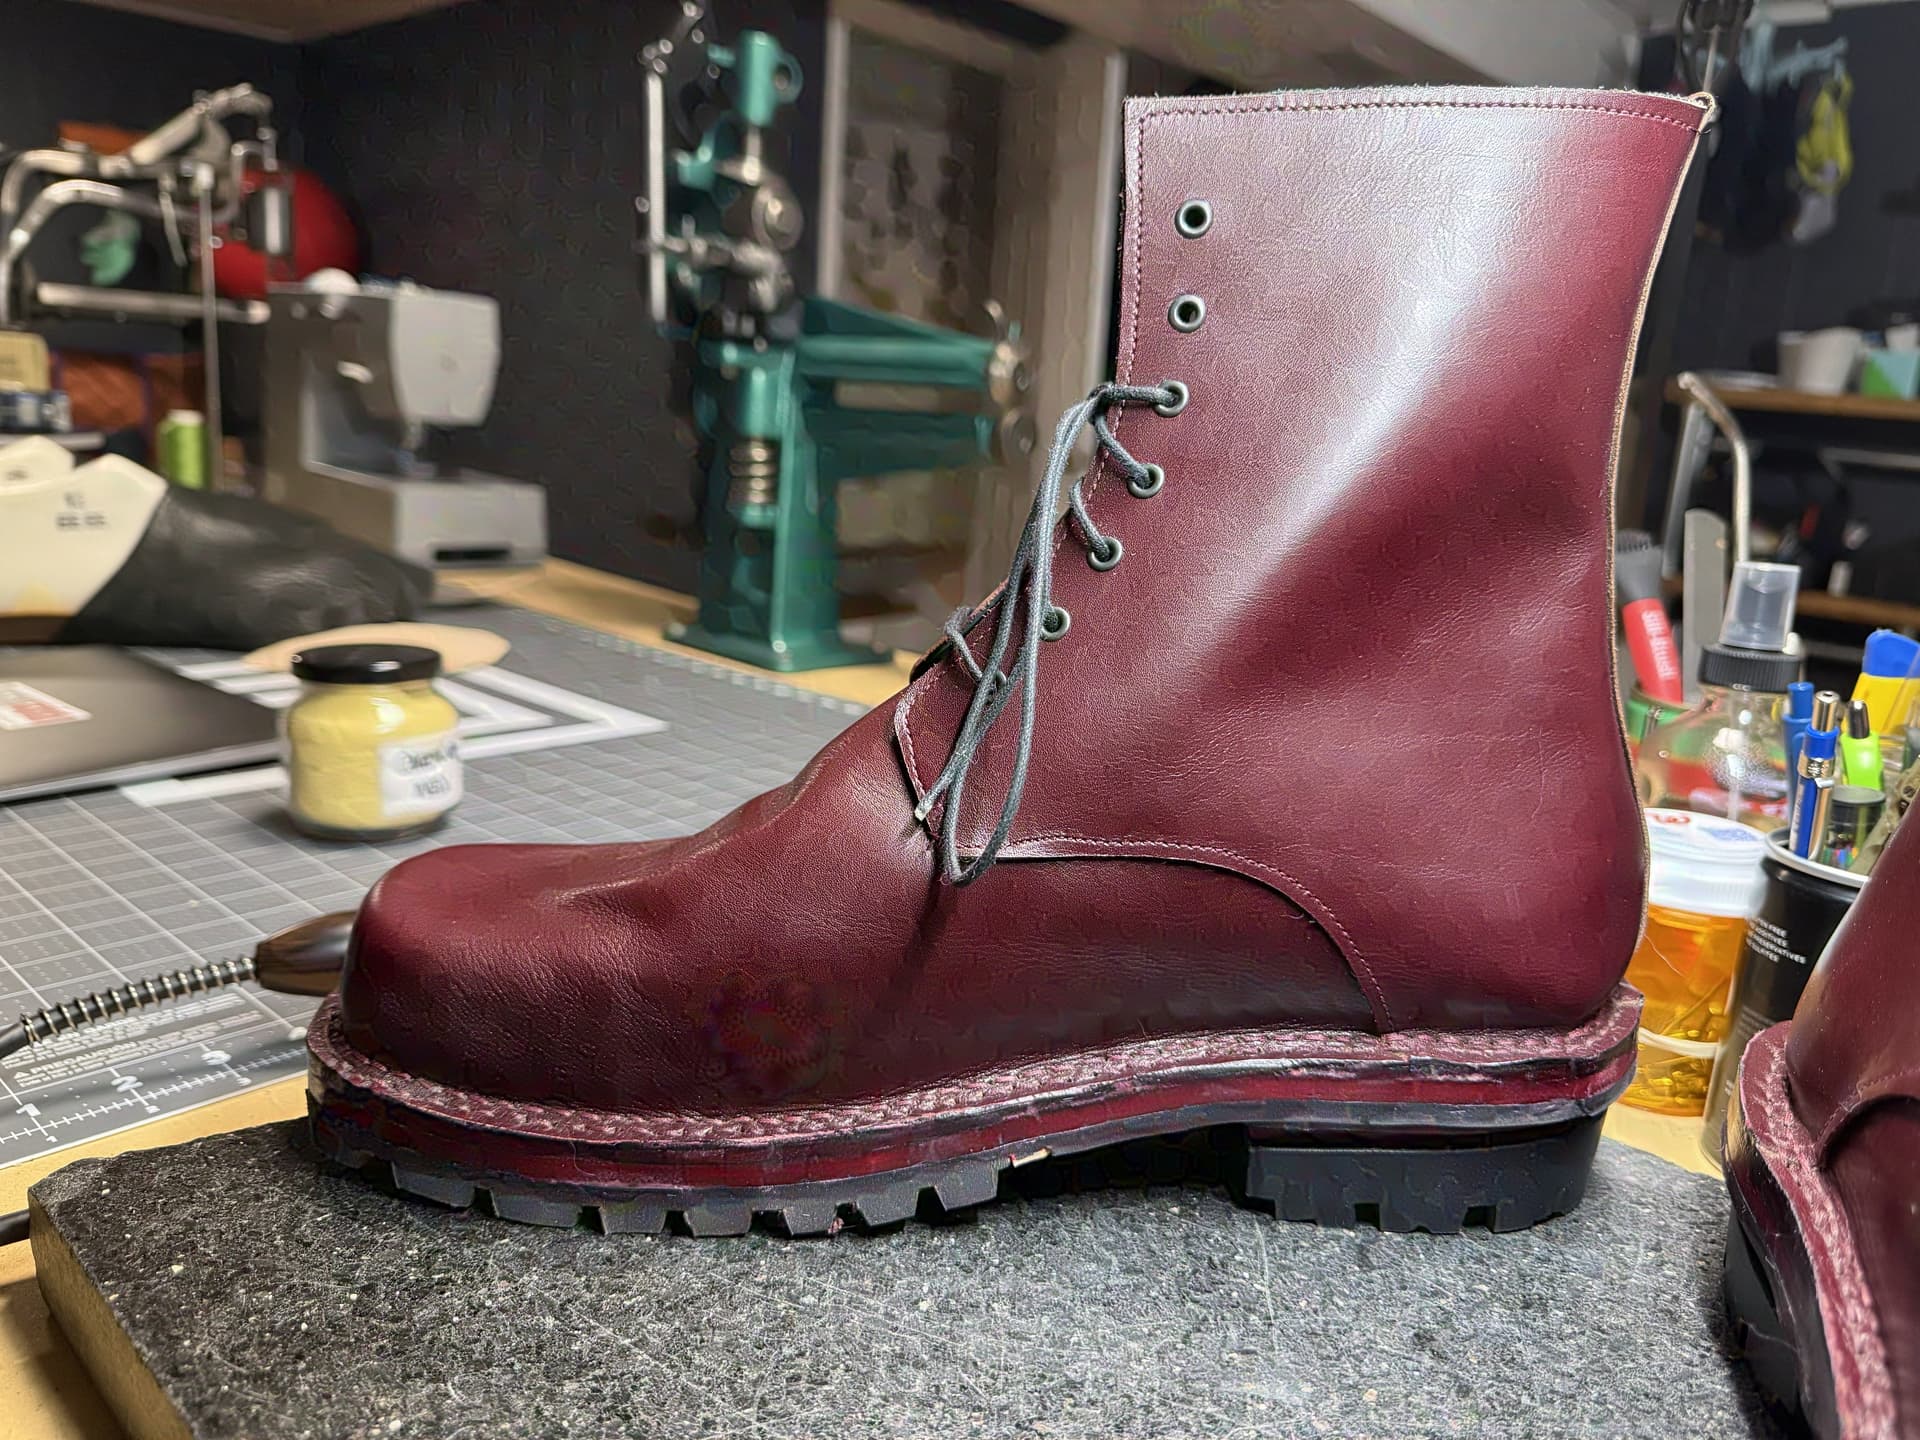
Notable on this construction is both the upper and lining have zig-zag stitching to butt them together, and putting the backstraps over that to hide them. My classmate Ray Latimer fixes up old sewing machines for fun and had fixed an old zig-zagger when I was working on the first version of these boots. He had just tried that technique on some shoes he was making and let me borrow it to try it on the boots. It was much nicer to evenly feed on a sewing machine than working through something lumpy on the side, as it might have been if it were not a butt seam. If you saw the bat boots I posted in the other thread, the reason I did that back seam and folded and stitched it down was to see what the alternative would look and stitch like. I actually thought that way was fine, but I think I would add a hair more allowance to sew down, and do it on my walking foot (or a double needle roller wheel if I could get access to one). All the stitching except closing up these boots done on my Sailrite LSZ with the smooth leather feed dogs and foot. First fuckup was forgetting the eyelet reinforcement tape.
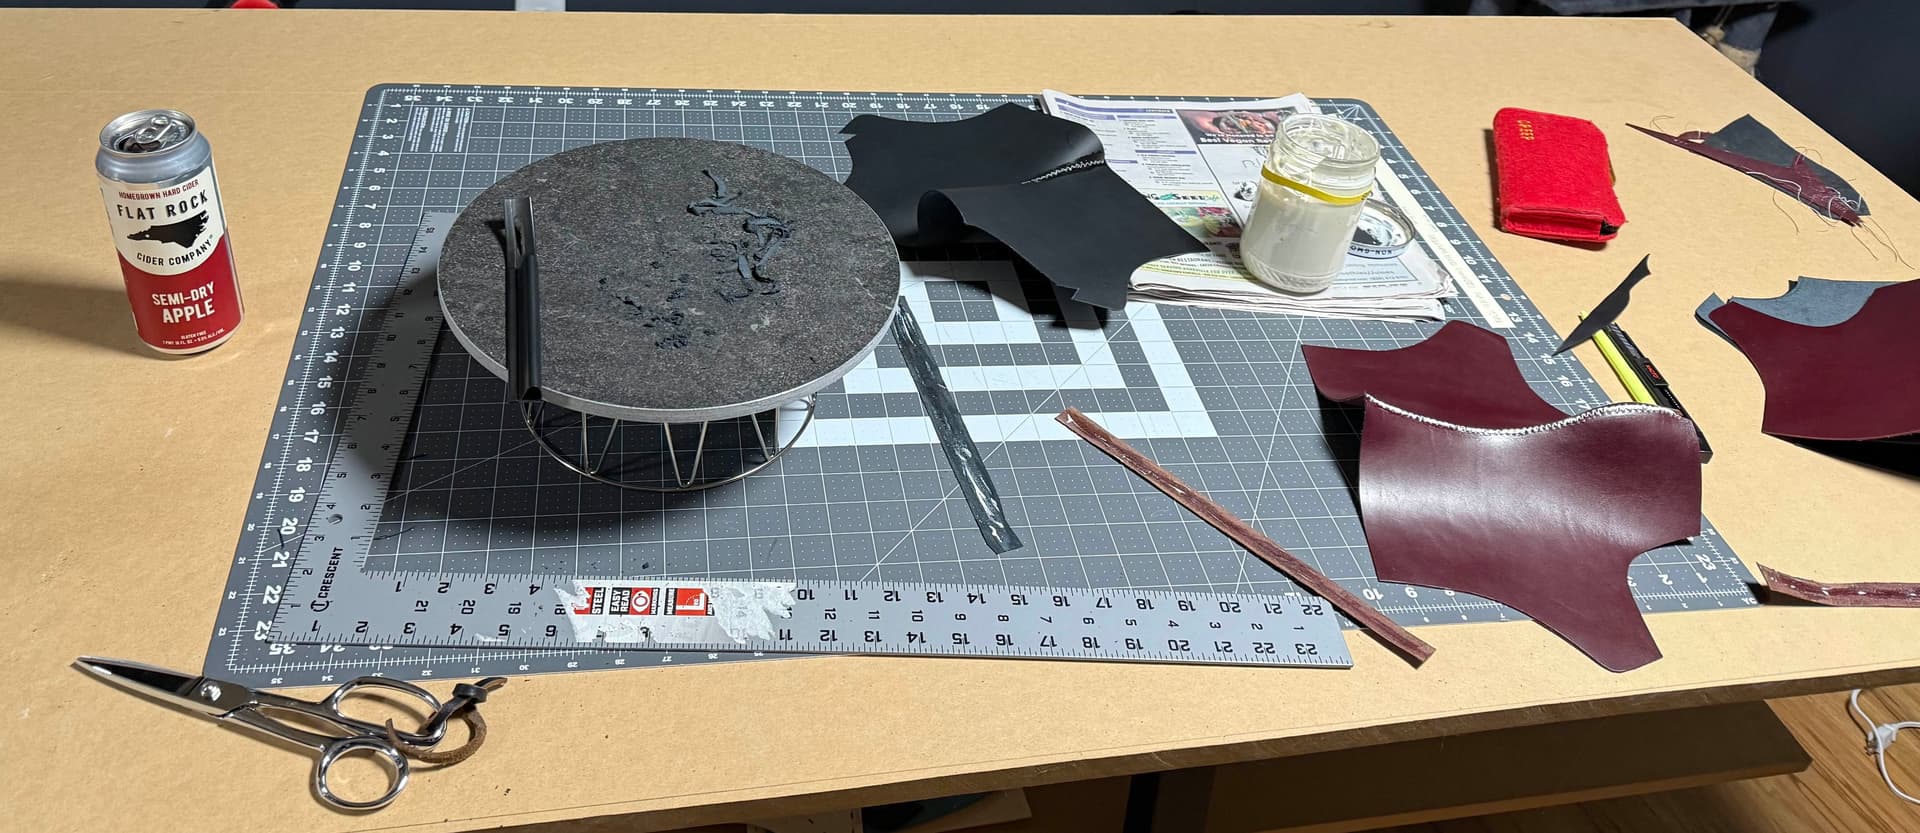
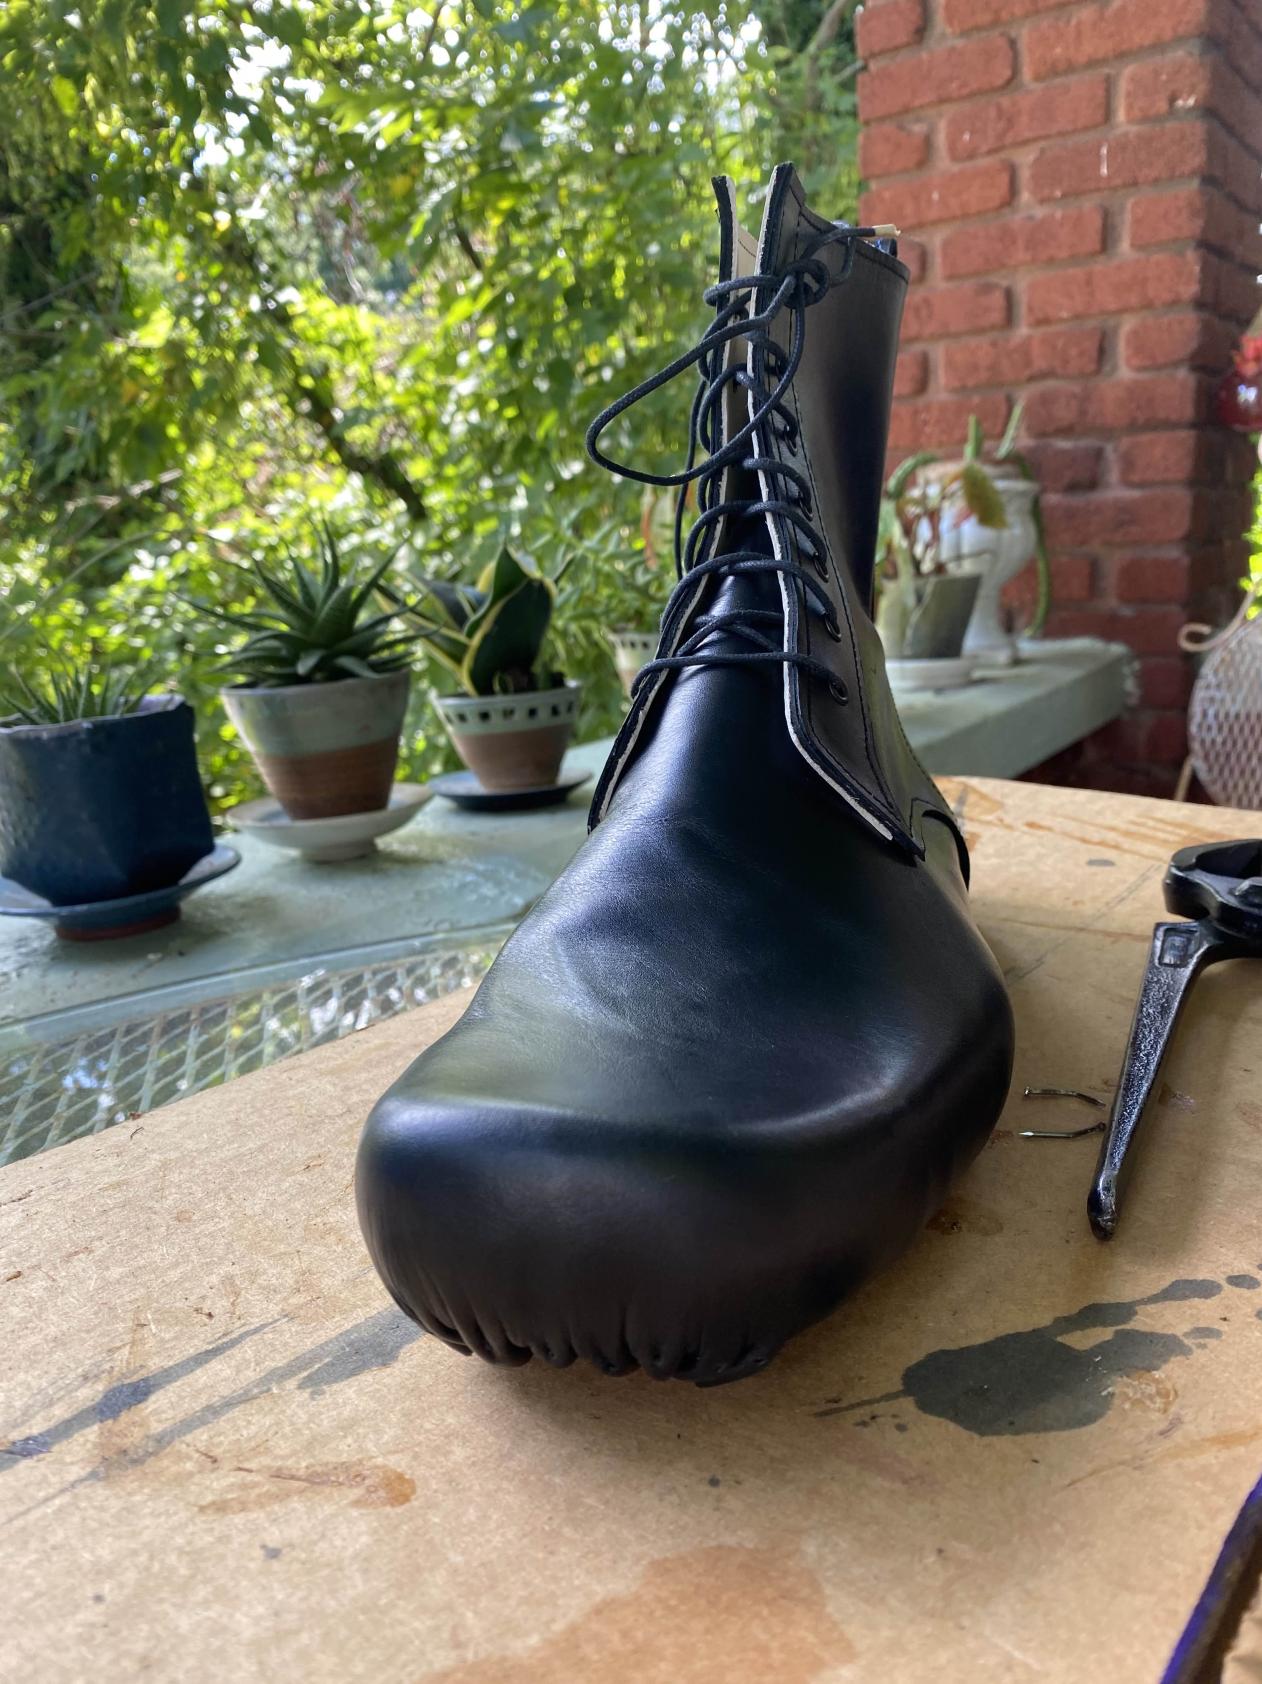
You can see how long ago I started these, I didn’t even have my space all set up here or have a decent skiving knife…At the time I also didn’t have permanent contact cement and kept accidentally ordering different brands of temporary stuff because I did not want the solvents and had not watched Lisa’s channel. When I figured out I wanted A315 it was winter and it couldn’t be shipped, so I waited quite a while to last these. In the interim I learned to stitchdown on the bat boots, and wondered if maybe I could do a stitchdown on these instead (the lasting allowance seems sufficient, so I am gonna try). In my haste to get to that step, I cemented the lining before remembering you have to shove the heel counter in before you do that.
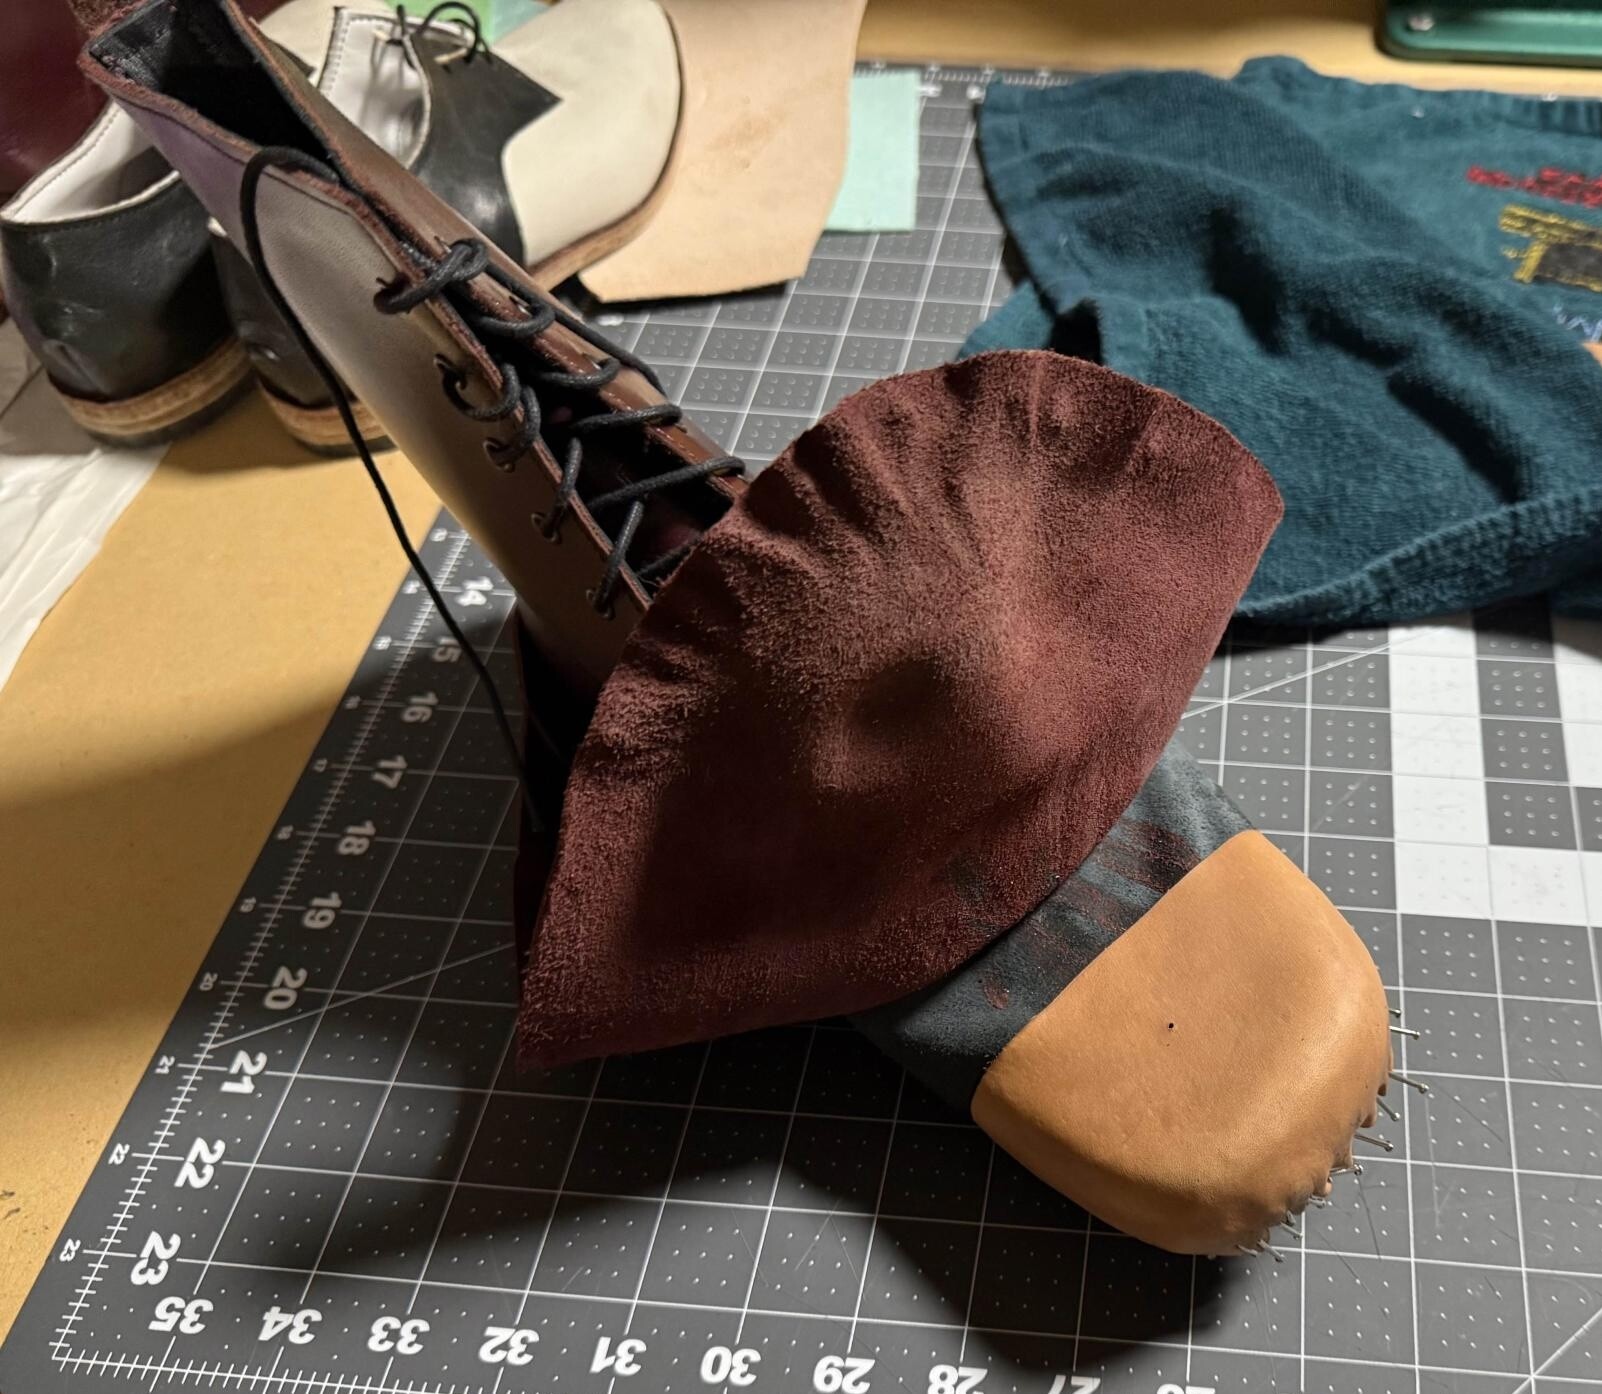
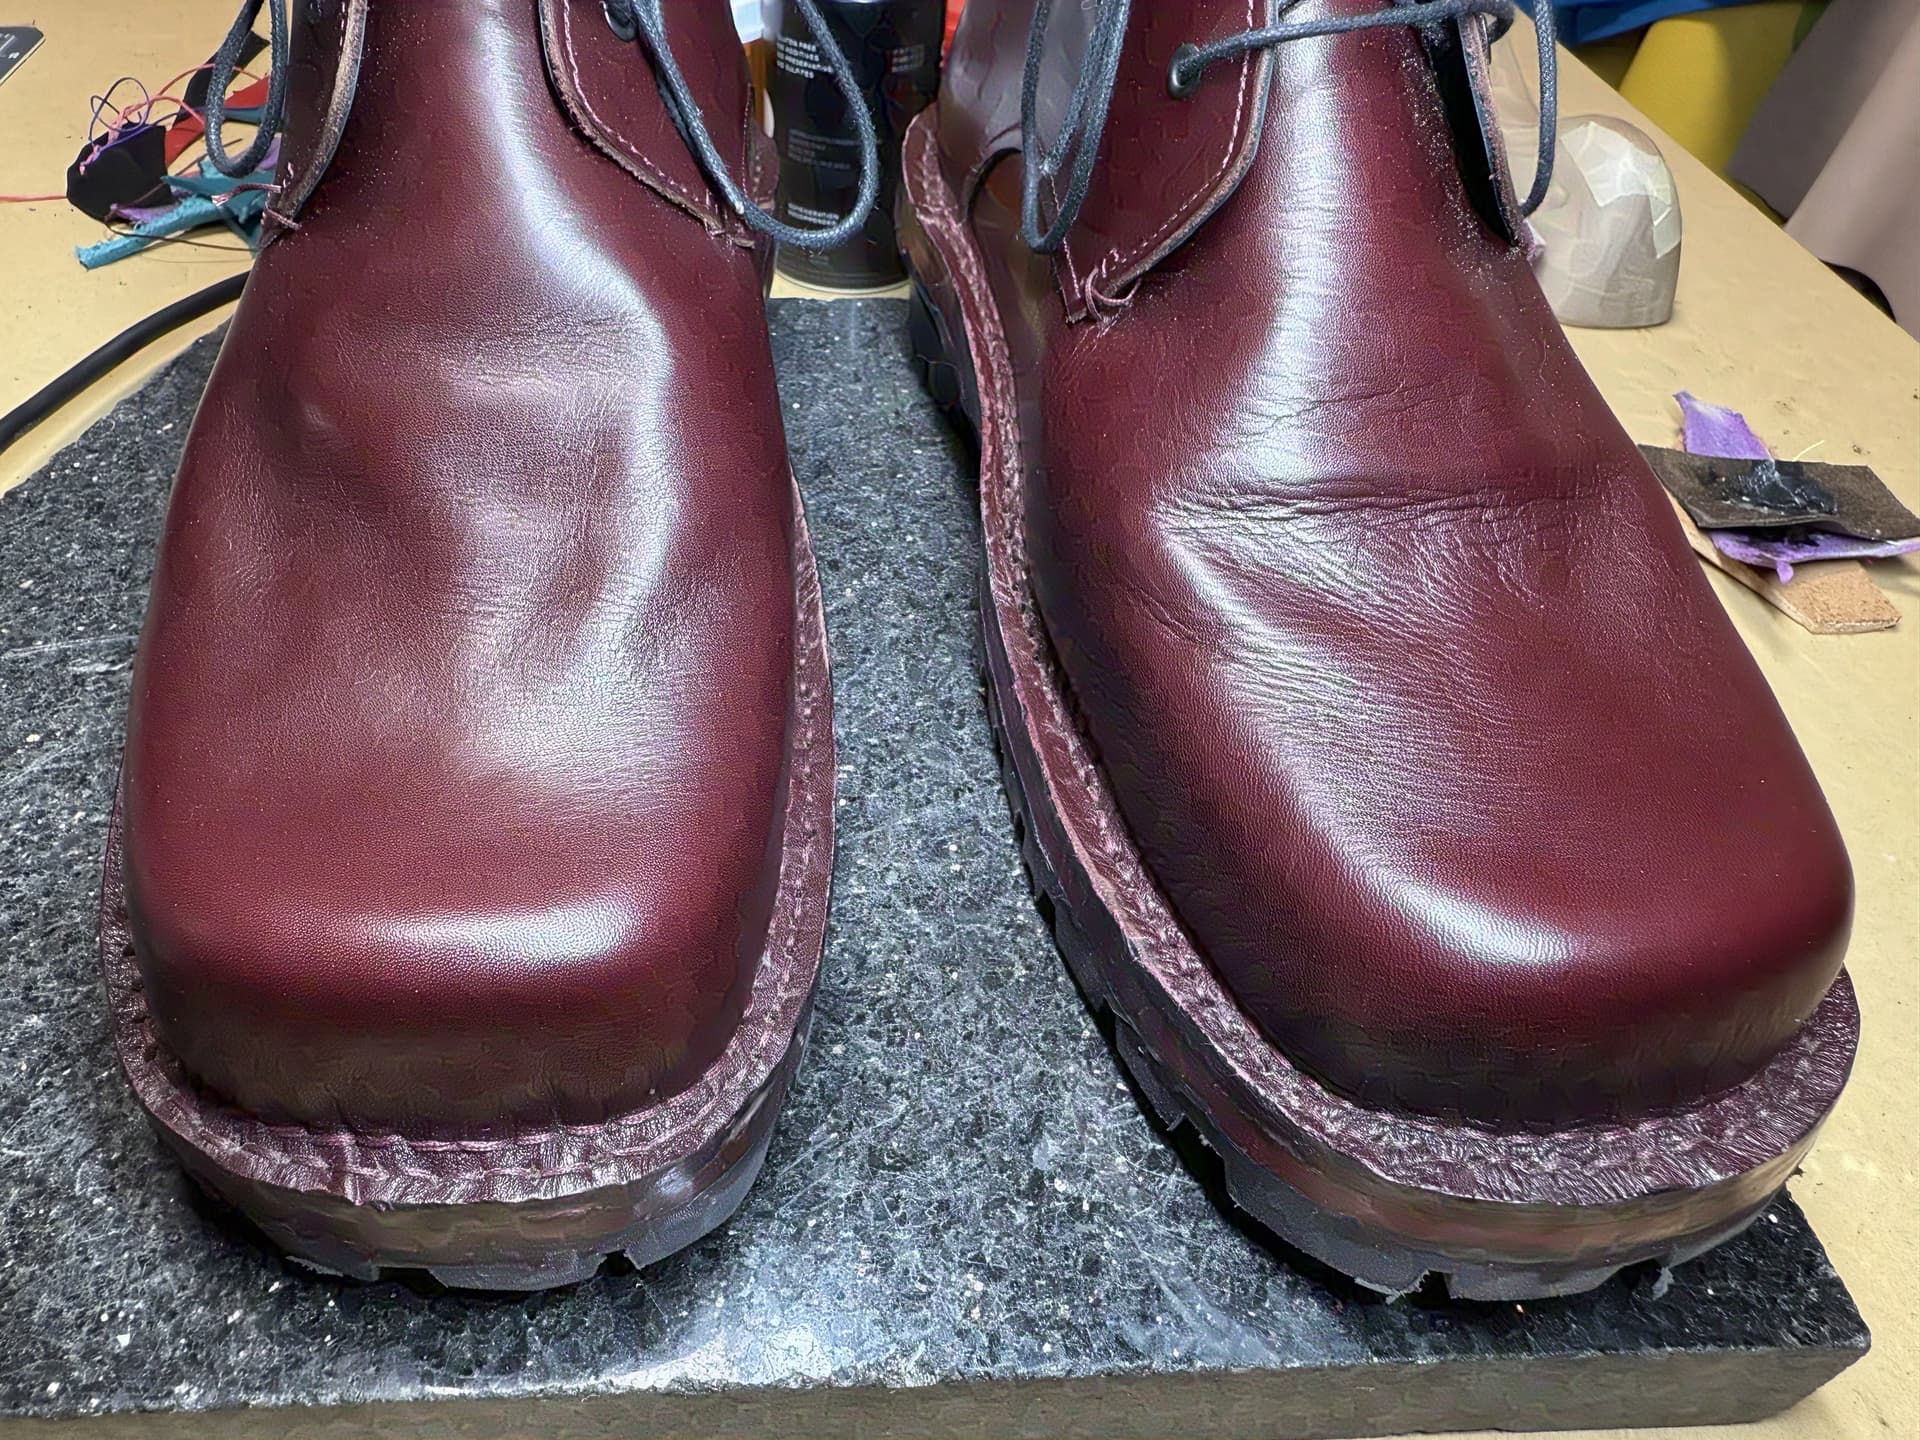
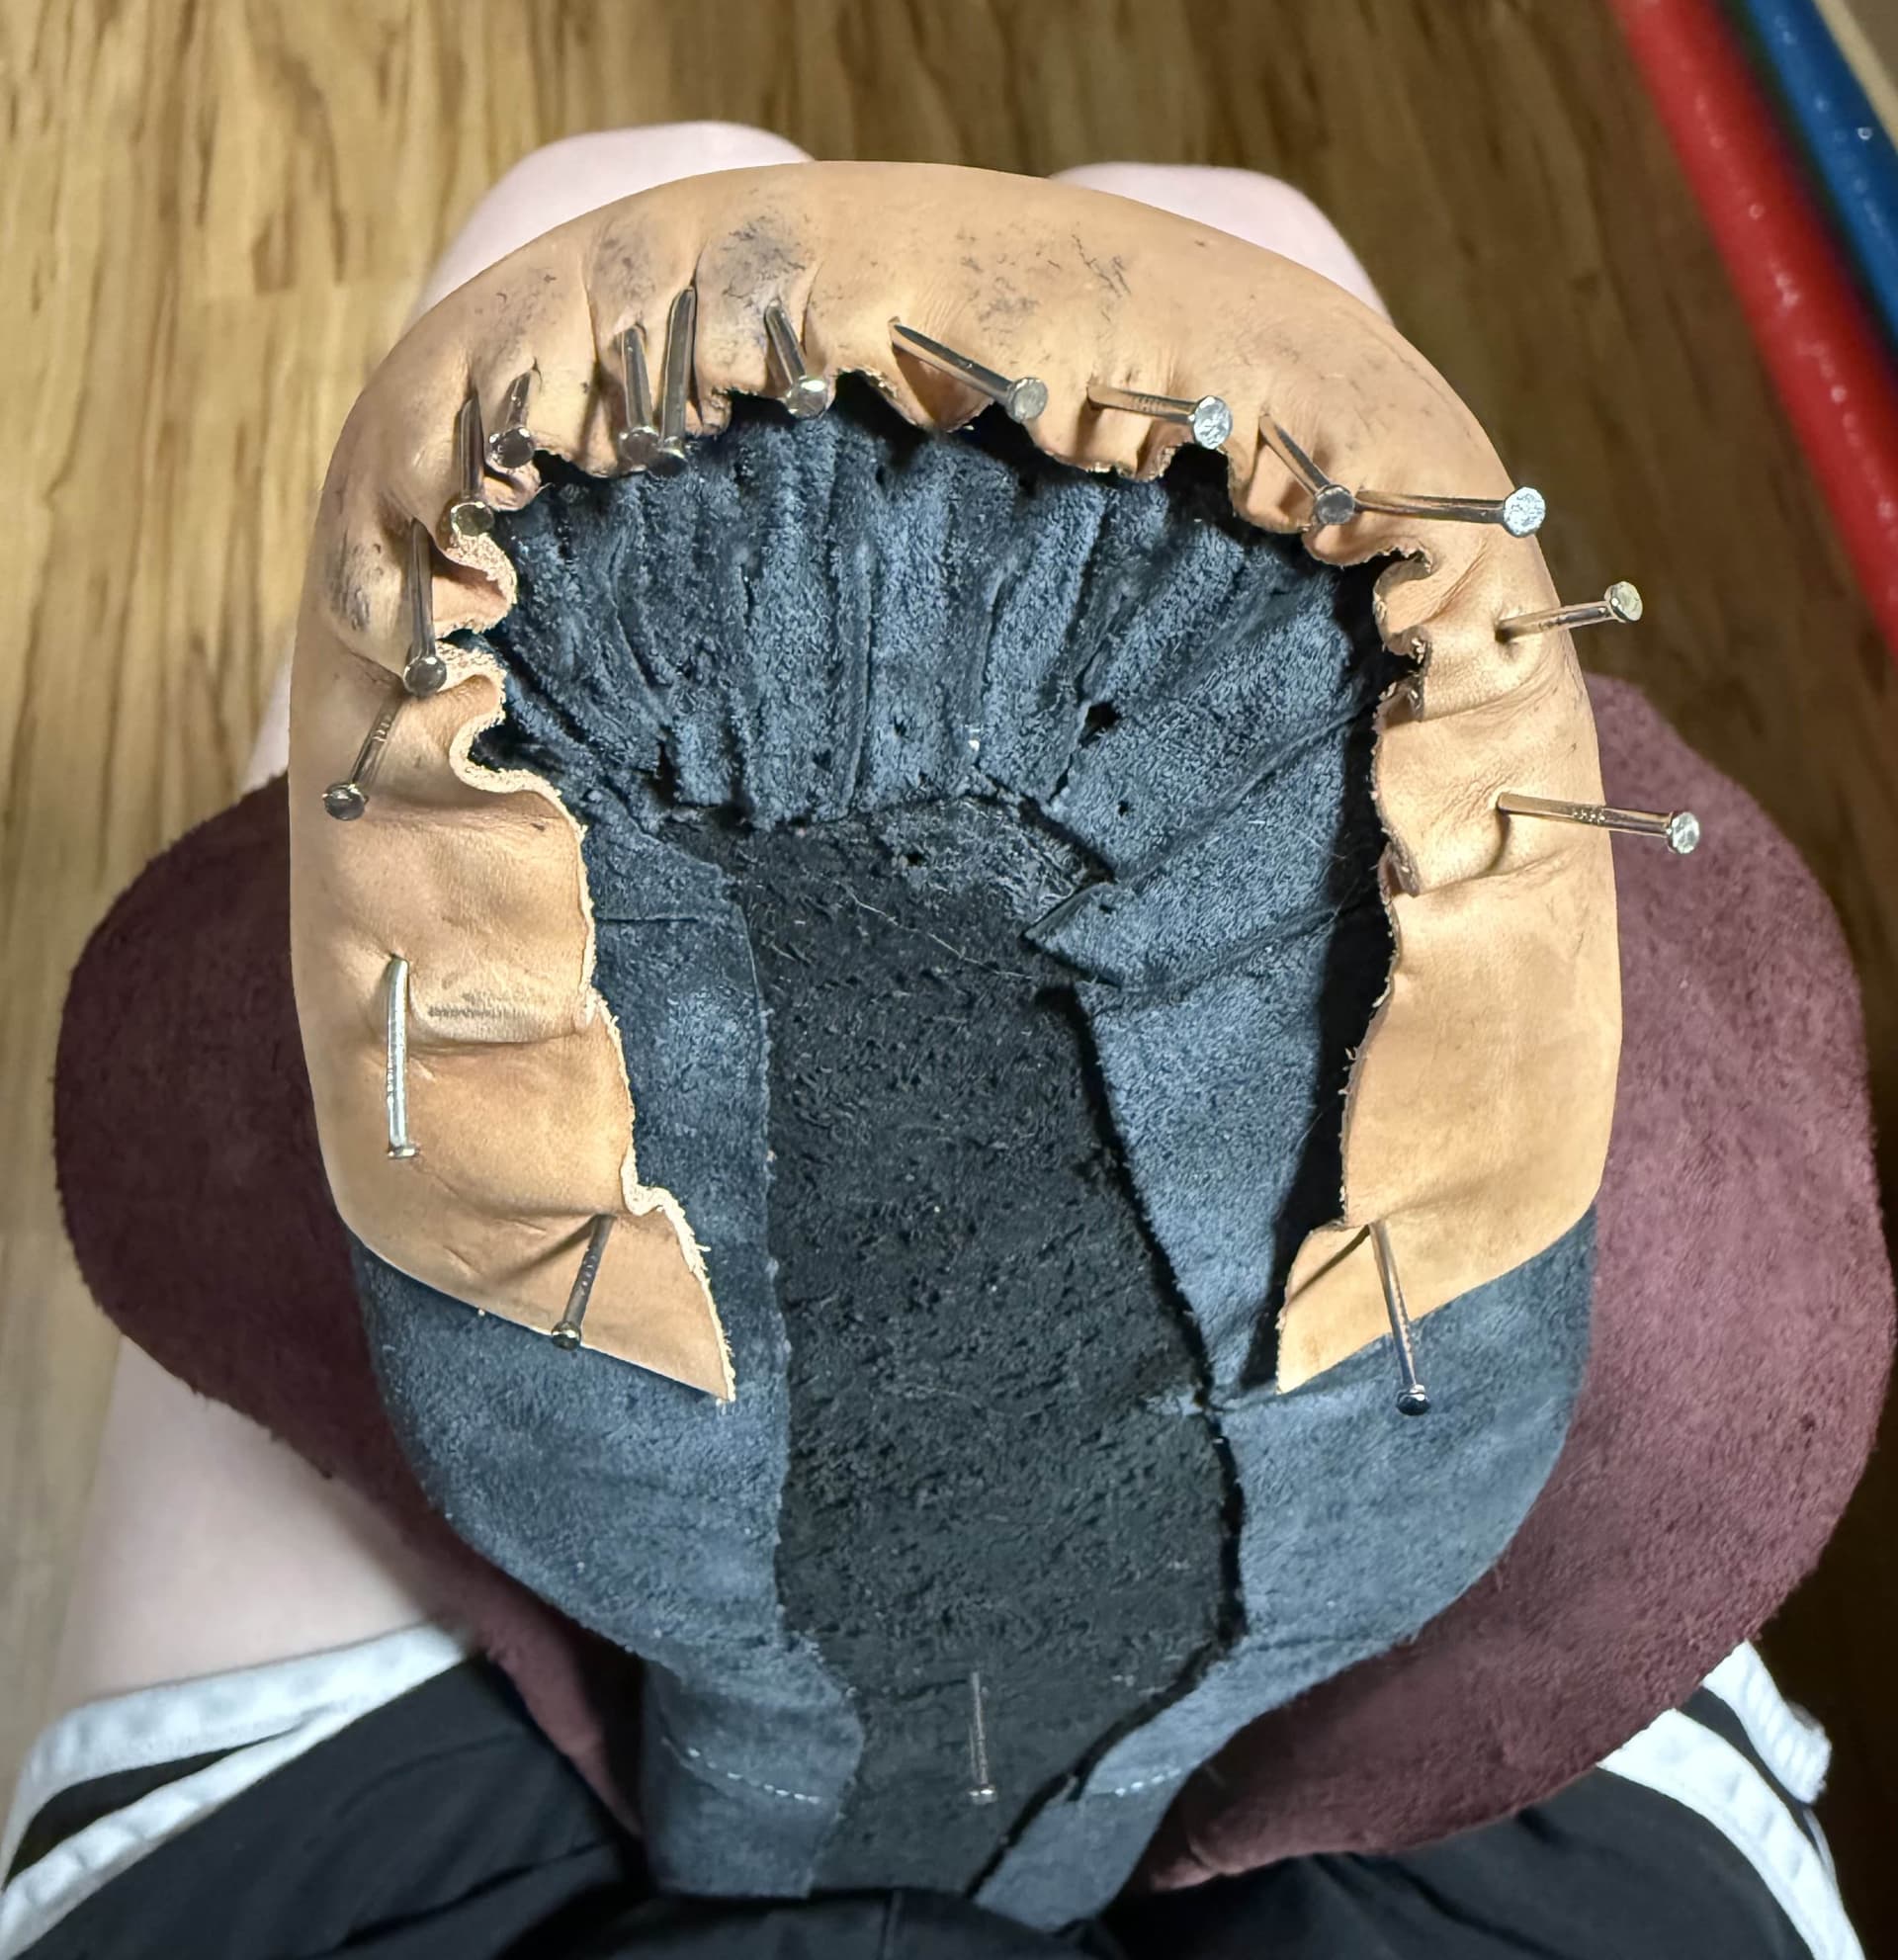
Because this has the back straps both in the lining and on the upper, and this leather is very stiff, I’m just gonna hope that serves enough of a structural function, even though it does not wrap around the heel. I did get the toe boxes in at least. @kemitchell I saw you using wicked thick veg tan! I used 4oz. I will say previously I fucking hated the heel counter because all my lasts have heel plates. Like I’m trying to secure and wet mold this thing but I can’t use nails?? Awful. Thankfully toe boxes not like that, but this was such an aggressively curvy toe box that I did one round of wet molding and forming and then trimming it before wetting and gluing it in.
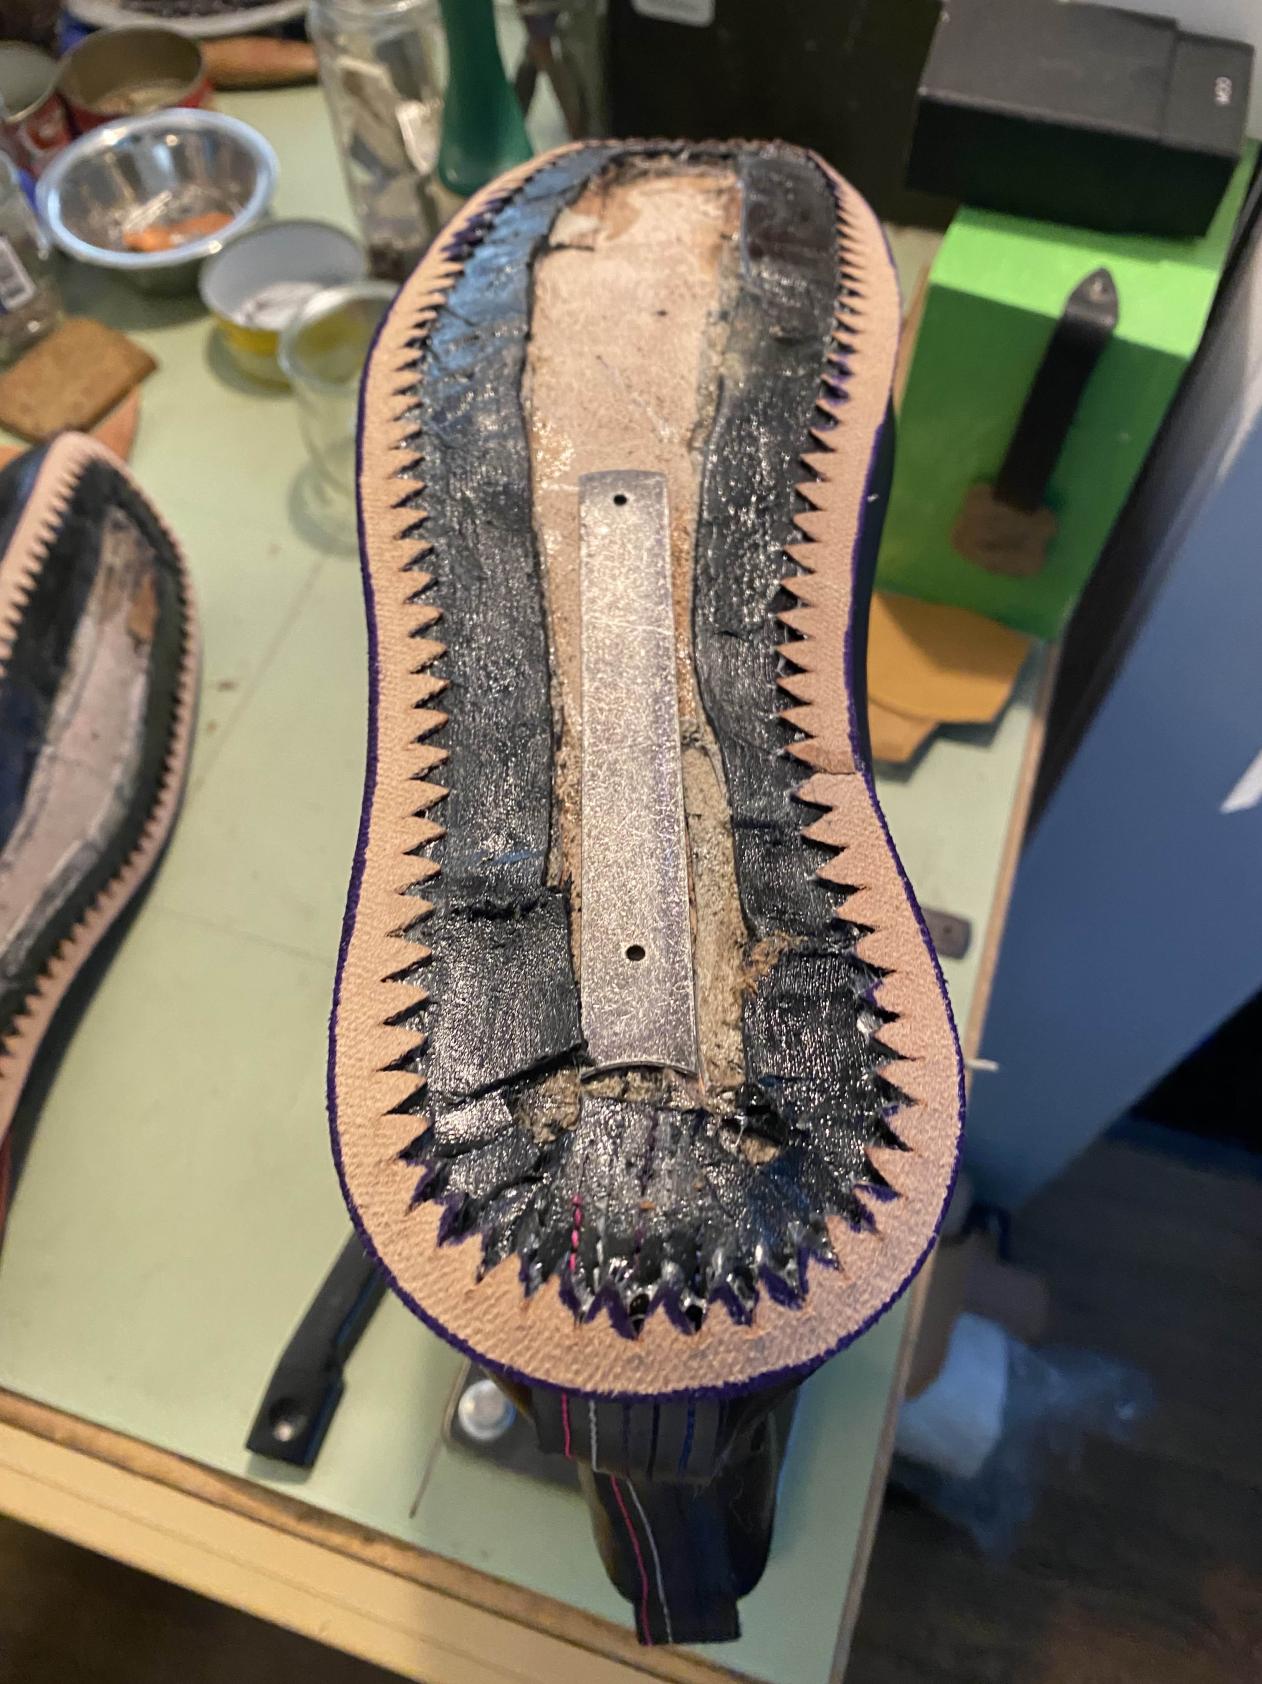
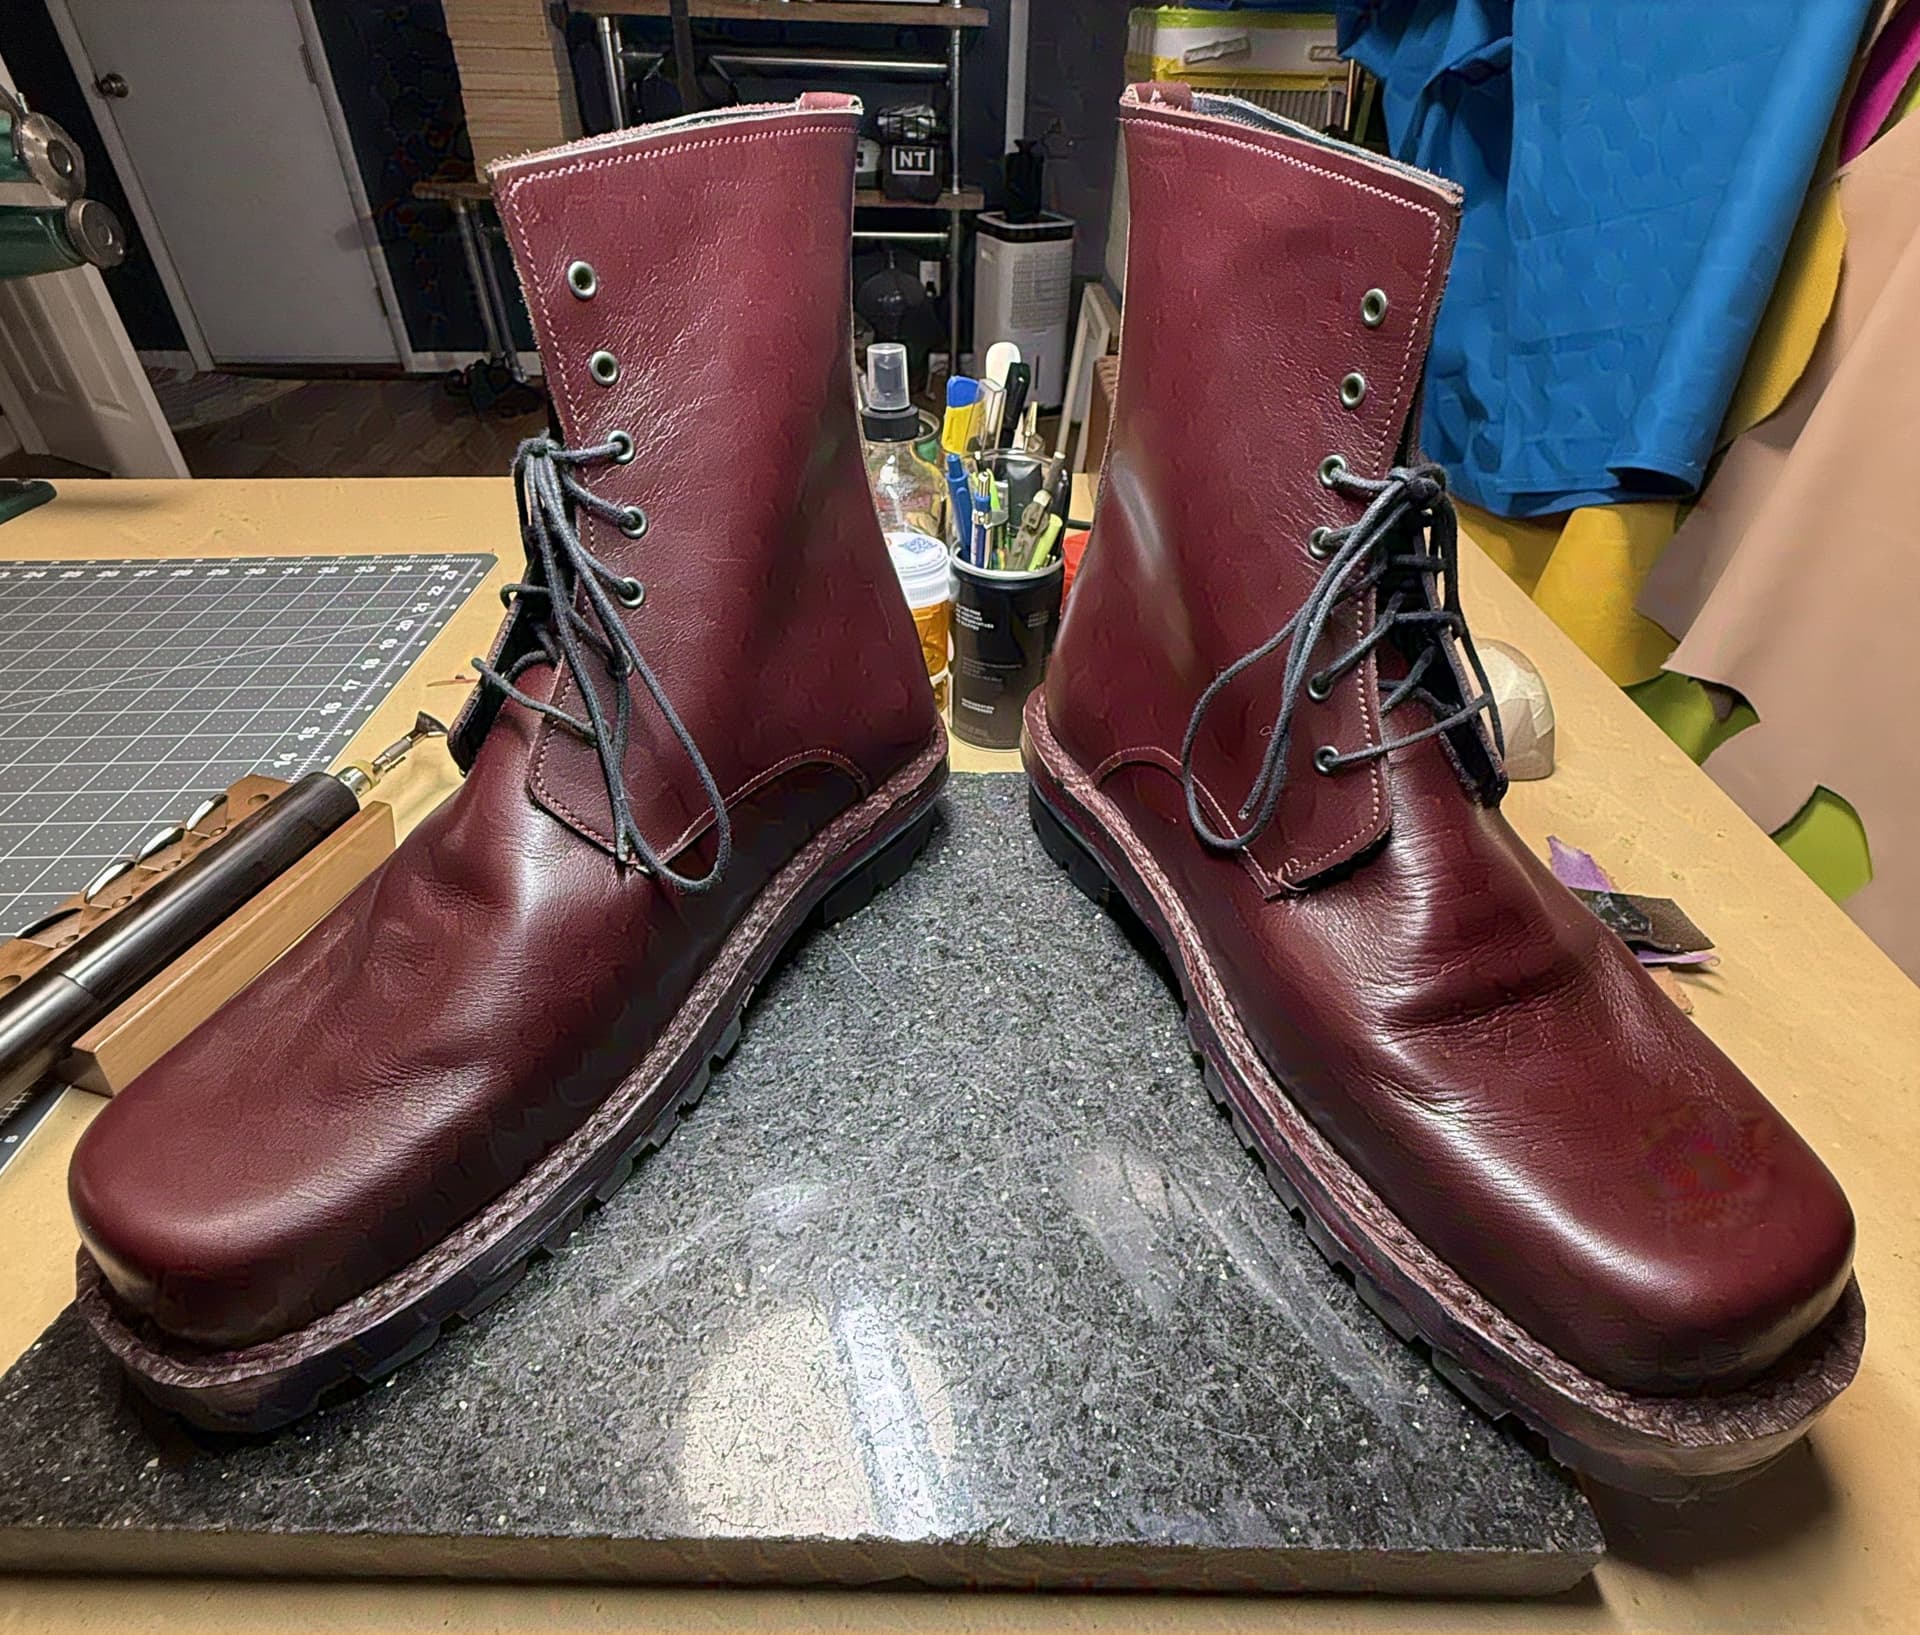
I see other folks using cork for midsoling, but I was taught with scrap chrome tan and that’s been fine, so that’s what I’ll be using here. Hoping to glue that and the shanks in today so I can do the stitchdown tomorrow. Outsole with be a layer of the same soling bend with a Dr. Soles Tumaz full sole + heel. I compared with the Vibram Montagna and I think I like this one better, but I already have another pair already mostly sewn up for these lasts after these come off