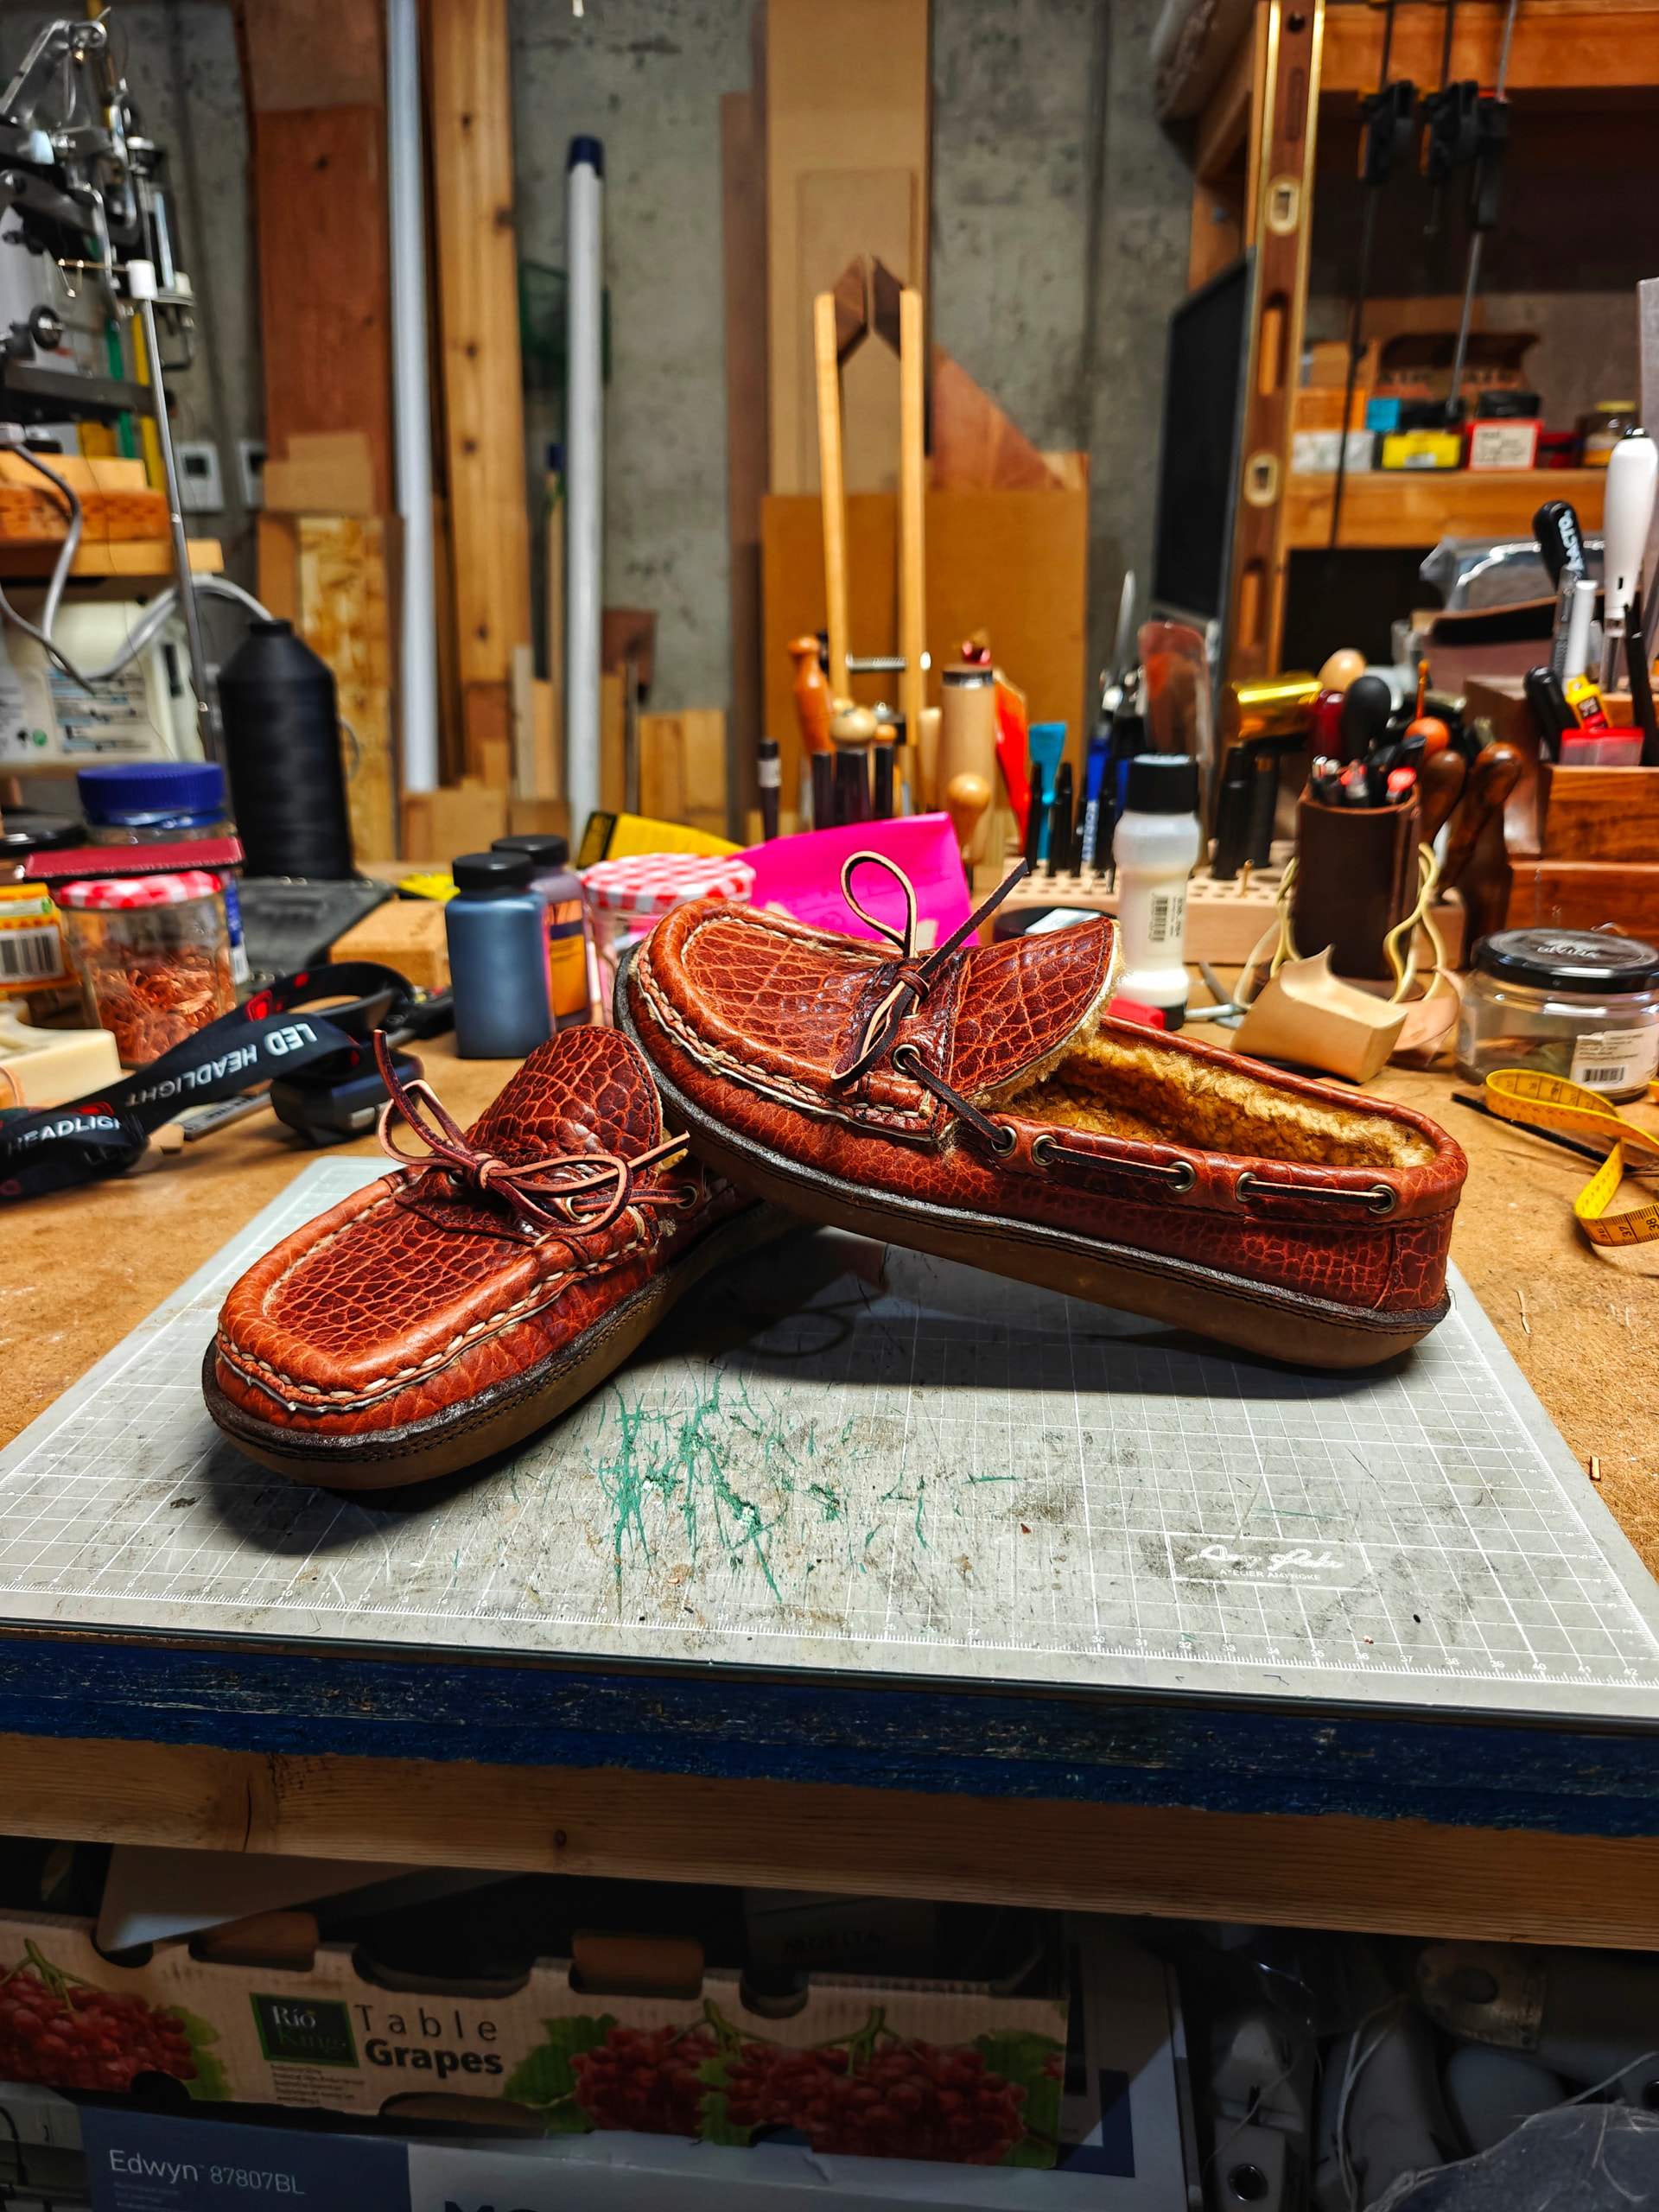
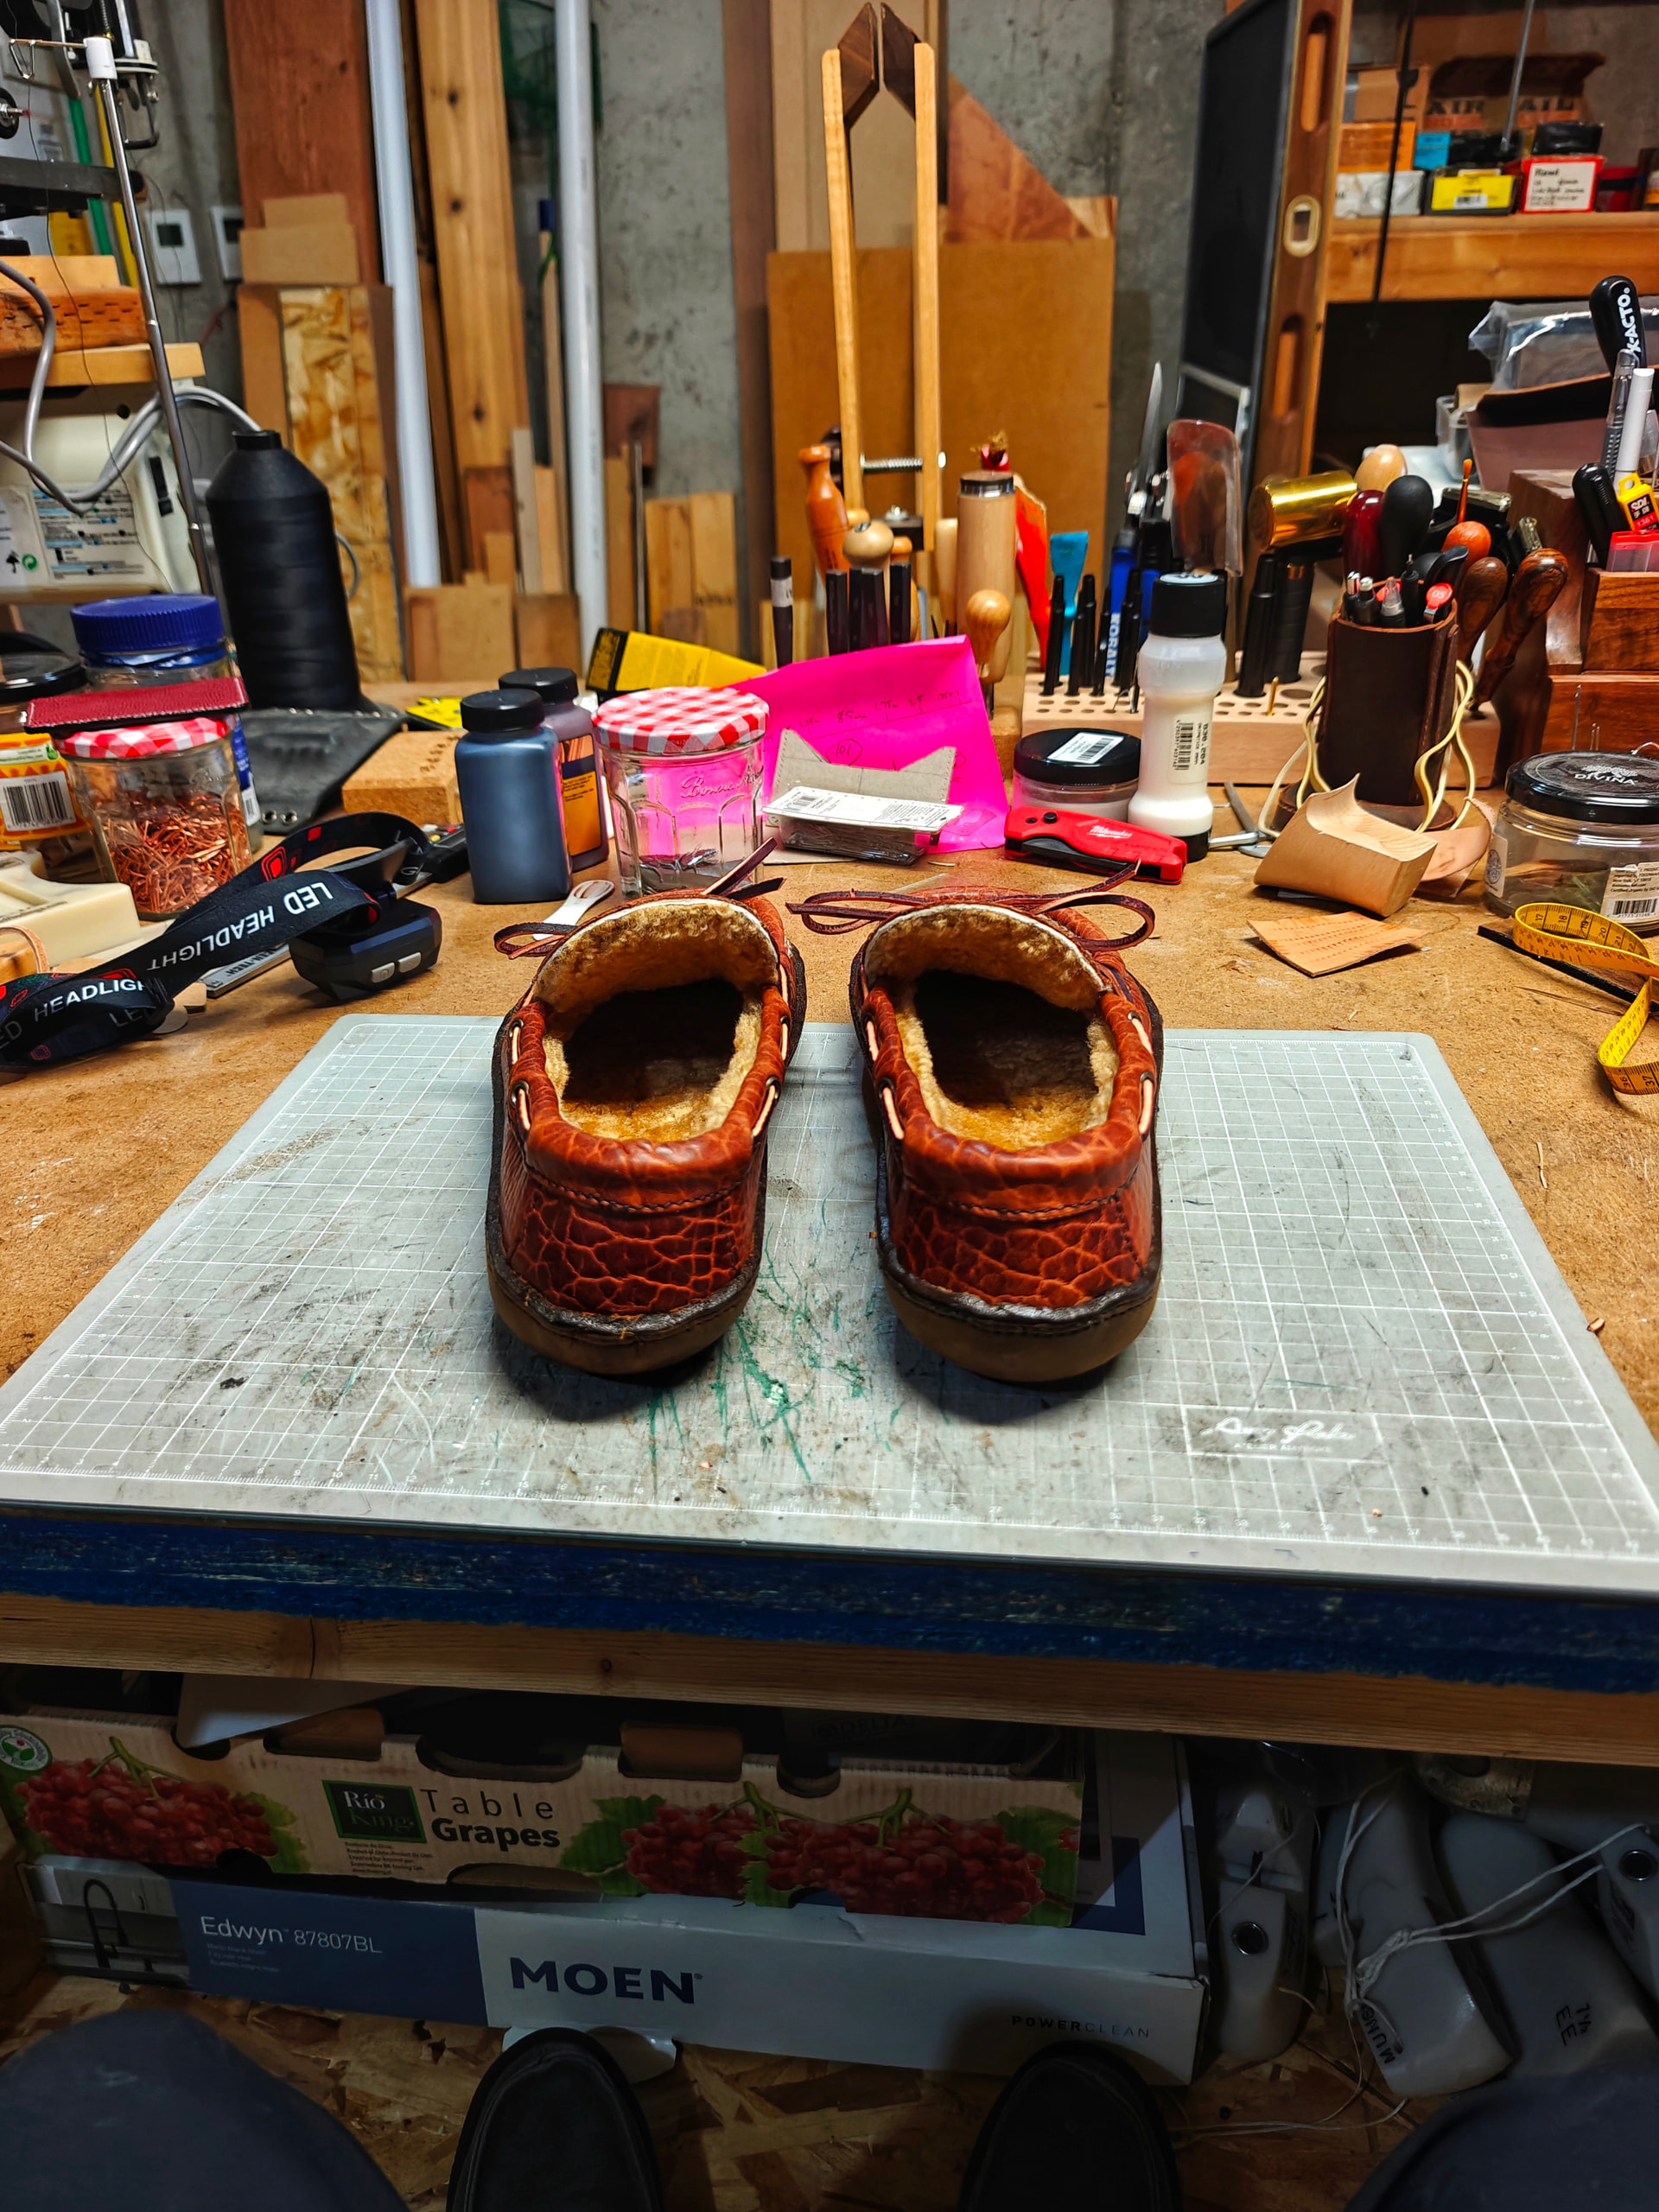
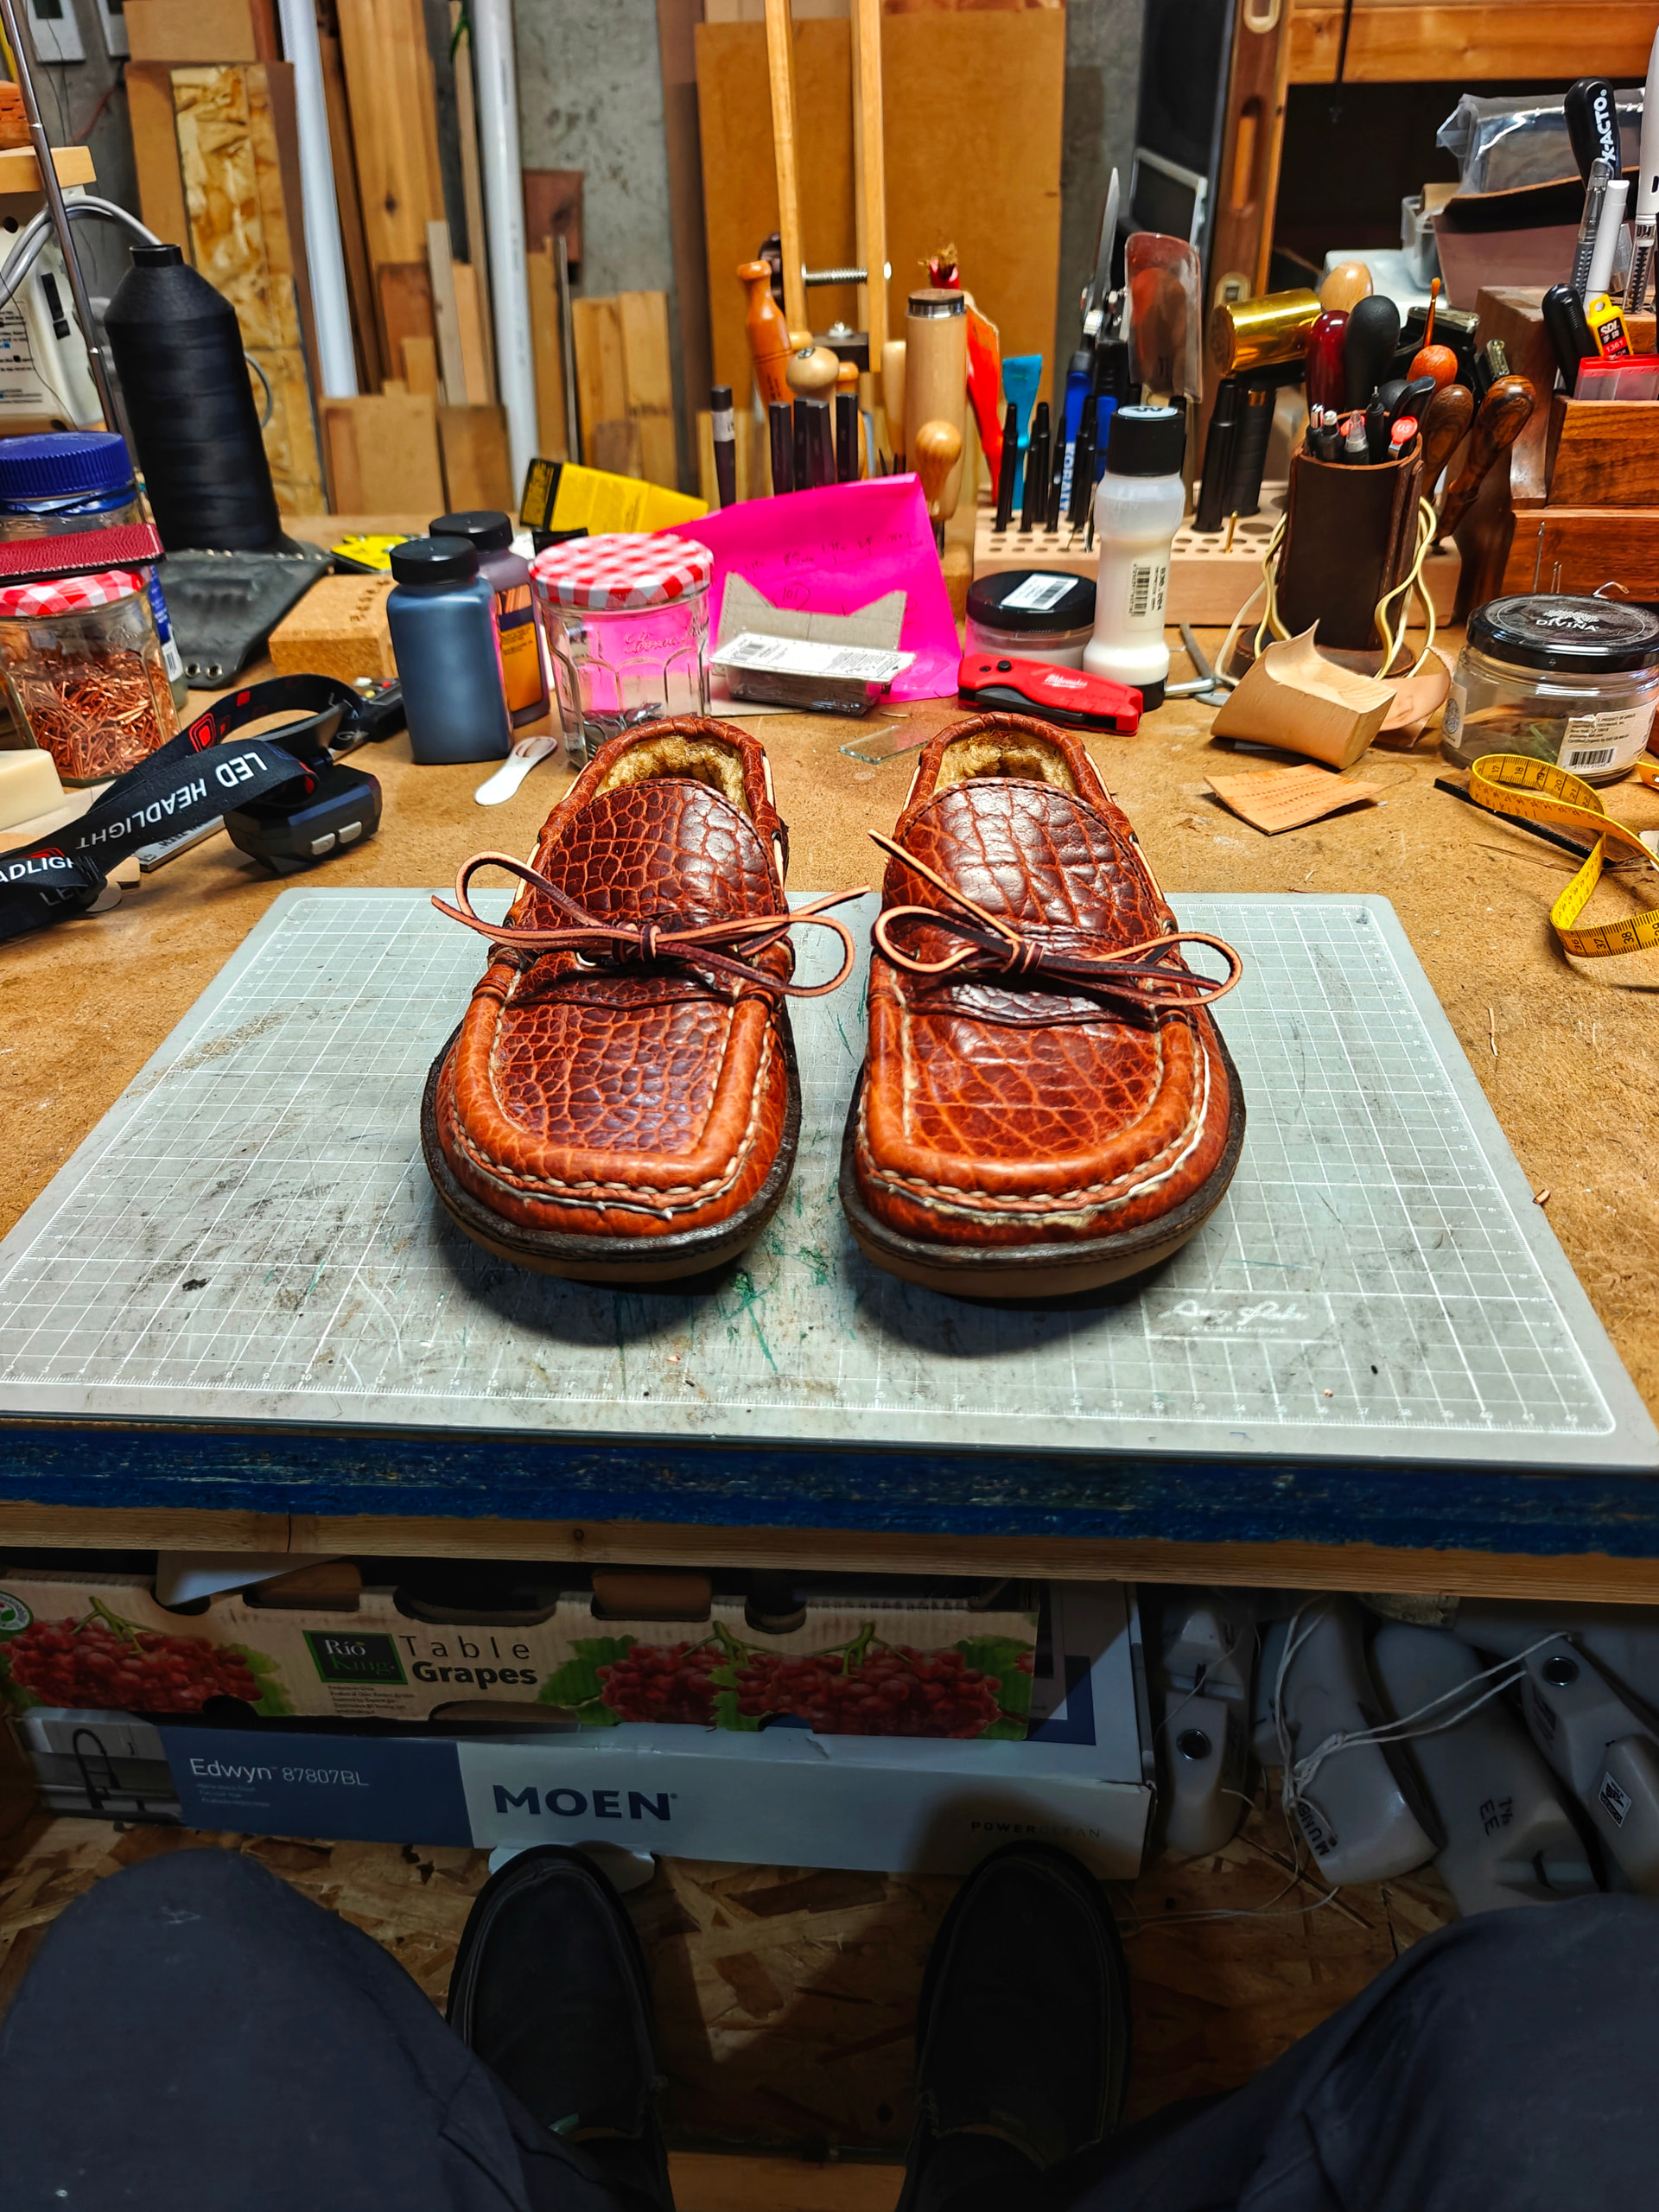
My previous slippers, from Olukai, started blowing out at the pinky toe area after just a couple years. I had been wanting a shearling Oneida from Russell, so I decided to just make myself a pair.
They turned out pretty nicely in my opinion. I have also uploaded a ~5min video on the overlap stitch on my IG if anyone is interested.
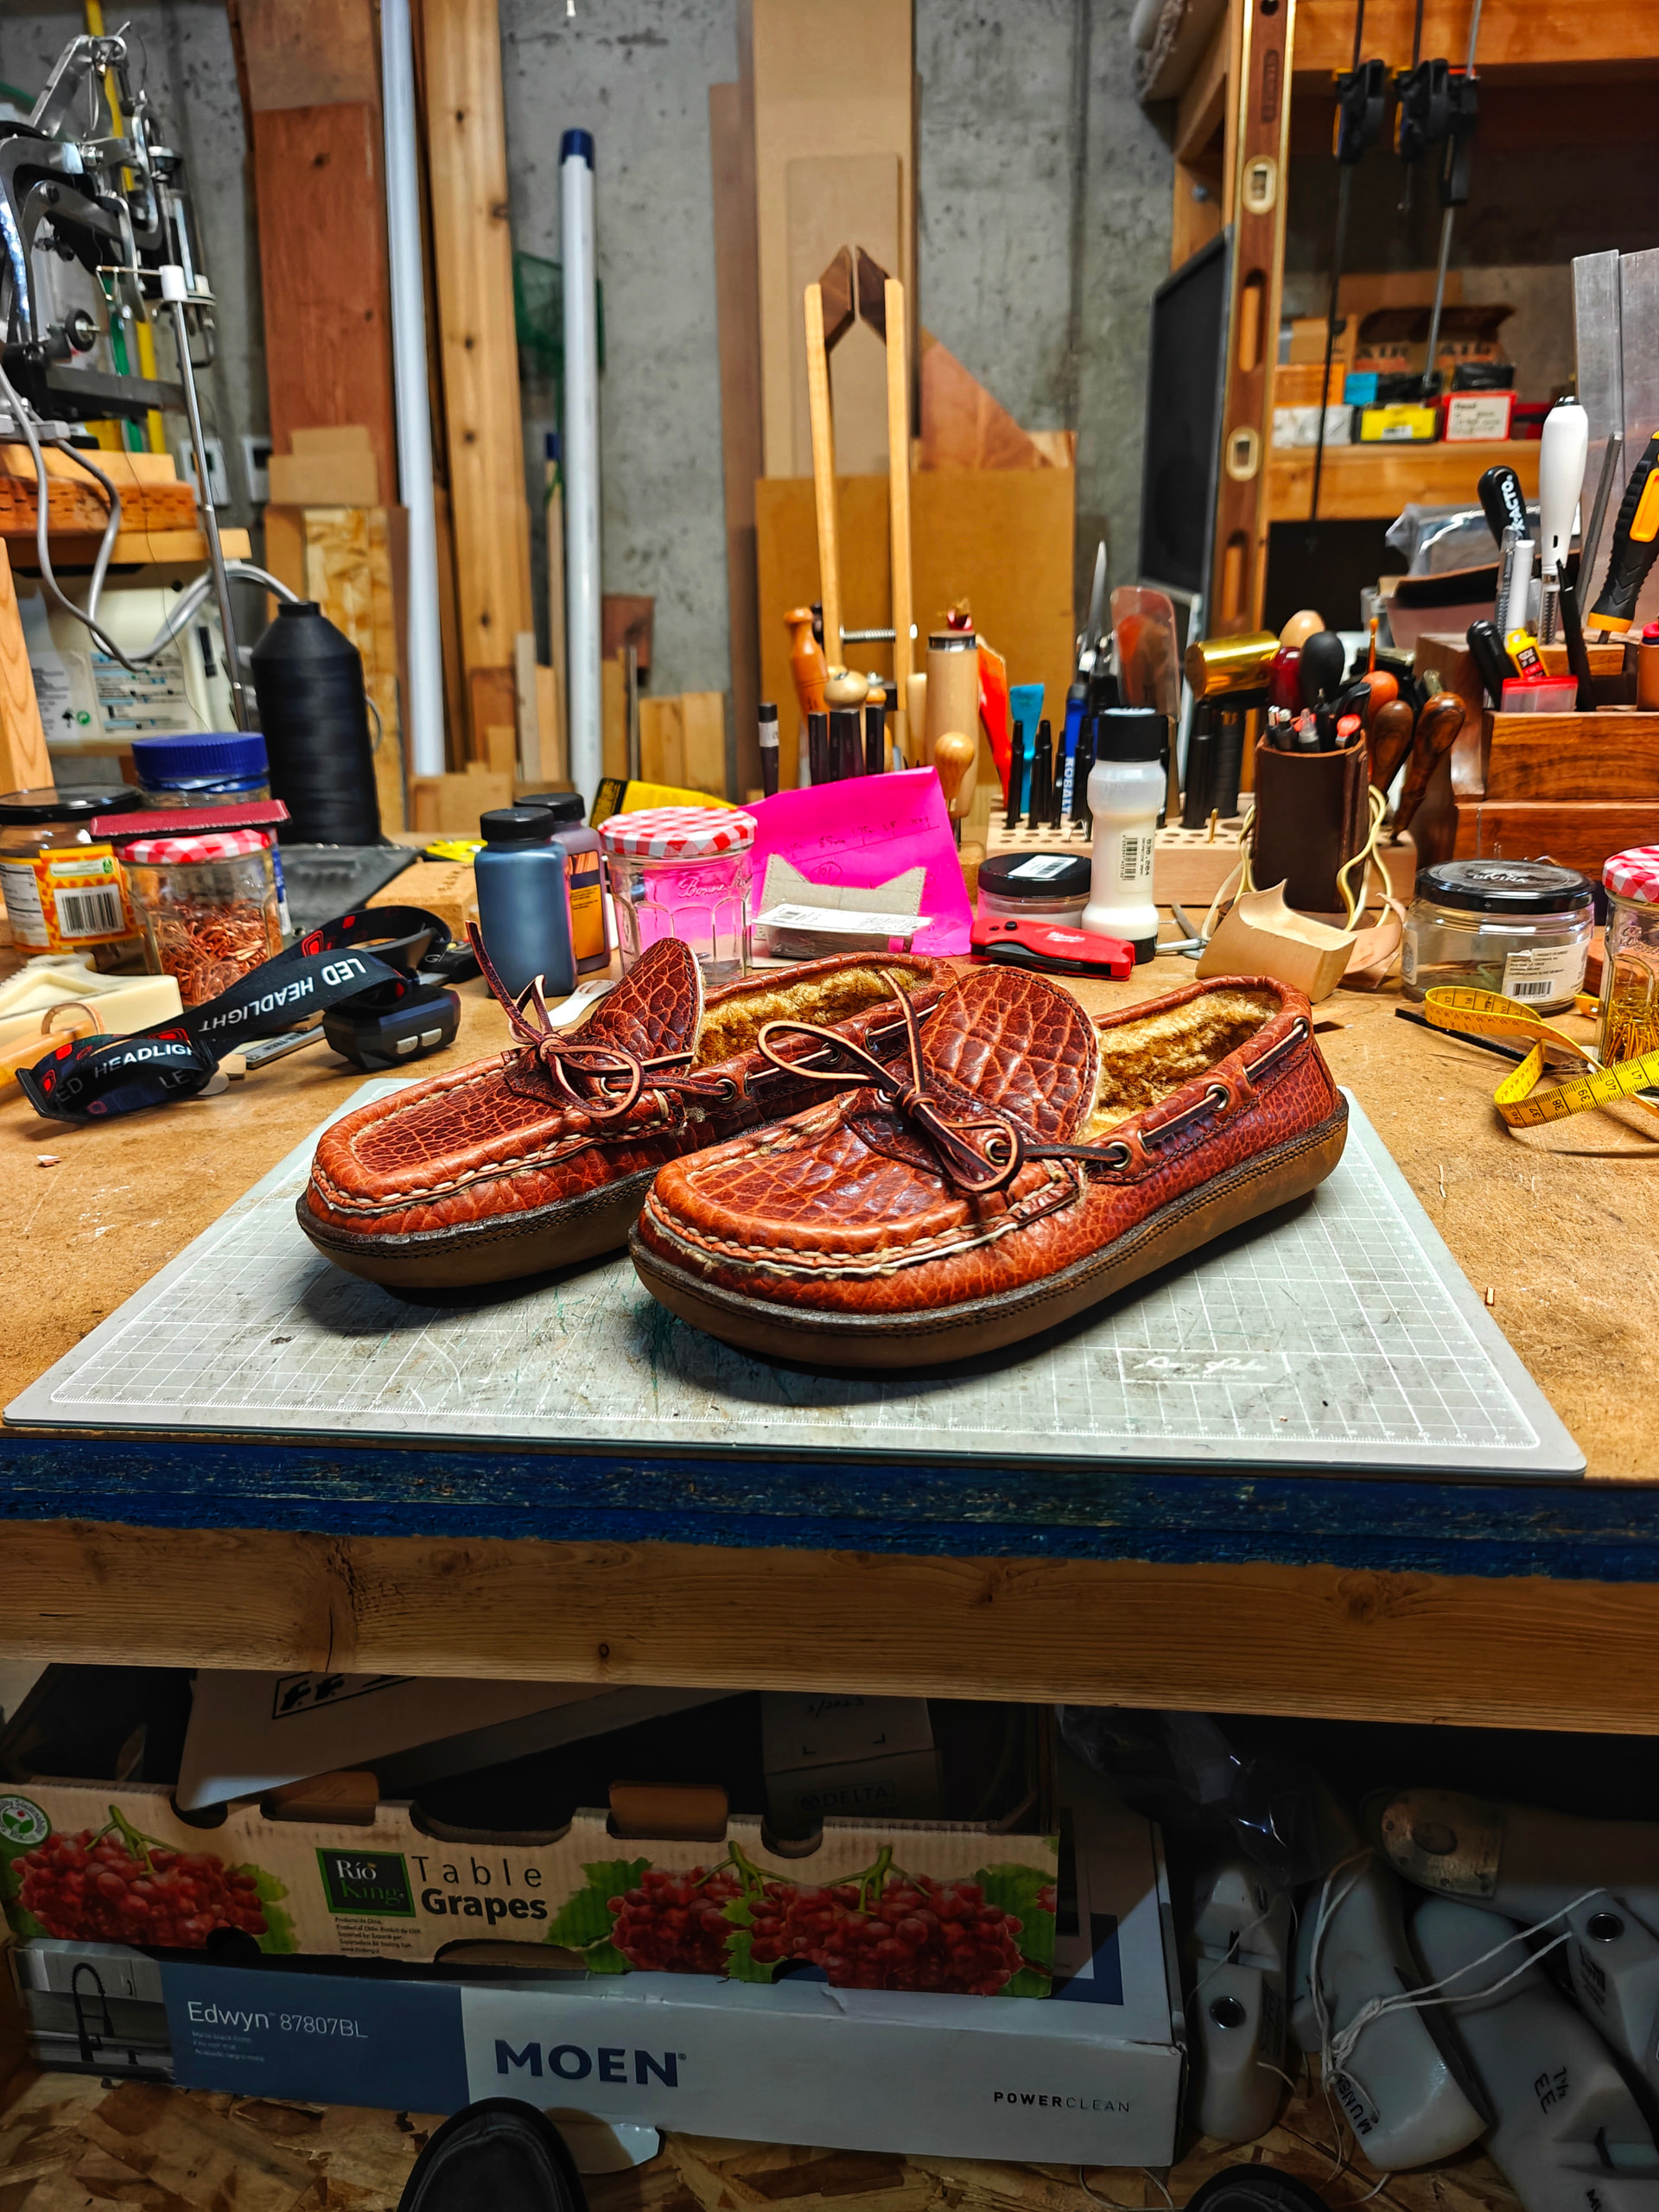
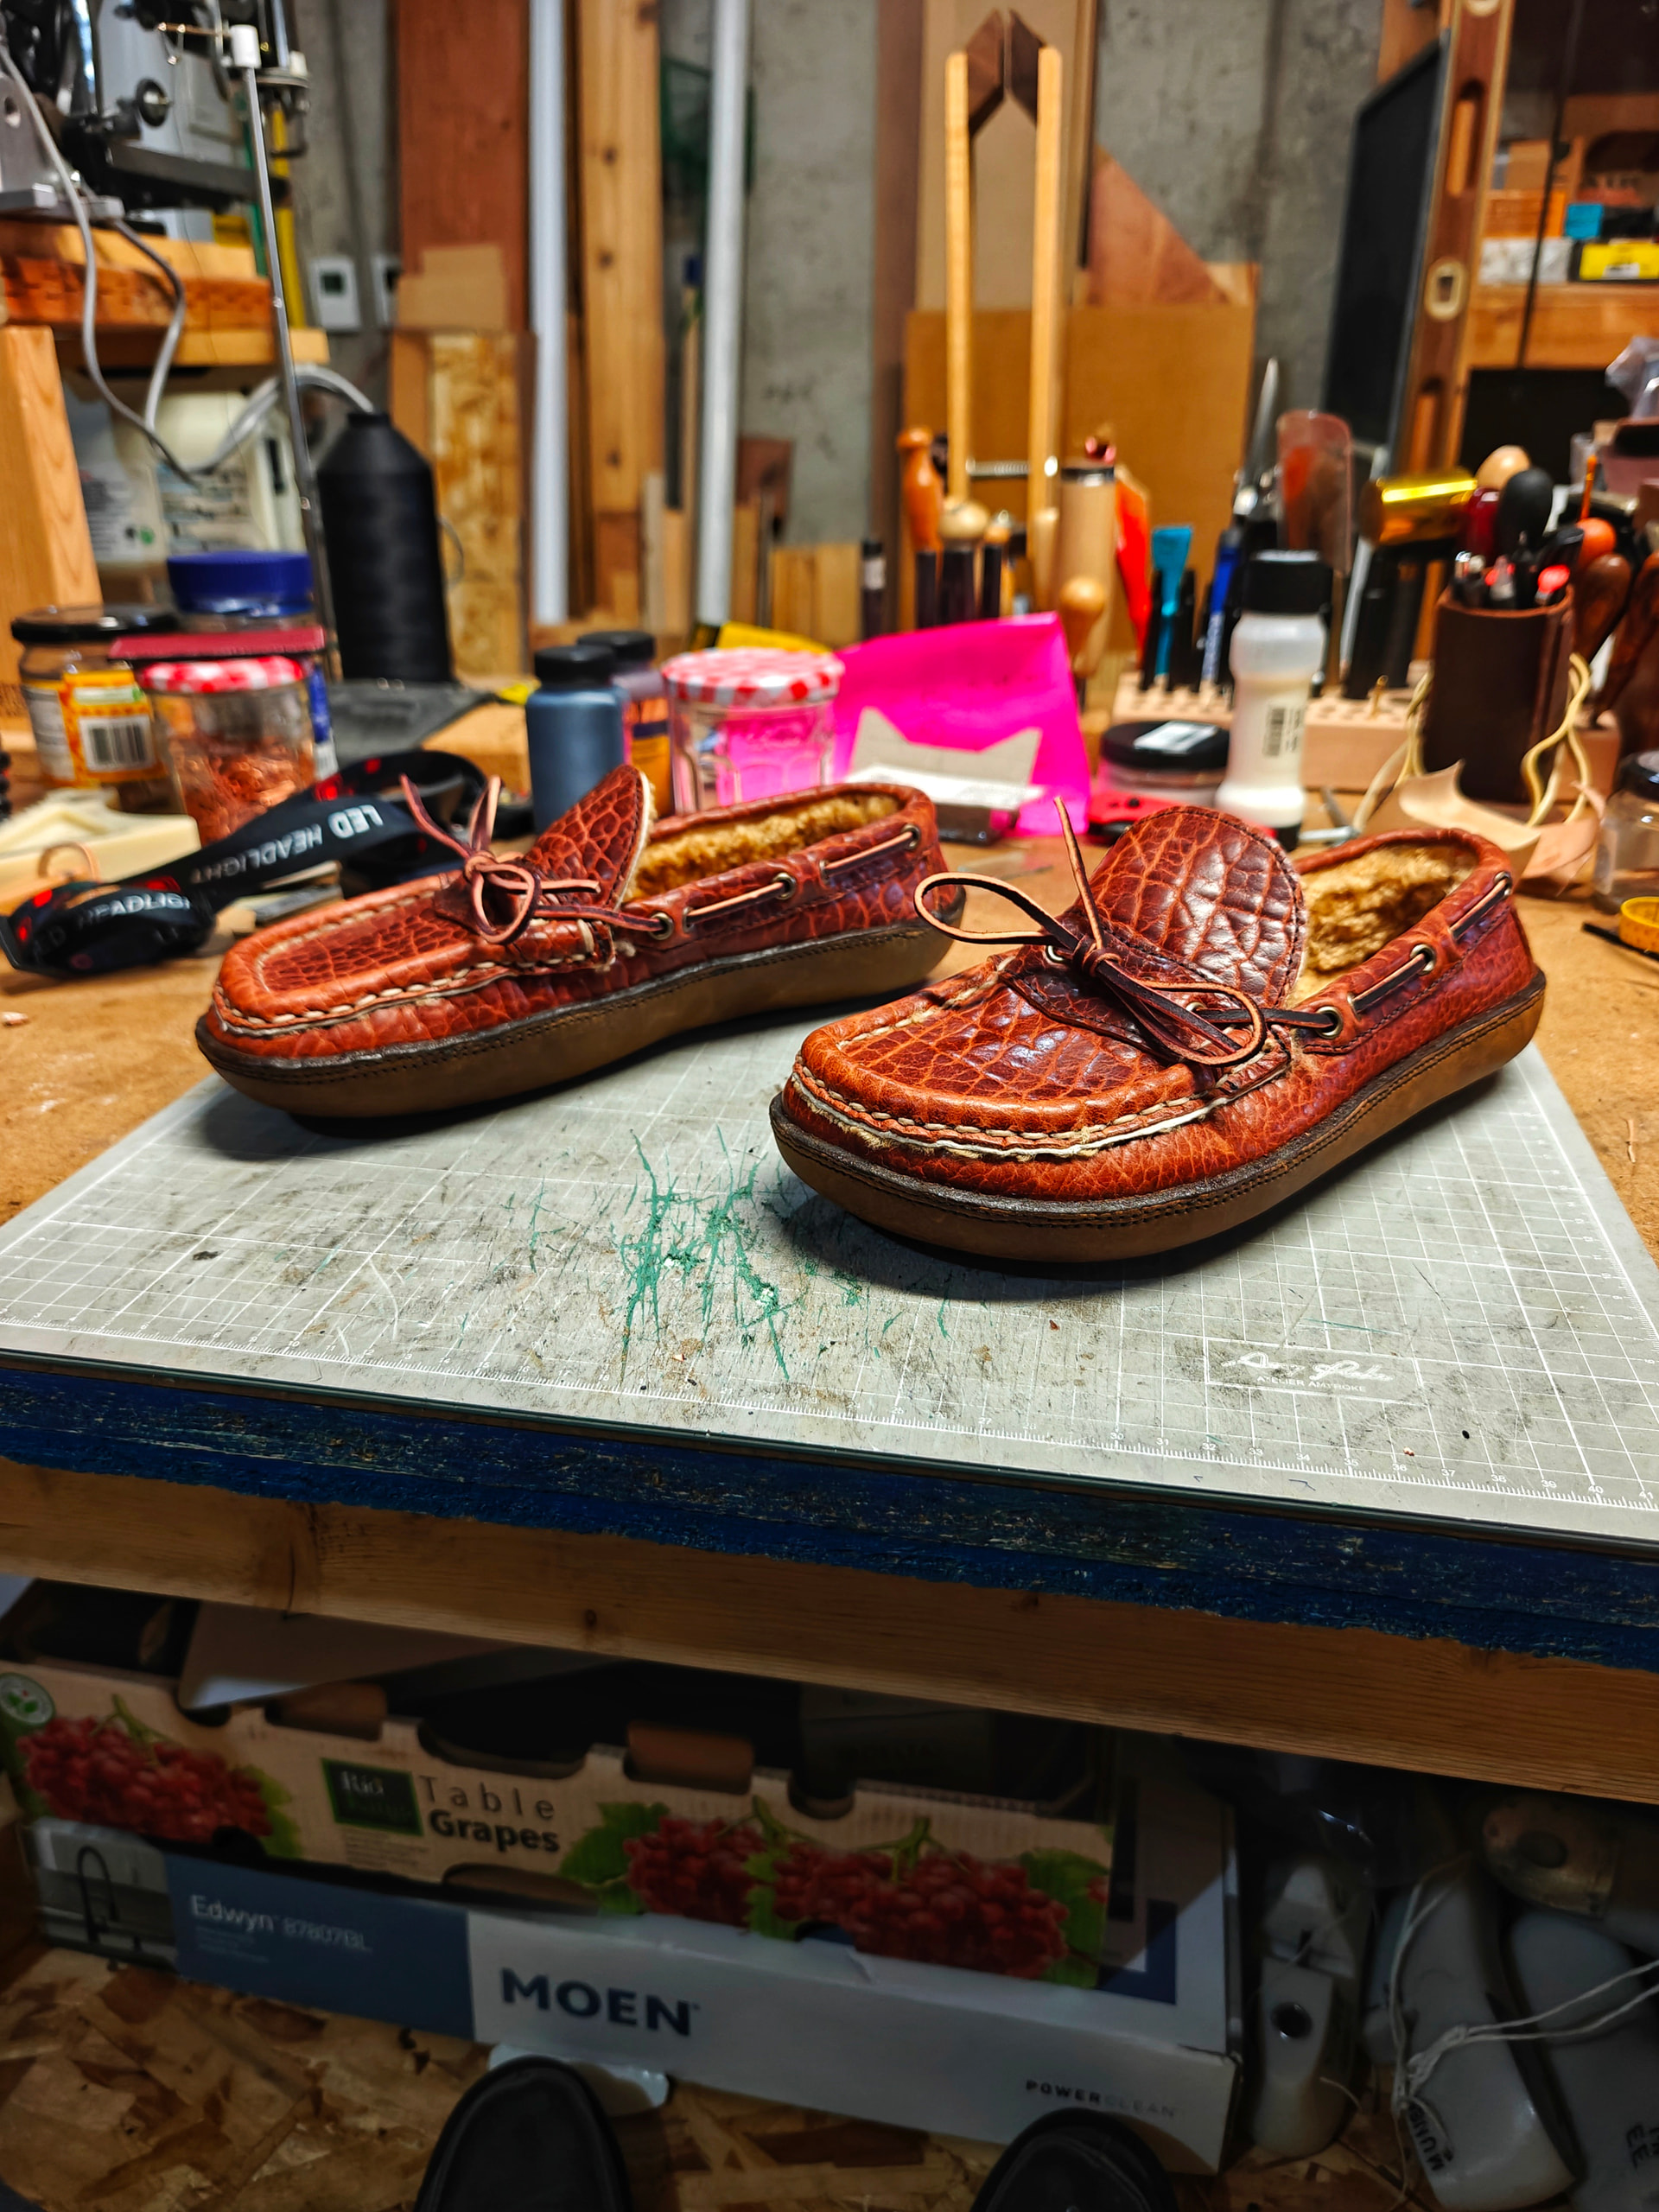
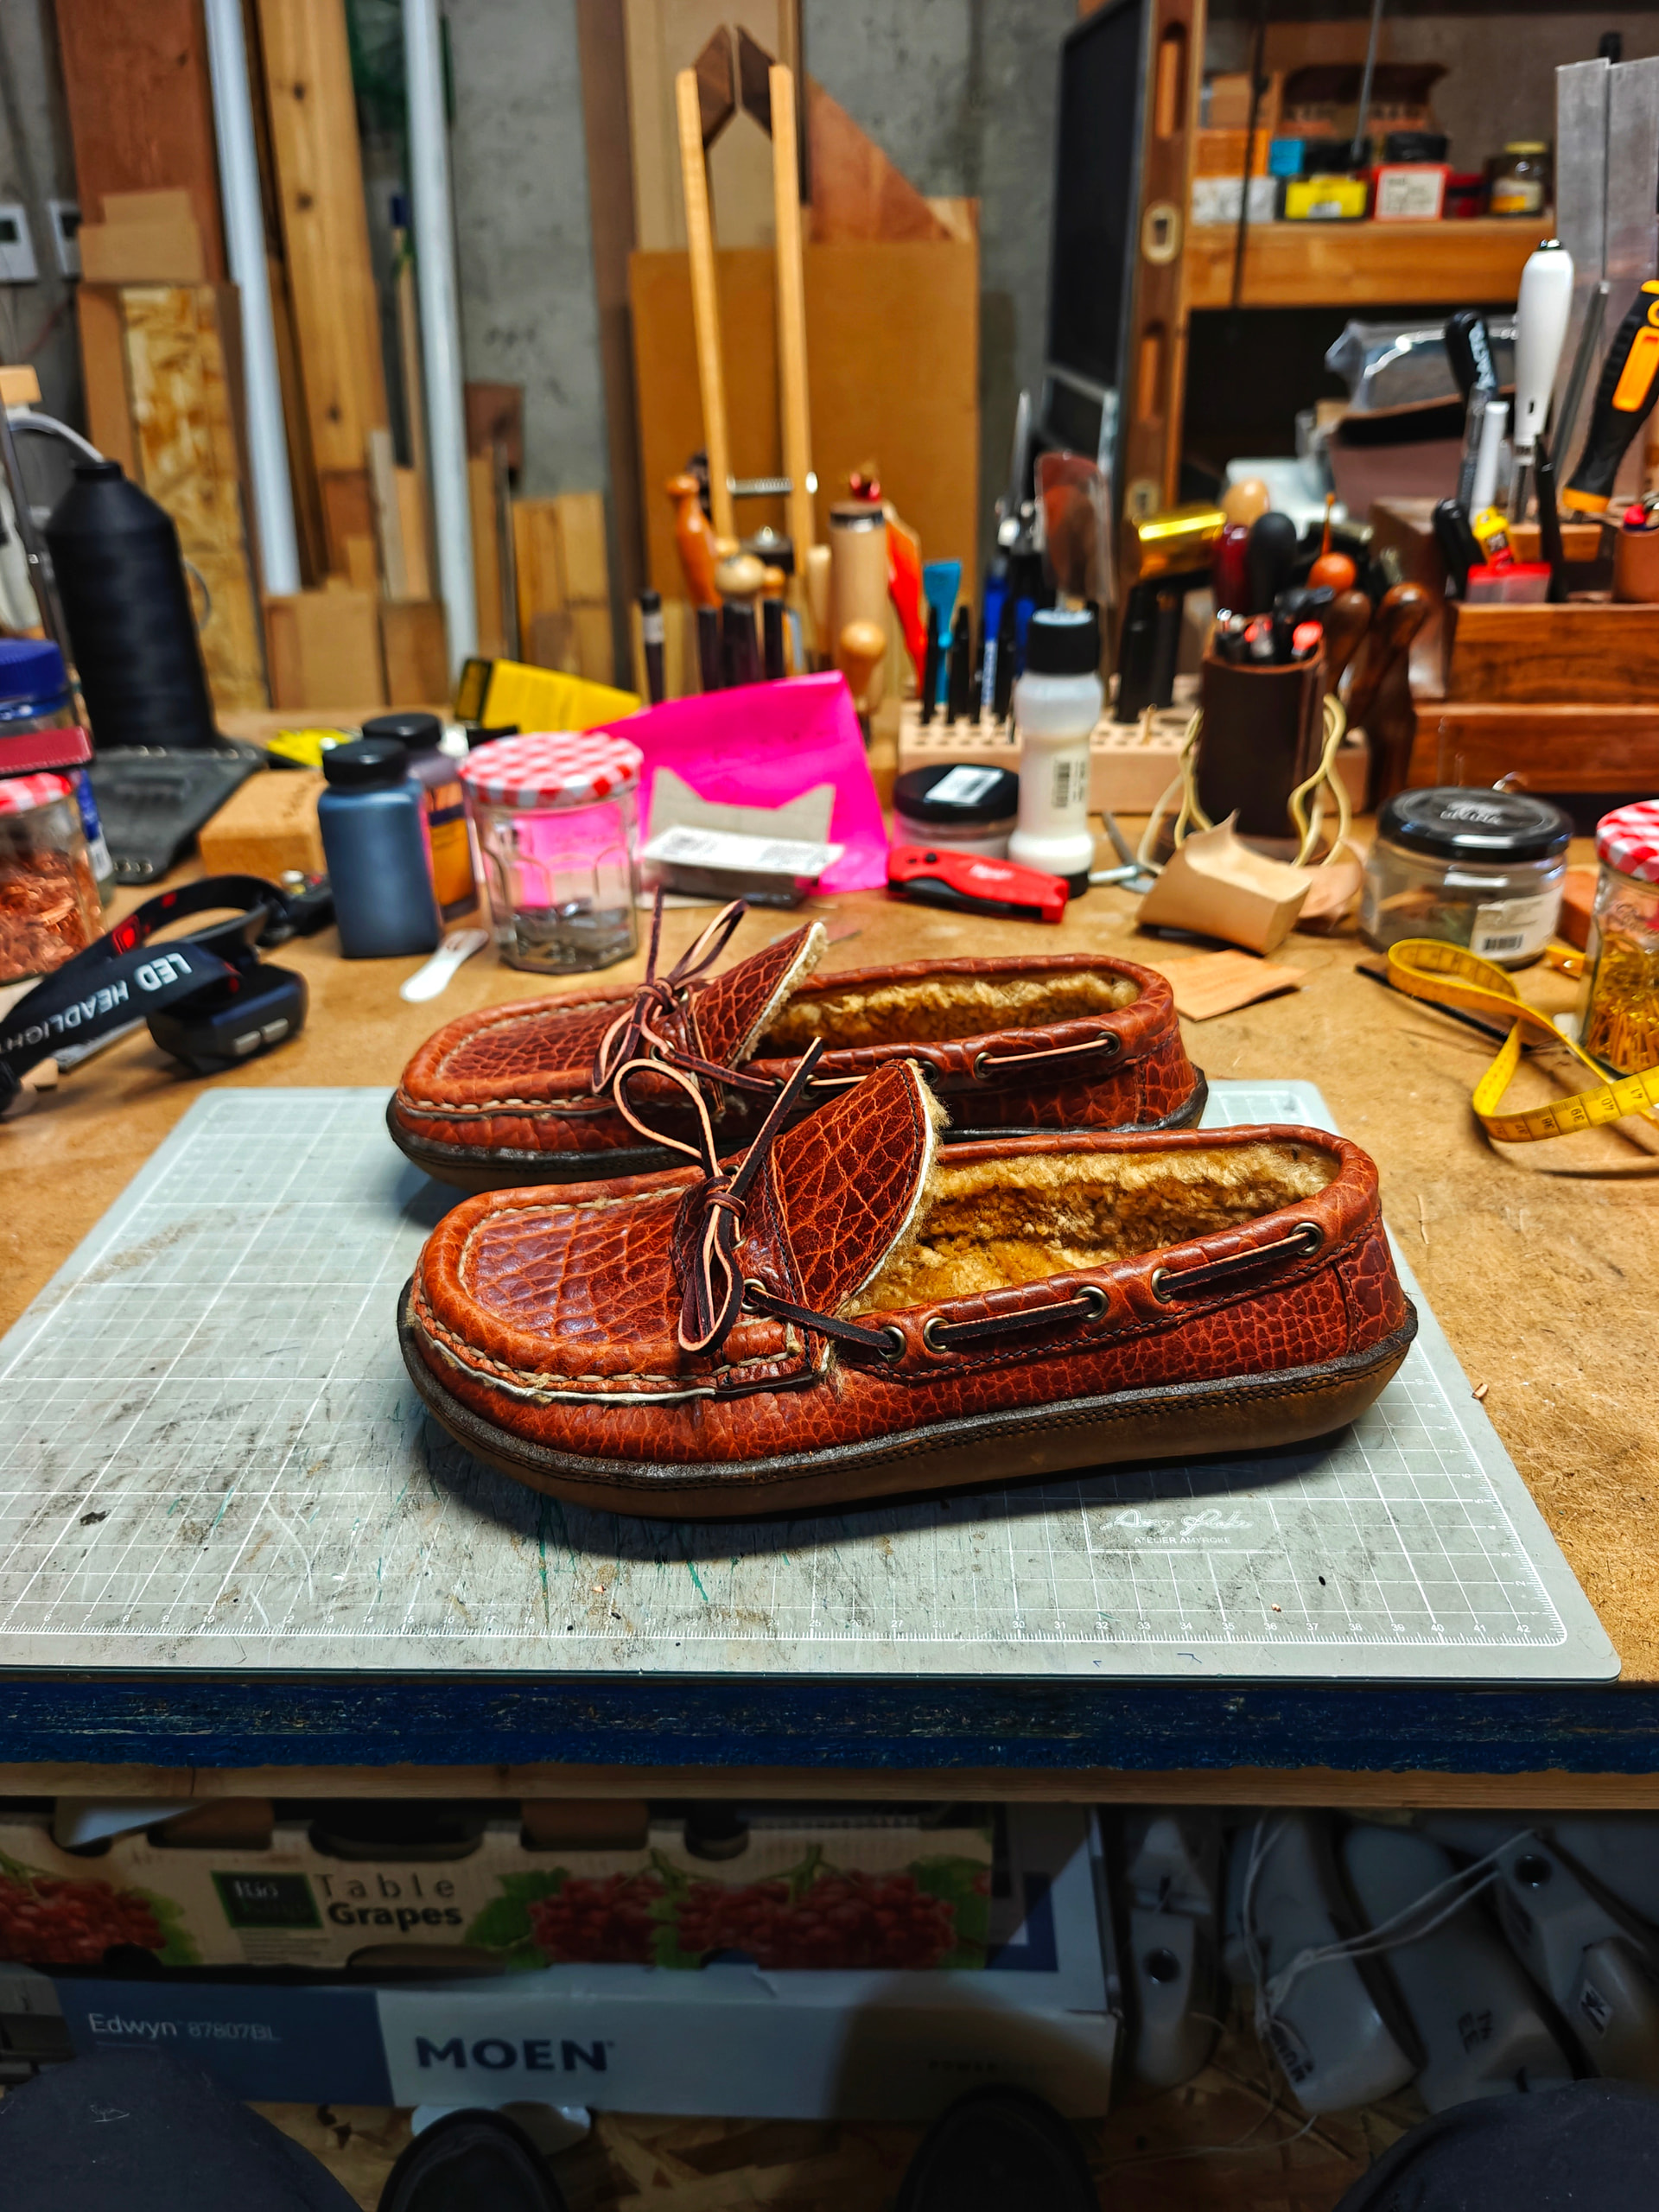
Upper Leather: Law Tanning Big Horn shrunken bison, Peanut colorway, split to 1.6-1.8mm
Shearling: Curly merino shearling from Rocky Mountain Leather
Molded sole leather: Newbury Crazy Horse from Buckleguy, 8-10oz. There’s a molded sole and a slip sole, so 2 layers of this below the laminated bison/shearling
Laces: Rose Anvil leather laces
Made these on a barefoot last I got from Alibaba. Only a few things I would do differently, but nothing that affects functionality or comfort in any real way. I’m very happy with these.
Please feel free to ask any questions!
1 Like
Very nice! Congratulations!
I’d definitely be glad to read lessons learned if you have time to share them.
Gladly!
No specific order.
-
The french seam part that folds over the top, which the laces run through, should have been cut wider. I think I initially took a single strip of 6cm wide bison and cut it down the middle. 3cm technically works, but it was tight and just less buffer room than I’d like. I should shoot for each piece being ~5cm wide for plenty of material to work with.
I also just did a stupid thing and cut them too short, so they don’t flow as nicely into the apron as I’d like. It’s only an aesthetic thing at this point, but it was annoying to me.
-
I took my standard pattern on this last and added ~3mm each side to account for the shearling bulk. I think I would have been better off adding 5mm-6mm each side. Shearling does compress well enough, but 3mm was pretty tight. I like my moccasin pattern toplines to sit right on the quarter line. These were barely touching it. Still works fine, but just not precisely what I’d want.
When laminating shearling to ~1.75mm leather, I’d say an extra 5mm on the appropriate edges is probably sufficient.
-
I really didn’t need to trim any of the shearling on the topline in preparation for the lace keeper part. I was a bit intimidated by the shearling, but it isn’t as hard to work with as I was thinking. It might be different on seam with shearling on both sides, adding significant bulk. But I think if just a single side of the seam has shearling, it doesn’t need to be trimmed.
In contrast, I did shave back the shearling on the apron margins, which was absolutely the right choice. That’s a kind of a seam where it would get too bulky real fast.
-
Lasting dense, 8-10oz leather is just hard. It’s a difficult pain in the ass, but it seems to be working out nicely as a sole. I step outside in them sometimes, but not much. It’s unclear how this specific leather will stand up to that kind of use. I’m sure I will make another pair without insulation as a slip on shoe that I do take outside the house, and we will see then.
I tried to get info on the leather than Russell uses for the molded soles on their Oneida, but that’s a pretty proprietary leather. All I can gather is that it’s a “bullhide”, and it remains to be seen if that’s a descriptor of the actual skin type, or a reference to the specific tannage process used for durability.
-
I used Edge Kote on the molded sole top edges after trimming, as one of the pieces of leather (supposedly the exact same kind) had the blue chrome line easily showing. The other did not, and I wanted them matching.
It’s still not my favorite look, but it stands out much less to my eye now that the project is finished. I’d prefer a struck through raw edge, but this leather doesn’t seem particularly consistent in that regard.
-
I like my use of the eyelets for the lace areas. I think it adds useful structure and durability. I’ve never really been a fan of raw leather holes that have laces going through, as I think it’s just asking for stretching and sloppy aesthetics.
-
For sewing on the molded sole, my CLSP did work swimmingly on the majority of the circumference. It cannot do the area with the backstay though, as that got close to 9mm or so of leather, which it just could not handle.
I found that out on my first stitch line, after not prepping smartly. So on the second stitch line on the first slipper, as well as both on the second slipper, I left lots of excess thread when beginning to sew, as well as at the end. This allowed me to then saddle stitch from each side, meeting in the middle of the back area. It looks cleaner this way.
One day I will get a sewing machine that can handle more leather, but I’m currently working with what I have.
-
On the topic of saddle stitching, patience is a huge virtue with shearling. Sometimes you find the holes you awled quickly, other times I wanted to scream at the damned things. But this molded sole leather responds well enough to being opened up wide with the awl, which helps the needle find it from the shearling side. The hole then closes well enough.
-
I really need to straighten on the lateral part of the moc stitch, as that would thin out the appearance of the shoe. I tend to follow the curvature of the last with the stitch line, and that really seems to emphasize the wide toe box.
Straightening that lateral side out, so that it almost cuts over the 4th/5th toes, would hopefully give it a less wide appearance. Kind of like vertical vs horizontal lines in clothing and how that affects appearance.
-
On the topic of the moc stitch, using calipers to set stitch width really helps appearances. I have maybe 15-20 completed moc stitches under my belt, but getting them consistently good looking still hasn’t solidified in my muscle memory yet.
-
I’d raise the back height by about 1cm. It’s currently sitting at the CP of the last. This works fine, but it’s just a touch less coverage than I’d like. As they are house slippers though, it’s not a dealbreaker at all.
That’s currently the main ones I can think of. If any more come to mind, I will add them here. Hopefully this is useful info to anyone who reads it!
1 Like
Great writeup!
I didn’t see so many issues with shearling coming, but now that you mention them, I could’ve seen myself learning those and a lot more lessons the hard way if I ever tried.
Any kind of tool for marking stitch width seems to make a massive difference in the appearance of freehand saddle stitching. Pricking wheel. Pricking iron. Even just walking a compass. I’ve been saddle stitching in various ways as a hobby for years, and it’s still hard to get stitch length consistent enough to look attractive without marking holes a consistent distance apart.
Shearling isn’t as bad to work with as I thought it might be. It sews well in most situations. Hand sewing dry thread doesn’t pull it through. Even hand sewing with Ritza Tiger doesn’t pull it through that I can remember. It was only pulling through with the coad-ed tapered ends I use for the moc stitch.
The bulk at seams is probably the most important thing to take into account, I’d guess. I have only done this pair full shearling, and my winter chelsea mocs have shearling on the foot side of the apron and the footbed. So I can’t say I have the most experience with it.
You’re right, and I have to remind myself of that. I almost felt ashamed of having to grab them to get my stitches to look good. But the sewers at Russell or others like Rancourt or Quoddy have significantly more pairs under their belts than I do. And I definitely would not want to freehand on other parts of the boot or other leather items in general. I think it’s just significantly harder to be consistently good with an awl. Even awling the stitches on the back part of the molded sole, I had used pricking irons on the line I already had to set the awl punch points.
So not dang thing wrong with using tools to serve the purpose of achieving the result you want.
1 Like