I got my second order from Mamoru today. I would like to share some information on the products and provide comparisons.
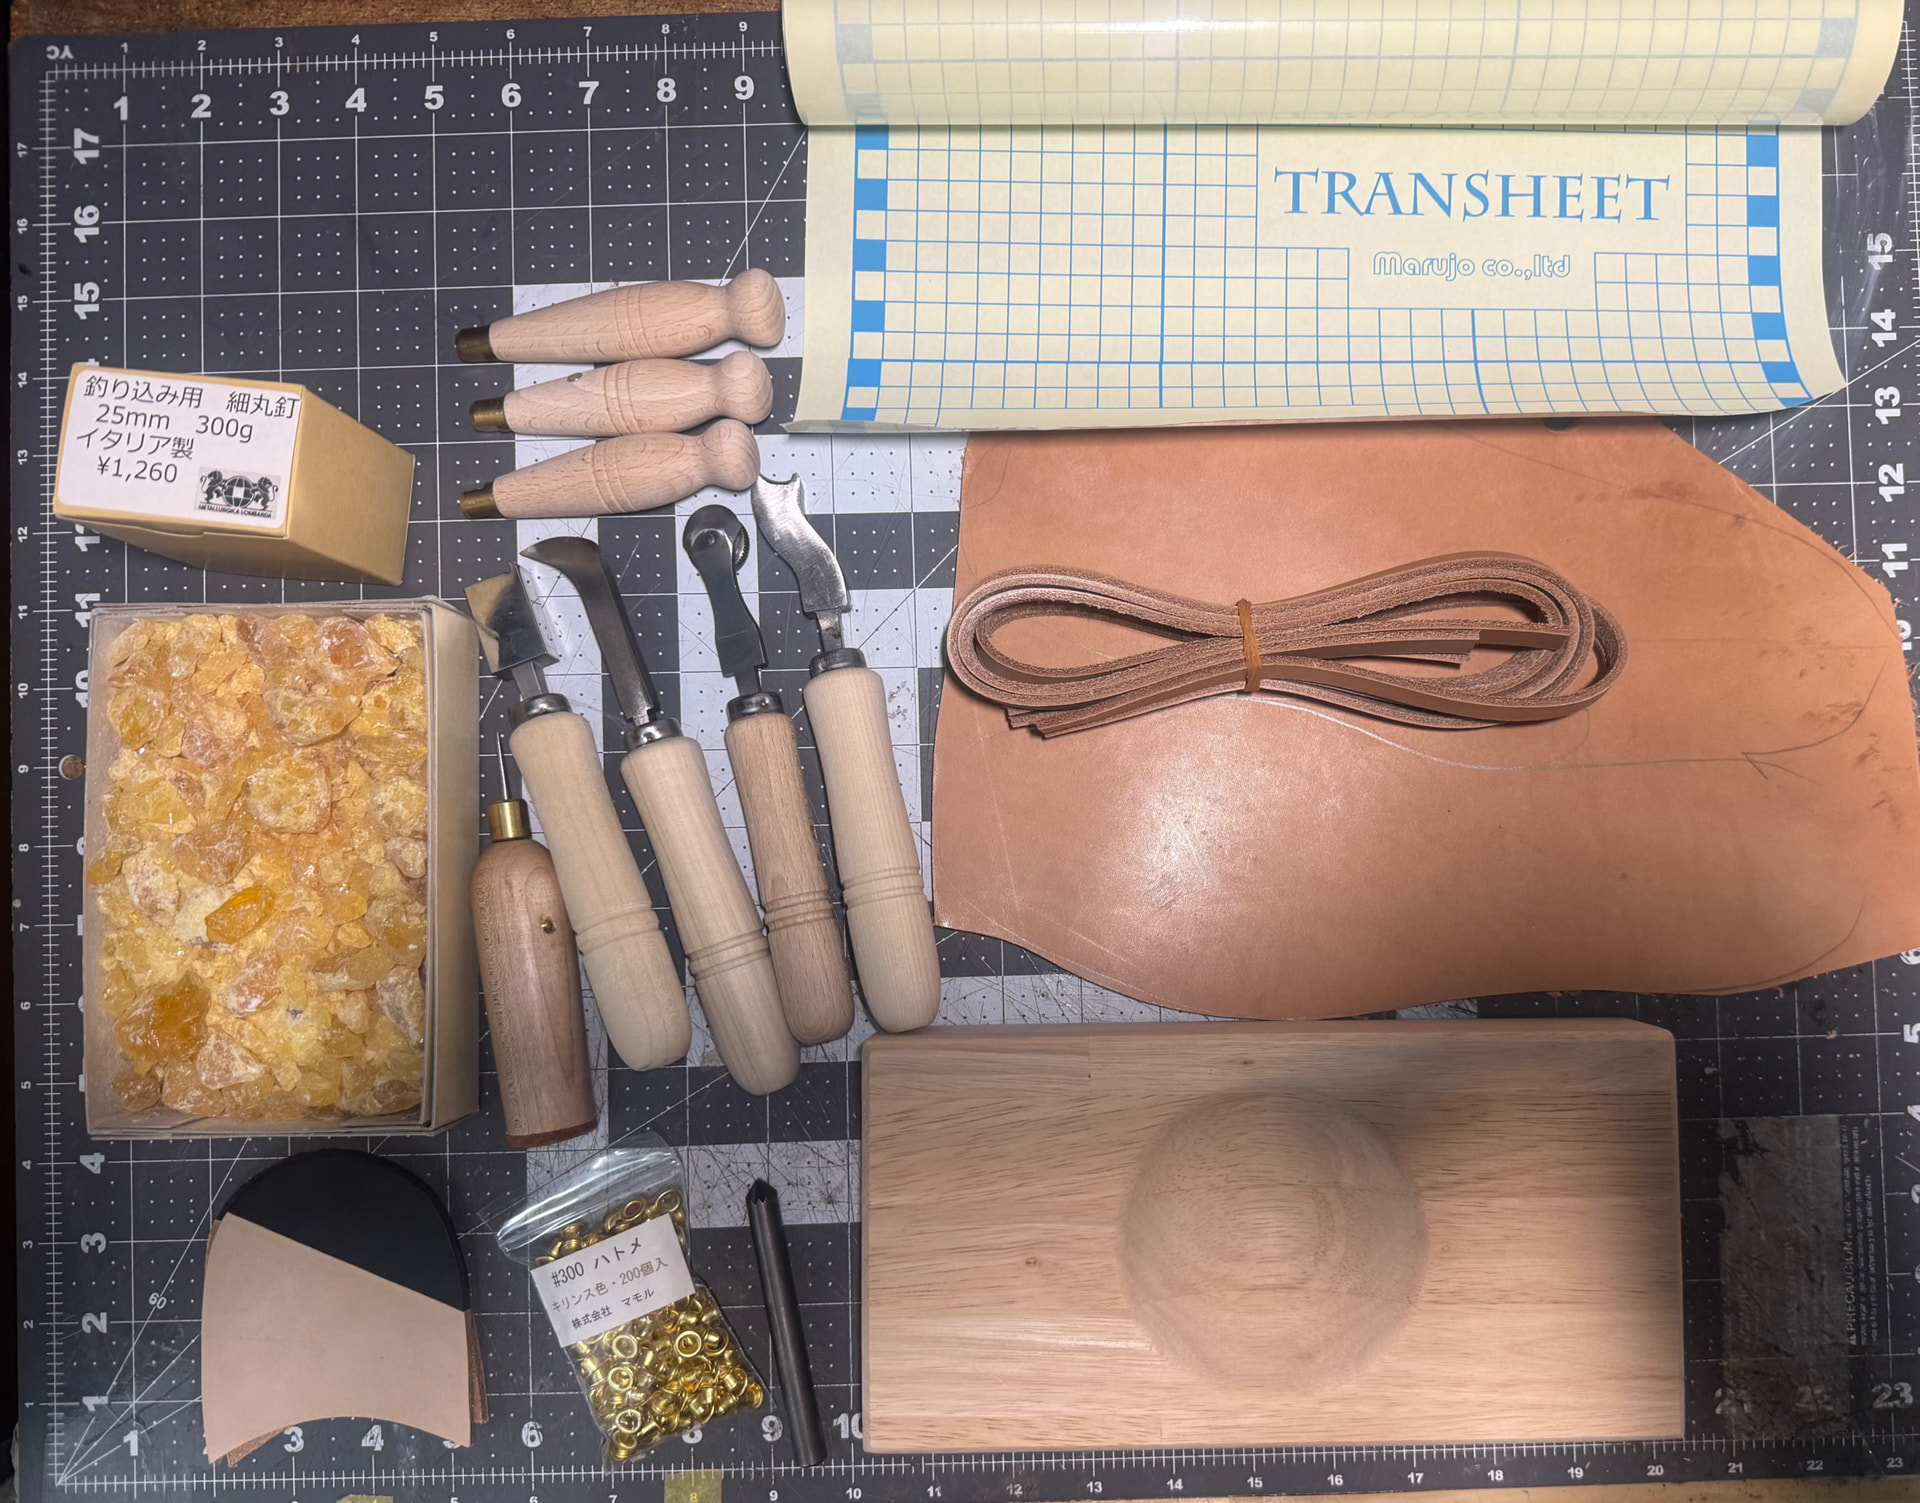
This time I purchased the following:
- Edge Iron
- Waist Iron
- Seam Detailer
- Heel Wheel
- Pine Rosin
- Large awl haft for welting
- Small awl haft for outsole stitching
- Pegging awl
- Italian lasting nails
- Moulding block/ Anaboko
- #300 Eyelets
- Flower punch
- 5M Transsheet
- Mexico Heel lifts
- 270° Leather welts
- Japanese Insole leather
Now I’d like to show a few comparisons with other tools and supplies I have.
Awl hafts
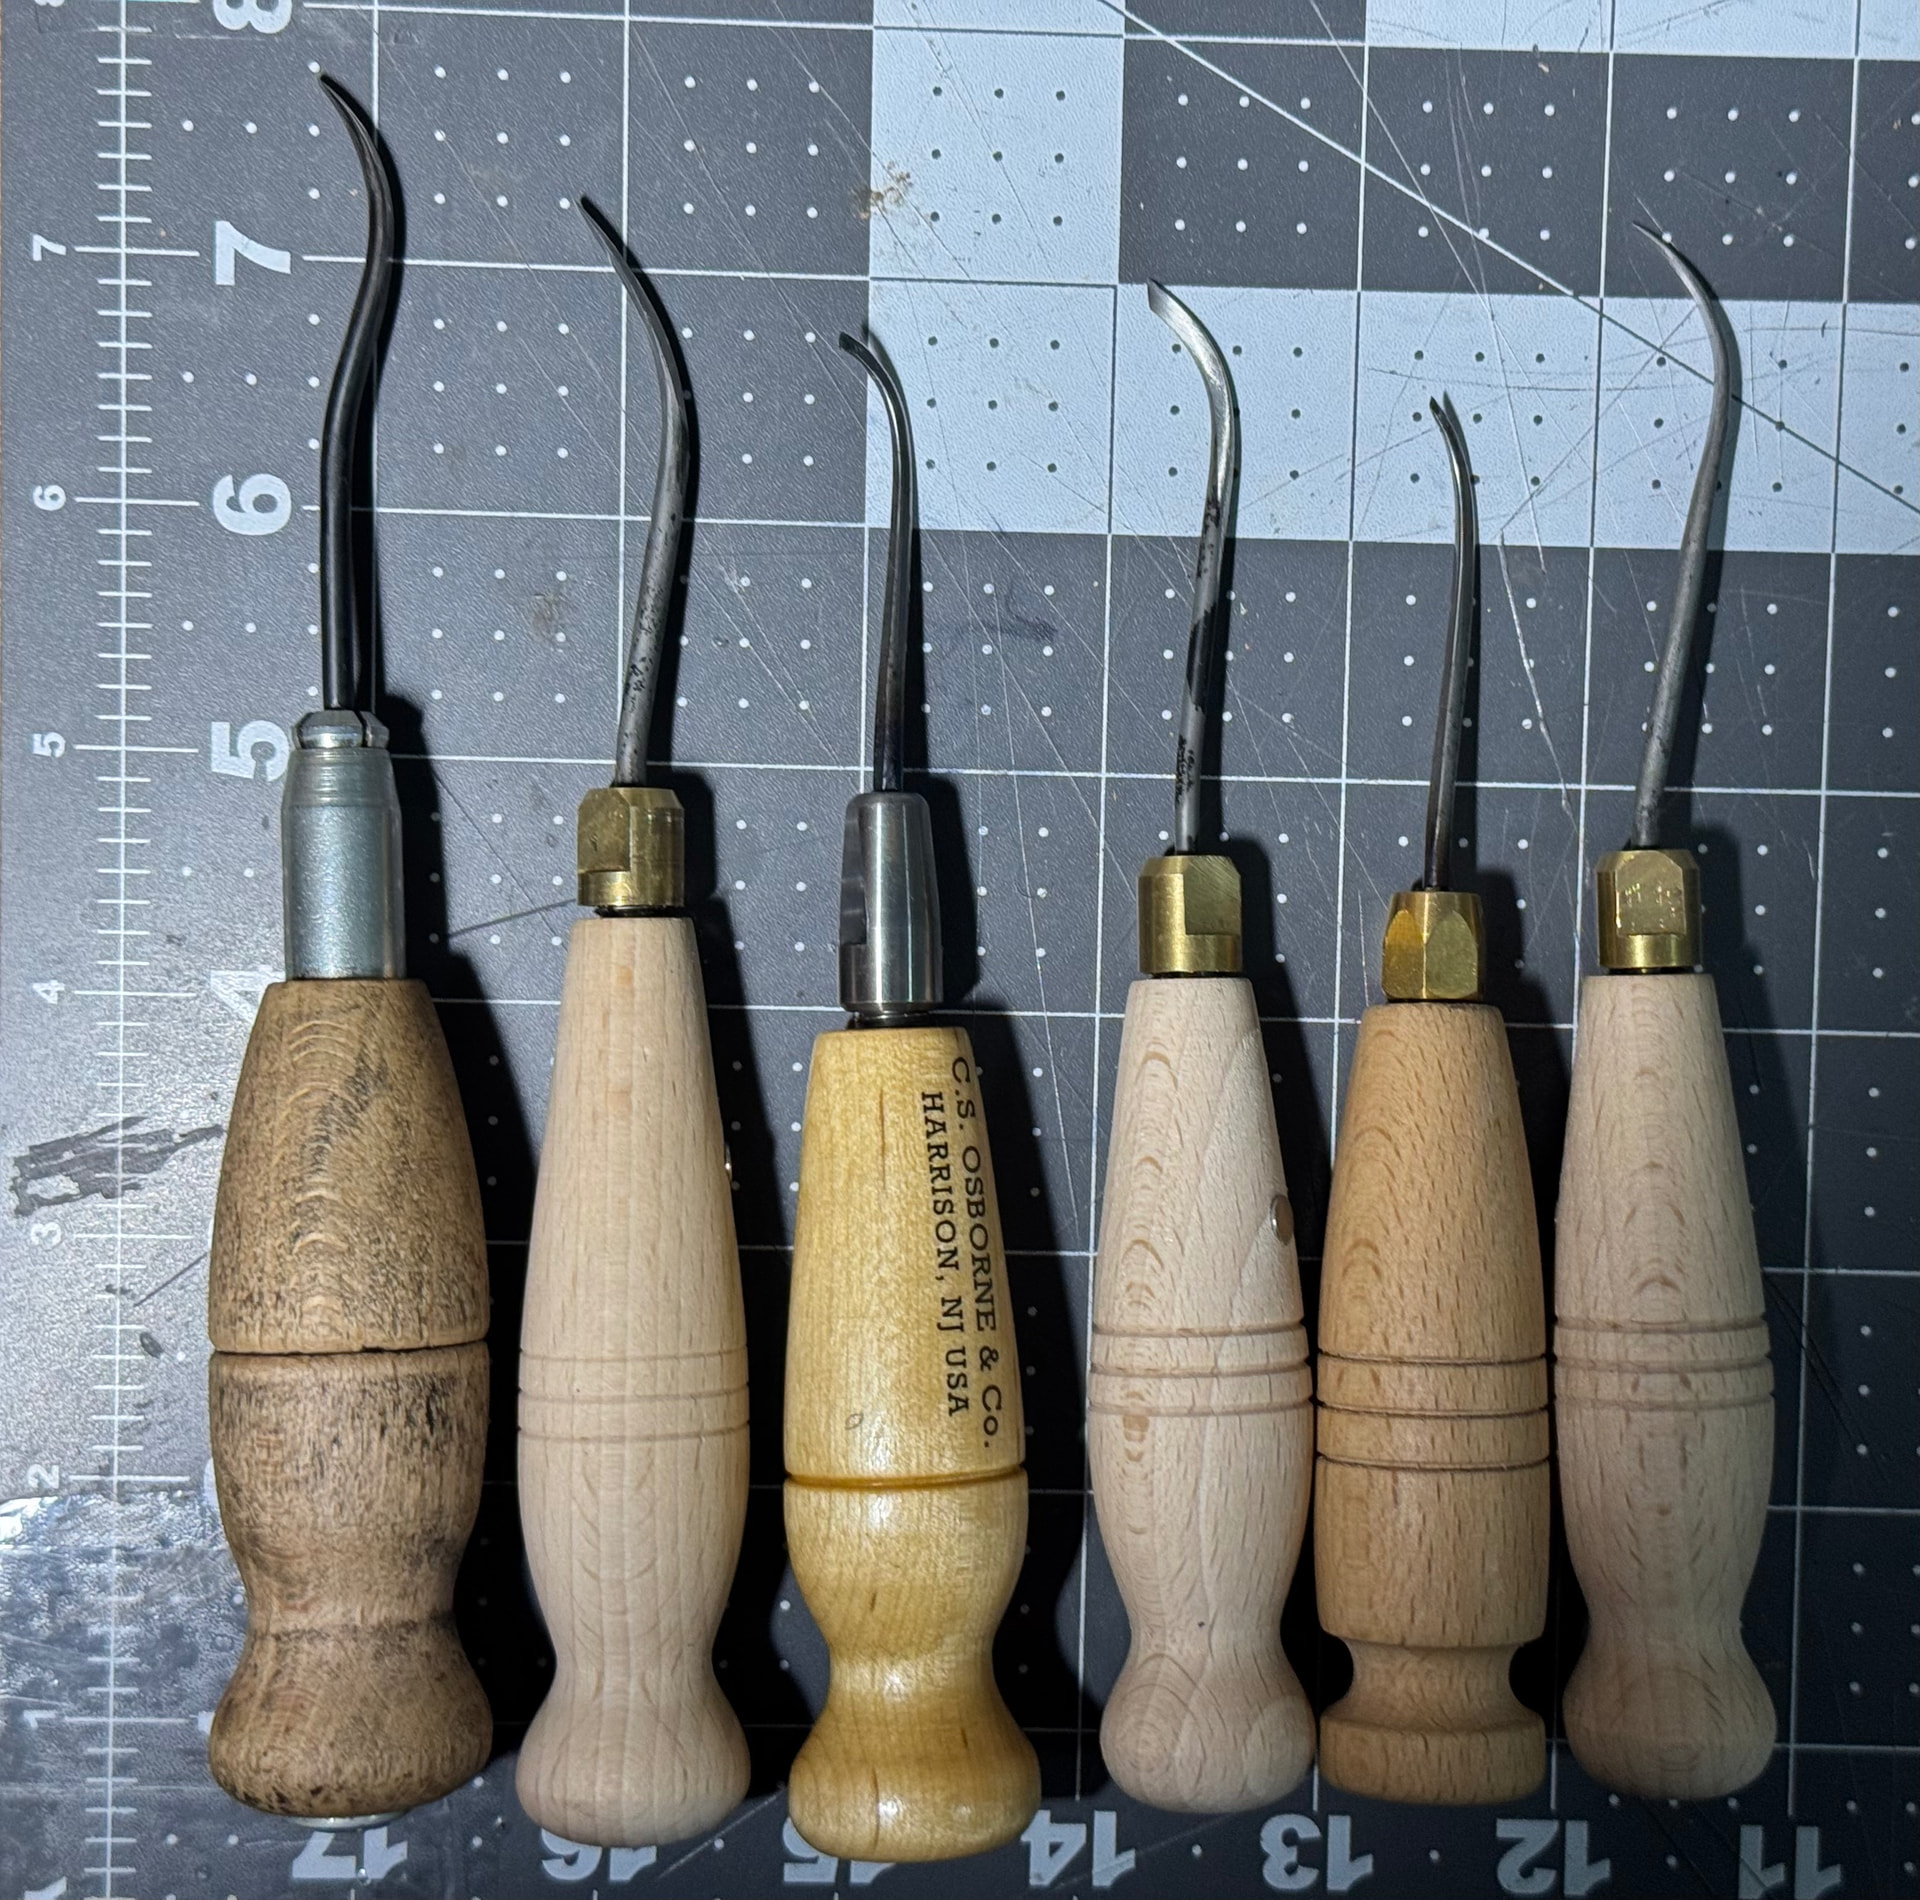
From left to right: Panhandle haft with Carbone 3 3/8” needle, Mamoru large haft and welting needle, Osborne 145 haft with Rasche needle, Mamoru small haft and outseaming needle, Chinese haft and King needle, Mamoru small haft and waist needle.
I have other awl hafts that fit the Mamoru awl needles I purchased in my first order but there was more play than I was comfortable with. I decided to get the ones Mamoru sells and they fit great. They are similar in shape to the Osborne but wood is raw.
I haven’t used the outseaming awls yet but I recently used the welting awl on a test shoe. Before using the welting awl you need to sand down the middle ridge. Here is a blog post that talks about it:
I really enjoyed using the Mamoru welting awl. It is very low profile so you can use it on a thinner holdfast. The outer edge (side?) is easily sharpened so pushing it through holdfast is very easy. It is not as well made as the Carbone awl and since its so thin I chipped the tip after dropping it. It is no longer pointy but still super sharp.
Pegging Awl
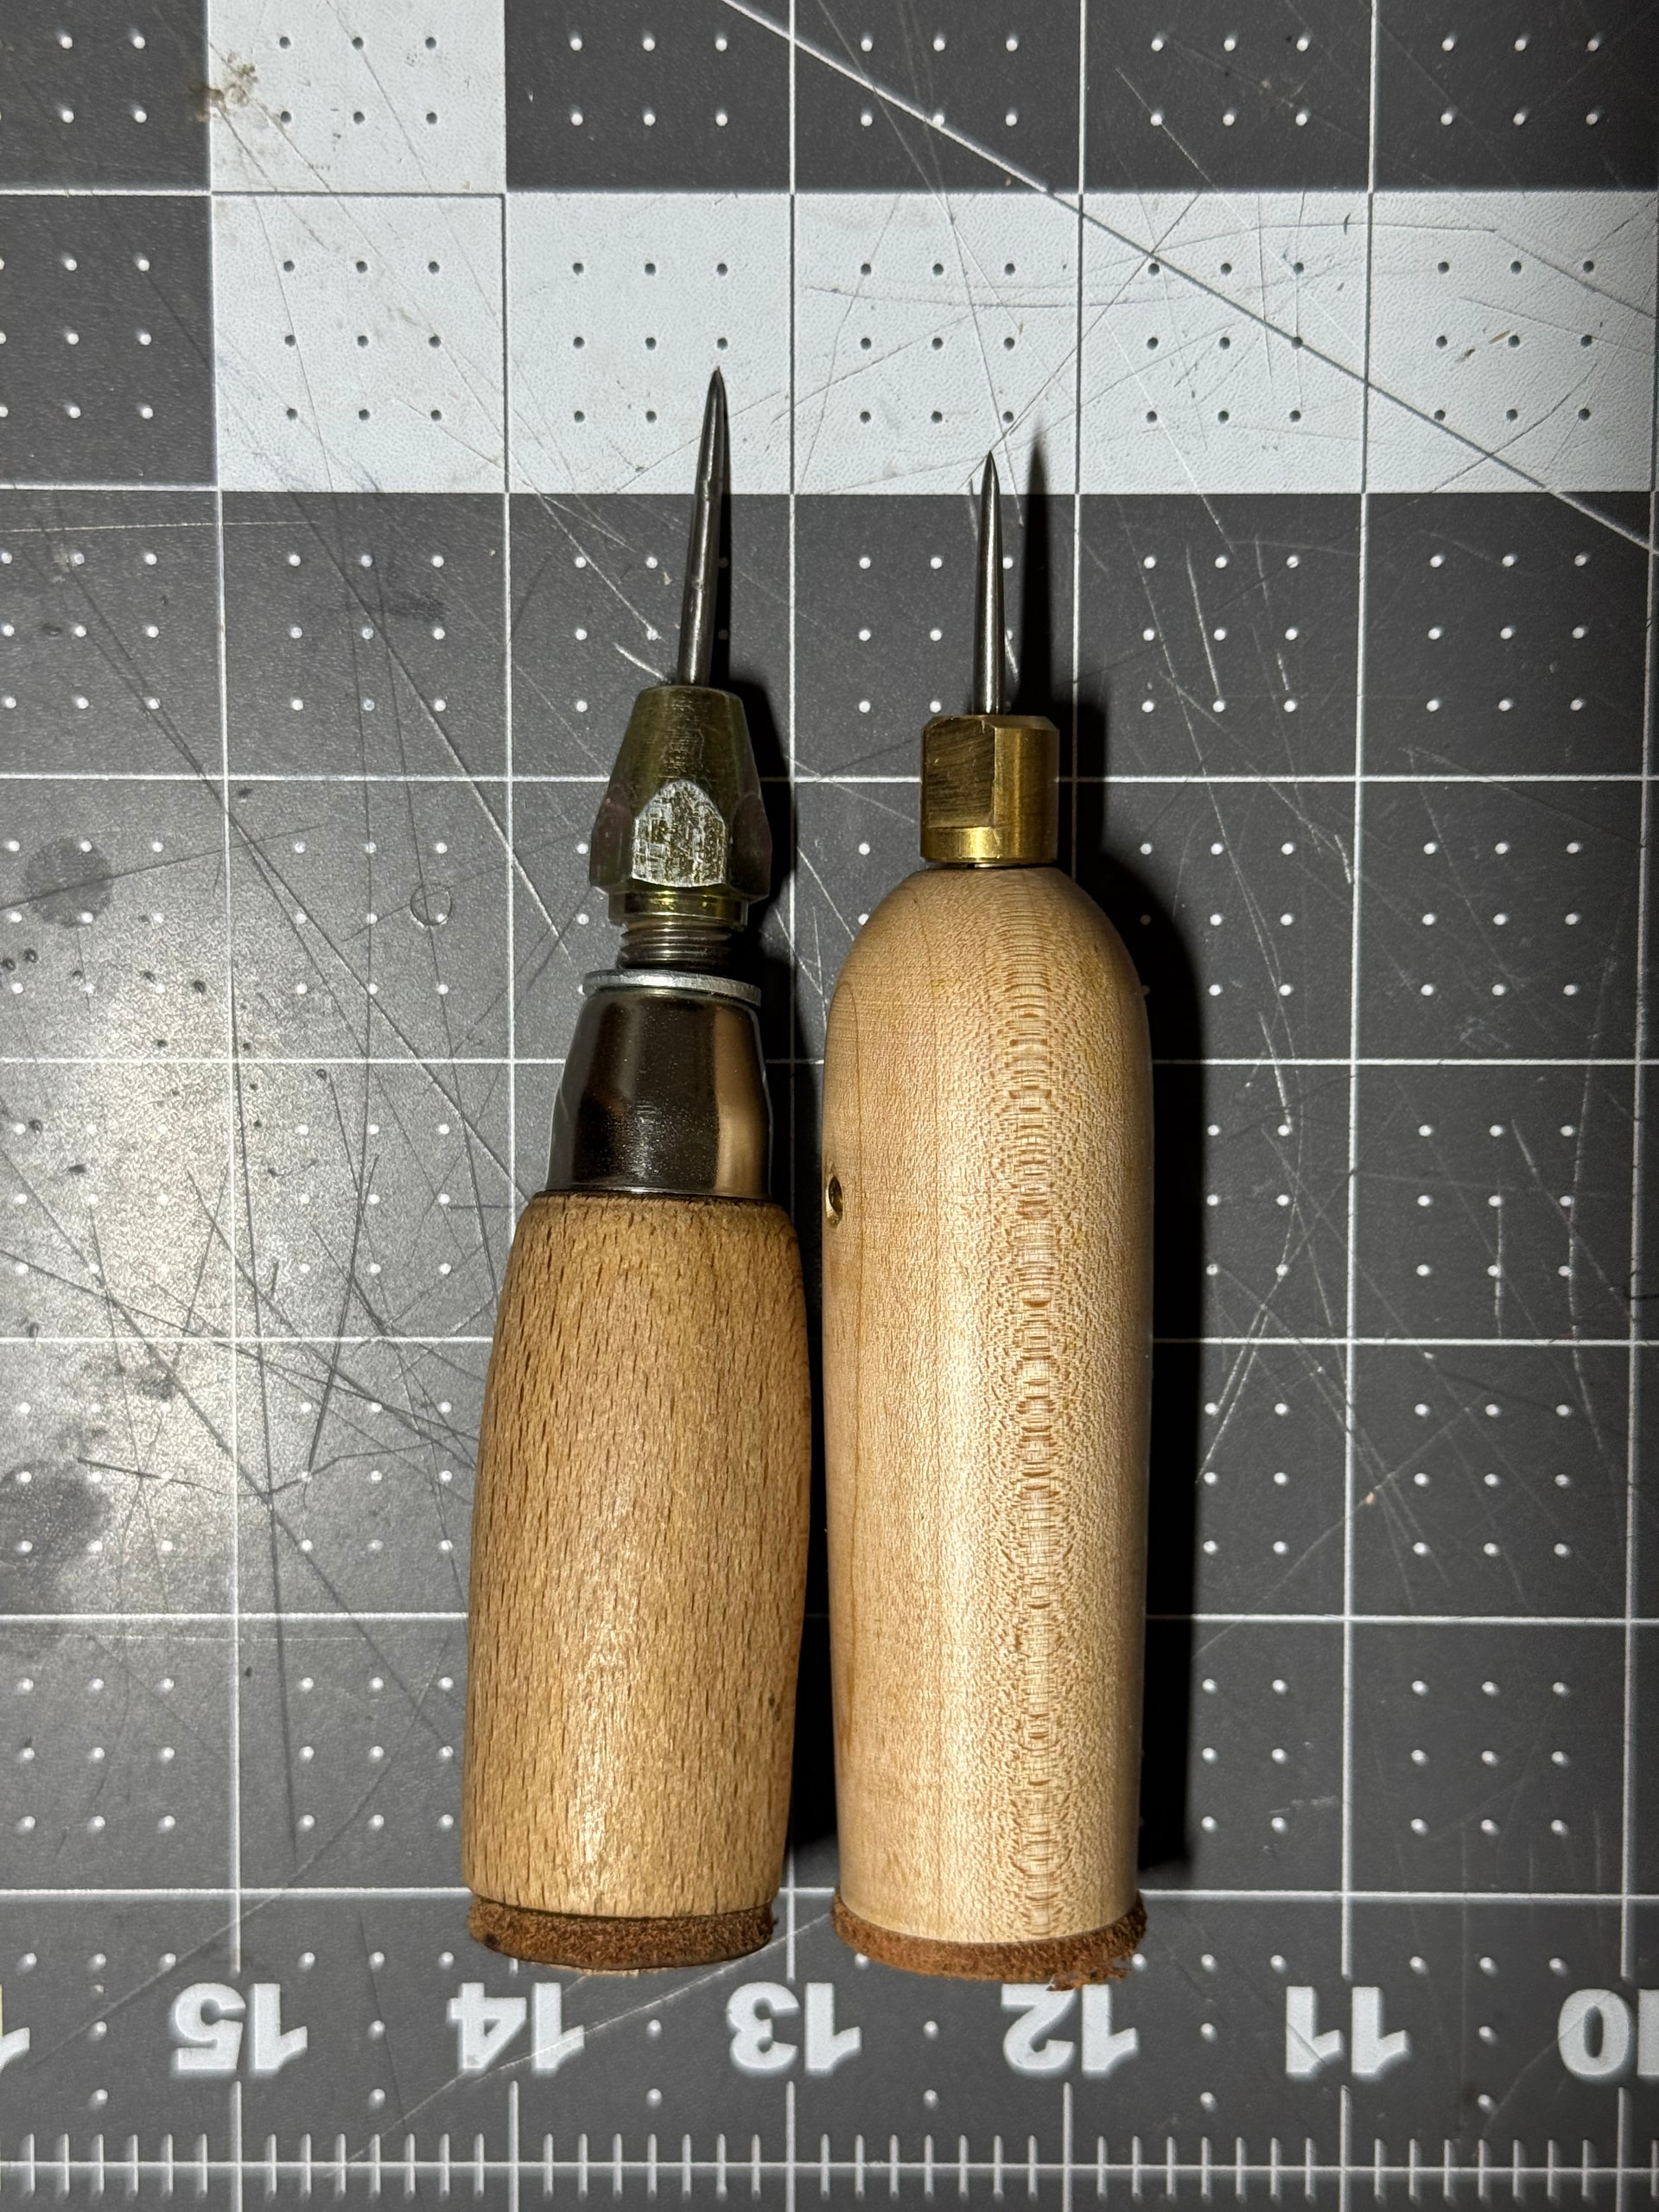
From left to right: Panhandle awl haft with Mamoru awl needle, Mamoru awl haft and needle
I was really happy with the Mamoru pegging awl needle but I didn’t like how much it stuck out from the collet. This can be easily fixed by adding leather as a spacer but I decided to just get the full awl combo. The Mamoru awl collet allows the needle to go much deeper so I can set it to the exact length of the pegs I am using. The piece of leather in the back works similar to the panhandle haft but on the Mamoru haft it is also glued.
Lasting nails
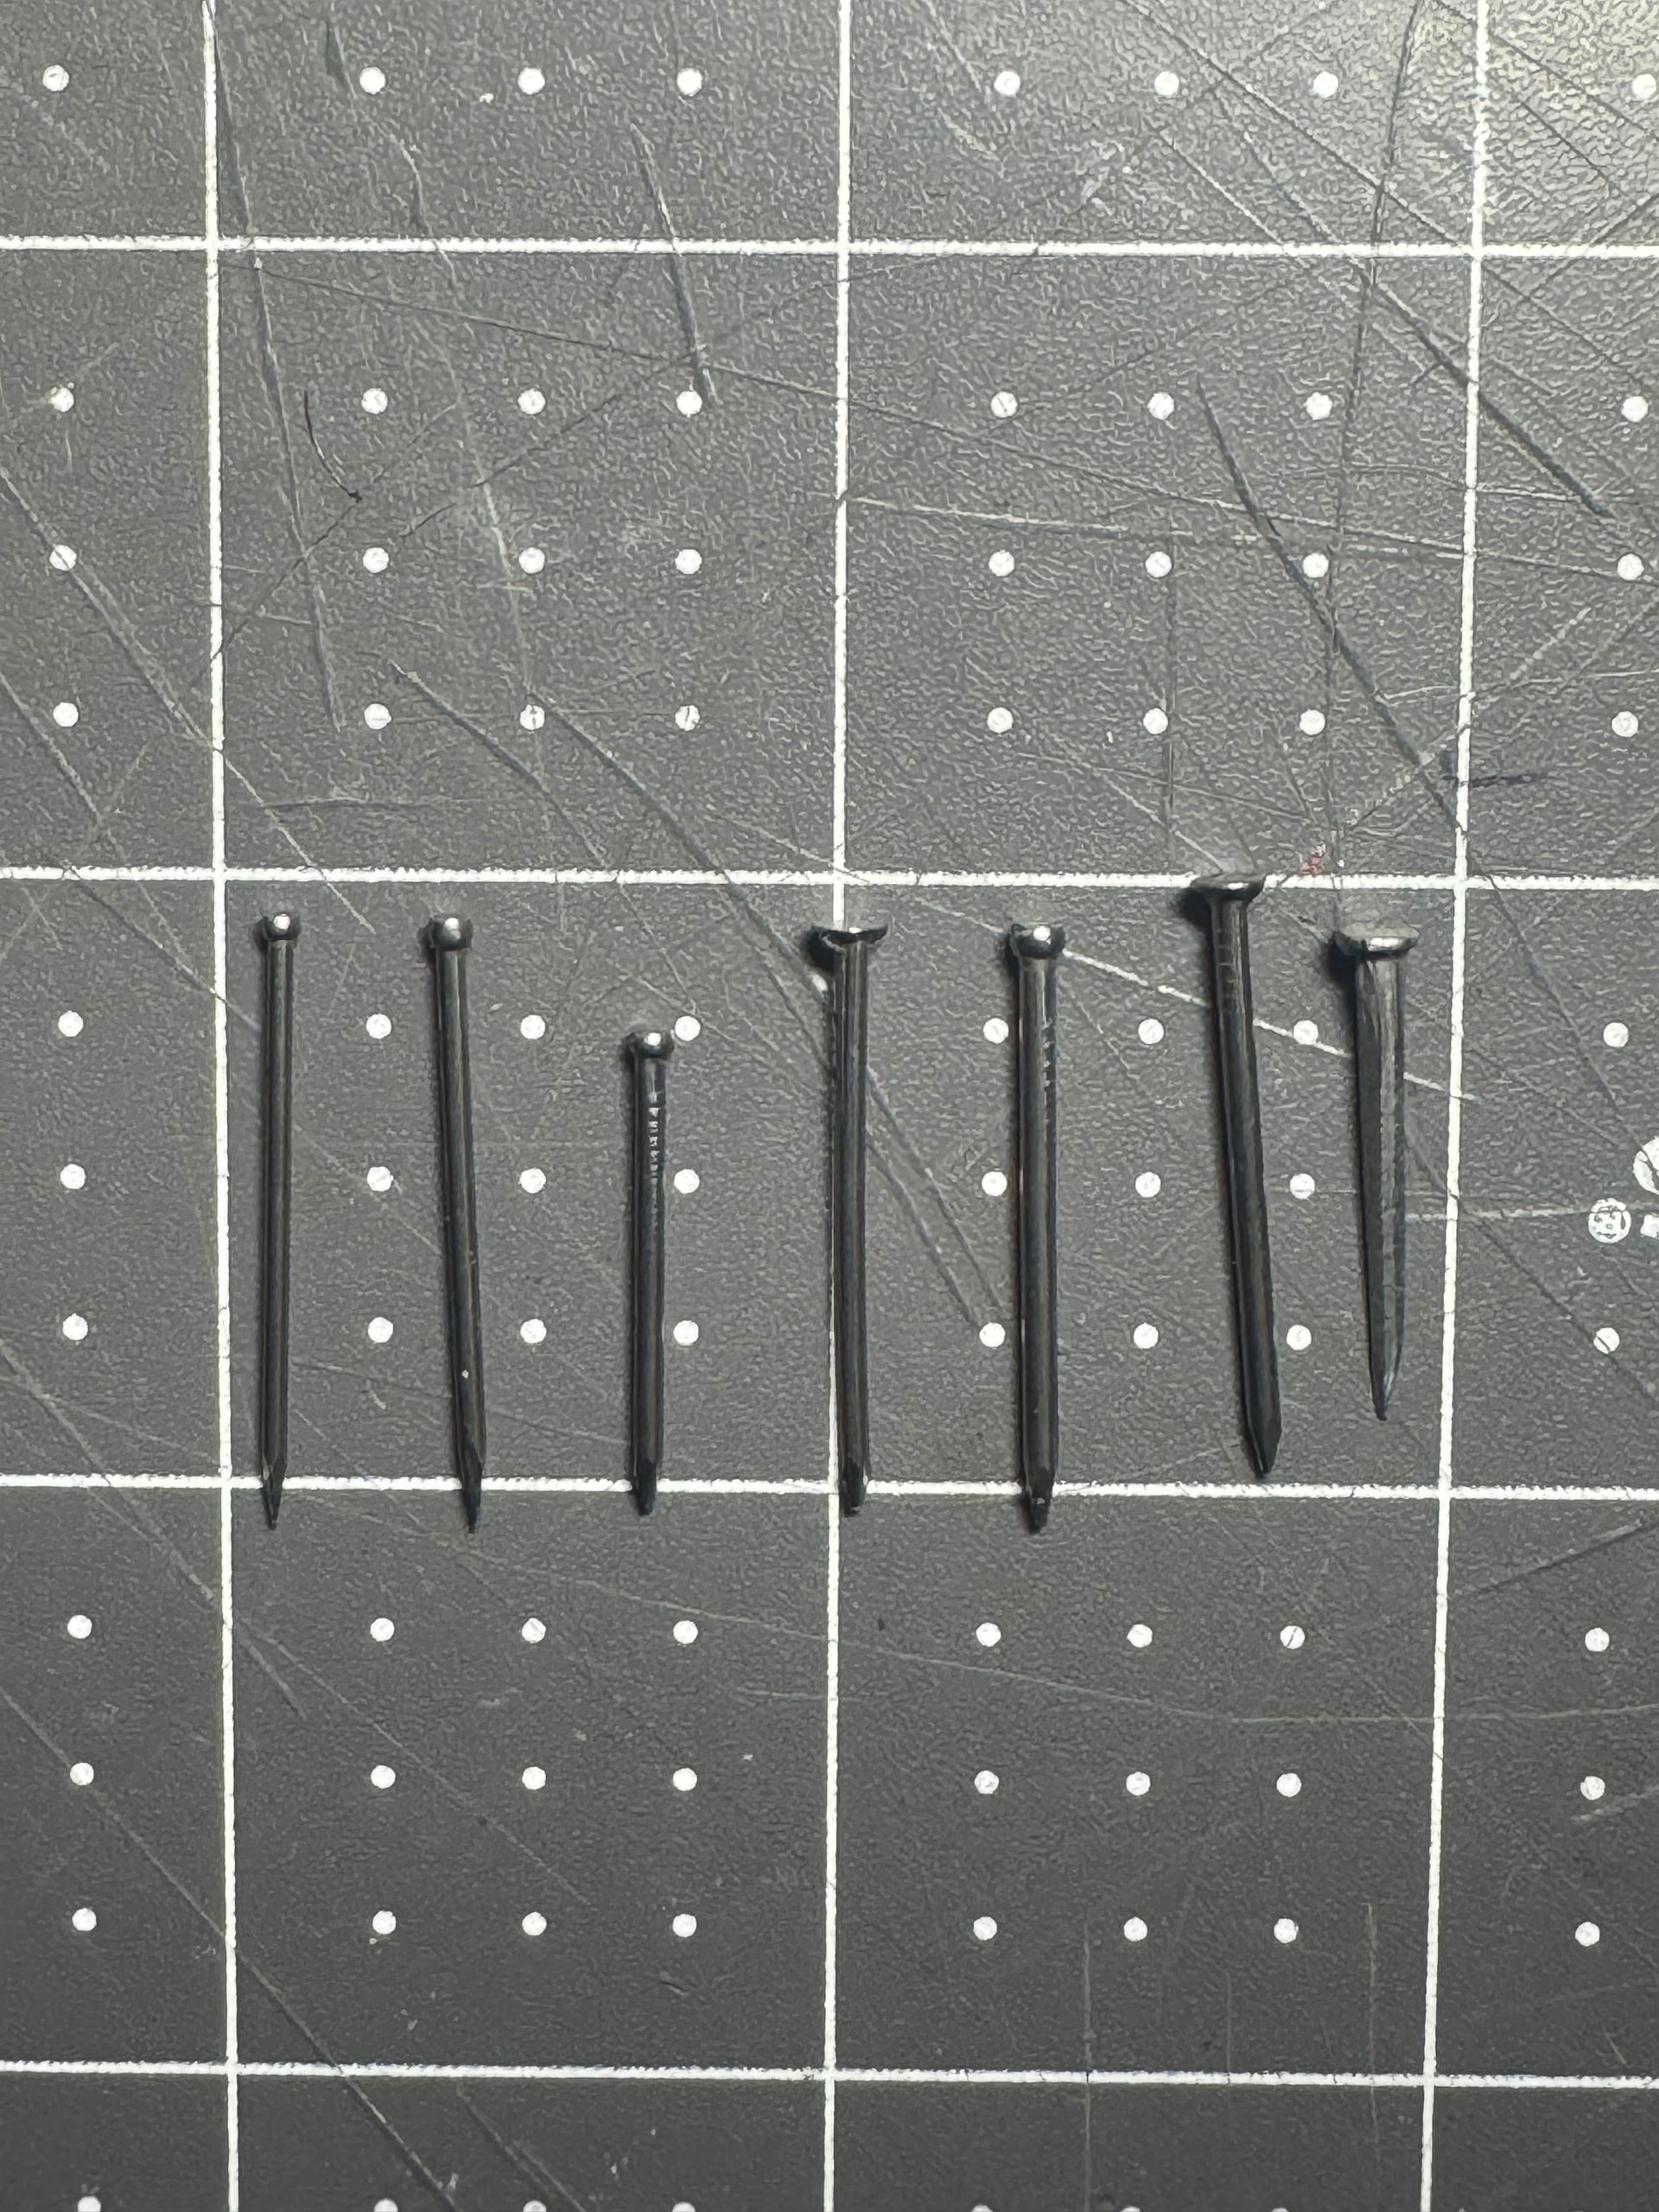
From left to right: Mamoru Italian, Leatherado Italian, 18 ga walmart, Starko tools, 17 ga walmart, Chinese, Db Gurney 7 oz tacks
A lot of the lasts I’ve been using are vintage wooden ones from ebay. They are well used and have tons of holes. The choice of lasting nails is not that important in my opinion but I am just paranoid that big cracks will form if I use the larger nails. I have begun to prefer nails over bike inner tube for blocking insoles so that puts extra holes on the last. I would love to import some lasting nails from Blackbird or Rivierre Nail Factory. Unfortunately, Blackbird has a large minimum order and shipping cost and Rivierre won’t ship to the US anymore because of the stupid tariffs. Until recently, I had used the Starko lasting nails for all my test shoes. The nails are about 1.2mm thick, they worked fine but I am not a fan of the T head design, it makes it harder to remove the nails after bending them over. I bought some Italian lasting nails from Leatherado, they are the same thickness as the Starko nails but have a lost-head and are much sharper. The additional sharpness makes it really easy to pierce the upper and insole leather without the upper leather losing the stretch. The Mamoru nails are from Metallurgica Lombarda. They have the same sharpness as the Leatherado nails but are 1mm thick. I haven’t used them yet but they will probably be my go to lasting nail (until I run out). I have seen nails from this company being sold by an LA company. The price is outrageous, double what Mamoru charges and 26 dollar shipping for 1 pound of nails… I hope I can find some other way to purchase lasting nails similar to the Mamoru’s. Mamoru’s pricing is reasonable, especially their 2.5kg offering, but the weight made shipping super expensive.
Welt Leather
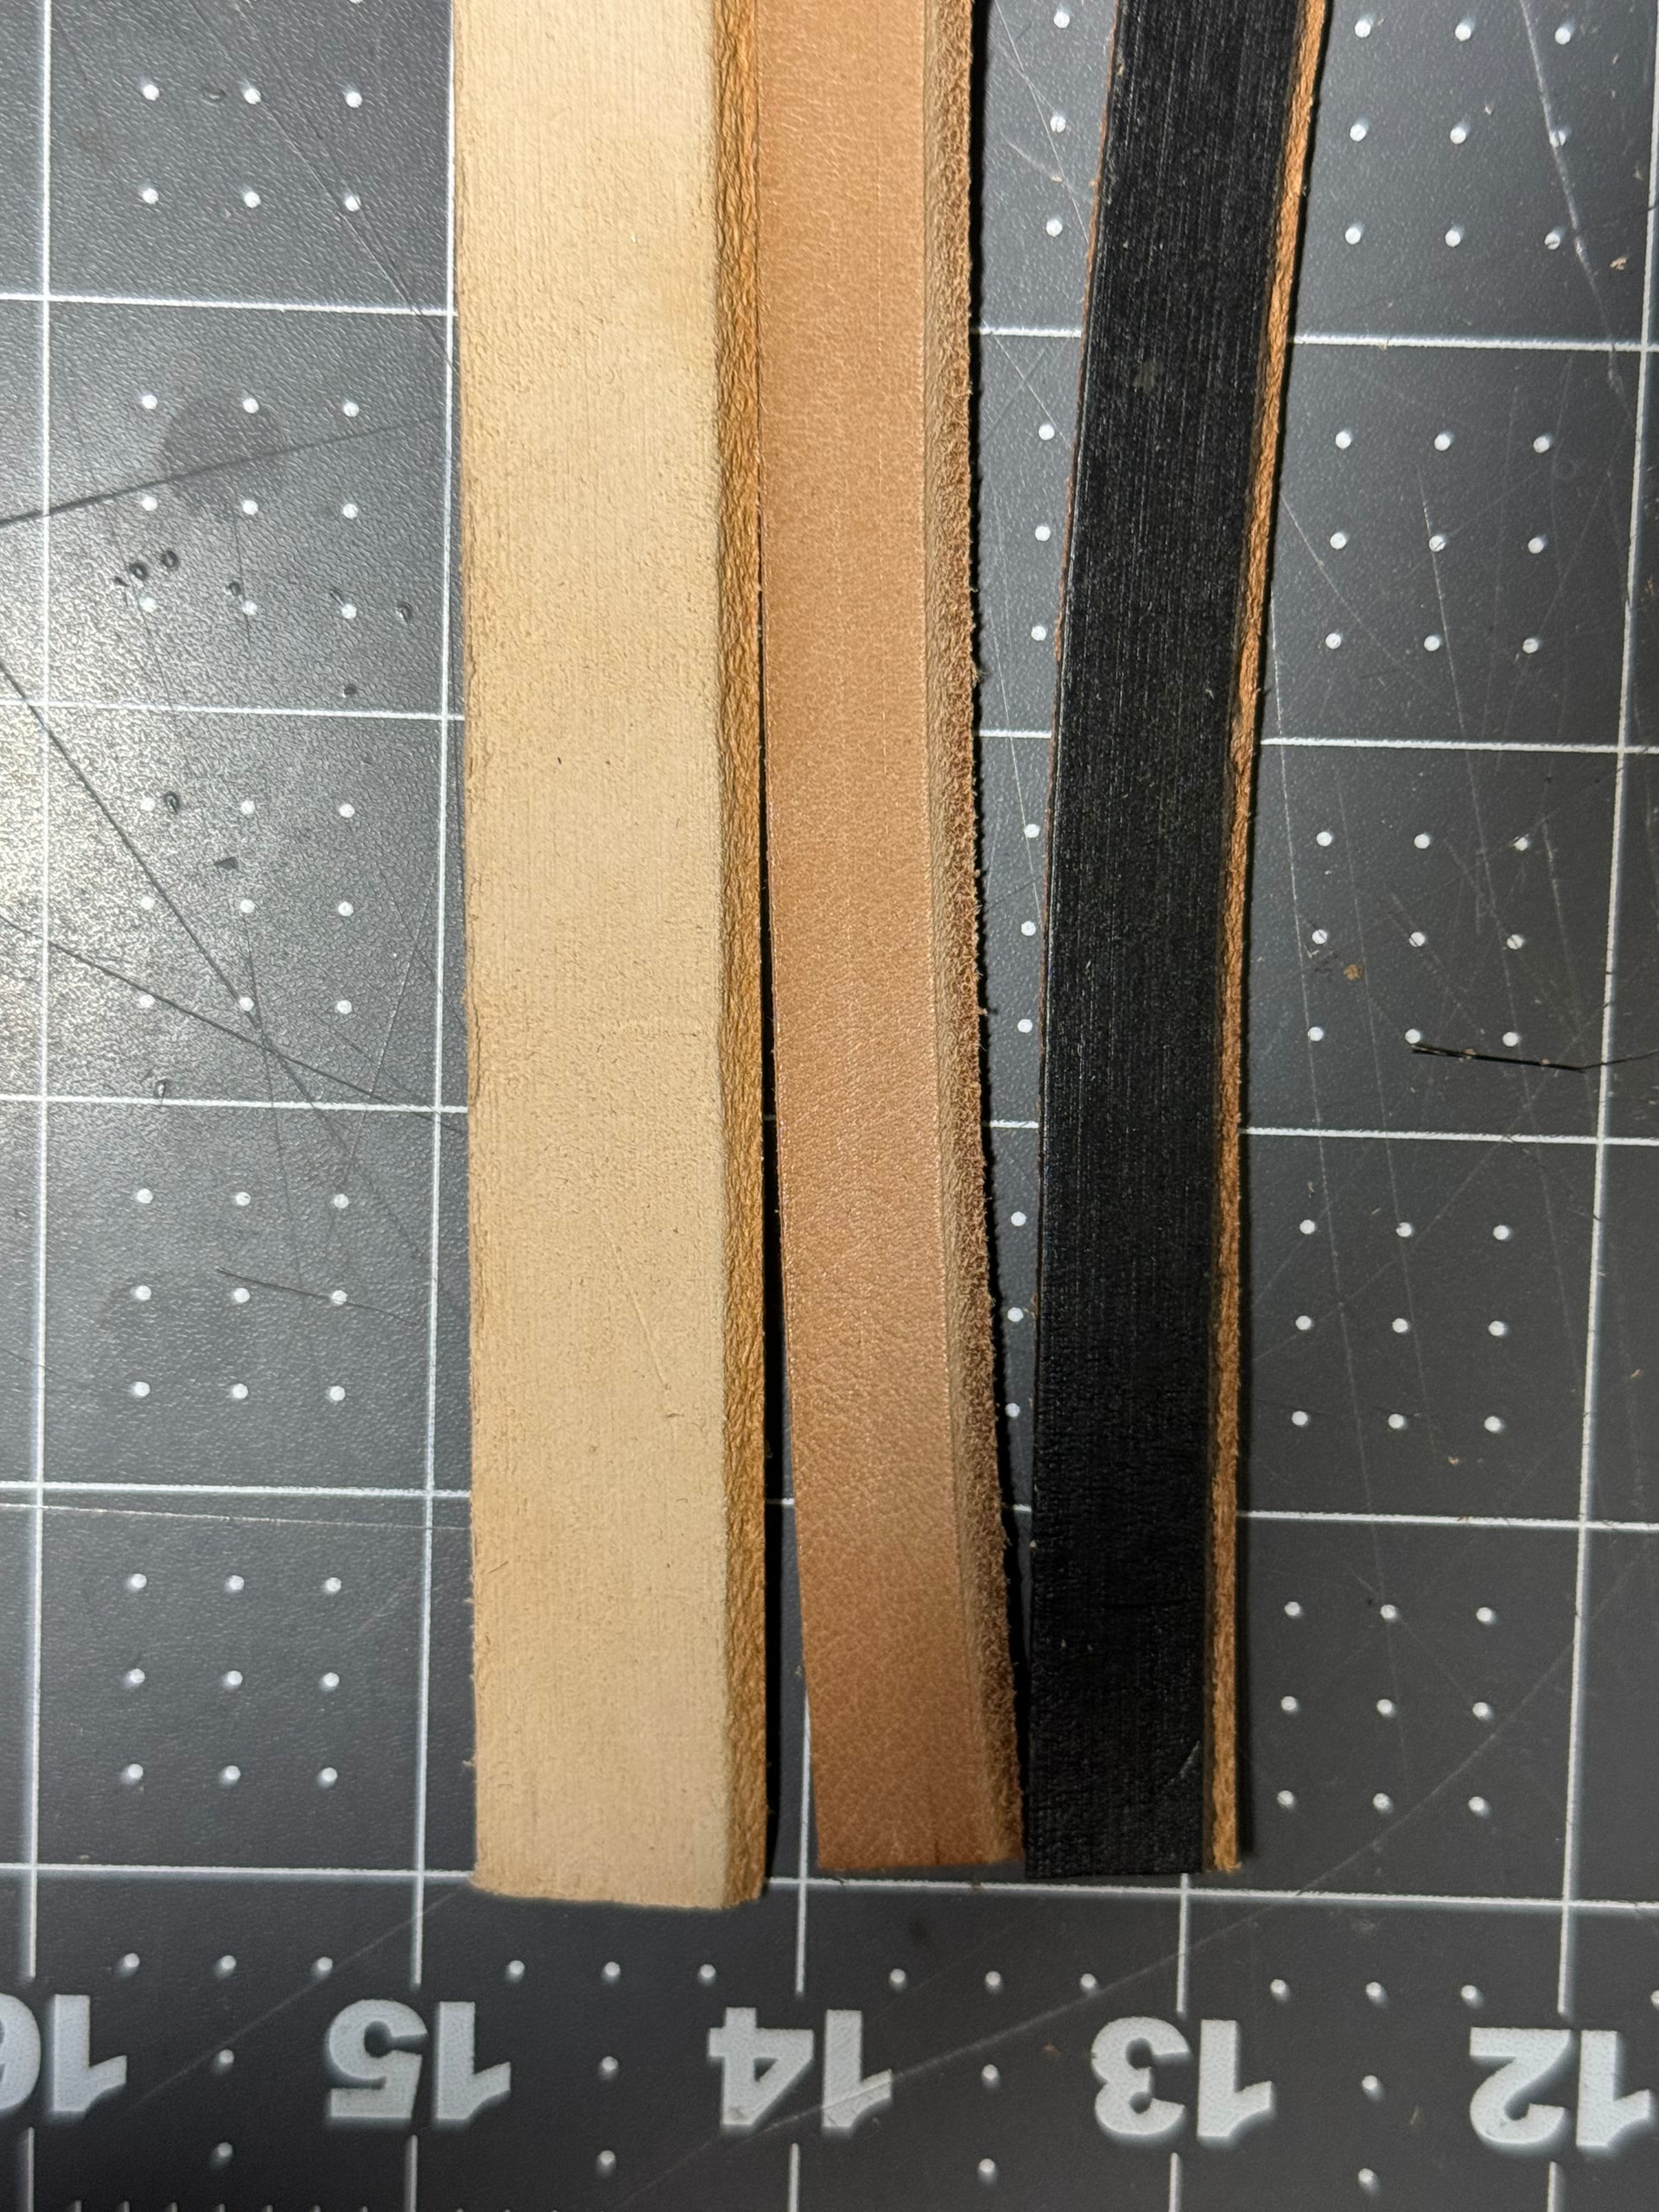
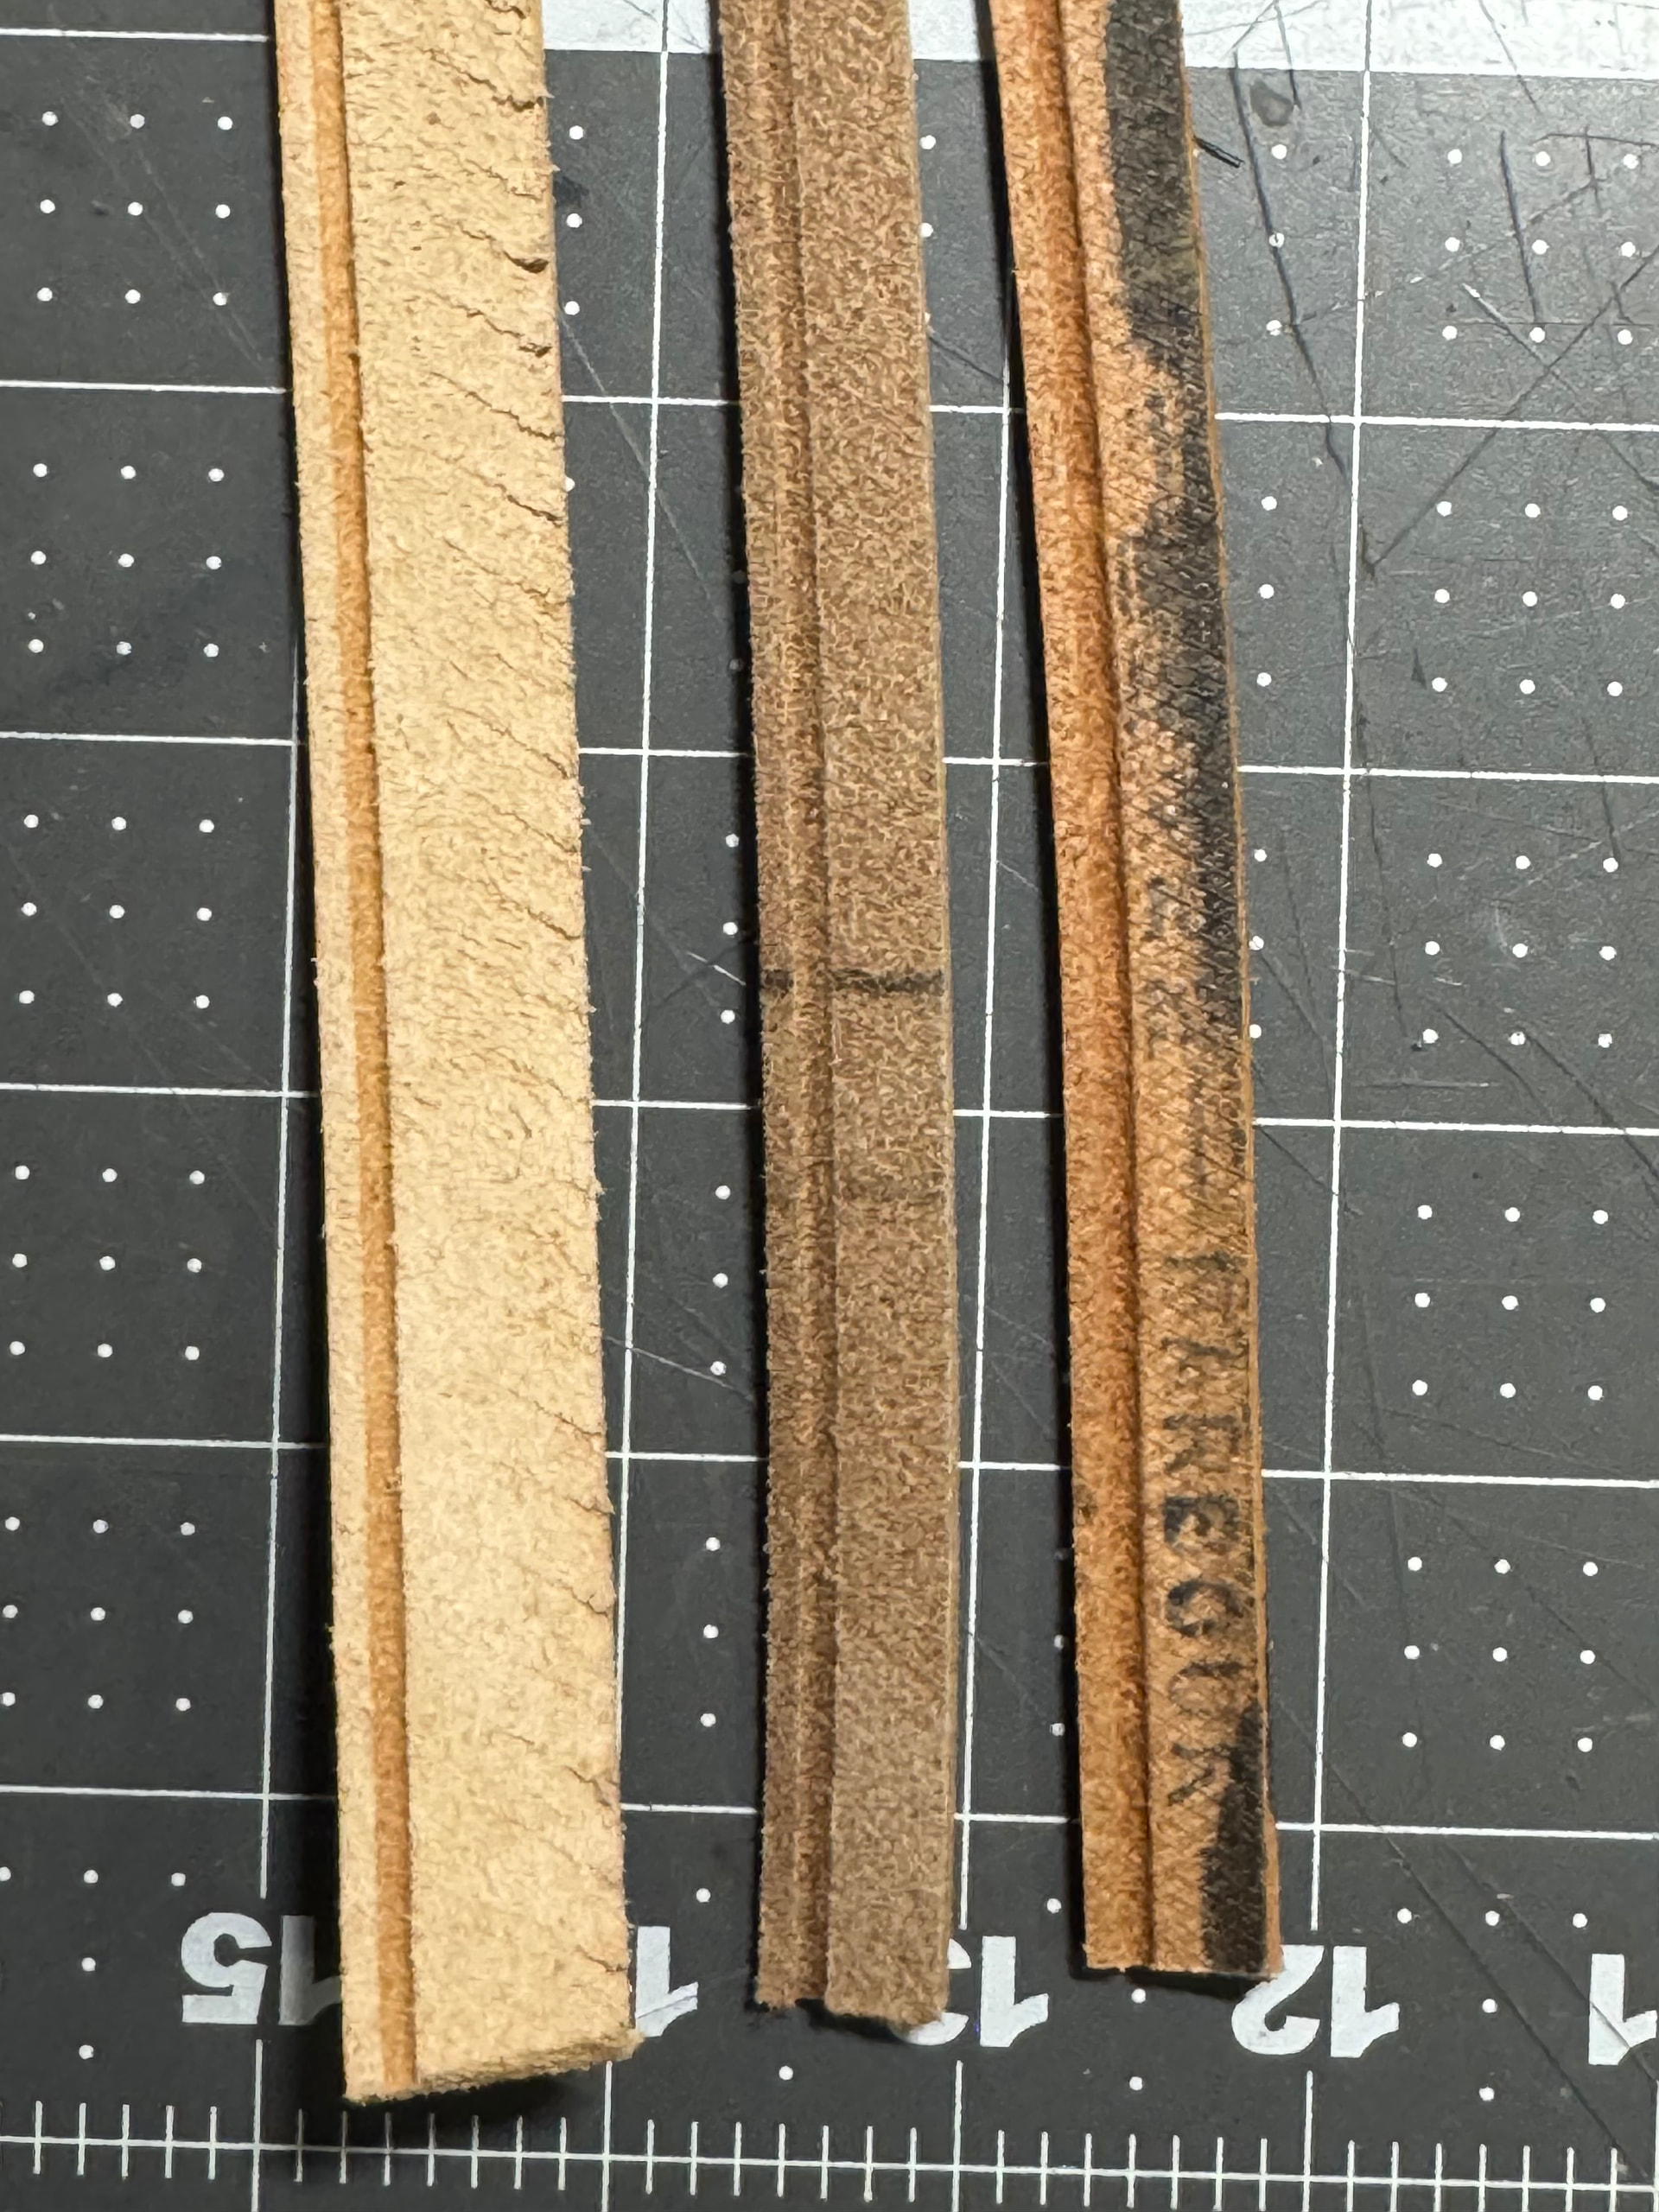
From left to right: Panhandle natural, Mamoru, Panhandle black (Barbour)
The panhandle welt offerings have worked fine for me so far but I saw Mamoru sold Japanese welt leather and I decided to try it out. Mamoru sells a 270 degree and a 360 degree welt option (55 cm and 75 mm) in pairs. I think the Mamoru leather is full grain since it is smooth to the touch and I can see the individual pores. Other than that it is very similar to the Barbour. I wasn’t a fan of how the Panhandle natural welt dyed so hopefully the Japanese leather does better.
Waist Iron
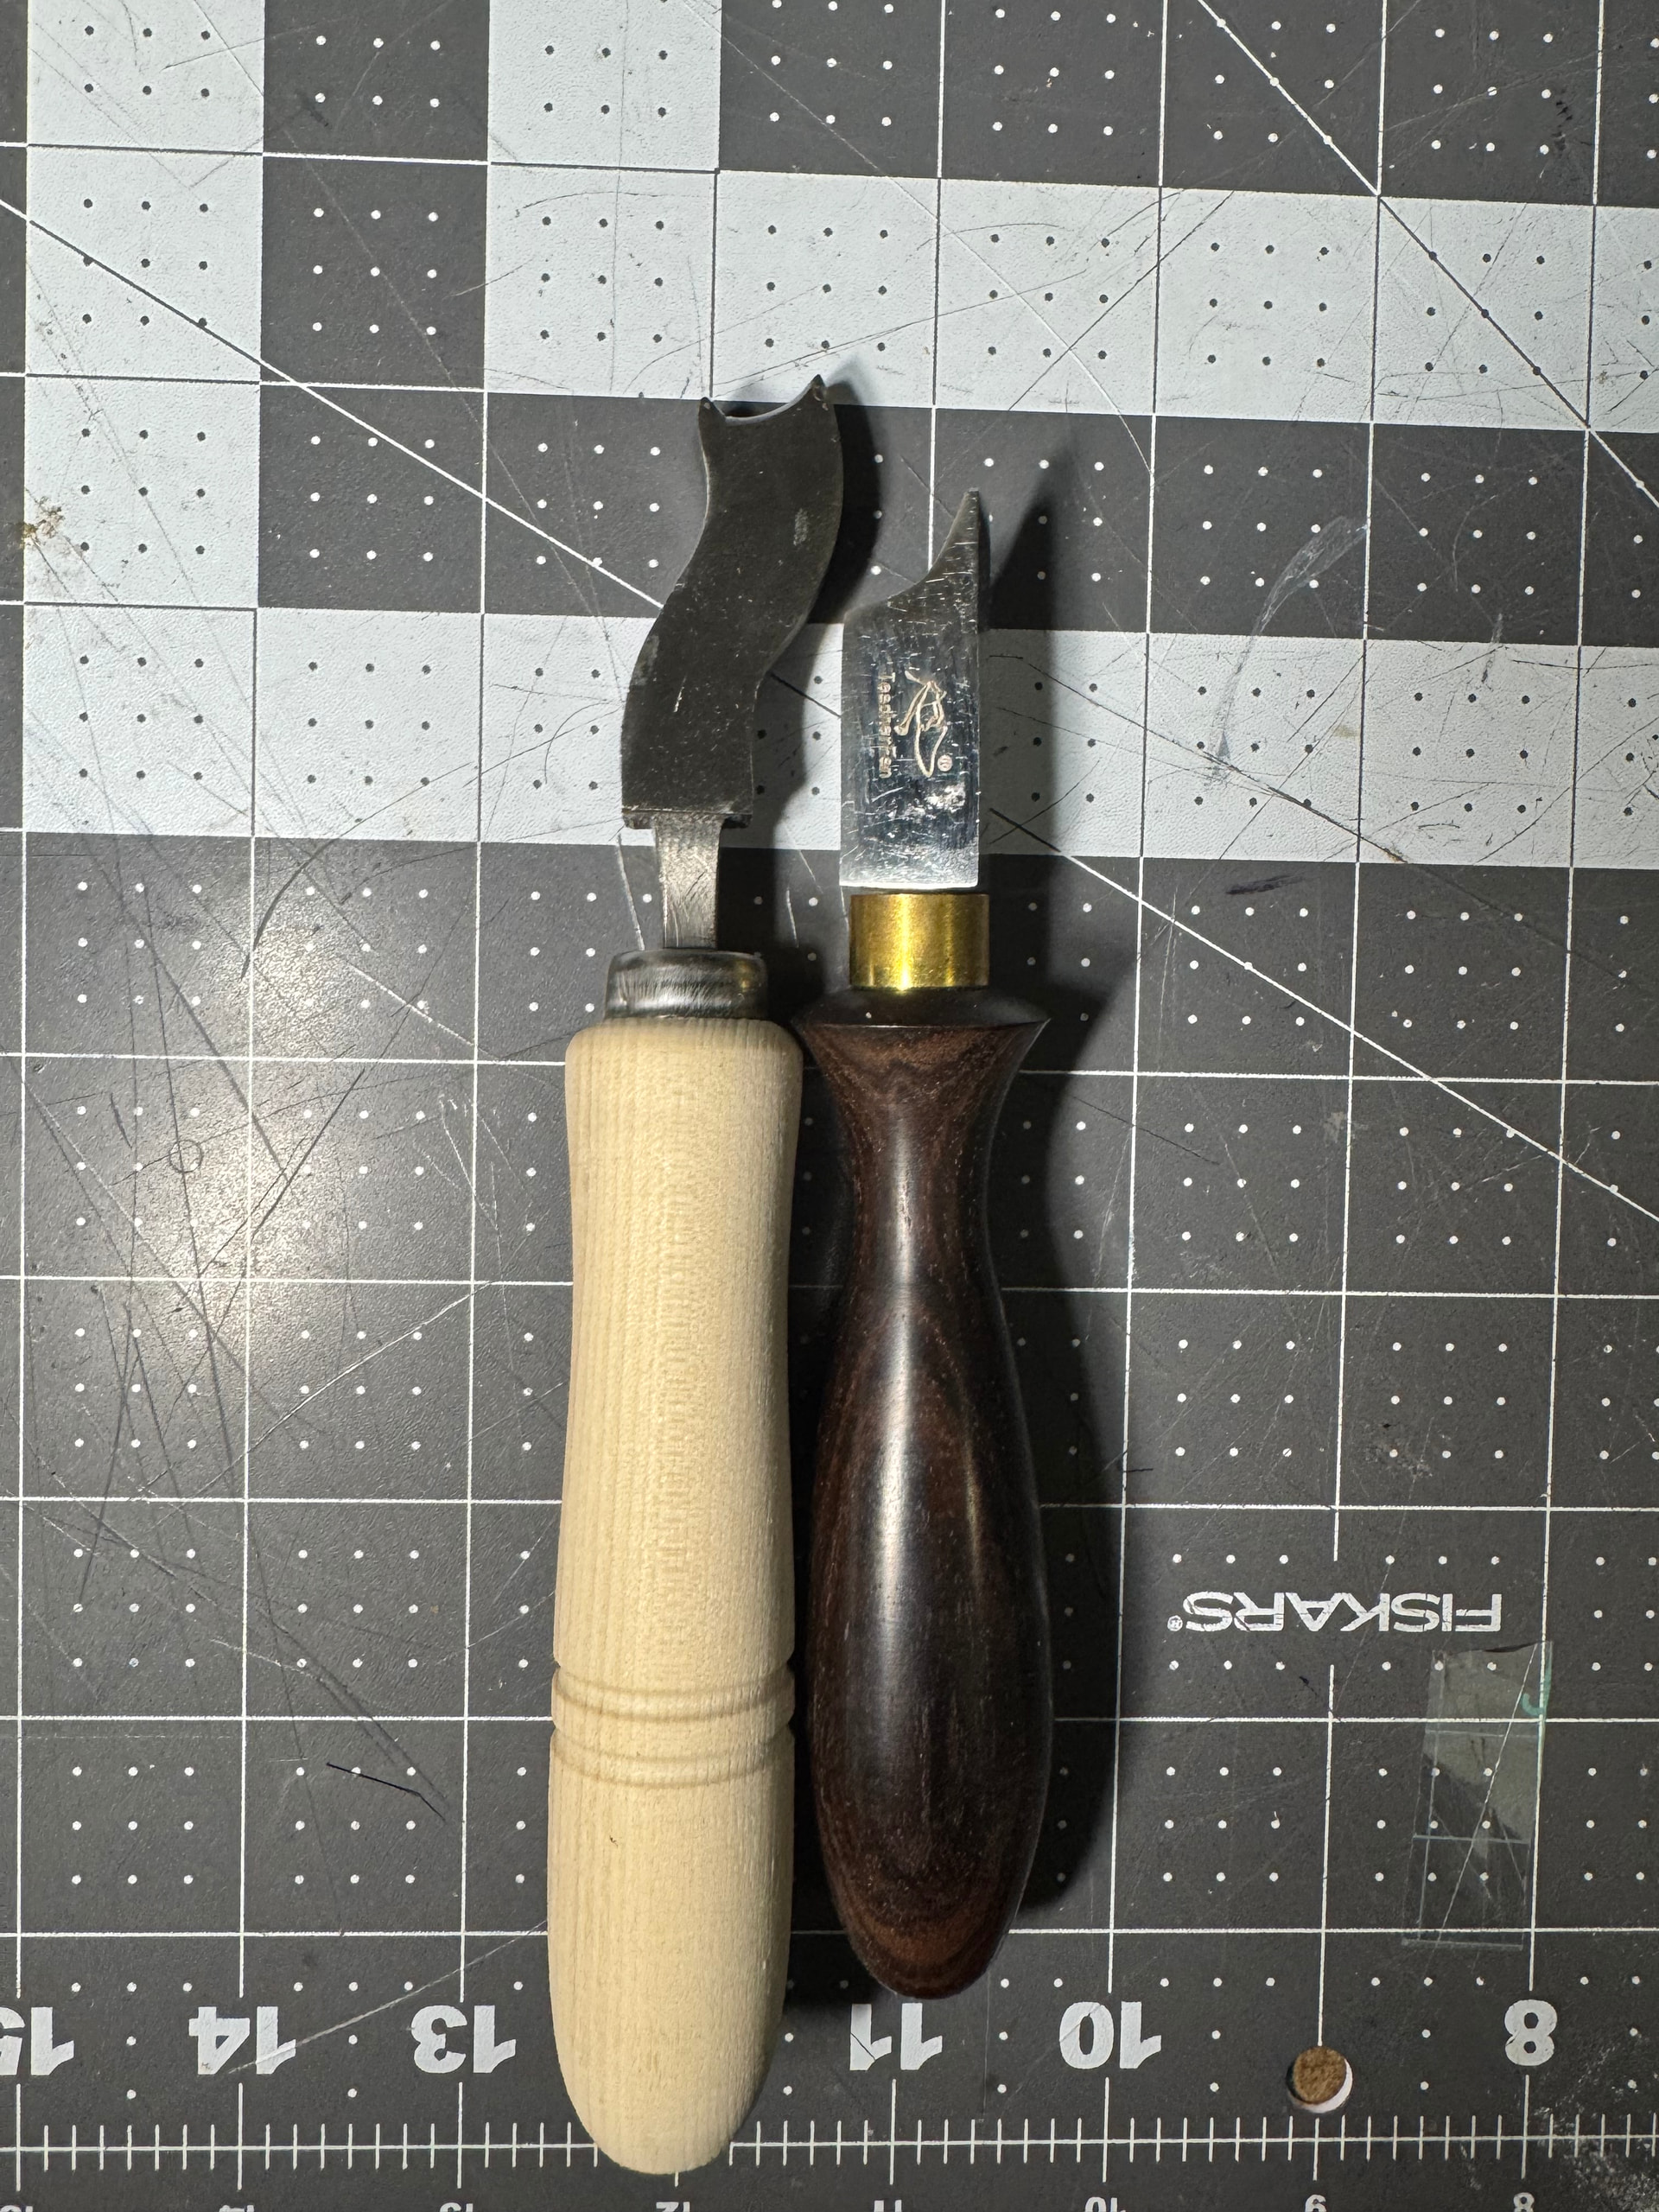
From left to right: Mamoru, Chinese
End to end the Mamoru is 13mm wide so even a double sole should fit. Unfortunetly, the Mamoru is really tough around and inside the part that actually touches the leather. I’ll have to do a lot of polishing. The Chinese waist iron is kind of a weird shape. I think you are supposed to flip it during use so that the top and bottom of edge of the sole gets rounded.
Heel Wheel
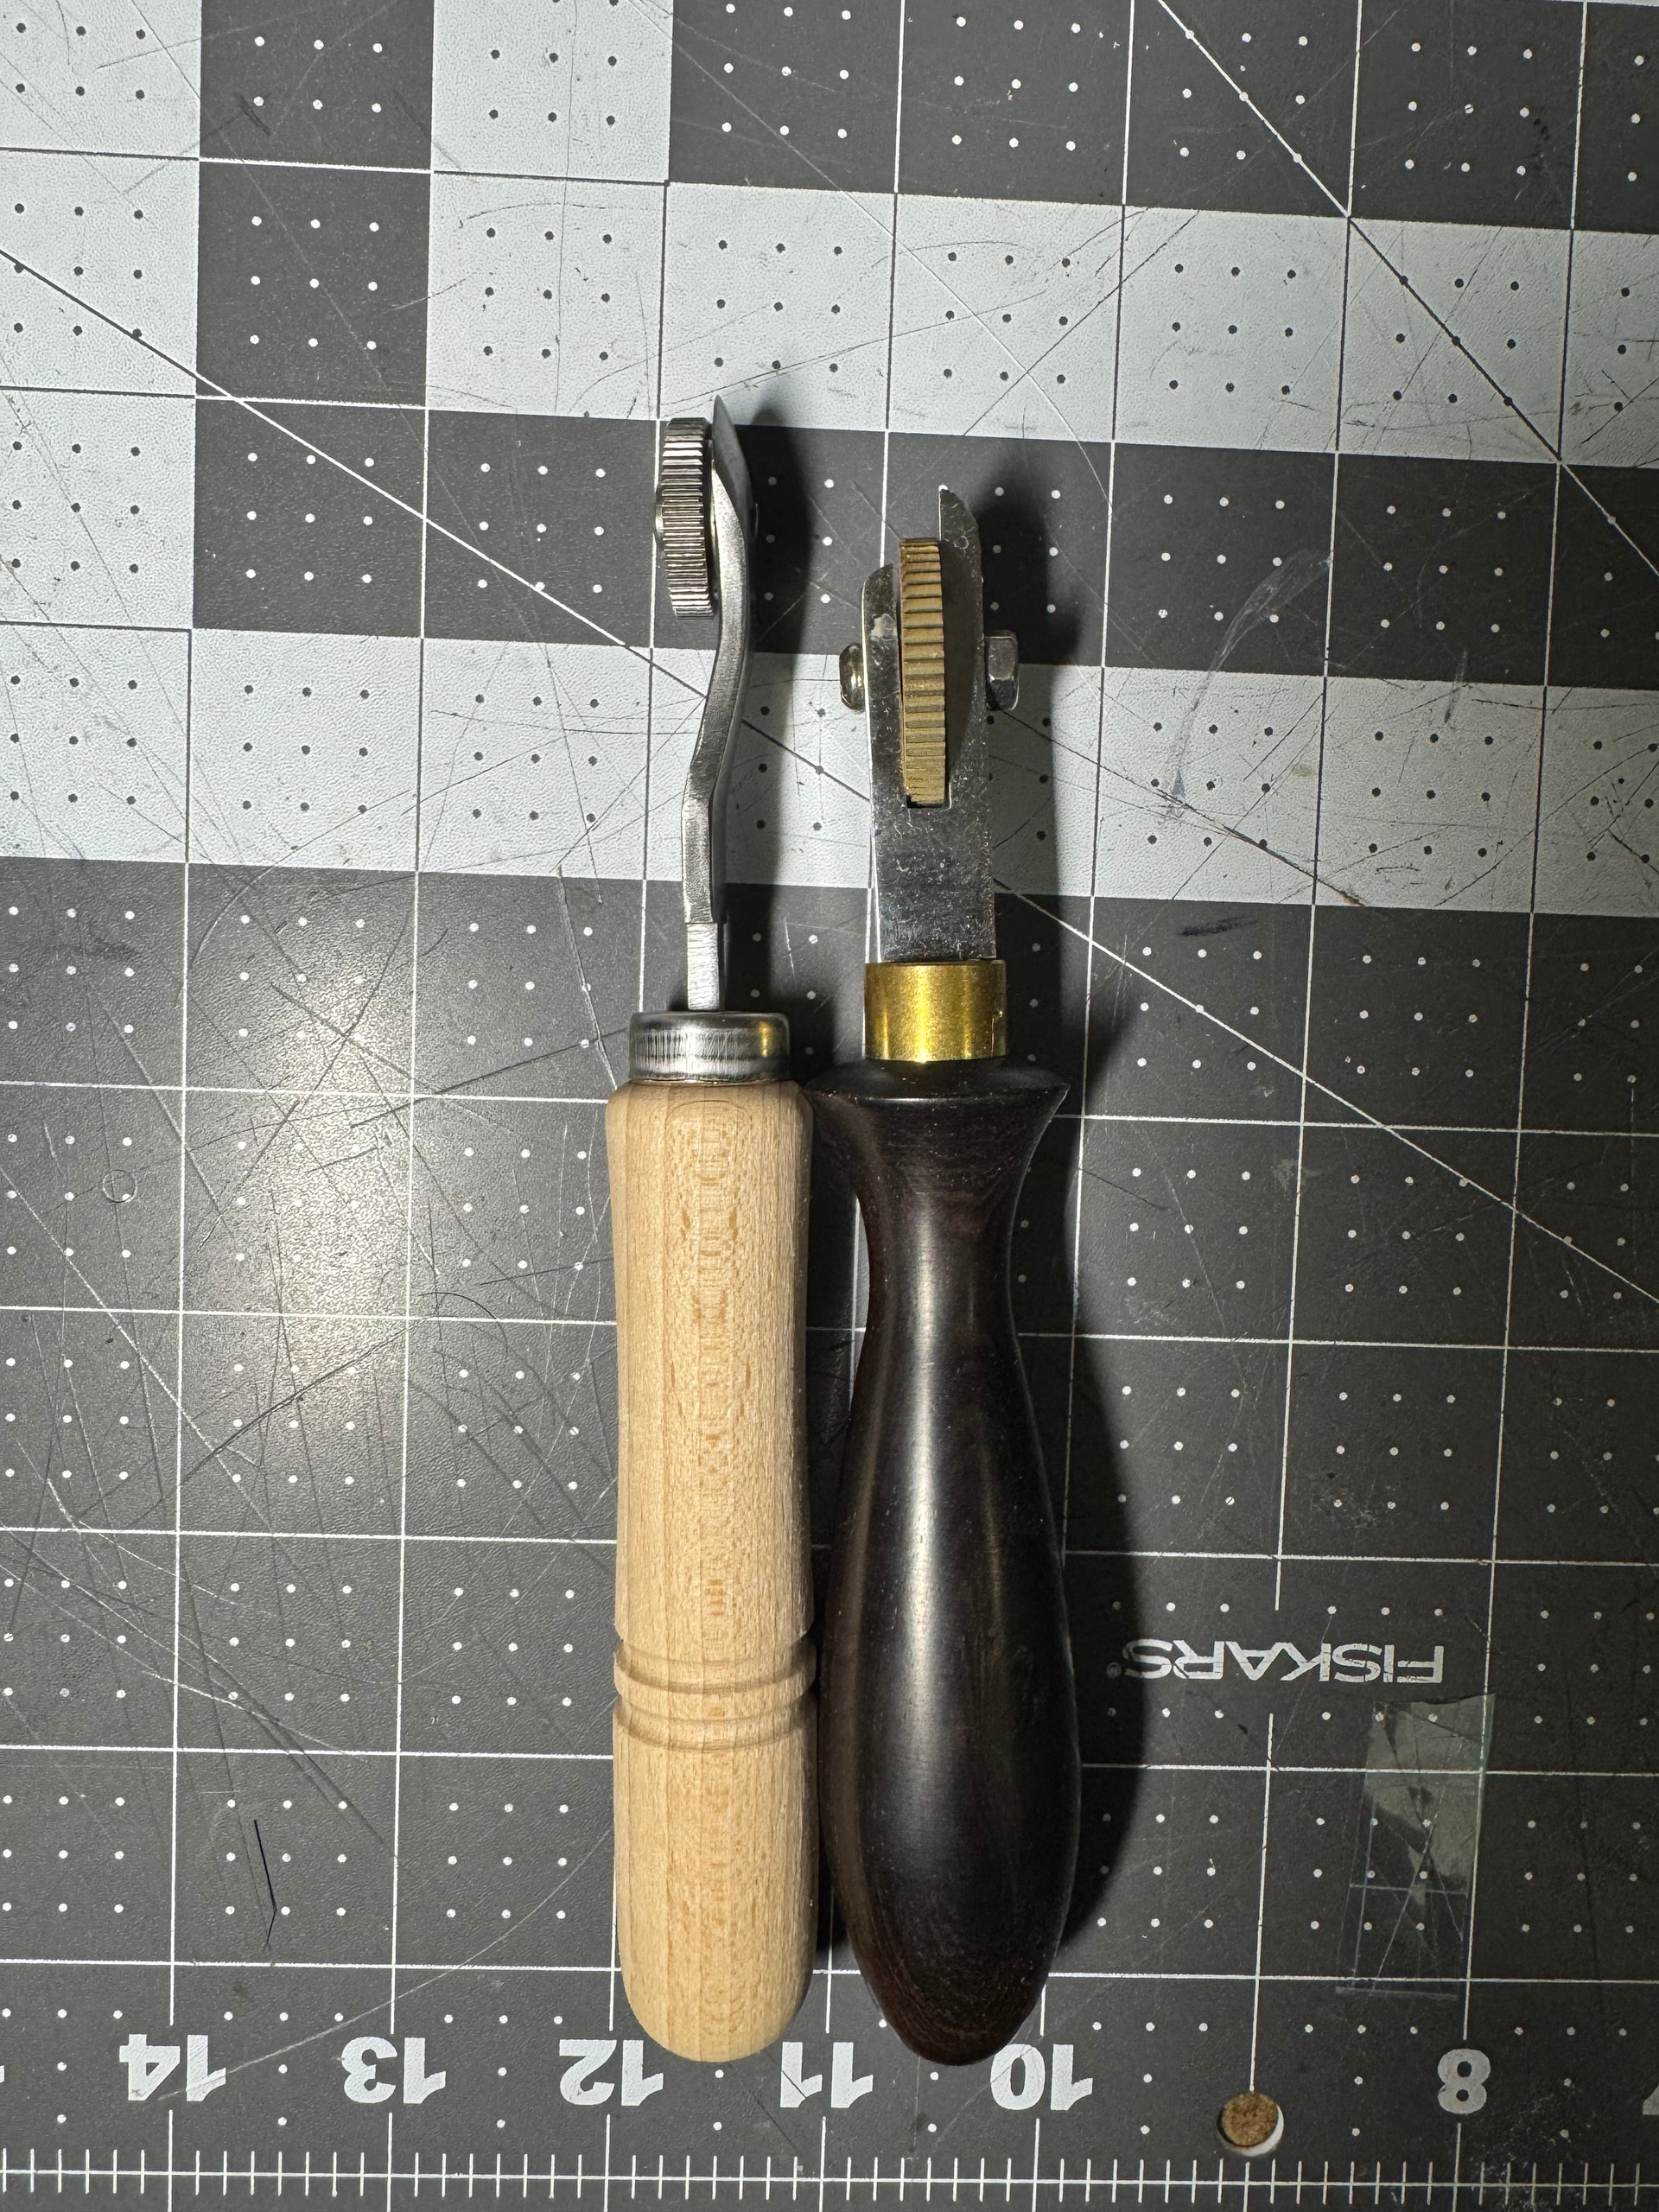
From left to right: Mamoru, Chinese
As I’ve gotten more tools I have begun to understand why there are certain features. I was excited to get the Chinese heel wheel so I could do the cool pattern I see on bespoke shoes. I never noticed that for the heel wheel to be compatible with a tight heel, the guard has to be very tapered. The Mamoru wheel is nicely tapered so it can fit in pretty much any heel but the Chinese wheel only really works if you have a big overhang like in PNW boots.
Seam Detailer
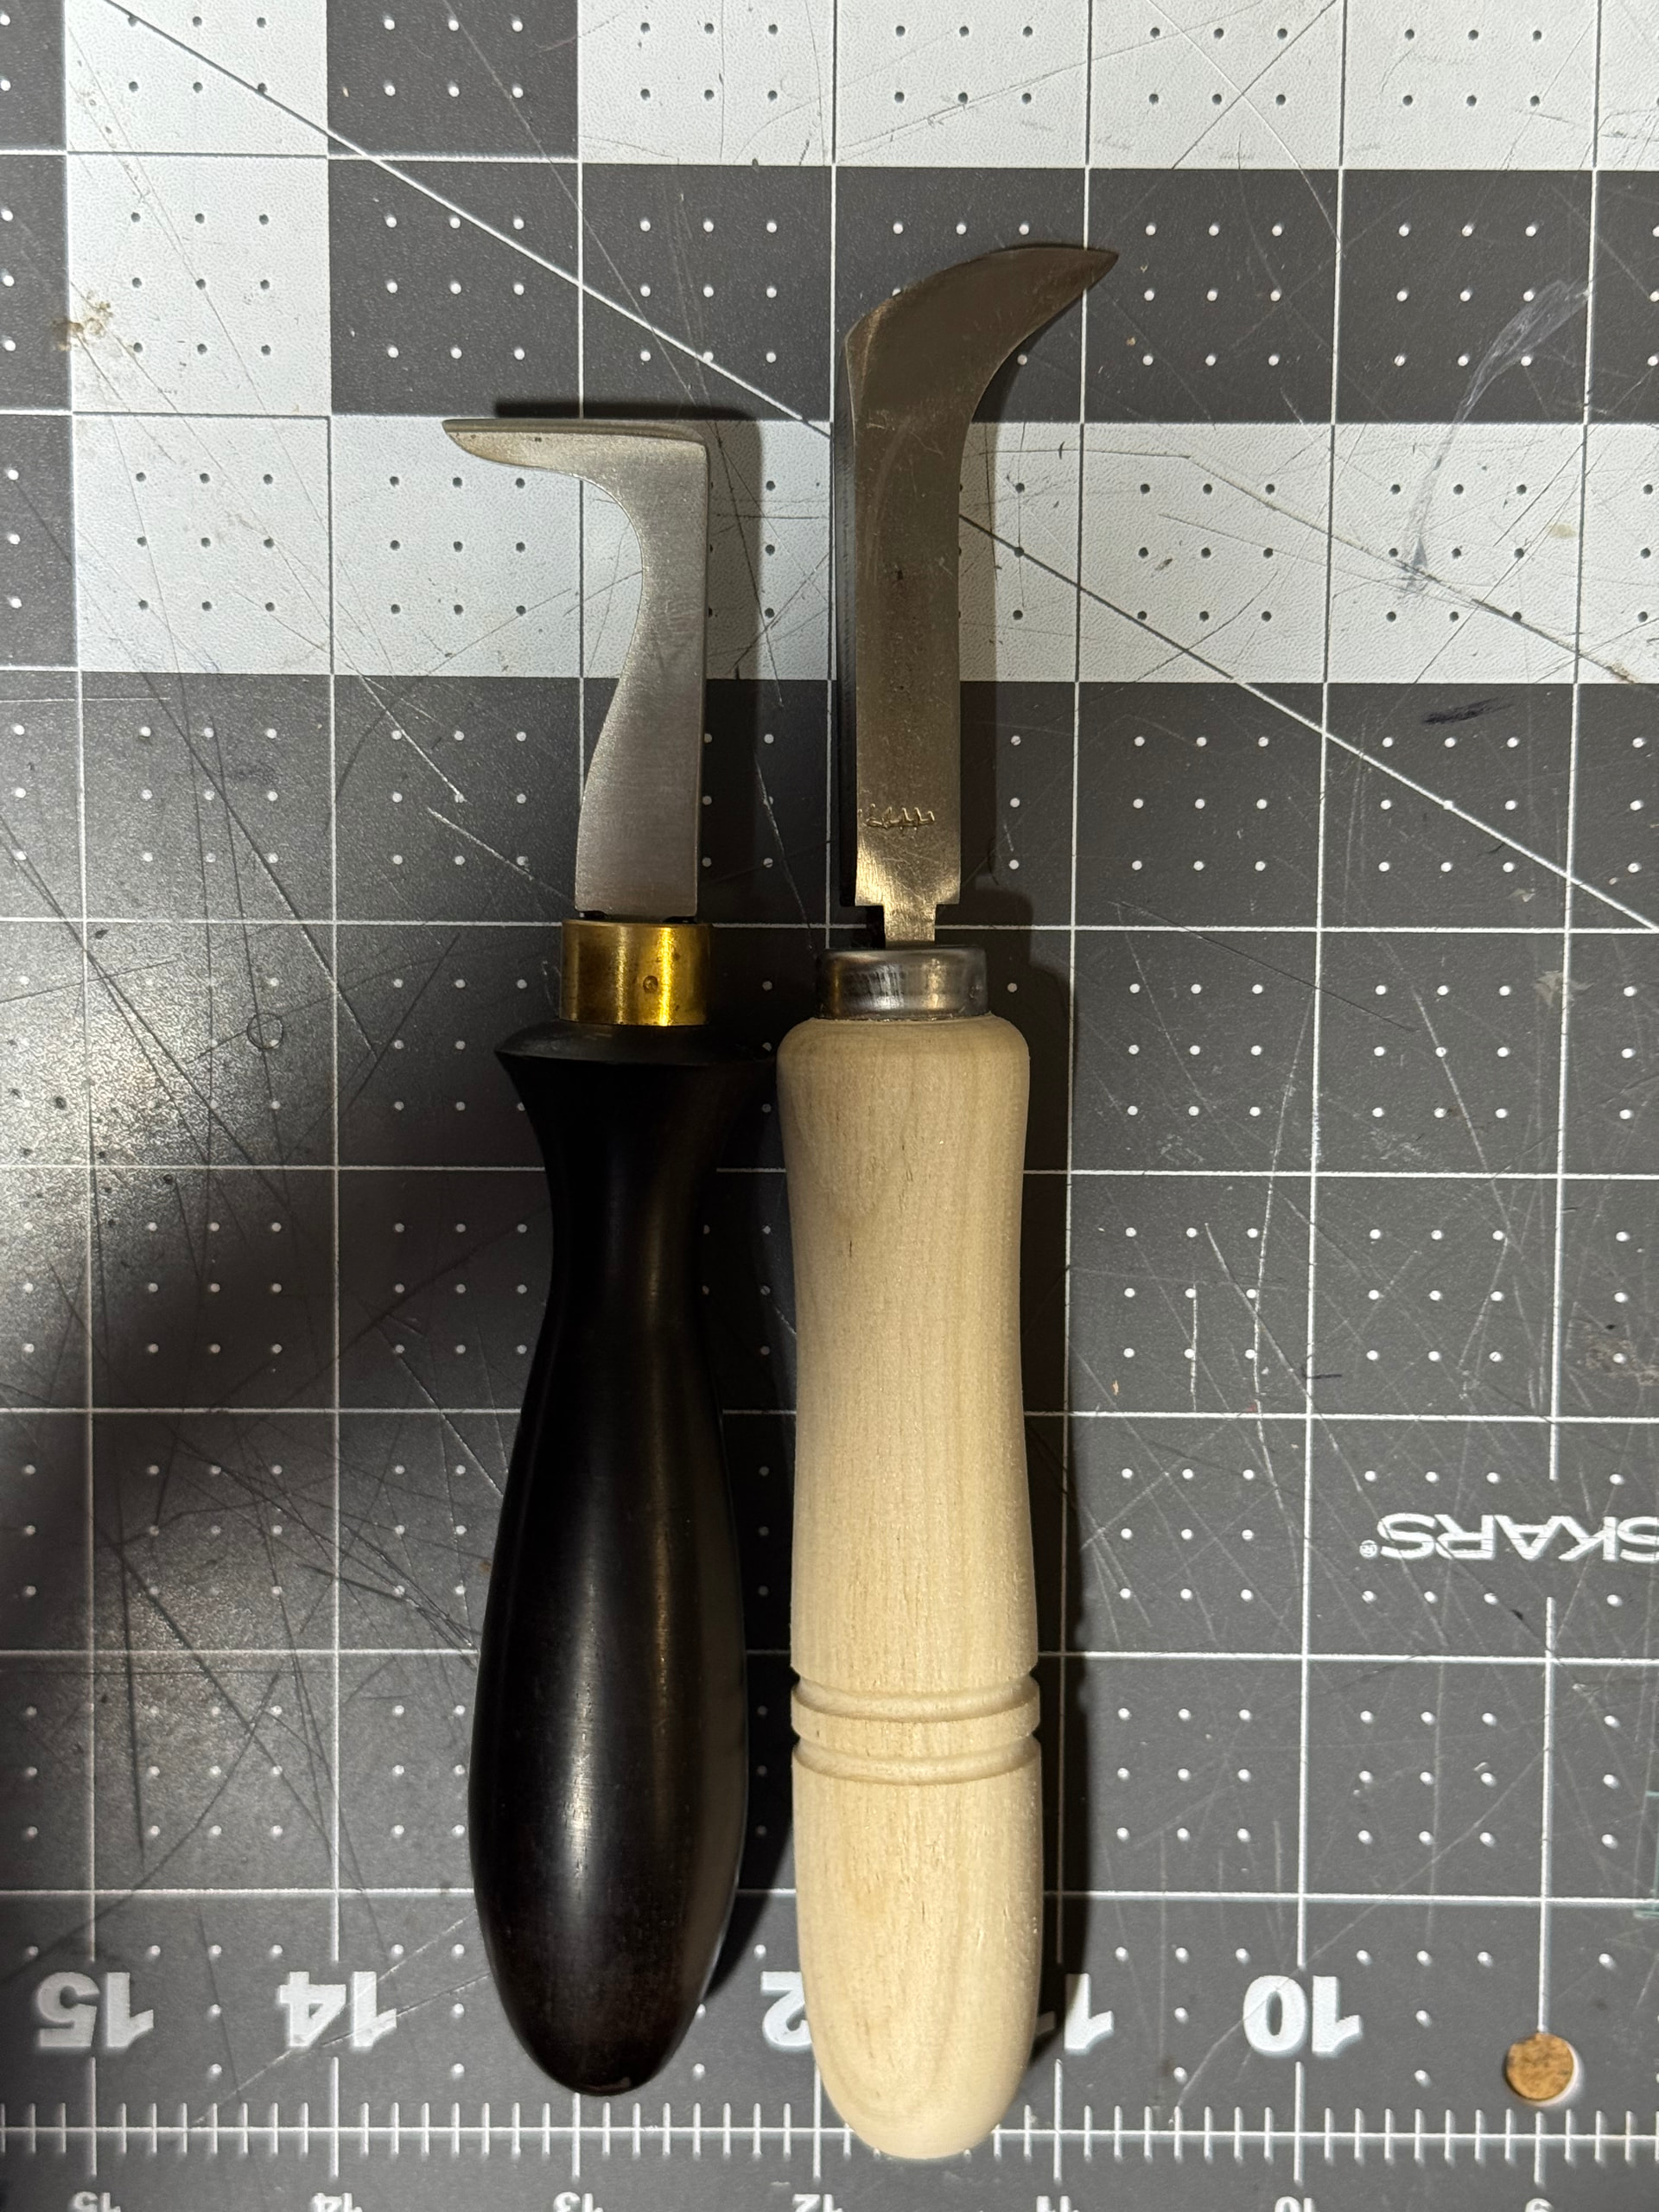
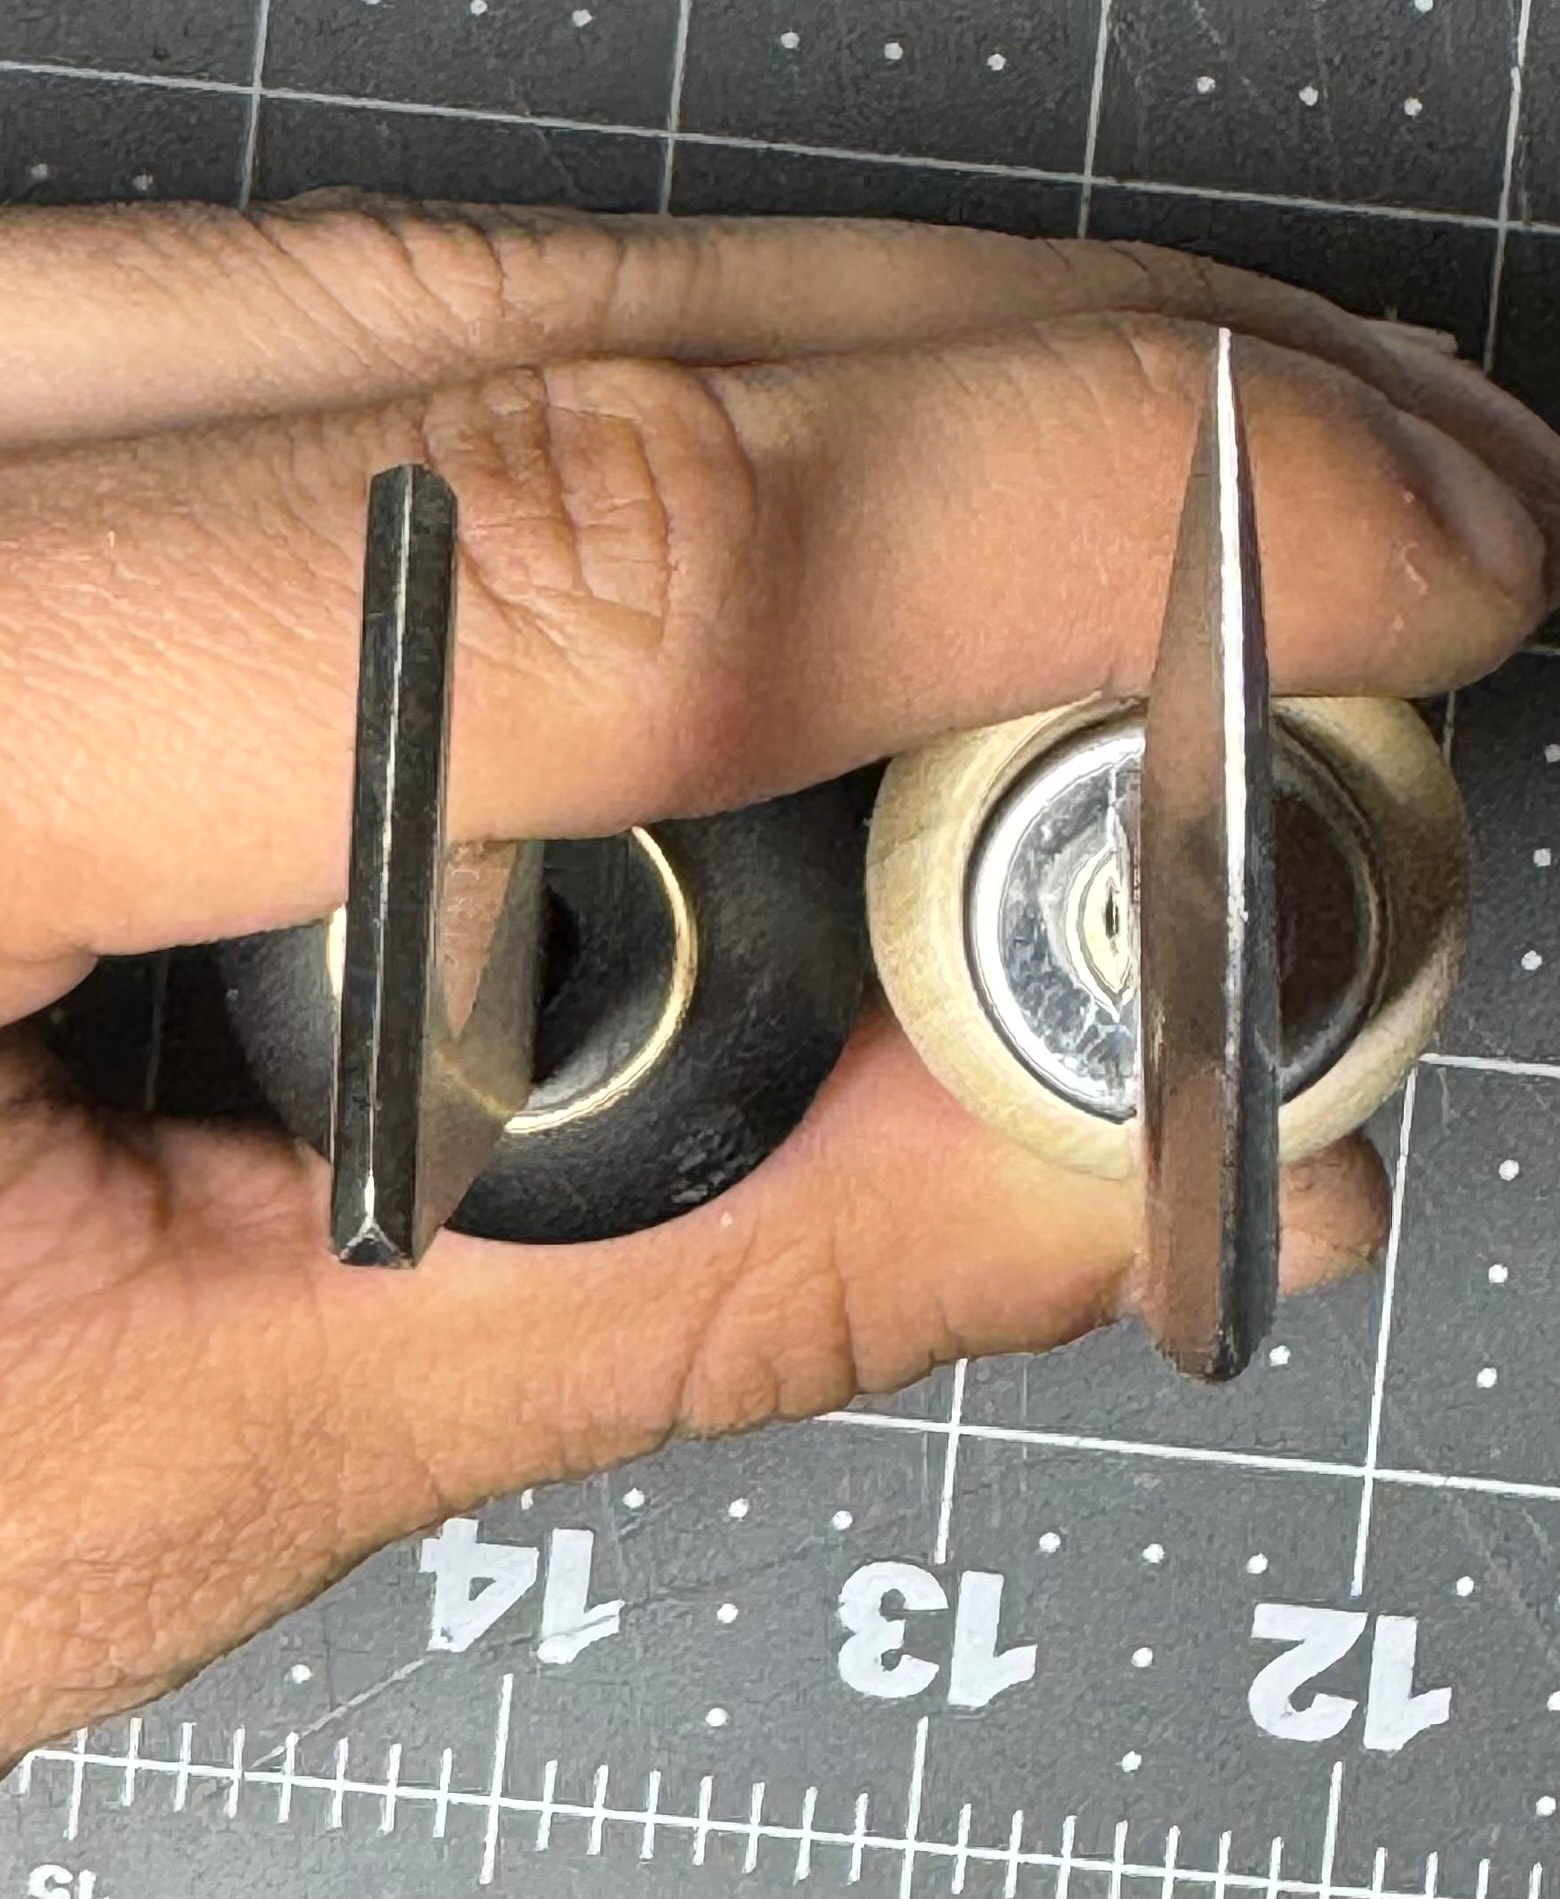
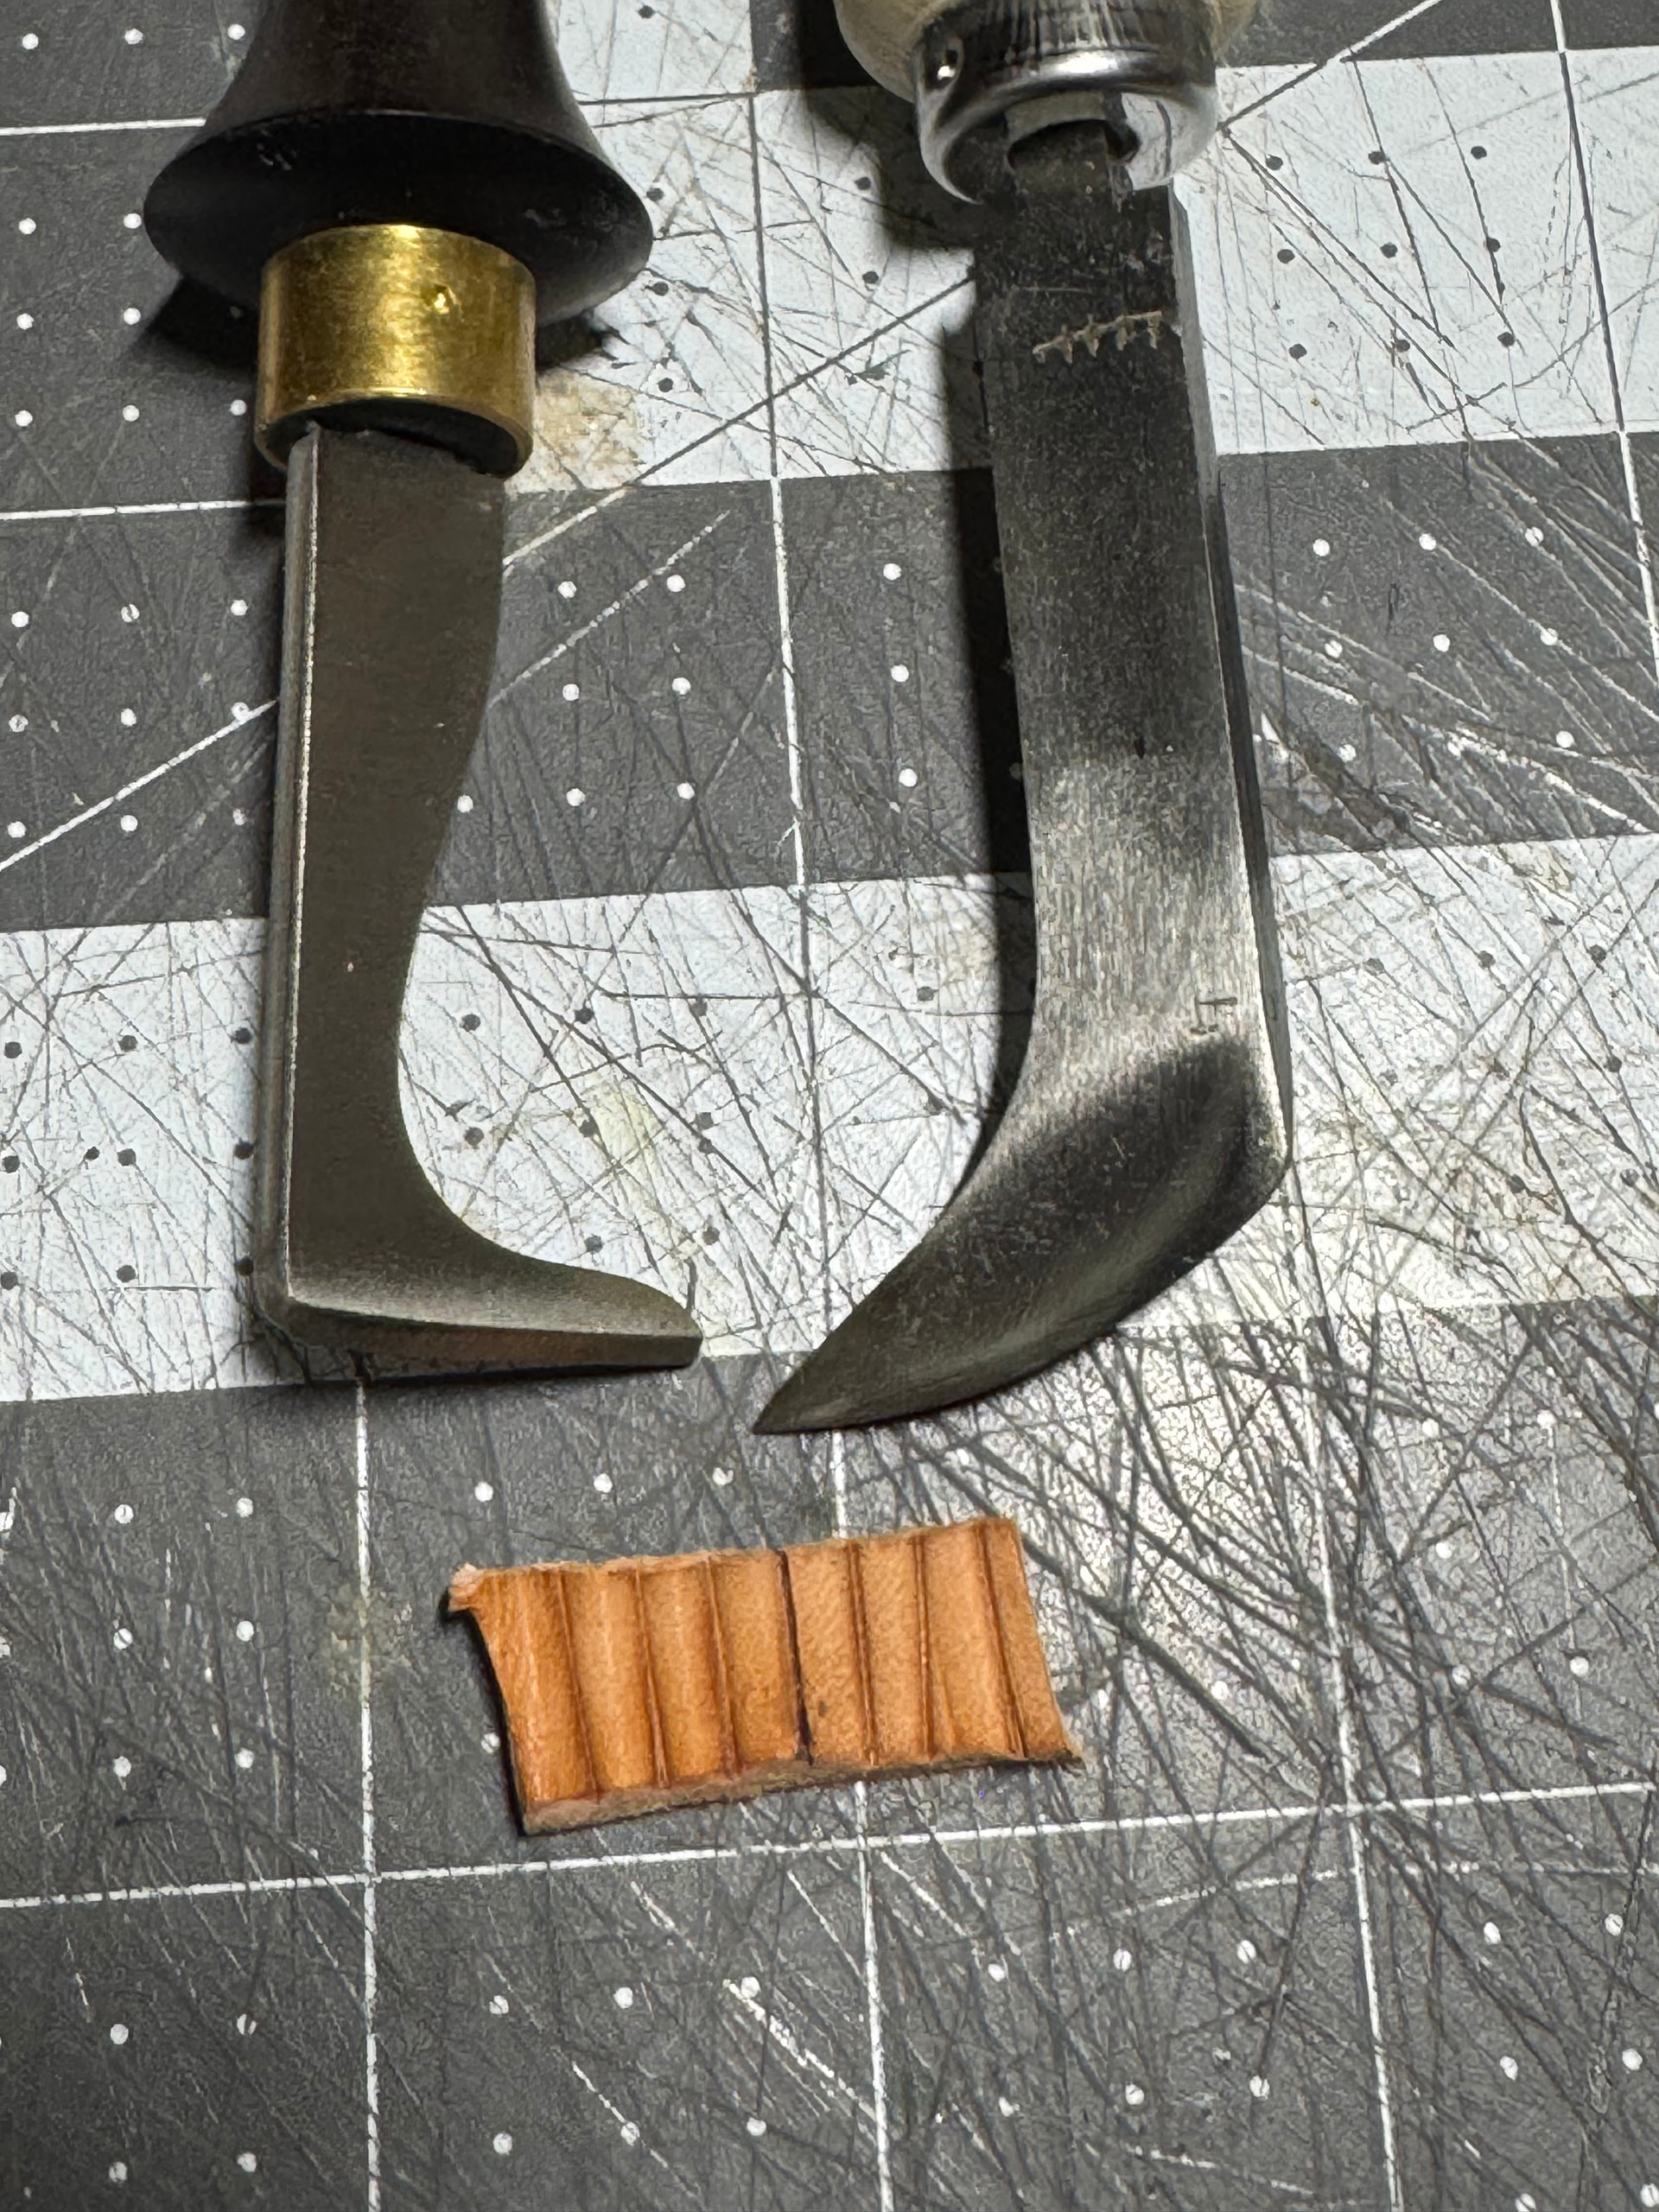
From left to right: Chinese, Mamoru
I had seen the Mamoru seam detailer in a few youtube videos and wanted to get it to compare to my chinese one. The Chinese one is the same style as Starko tools sells. There is a bevel on each side and the edge is close to straight. The Mamoru one doesn’t really have a bevel, its like a long rounded taper. The edge is very rounded/curved. I have only used these for testing but my first impression is that the Chinese detailer is much easier to use. Since the edge is straight you can align with the fudge wheel marking much easier and the pressure is applied evenly. The Mamoru detailer requires you to rotate the tool to apply pressure to all areas. Since the edge is curved you can apply a lot more pressure and get deeper grooves (not by much). The bevel on the Chinese detailer is pretty wide so it doesn’t work that well with high spi (Starko tools sells a high spi version). The Chinese detailer leaves a more defined shape/bump than the Mamoru which mostly just leaves a groove.
Flower Punch and Eyelets
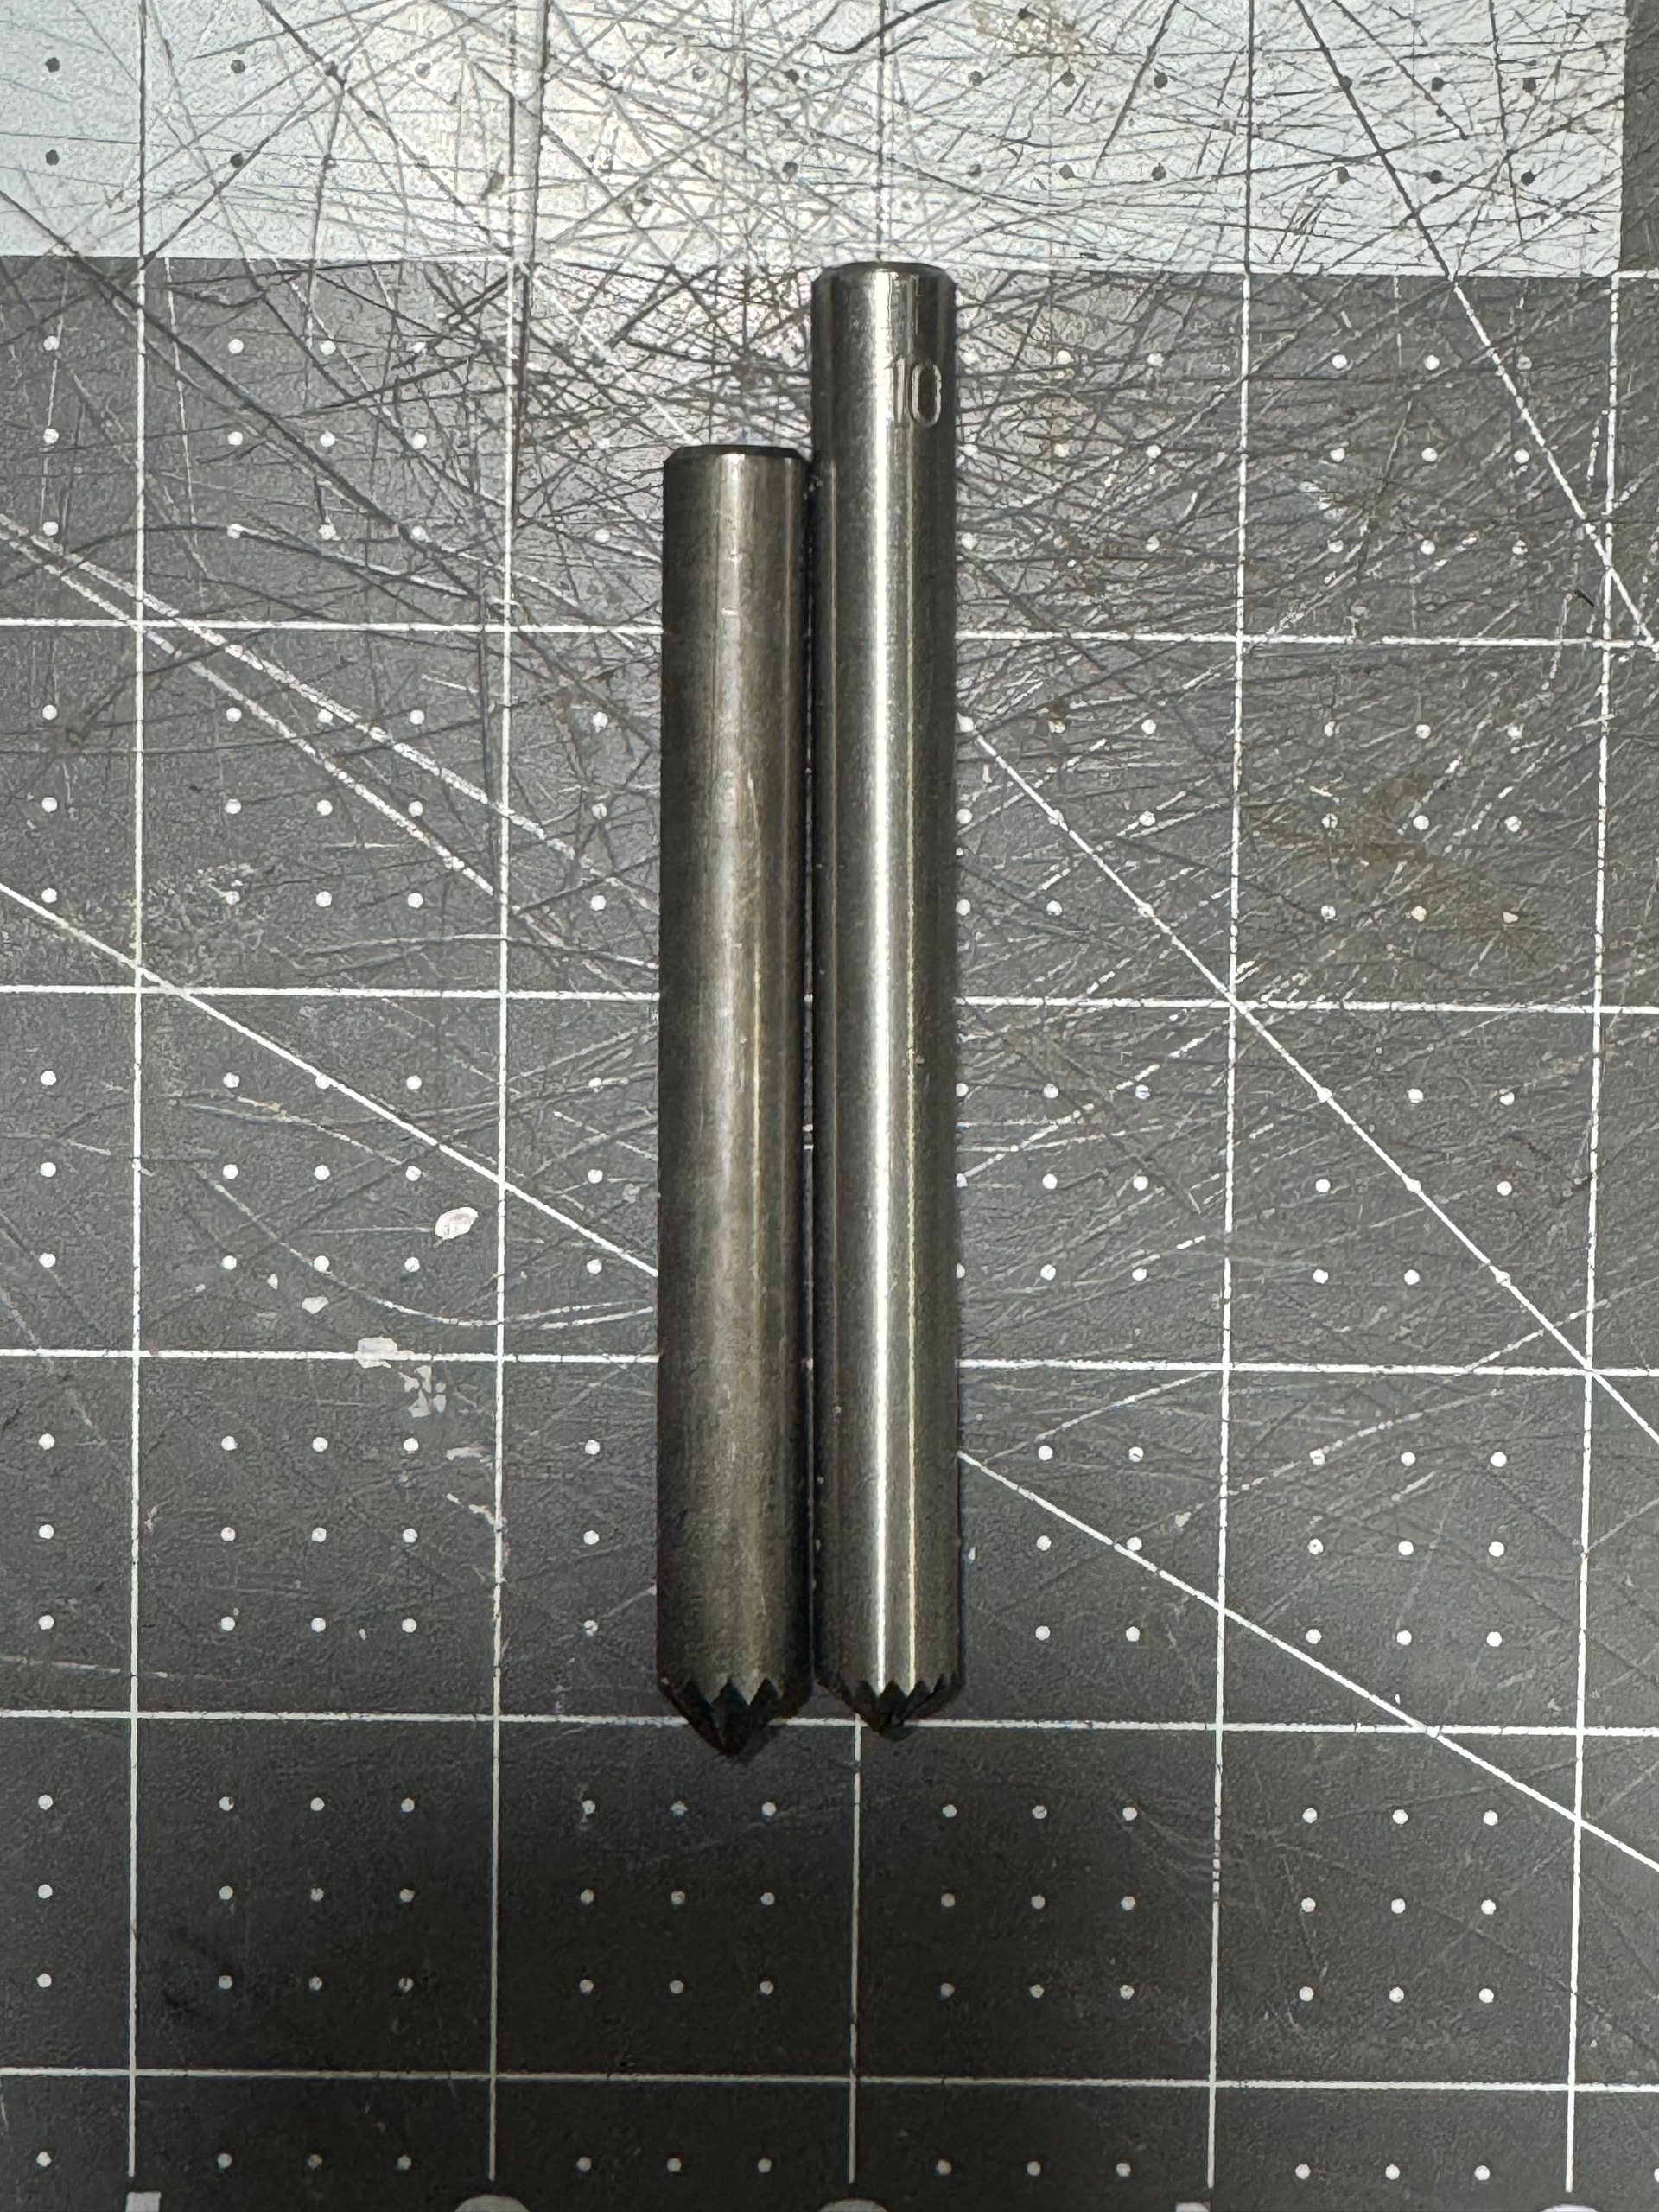
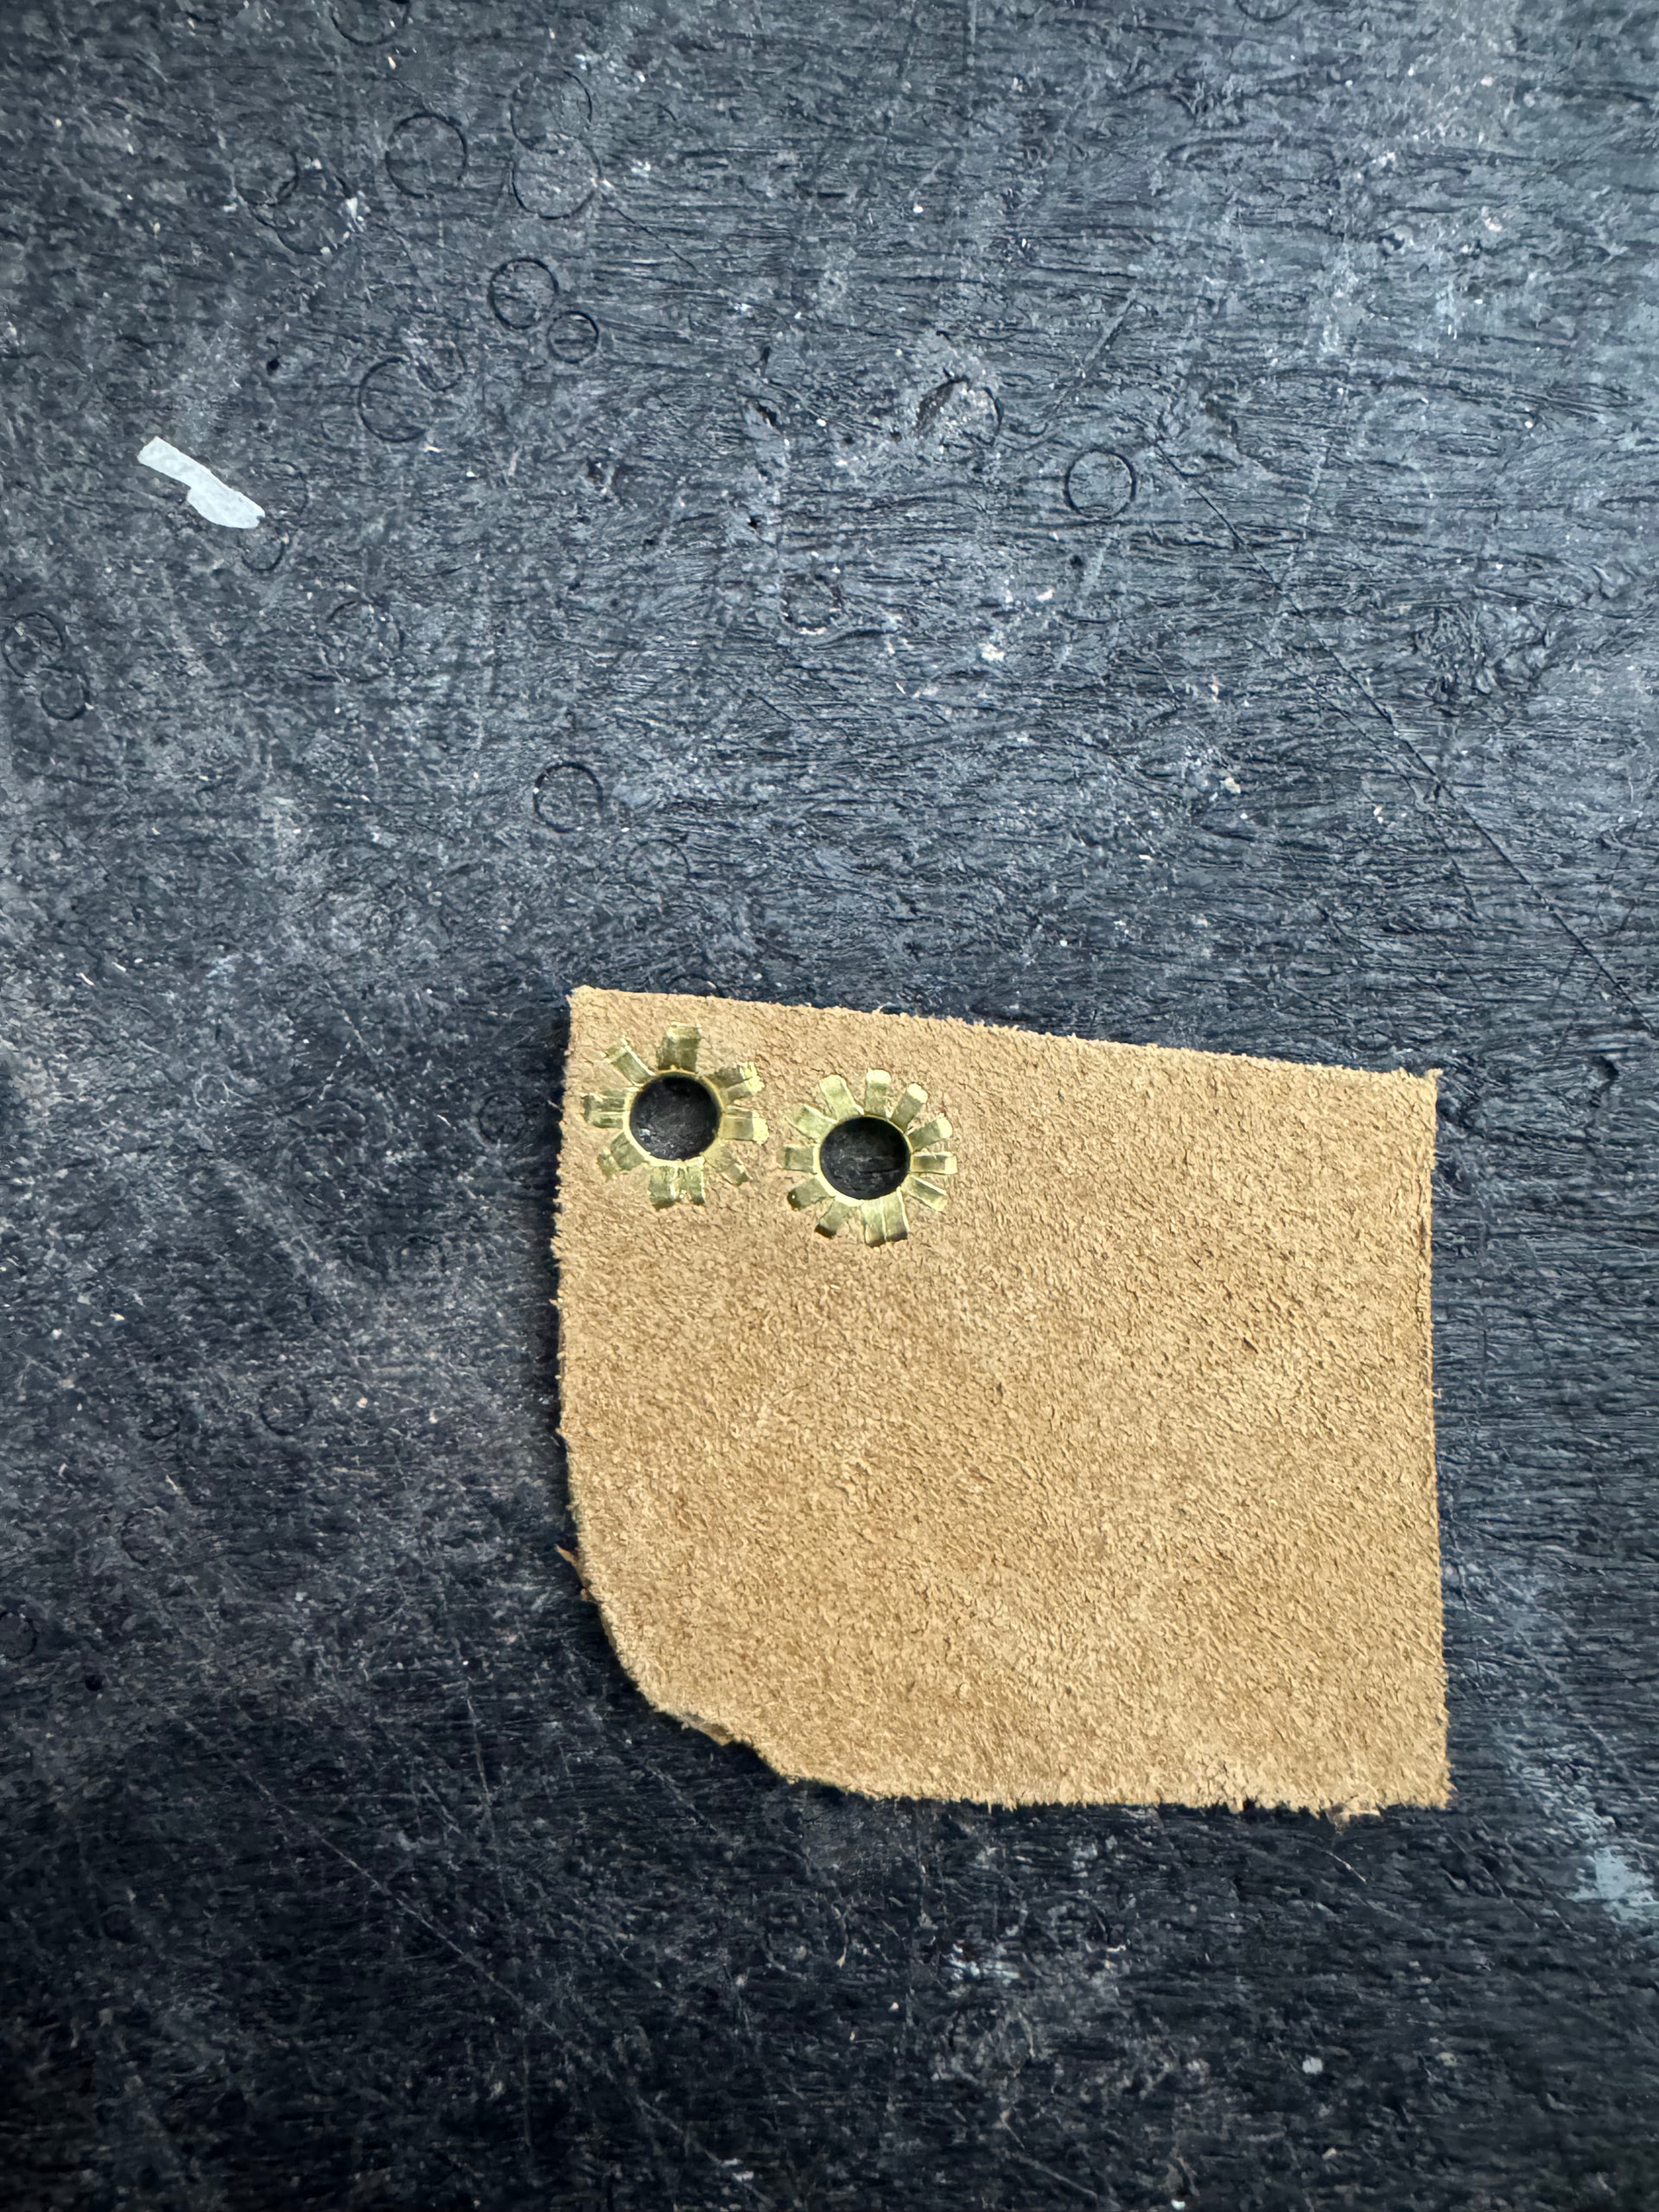
From left to right: Picture 1 - Mamoru, Chinese Picture 2 - Mamoru eyelet, Oka factory
I was curious to see if the Mamoru flower punch was any better than the Chinese one I purchased. They weigh about the same (although the Mamoru is shorter) but the Mamoru has a better material and design. The Mamoru punch has fewer petals which allows them to be thicker and more resistant to impacts. The Chinese punch already has a few broken petals after use on 2 Oka factory eyelets. You will get the same result from both punches the Mamoru will just last longer but I don’t think that’s a big deal unless you are doing this professionally, everyday.
I also bought the eyelets Mamoru offers. These come with cutouts in the shaft that make it easier to flower and puts less impact on the punch. They are the same size as the Oka eyelets including the shaft length. Unfortunately, that means its not long enough for use when doubling up on thick leather. I tested to see if the Oka eyelets, which are meant to be used with washers, could also work with the flower punch and it worked but it puts more stress on the petals of the punch. The nice thing about using eyelets that flower is that the back is flat. This doesn’t matter if you have your eyelets on the upper leather, but when doing blind eyelets the extra space from the washer between the upper and lining is noticeable.
Moulding Block/ Anaboko
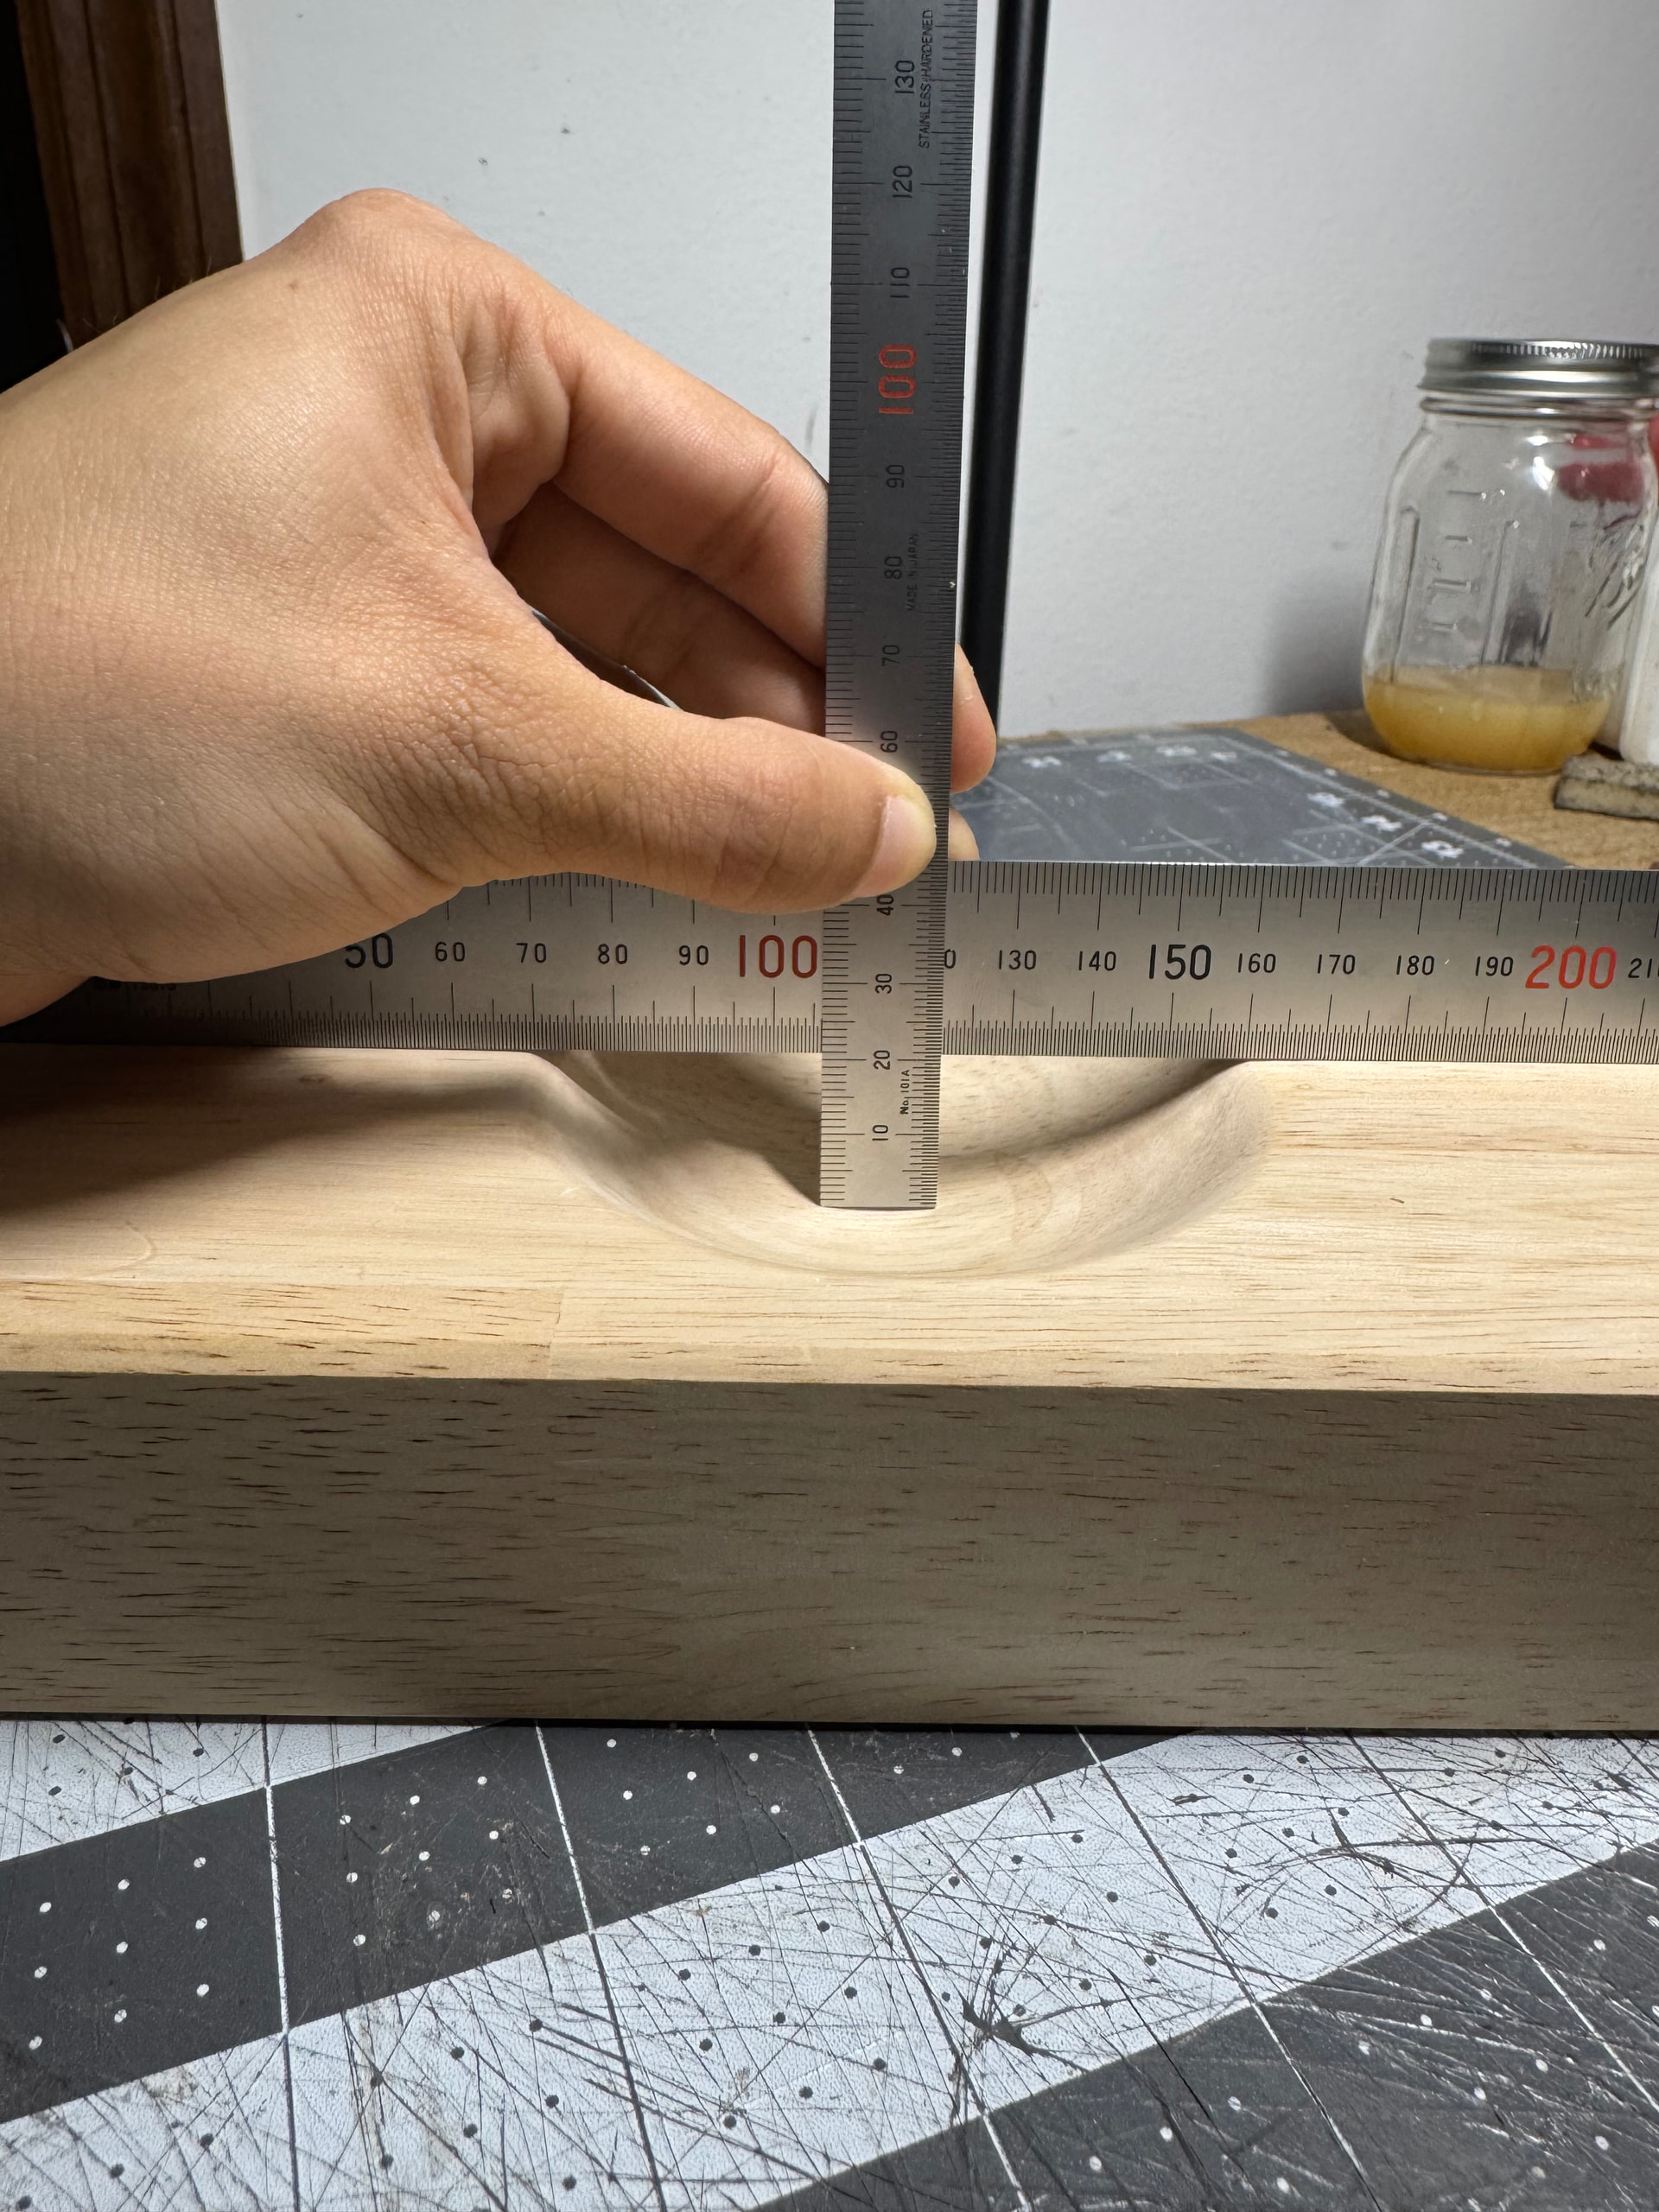
The book of men’s shoe making uses the Moulding block to shape the outsole leather before gluing. I am not sure how important this process actually is but it’s a common practice in Japan. The block itself is pretty simple. It’s a 23.8 x 11.8, 4, 5 cm block with a 9 cm diameter hole of 2.1 cm depth and weighs around 700 g. If you have the tools I think this wouldn’t be too difficult to make. I live in a small apartment and have no wood working experience so I just purchased it.
Insole Leather
MSY has a blog post on the bottoming material available on Mamoru.
It’s very informative and helped me figure out what are the typical materials Japanese shoemakers use. The insole leather caught my eye and I included it in my purchase. I have smaller feet so the regular size fits the last’s I have but they have larger sizes available. The listing says it is shoulder leather but the piece I received has a section that gets really stiff and it feels like the soles I have. I probably got a cut near the bend. The thickness range is pretty big from 4.5mm to 3.5mm. They drew shoe shapes, putting the toe in the thickest area and the heel in the thinnest. Other than the one really hard area it feels pretty soft, not as soft as Baker leather.
Transheet
The book of men’s shoemaking uses this product to transfer the pattern from the last to 2D. Ken Hishinuma also uses this approach. He draws reference lines that he can then use to adjust his outer and inner forms so that the distance between lines is preserved. I had seen this product referred to as a vinyl sticker and when I googled it I couldn’t find anything. It turns out its just transfer tape that you can easily buy at any crafts store.
Conclusion
This purchase ended up being a lot more than I expected. I knew the costs of the items going in but the shipping was crazy expensive about 6000-10000 JPY for a 3870 g 35 × 26 × 17 cm package. I wasn’t very efficient with the size of the products I chose and the box had a lot of “empty” space (filled with newspaper). The biggest contributors to cost was probably the moulding block, nails, rosin, and transheet.
If anyone has any questions I’d be happy to help.