I don’t believe there are variations, I think there are thus far, no good authors to have clarified the topic properly. Frank Jones builds his entire book on the SLL system and only includes a very simplified chart that only lists SLL lengths. It’s maddening, because he omits a base FL chart for the user to infer that SLL = FL+ 2/3", however, as I stated, you can look it up on wiki and it will show you in clear terms that is indeed this amount. I have read Motawi’s books as well as Koleff’s, and I believe their written work could use some editing - you can’t really get from here to there using their books. This is just one example of such.
What you’re asking about, a system based on the heel to ball length to draw proportions from, leaving the toebox to be a decorative appendage - that’s what I am referring to when using FL. I don’t use SLL btw, I only go by FL. It’s always fixed. Again, it’s on wikipedia in a clear chart.
Wiki Pages
@cjackson, can I ask which wiki page you are referring to? This one?
For what it’s worth, that page was one of the starting points for my own shoe journey, and not in a good way. There is a bunch of text and formulas there, but few if any cited sources in most sections. There is also a bit about the allowances over foot length varying, both between sizing systems and more generally.
As an side, my own contributions to that Wikipedia entry eventually moved over to the Brannock Device entry, where I shared the formulas and measurements table that I reverse engineered from old reference sources and by measuring a physical Brannock. Let that be a warning to all: Wikipedia text without citations can come from any old fool.
Frank Jones’ Book
Thanks for mentioning this again. You led me to realize that Frank himself was the one behind the red pattern-cutting book. There’s no author name on the cover, and the website doesn’t say it directly, so I wasn’t sure!
Terminology
Diving into shoemaking rather later in life, I took the opportunity to apply better habits and systems of notetaking to my shoe learning journey, even though it’s just a hobby. One really big upshot of keeping all those notes organized has been that shoemaking terminology is a mess.
Many good people have wasted a ton of time and energy arguing about what meanings of words are “right” or “correct” or descended of the wisdom of more or more prestigious masters, naturally all dead unable to correct what we attribute to them. And that’s just what I’ve seen online, say, in old Crispin Colloquy threads. What people really seem to want is not to change how they talk about things, or not to break the spell of the idea that the way there taught is somehow the bestest.
I’m still interested in “standard last length” and where it came from as a phrase, mostly because I’ve an ironic sense of humor and find the idea of a measurement called “standard” being so vague darkly hilarious. Clearly, we could all just use more words and be more specific, as in “stick length of the last with the backpart lifted up” or “tape-measure length from heel to toe along the bottom” or “expected foot length plus three English sizes”.
Back on “SLL”, Whatever That Means
Our conversation has led me to revise my own “wiki” entry on SLL, first and foremost to mark it as yet another ambiguous term.
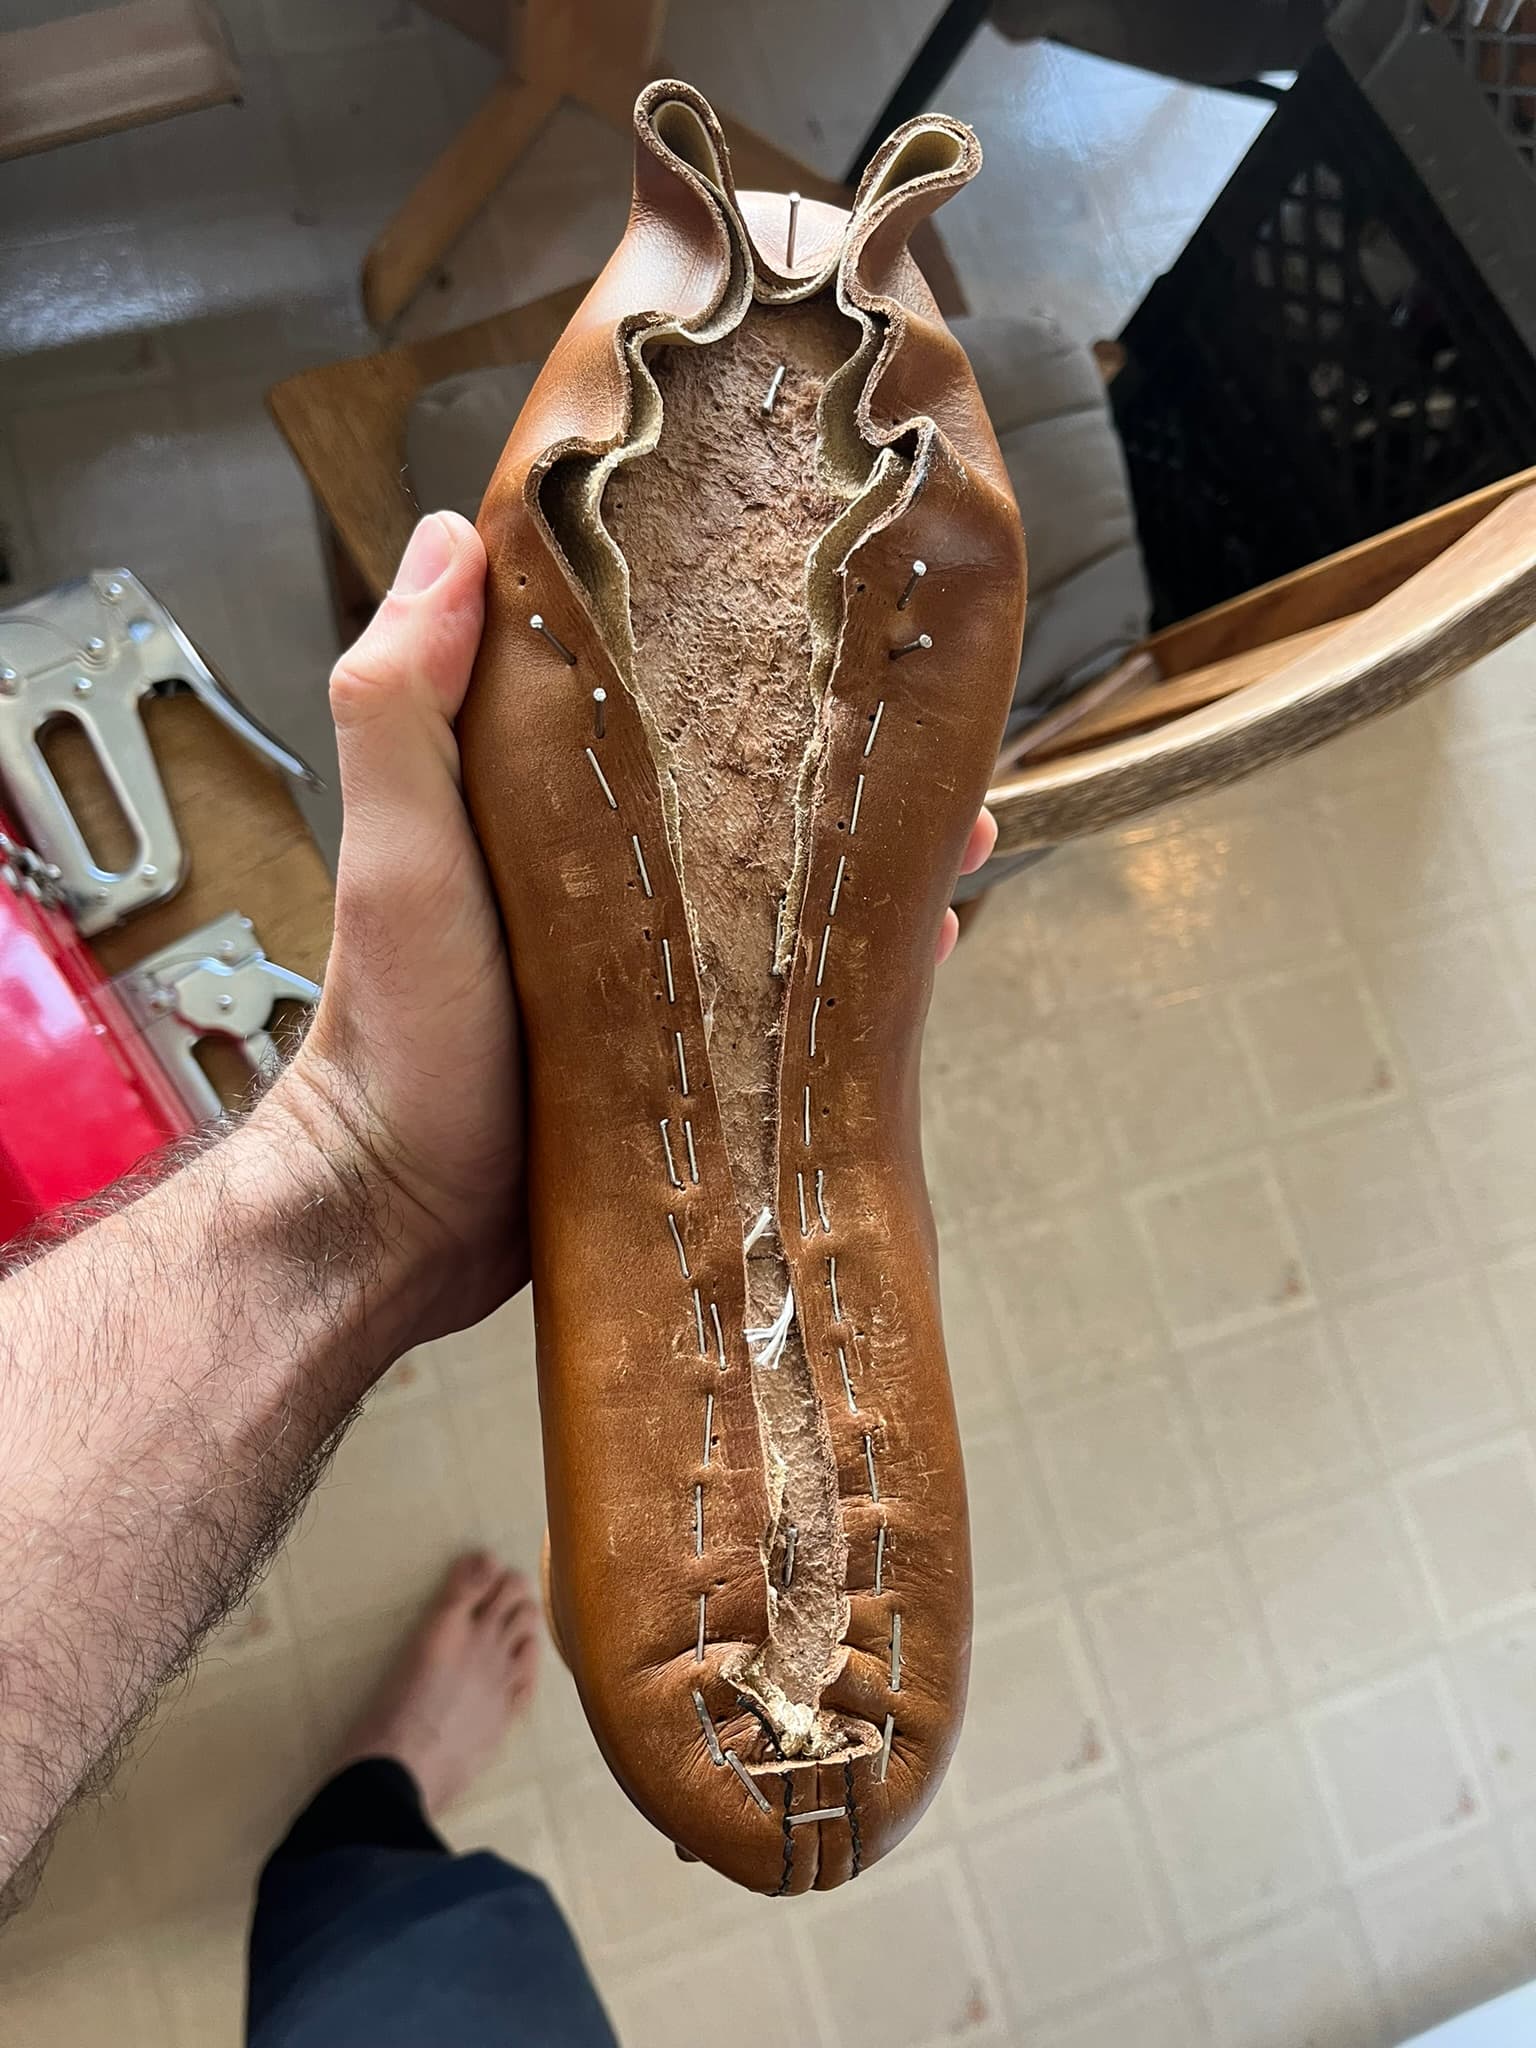
By the by, here’s Bill Bird adding three sizes and using that to calculate other points, being none too specific about how to measure “standard last length”, and likely not needing to be. The measurements he calculates wouldn’t differ that much by measuring method, and he built the last from a ray of wood on a bandsaw in the first place. He approximates stick length with a measuring tape over a scale drawing and moves on.
As for the last manufacturer side of things, the best, most recent English source on lastmaking and last measurements I’ve seen is the 1982 Sterling anniversary pamphlet @customboots shares for free via her store. It doesn’t mention “standard last length”, only stick length. Maybe that says something.
At the same time, that pamphlet’s also the only source I’ve ever seen measure stick length like this:
It never ends.
to be clear, SLL does not refer to any particular irl last, it’s a concept - you’re not measuring stick length here, nor anything on the top side - you’re measuring the insole on the central axis, adding foot length + 2/3" - it’s set in stone. SLL would not change at all whether you’re working with a soccer boot with almost no toe allowance, or a modern Italianate men’s dress shoe last with 4cm+ of toebox extending past the FL line. Many of the proportions that use SLL as a reference rely on the SLL being a fixed number - for example, the vamp point, the height of the topline from feather to under the malleolus, and so on - if SLL derived from the actual last’s length, then you can see how you’d have disastrous results using the same SLL proportions to measure those points these lasts with varying toebox lengths.
It is interesting you bring up the Brannock device here, because the Brannock device actually indicates SLL - the size indicated on the Brannock represents FL + 2/3rd’s of an inch, the same measurements on the wiki page you linked. As is well known, manufacturers do not follow the Brannock religiously, however the FL+2 barleycorns is what the Brannock is indicating.
@cjackson, thanks for helping me understand this.
I definitely see sources defining “standard length of a last” as you do. Pucknett’s book, for example. And I see a value in a reference measurement derived from foot length, though I wonder why that’s preferable to just foot length, especially since “standard” allowances vary.
At the same time, I’m not ready to run out and correct all the other people I’ve read and seen using “standard last length” to refer to a particular tape measurement. For all I know, that use of “standard” arose independently.
I see the bit on the Shoe Size Wikipedia entry about the Brannock assuming two barleycorns less than the last, but I’ve been through all the documentation for the Brannock that’s available, including both patents and the two sources cited, and I don’t think they support that conclusion. It sometimes works out like that, for a particular shoe. And you can try to infer your way there from equivalence tables since Paris point sizes are supposed to be last lengths. But the patents in particular all focus on measuring the foot. There’s nothing about the continued use of the 7-1/3-inch origin of the scale to say two barlerycorns of it are toe allowance.
My understanding is sll only exists to be a variable which you can plug into geometric method formulas. And looking at the formulas in say koleff or whomever, they are often proportions like 1/4 SLL that make most sense as things that being visual balance to the pattern if they are proportions of the length of the visible shoe, so should include some adjustment for toe box. But if you actually used foot length plus toe box FLPTB to plug in then your formulas really have two variables and would need to change with every last, so the common sense solution seemed to be to take something of an average of common toe boxes and add it to the single variable of foot length so you could just make patterns for half shoe sizes and get to manufacturing uppers.
I think if you are making shoes for yourself it makes sense to just use last length since you’re probably making that pattern one off, and the proportions relative to the actual last being used might as well be spot on.
Also ive seen a couple pictures of folks in lee miller’s shop measuring lasts the sterling pamphlet way. I dunno if he uses that to create balanced proportions on his vamp patterns or something. Ive also seen him say he just eyeballs the heel length or maybe measures forward from the side seam.
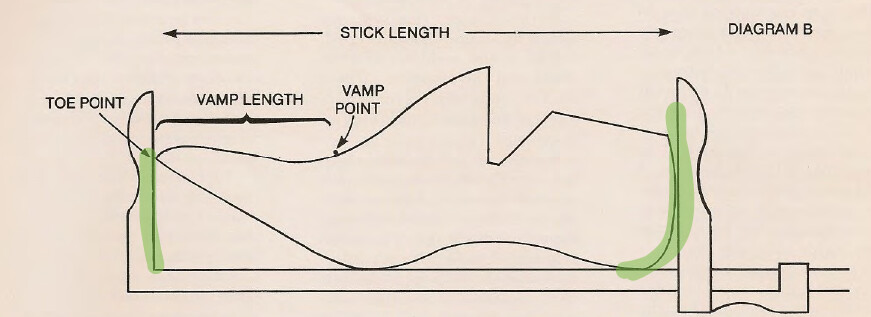
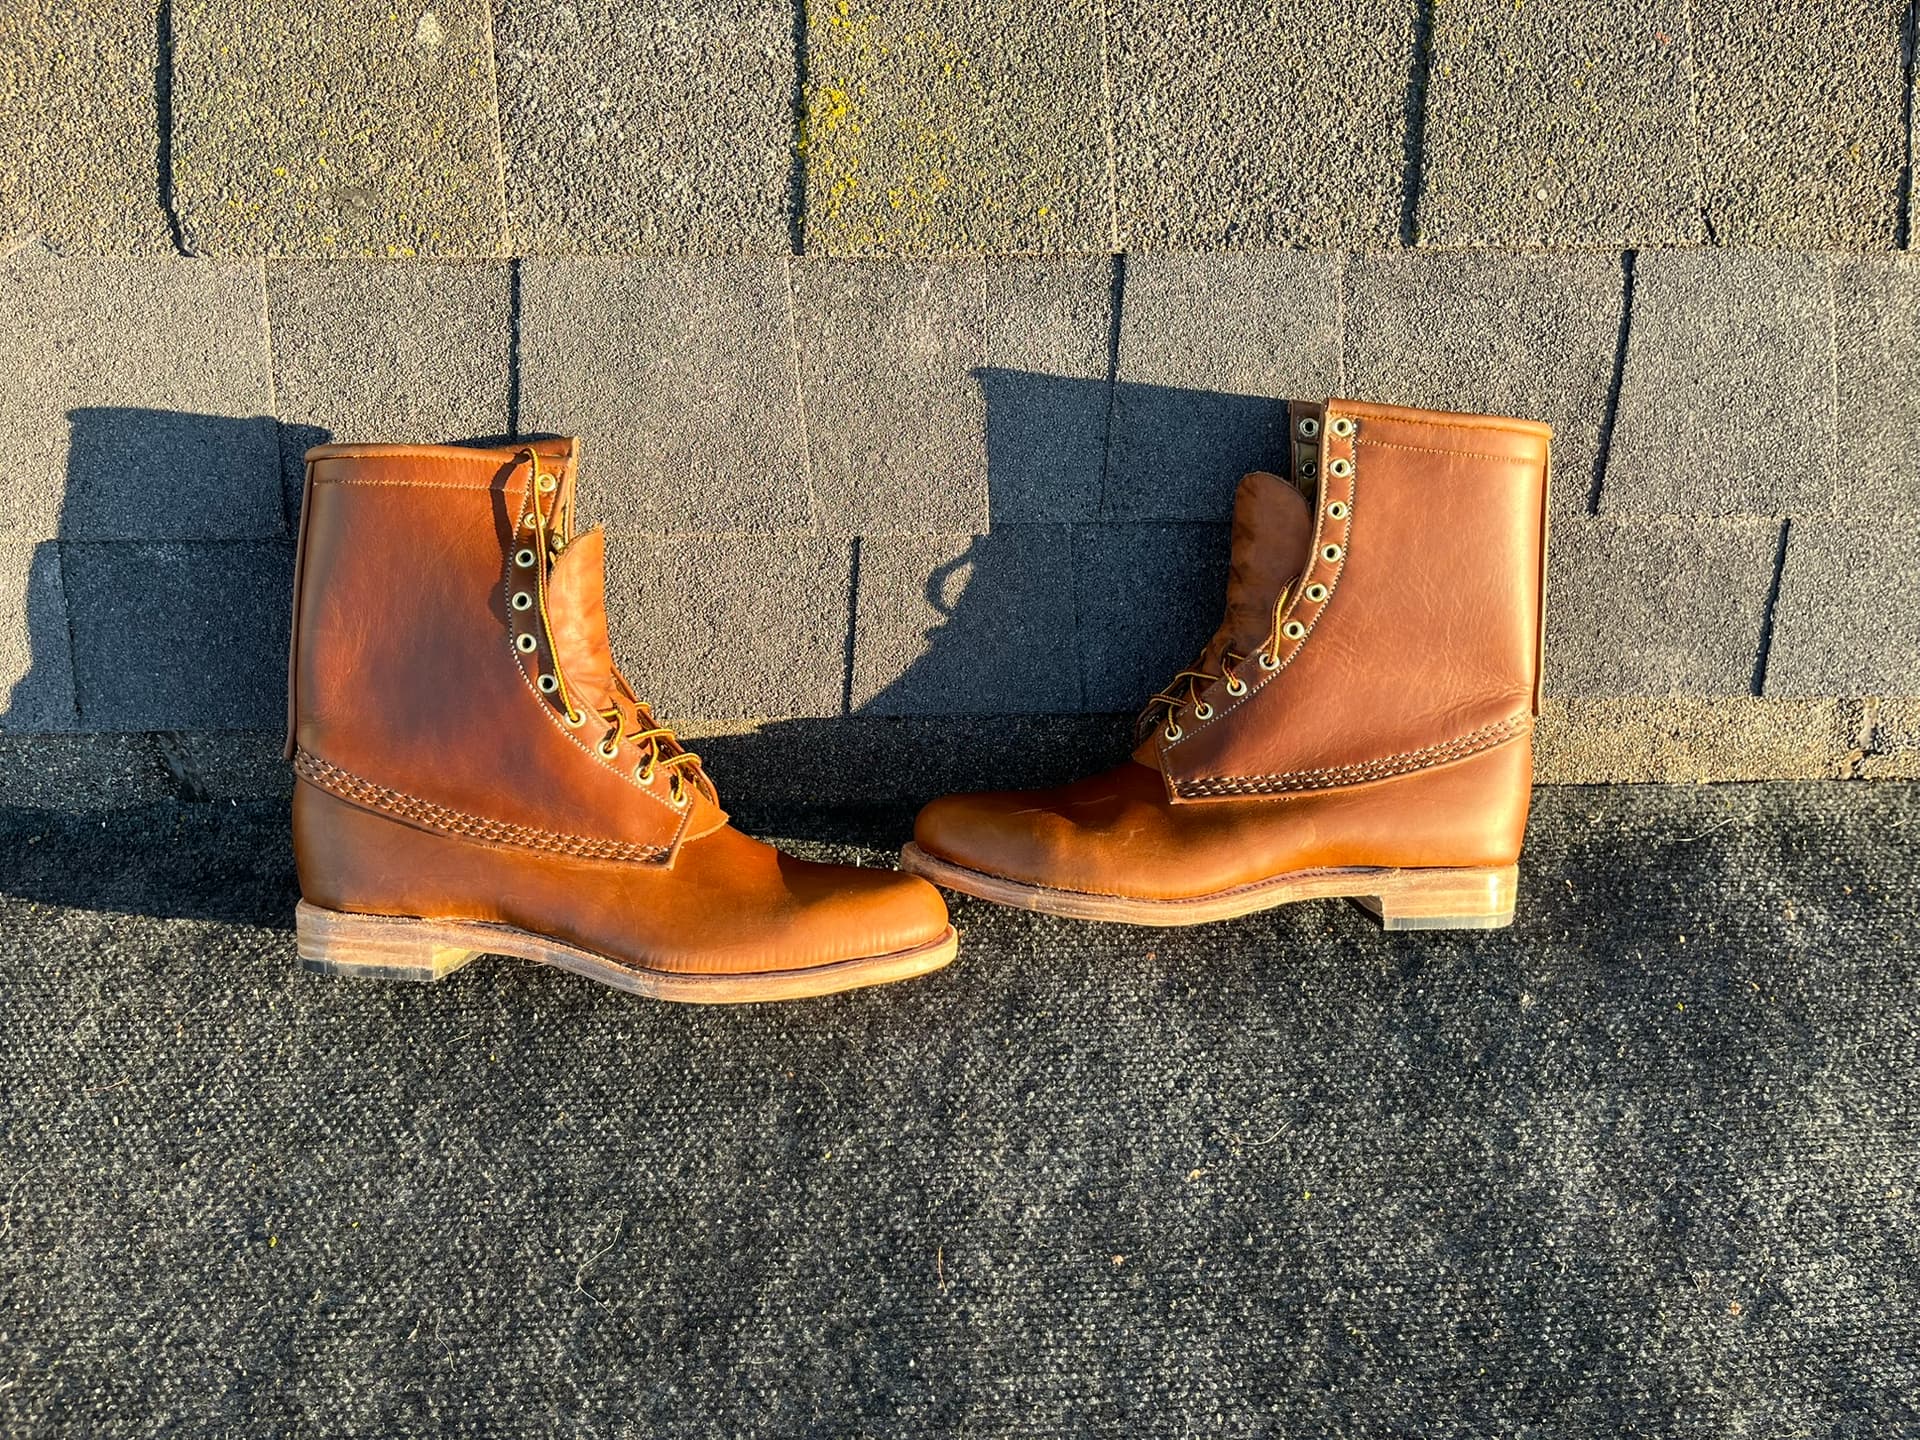
Heels Lasted
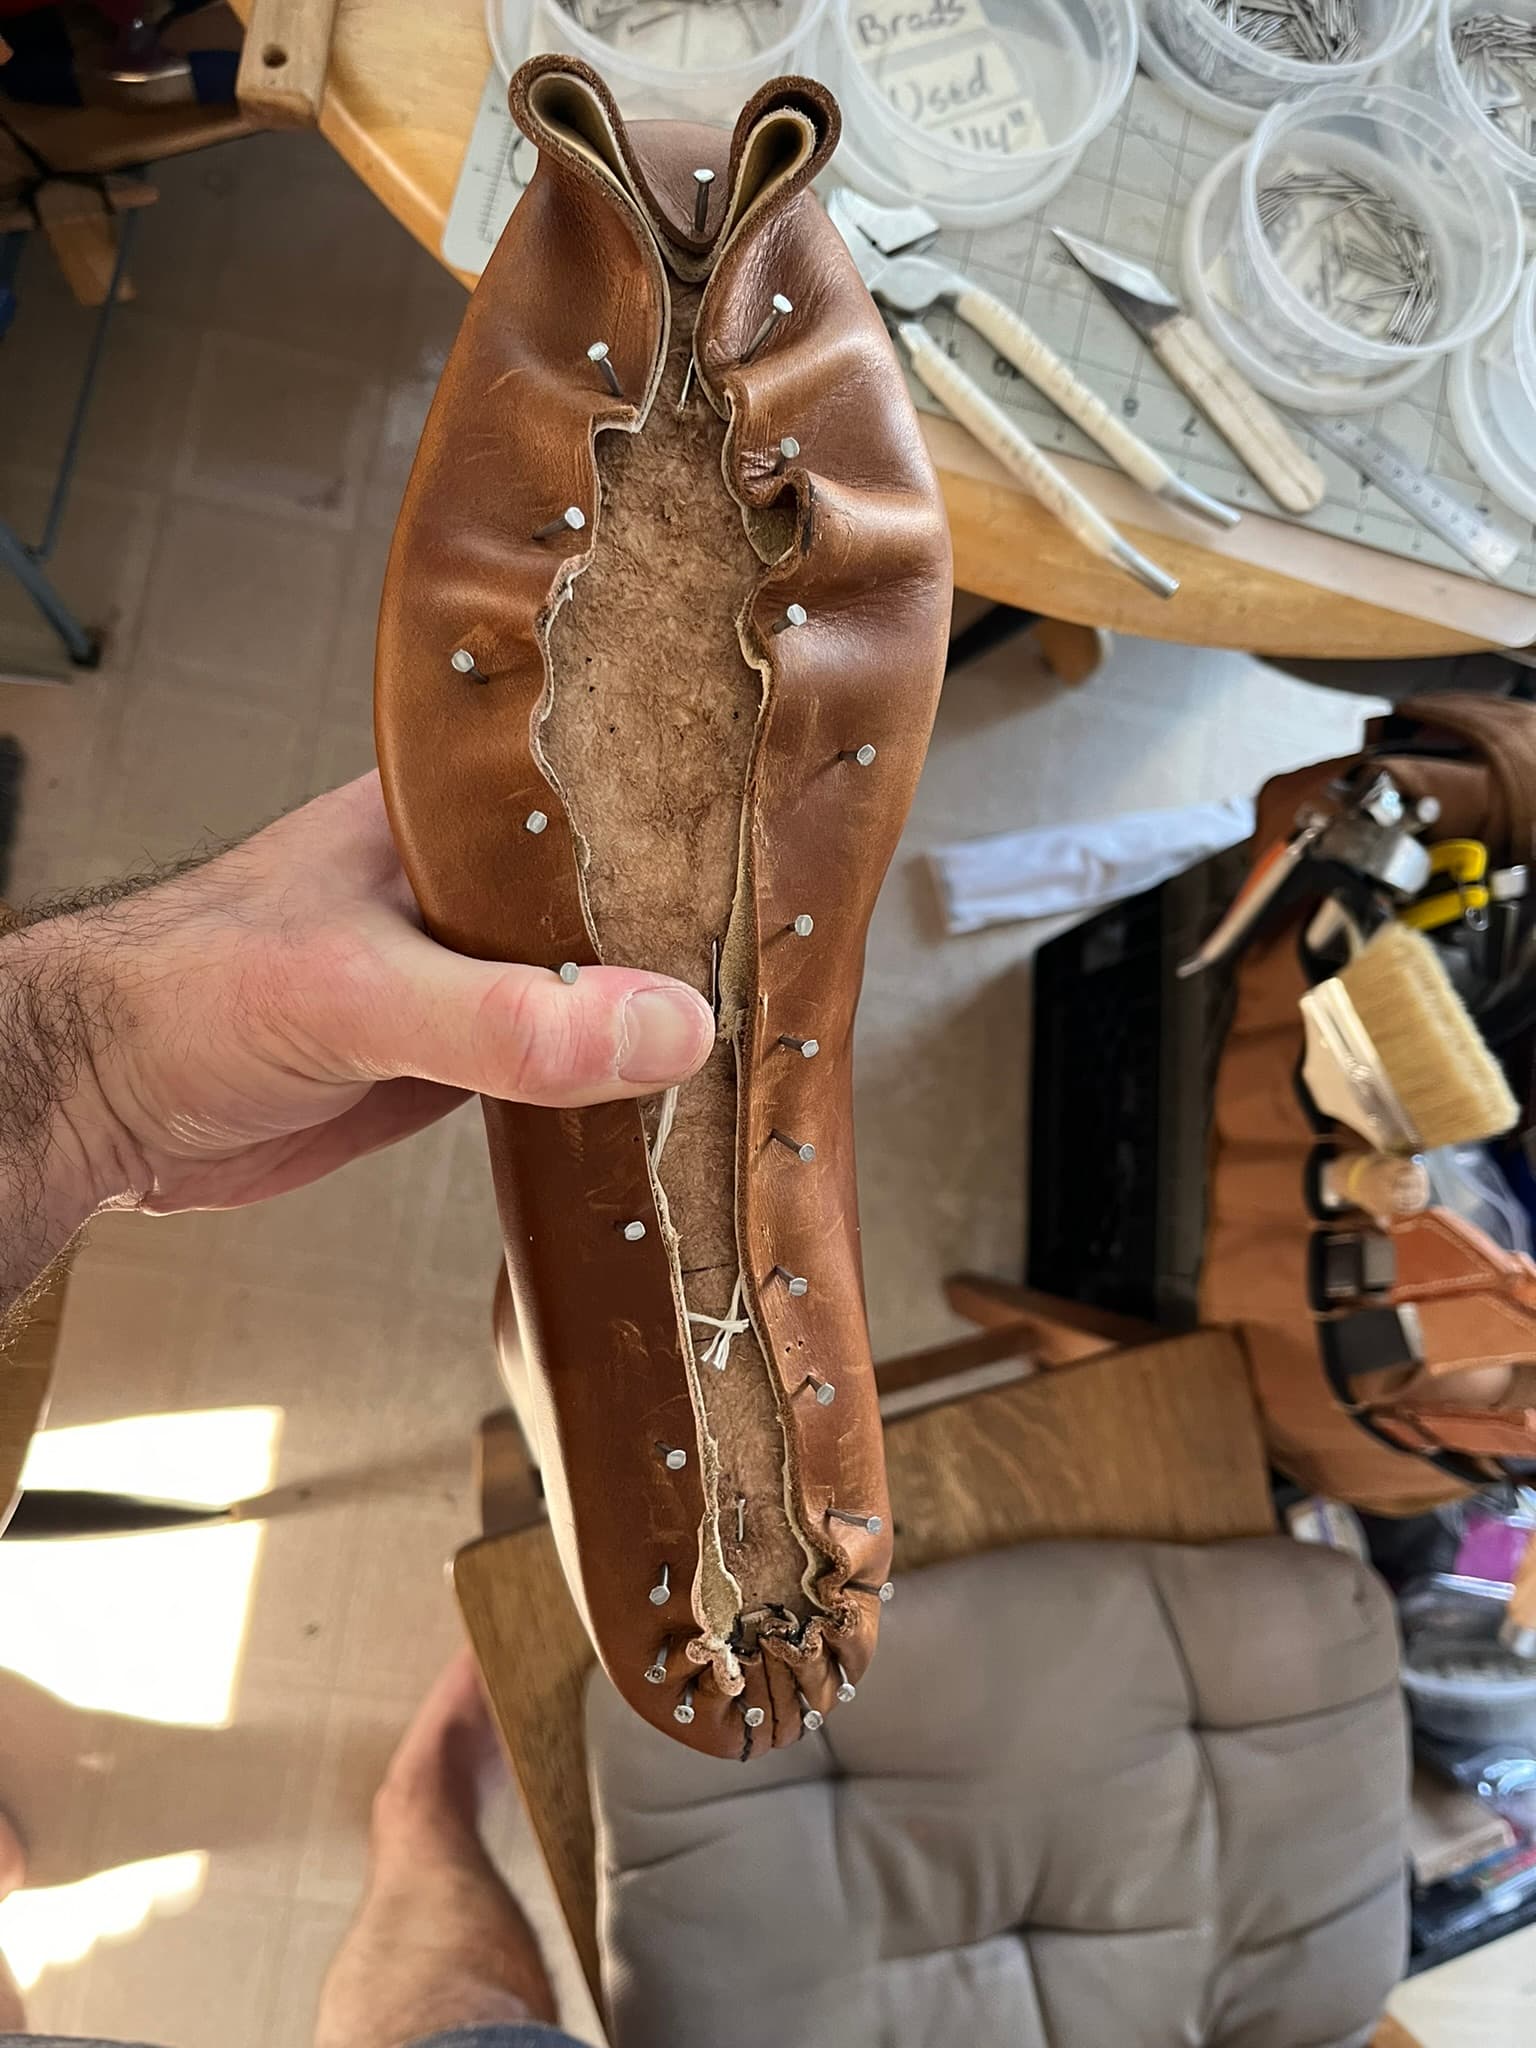
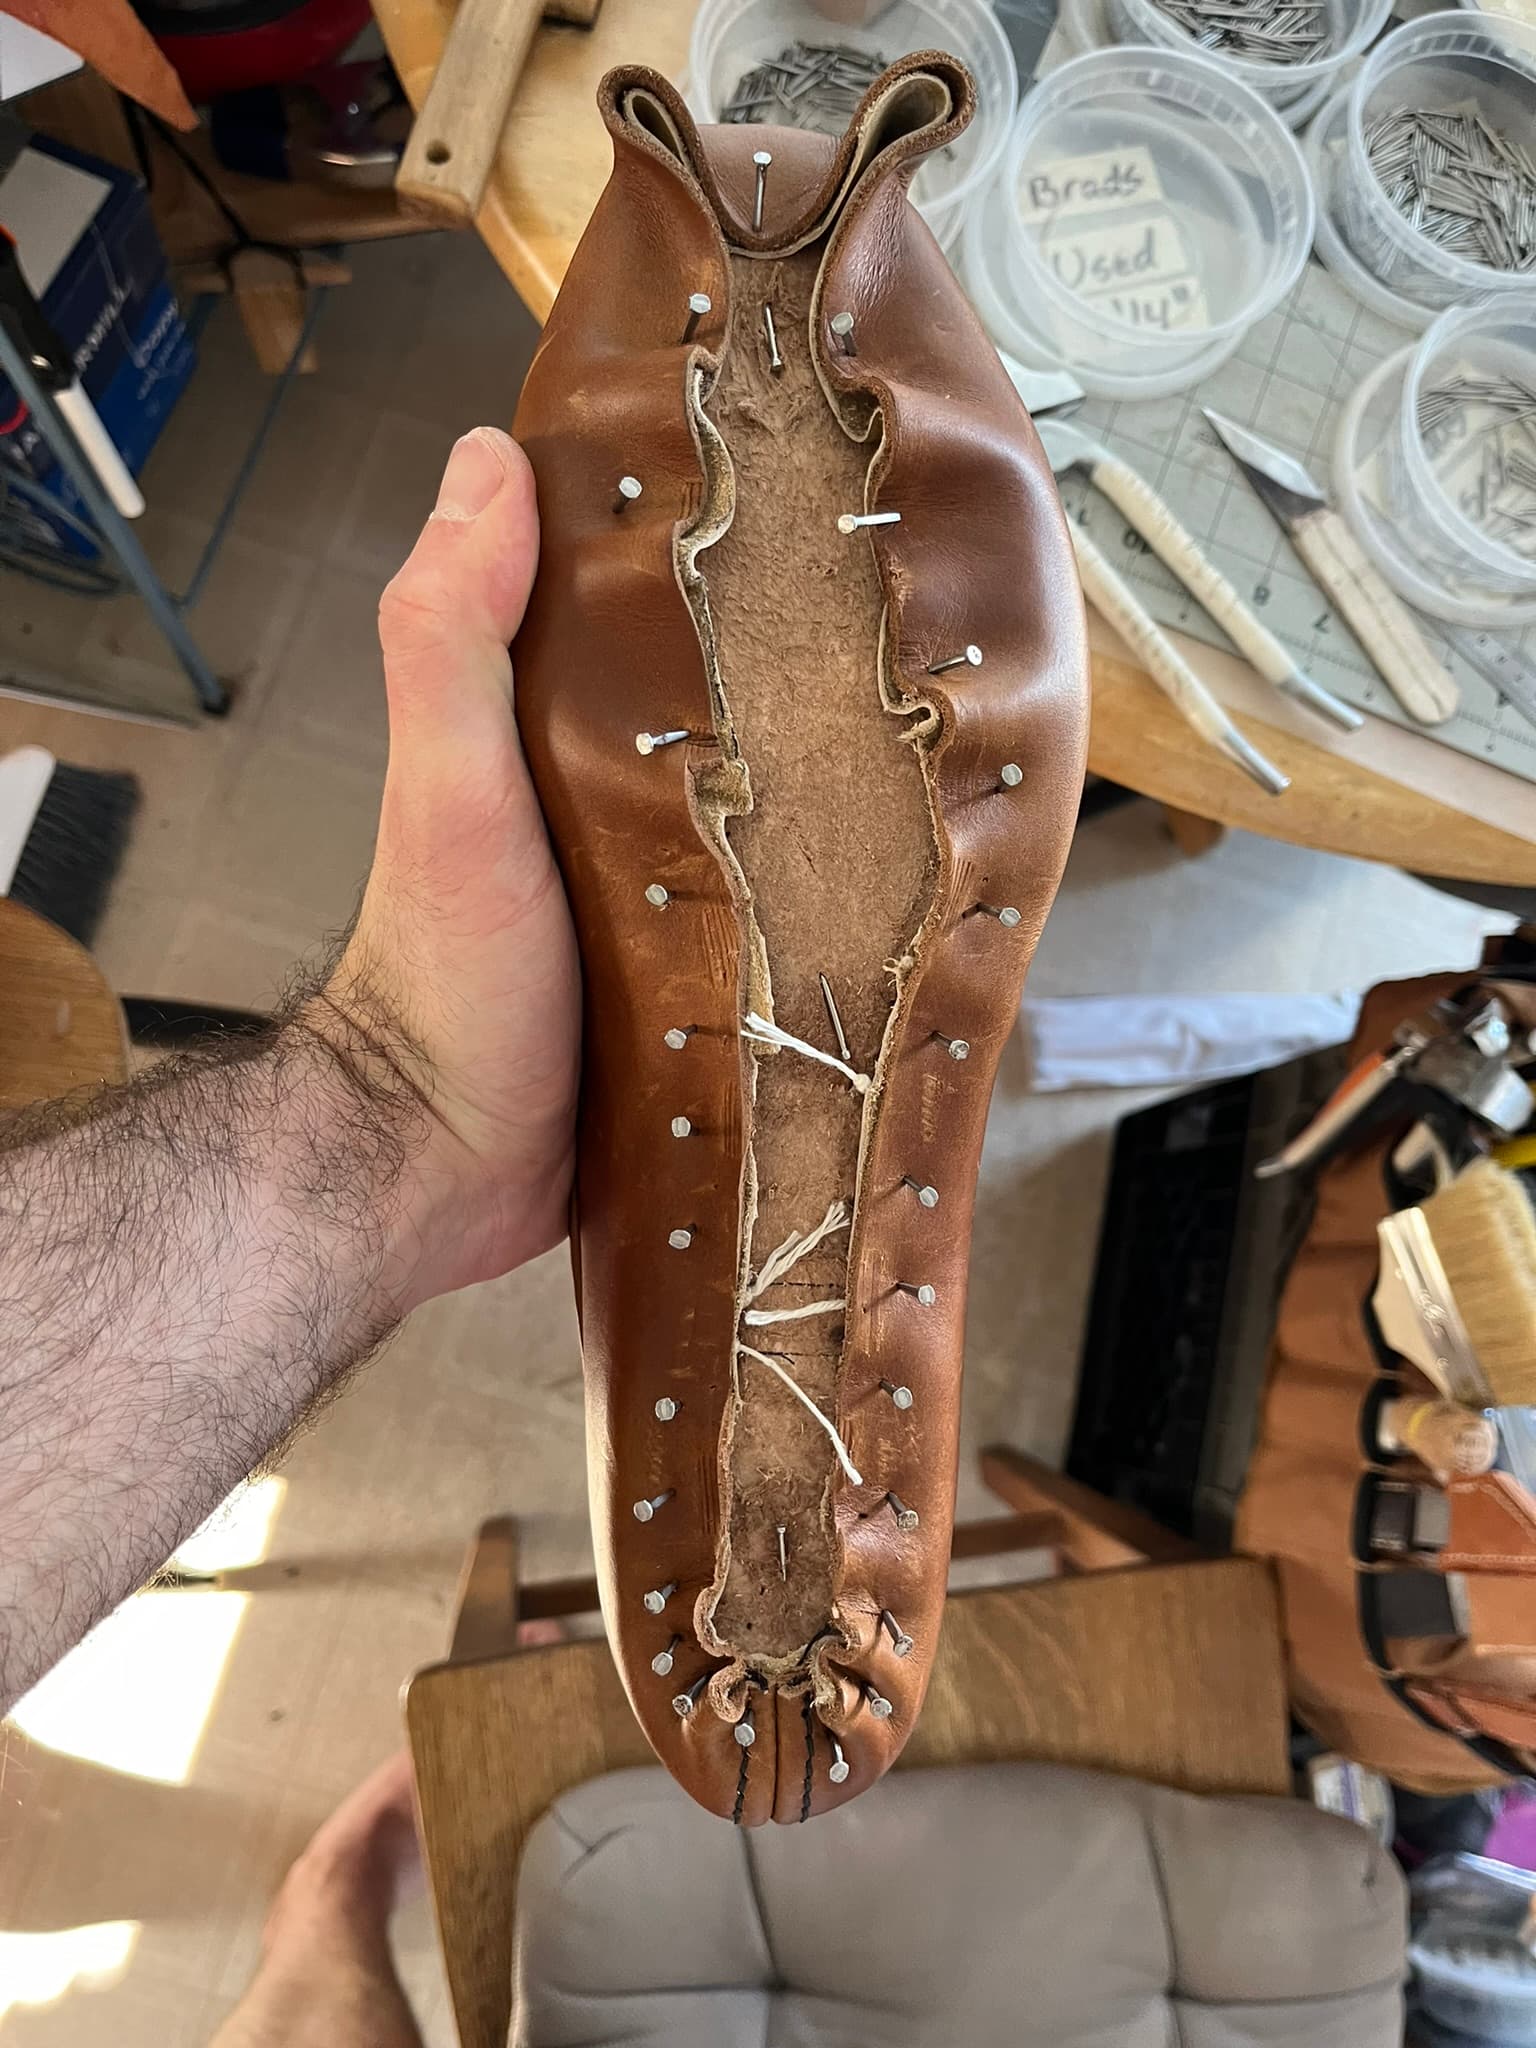
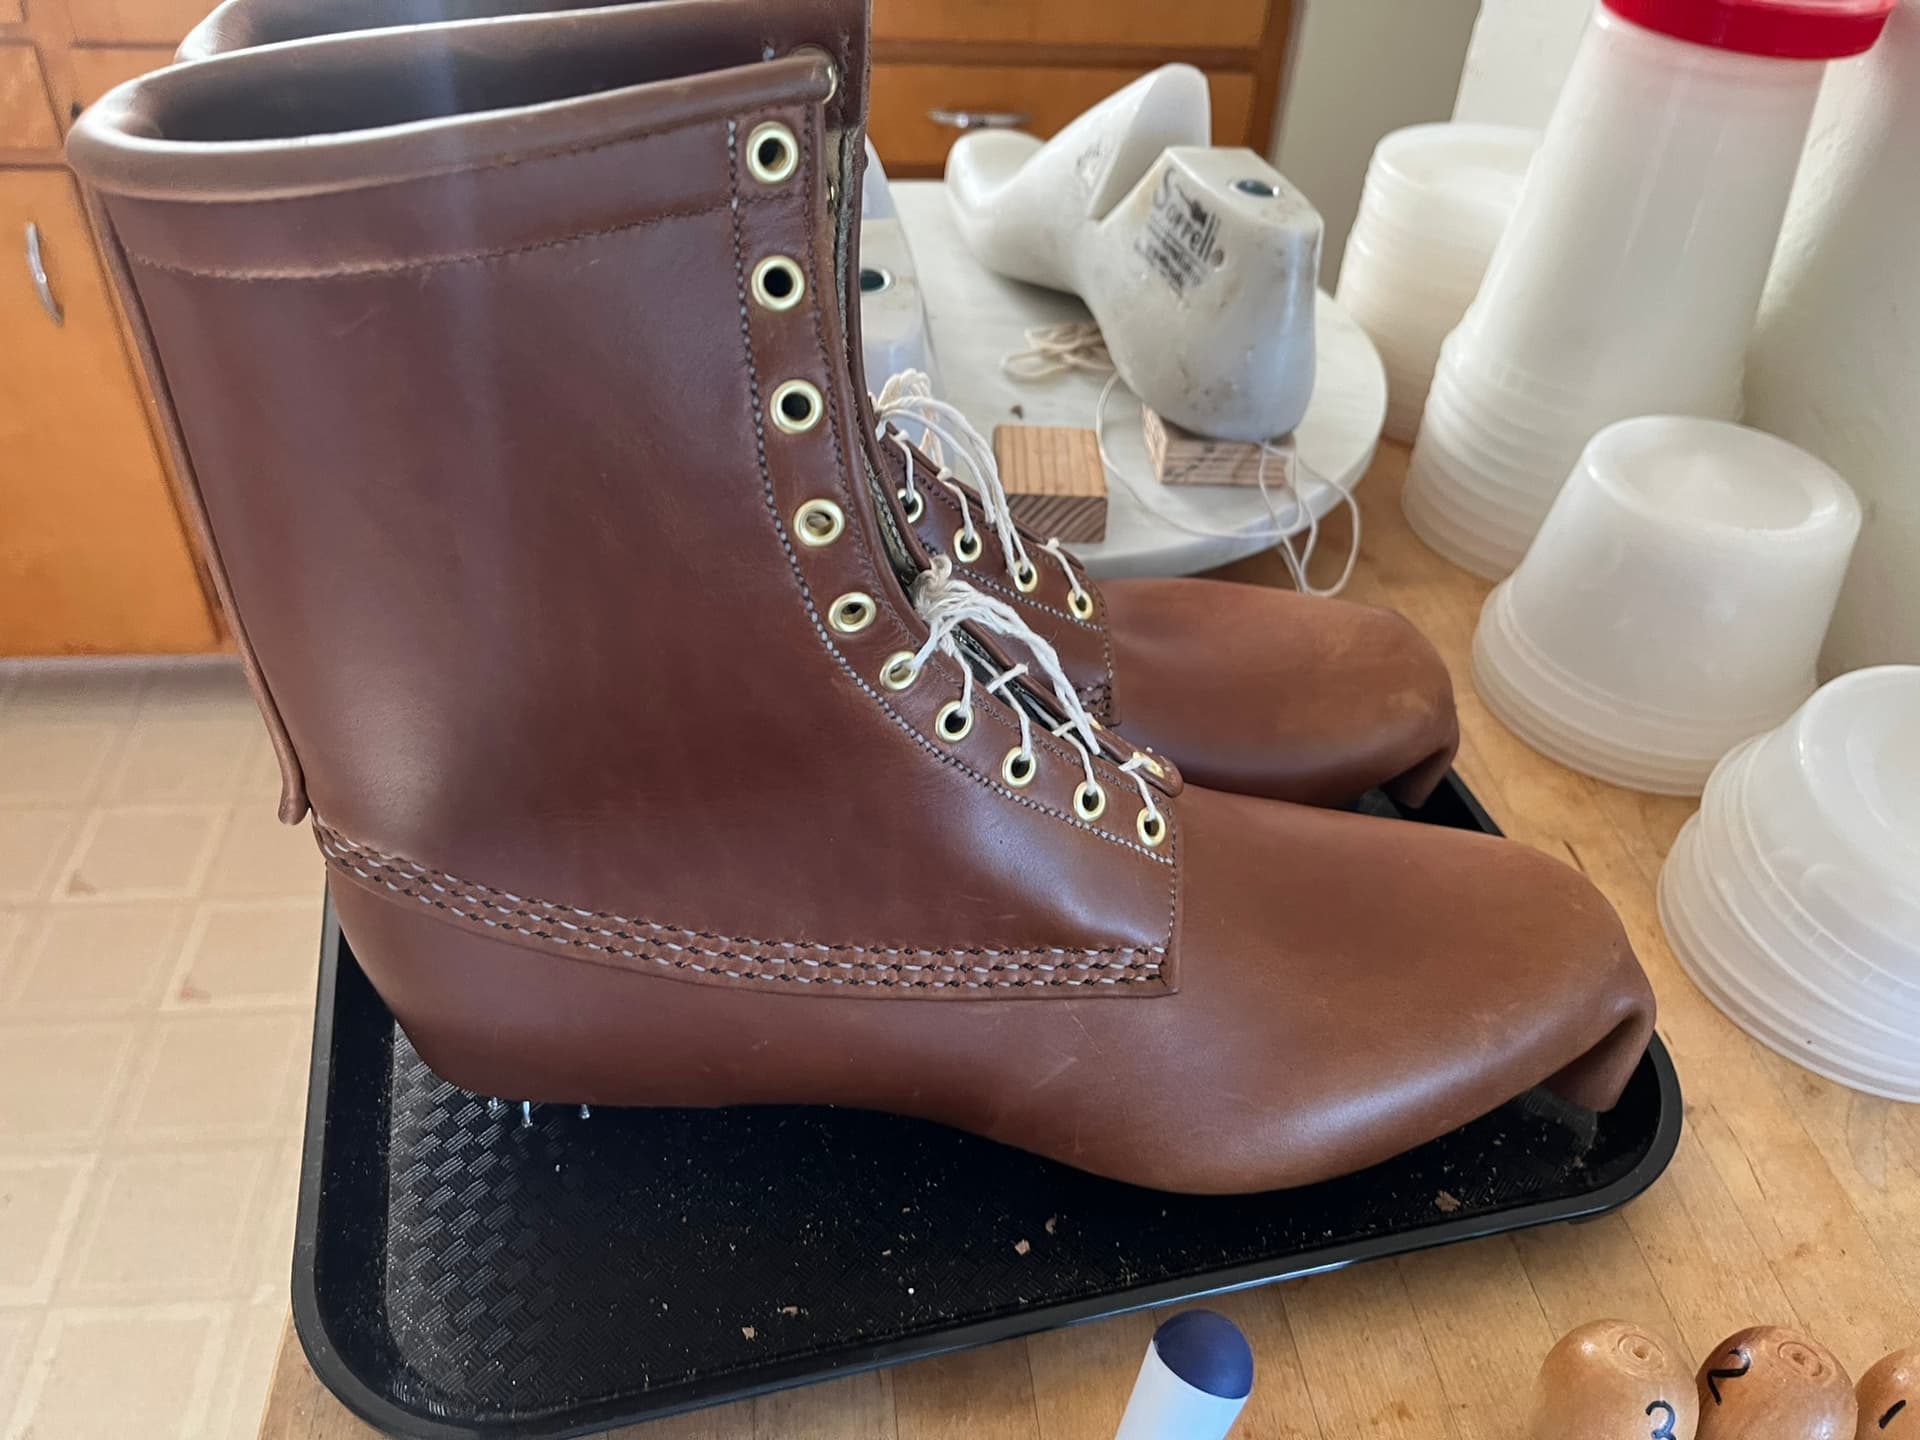
Mistake: Too Much Lasting Allowance
I think I actually overdid it with the lasting allowance.
After my first pair, where I ran short over the toes, I increased the allowance. But at this point, I was having issues running out of room to pull the sides of the heel seat and waist over without overlapping.
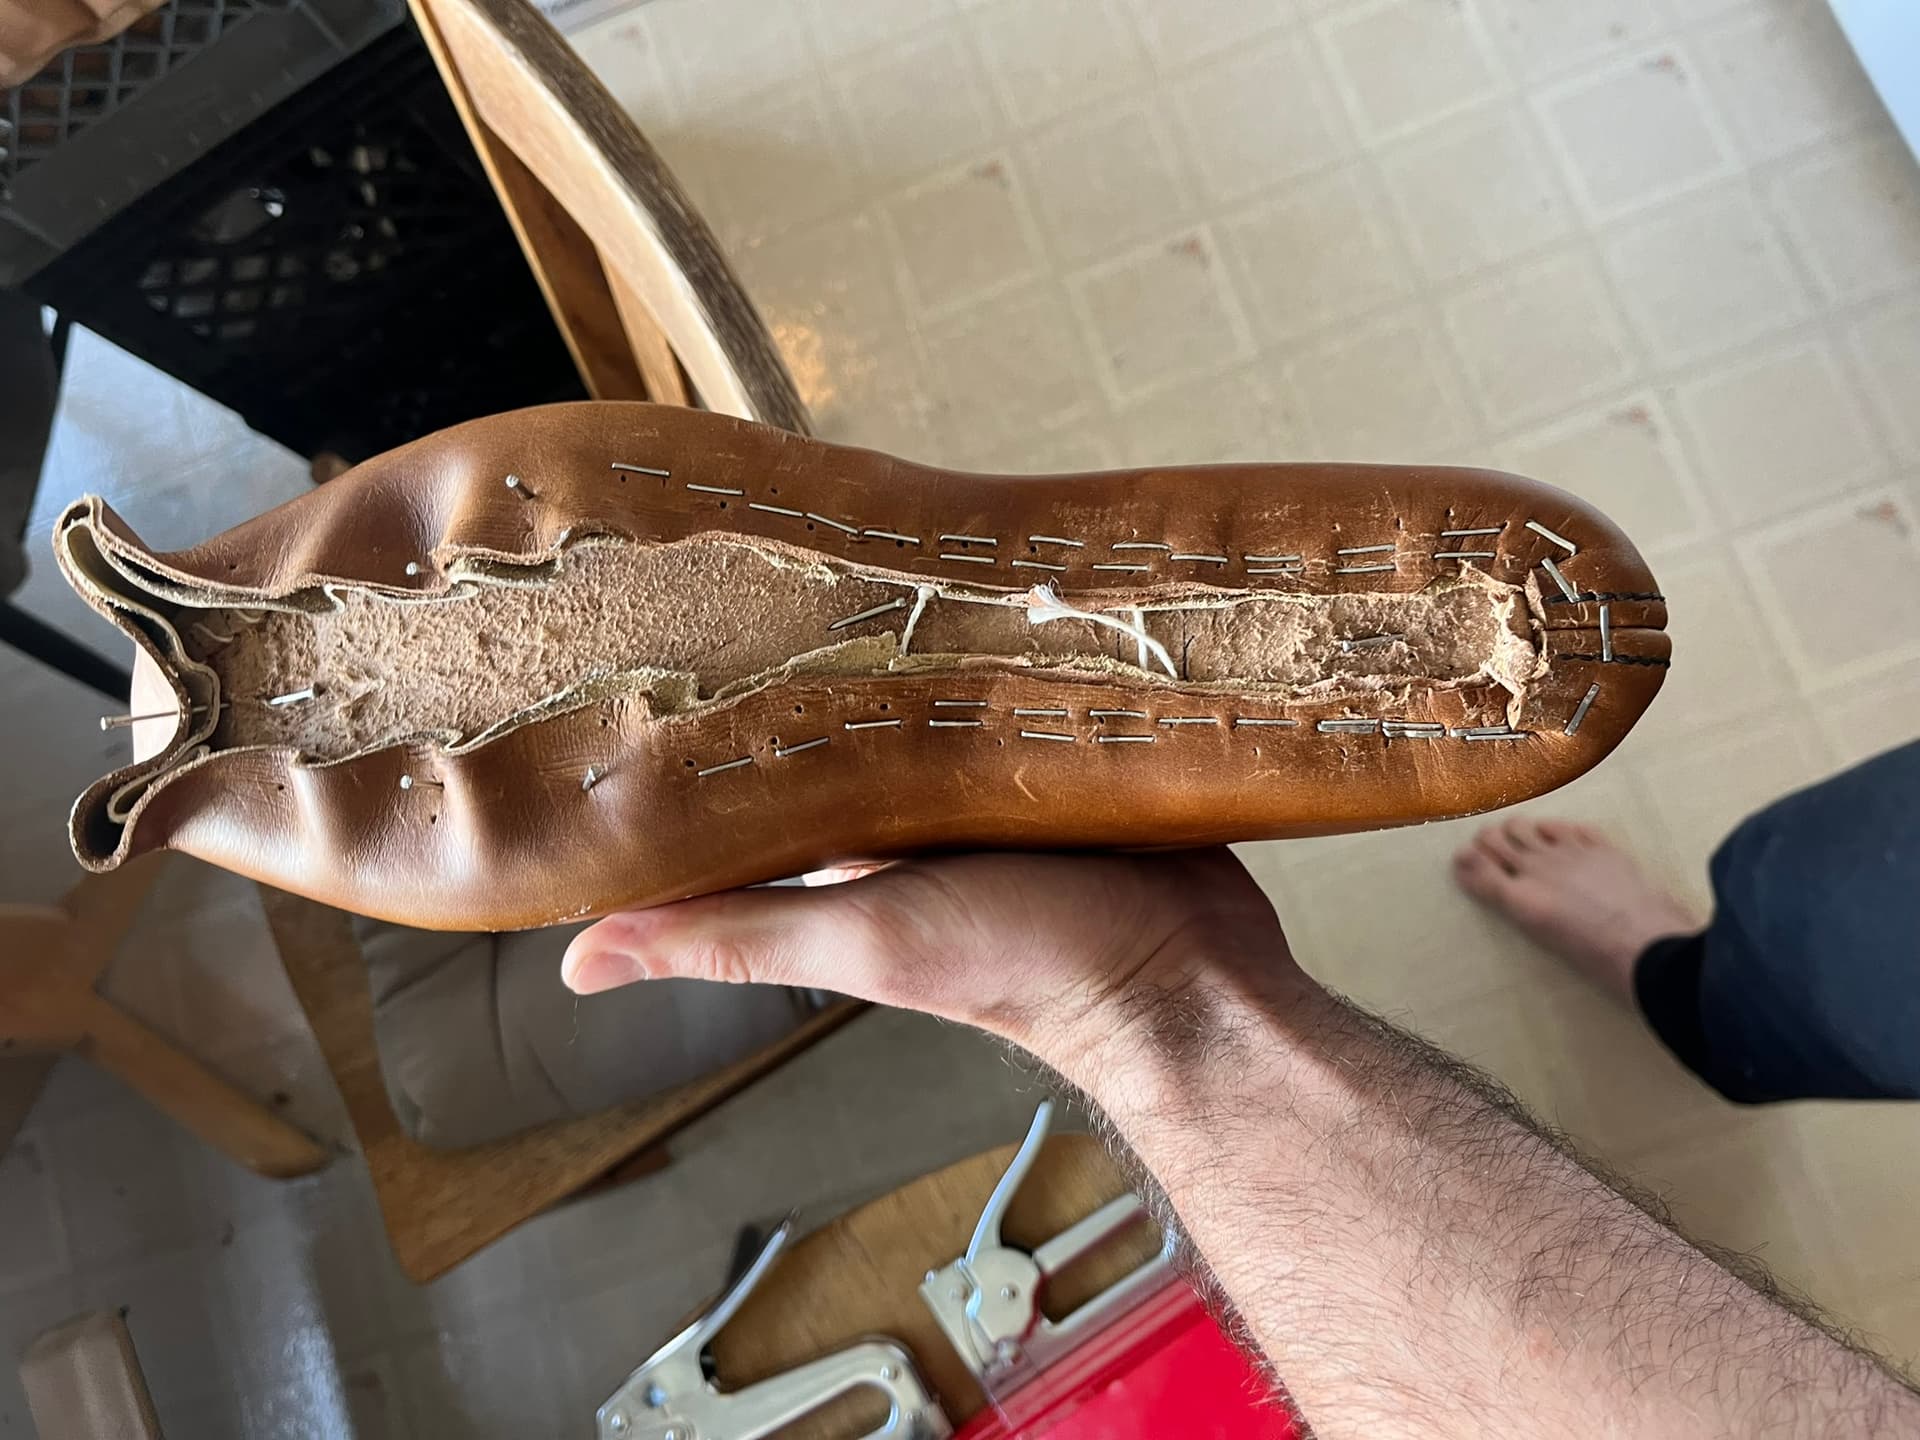
Mistake: Stapled Too Far In
I decided to try replacing tacks with staples before inseaming this time. I’m still liking that idea, but I think I stapled too far in. I should have stapled closer to the featherline and trimmed more waste away.
For what it’s worth, my upper leather is 5½ oz with 2 oz lining, and I ended up finding 3/8" staples worked best, for both large and small stapler:
- Arrow T50 3/8"
- Arrow JT21 3/8"
Starting from nil, I’d recommend just getting the smaller gun and JT21 staples. The larger gun was better for fixing upper, stiffener, and lining right at the back of the heel seat. But it’s also possible to shoot a smaller staple and then hammer it home to penetrate the thickness. And the smaller gun is much handier and easier to shoot precisely.
Stitched the welts on.
This process went much smoother this time.
The #2 awl from Dick Anderson was a real improvement, though I tried a few holes with a similarly shaped Tom Carbone awl blade, as well, and I think most of my suffering was relieved by the Baker insole leather. The cut-stock insole leather I’ve used in the past was much closer to outsole leather in hardness and density.
Mistake: Stapled too far in.
Even switching out the tacks for staples, I stapled way too far in from the featherline. I should have fixed closer to the holdfast, or even into it, so there’d be less lasting allowance flopping about. I ended up trimming as I stitched, which interrupted the process.
Overall, the staples were a win, though. I’d definitely recommend a purpose-built staple lifter for those who want to try it. I found a big, sturdy Osborne 1066 for a decent price, and that worked great. But honestly, something from the office supply market might be handier, especially if you go with the lighter-duty JT21 staples, which I now strongly prefer. I’m working 5½-ounce upper leather on this pair, and the lighter staples were fine. The thicker T50s just took up more space.
Mistake: Forgot the threads I whipped through the holdfasts.
I forgot to pull the thread that I’d looped through the holdfast holes out before lasting, so it was buried under the lasting allowance. I had to dig it out of the holes as I stitched.
With the Baker insole leather, I suspect there’s actually no point in using thread or anything else to hold the holes open. There’s a chance of shrinkage when holing moist leather, but I didn’t have any trouble finding or piercing through my holes this time.
Mistake: Bristle Madness
I still don’t feel like I’ve really pinned down my choice of bristle or needle. I tried wire, fishing line, and some curved upholstery-style needles. But eventually went right back to some ugly bent Osborne harness needles. The eyes on those are plenty fine, and I can take the temper out of them with a seconds over a candle flame, so they become bendable.
I was worried that I’d have problems feeding bristles or needles through from the outside to inside, having only gouged out a stitching channel on the inside, rather than carving out a ramp. In practice that didn’t turn out to be an issue. When I’d hit a dead end trying to feed a bristle or needle through, I could never see the tip hitting the wall of the channel. It was always a problem somewhere inside the holdfast.
I suspect that may be because I’m piercing the holes in my holdfasts too curved, rather than basically flat from inside to outside. I may also be shooting to have my awl poke out of the upper too far under the featherline. When I’d take the time to pop more staples and get a look under the layers when a needle wouldn’t go through, more often than not the problem was getting the tip of the needle through the very last hole, in the upper.
Mistake: Not the cleanest lasting allowance trimming job.
For whatever reason—maybe because it was late and I was tired—I didn’t think to strop up my knife and make sure it was maximally sharp before trimming the huge lasting allowance, once the welts were stitched in. I ended up going back in with a French edger and a few more passing tugging and slicing with a knife.
It’s all just going to get covered up with cork. But I wish I’d done a cleaner job.
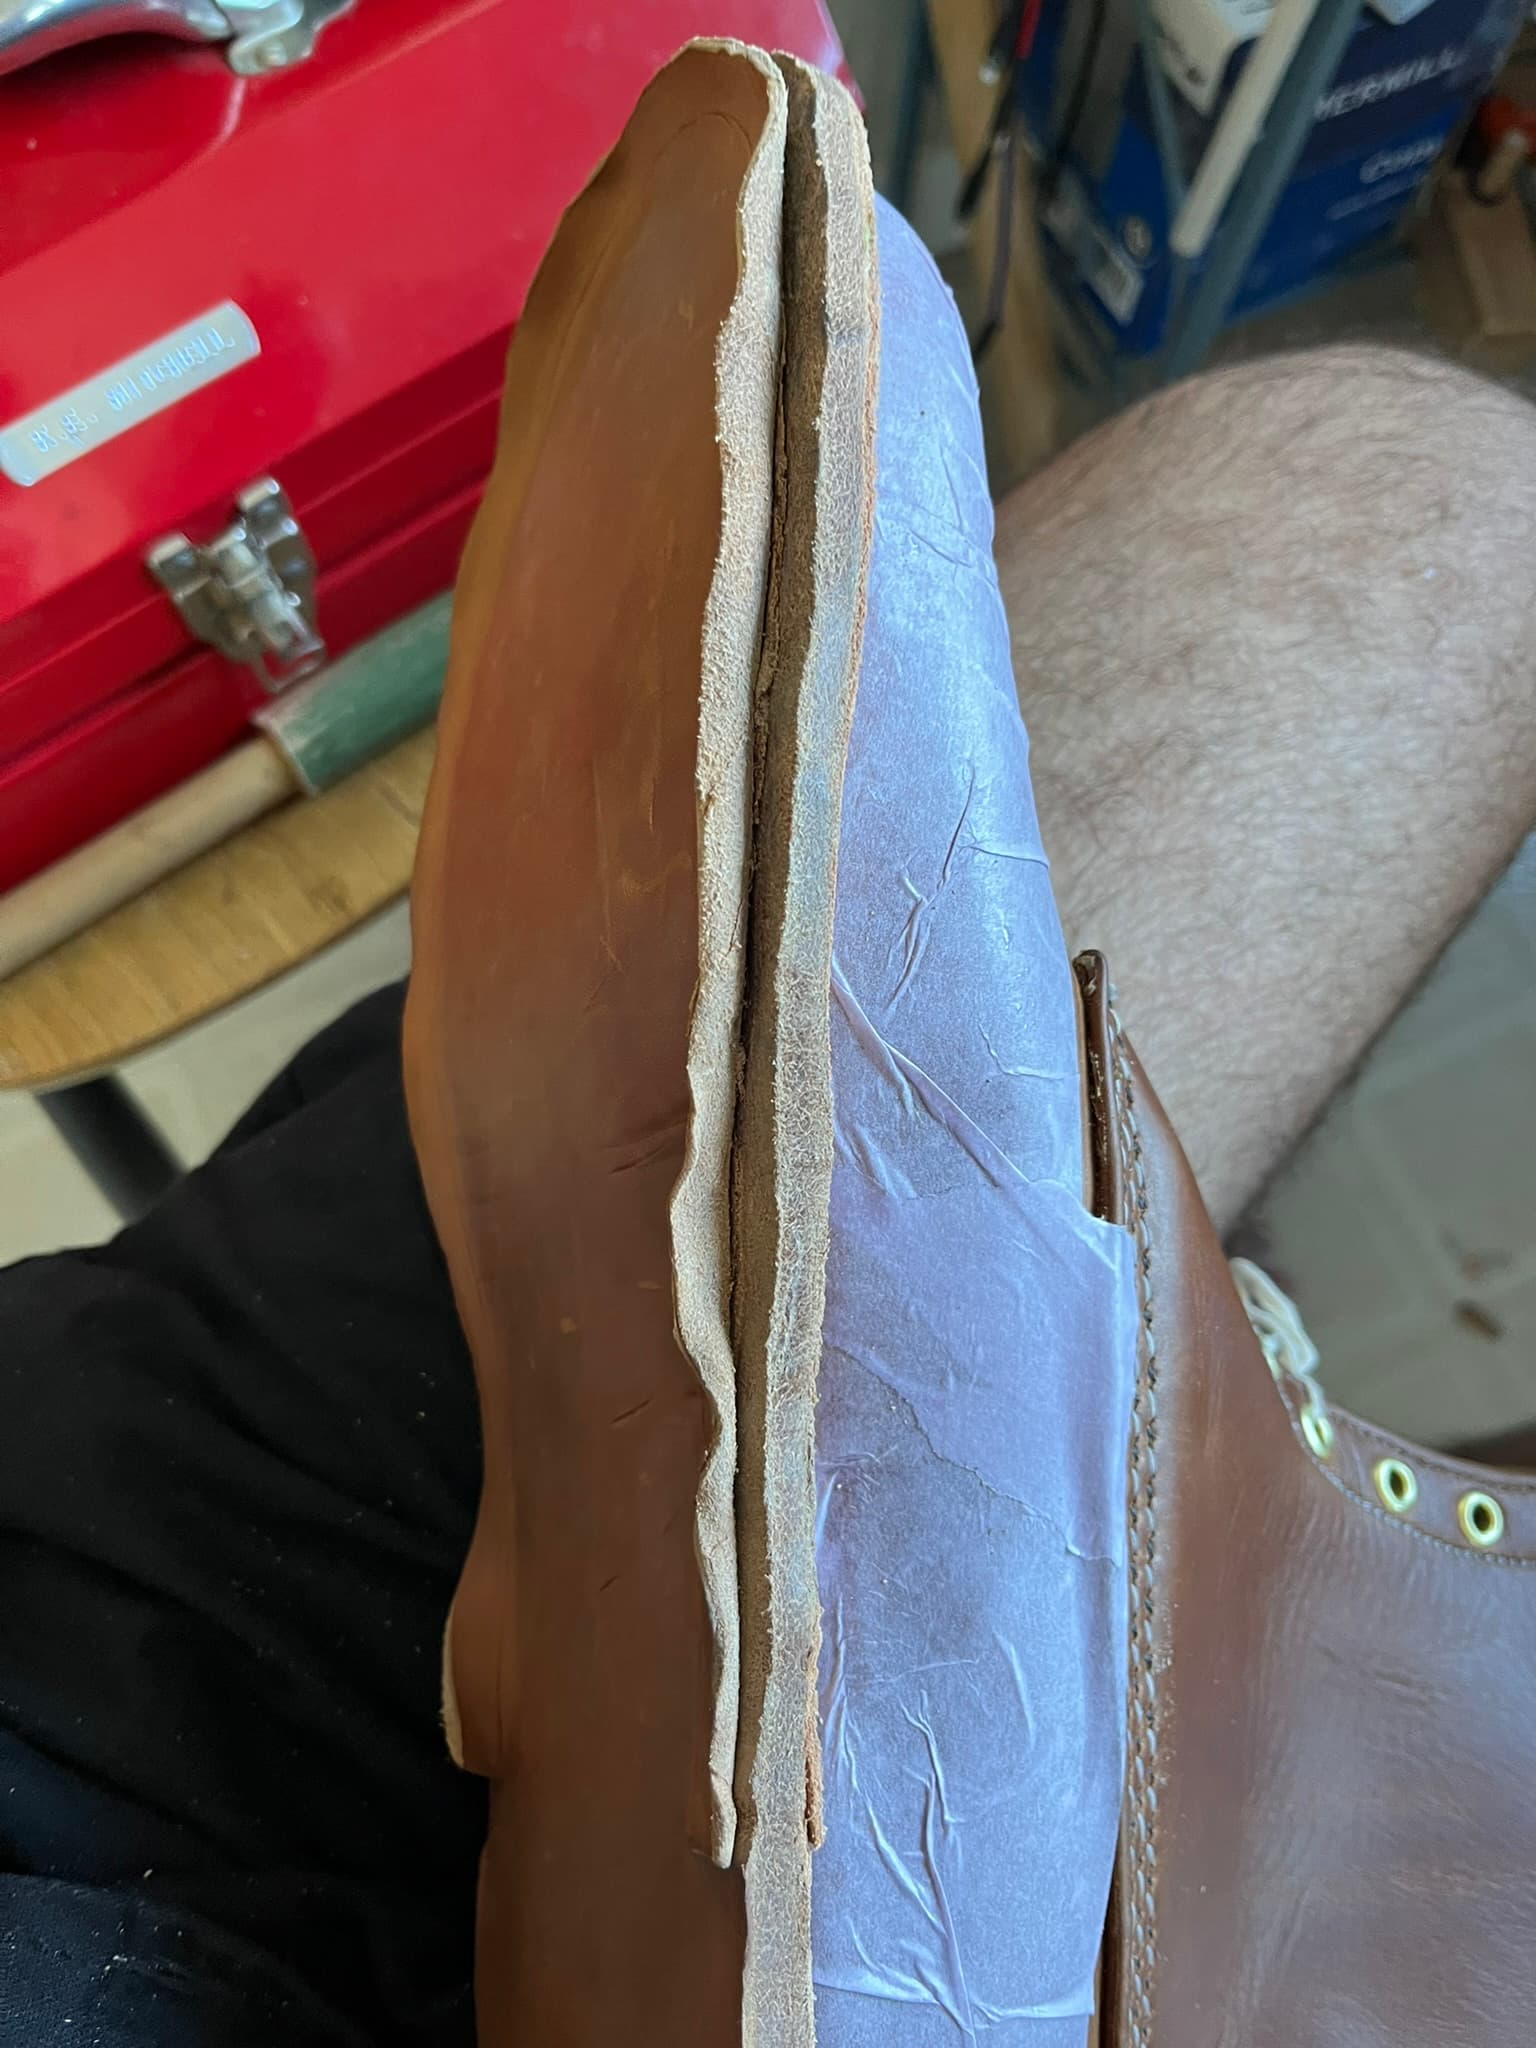
Mistake: Welts a bit thin.
I used my new so-cheap-it’s-scary fixed-blade splitting machine to thin the welts down this time. Unfortunately, I think overshot from clearly too thick too a little bit too thin. These are just over 3 mm, depending on how I squish the calipers.
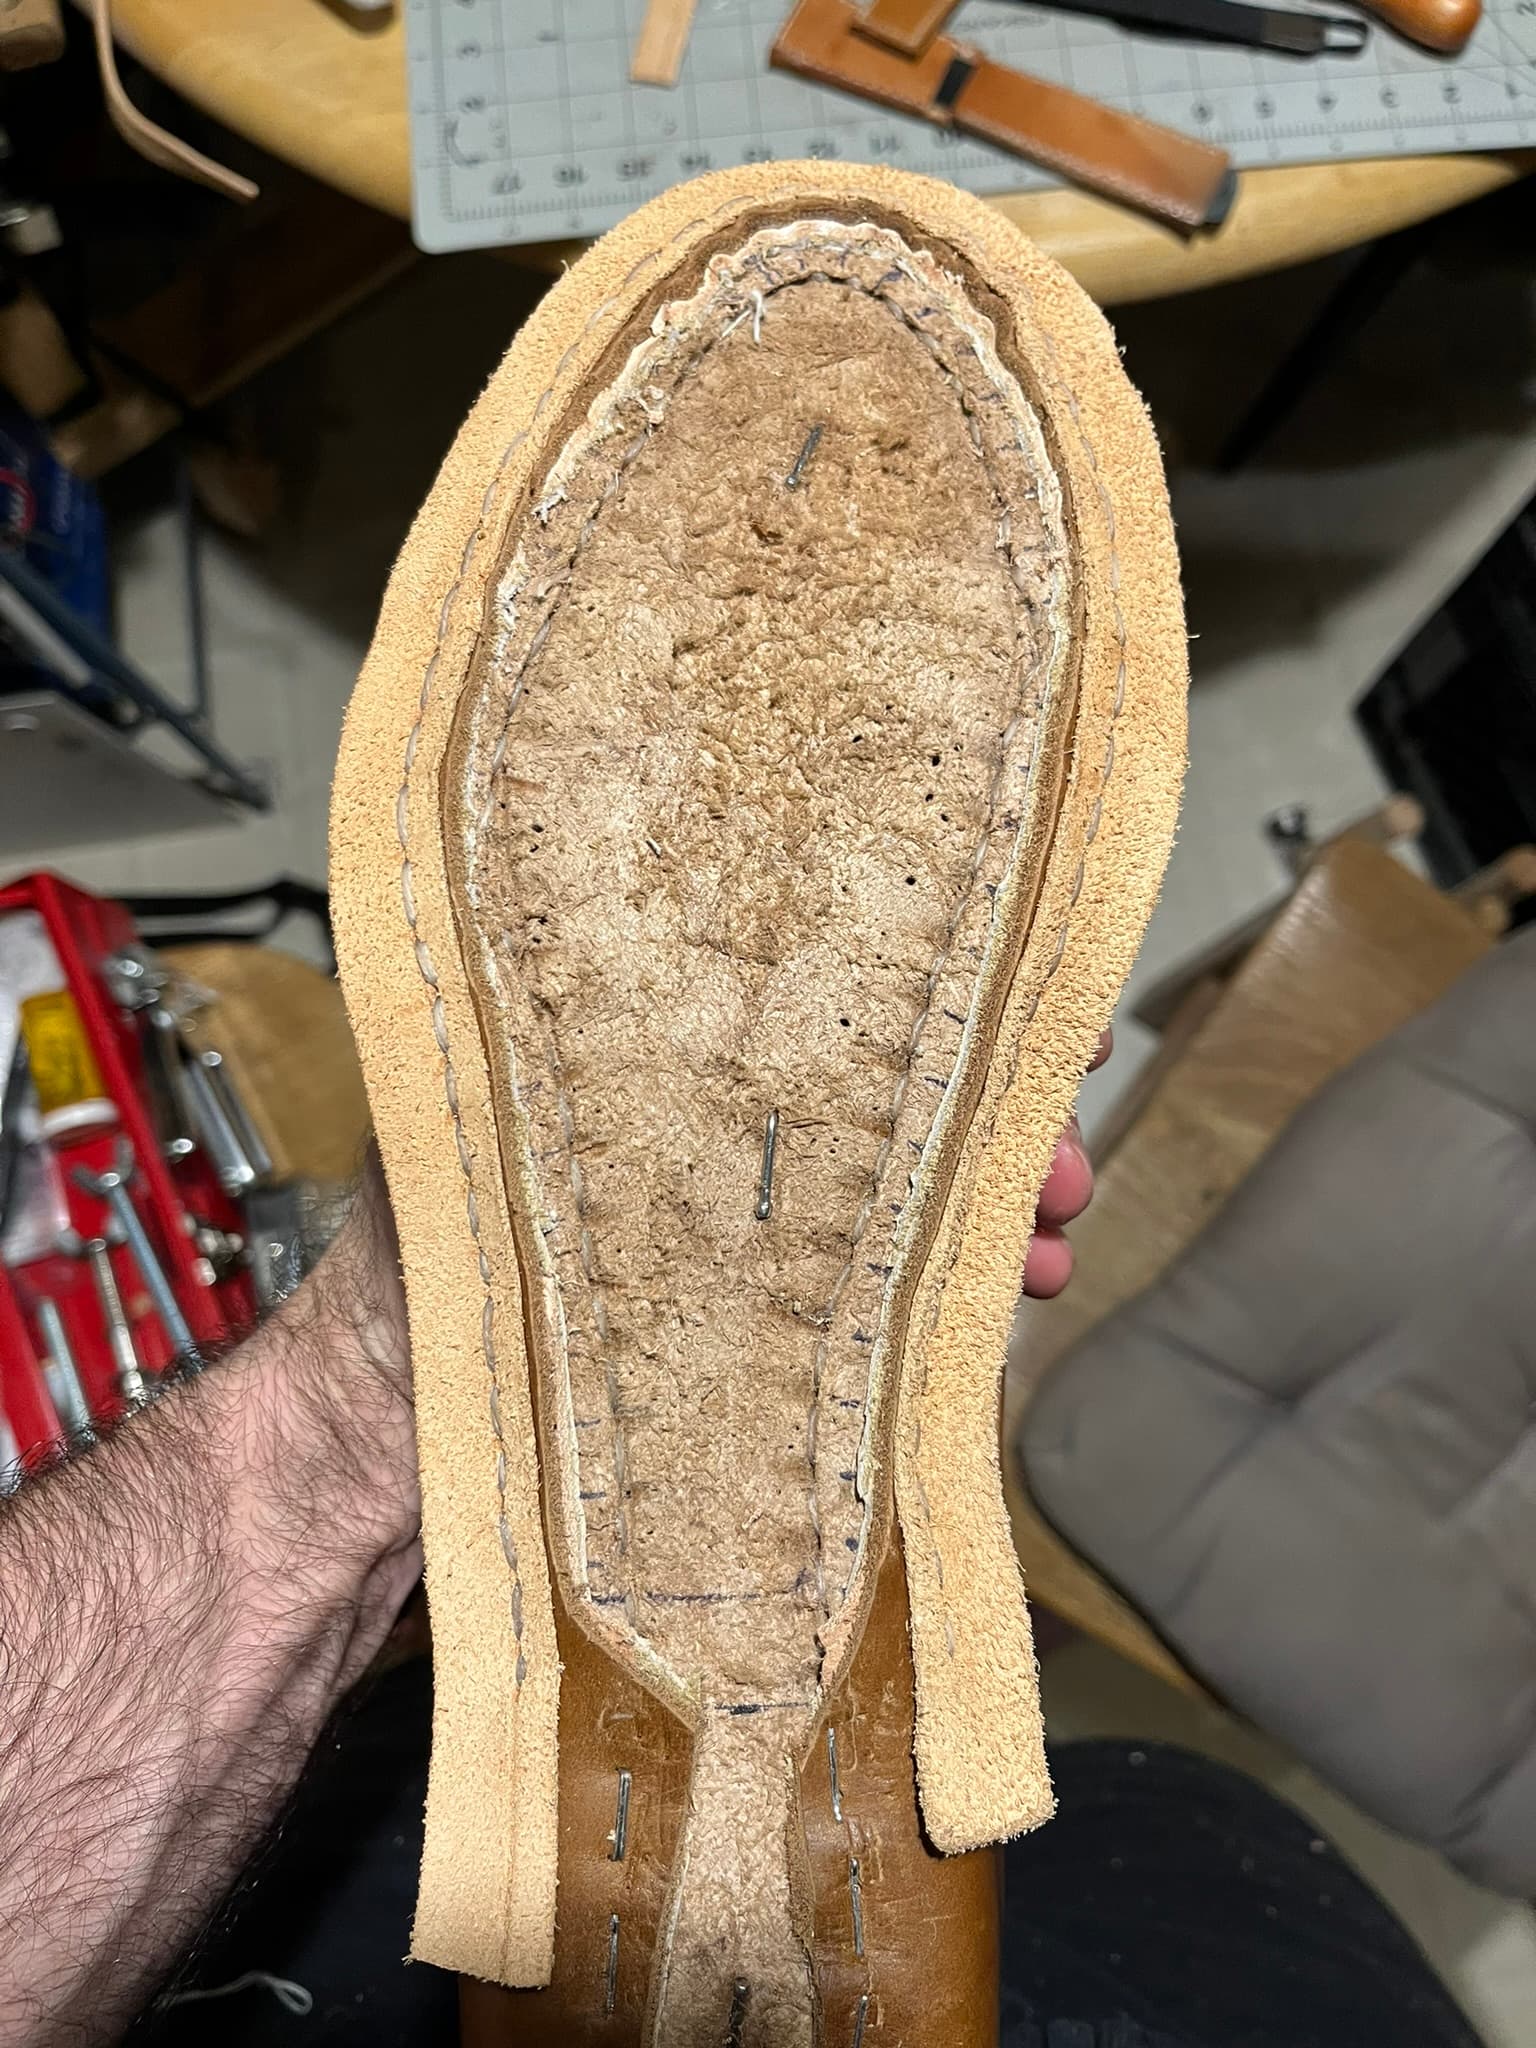
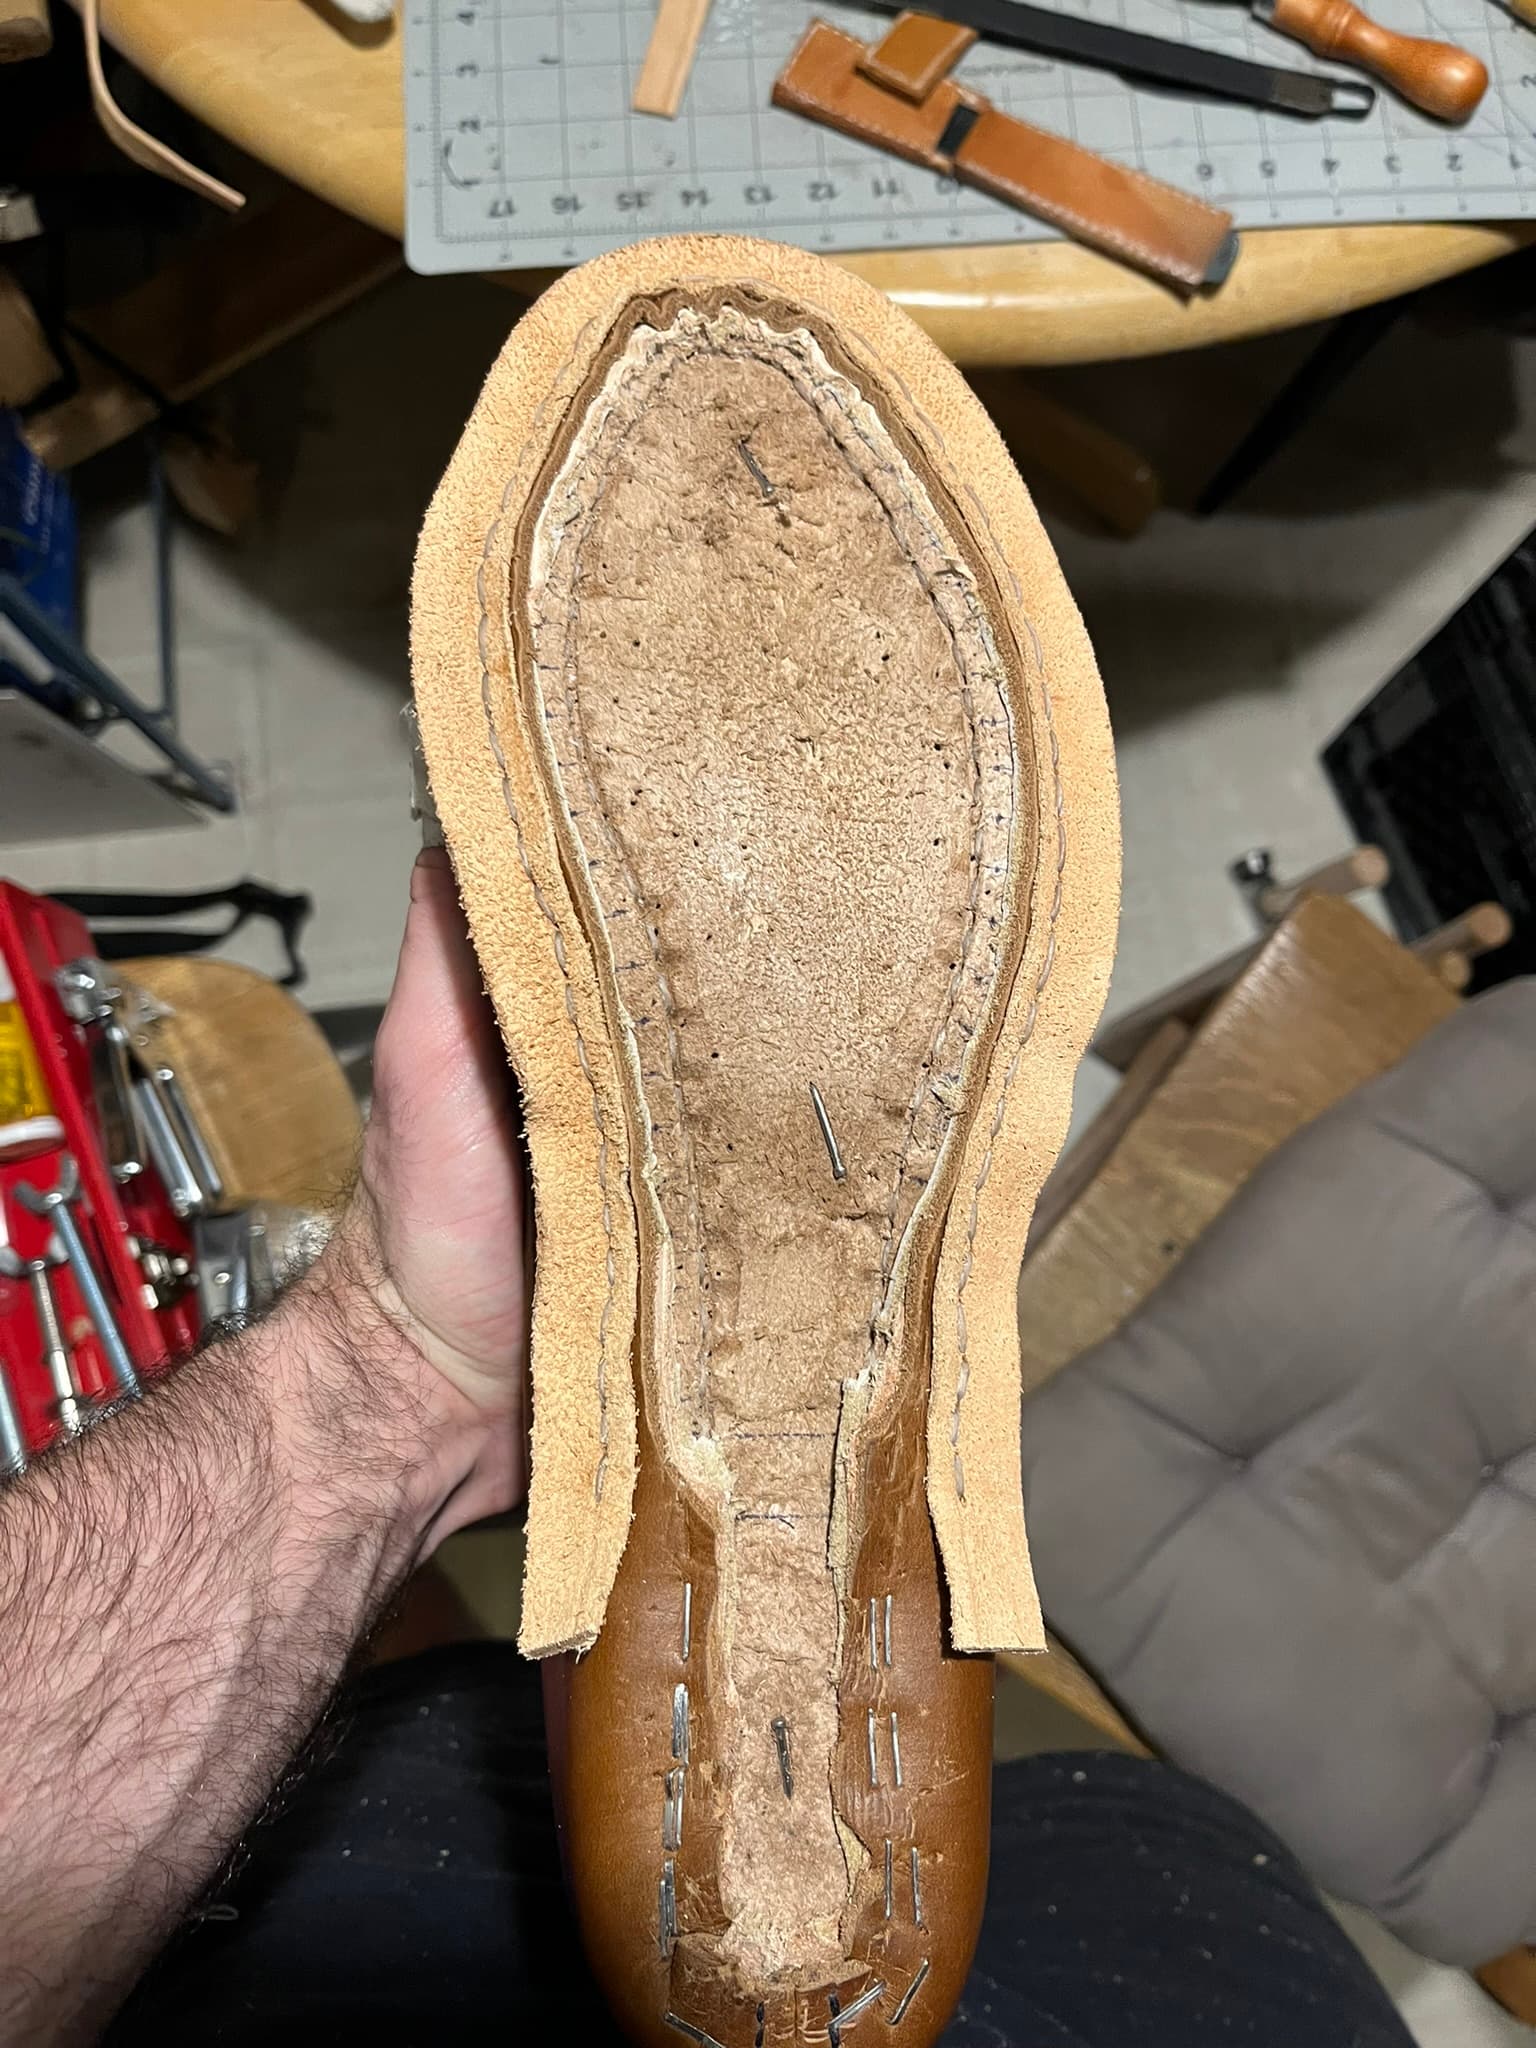
Sewed the heel seats.
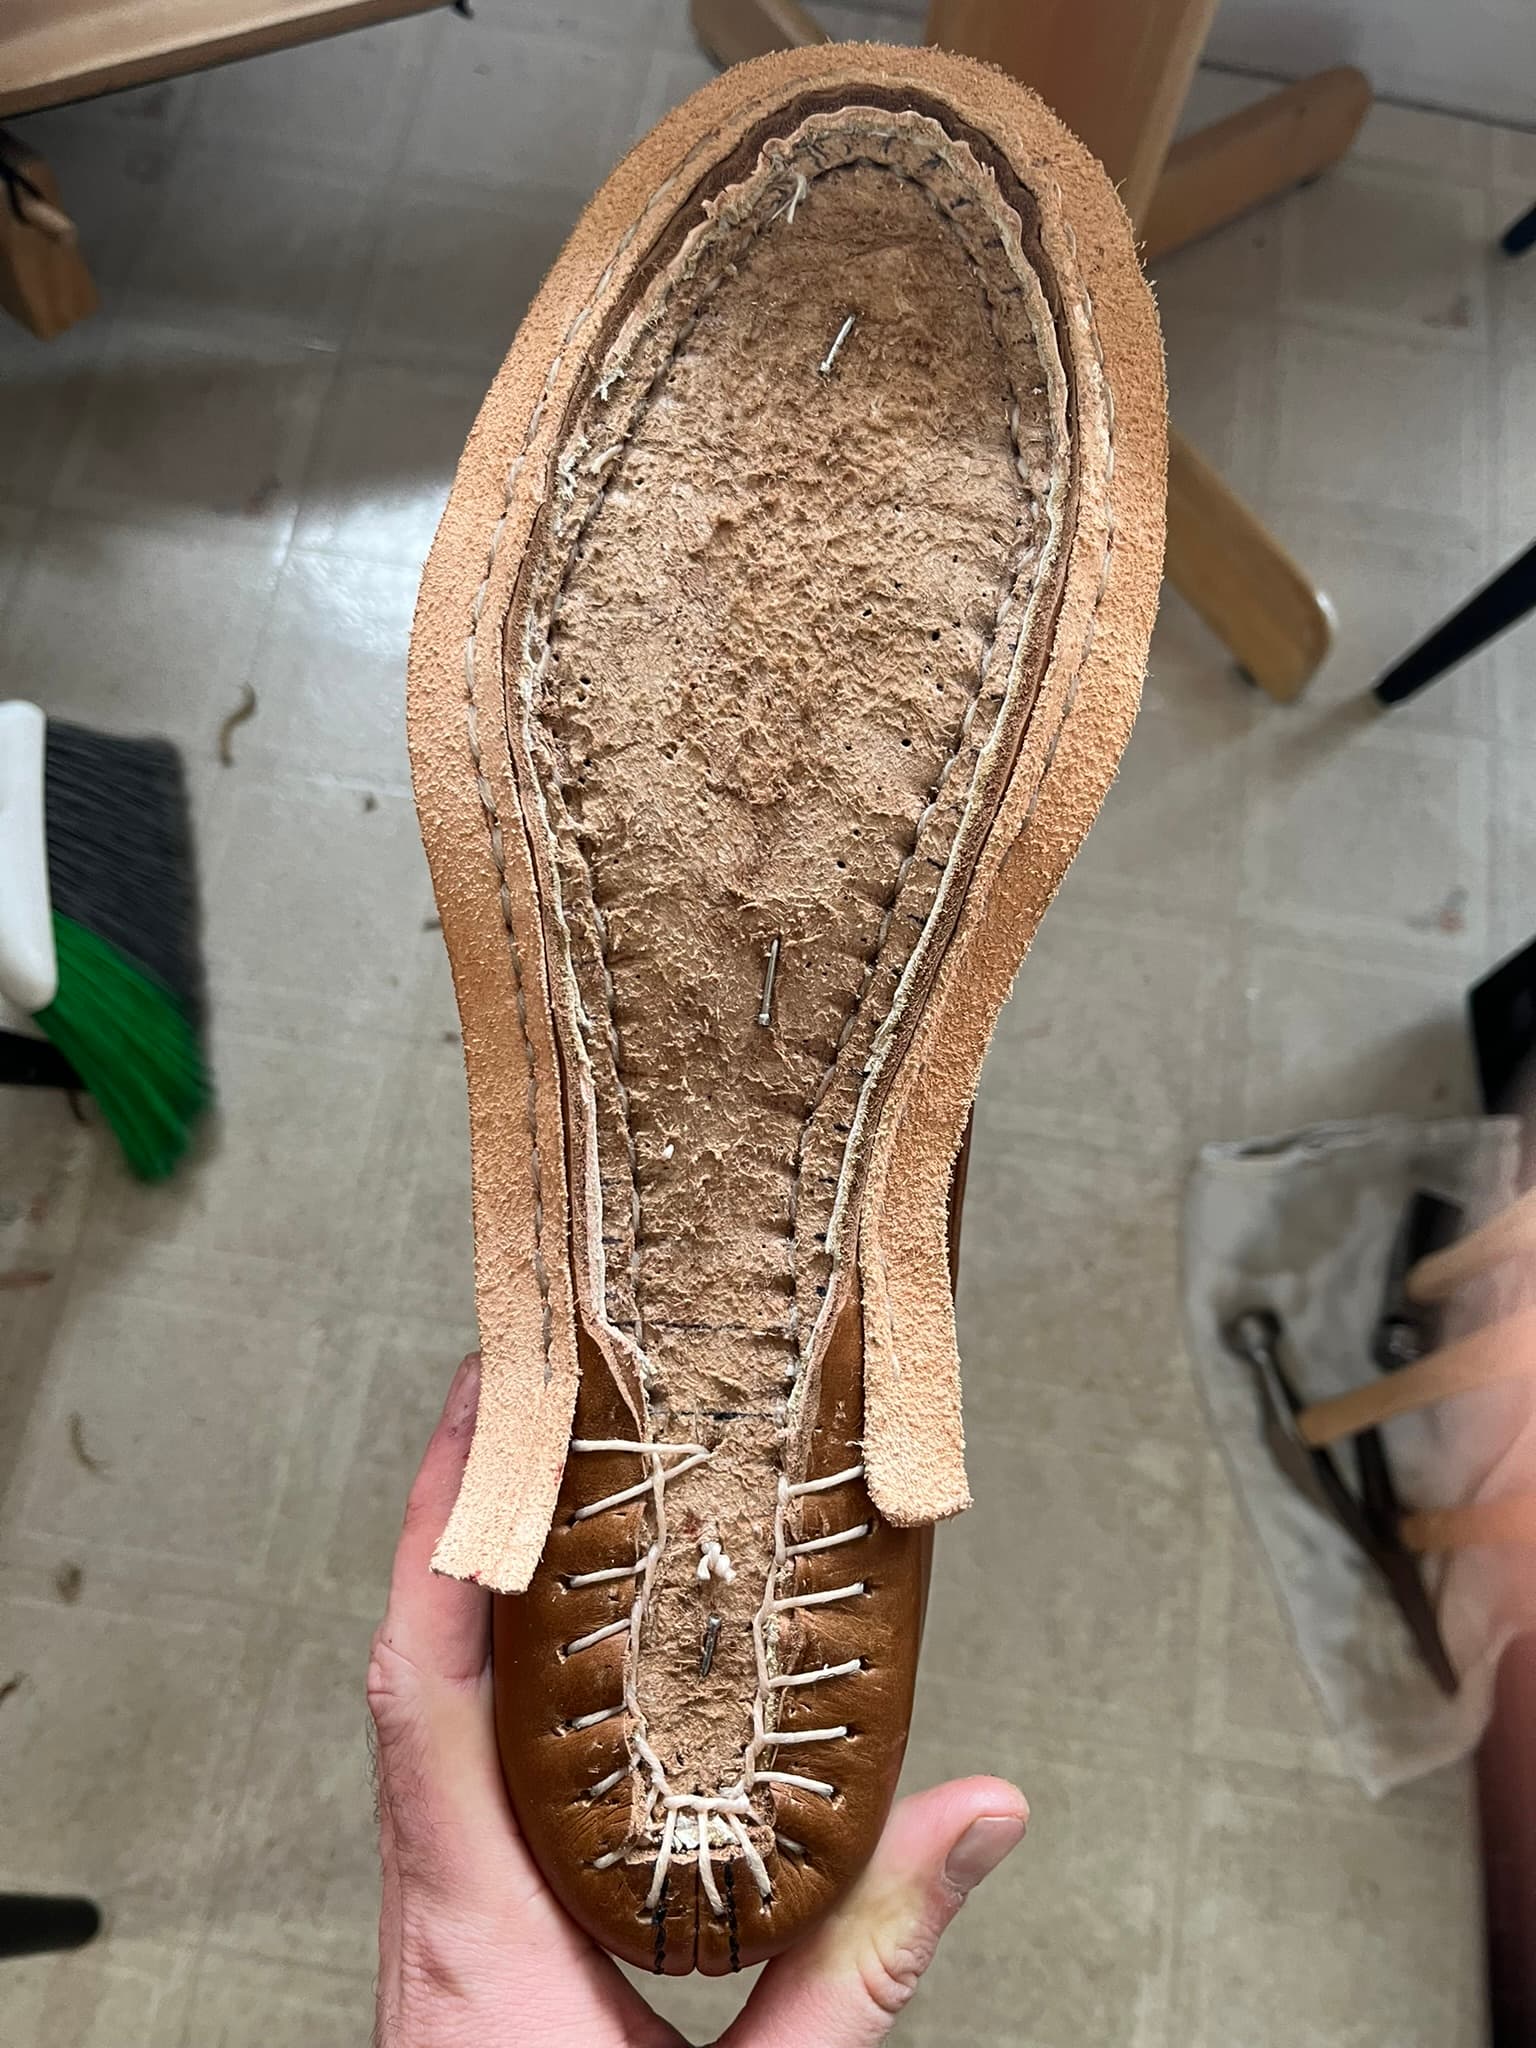
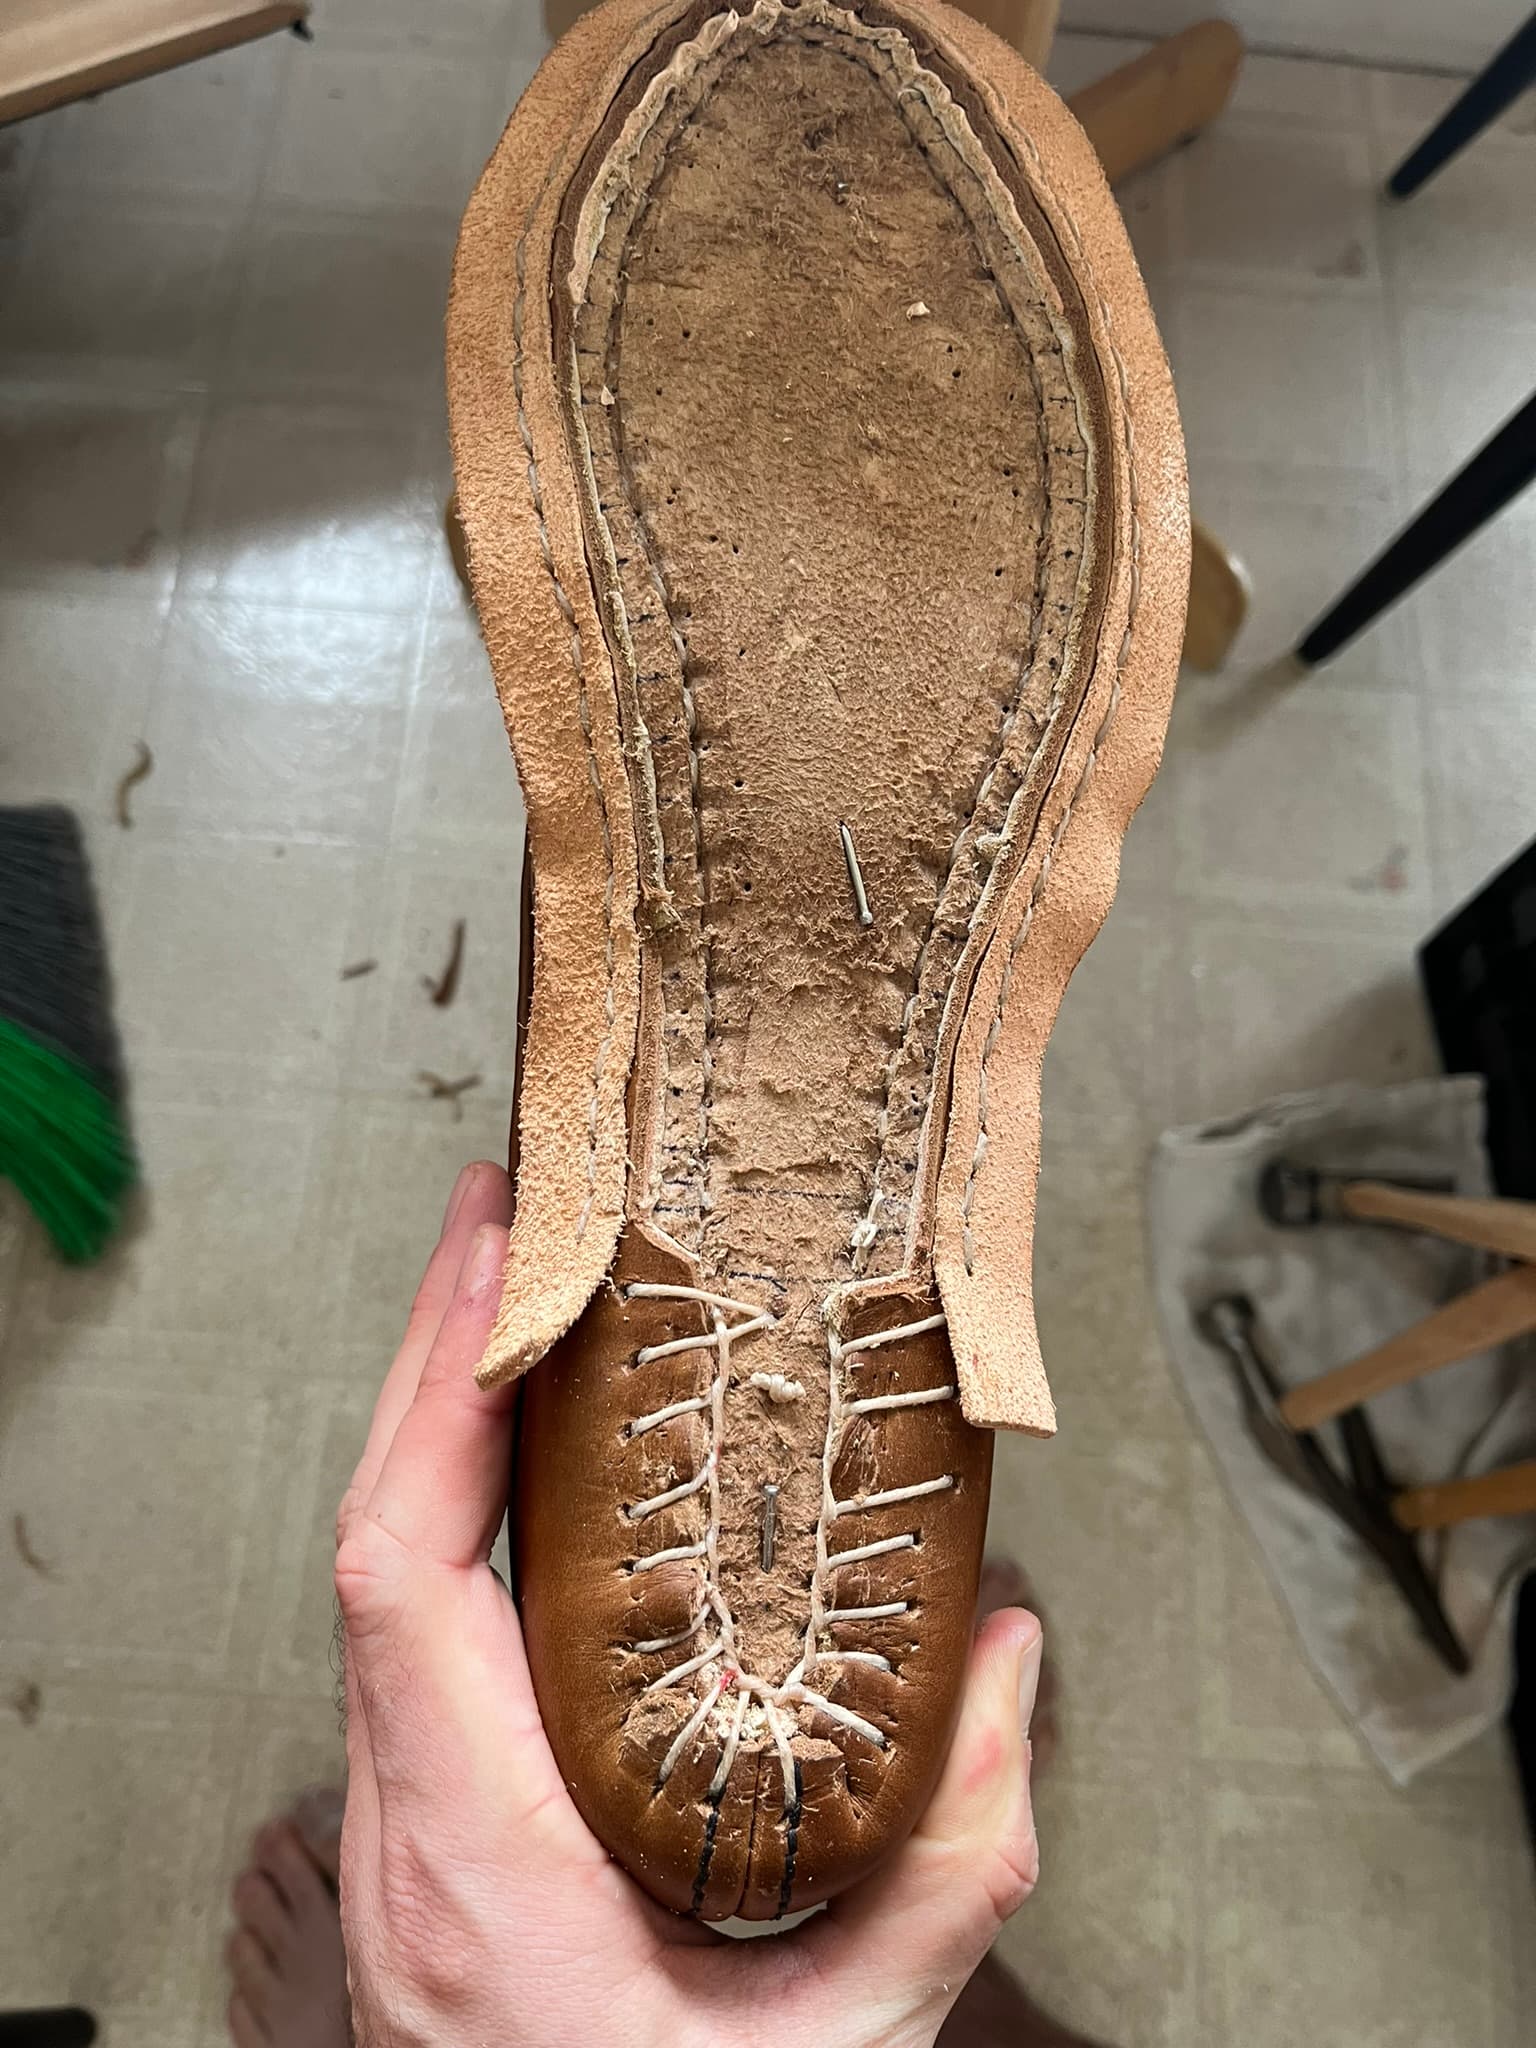
This would have been even worse than welting using the other insole leathers I’ve tried so far. This was a pleasure.
My first time using the #3 awl from Dick, as well. I was trying hard to remind myself not to pry the awl. But it was reassuring have a slightly thicker one plunging into the leather like this.
I decided to try a different heel seat stitch that I first saw in a terrific video series showing Anthony Delos make horse riding boots. It’s a kind of twisted whip stitch, but with two needles.
Once I got the rhythm, it went very smoothly. I found it really helped to take some pairs of rare-earth magnets and stick them on the inside and outside of my sweatshirt, creating two little magnetic perches for the needles when I wasn’t holding them.
Having struggled my way back to bent harness needles, I used those from the get-go on the seats. I also went down to the thinnest width I have, some 517-3s, which I believe are 20 gauge.
I now understand far better why I see so many makers feed the needles back and forth through the holes at the same time, before pulling any thread through. The hole will simply never been less crowded, and to a limited extent you can use the first needle through to guide the second, coming the other way.
I used the shorter 72" Maine Thread tapers for the seats, and they were more than enough to do the job, but not so long to get tangled. I’ve been making boots for my own feet so far—11½″ long, heel to toe—so I’ve needed the longer 110" tapers for welting. But the shorter ones did fine for the seats.
Mistake: Should have trimmed the lasting allowance in more on one side.
The photos will show a lot more upper leather sewn in on one boot than the other. Once again my stapling too far in from the featherlines got me. I should have trimmed both like I trimmed the second. It didn’t stop me from sewing the first, but the cavity for the shank is going to be very thin on that side.
Mistake: Inconsistent hole placement.
Once or twice, I plunged the awl too far out toward the featherline. Hopefully it’s all covered by the rand.
Mistake: Not terribly accurate plunging with the awl.
I wasn’t getting the awl to poke out exactly where I wanted it about half the time. Fortunately, when I missed, I always overshot, rather than coming back out through more upper material.
That’s clearly on me, and probably gets resolved by practice. But I’m thinking now that I should check whether the curves of the #2 and #3 awls are the same. I’m guessing they’re the same, and that Dick thought about that years ago.
Trying carbon fiber shanks.
Inspired by an Andi’s workshop video, I decided to try laying carbon fiber shanks for this pair using a kit from Amazon.
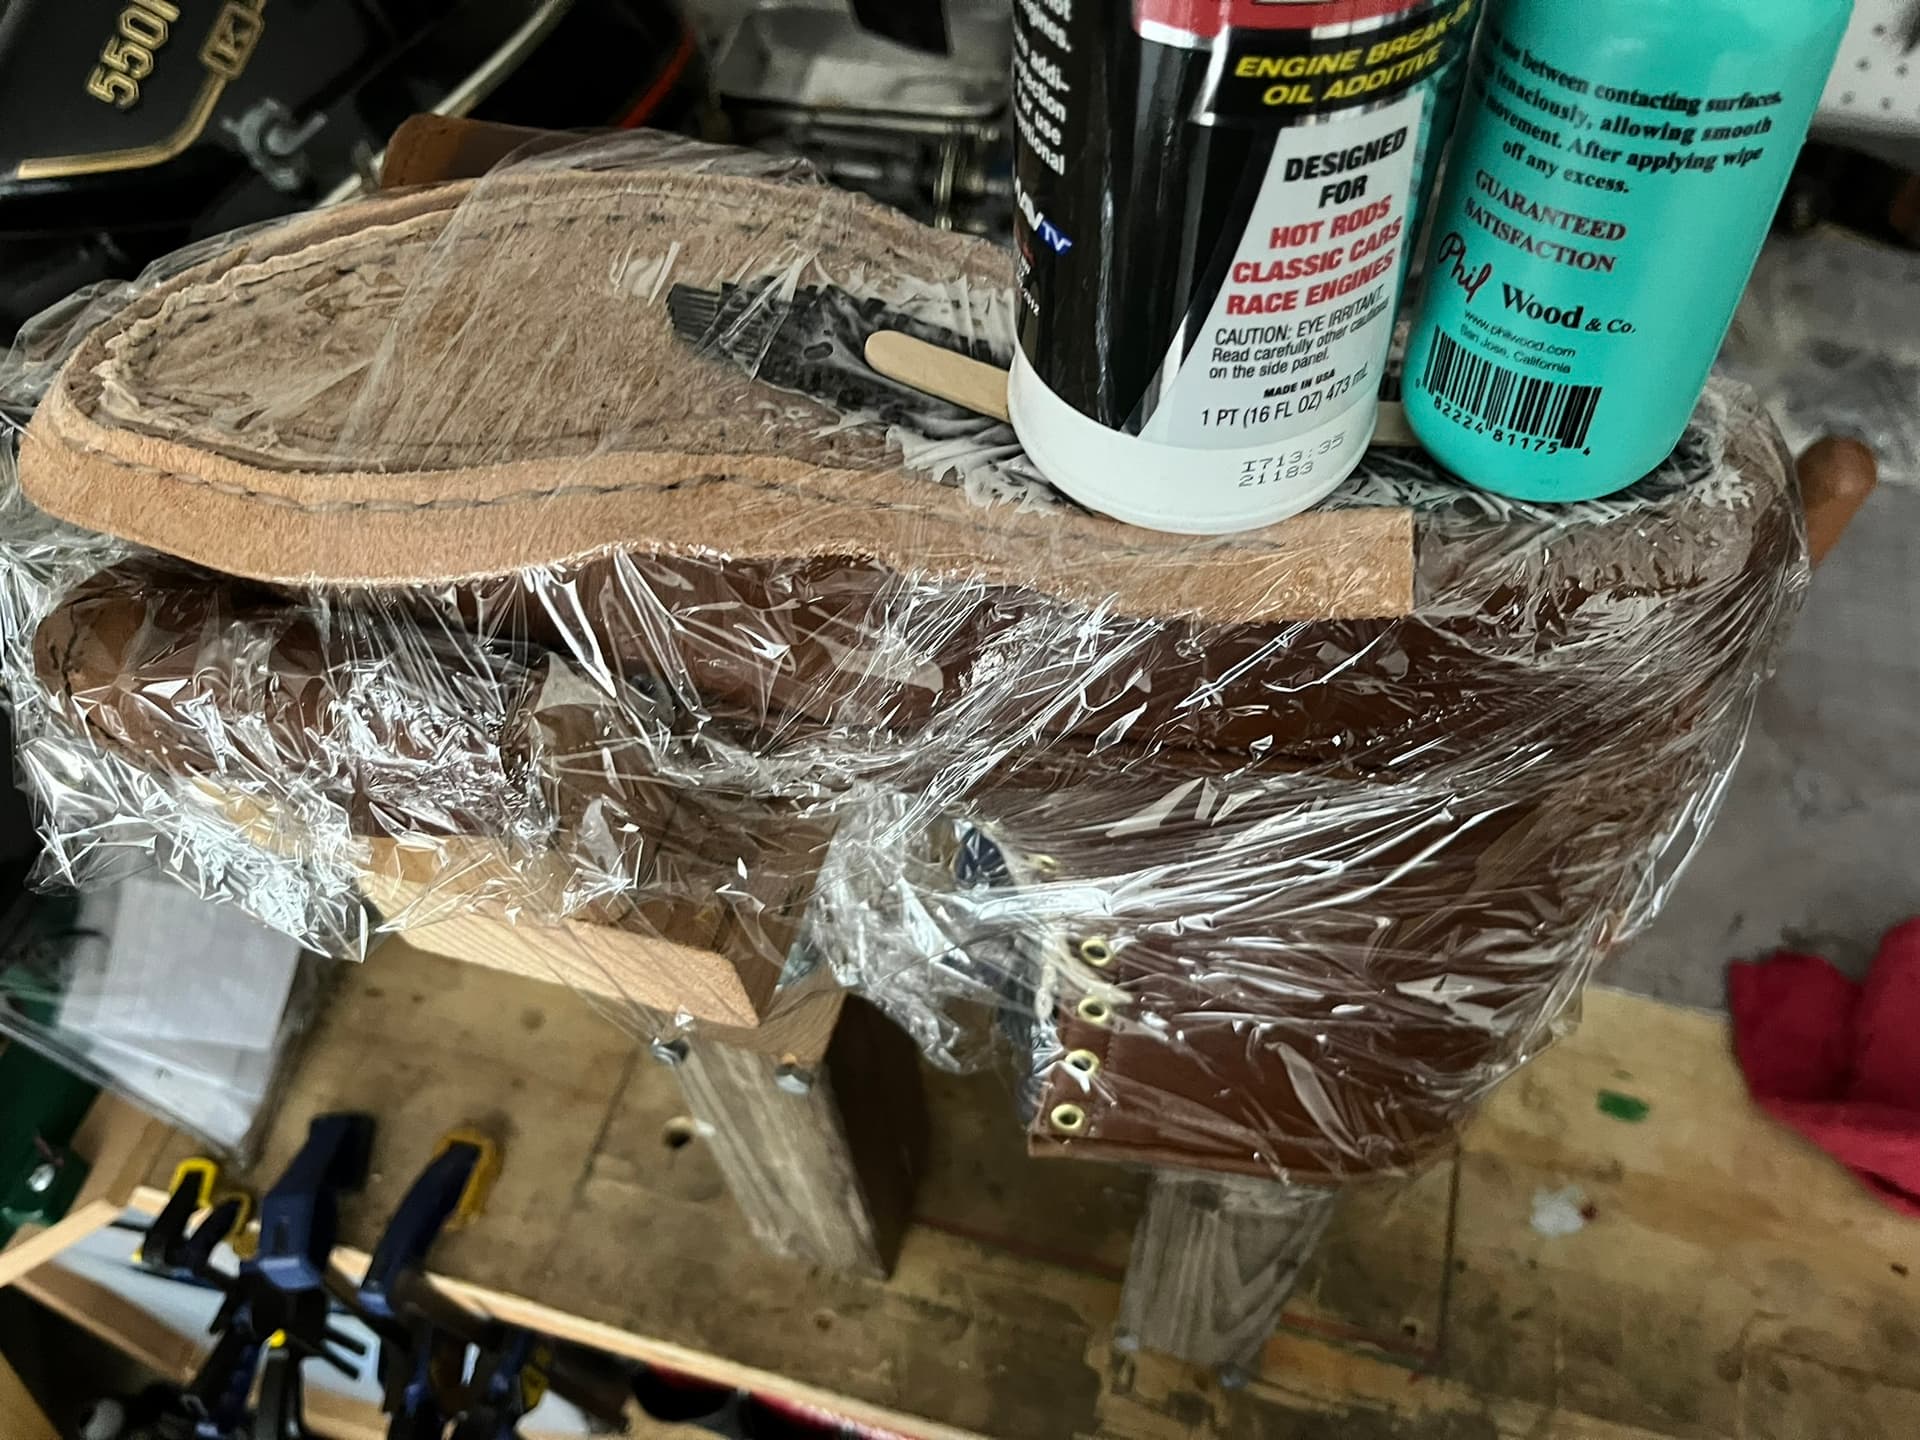
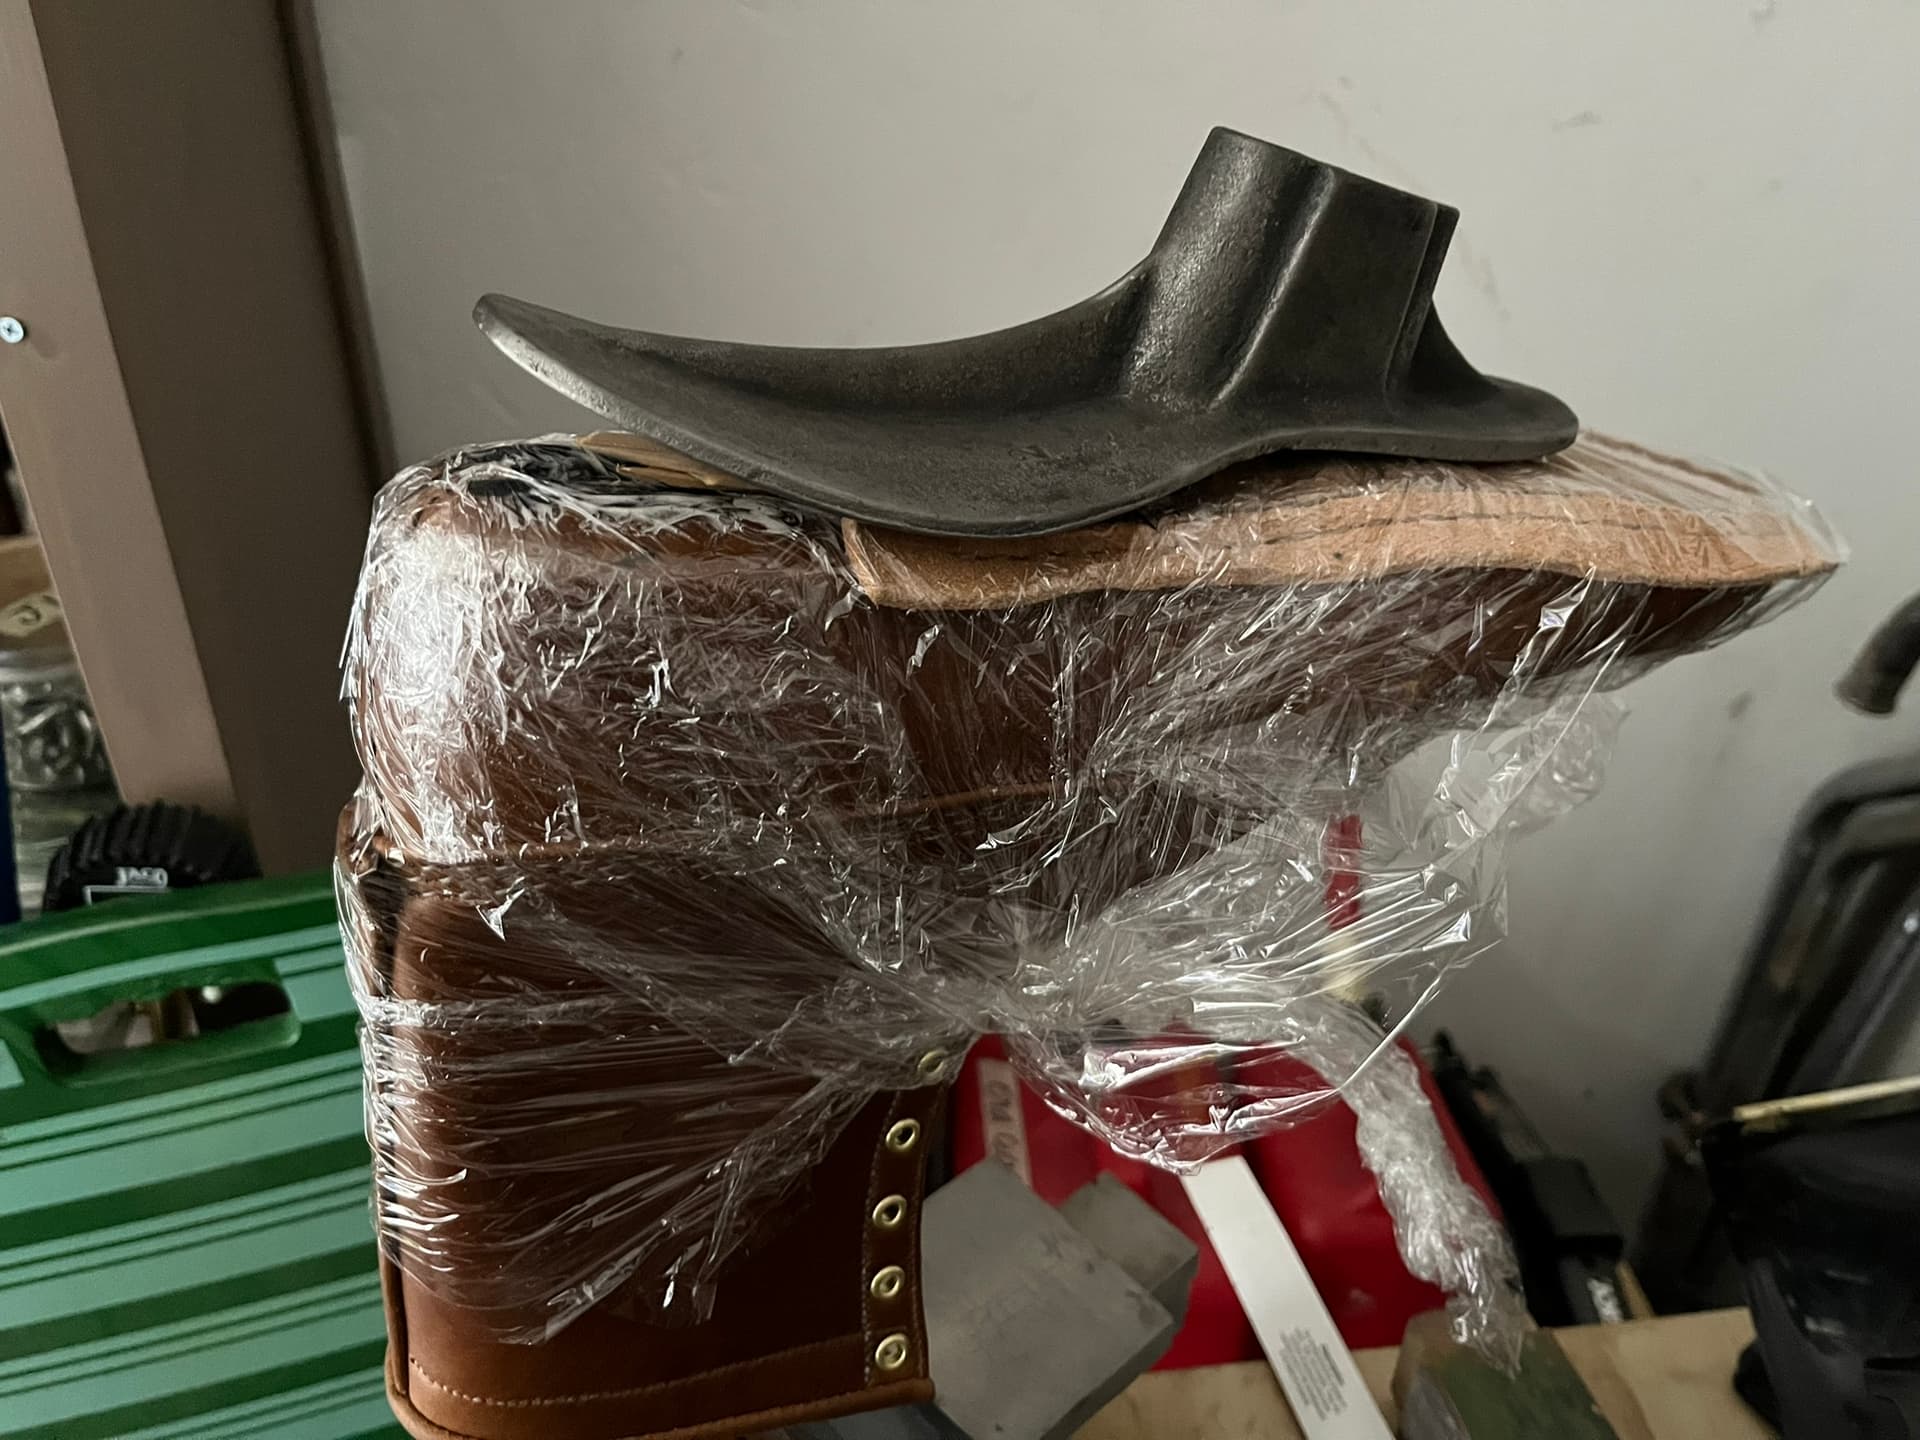
My approach was to:
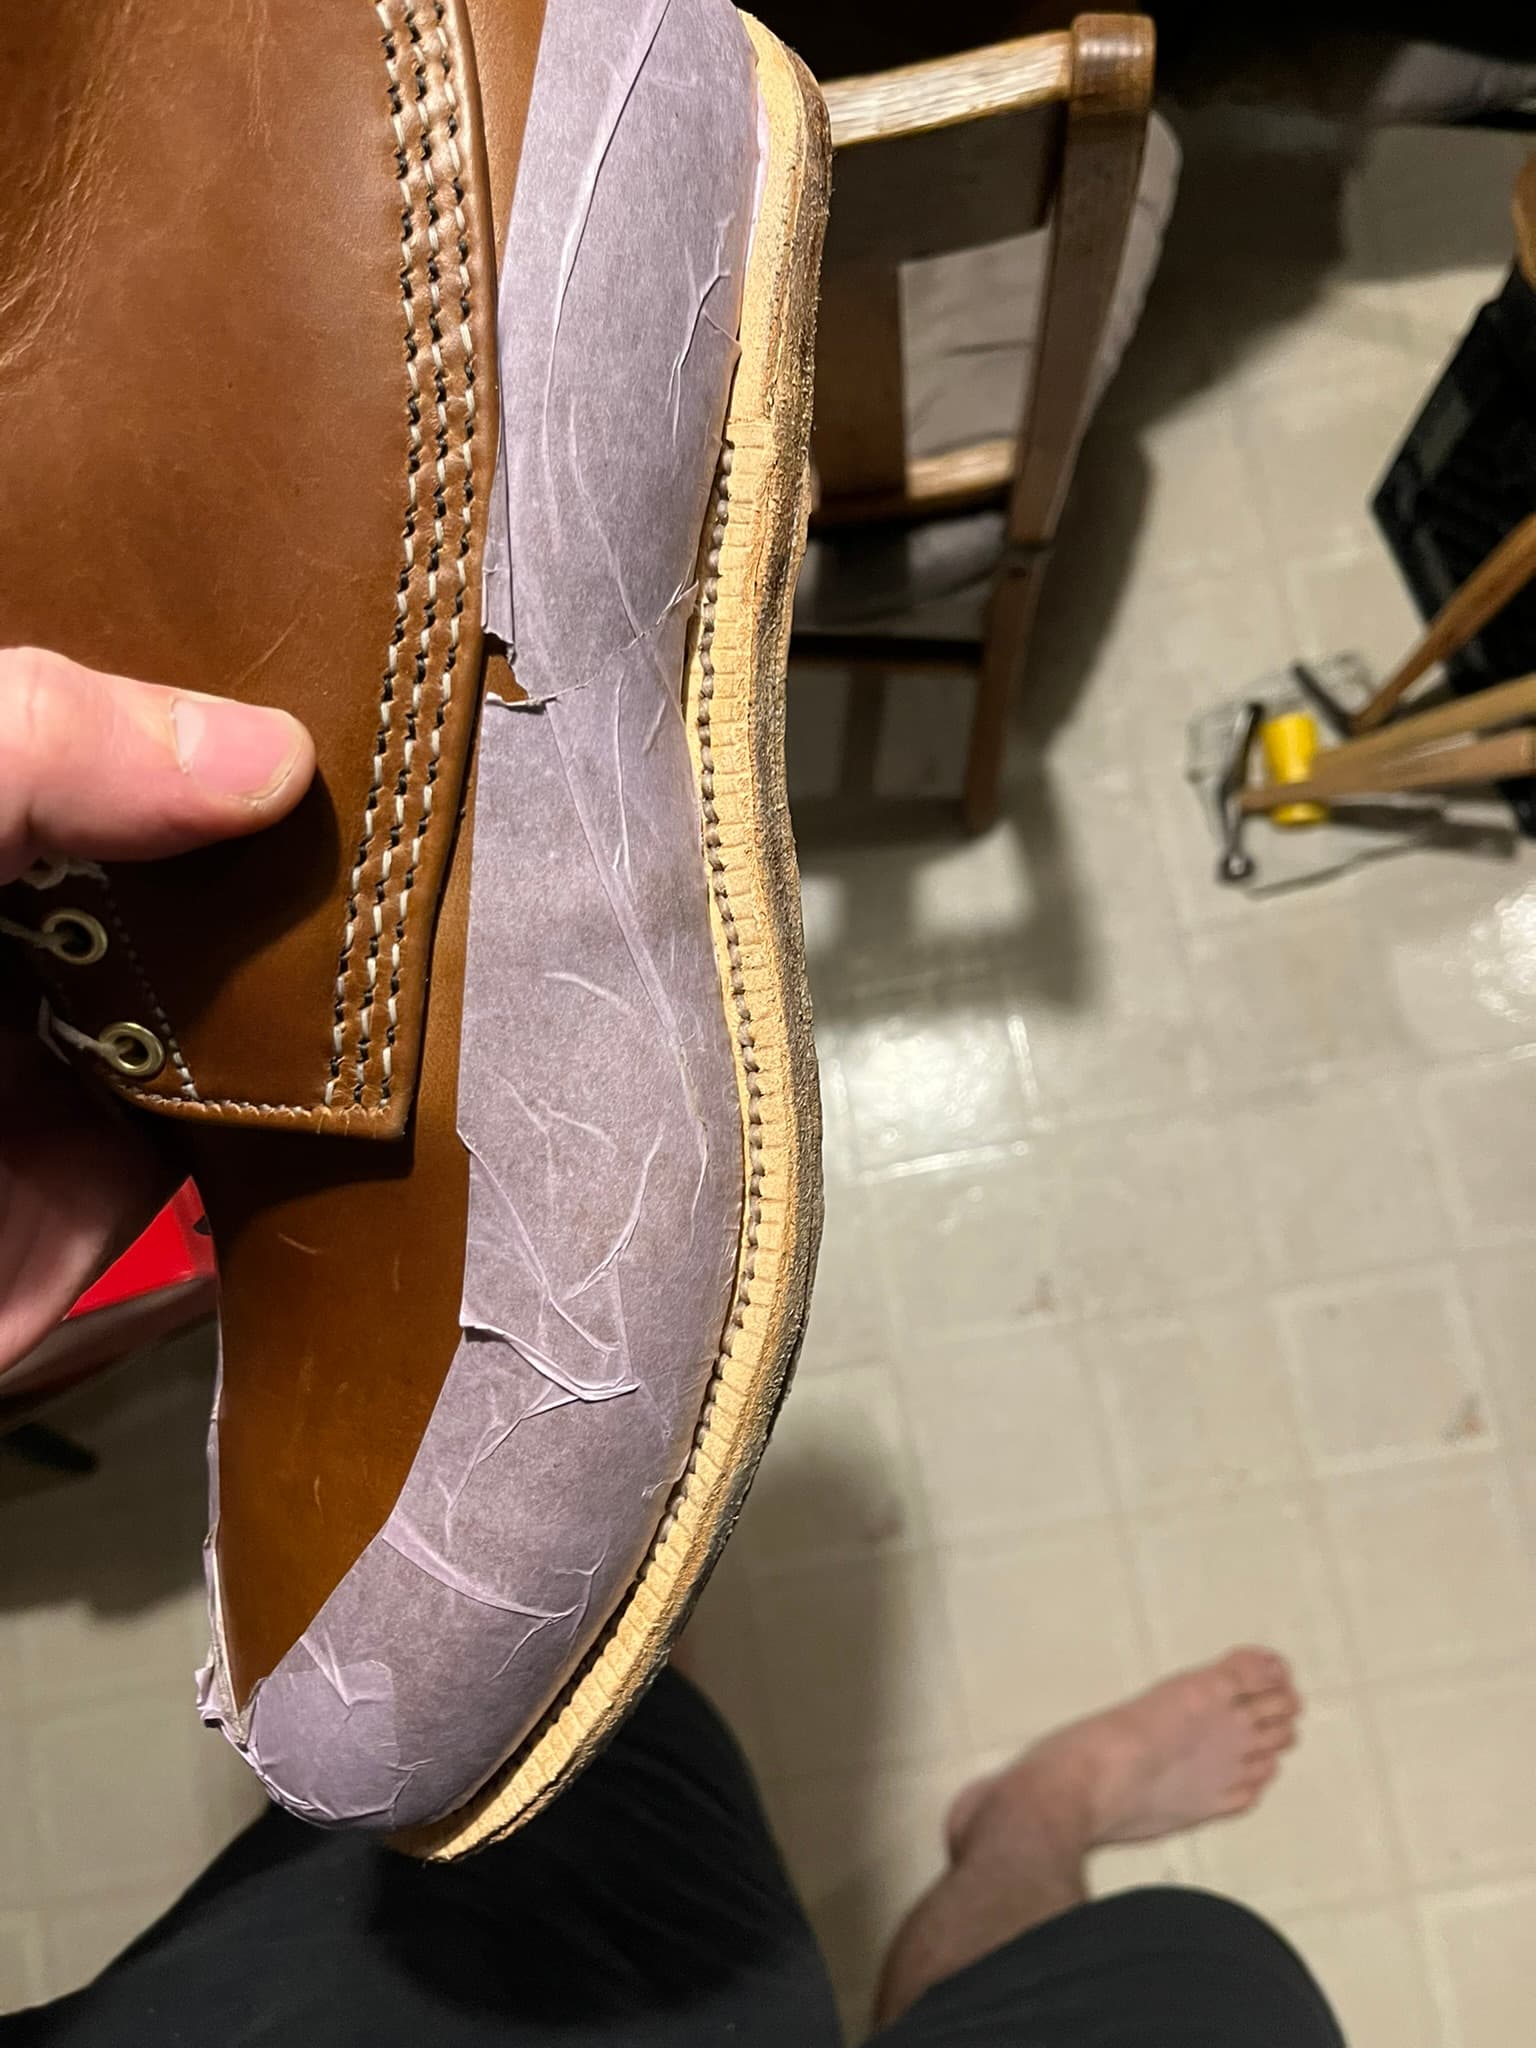
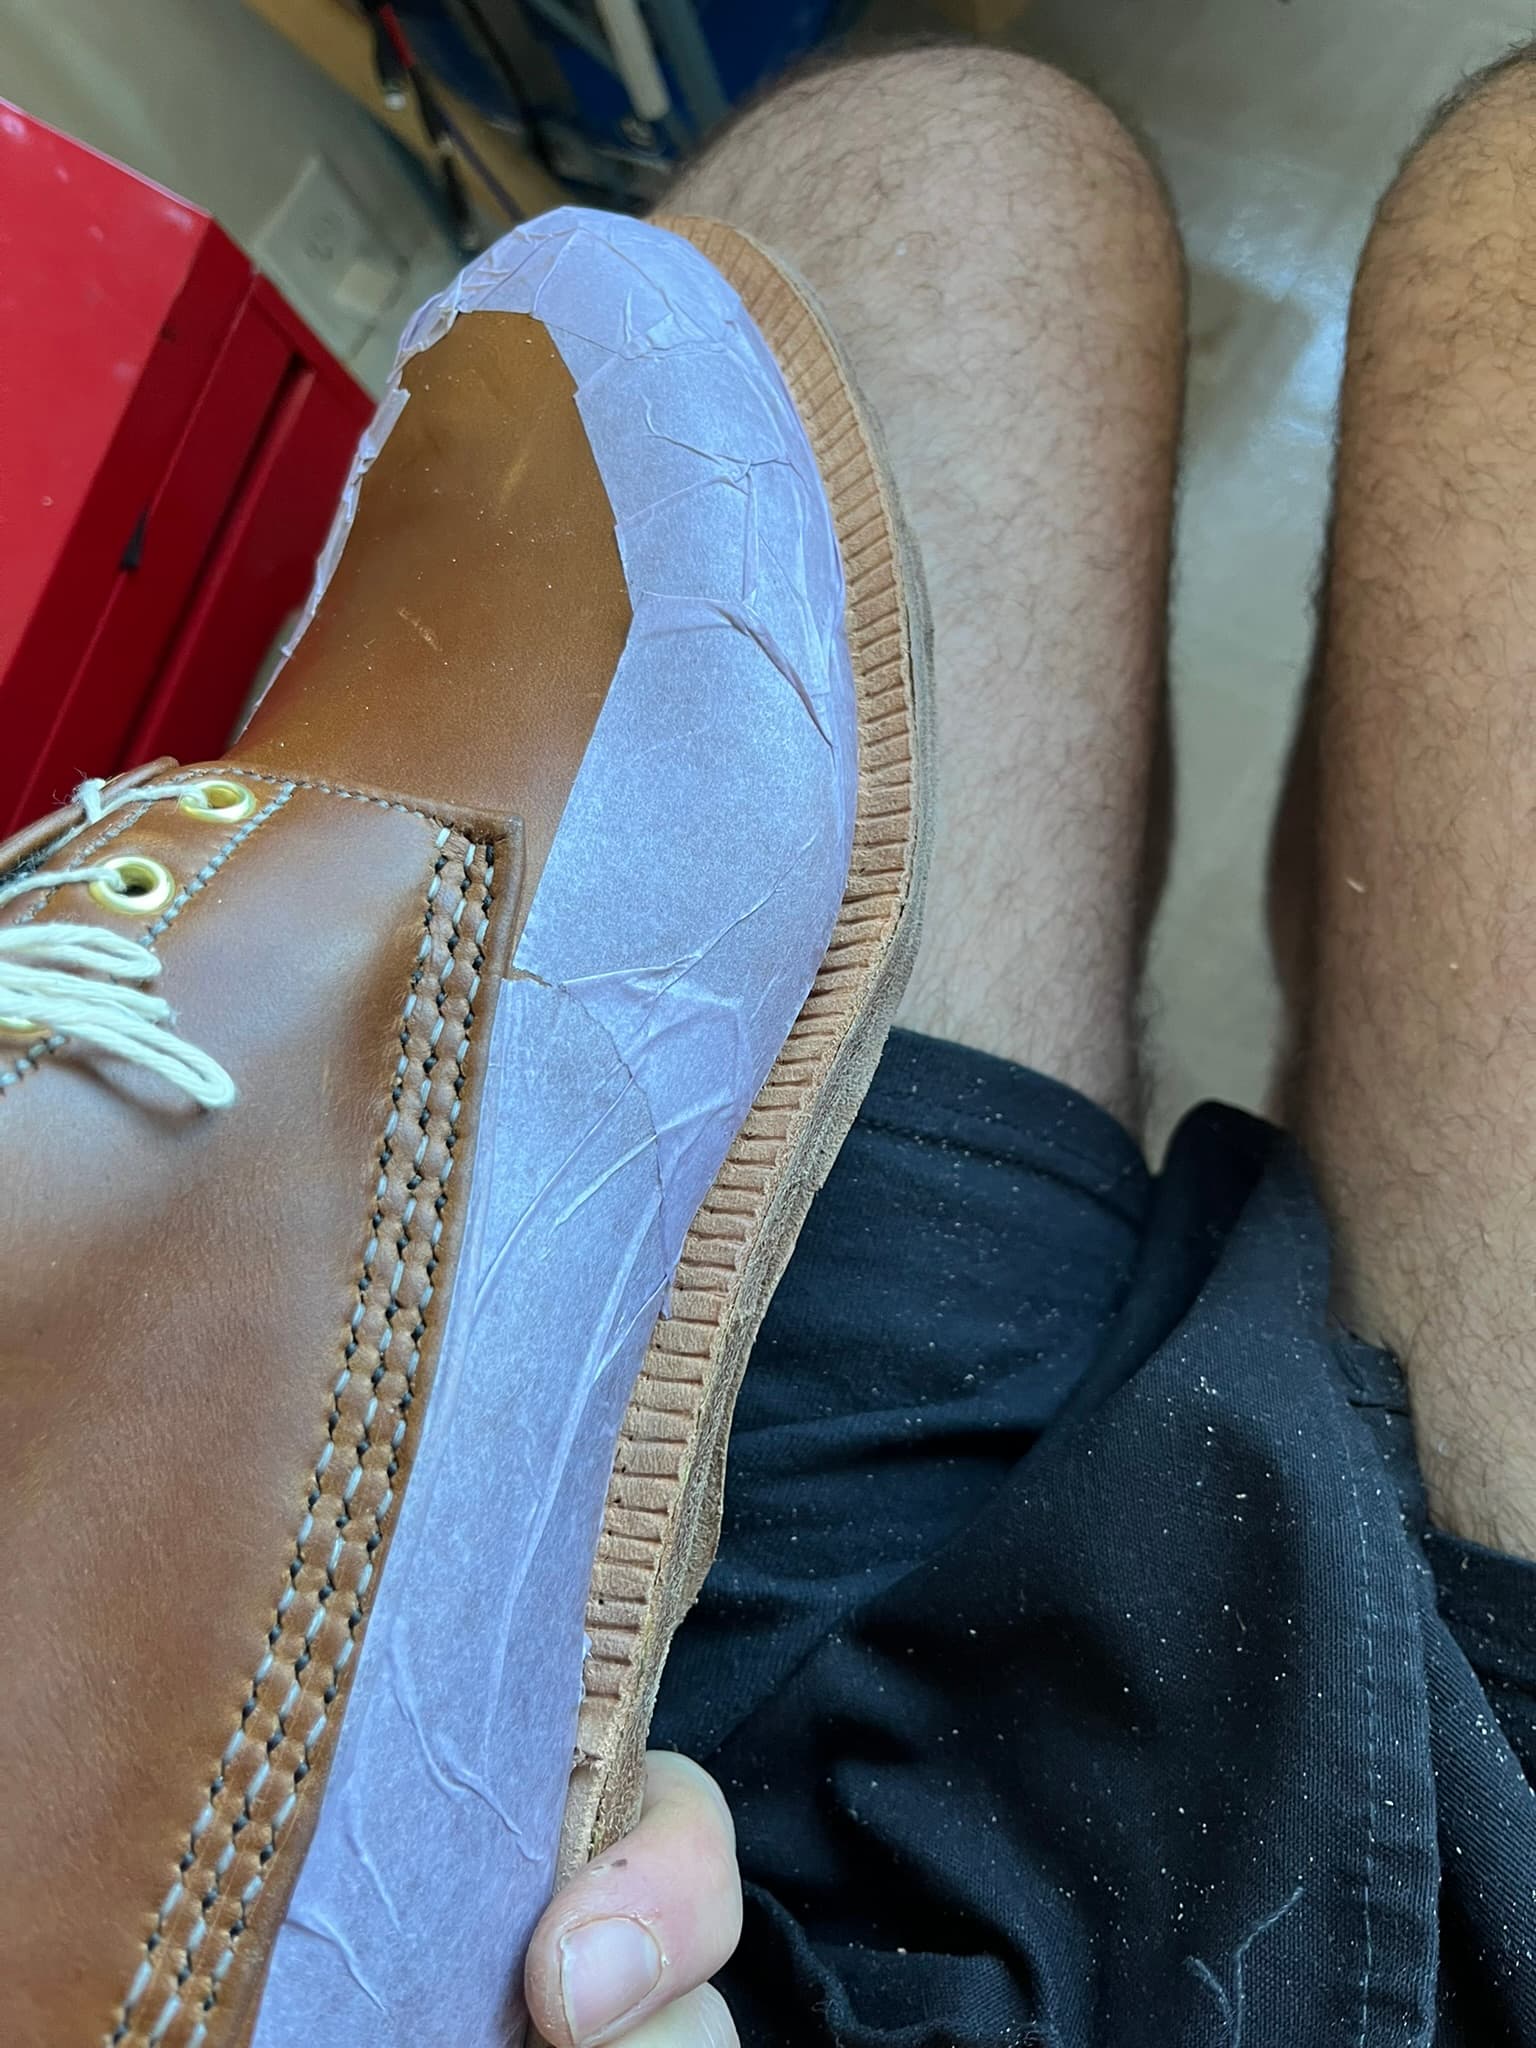
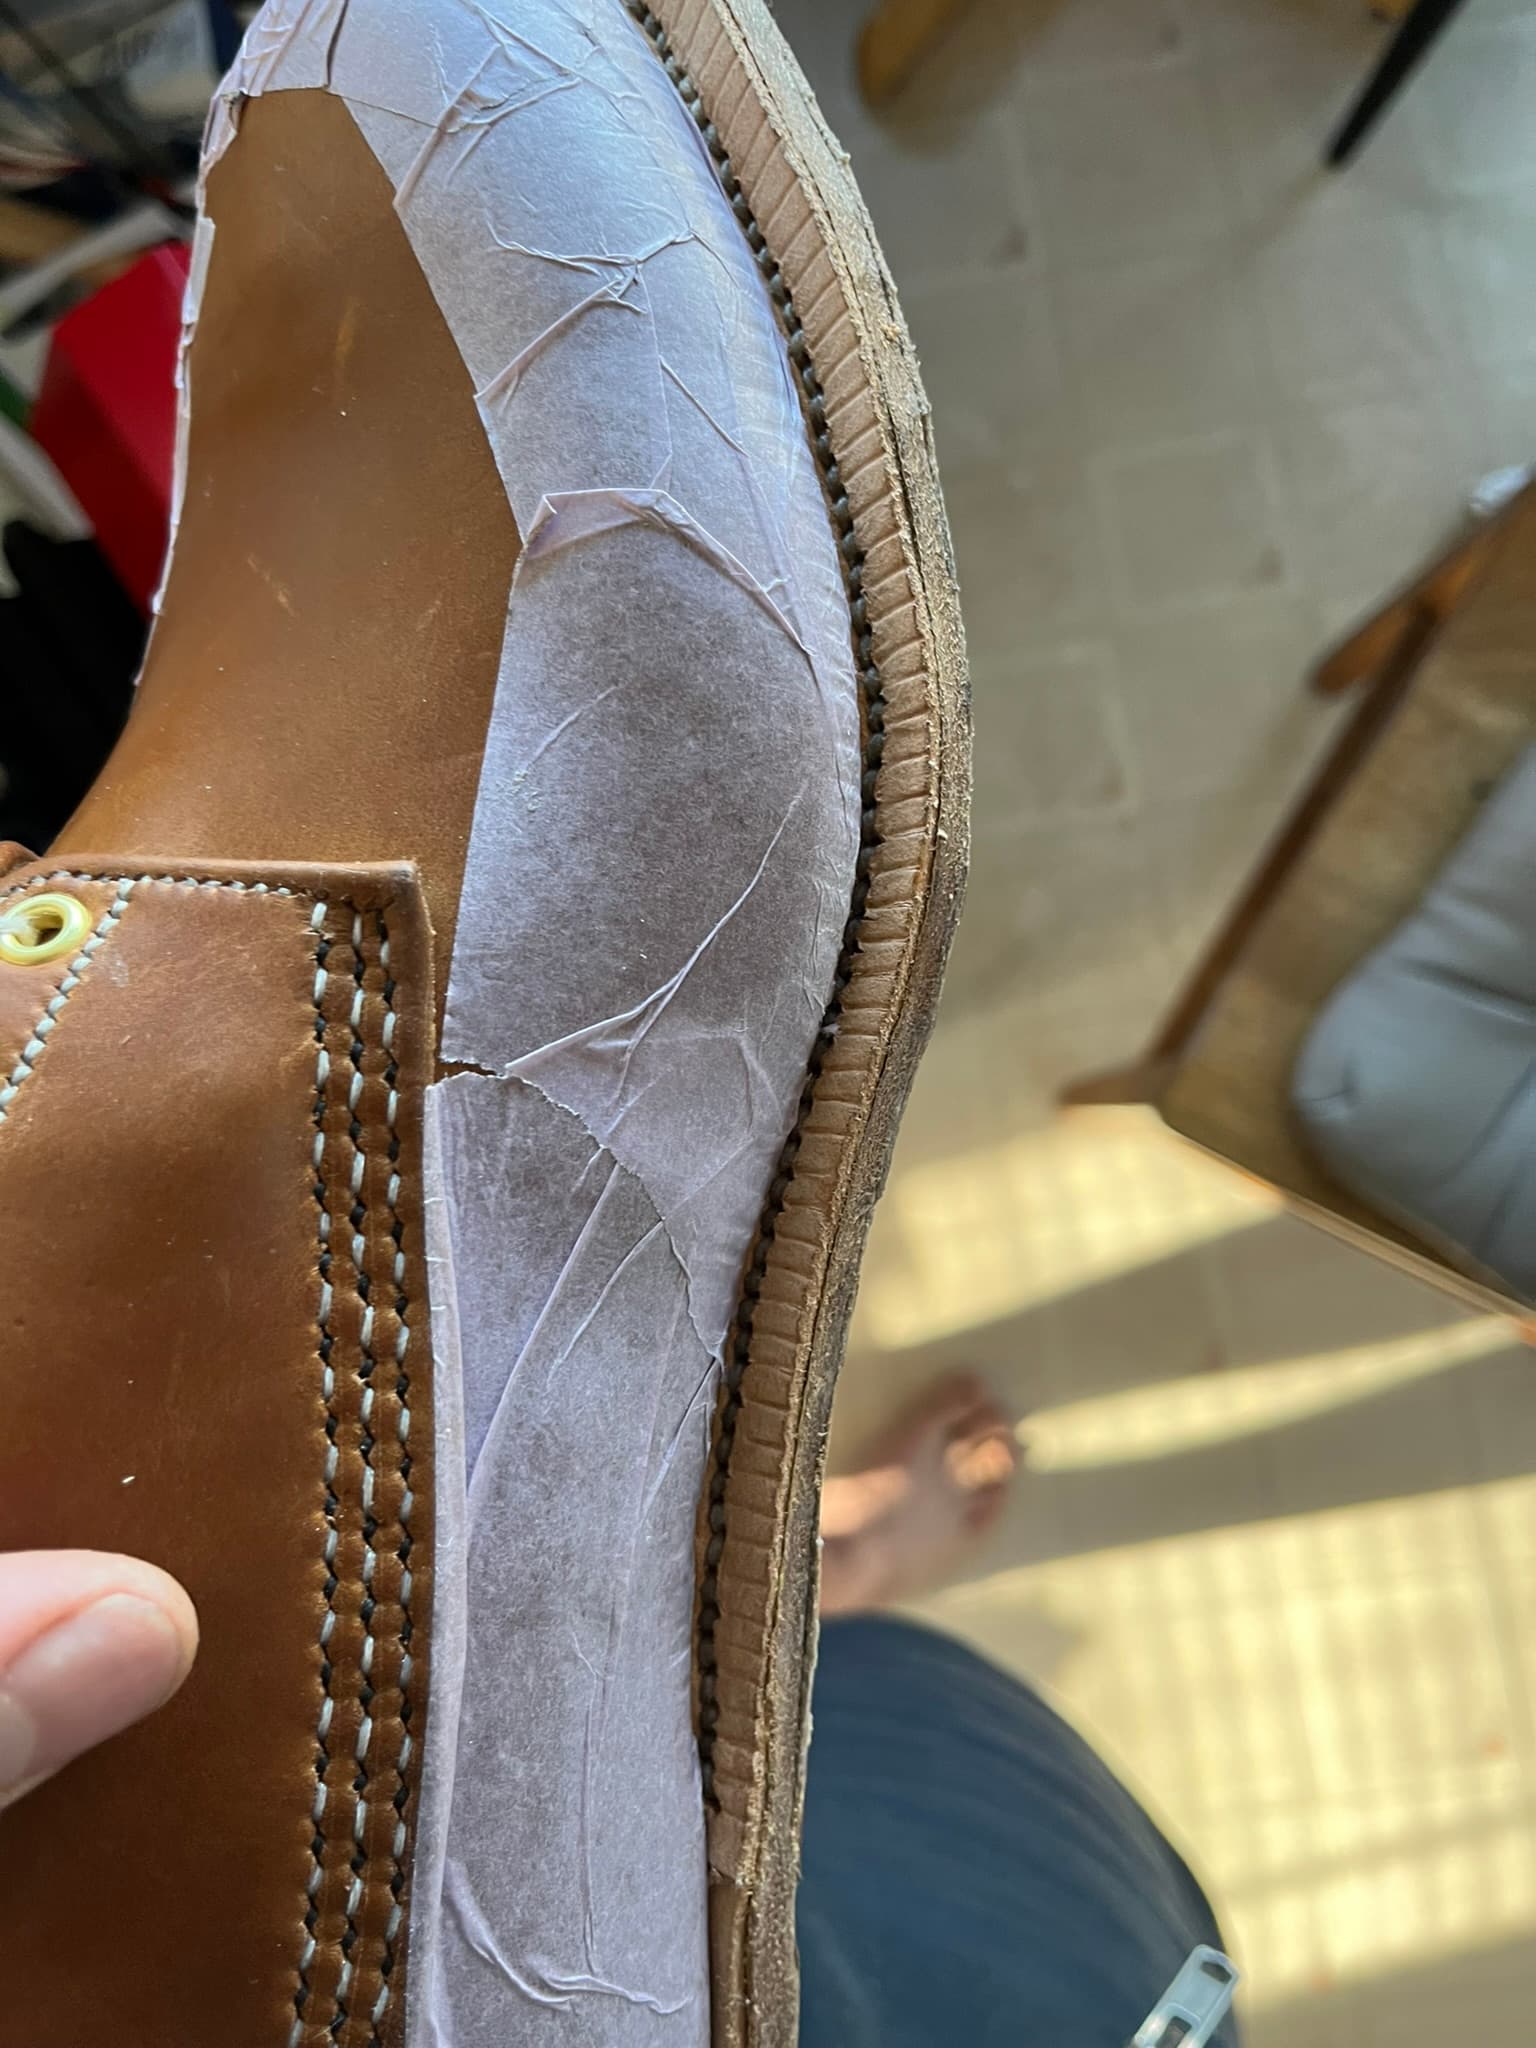
- Cover the bottom cavities and shafts in kitchen plastic wrap.
- Lay on a bare layer of carbon fiber.
- Paint on epoxy.
- Repeat to three total layers of carbon fiber.
- Wrap the top with kitchen plastic wrap.
- Weight down so the shanks cure pressed into the cavities.
Mistake: Used coarse woven carbon fiber.
I did right buying a kit with a roll of carbon fiber plain weave roughly 6 inches wide. That proved a handy size for cutting layers running from heel seat to ball. But the thickness of the ribbons the fiber sheet was woven from made it difficult to cut the small strips. The wide ribbons also tended to pull apart, both while cutting and while painting with epoxy.
I am learning that I do not at all enjoy waiting two days for carbon fiber to cure at this stage of the bootmaking process.
@twand mentioned that he has some leftover fiberglass shanking kits left over. I suspect those may offer all the fitting benefits of laying carbon fiber with much less mess and shorter cure time.
Carbon fiber shanks done.
\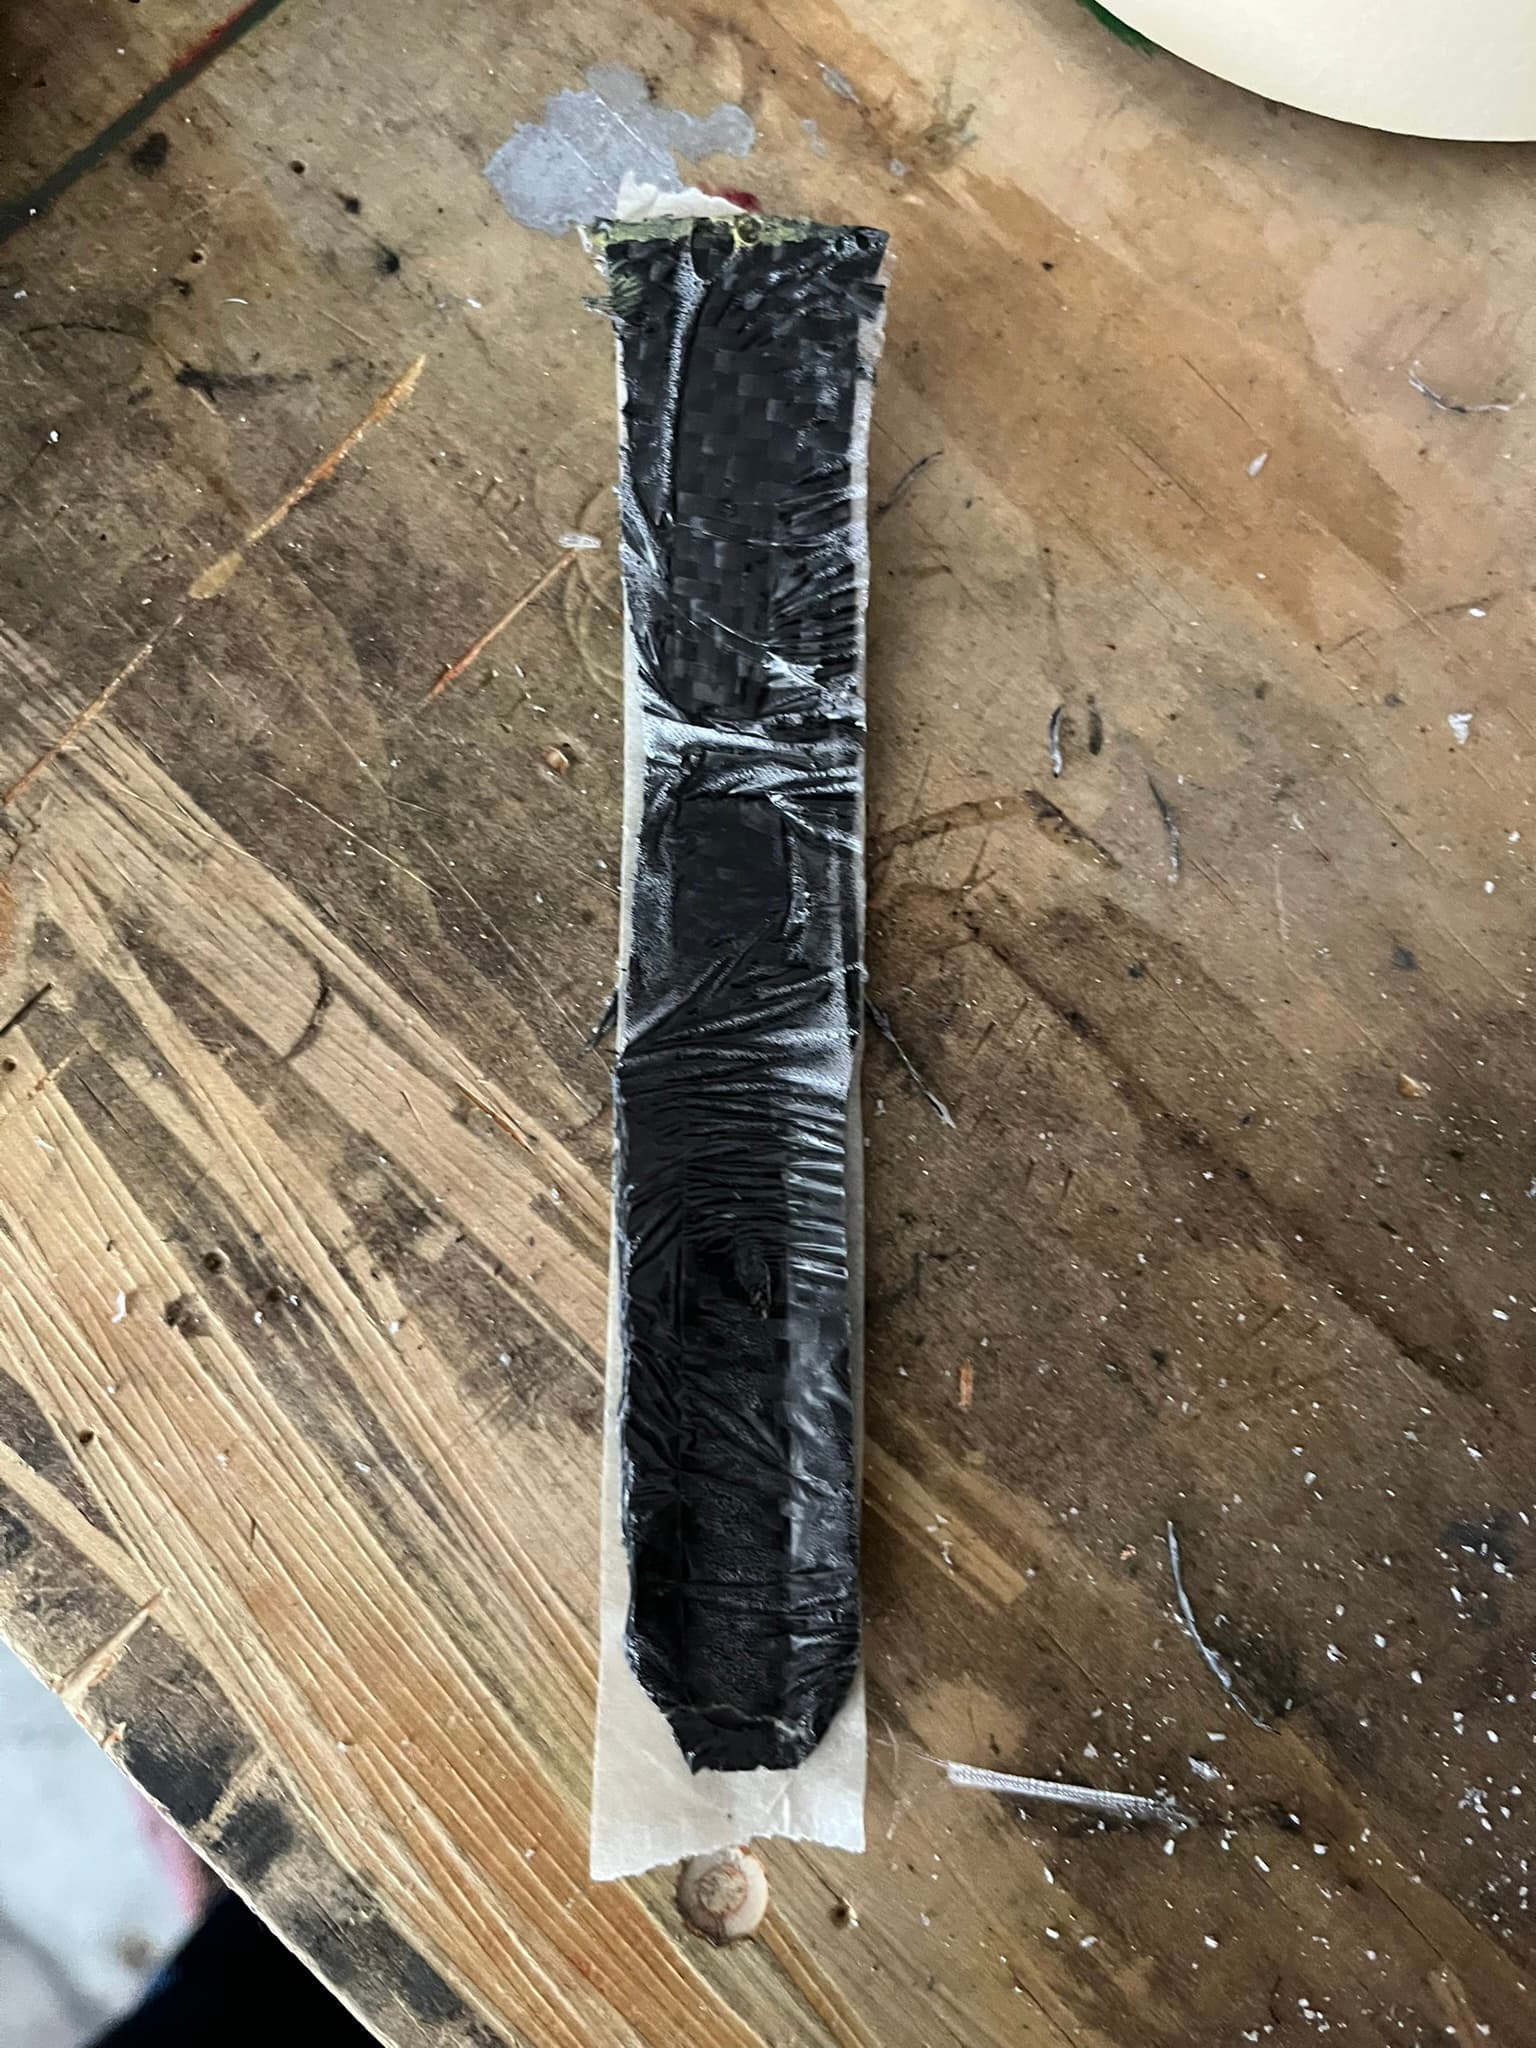
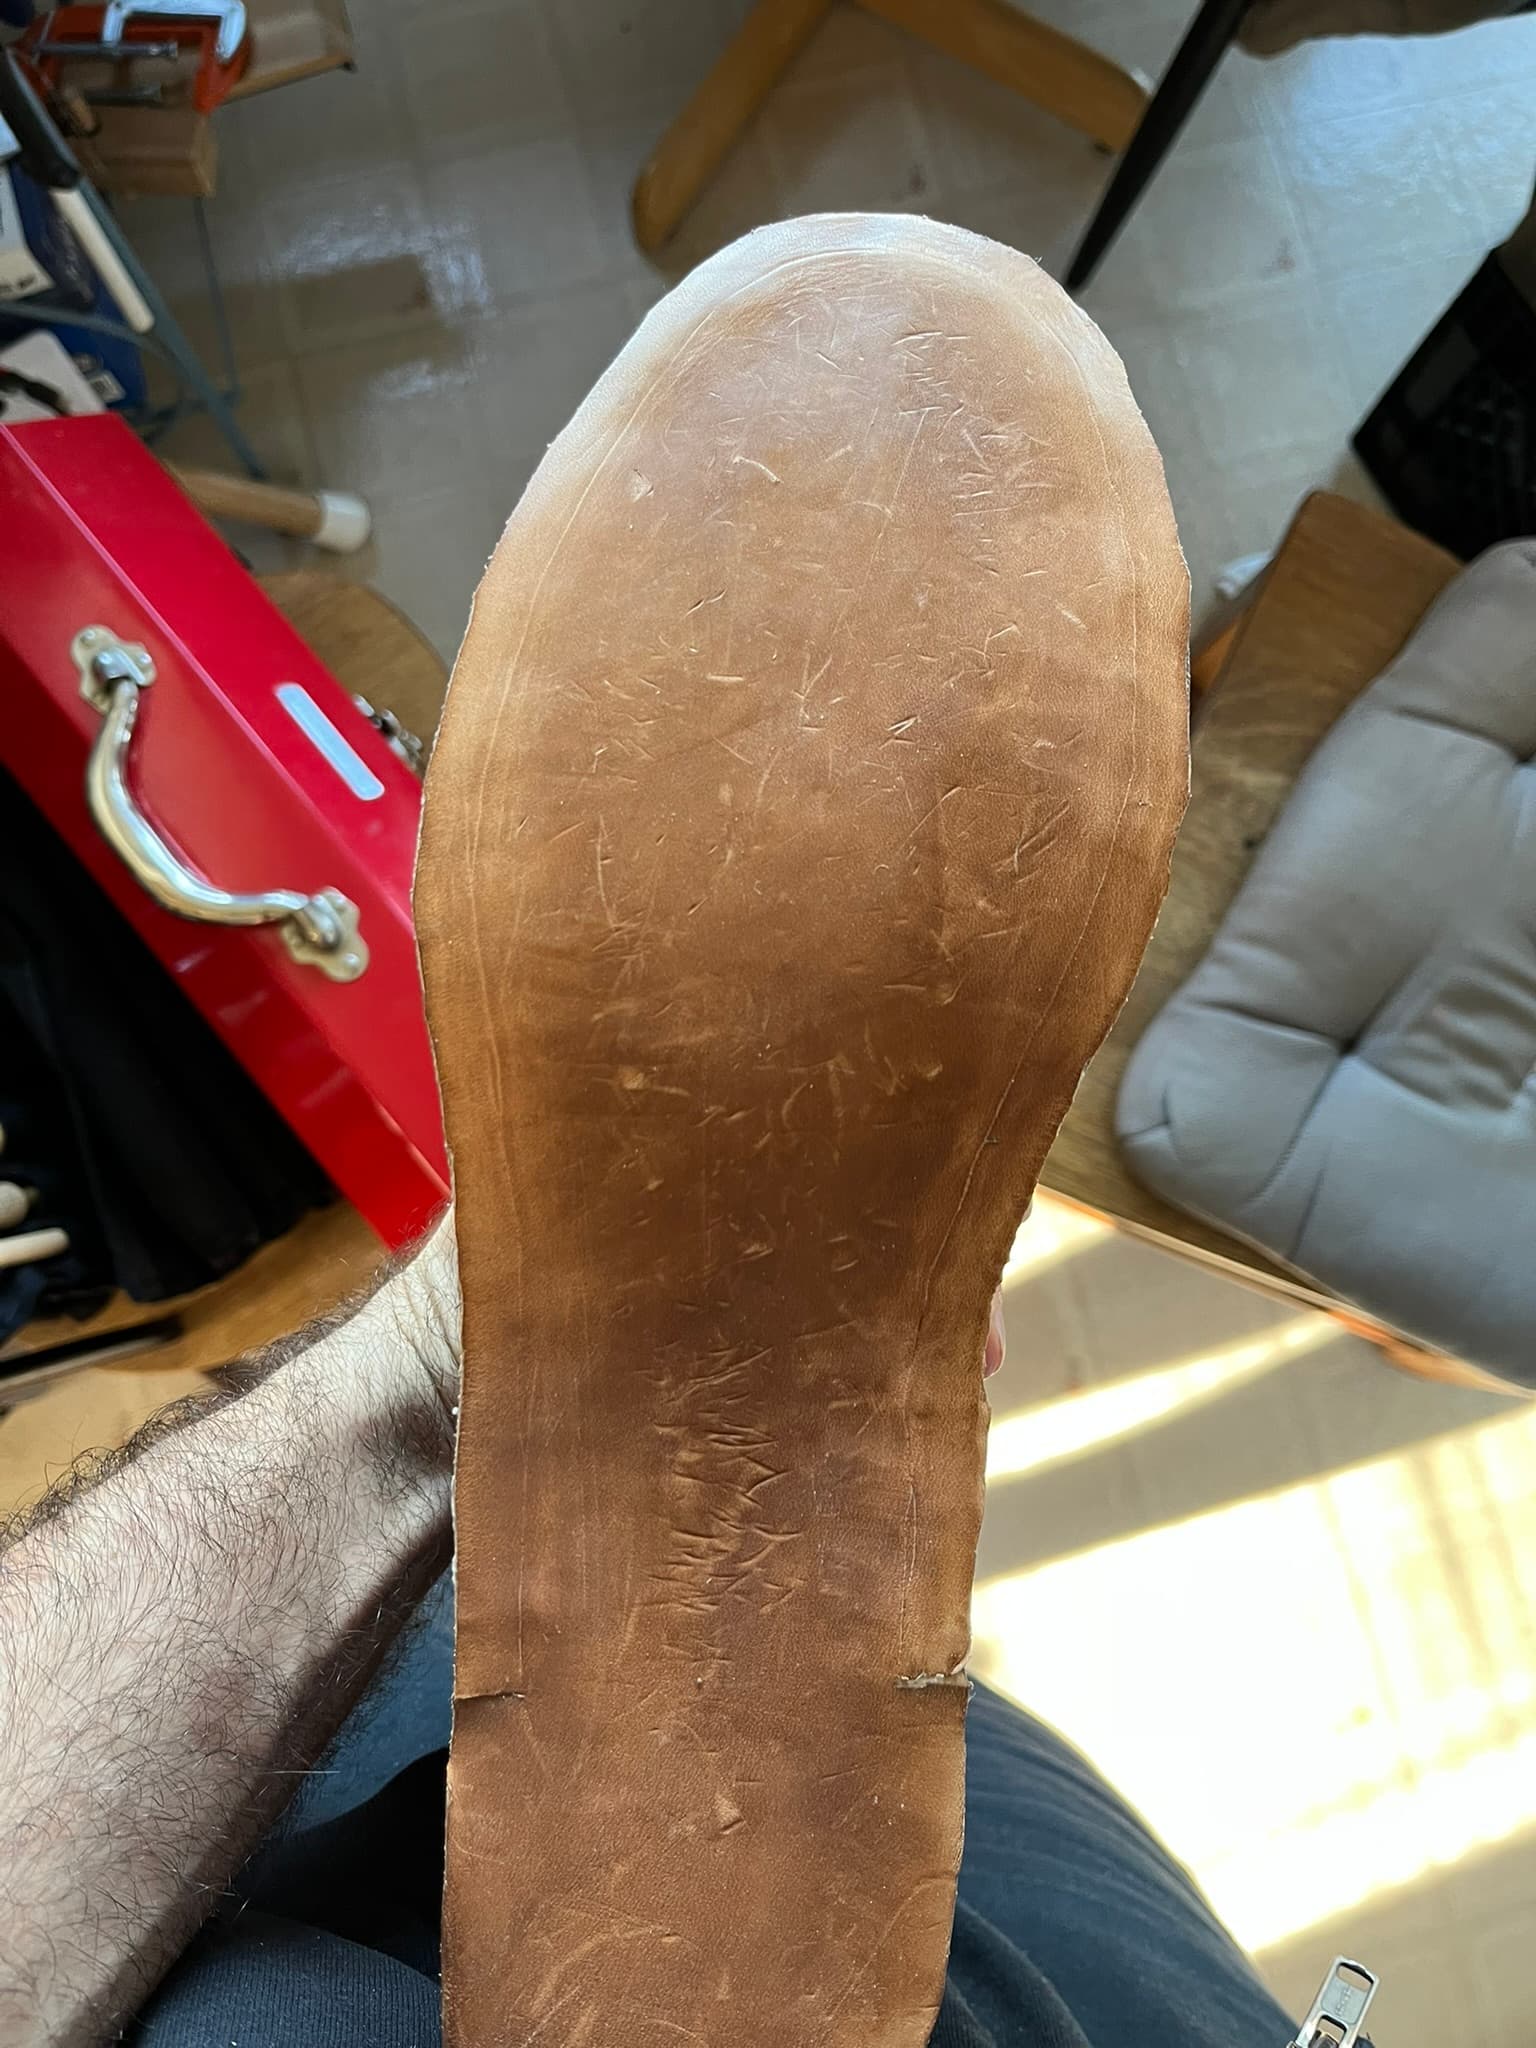
As I expected, the carbon fiber shanks laid over plastic wrap needed some significant trimming. I found a coping saw and a bastard file worked best. It’s messy.
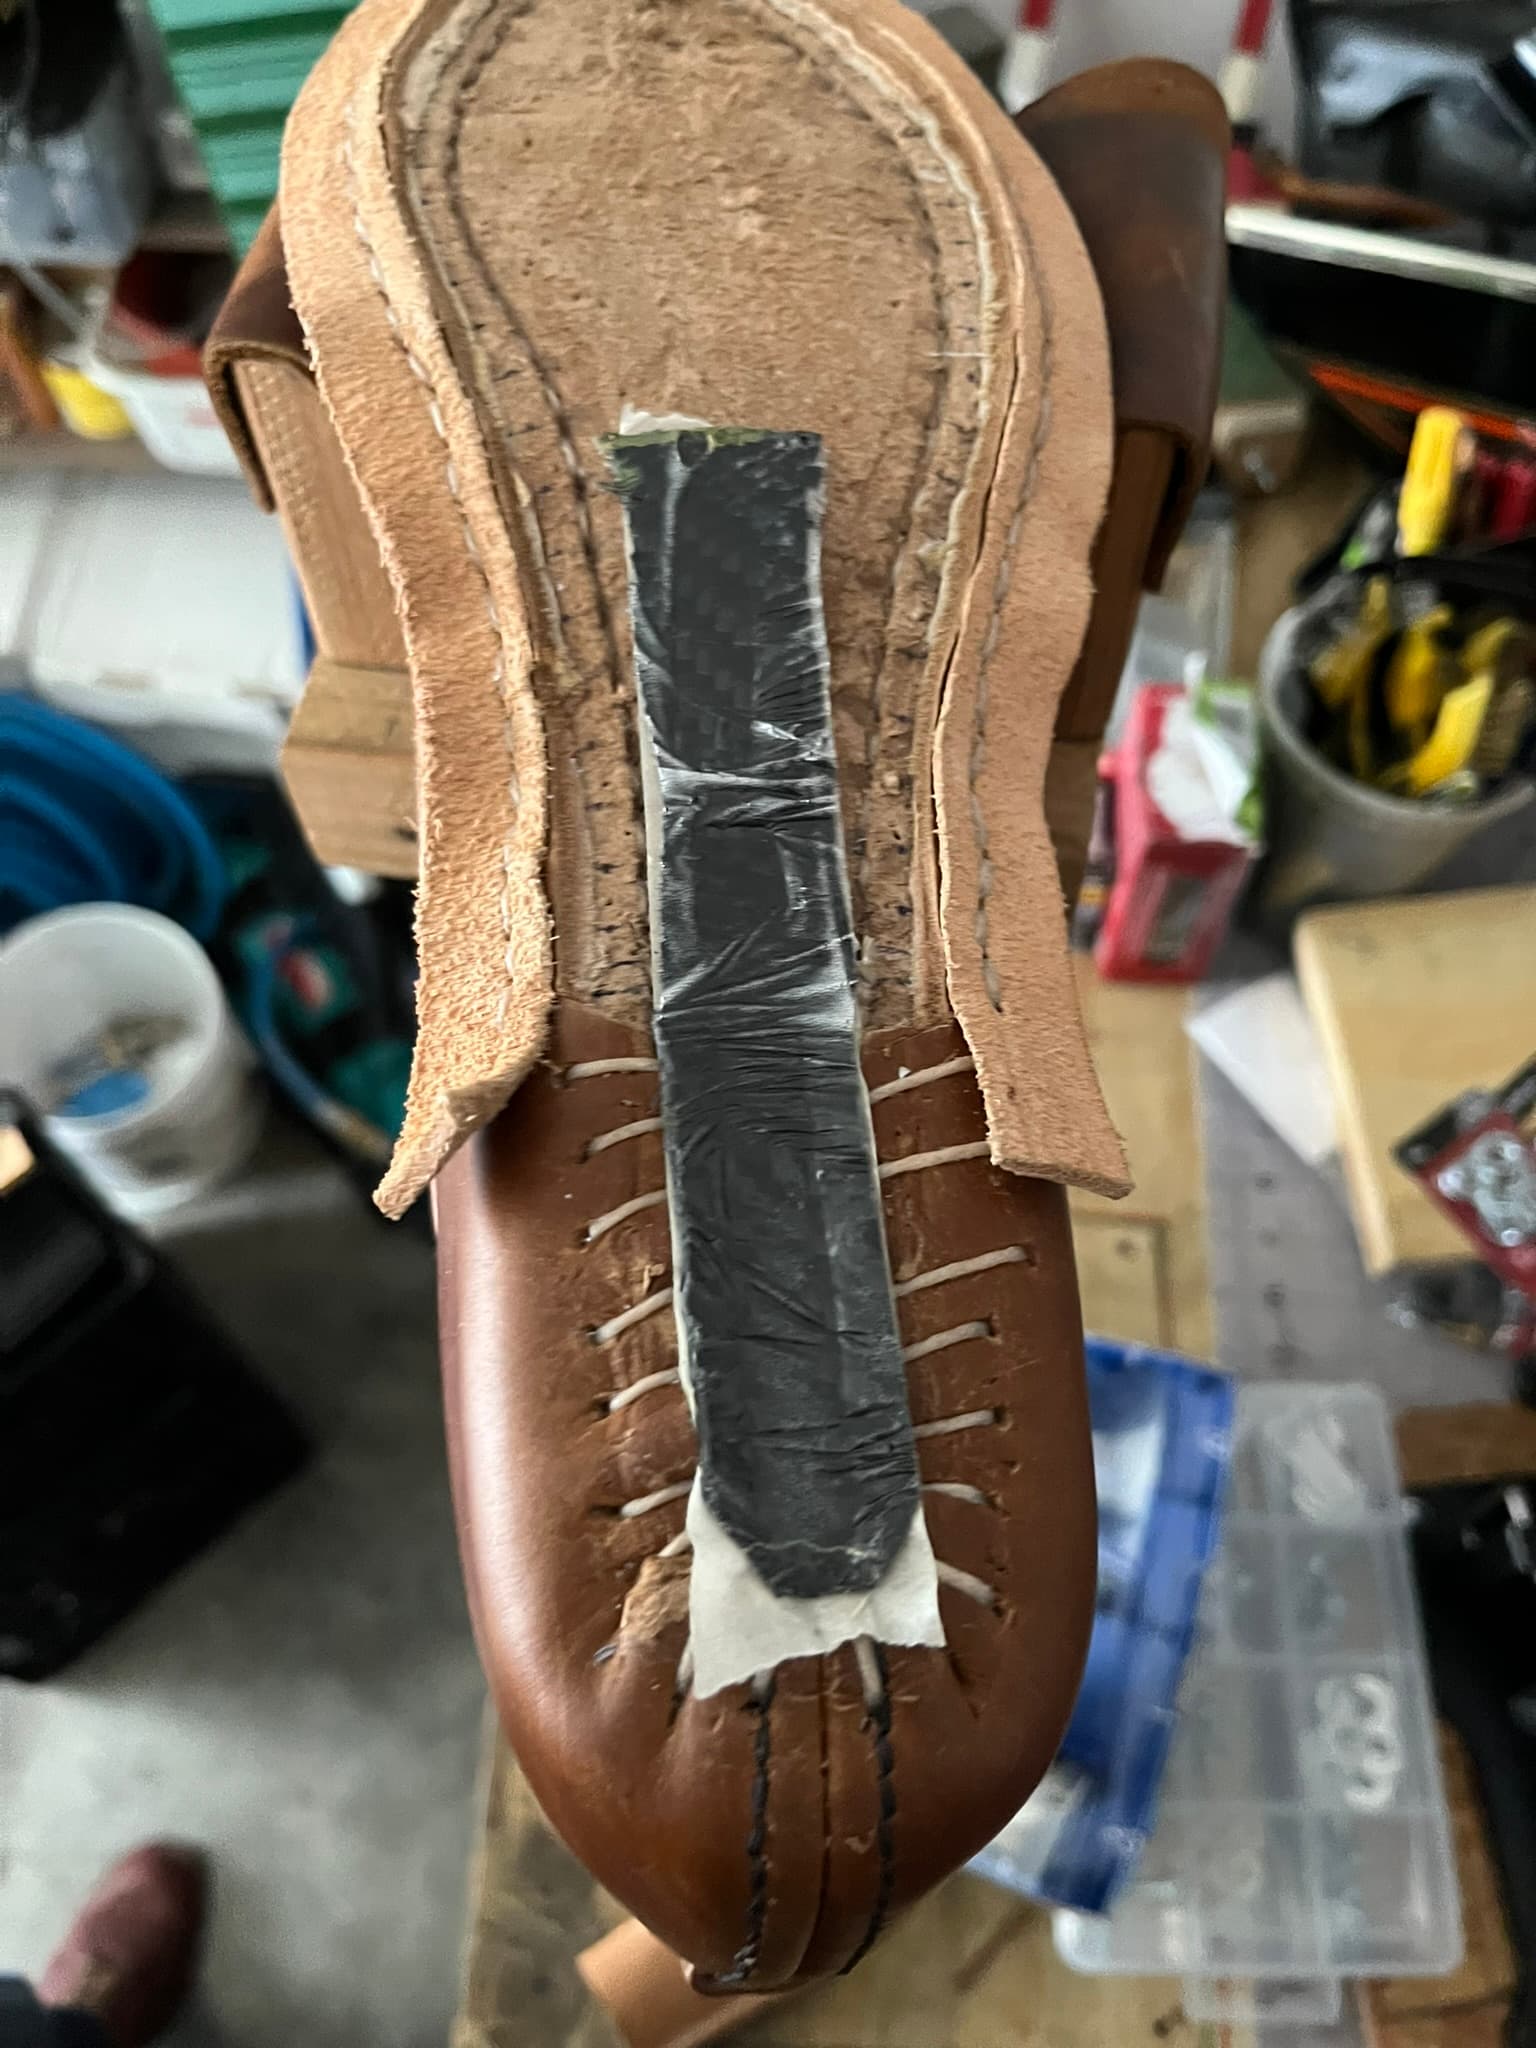
There is definitely a reassuring feeling putting these shanks back into their places in the cavities. They were formed there exactly, so I felt them click or snap back in place.
I was worried that fit might be compromised by wrapping the shanks in tape, for a better gluing surface. Fortunately, that wasn’t the case. The paper tape didn’t seem to make that big a difference.
These are certainly lightweight. And I’m still surprised by how stiff laminated carbon fiber turns out to be.
Overall, I don’t think I’ll be doing these again, unless I can find a method to speed up the cure time. It may also be possible to just wait out the set time, fill, and let them fully cure within the finished bottom. So long as they cure before delasting.
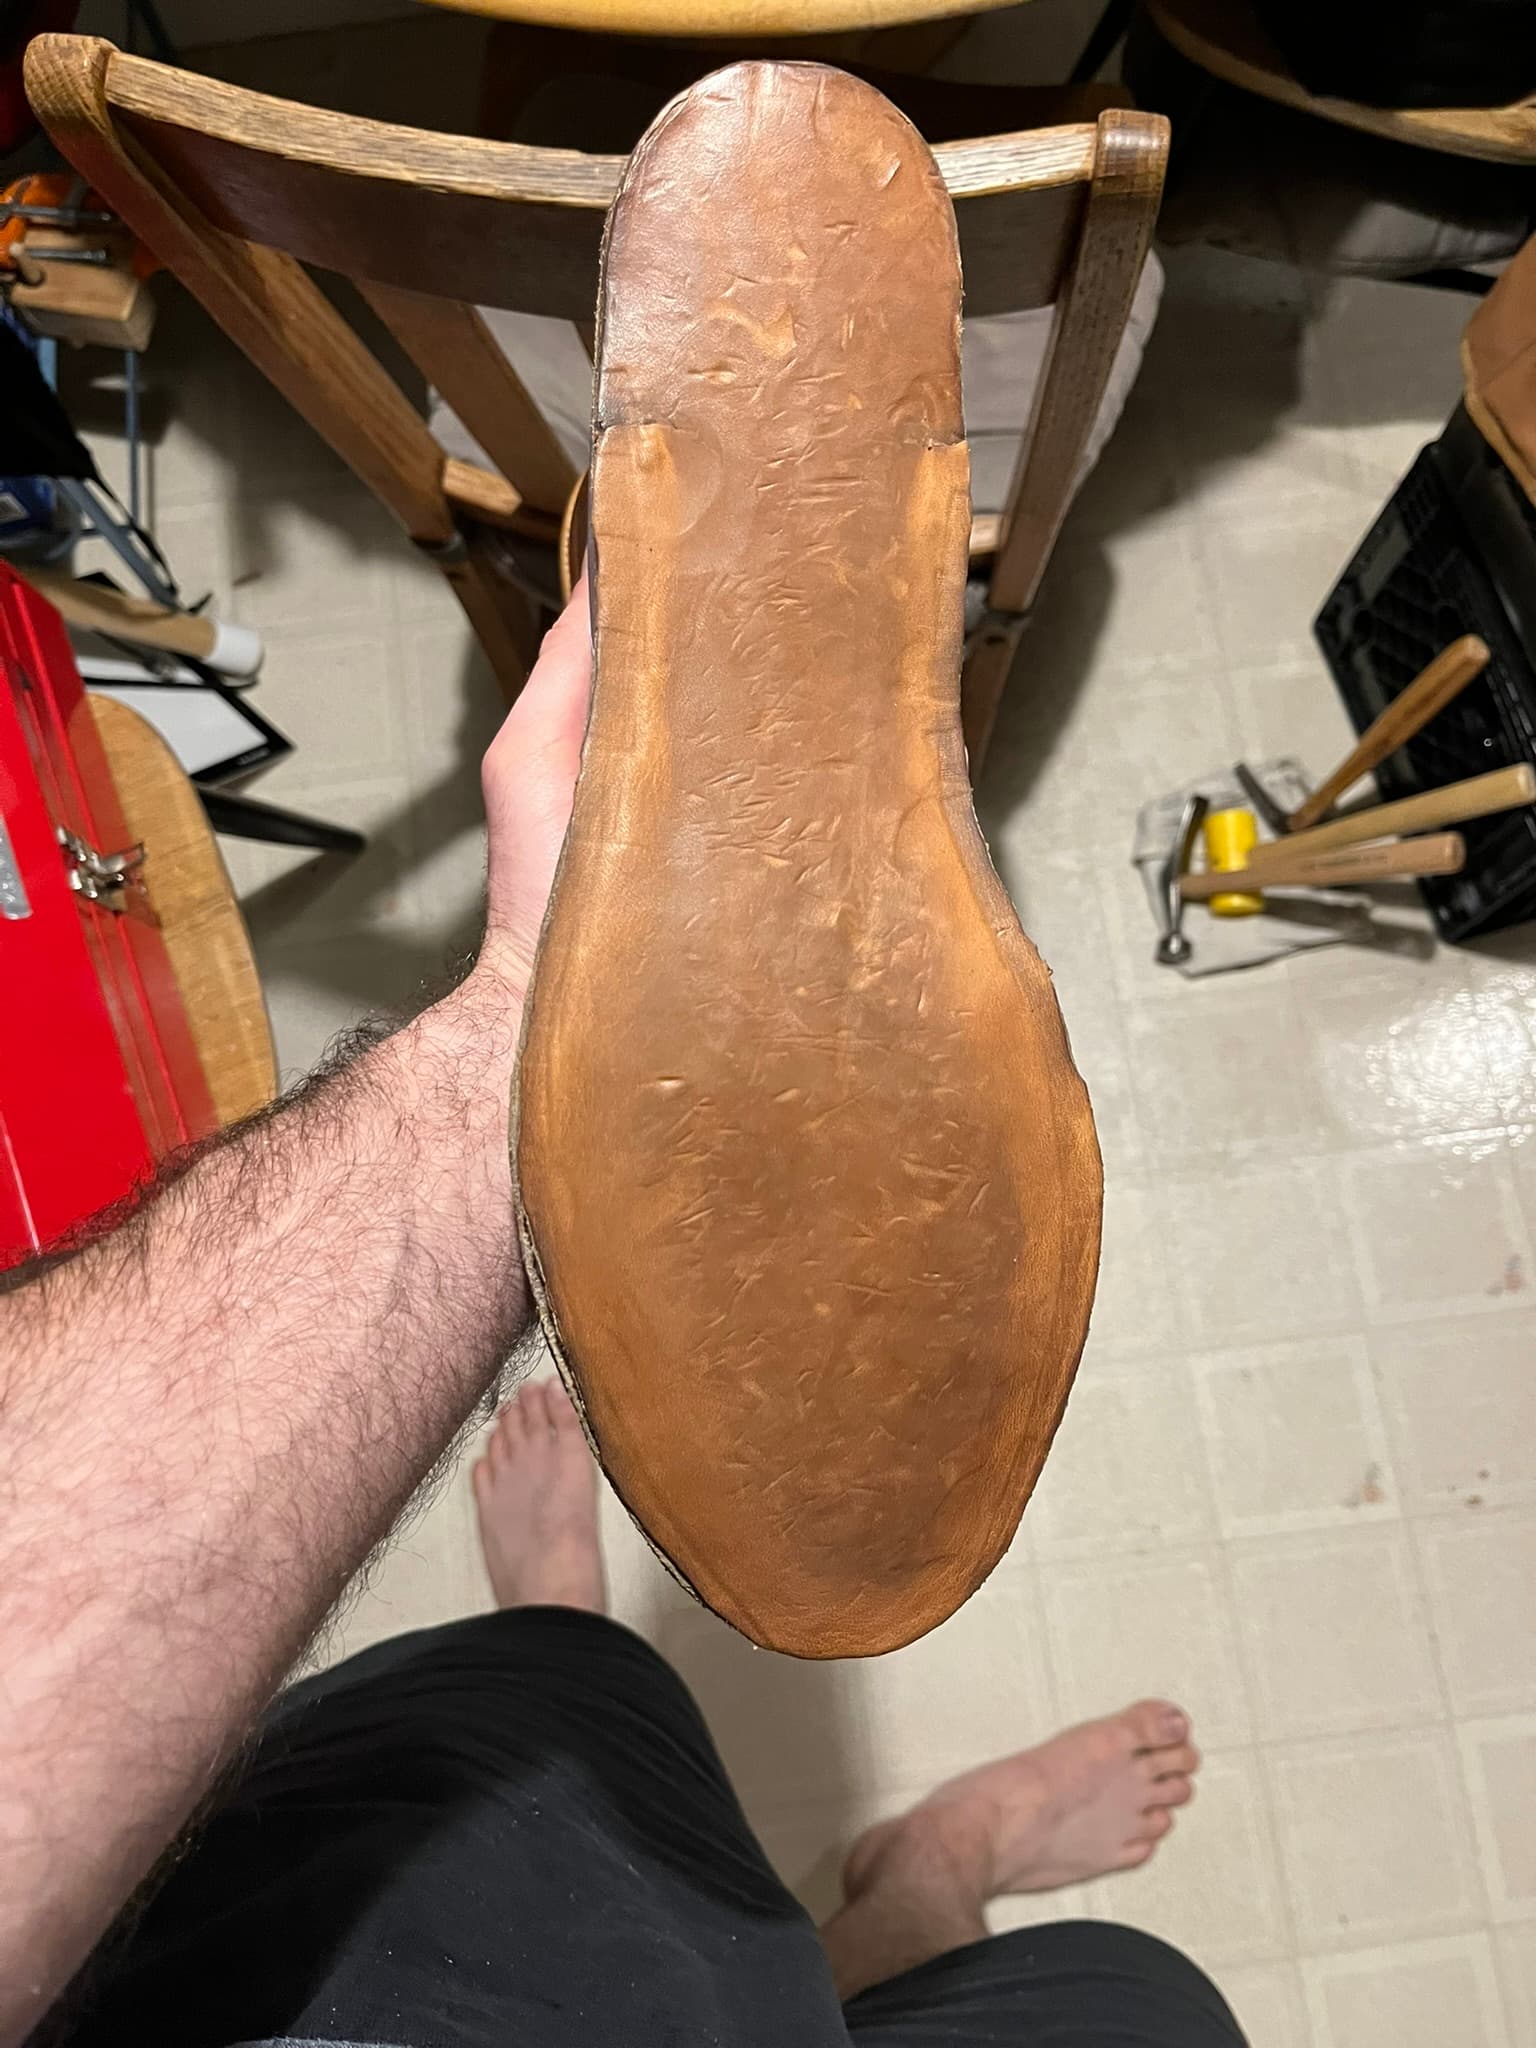
Filled.
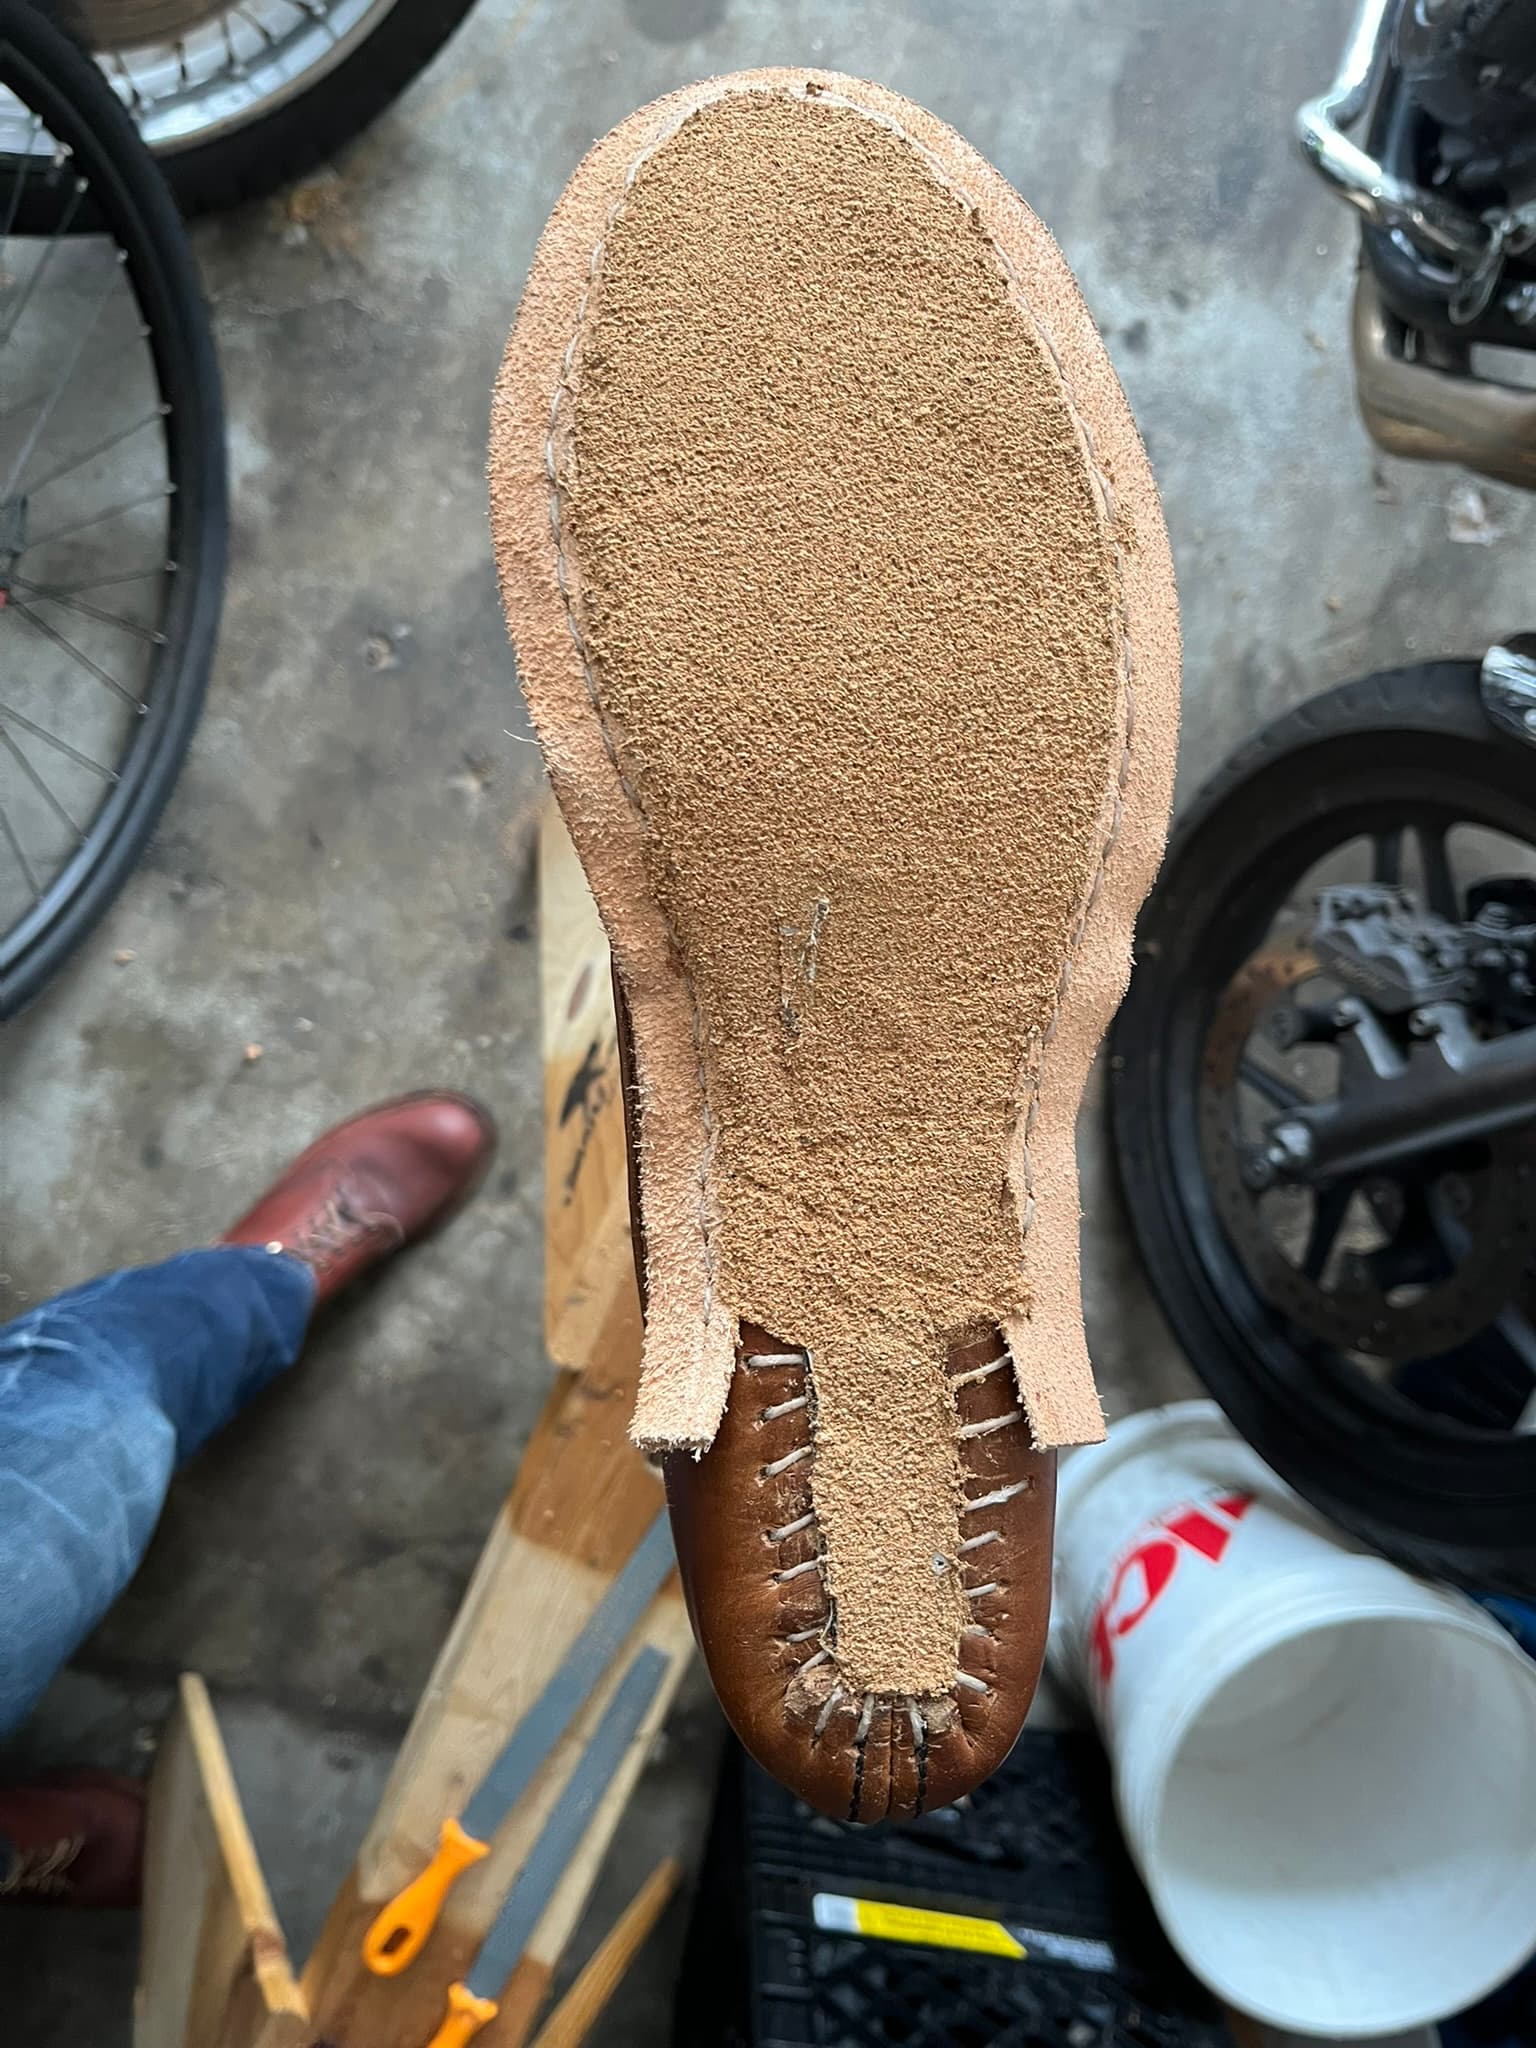
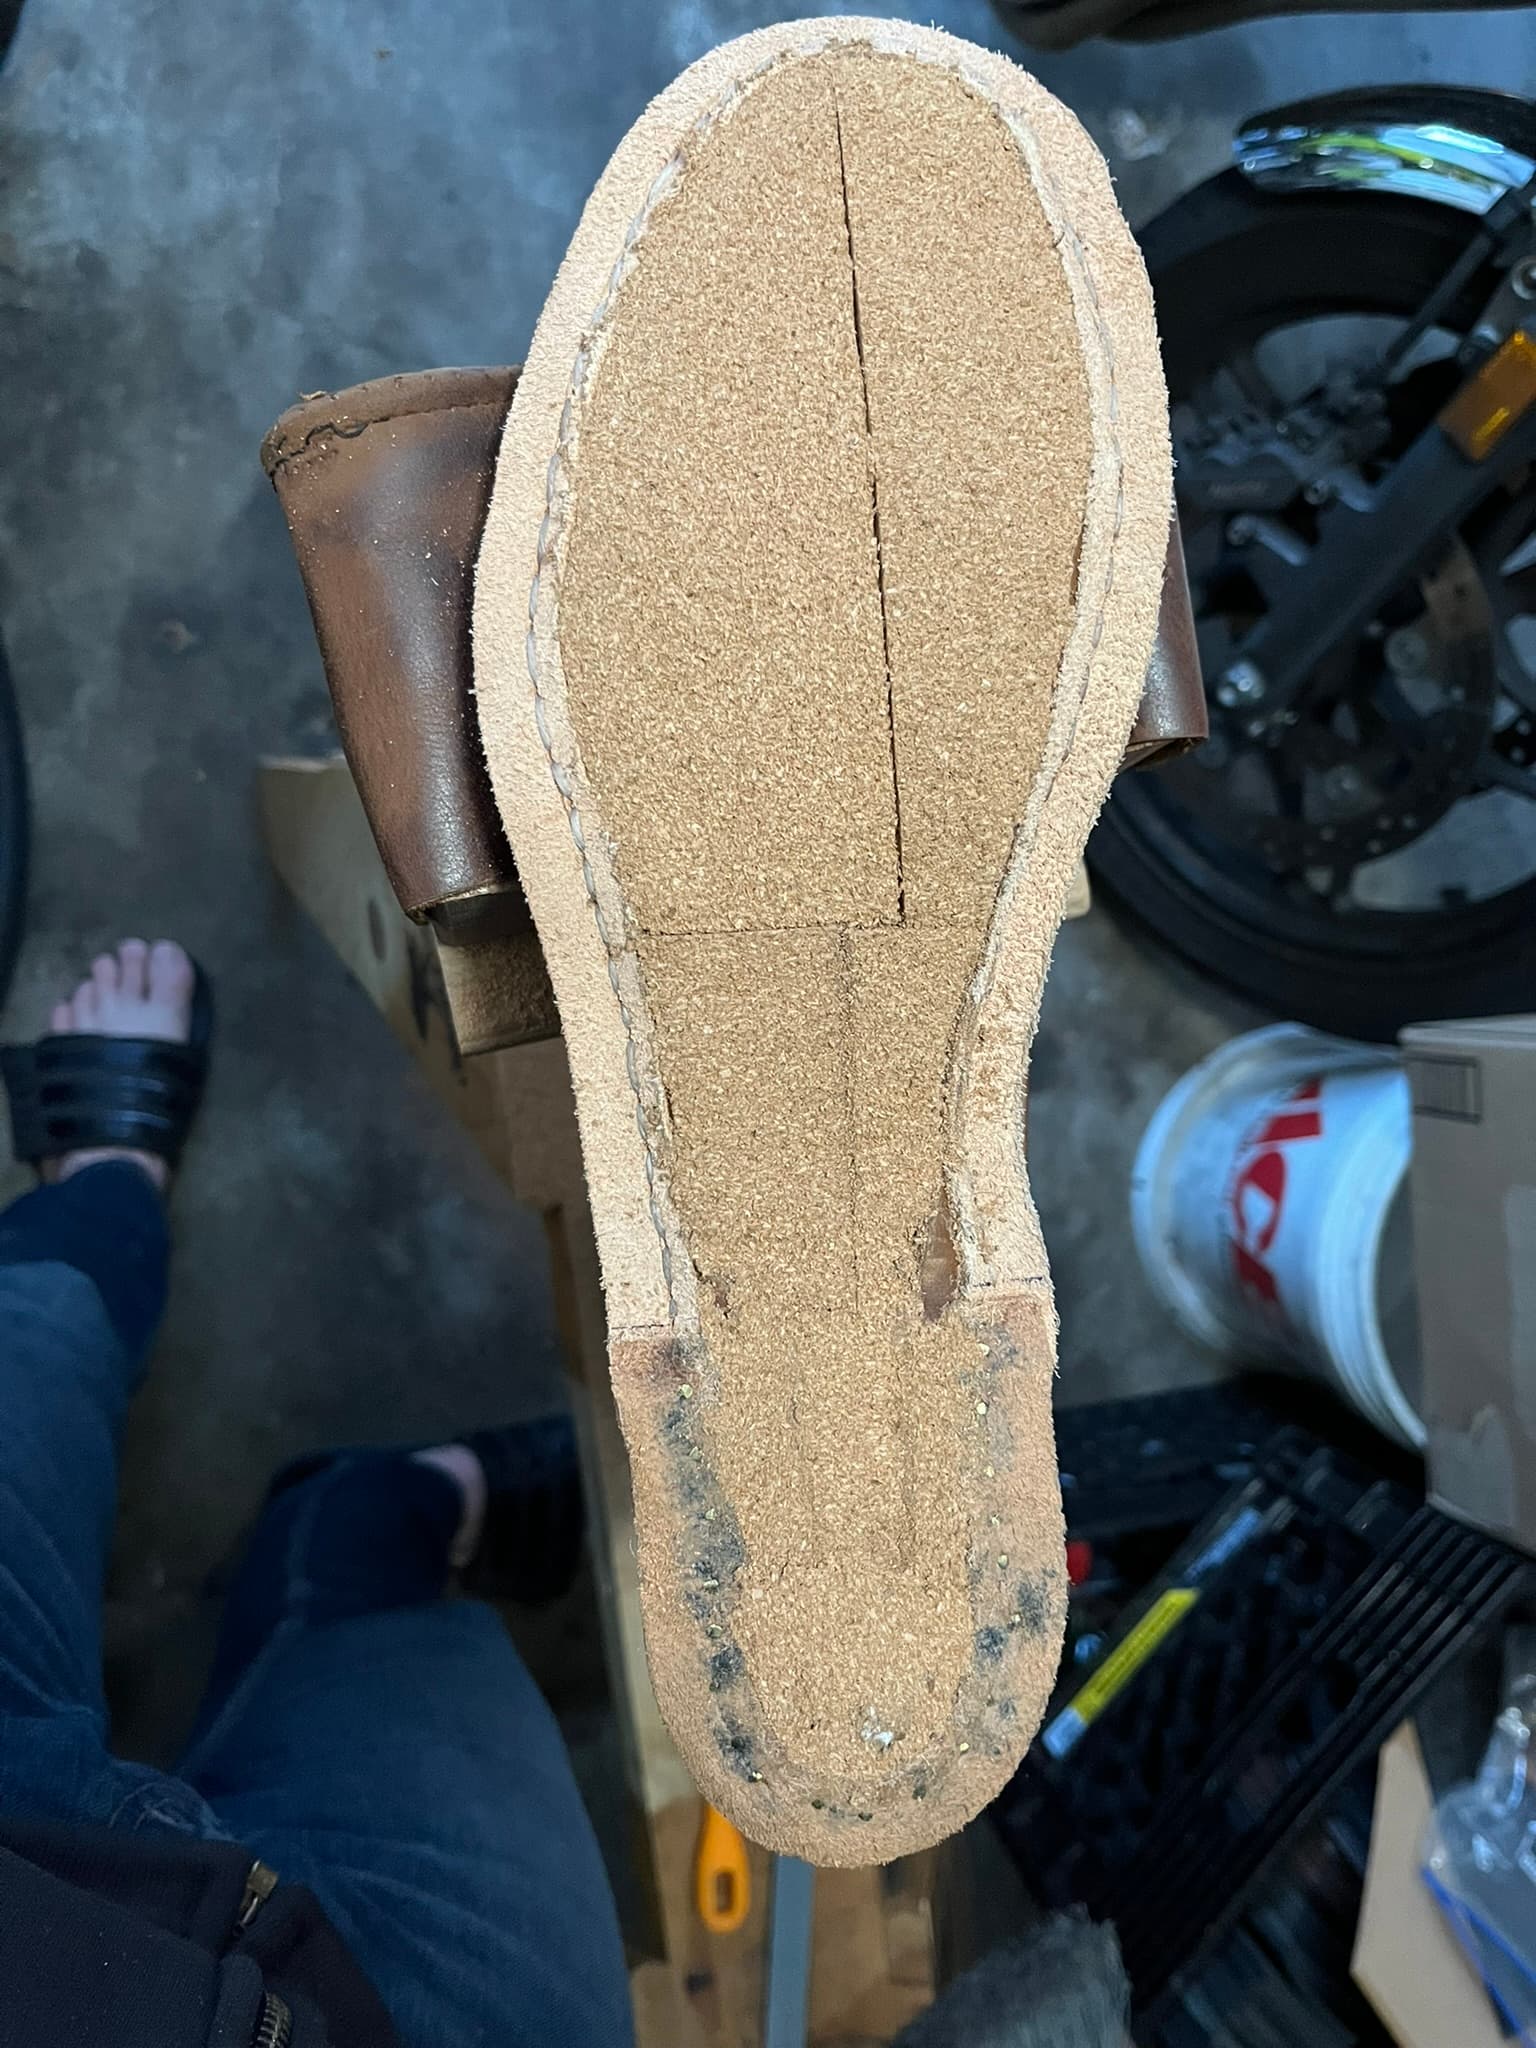
Sheet cork again.
Mistake: I am still bad at driving brass tacks.
I’m really happy that I bought sample bags of Gurney brass tacks from @customboots in all the sizes. I ended up using the smaller 5/8 ones in these seats again.
At the same time, I’m wasting a lot of them by bending them over as I hammer. I find it really helps to pierce pilot holes partway down with a pegging awl or wire brad. I had the best suggest actually driving with many taps of a small tack hammer. But it takes a long time, and sometimes I’m still bending them over. At least I was better this time about just pulling out the bent ones and doing them over again until they stood right.
Mistake: Forgot to mount the rands before filling.
I forgot the rands would create a little bit of a cavity in the seats, so I had to go back and do cork filling again after mounting them.
Photos are useful.
I somehow got it in my head this morning that I may have forgotten to pull the tacks holding the insoles to the lasts before filling. Fortunately, I can look at the photos I took and see that I did, in fact, pull them out.
For reference, the instructions for the True Composites carbon fiber kit I used say:
- 25 minutes working time
- 3 hours to tack-free
- 24 to 48 hours to cure
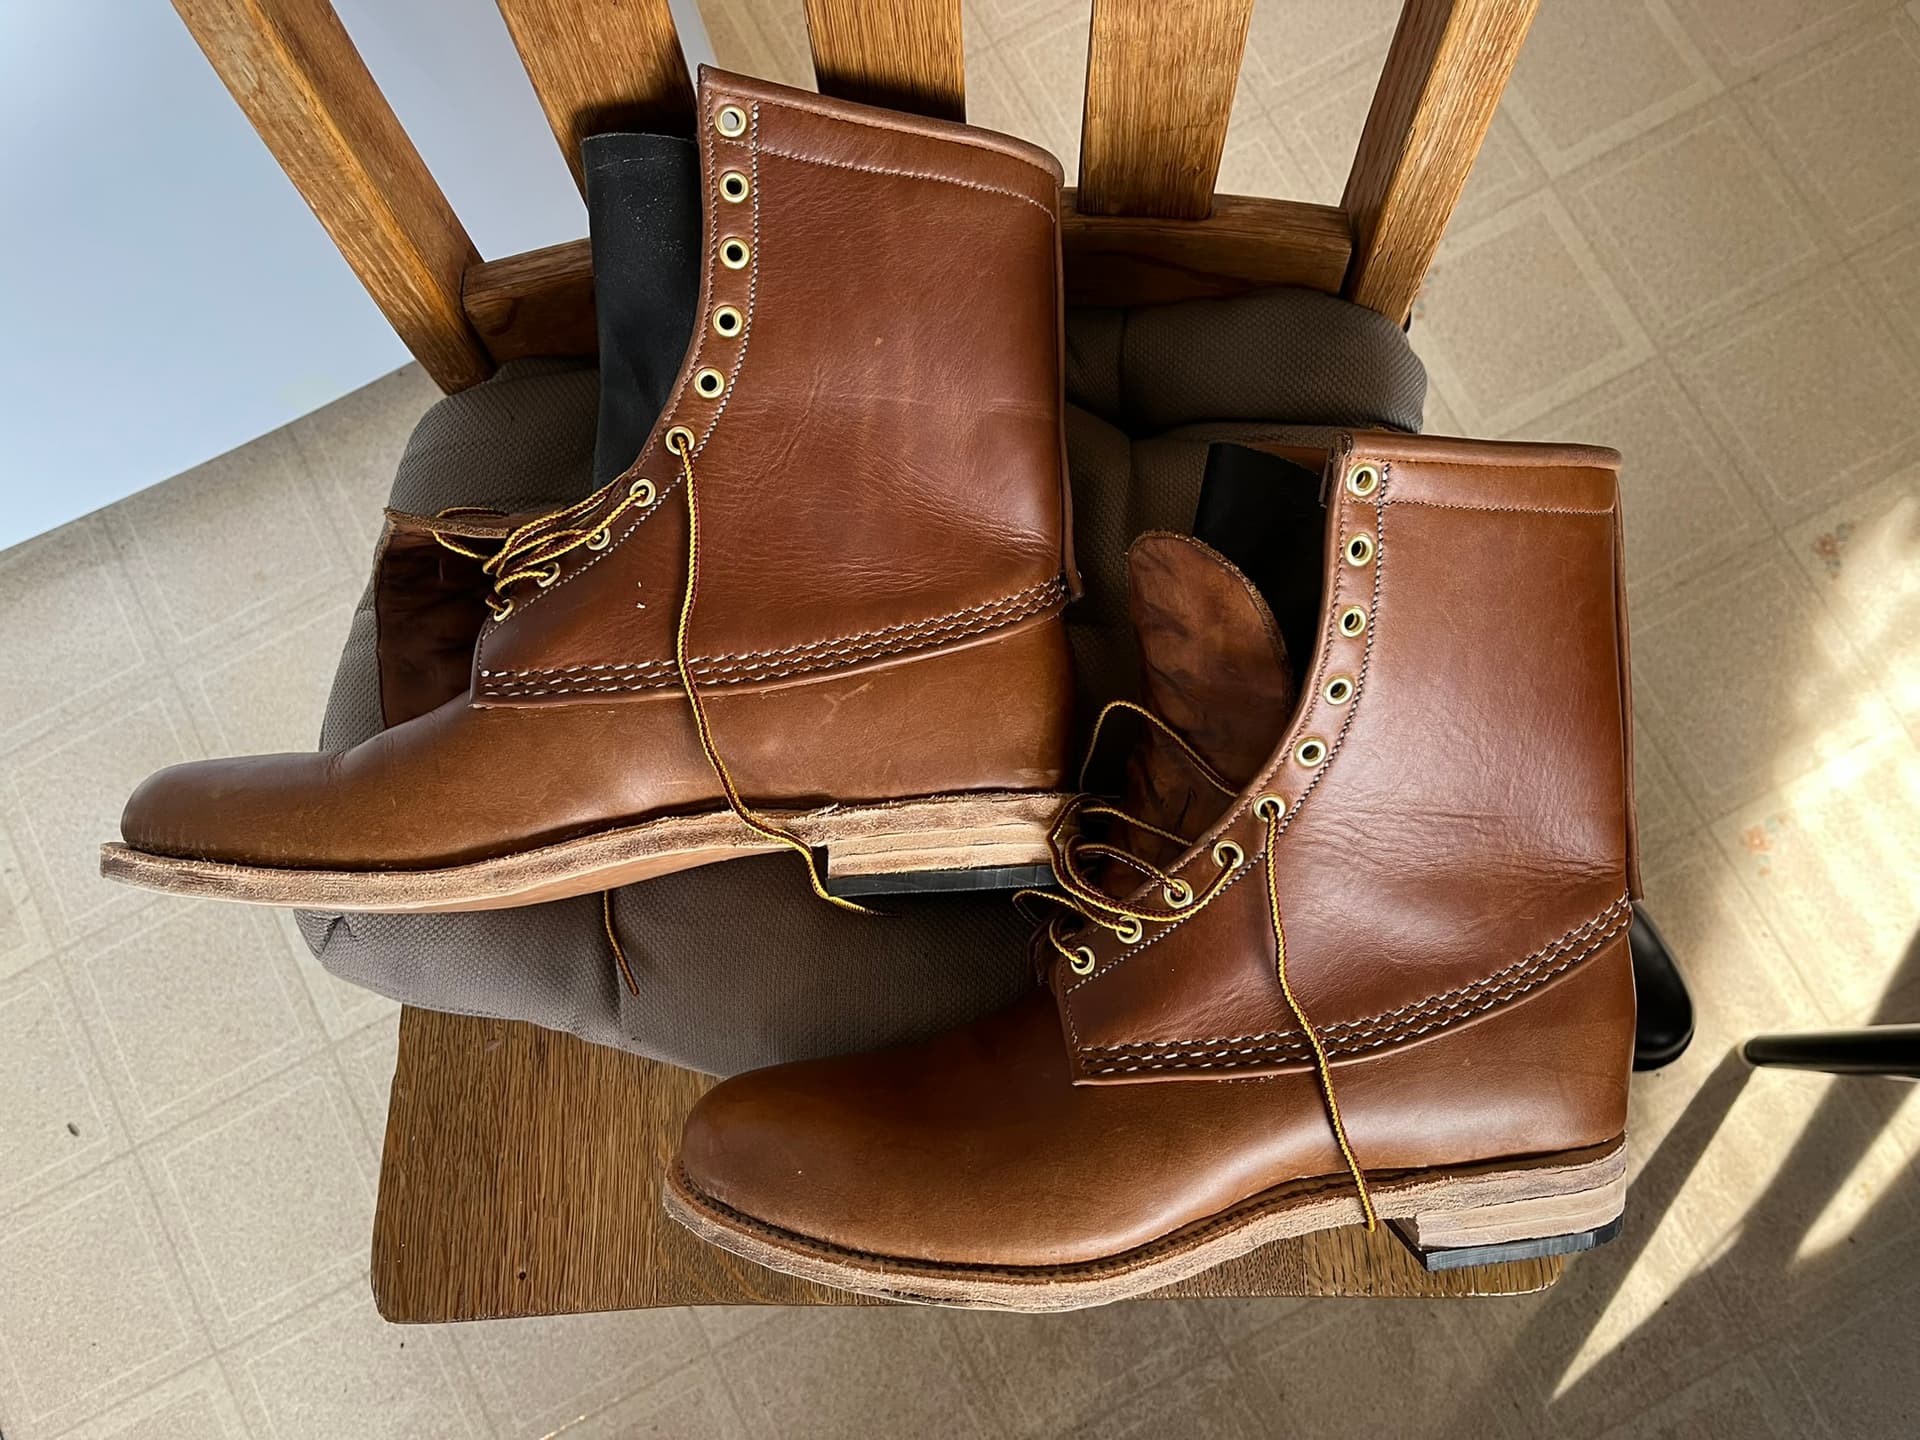
Welted

Mistake: Still not placing holes quite as I’d like to.
I’m still not entirely happy with the consistency of my outseam stitching. Somehow, I’m still wandering a bit, in terms of how far out from the inseam I’m placing the holes.
I suspect it has to do with the way the square awl pierces, relative to where the point initially touches the leather. I’m still relearning this anew each time I outseam a pair by hand. Which probably means I’m due for a round of practice with sole scraps from the scrap bin.
Mistake: Fudging with no fudge is fudging hard.
I’m also not terribly happy with my “fudging”. My process here was to use a saddle-style overstitch wheel to mark the spacing on a scrap, then set a compass to the stitch length and use that to mark holes on the welt. I went over those holes again with a scratch awl to make the marks deeper, then wet the welt and tooled the ray-like lines into the welt with an old heavy-duty letter opener.
The answer here may just be that if I want to make work that looks like what a fudge wheel does, I should get a fudge wheel.
Thread
The thread here was natural-color, 110", 7-cord Maine Thread tapers. They were just long enough to welt these rather long boots from heel to heel.
I think for outseaming I might prefer white over “natural”. The “natural” shade looks, well, rather synthetic to my eye once it gets a little dirty. But I don’t know a source for white 110" Maine Thread tapers at the moment, just black and natural. Maine Thread’s minimum order quantity would be way, way more than I’d ever need.
Maybe I can step down one ply to their 0.050" white twisted cord, cut my 110" lengths from a spool, and make tapered ends with sandpaper.
Bristles
I tried some of the longer soldered wire bristles that @Customboots sells this time, and really liked them much better than the twisted-wire kind. Once the tips get bent, they never seem to ever really bend back perfectly straight. But they work fine even with little kinks in them, and proved very durable. They were easy enough to feed through the holes two at a time.
Awl
The awl was a Tom Carbone blade in a C.S. Osborne #140-H haft. I really like that haft for pushing through soles, but the tip of it is rather narrow. I made the mistake of drilling the pilot hole for the Carbone blade too narrow, and got a bit of wood splitting when I tapped the blade in. I seem to have fixed that with wood glue and some heat shrink tubing. I don’t think it would have been a problem if I chose the right drill bit for the pilot hole.
Mistake: Runaway gum tool.
I was able to get nearly all my welting holes to poke out into nice channels under the flaps this time, by using a gum tool to extend the channel under the flap every ten stitches or so. But on one boot, the gum tool ran away on me, and I ended up gouging a channel straight off the front of the toe of the outsole.
The edge of the toe isn’t exactly the most visible place on the boot, but you can see a little gap under the welt if you look for it. Bummer.
Fun Find: Butter Warmers
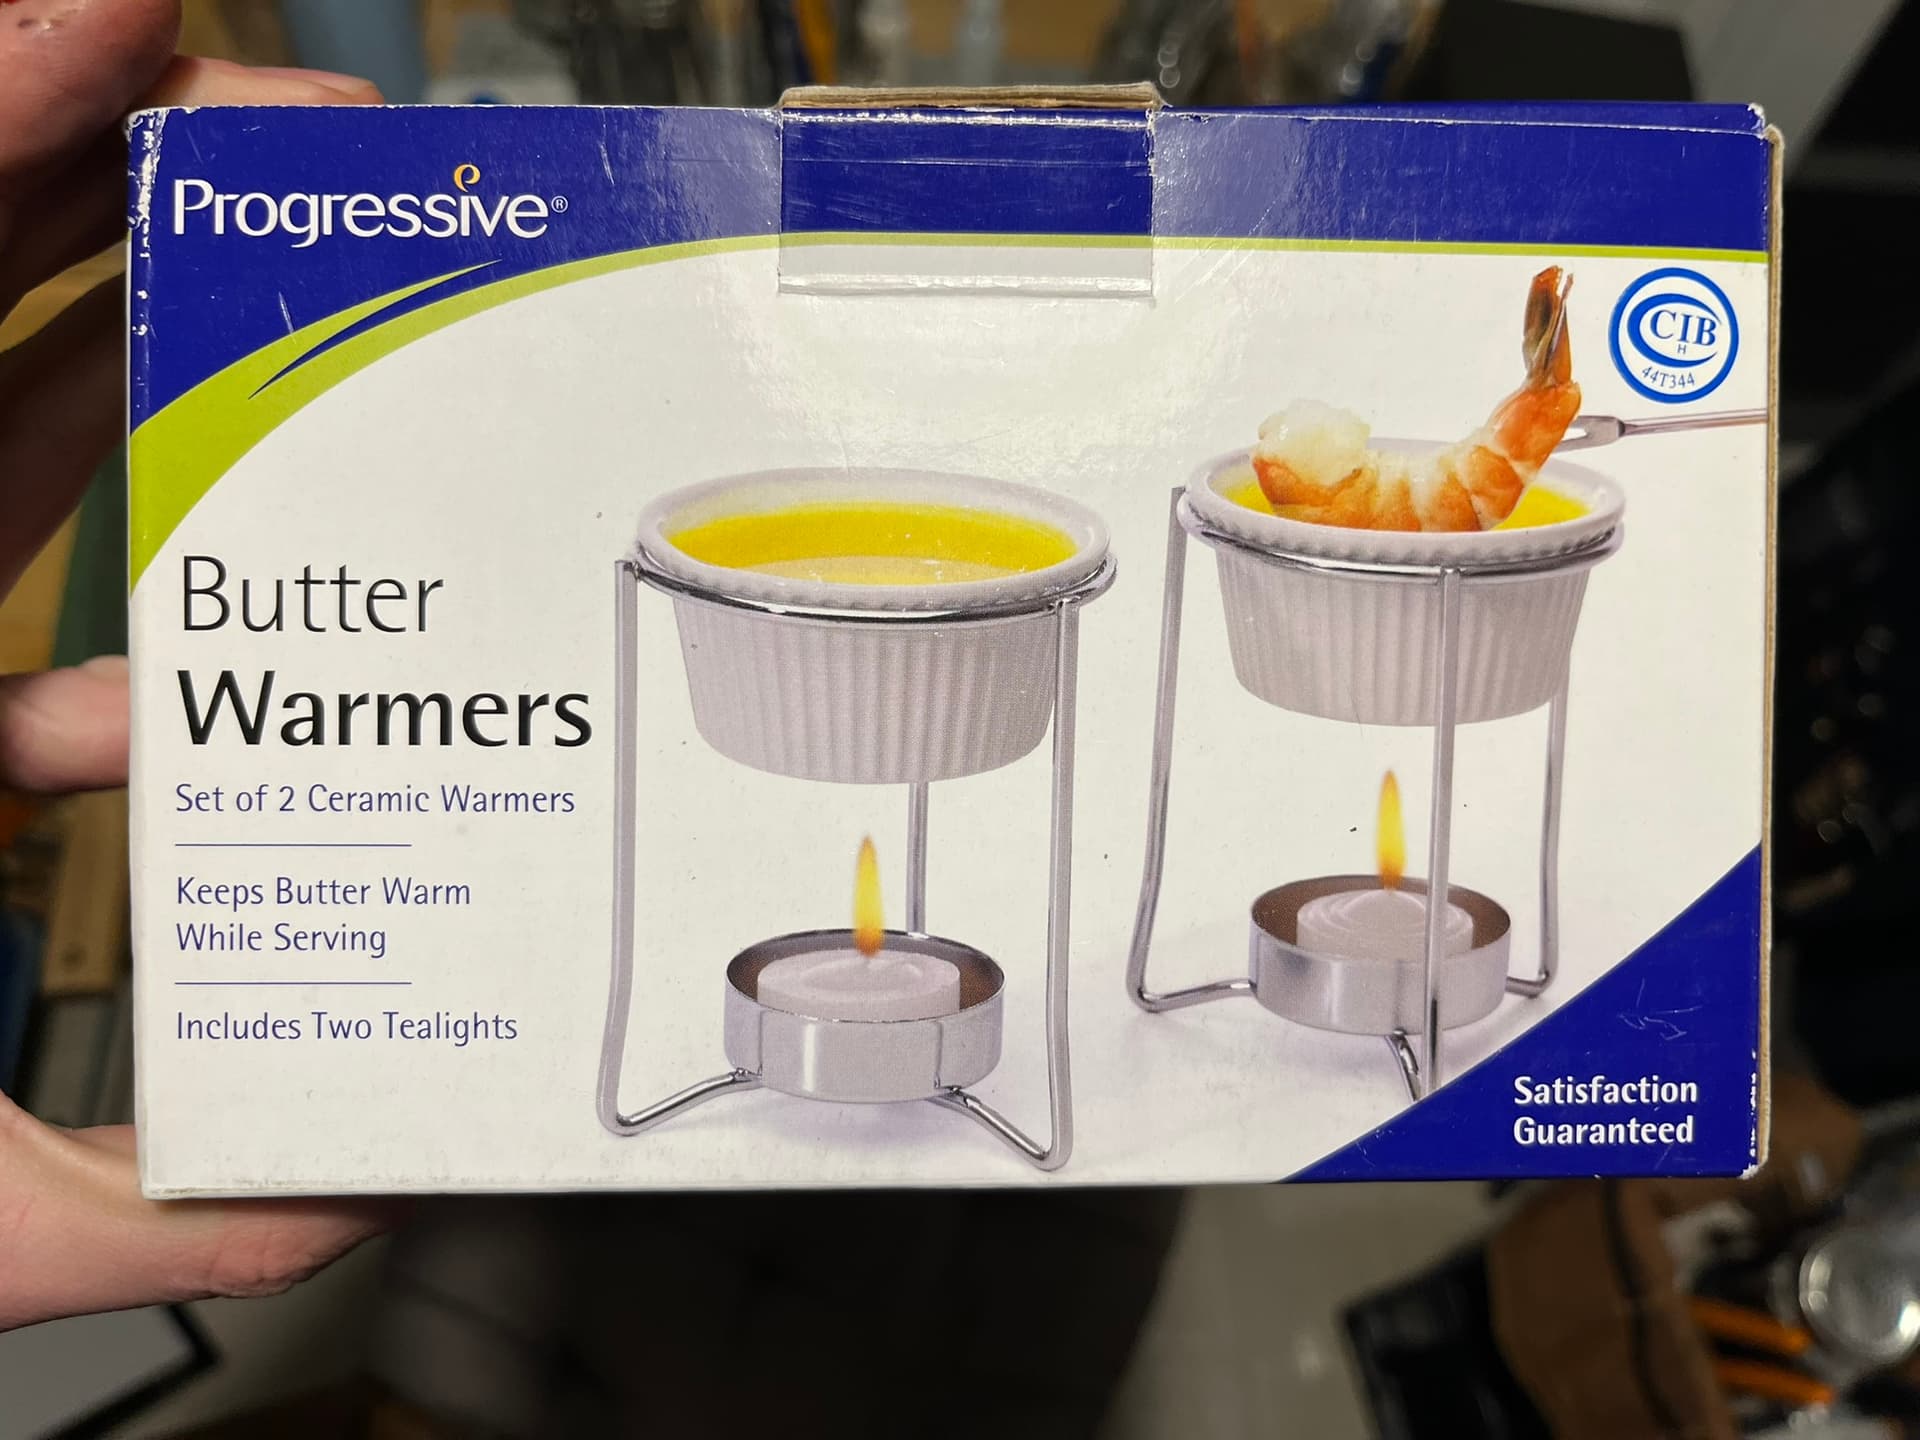
I found a pair of these absurd tea candle “butter warmers” in a thrift shop. Turns out, they work pretty nice for making a handy pool of liquid beeswax to dip awl blades in!
I did make some 50-50 beeswax-mineral oil specifically for awl lubrication. But for whatever reason, I feel better about using pure wax that will harden again at room temp, rather than mixing in mineral oil. Having cooked up some coad, I guess I’m now convinced it has mystical stitch holding properties, and don’t want to spoil it by adding oil.
It does take a few minutes for candle power to start melting the beeswax, especially when there’s lots in the little cup. But once melted, it also stays relatively soft for some time if I blow the candle out.
Flap Cutting
I cut flaps to hide the outseam stitches again, more for practice than for wanting hidden channels on this pair.
On the first one, I kind of chickened out, and cut it probably twice as deep as it should have been, just to avoid cutting through the surface by mistake. On the second boot I was braver, made it thinner, and got away with it. I’ve been watching lots of videos of Japanese and Korean makers lately, and used my Japanese leather knife for the job. It went very well. Great little knives, those.
Still haven’t figured out lip knife sharpening.
I’ve officially traded my Osborne lip knives in for Russel ones. I certainly got Russels sharper than I was ever able to get the Osbornes, including with a friends’ help. But they’re still not cutting as well as I’d like. I found myself using the Japanese leather knife for most of my whitting, making do with lots of short, shallow lip knife cuts in the curves of the waists.
Maybe I just need to sit down with the round strop I made, load it up with fresh chromium oxide, and go at each blade for thirty minutes or so while I watch some video.
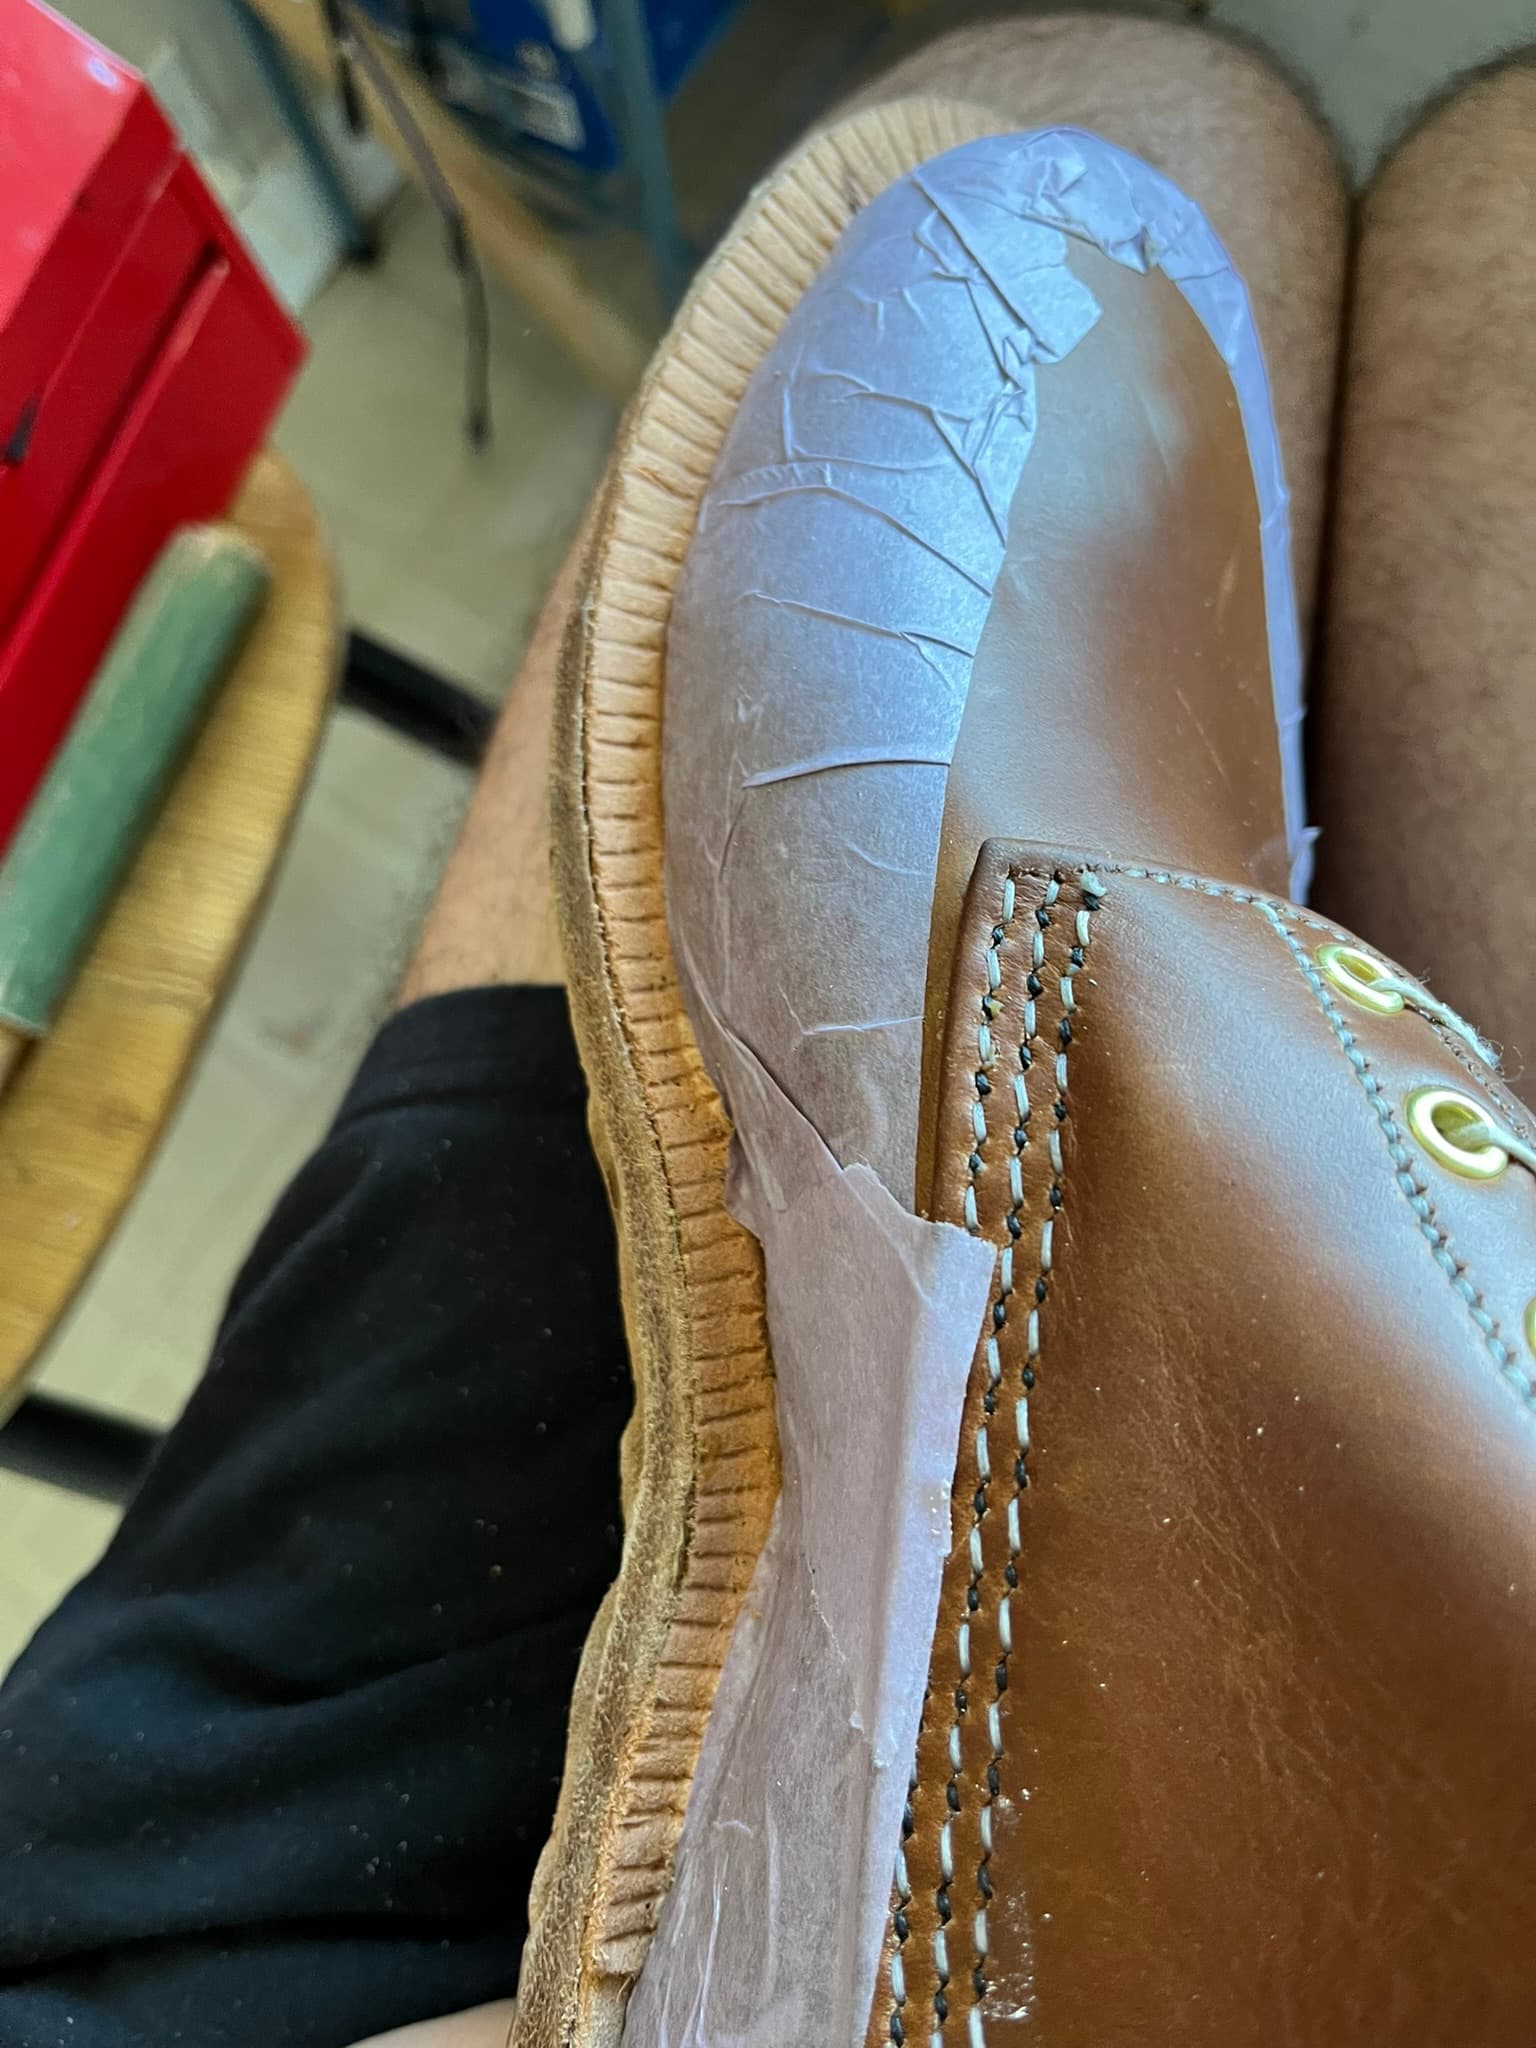
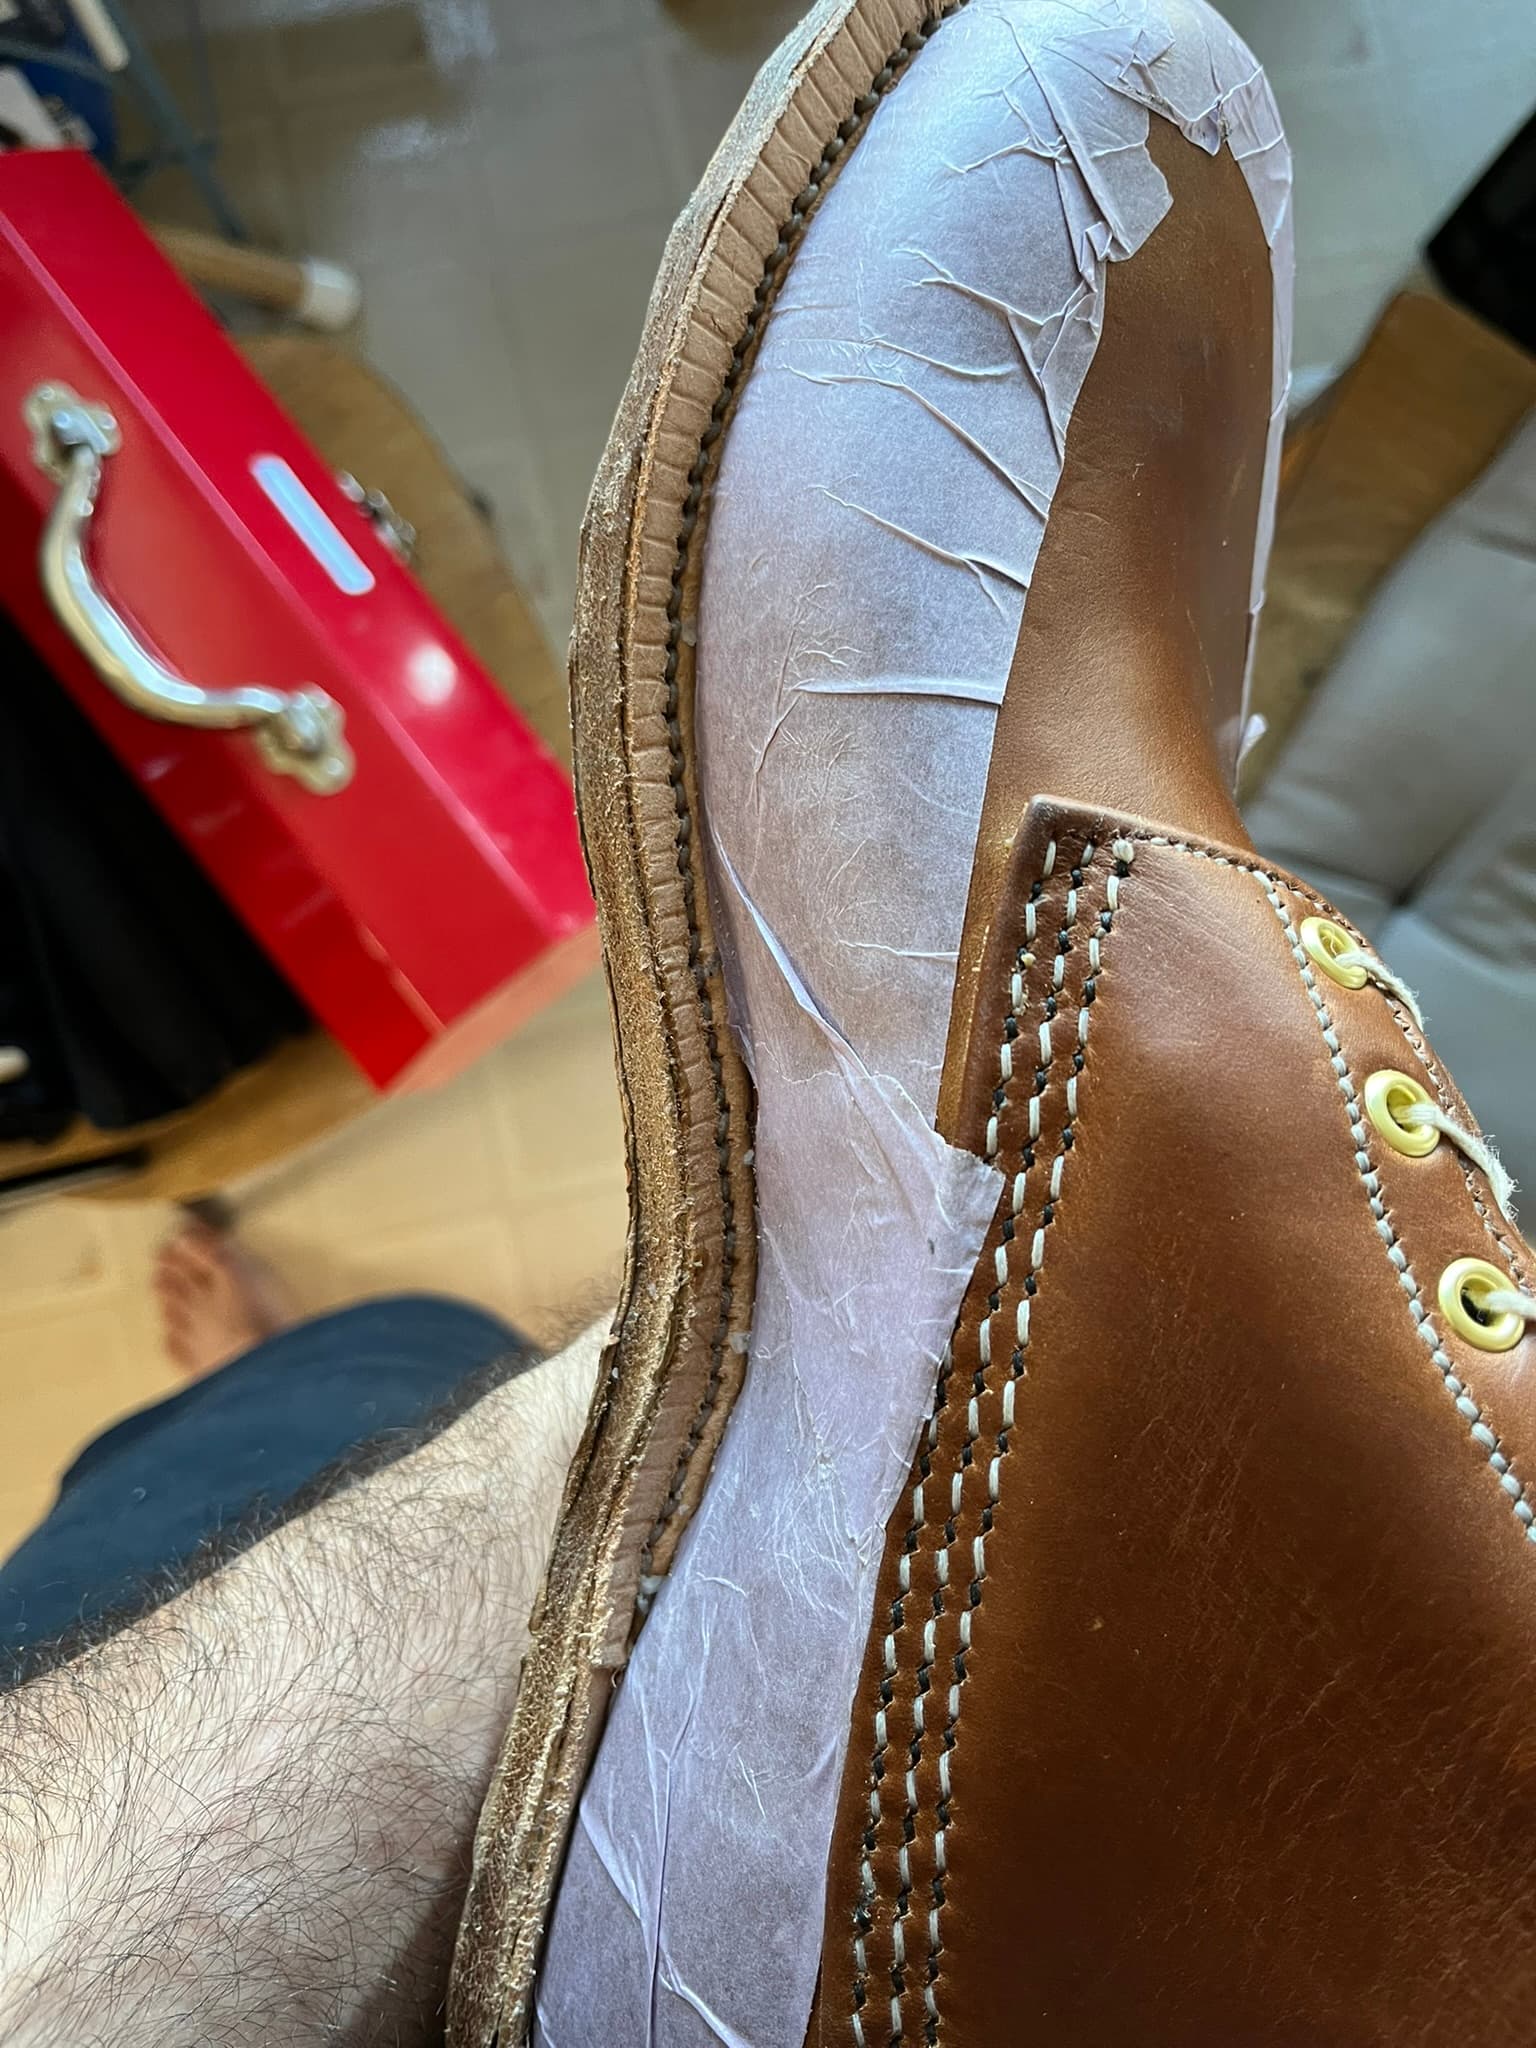
Mistake: Even “delicate surface” painters tape left a bunch of residue.
I decided to try the light-purple-colored “delicate surface” tape sold in home stores for painting to protect the surfaces of my uppers above the featherline this time, instead of inseaming in a sacrificial sheet or plastic wrap.
https://www.scotchblue.com/3M/en_US/p/d/cbgnaw011281/
Unfortunately, it still left a noticeable effect on the uppers, including a little residue. I this it’s also something that I could remove in finishing, especially on the hot-stuffed leather I used for this pair. But I probably won’t use tape like this again. It doesn’t seem worth it.
Mistake: A couple gaping inseam stitches.
I was able to meet Jeff Mandel of ExIT shoes recently. Great guy. And I remembered to bring along one of the boots from this pair, to show for critiques.
He noticed that one of the inseam stitches around the toe on the boot shows a bit between the welt and the upper. Bummer.
It’s in a place where it probably just gets covered up, especially as the upper wears in and the toe curls. But it annoys me to no end.
I think the real fix here is to take Jeff’s advice and inspect every stitch from the outside as I inseam. I’ve had trouble maintaining habits like this as well as I want—check the twist of every outsole stitch, check the tension of every upper stitch—but I know that’s on.
I suspect that some changes to my inseaming strategy might also help. I rewelted my second pair yesterday using unwaxed Maine Thread 11-7 with a proper rosin-and-tar “wax”. I definitely felt the effect of the rosin holding the stitches in place. I also found myself needing to wrap the thread around a haft or a hand leather to really pull it tight, where I tried to get away with using only lots of hand tension on this third pair. I probably should have been pulling harder on the stitches in this third pair to begin with.
Mistake: Lines on upper from outseaming awl.
When Jeff saw the tape, he immediately went looking for signs on rubbing against the upper with the outseaming awl. There were some.
We talked a bit about it, and I think most of this issue is coming from the idea I had in my head that the line of stitching on the top of the welt should be more or less right over the line of stitching on the bottom of the outsole, under the flap. Jeff strongly recommends that I think instead about angling the stitches in, so the stitch line on the bottom of the outsole ends up closer to the middle of the shoe than the welt stitches.
One benefit of doing that would be that I wouldn’t need to angle my square awl in a way that puts the shaft close to the upper at the featherline.
Mistake: Outseam holes still not a consistent distances from the inseam.
This was one I mentioned to Jeff, and he chalked it up to just needing practice. I’m secretly hoping that changing the angle of the awl will also help me improve results here.
Mistake: Heel slugs for top lift too tall.
I decided to try a “blind” rubber top lift this time, with clipped-off nails acting as slugs.
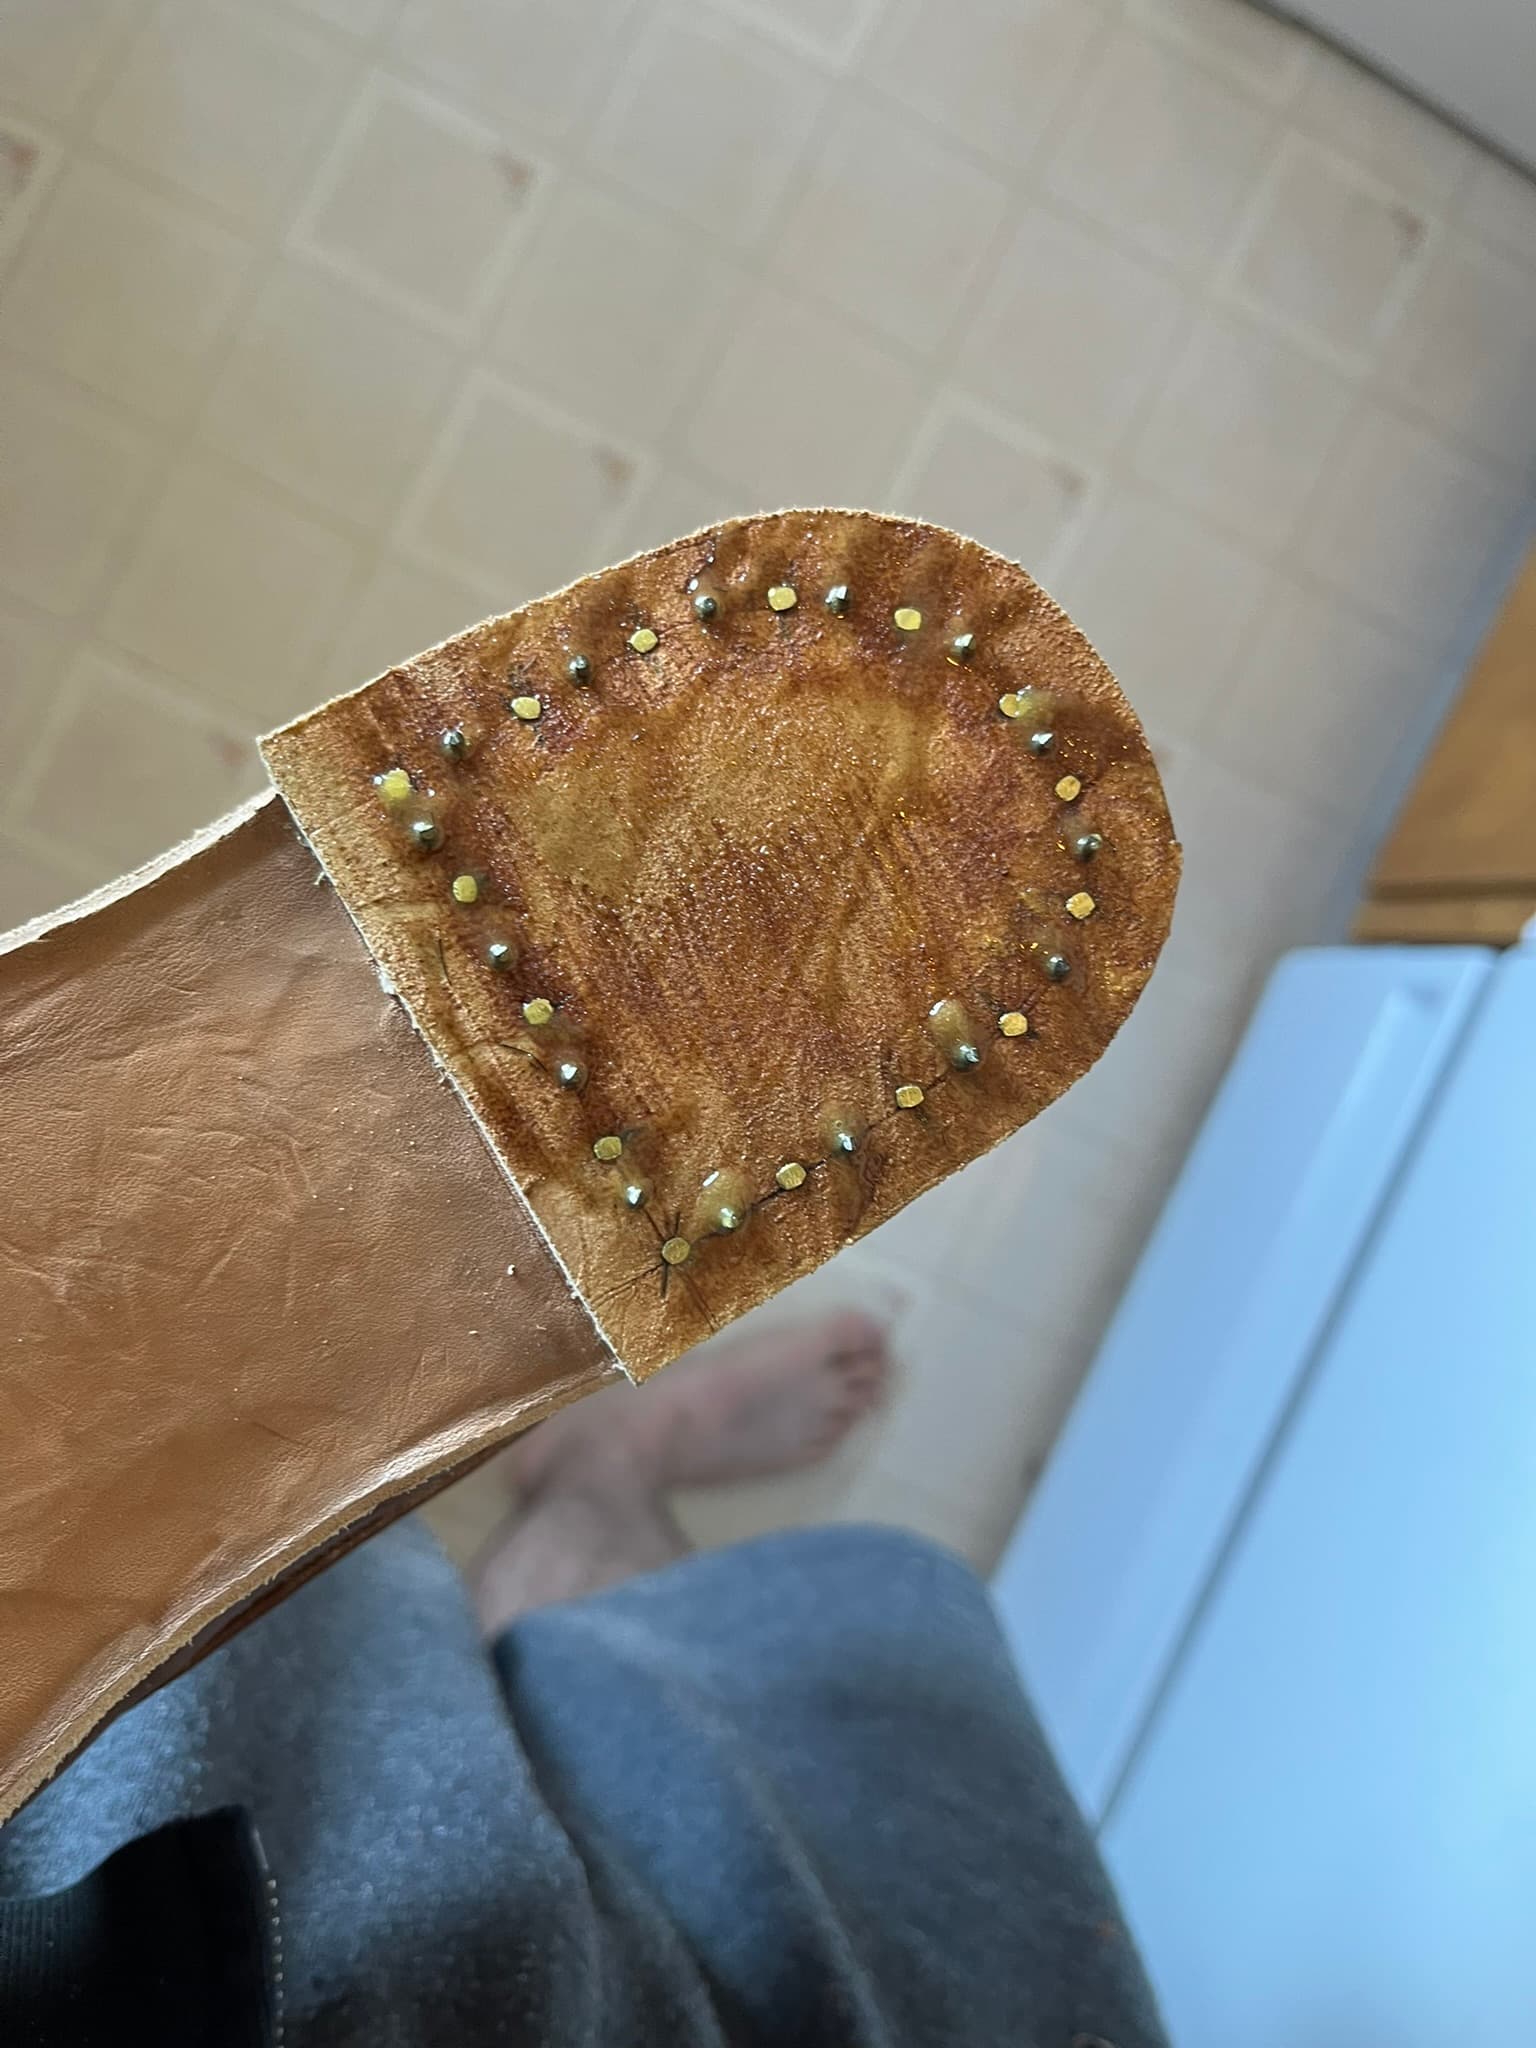
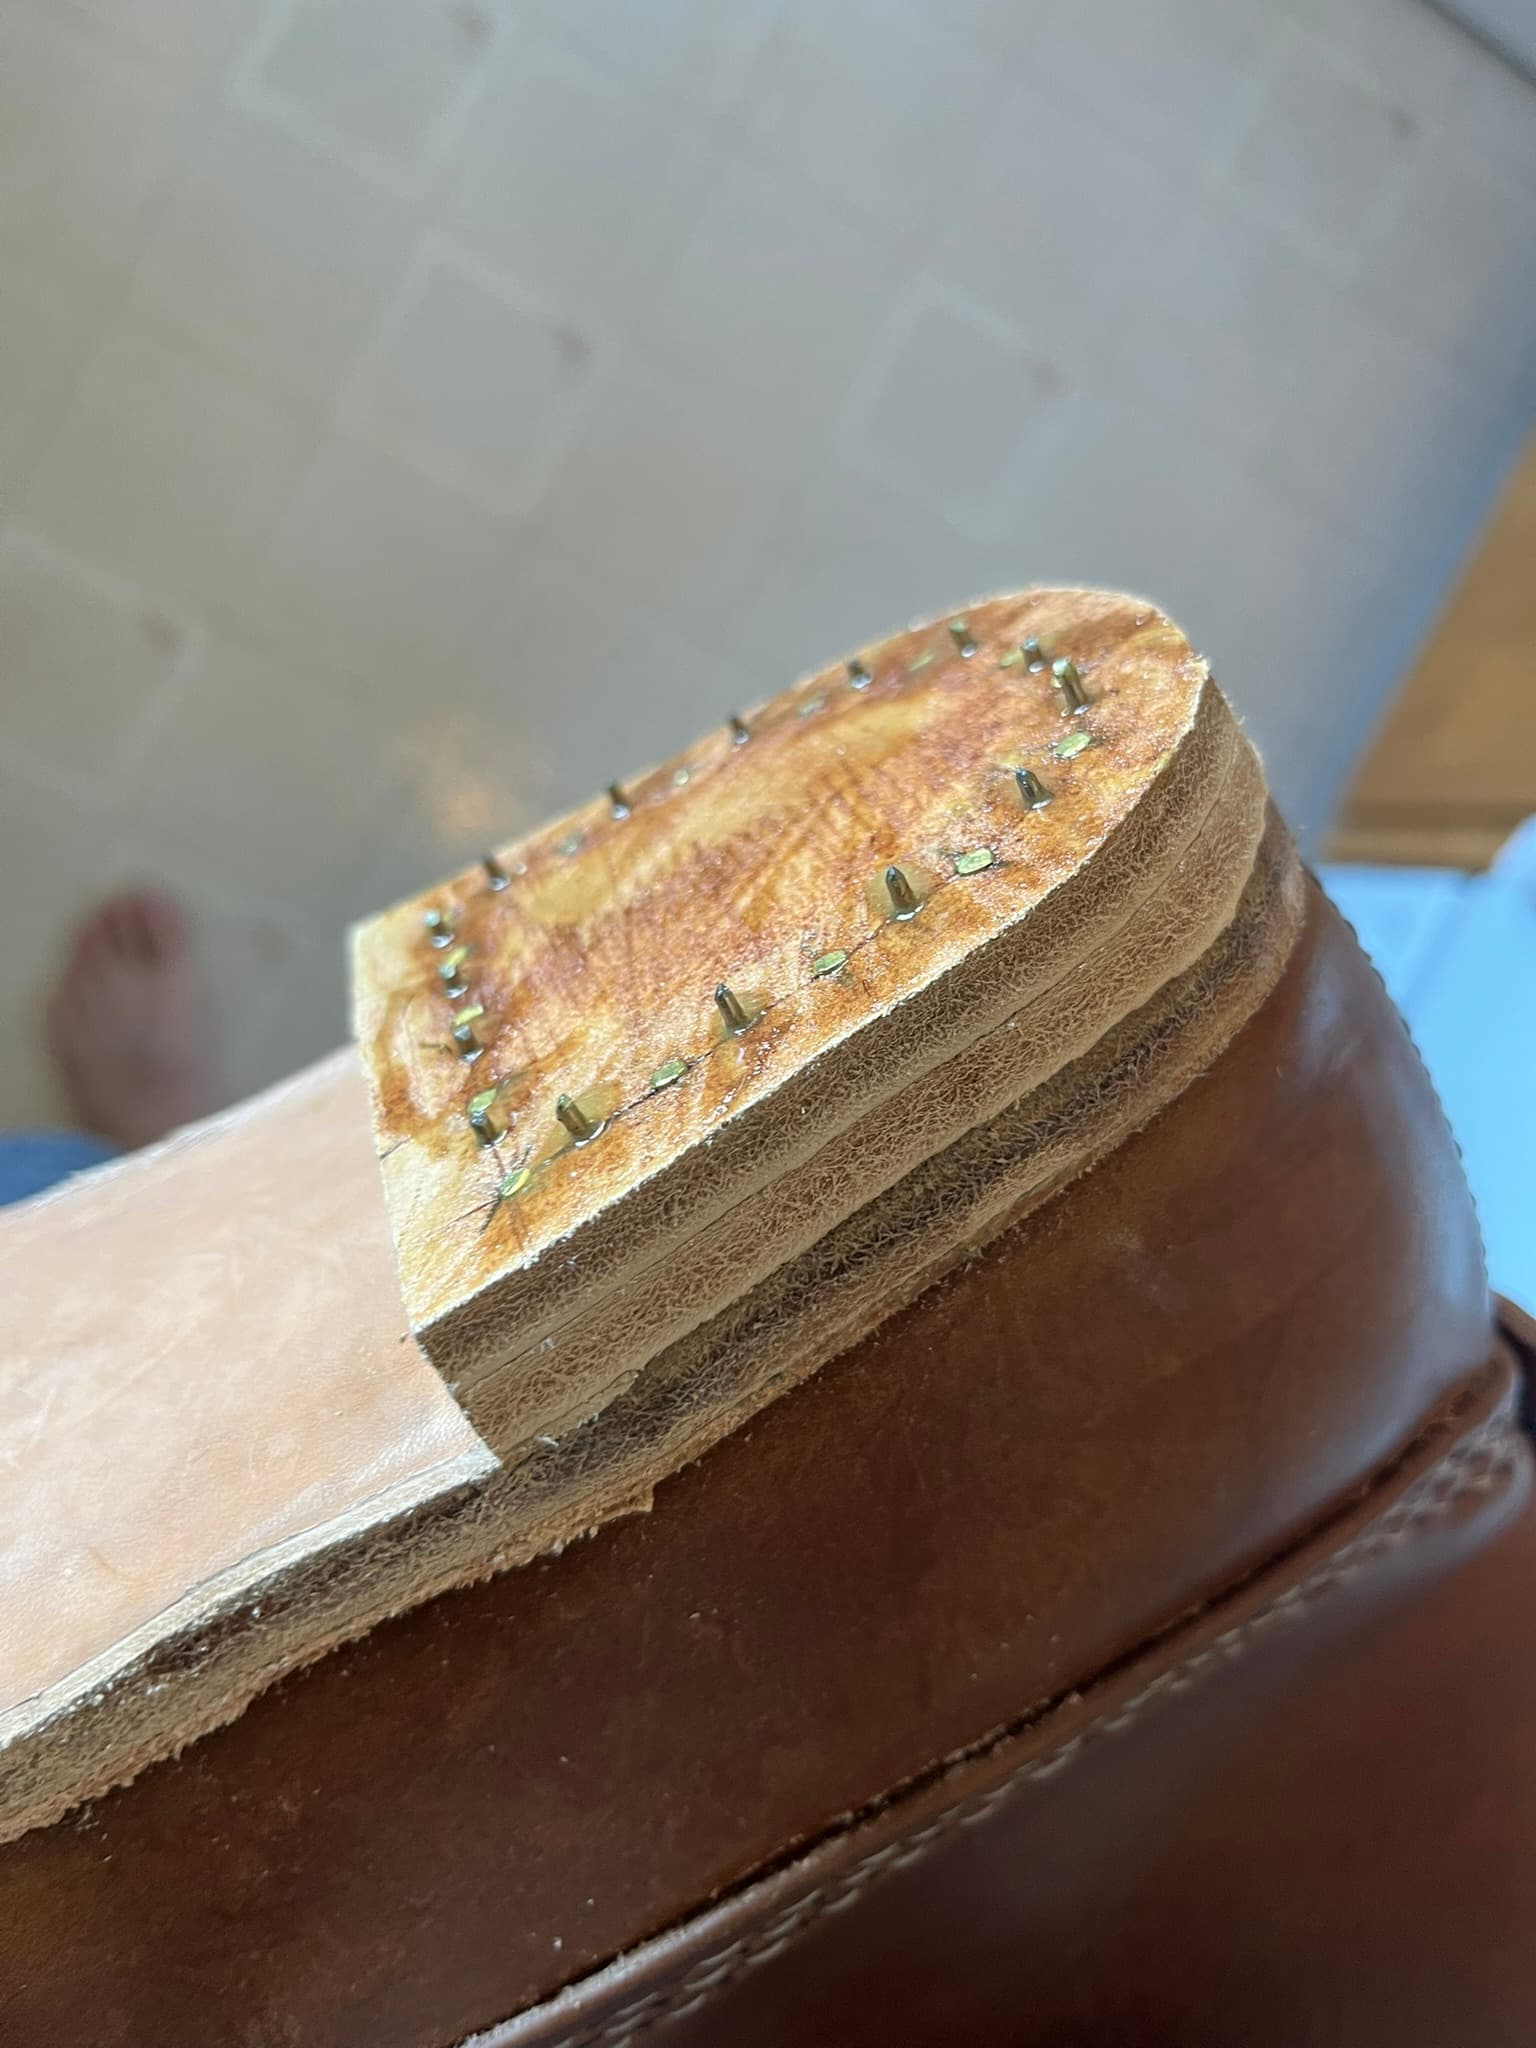
I found that it was better to use longer wire brads. I initially started with 7/8" ones, the shortest I have, thinking that I didn’t want to waste more material. Their short height made them harder to hold in place with my fingers, which mattered more than in lasting, since I was trying to hammer them into dry sole leather. I switched to the longest ones I have 1¼", and things went better.
I also initially clipped the nails off too tall. I measured the thickness of the top lift, and was shooting for half that thickness in slug height. But that only made the top lifts push themselves off the surface, even with Barge cement and lots of pressing in place.
I went back and clipped the slugs much shorter with my cobbler’s pincers. Even trying to clip them flush with the surface, I still ended up with points above it, which turned out to be more than enough to keep the top lifts from sliding around. And of course the contact cement immediately grabbed and held without the slugs trying to push the rubber away.
Better carbon fiber cutting.
I did a little messing around in the garage and found much better results cleanly cutting thick-plain-woven carbon fiber by:
- pulling out a weft strand at the length I want to cut
- cutting the warp strands with a rotary cutter
The benefit of the rotary cutter seems to be that the pressure through the blade into each strand is more vertical, as opposed to a utility or craft knife, which tends to also push the strands as it’s drawn through them. I happened to use this particular OLFA cutter, but I expect most any decent make and diameter would do.
The grid of the plain weave may still distort a bit during cutting, but the warp strands cut more cleanly, and it’s easy enough to realign everything square so the resulting strip is straight.

Curious if in retrospect, your opinion of these has changed at all. After going through airport security and having to take my boots off again, I find myself reconsidering doing composite shanks.
The composite side of things doesn’t give me any pause; I used to own a company formulating specialty resins and have done tons of composite layups. It’s more the sizing and leather interactions that I am curious about.
On the side note of your desire to not have to wait on cure time, most of the resins I worked on formulating were uv reactive that would allow for curing in sunlight in about 2 minutes.
I’ve nothing against hand-laid carbon fiber shanks, except perhaps the scant benefit for the cost. There are plenty of non-magnetic alternatives, including hard wood and fiberglass. With filler above and below, I don’t see a tremendous benefit to a form-fit shank rather than a straighter, premade one.
Fortunately, I have several rolls of carbon sitting in my garage, so cost isn’t much of an issue there.