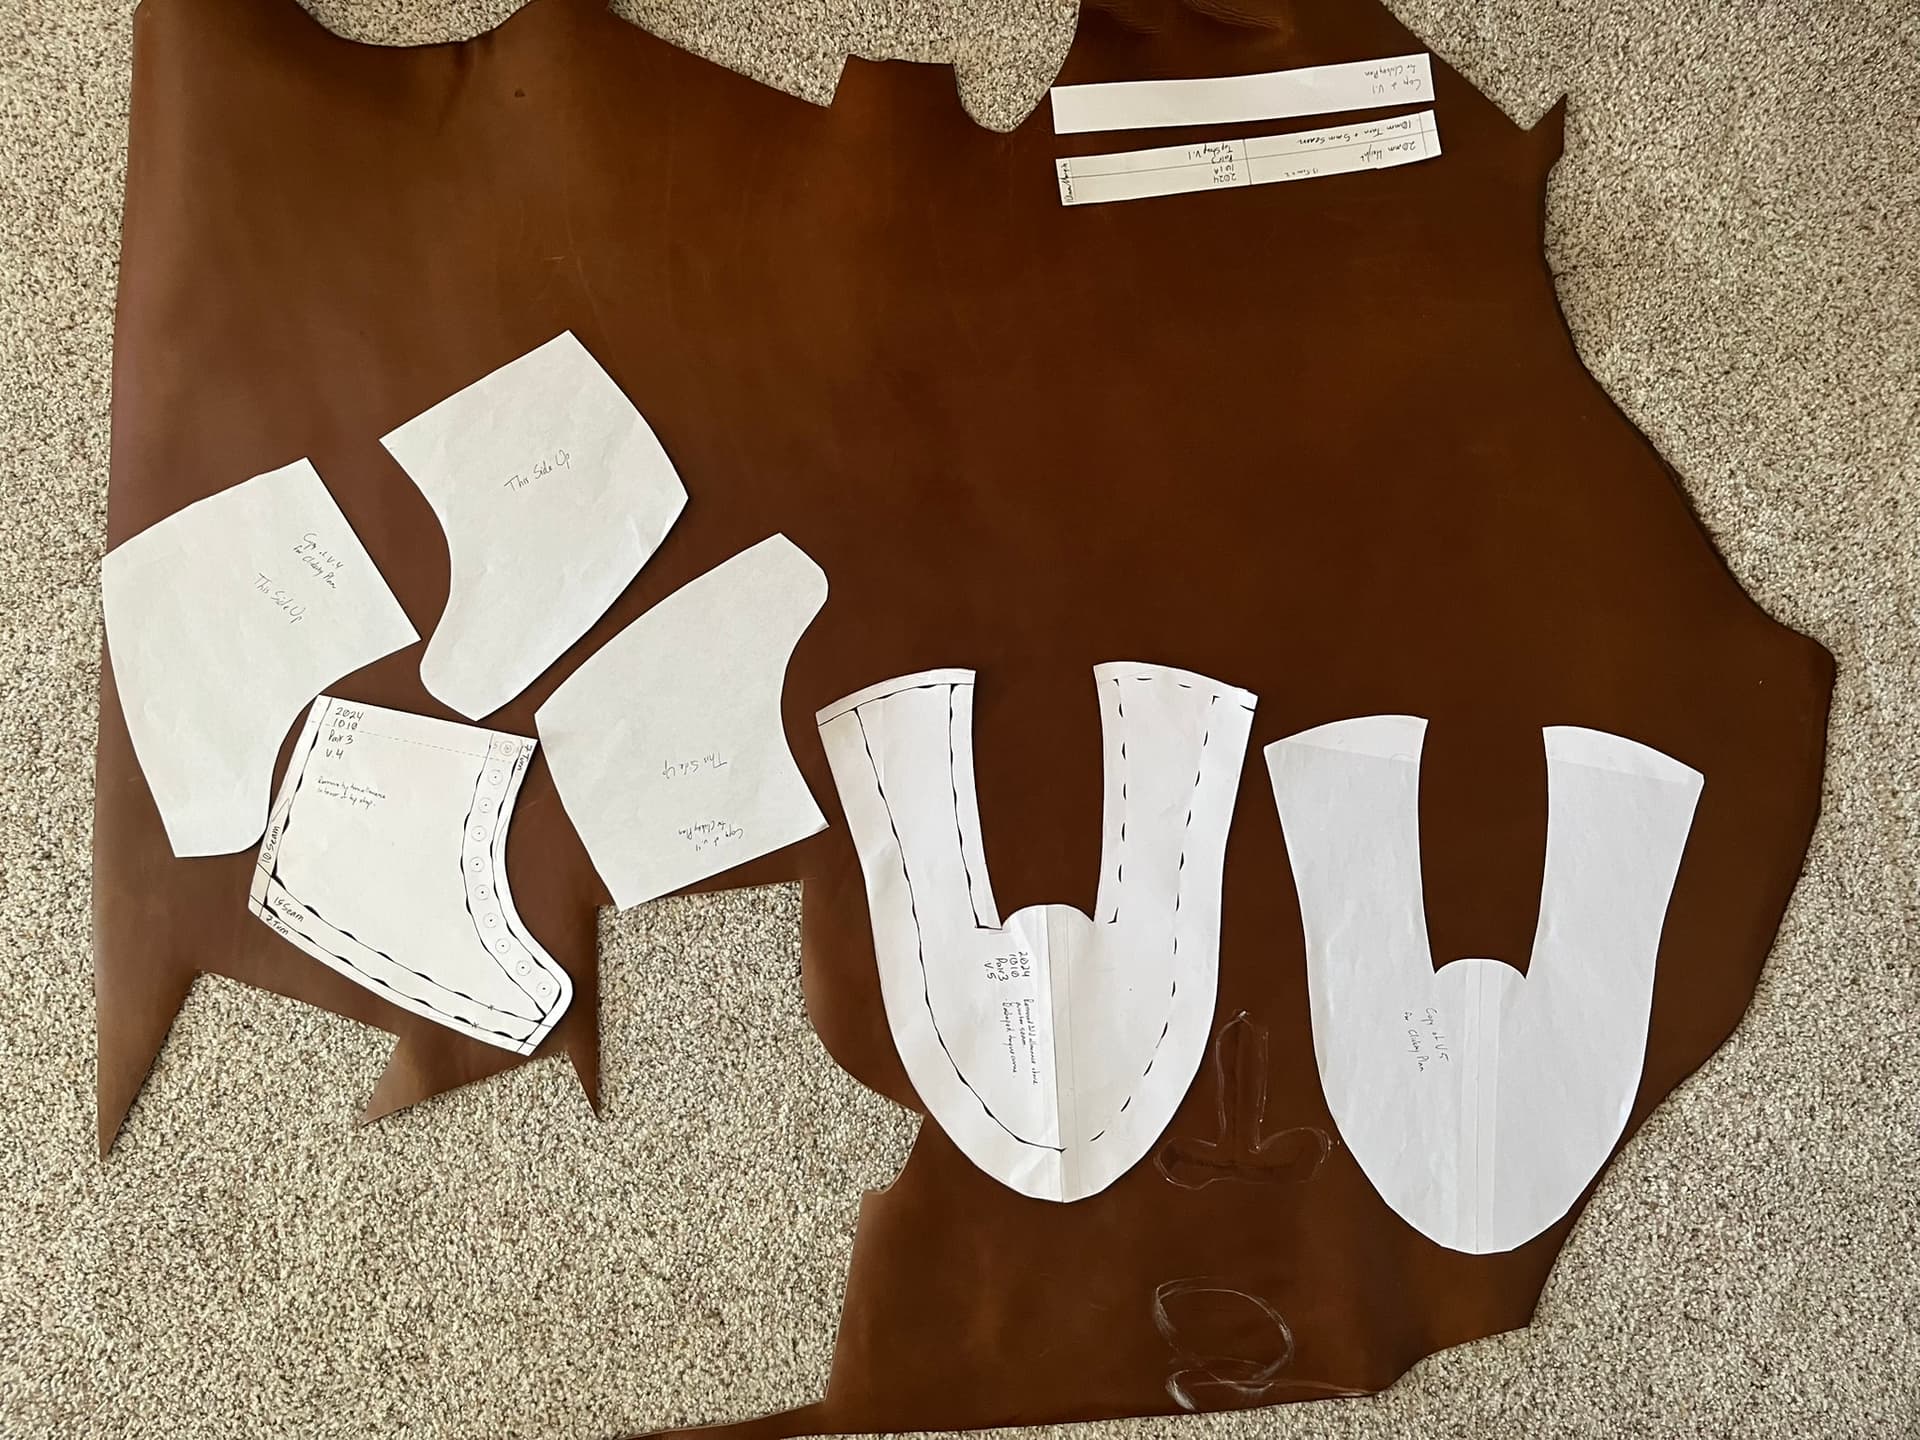
Pair 3: Wrap-Around Vamp Ankle Boots

I’m starting in on my third pair from scratch, and plan to share notes and photos here again as I go.

Plan

Overall, I’m planning to reuse more work from my second original this time around, in large so I can get to closing, making, and bottoming practice faster. That said, I do have a few tweaks in mind:

  • Keep the same built-up Carmack roper last, but adjust it to remove the excess volume over the balls.

  • Start from the patterns for pair 2, but make a couple adjustments:

    • Combine the vamps and counter covers, so the vamps wrap around all the way back to the backseams. No more cowboy-boot-esque piped side seams.

    • Stitch the quarters over the vamps the whole way, rather than just at the tabs.

    • Do some different contrasting decorative hand stitching on the quarter seams, likely with finer thread and shorter stitch length. Perhaps more of a slanted stitch with braided thread. Maybe something with different colored top and bottom threads, or alternating short and long stitches.

    • By biggest inspiration here is probably these old Addison military contract “flyer” boots I have around for when I need steel toes:

      There are also a number of cool old military boots these points back to, like the English “B2”-pattern boots and US 1912 Russets. I thin Horse Power actually did a similar lace-up pattern on a roper last sometime back.

  • Welt all the way from heel to heel. Nail the heel seats from the get-go.

Looking Ahead

Longer-term, I want to make my fourth pair for someone else’s feet. I want to see what the desire to please someone else, and not just myself, does to my care, attention, and speed while building. However, I think I’ll probably do that by fitting them to a stock last, perhaps Greg Carmack’s 400 dress shoe last or the Spokane-style 55 outdoor boot lasts @customboots now sells.

Meanwhile, I can try my hand at lastmaking from scratch, again on my own feet, for ease of reference. Probably sculpting in clay for casting to plastic.

1 Like

Would you ever be up for trading a pair? I need more guinea pigs to practice boot making on. :slight_smile:

Definitely not yet! One of my bigger goals for pair three is to turn out something I think someone else would be happy to receive.

With the lingering bump-under-arch issue of my second pair, I don’t think I’ve met that standard yet.

1 Like

Patterning

I’m homing in on clicking-ready patterns.

The dampness around the edges is a water-based polyurethane hardener, PC-Petrifier, out of a needle-nose squeeze bottle. I got a tip, I think from the Stitchdown cordwaining chat channel, to try that for reinforcing the edges of patterns.

I’m very explicitly patterning curves around the heel this time, both in the galoshes and the quarters. Having only worn my second pair a few times, I’m already seeing it take in nicely over the heel, which is great. But I’d prefer to do more to set that shape right off the lasts. Hopefully hoisting plus patterning does the job.

Somehow I’ve already done more revisions of the quarter pattern for this pair than I ever did for my first two pairs. Mostly, I’ve been trying to make sure I get the quarter-vamp seam right. The plan is to have that be a rather broad seam—15mm—so that I have room to do multiple rows of decorative hand stitching. I also want that seam to sit slightly lower over the heel at the back than on my second pair, more like 60mm up from the featherline than 70mm.

At the same time, I’m concerned about overlapping the ankles and all the discomfort that can cause. All the boots I’ve checked with wrap-around galoshes like this make sure the quarter seam falls down where the topline of a shoe would, even work boots with big seams like Red Wing’s 10877s:

Classic Timberlands are the same way, with triple seams, albeit Oxfords:

https://www.timberland.com/en-us/p/men/footwear-10039/mens-timberland-classic-6-inch-waterproof-boot-TB018094231

I noticed a cool pair of Frank Giffords with pinking and five lines of stitching, in two thread weights, for sale on eBay this week:

Those also have really sharply swept-back quarter tabs. Not sure that’s for me, but it’s a look!

I haven’t quite settled on a plan for the backseams yet. I might do backstraps just down the quarters and leave the stitch-and-turn backseams of the galoshes exposed.

1 Like

I realized I could nix the turn allowance and avoid the straight line around the tongue seam, since the inside of the quarter seam will be covered by lining.

1 Like

Those giffords are awesome

1 Like

Clicking Soon

Starting to plan clicking for this pair. I promised myself for this pair I’d cut out paper templates for all the pattern pieces, lay them out all at once, and sleep at least one night on my nesting plan. Here’s the start:

This came to me as a “half side” of Seidel “Double Shot” from Rocky Mountain. Alas, there’s a big “T” brand and another very blemish rather near the backbone, at lower right in the photo. The belly also gets very wrinkly just above the two top straps laid out above.

Lining Patterns

I did lining patterns for these boots today.

I’m basically following the model of the old Addison military contract “flight boots” I have laying around. Those also have wrap-around vamps, AKA galoshes, with quarters sewn on above. However, they did the lining essentially like classic derby boots, with front vamp pieces covering the toes past the joints to the tongue seam, then arcing down to the featherline where the quarter seam on a more common derby pattern with stirrups would go. The lining of backparts and shafts are in two halves, split along the backseams, but covering over the seams between the shafts and the galoshes. Everything gets sewn together at the tabs.

Since I’ve got a bunch of continuous lining leather left, I can do the extravagant thing and cut the back linings as single pieces per boot, rather than halves meeting at the backseams:

I probably don’t think enough about positioning and stretch on my lining pieces. I catch myself just looking out for defects and staying away from the stretchy belly parts. I suppose it really doesn’t matter all that much for vamp linings. But the quarter linings are visible enough.

PC-Petrifier on Paper Pattern Edges

Dave, AKA New River Boot, shared a tip elsewhere to use PC-Petrifier, a water-based urethane solution marketed as a hardener for rotted wood, to reinforce the edges of paper patterns. He mentioned using an edge paint applicator. I’ve had good success using a needle-nose squeeze bottle.

You have to let the patterns dry. If you put on too much, the liquid can cause a little wrinkling and discoloration first. But once hardened, it definitely beefs up the edges a bit. Not exactly brass binding, but definitely an improvement.

Skiving and Turning Quarters

I’m not sure the binder clips are really necessary. I still never quite know when Aquilim 315 will tack, but once it does, it seems to hold. Still, leaving it clamped gives me confidence.

Working Faster

I’d really forgotten how much faster things progress when you don’t chicken out and advance just one shoe of the pair, afraid it might not work out right. I’m inevitably faster doing something the fourth time, and I’m not going to have to check notes to make sure I get fellows the same.

Hooray Skiving Knives

Another chance to sing the praises of @Customboots’ skiving knives here.

I still have it in my head that I generally prefer skiving with knives beveled just one side, like chisels. I did use a Barnsley paring knife like that on these a bit, more for variety than anything else. But @Customboots’ symmetrically ground blade is definitely growing on me. Especially since I figured out a tiny trick for stropping it quickly:

Slow:

Faster:

Hold the paddle strop / rap stick parallel with the long axis of the knife. I usually do this on a table, but it was easier to get the photos here standing up.

When you’ve pulled one side down the strop, flip the knife to strop the other, without moving your arm or the strop.

You can also flip your whole wrist over, though I find I’m less good at getting the same angle that way:

Lining and Top Bands


The first top band I just held on with gator clips, which of course left ugly, if temporary marks where the jaws gripped. The second time, I improvised and shoved some wood chopsticks under the clips, at least on the insides. That definitely worked better.


Mistake: Top Band Too Thick

I decided to try “rolled tops” on this pair for the first time. I skived the bands where they would roll—10mm for the roll plus 5mm for the seam—and that worked out well. But I should have skived the top bands thinner overall, so they were less bulky.

Mistake: Lining Under the Top Bands

I should have trimmed the lining back at the very tops of the facings before sewing on the top bands there. Since I didn’t, the contrasting lining shows between the brown upper and top bands at the tops of the facings. I may try to separate those layers and pare the lining back, or perhaps dye the edge brown to match. But that’s going to be a little more fiddly than just trimming it before sewing would have been.

Mistake: No Plan for Finishing the Edges of the Rolls

I’ve always just seen raw leather edges at the ends of rolled tops, where they reach the facing gaps. I just cut my rolled tops square there, too. But I wish I’d taken the time to think of a way to finish those edges.

I think next time I’ll try skiving that edge to a feather and turning it back on itself. The edge of the “tube” of each roll will still show a little hole that way, but the edges themselves will be grain, not substance.

I’m kicking myself now, because I actually cut my top bands long enough to have excess on both sides for this pair. But I cut it off square before thinking about how I might skive and turn it back.

Mistake: Didn’t Smooth Eyelet Stay Doublers Well Enough

I decided I’d try gluing in some fabric to reinforce the eyelet stays this time. I ended up using some scrap Cordura-brand fabric I had around, which I believe is plain-woven nylon with a urethane coating on one side.

I cut straight strips of the Cordura was wide as the eyelet stays and just glued them down, creating pleats to get around the bend of the facings. That worked fine, but I should have been more careful cutting out those pleats and making sure the resulting glued-down pieces butted up against each other neatly, without overlapping at all. Even the very slight overlaps from some of the pleats show through my tan lining, shown in a few of the photos above.

Those won’t be visible parts of the boots from the outside, and they won’t lay against the skin of the feet, either. But I could have done a cleaner job and avoided them outright.

Mistake: My Lining Trimming is Still Ugly

I followed my own advice and trimmed the lining quarter lining with an edge beveller this time. It really helps to leave excess lining so you have something to grab and pull on.

Still, I got ugly, ragged, angled edges in a number of places. I am going to have to go in with razor blades and clean up those lines, trying really hard not to cut through into the uppers. I’ll probably try using an old credit card as a mini cutting board this time. I’ve used bits of thinner flexible poly cutting mats sold at restaurant supplies for prep work before, and sliced right through them.

Awkwardness from Lining Choice

I decided to have single lining pieces cover both the quarters and the heel pocket part of the galosh vamps on these. The idea is was to make one less seam for the feet to feel in the back there. But that has made planning to close these boots more complicated. In particular, I’ve had to think a lot about the order in which the various parts need to get stitched together.

For those big lining pieces, my basic approach has been to glue them to the tops of the quarters, but leave them unglued at and a bit over the seam allowance for the quarter-vamp seams. I can roll up the lining pieces within the quarters, to make room for sewing onto the vamps, then hopefully unfurl them and figure out what to do about adhering to the vamps then, leaving pockets for the heel counters.

Quarter Stitching and Hardware

I sewed the main lines of the uppers yesterday and set the eyelets earlier today.


Mistake: Too Fine Thread Pitch

I tried sewing the seams for the the edges of the facings, the top bands, and the eyelet stays finer this time. I used 2.5mm center-to-center pricking irons, a small Oka-brand awl, and 0.020" Maine Thread twisted poly thread.

Overall, I think this is too fine. The look should improve a bit when I hammer the stitches down and go over with an overstitch wheel. But I think I’d actually just prefer slightly longer stitches that better emphasize the slanting of the saddle stitches.

Mistake: Dirty White Thread

I still haven’t figured out what makes white poly thread and go grayish when I sew some lines. Some of the lines I did yesterday—specifically the eyelet stay lines—turned out much better than others—the facing edge and top band lines.

I suspect it may have something to do with the way I sewed. I did the eyelet stay lines last and got into my groove of sewing ambi, passing the needles up and down more than side to side through the leather. That seemed to keep things much cleaner.

It may also be worthwhile to run a sacrificial piece of thread my holes before stitching the final thread. It could be I’m picking up dirt or color off the leather finish.

Mistake: Eyelets Petals and Washers Still Kind of Ugly

I used an SPS twist-style hand press to set the eyelets for the first time. The experience way definitely much more enjoyable than C.S. Osborne setter pliers or whacking on a setting die with a hammer, but I don’t think my results look all that much better than on my last pair.

I was embarrassed to do so, but I wrote Ohio Travel Bag to make sure I’m orienting the washers correctly. They have little half-torus-shaped ridges on them. I’d been setting the washers with the concave faces of those ridges up—away from the backside of the material—rather than facing down into the leather. That still makes the most sense to me. I also set one washer the other way around, just to try it, and didn’t particularly like the result. Likely OTB will simply tell me I had it right, and that’s just how it goes.

I’ve seen some eyelets with very neat and clean backs, like on Truman boots. I read somewhere that Truman also recently upgraded to also use backing washers. But I don’t know how to describe the style of hardware. Maybe “rollset” is the magic search term here.

Not that any of this matters so much. From the outside, the visible parts of my eyelets look fine.

Mistake: Jumped the Gun Stitching Eyelet Stays

I realized that I stitched the lines outside the eyelets without including the gusset tongue, so I picked those stitches.

It’ll go faster at the right time, since I already have the holes pierced. But I’m disappointed that I made another closing-order mistake.

Mistake: Eyelet Stay Stitch Lines a Bit Close

I decided this time to stitch the lines around the eyelets a bit closer, but didn’t think ahead about how the outside lines also hold the gusset tongues. I think I’ll get away with it this time, but ideally that stitch line would be 2.5 mm or so further from the eyelets—5 mm in total—so the gusset tongue has a full 5mm of seam allowance where it attaches to the quarters.

Word from Weaver/Ohio Travel Bag on Washers

The folks at Weaver were kind enough to confirm that the washers should indeed be set with the concave faces of the ridges facing up and away from the material.

They mentioned that too much pressure can force the eyelets too deep into leather.

Galosh Backseams


This seems to have gone pretty well. The steps here were:

  • Double check the seam allowance and skive.
  • Mark spacing on one side with an overstitch wheel and pierce the holes.
  • Lay over the second side and pierce through the holes through the second side.
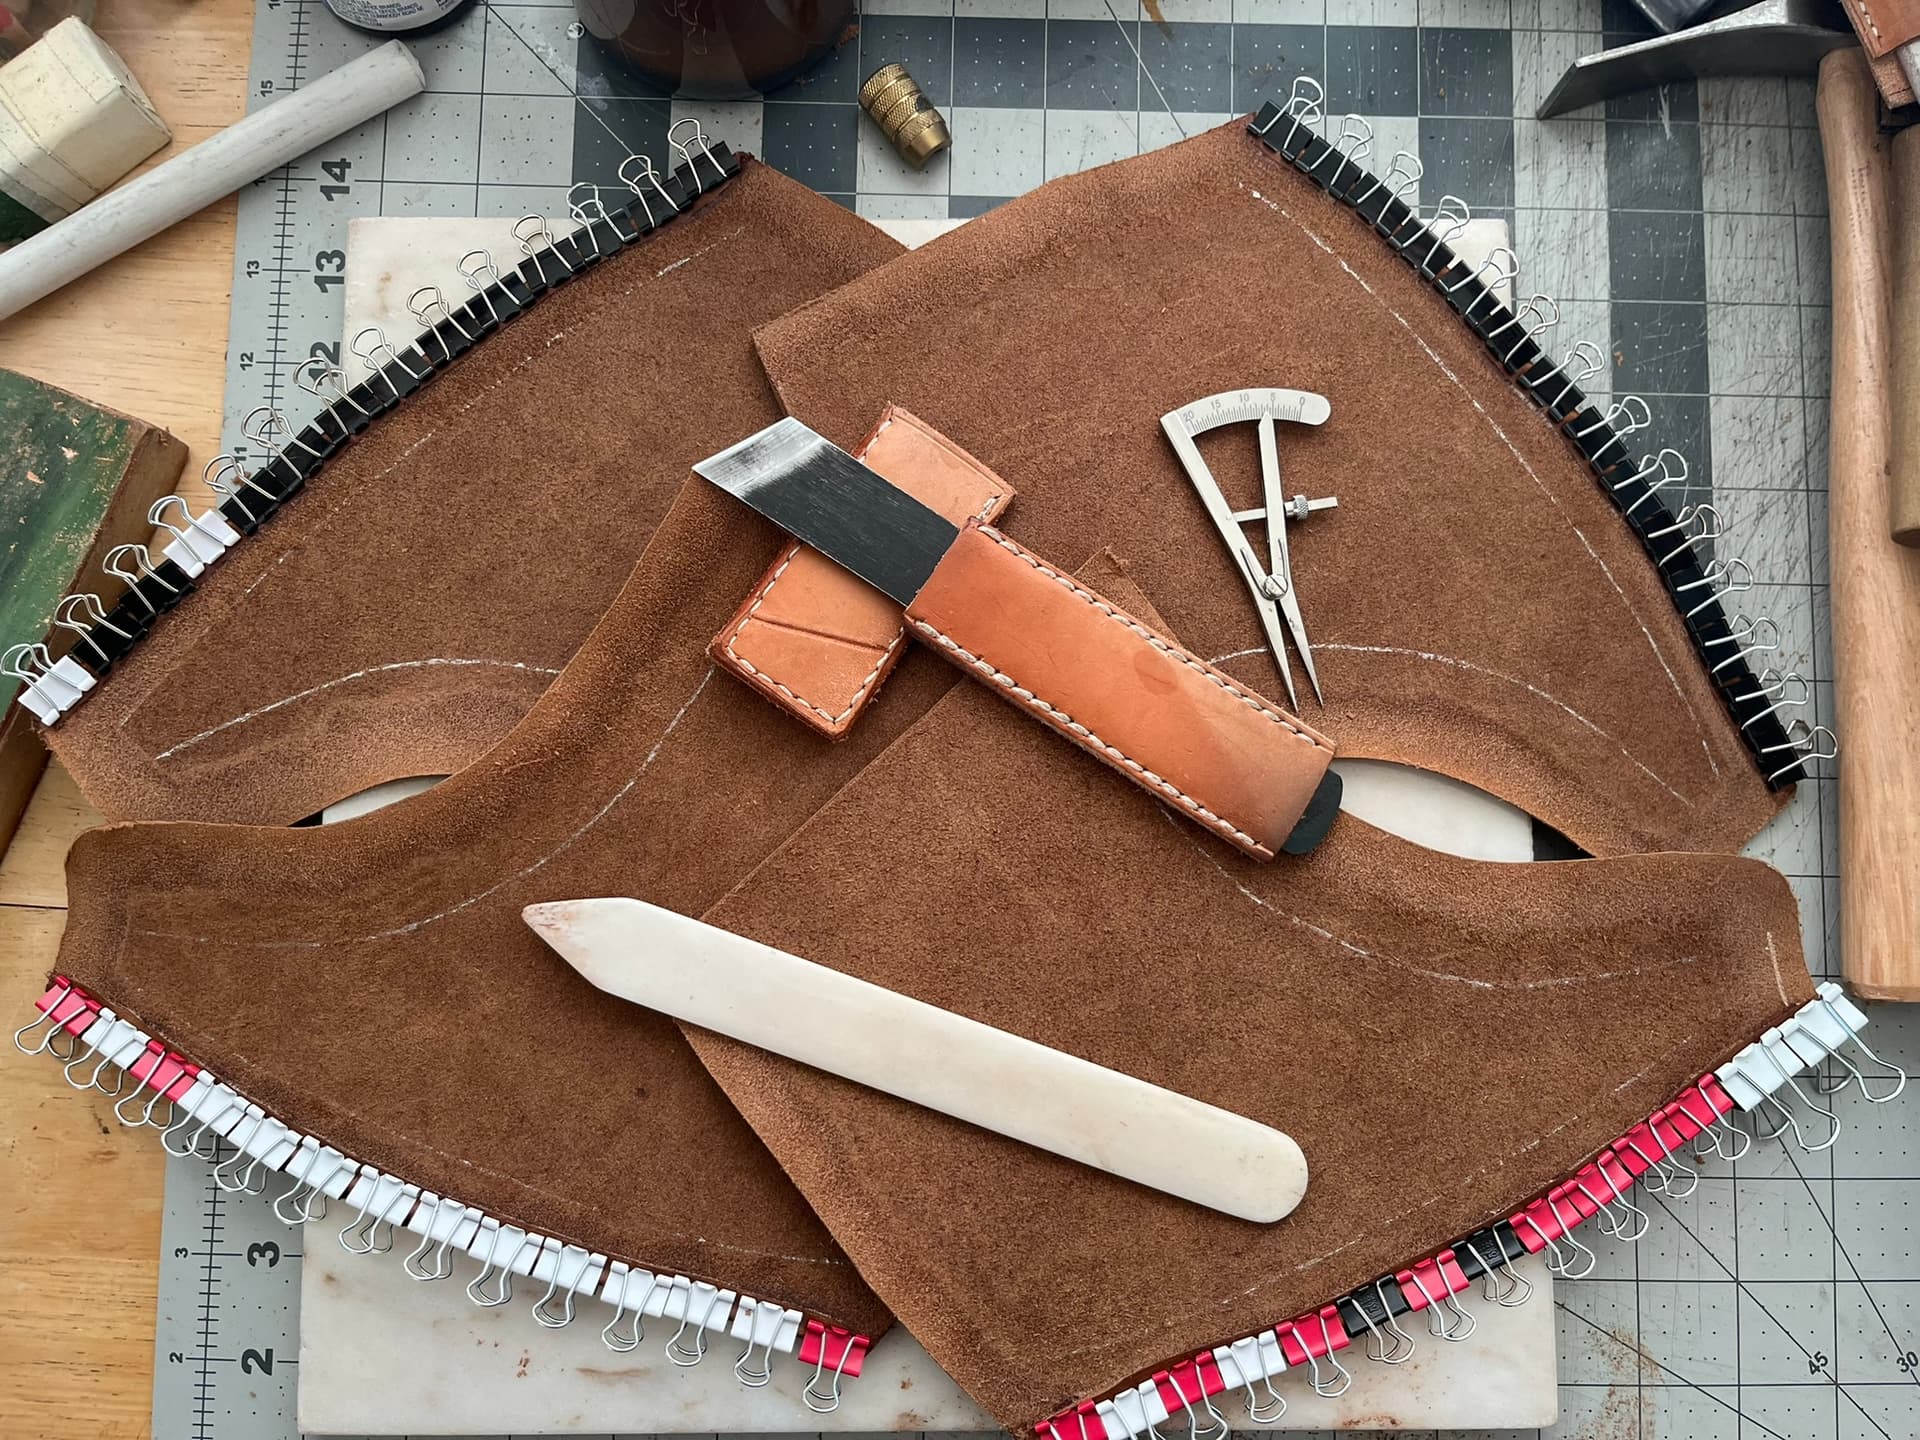
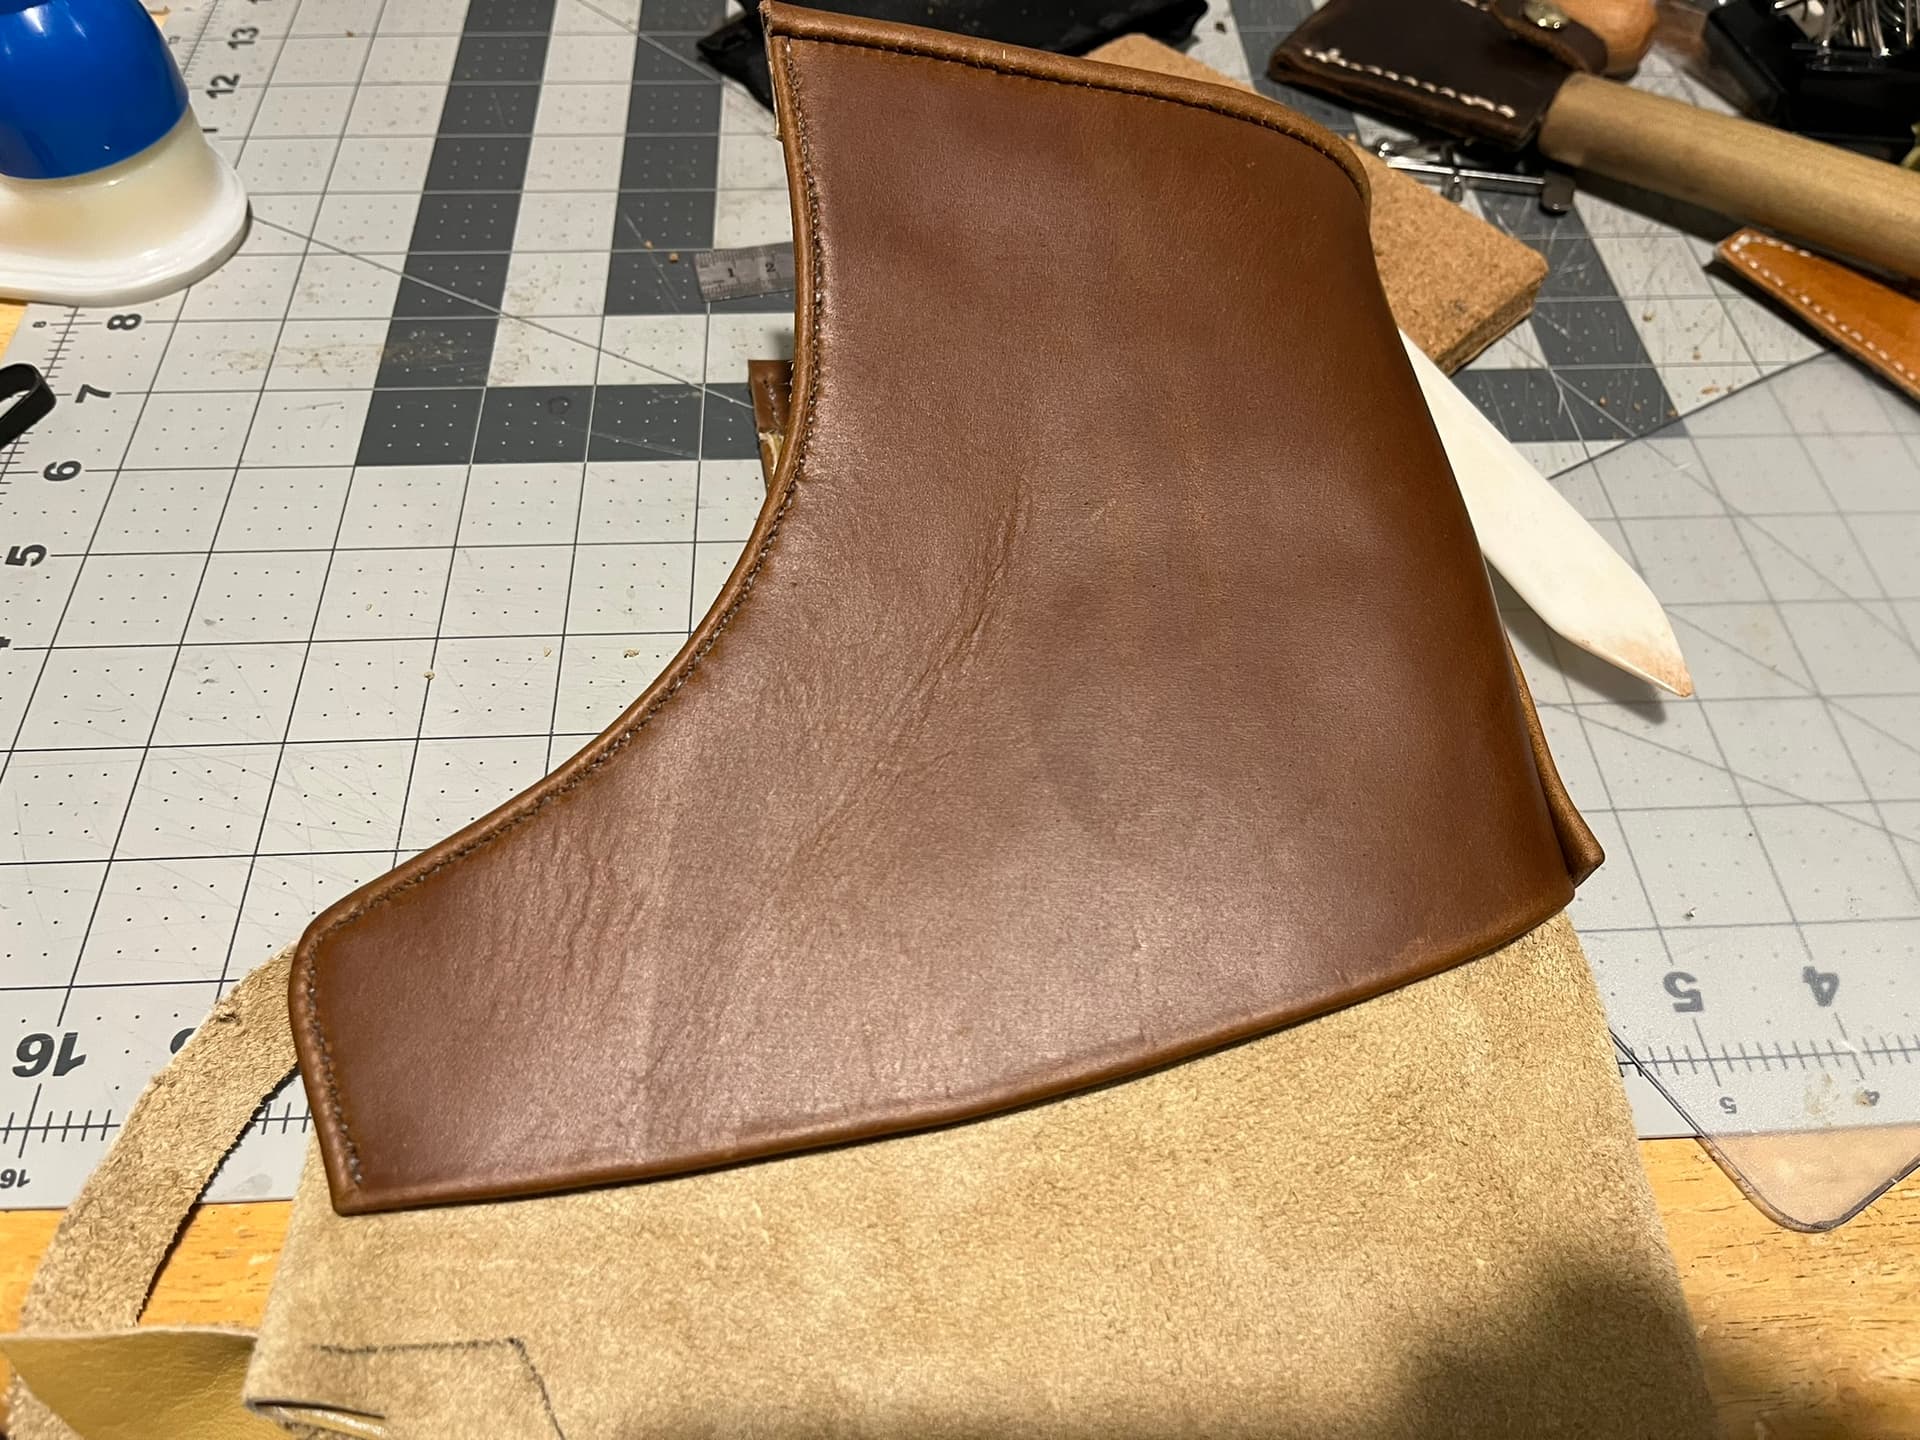
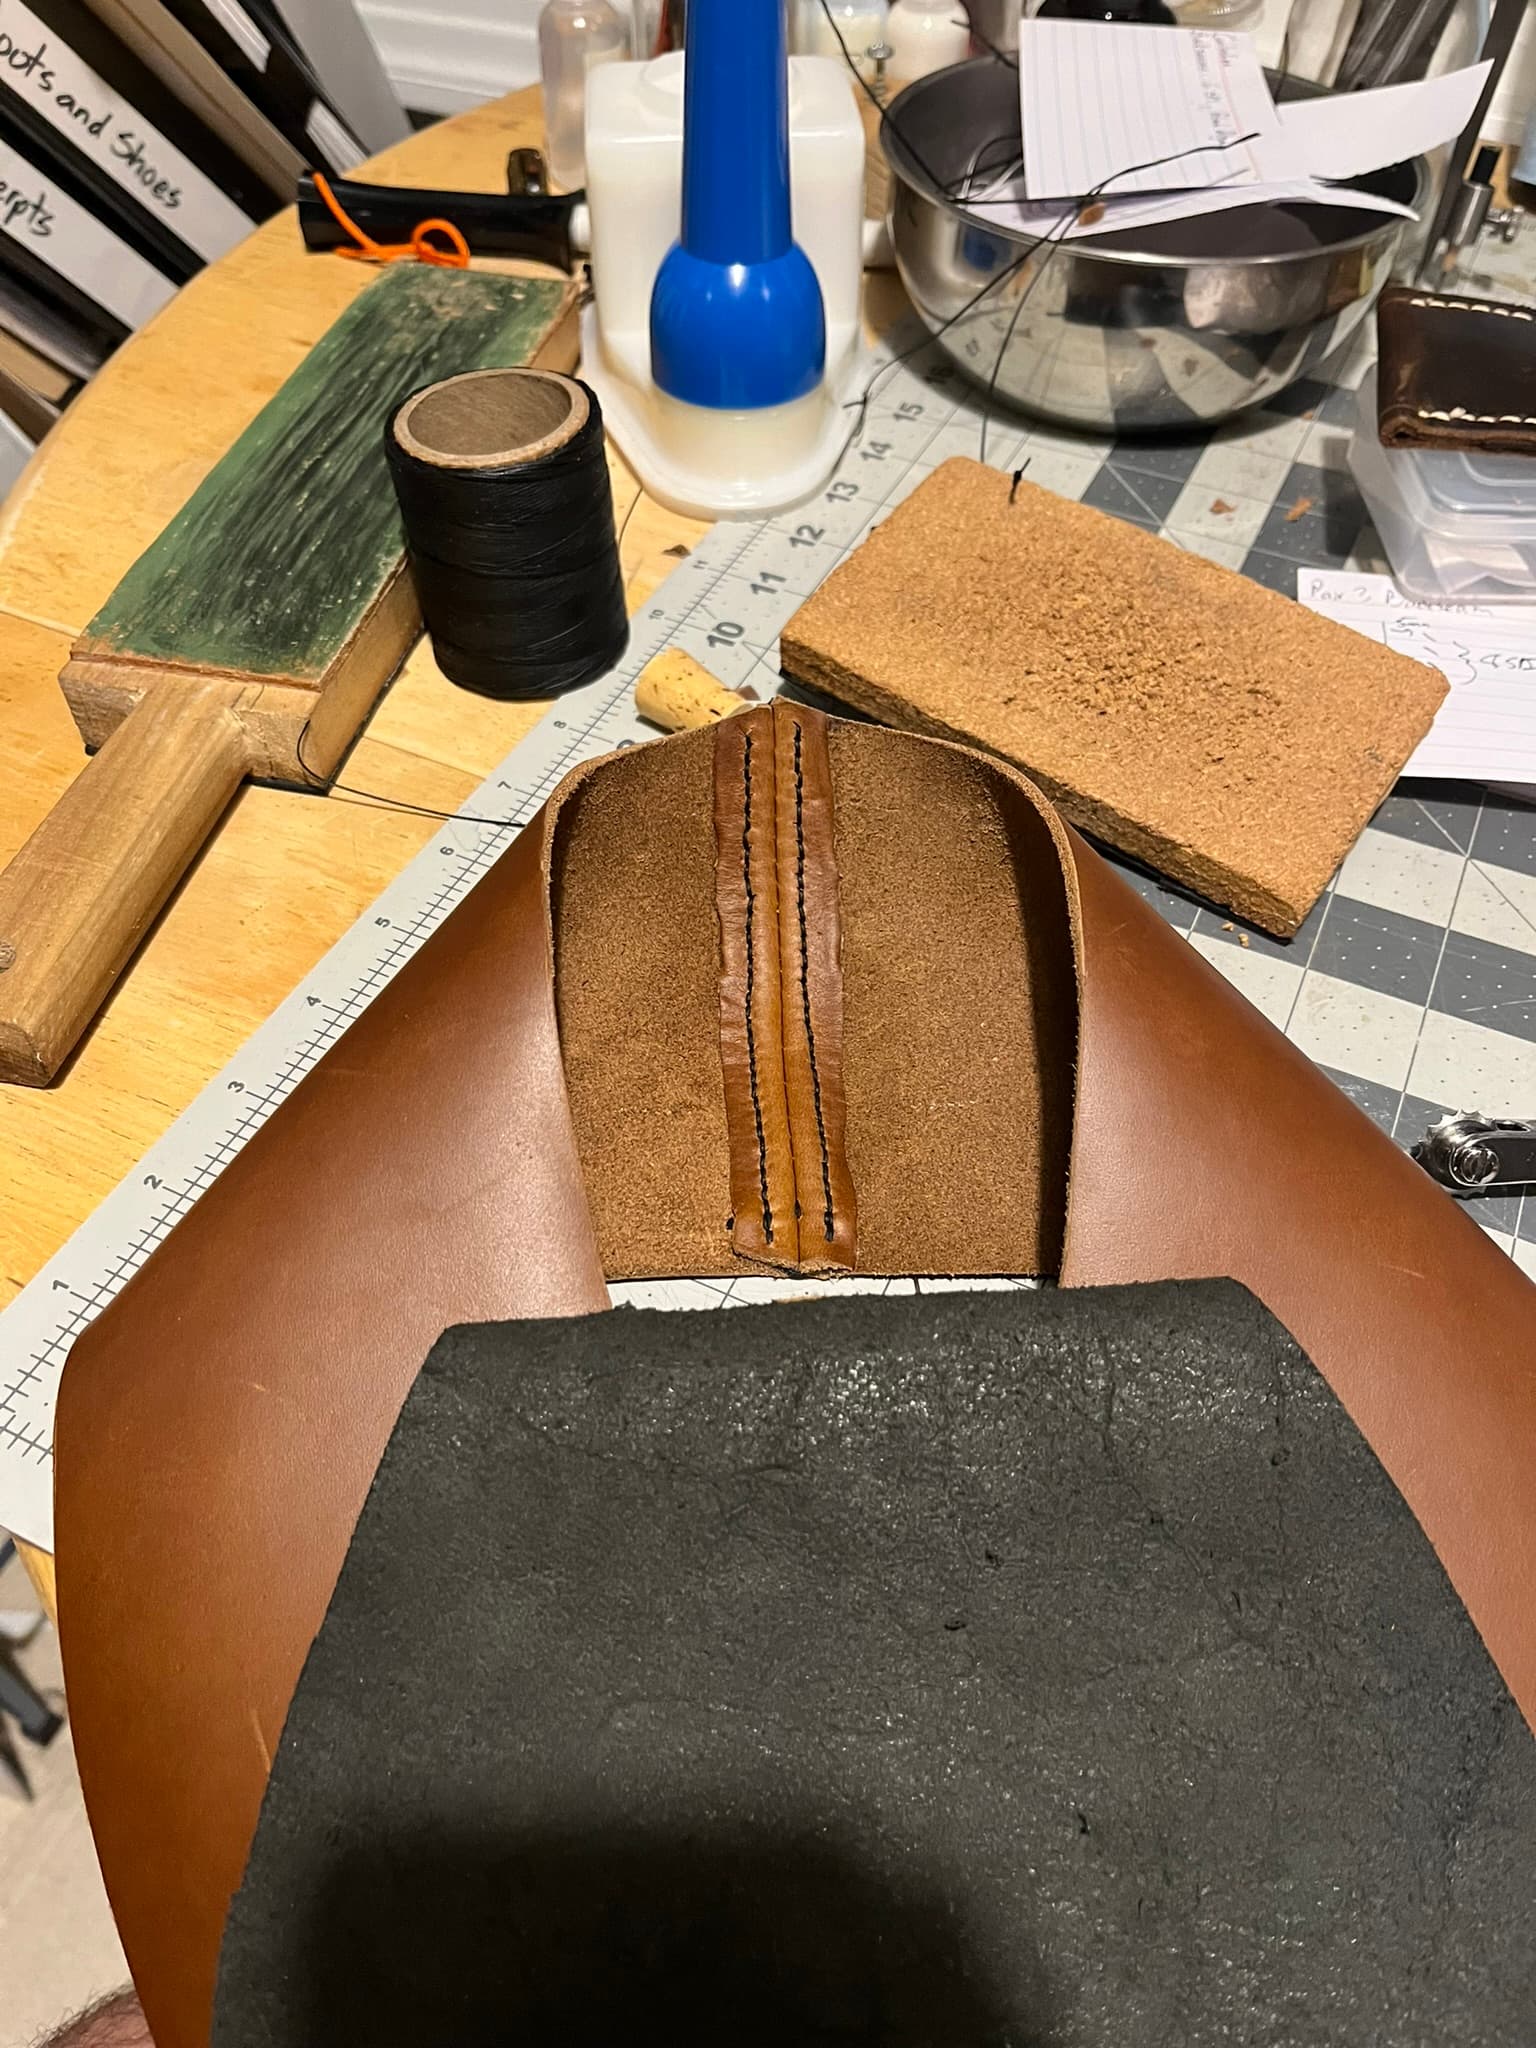
  • Sew face to face.
  • Hammer seam open a bit. The biggest progress here actually came from rubbing the side of the hammer face against each lip, rather than banging top-down on the seam.
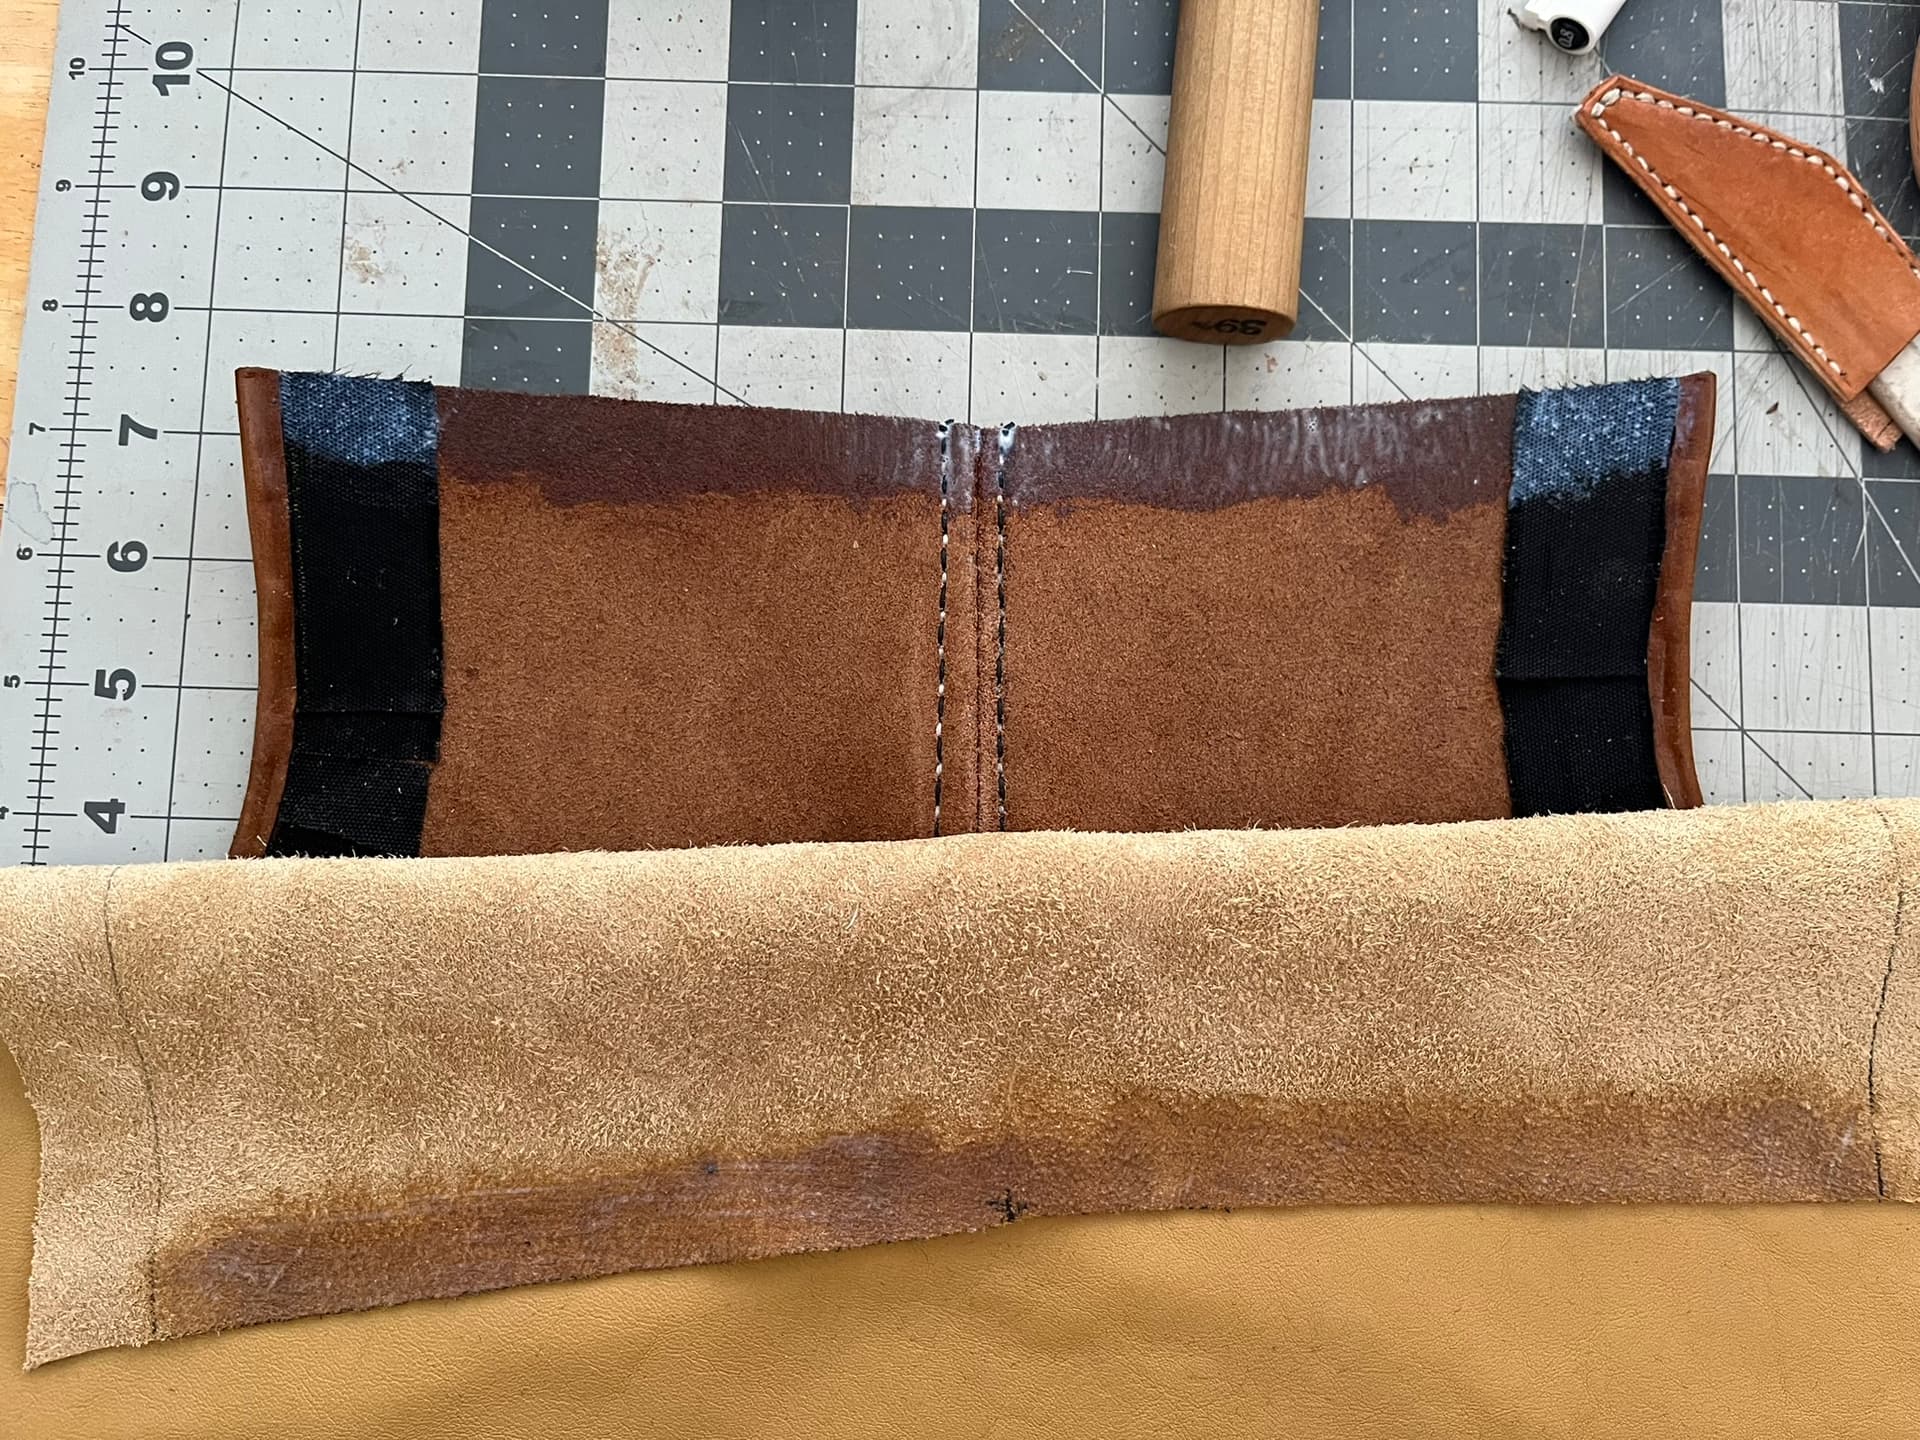
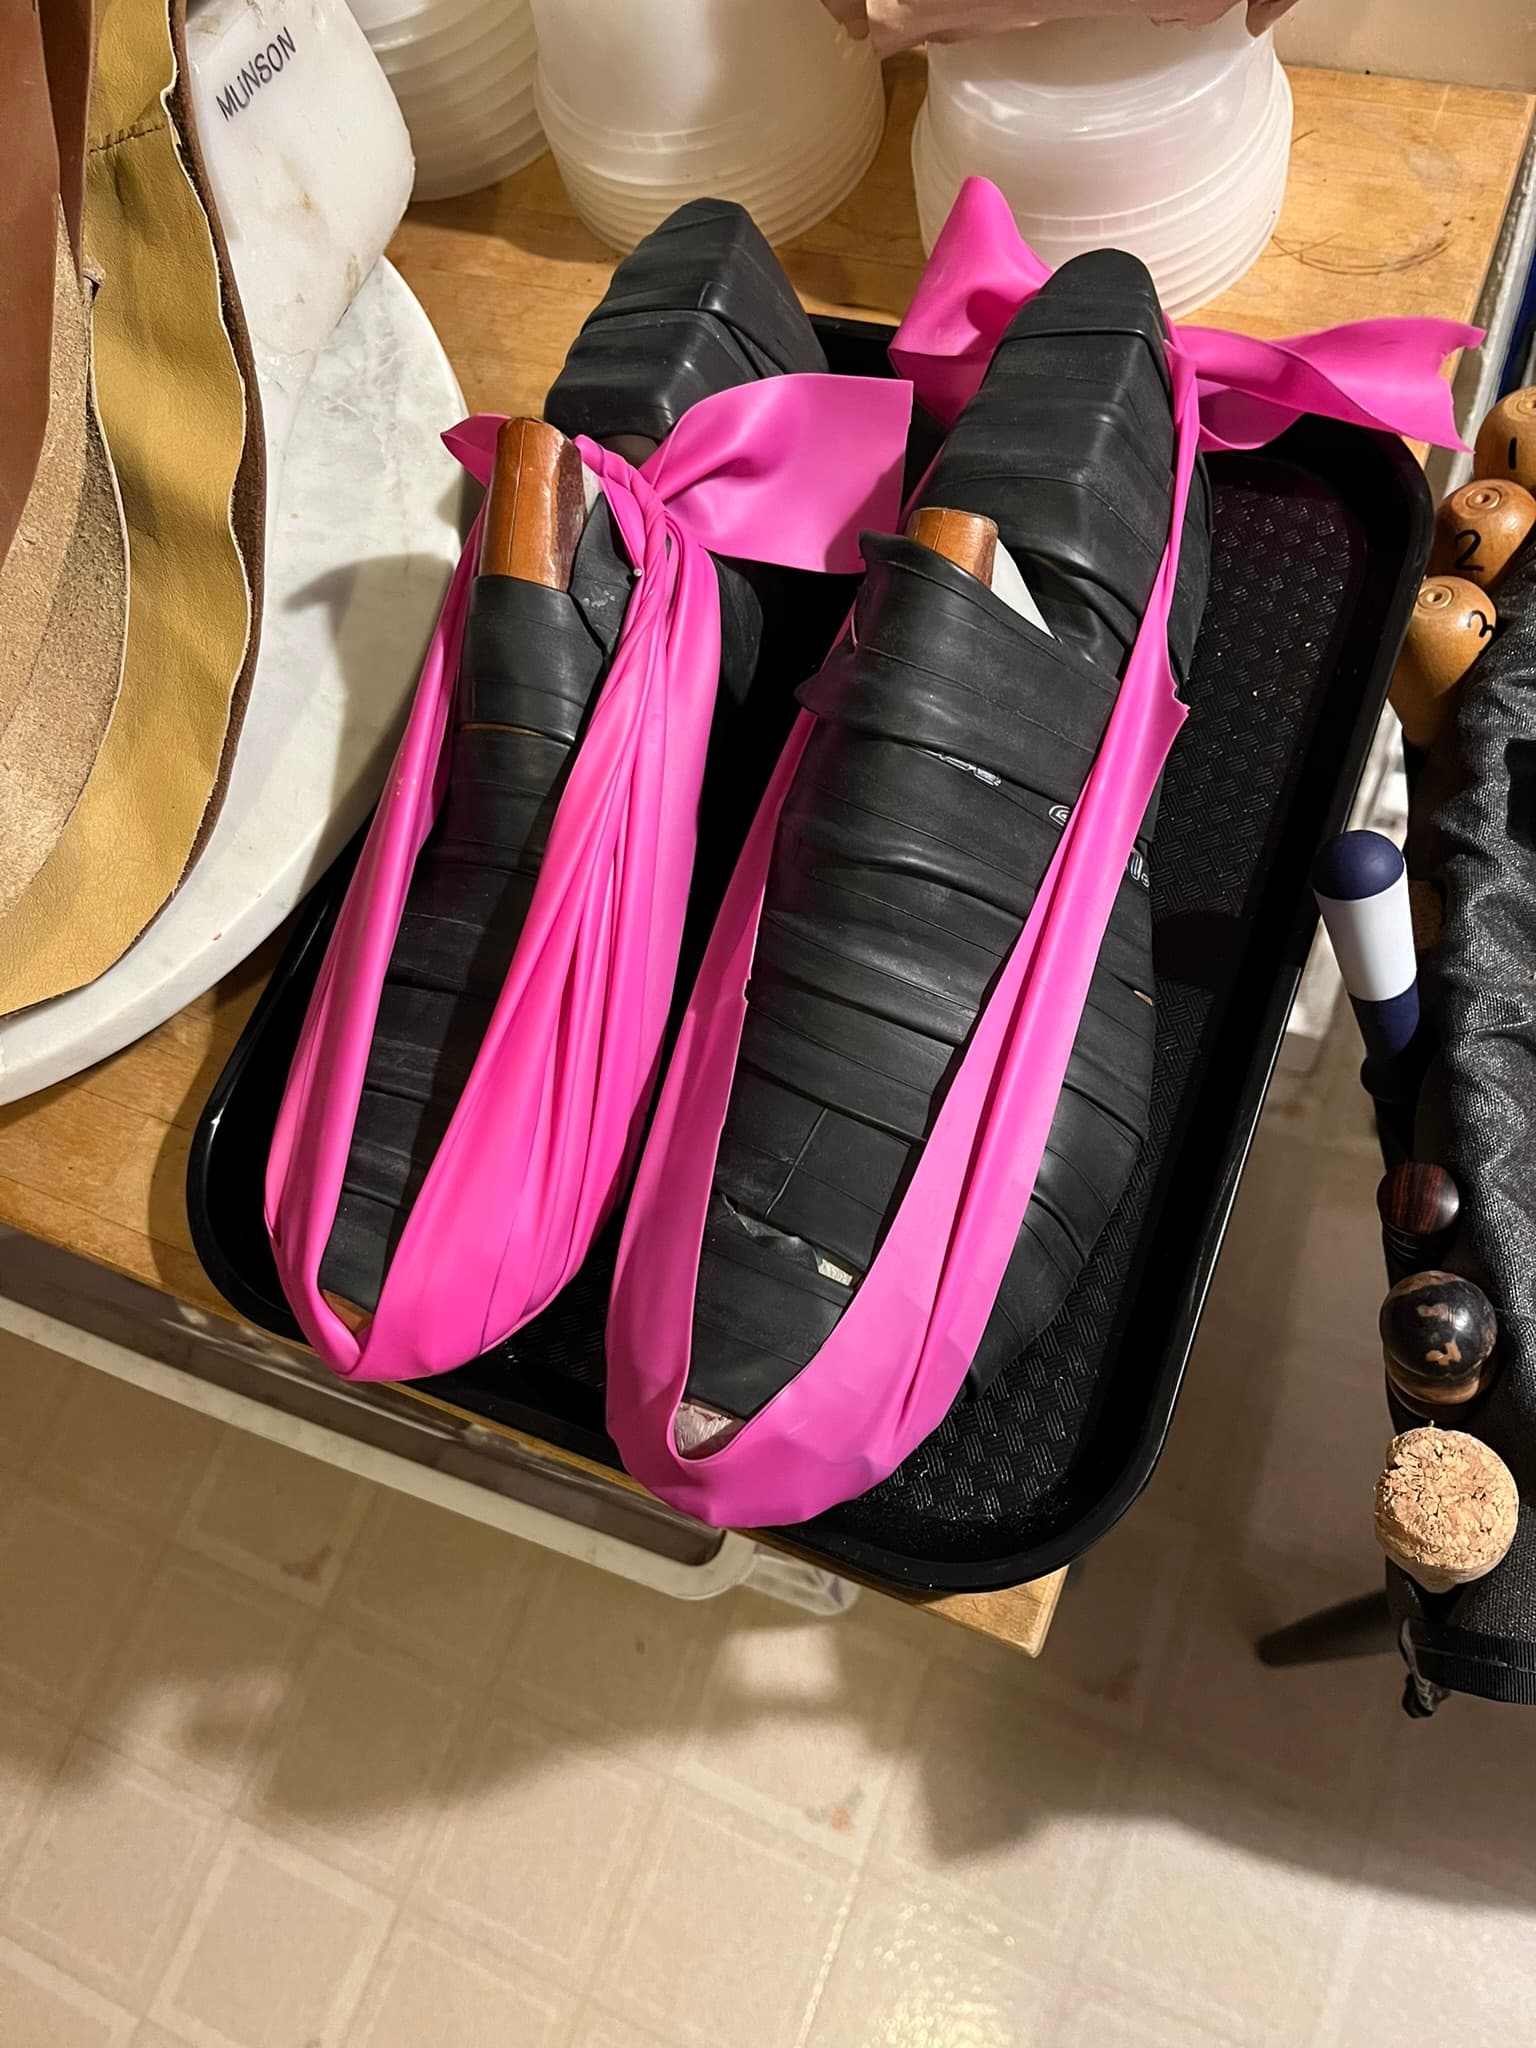
  • With the galosh turned inside-out, I brushed Aquilim 315 water-based contact cement about 5mm before and after the seam and let it go clear, ready to tack. Then I worked the flaps down, cement to cement, with my fingers and a bone folder. This got them most of the way flat.
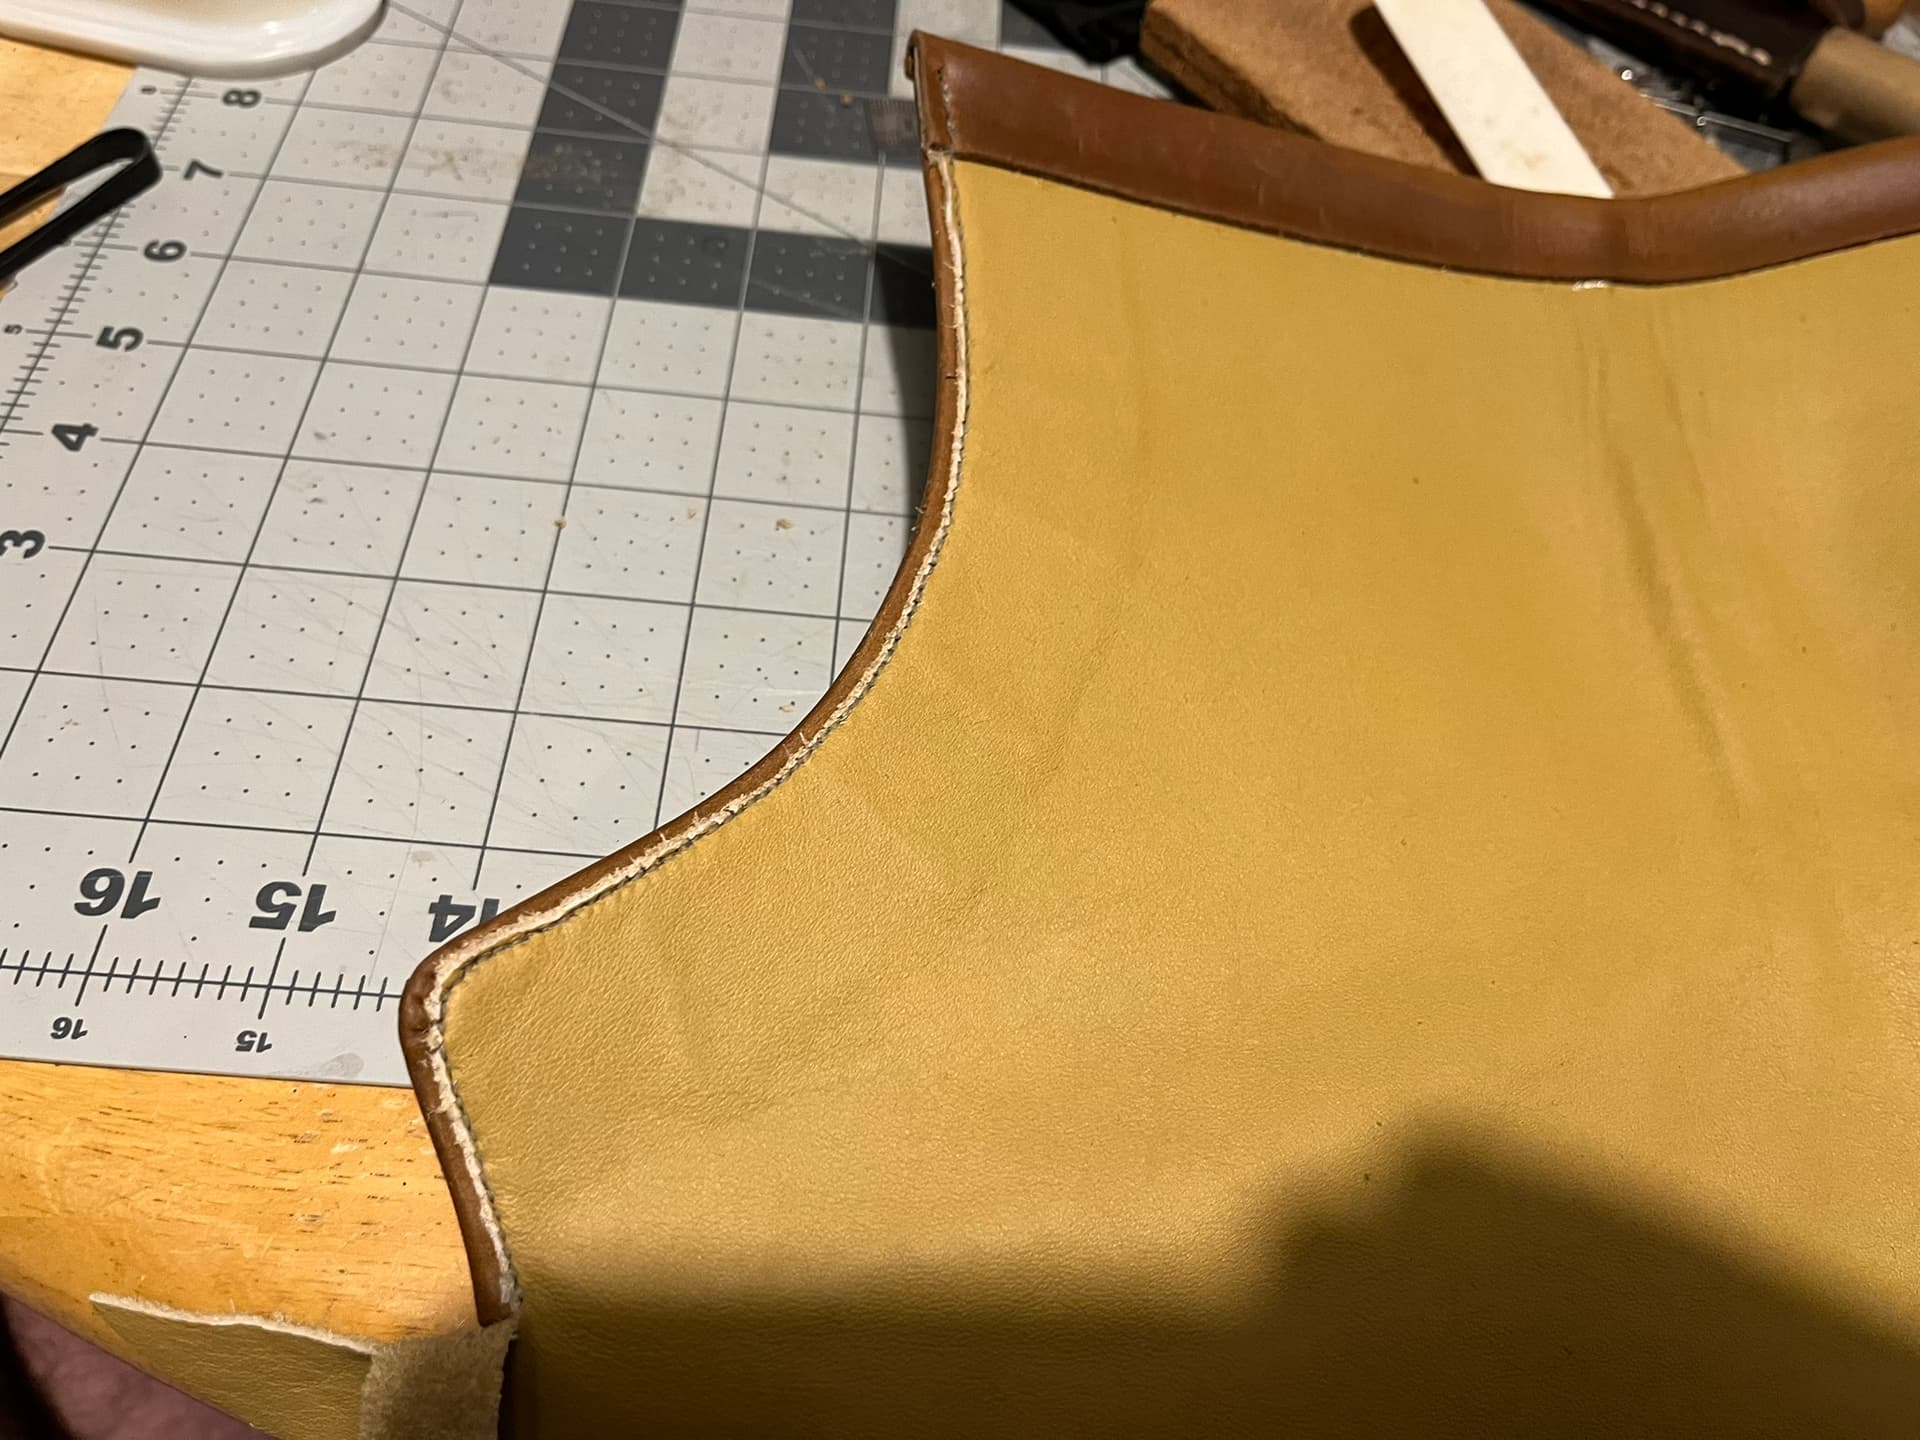
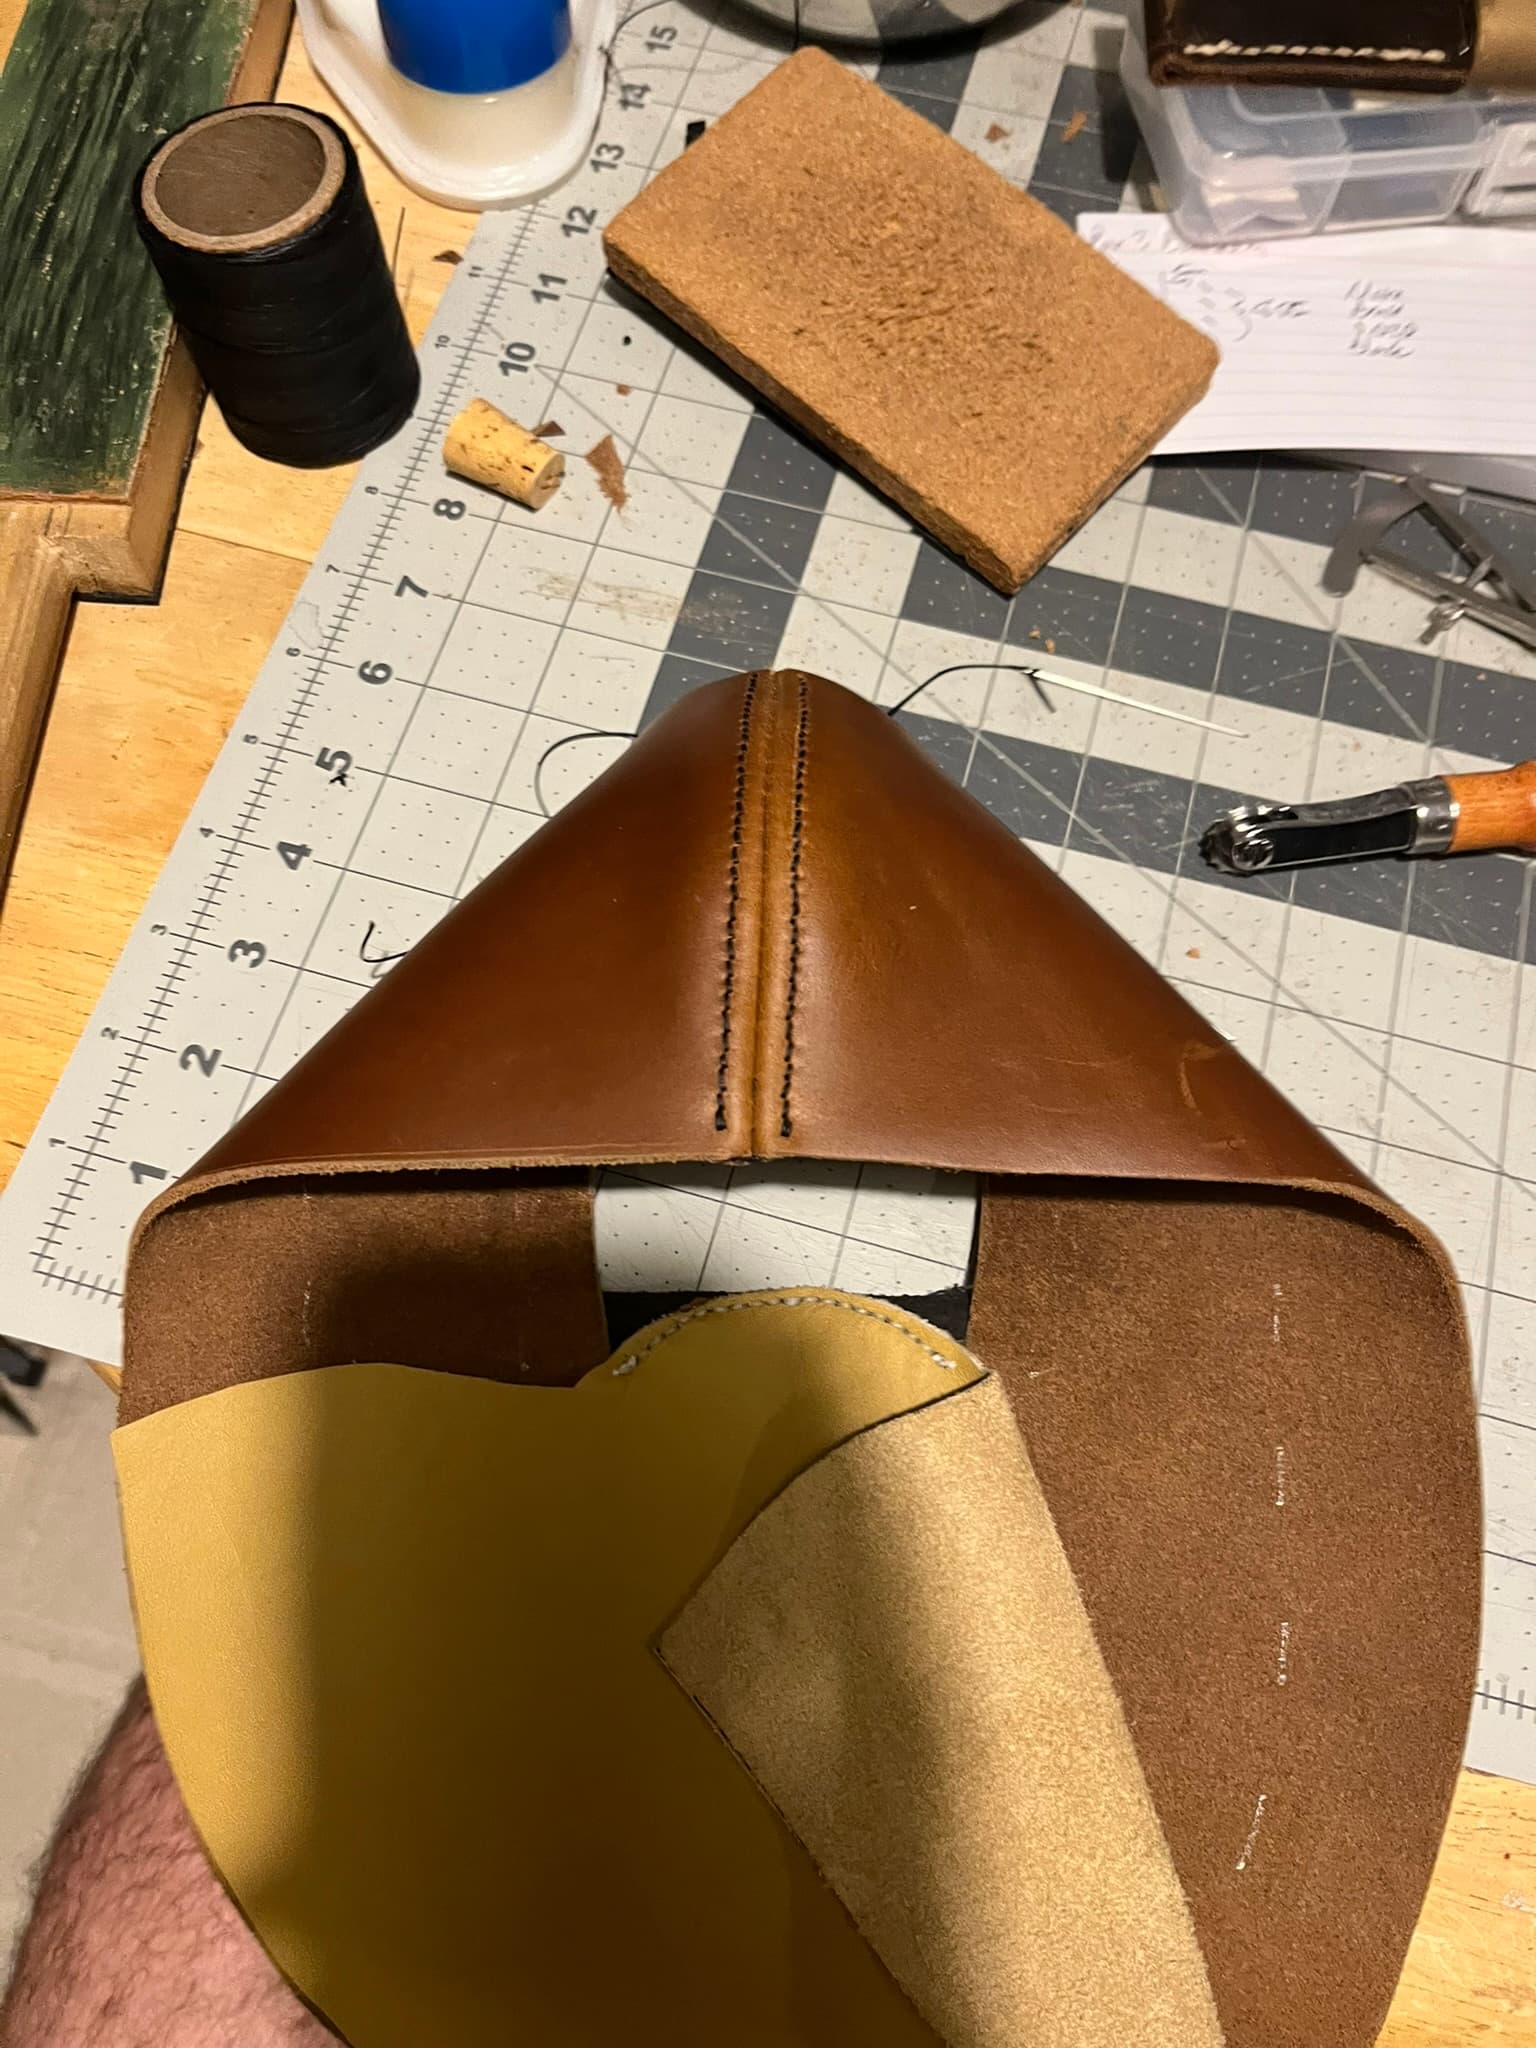
  • Turn the galosh rightside-out again. Turning the seam from convex to concave like this made it easy to flatten the flaps down the rest of the way.
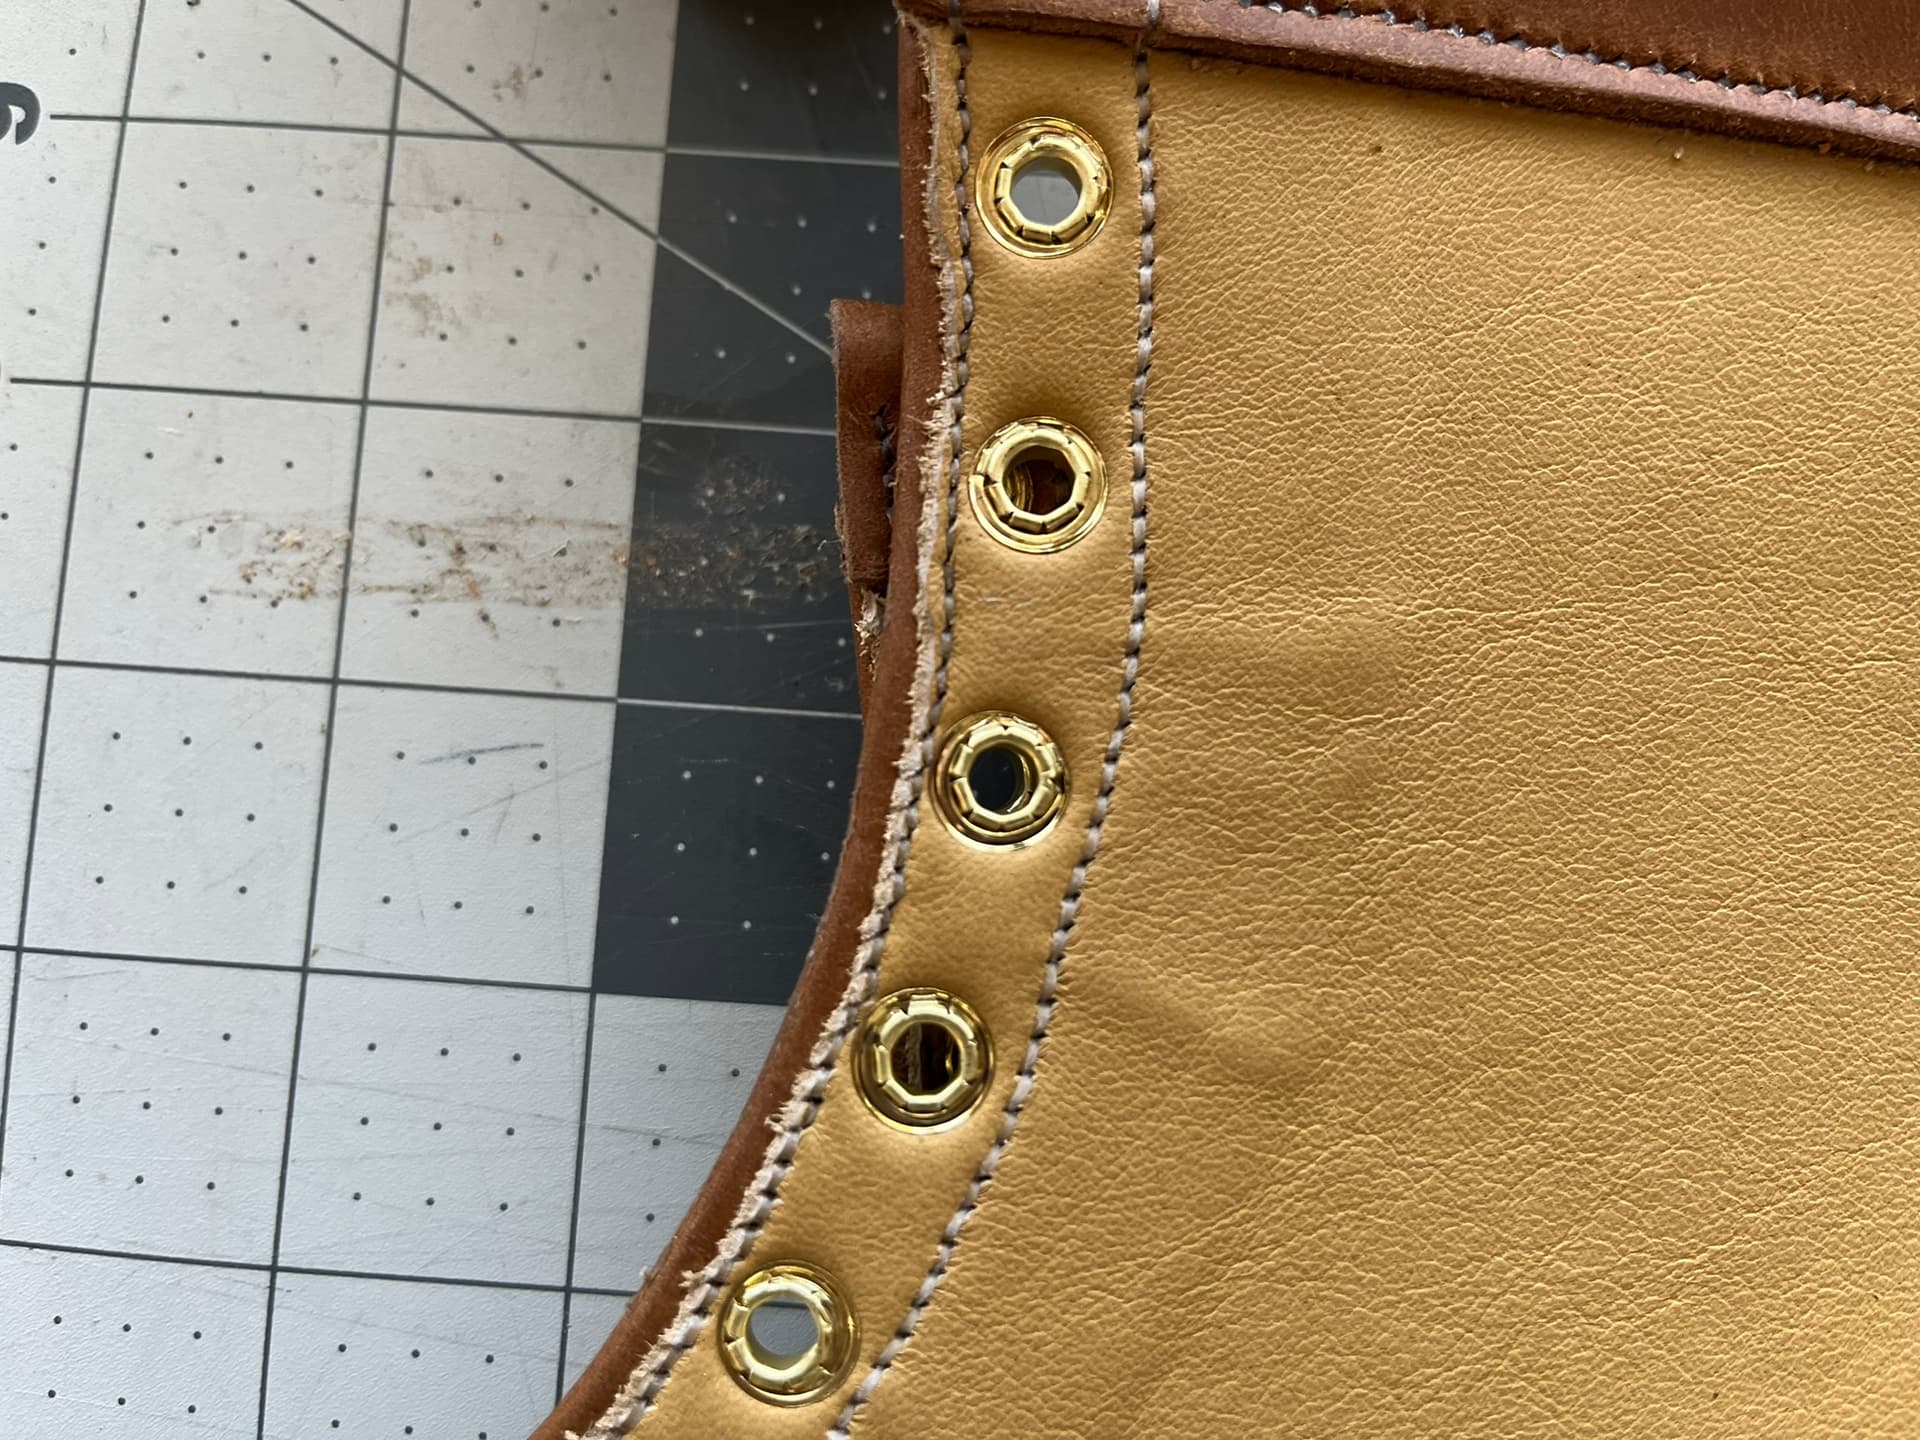
  • Mark the stitch lines to the sides of the backseam using an adjustable compass / set of wing dividers—I really like these—running one tine along the backseam. Mark the spacing with an overstitch wheel and pierce the holes, pushing the awl through with one hand between two fingers pressing on the inside of the upper with the other hand. Don’t pierce yourself! Stitch it up.
  • Hammer over something curved I used the curved top of a wood chair.

I used 0.020" black braided Maine Thread. I believe the spacing was 8 SPI.

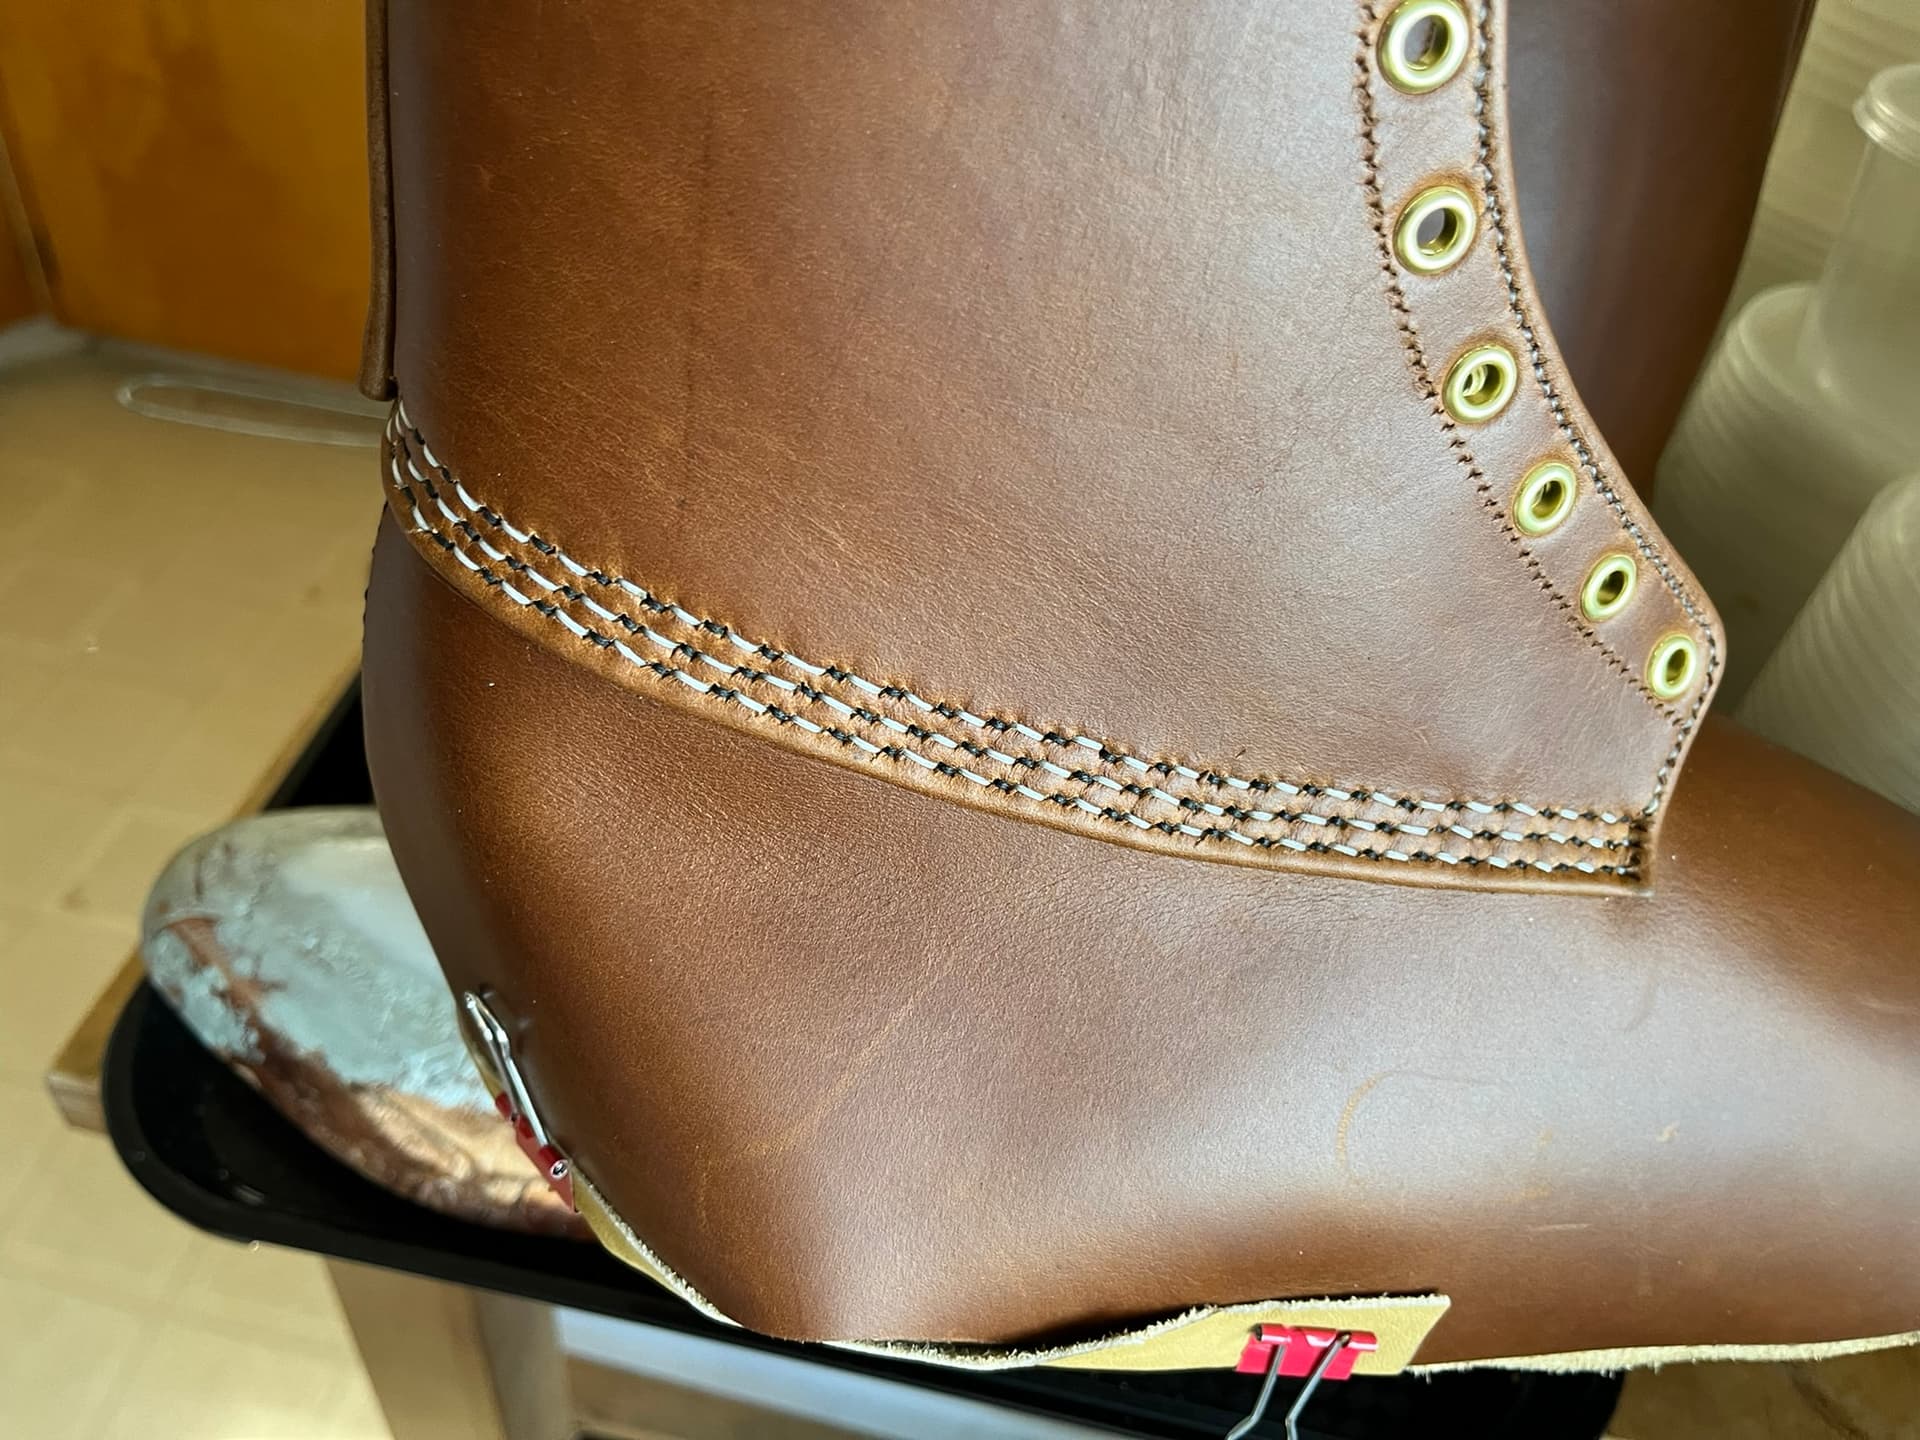
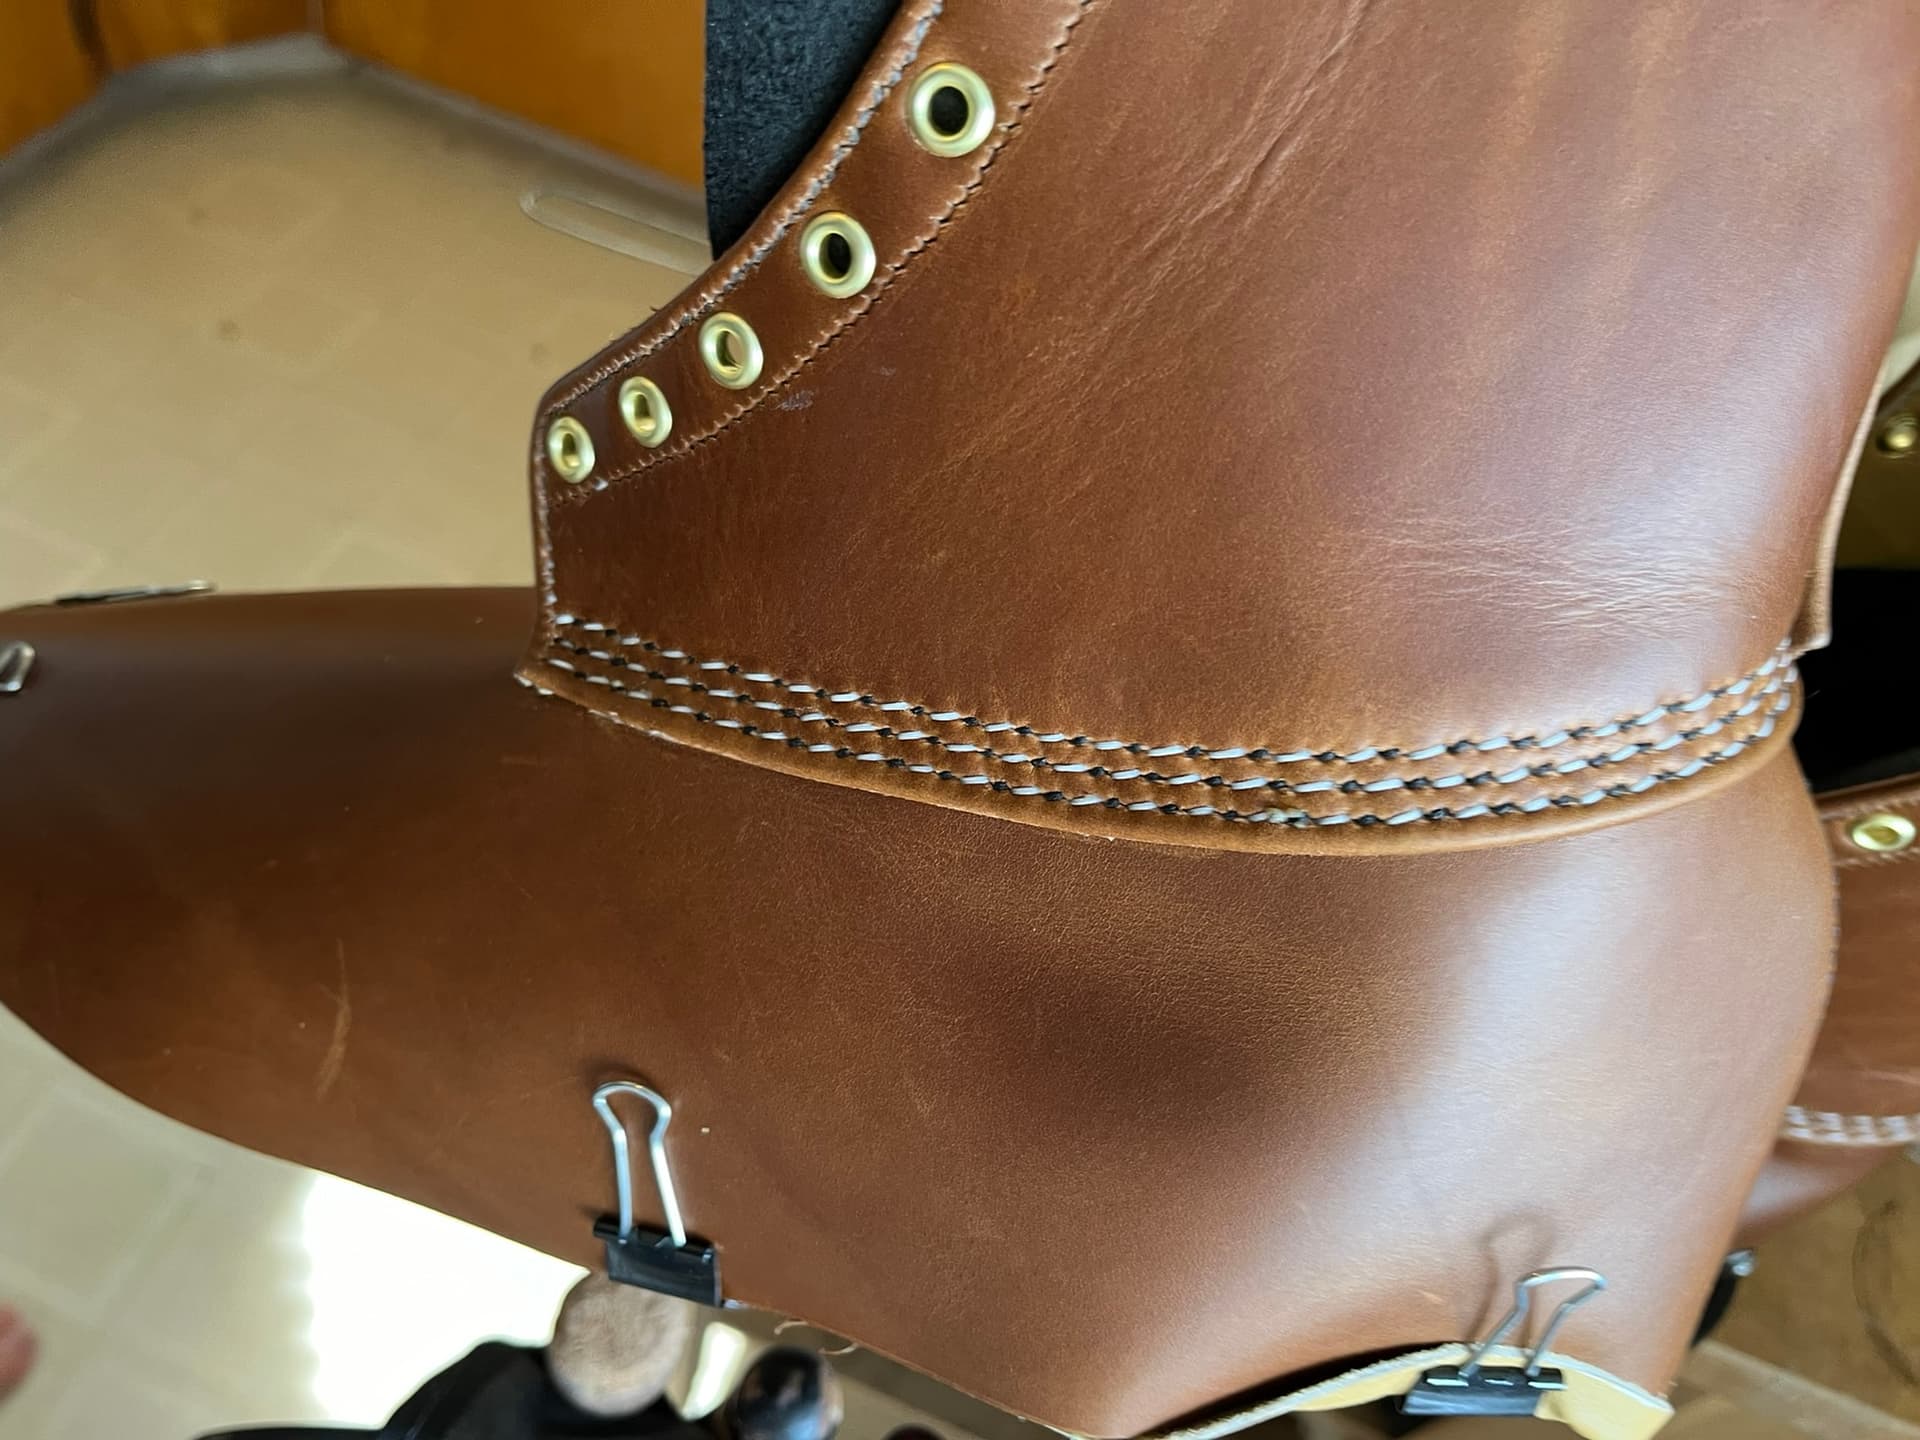
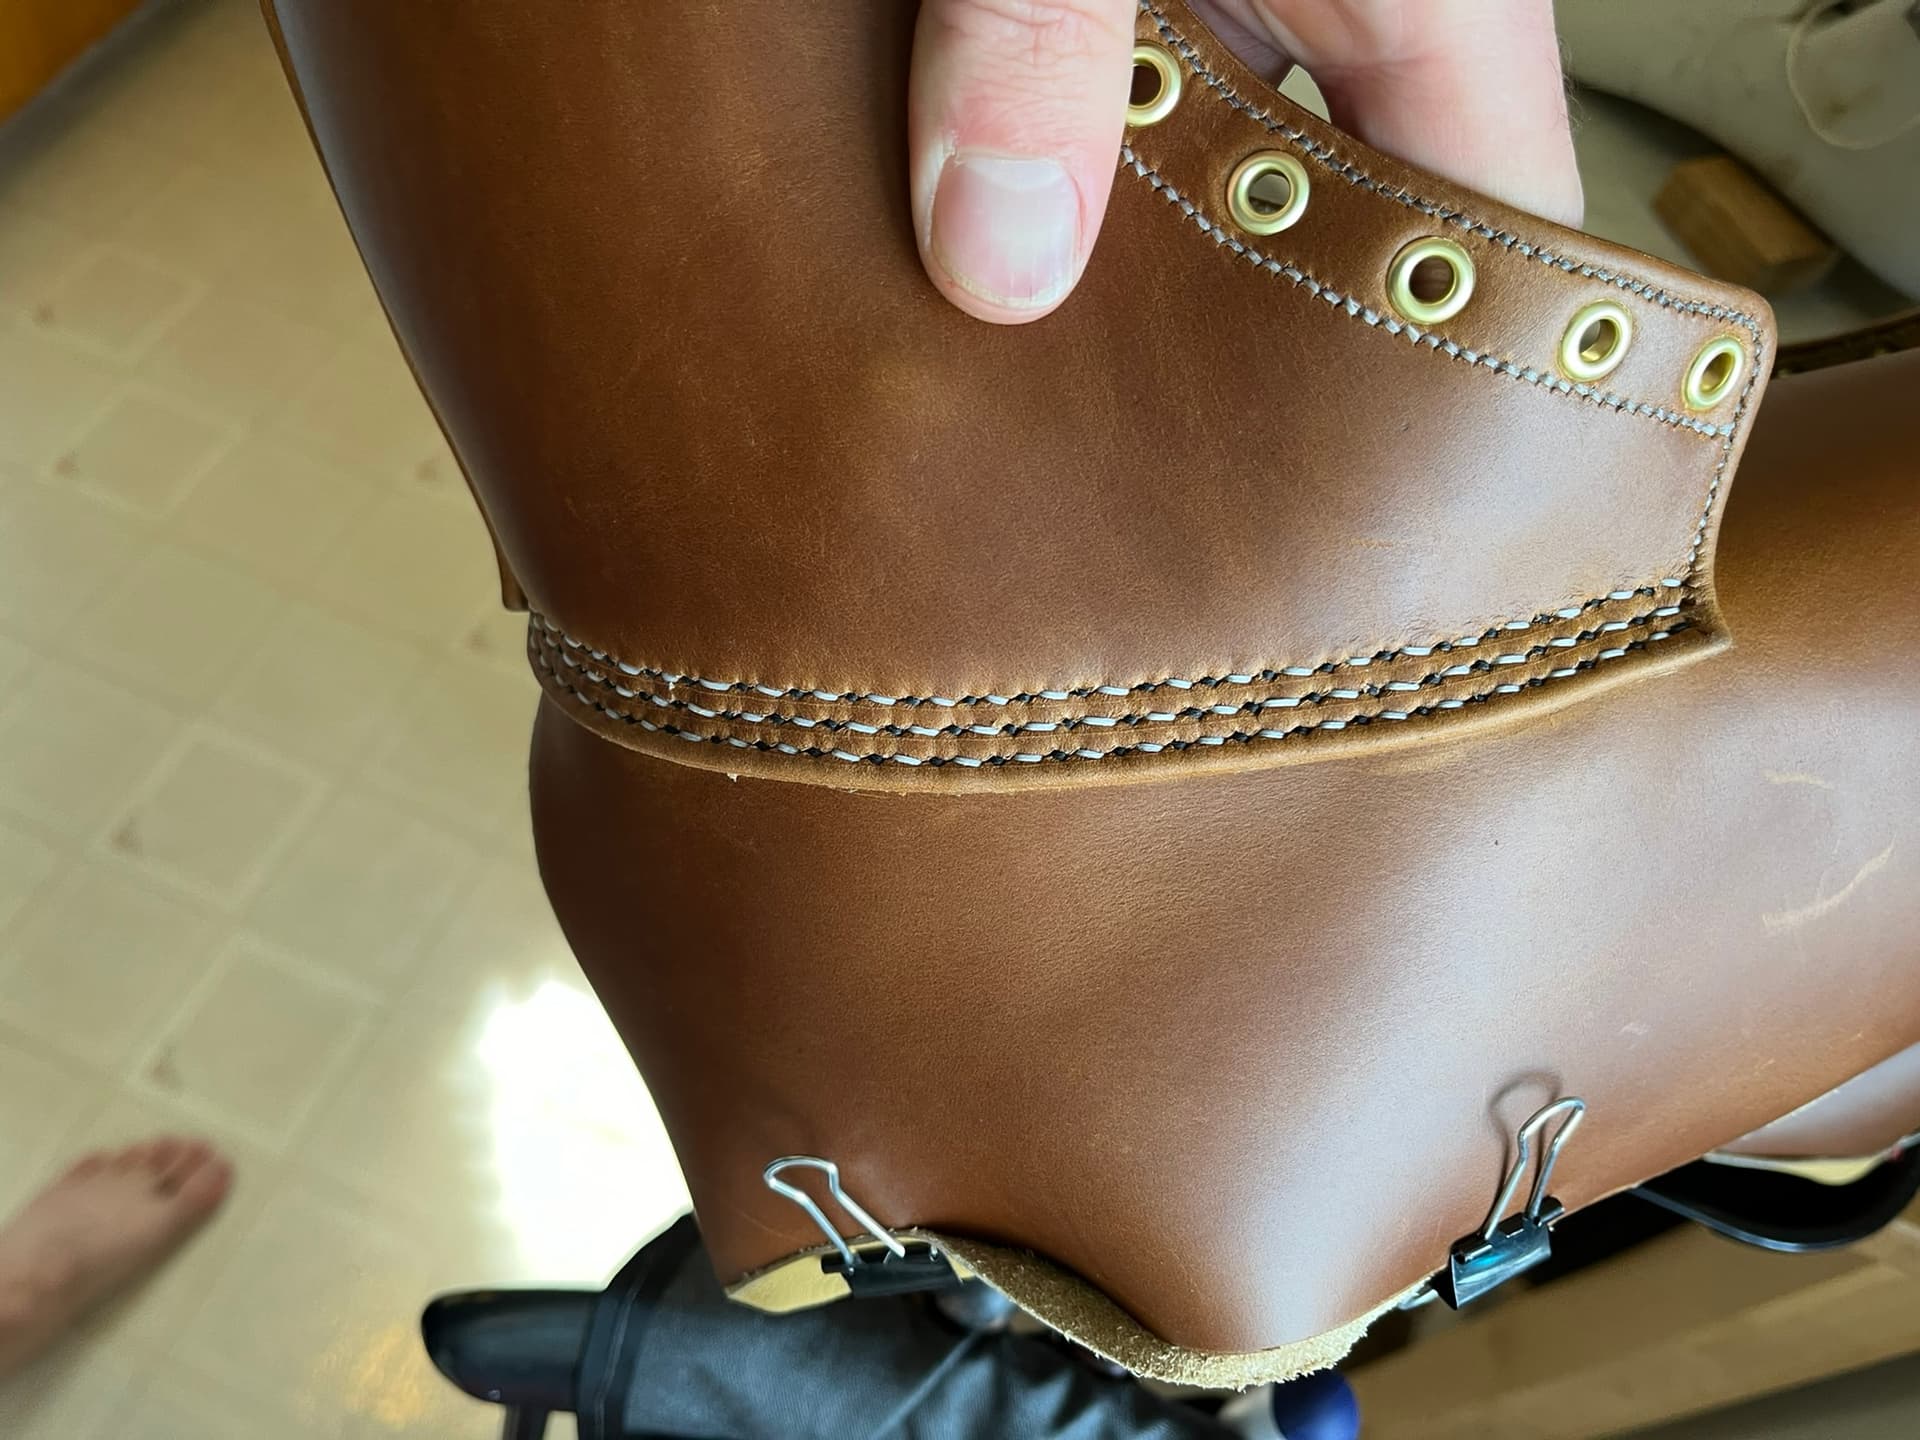
Quarter Seam Stitching

I’d been looking forward to this part. If I get in the right state of mind, I actually enjoy hand saddle stitching plain lines on uppers. But I’m always eager to do the fancier hand stitches.

Aside: I am starting to worry that my nice, wide strips of Cordura eyelet stay backing are going to make ugly creases inboard of the eyelet stay seams.


Materials here were 0.020" braided Maine Thread again. Osborne 517-3 needles, as they recommend.

This was involved, not just because of the fancy stitching, but also just from the challenge of positioning the quarters over the galoshes right. I will probably forget some details, but from memory:

  • Bevel the inside edges of the galosh seam allowances. There is going to be a ridge that can be felt, even though the lining will cover the quarter seams. But beveling a bit can’t help. I believe I used a number 2 or 3 Craftool. I like the kit Tandy sells with one handle and a bunch of interchangeable cutters.
  • Mark the stitching on the quarters
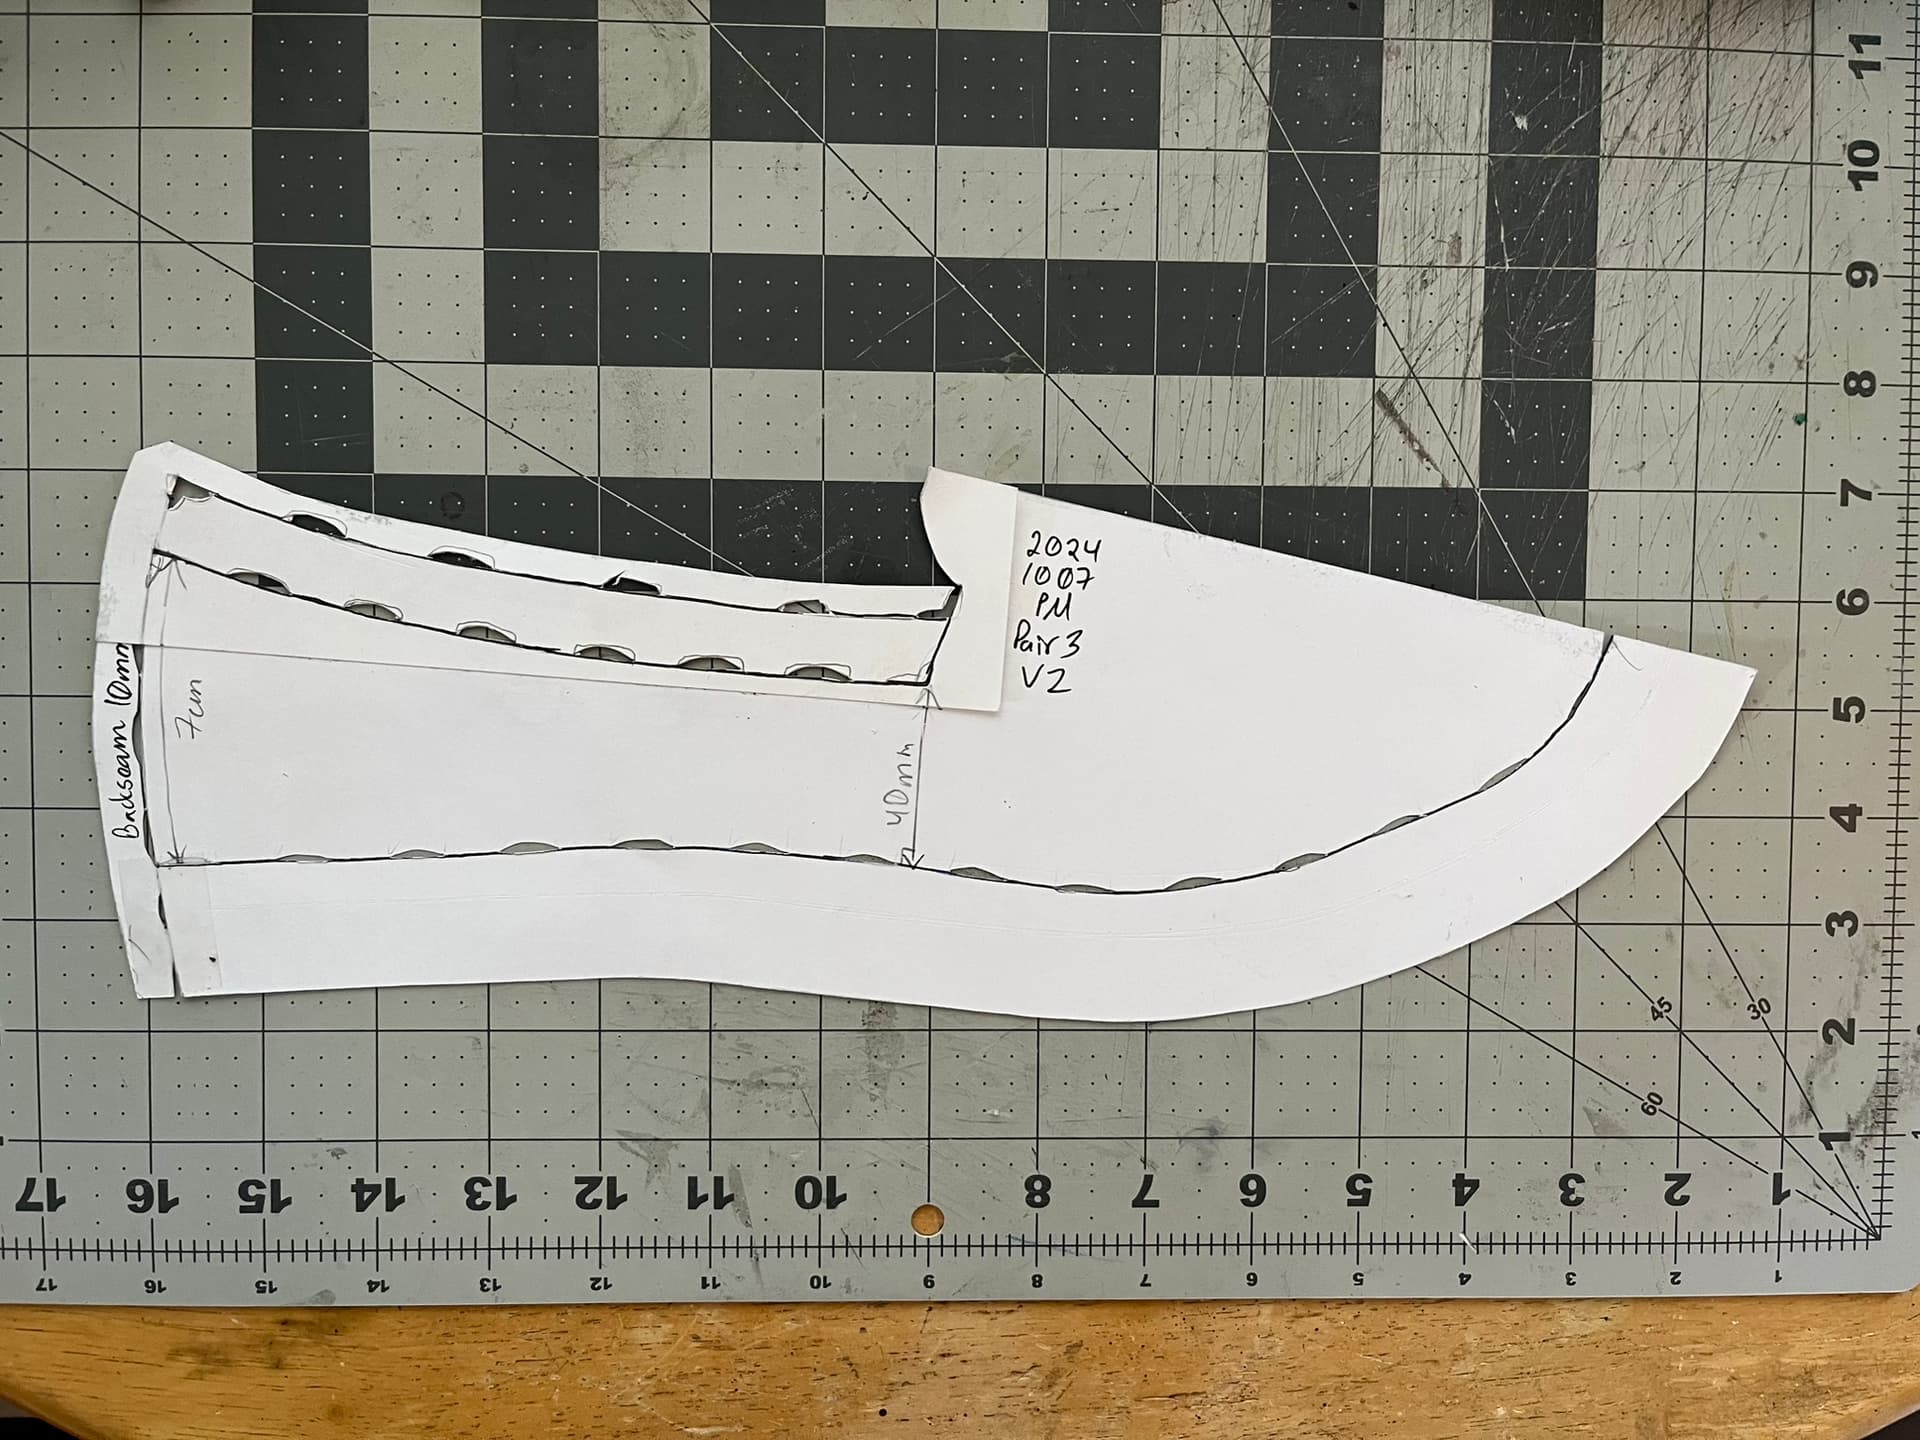
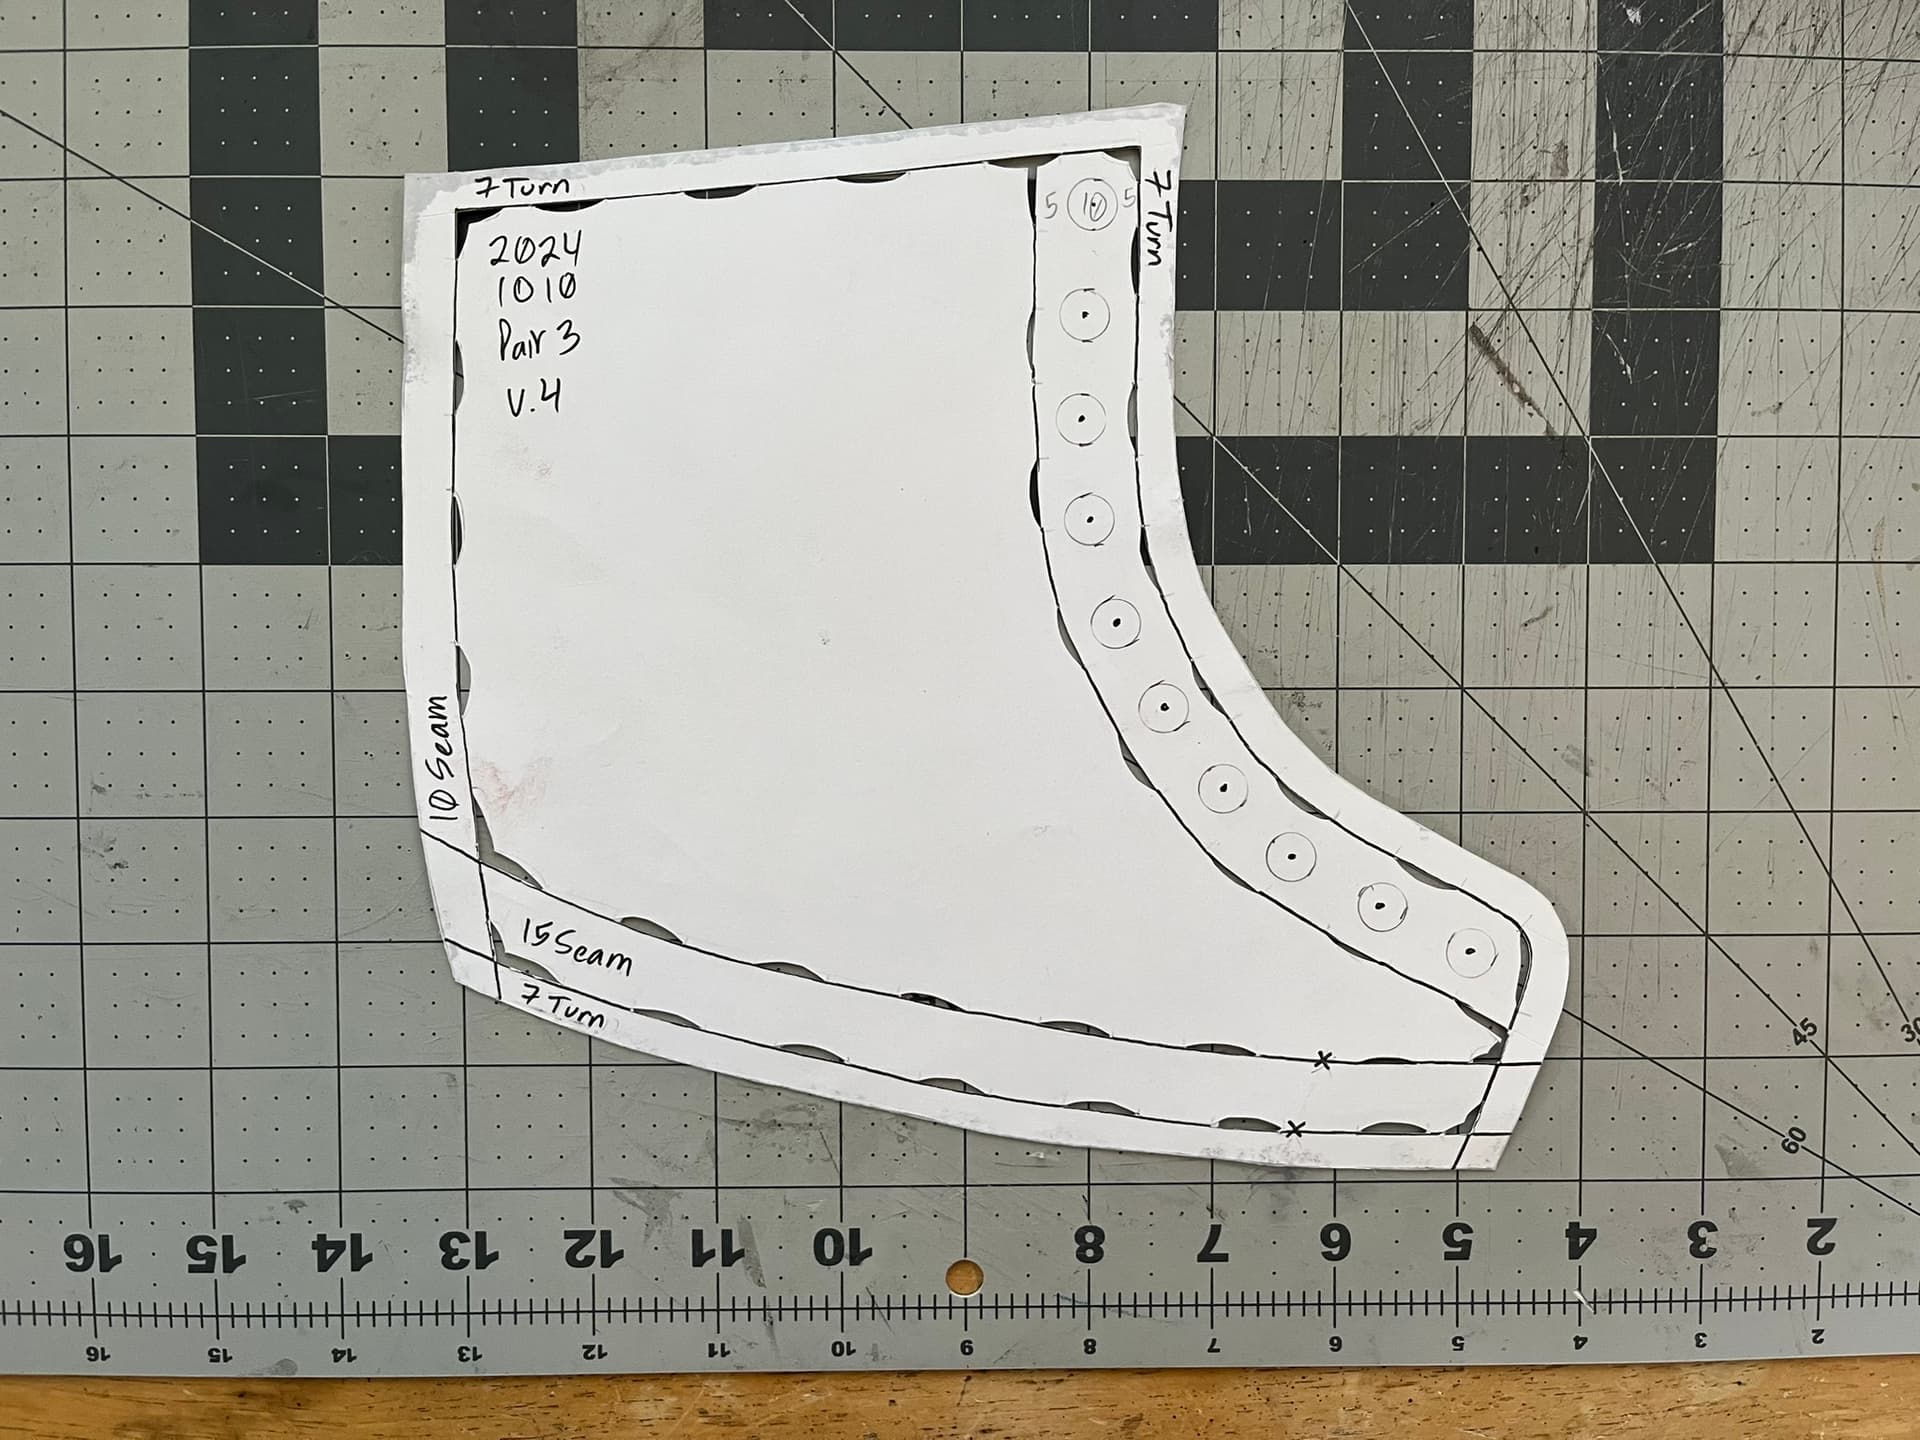
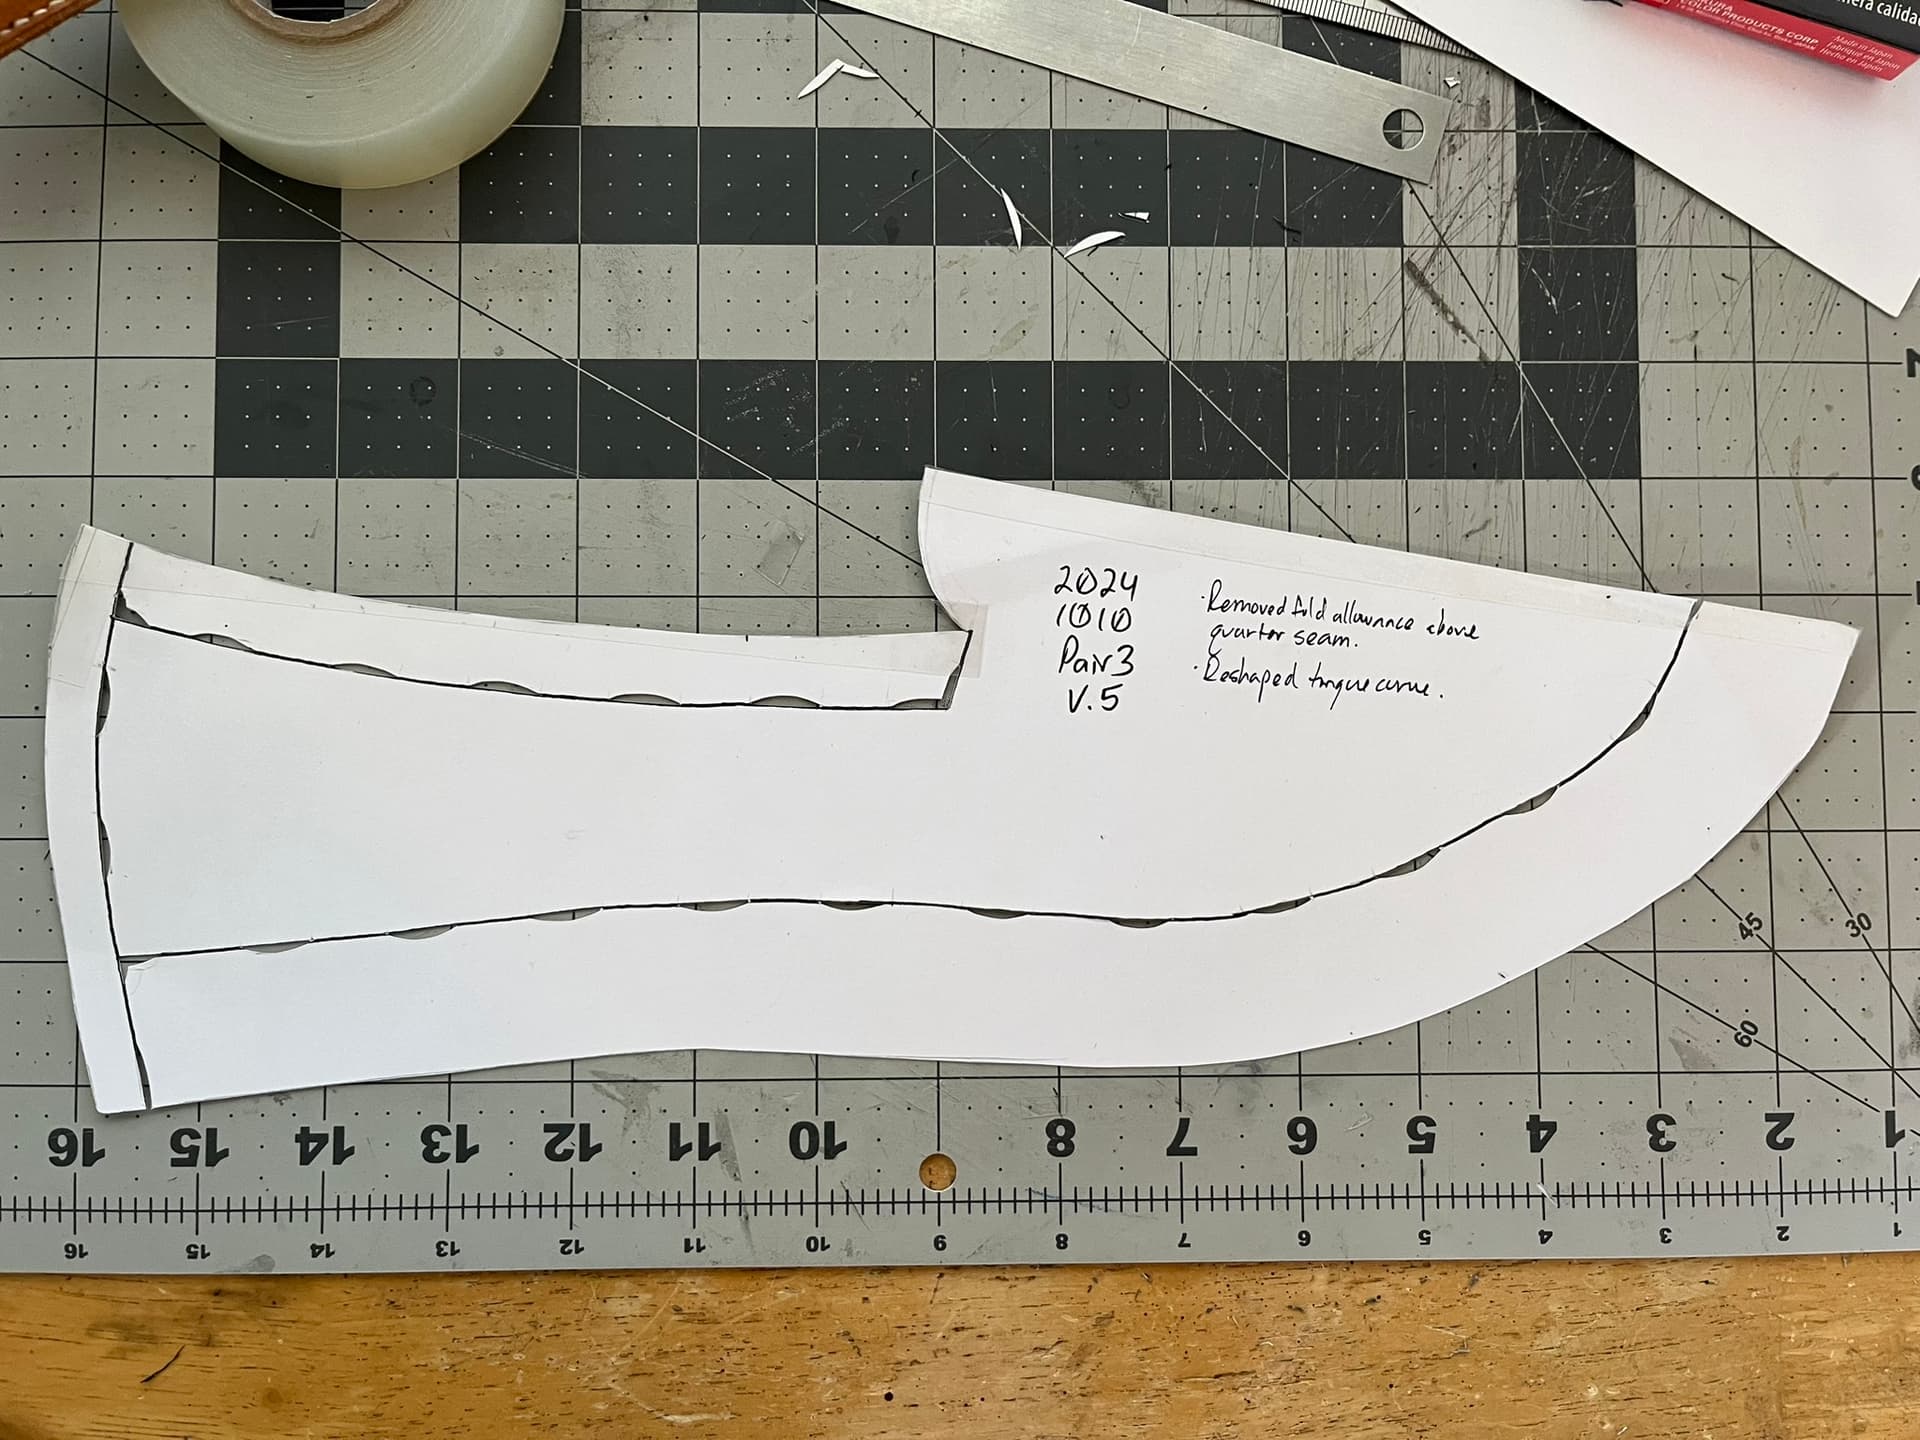
    • I gave 7mm turn allowance for the bottoms of the quarters and 15mm seam allowance for quarters and galoshes to overlap. I only ended up using about 5mm of the turn allowance, leaving an extra 2mm. so I had 17mm total to work with.
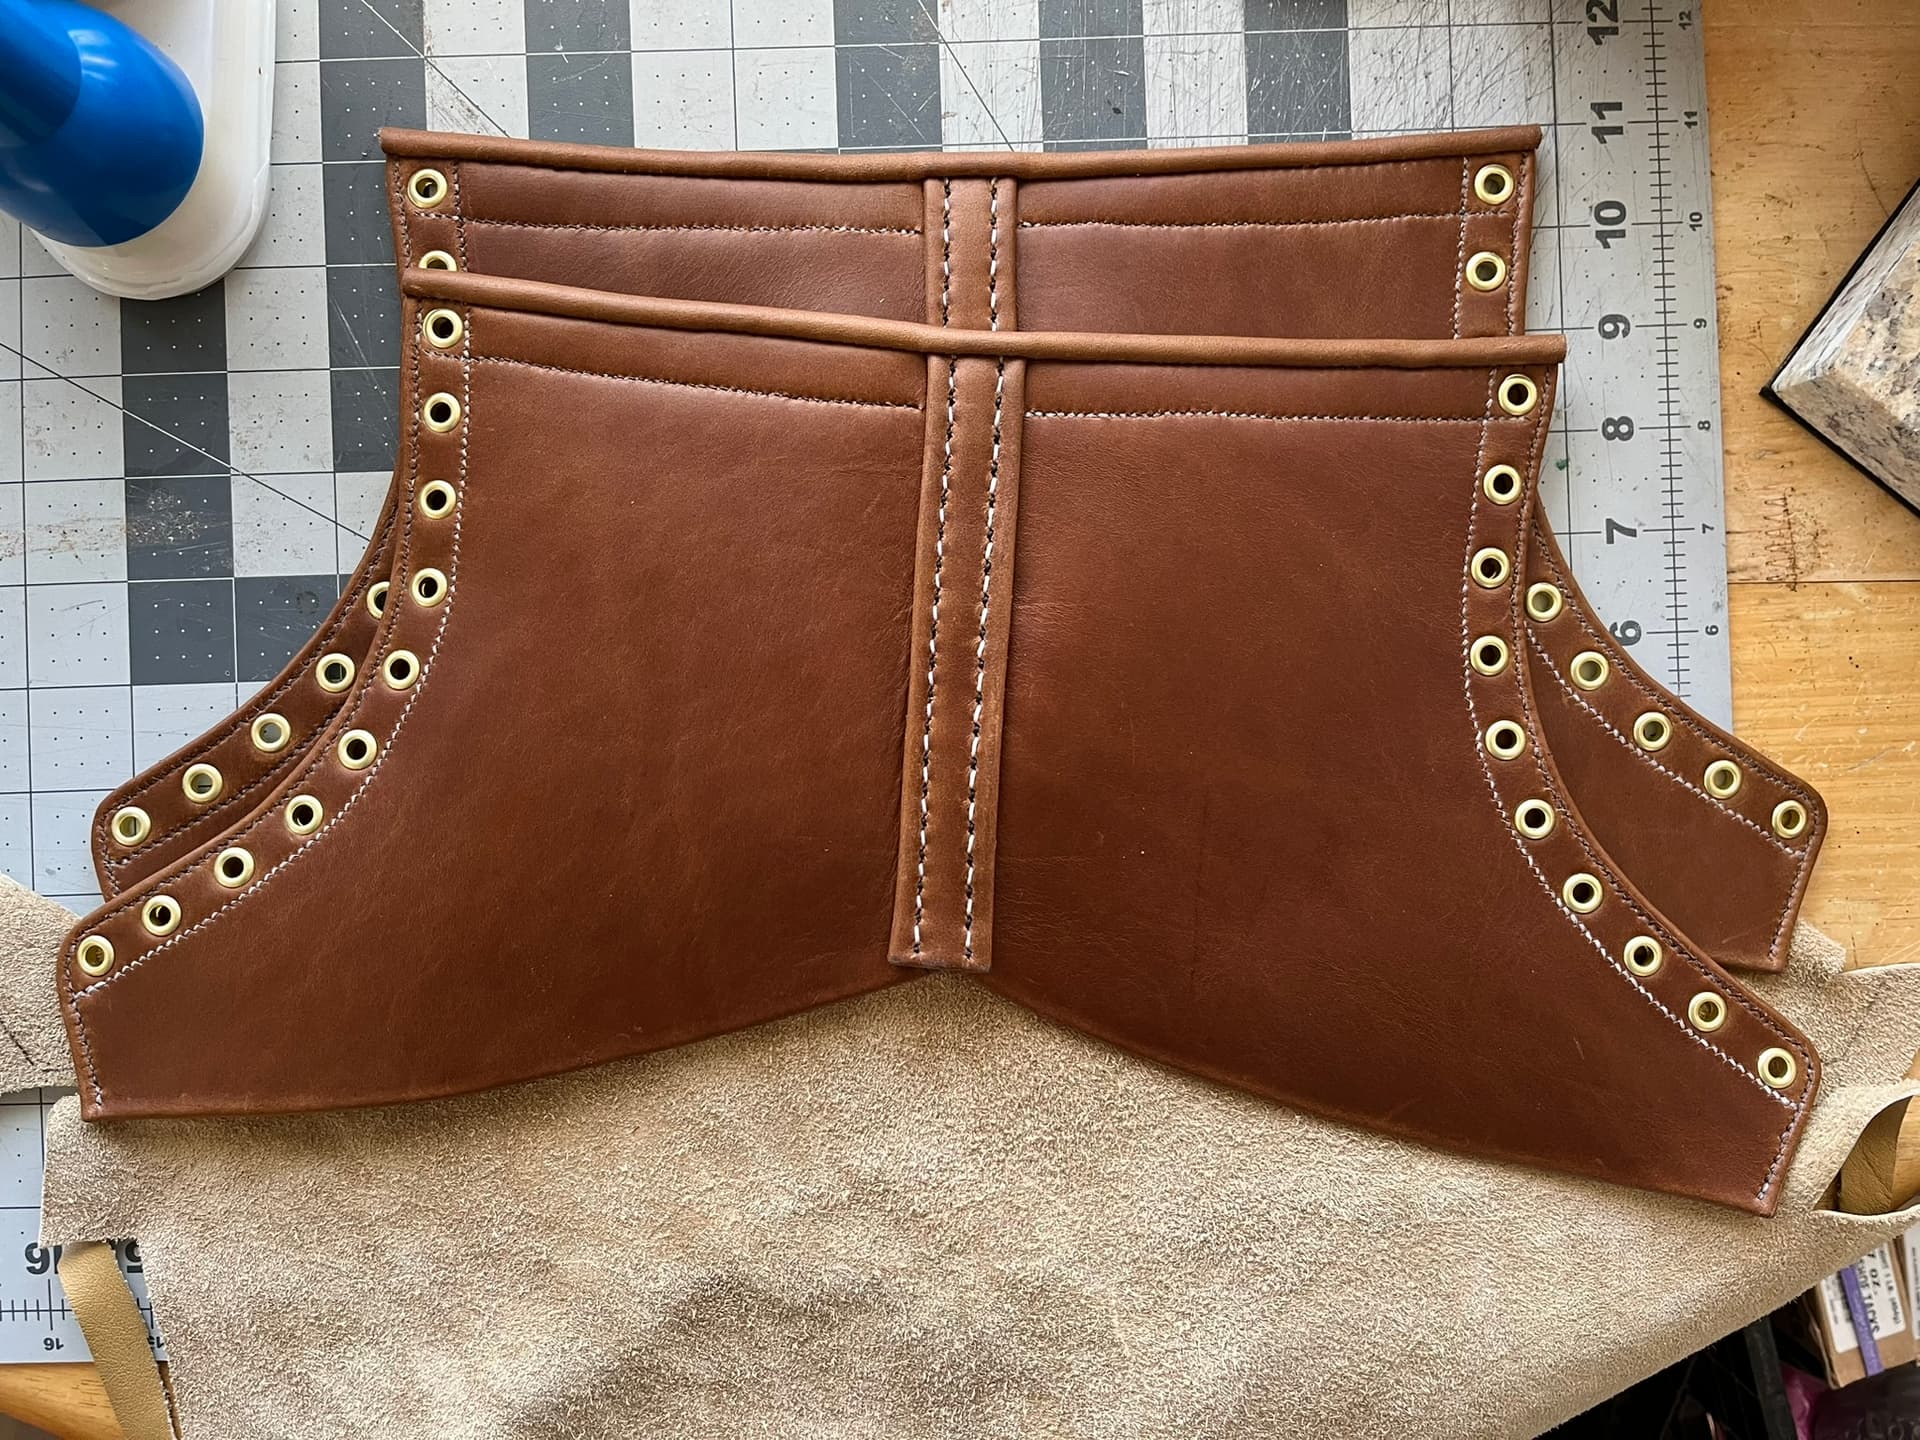
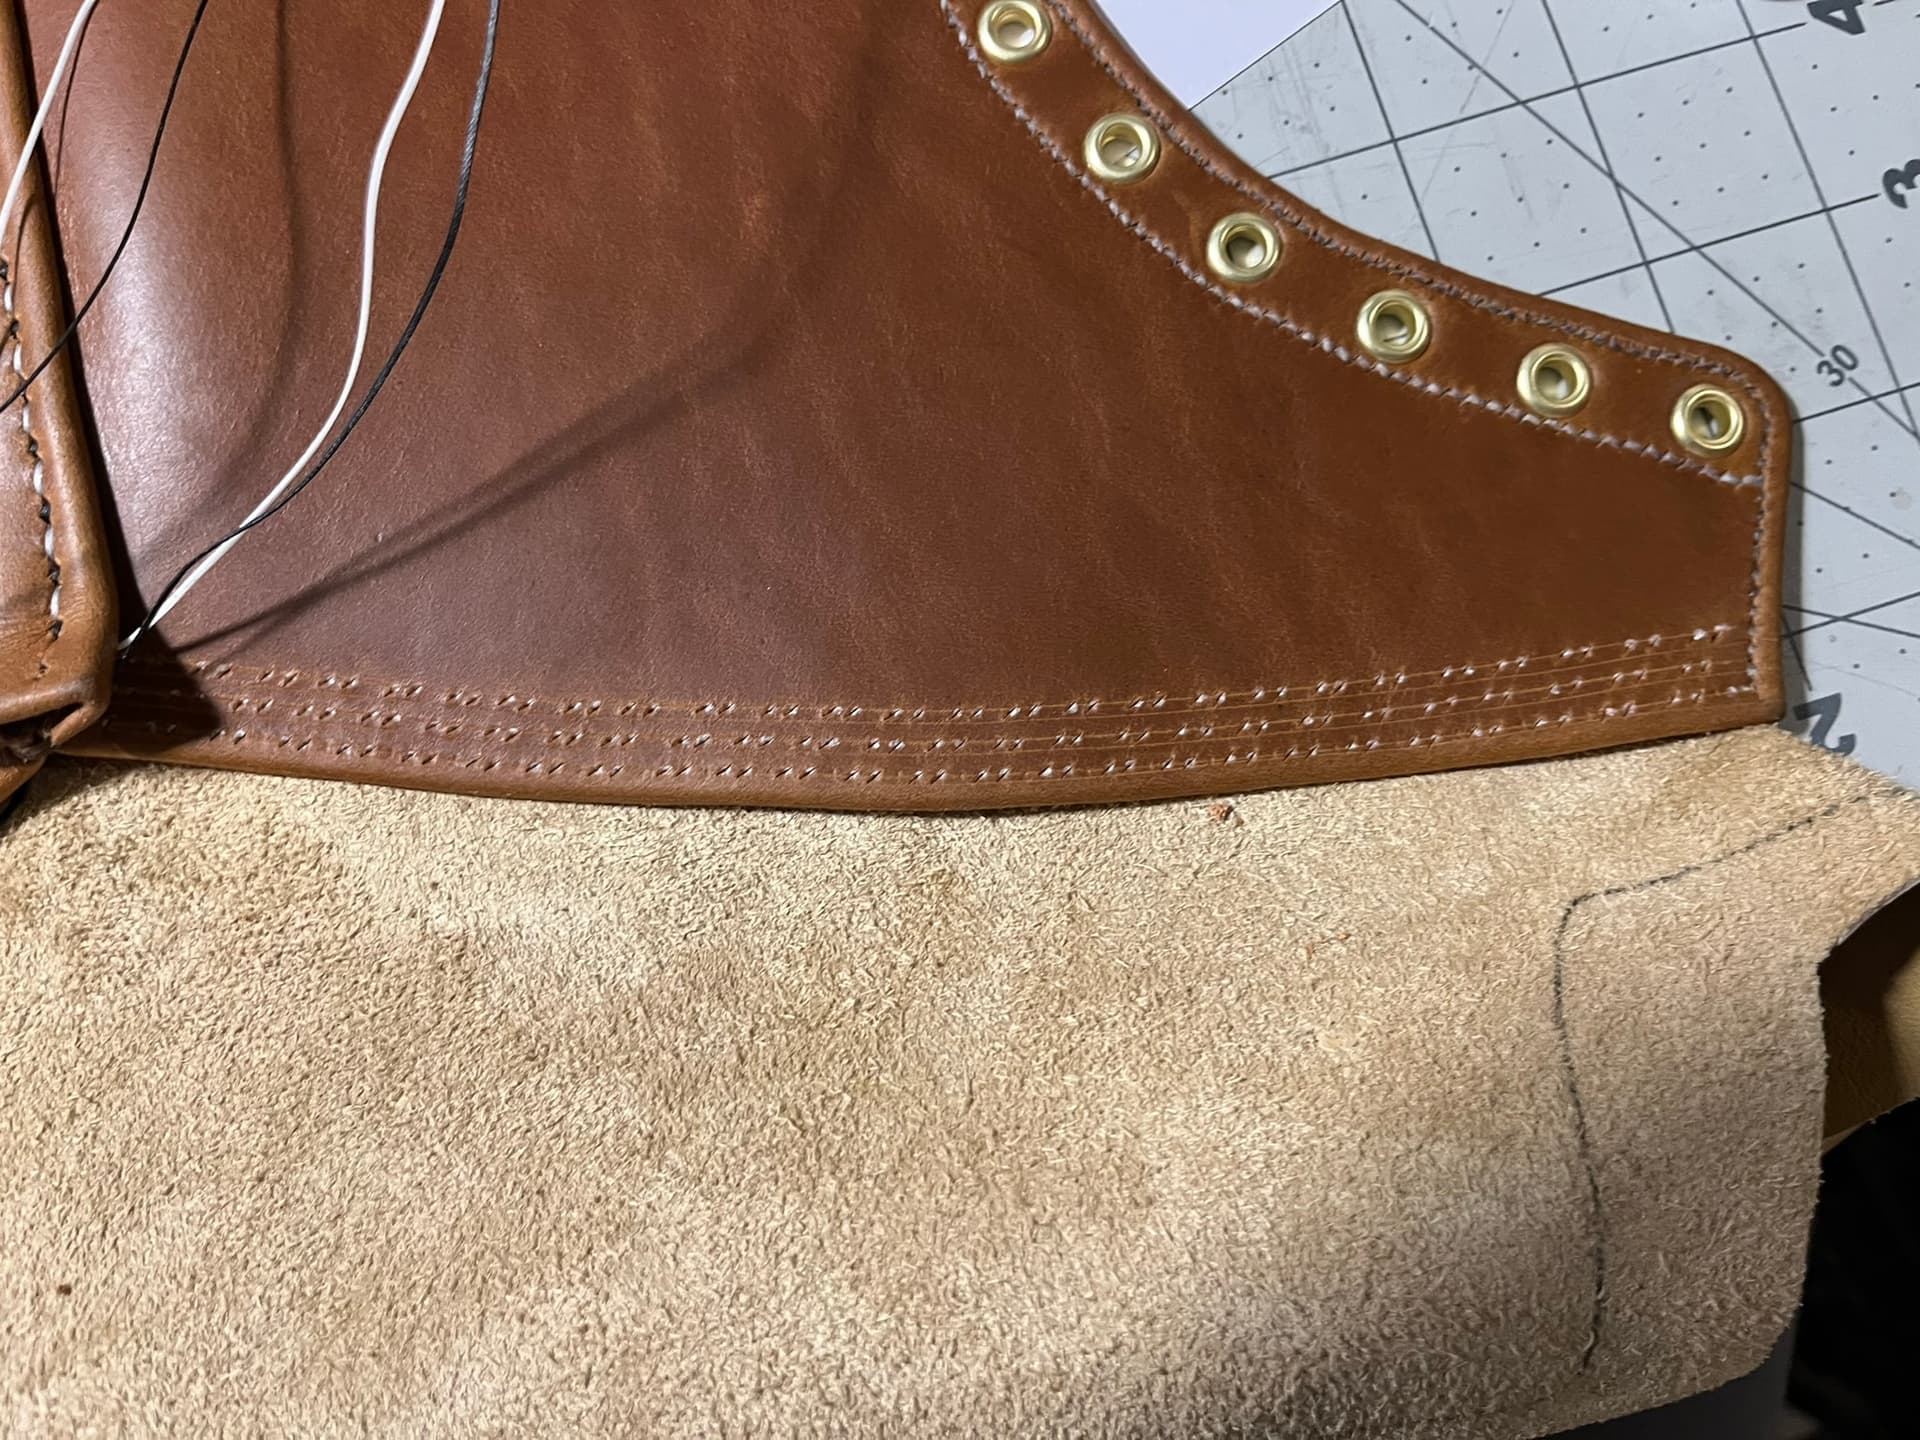
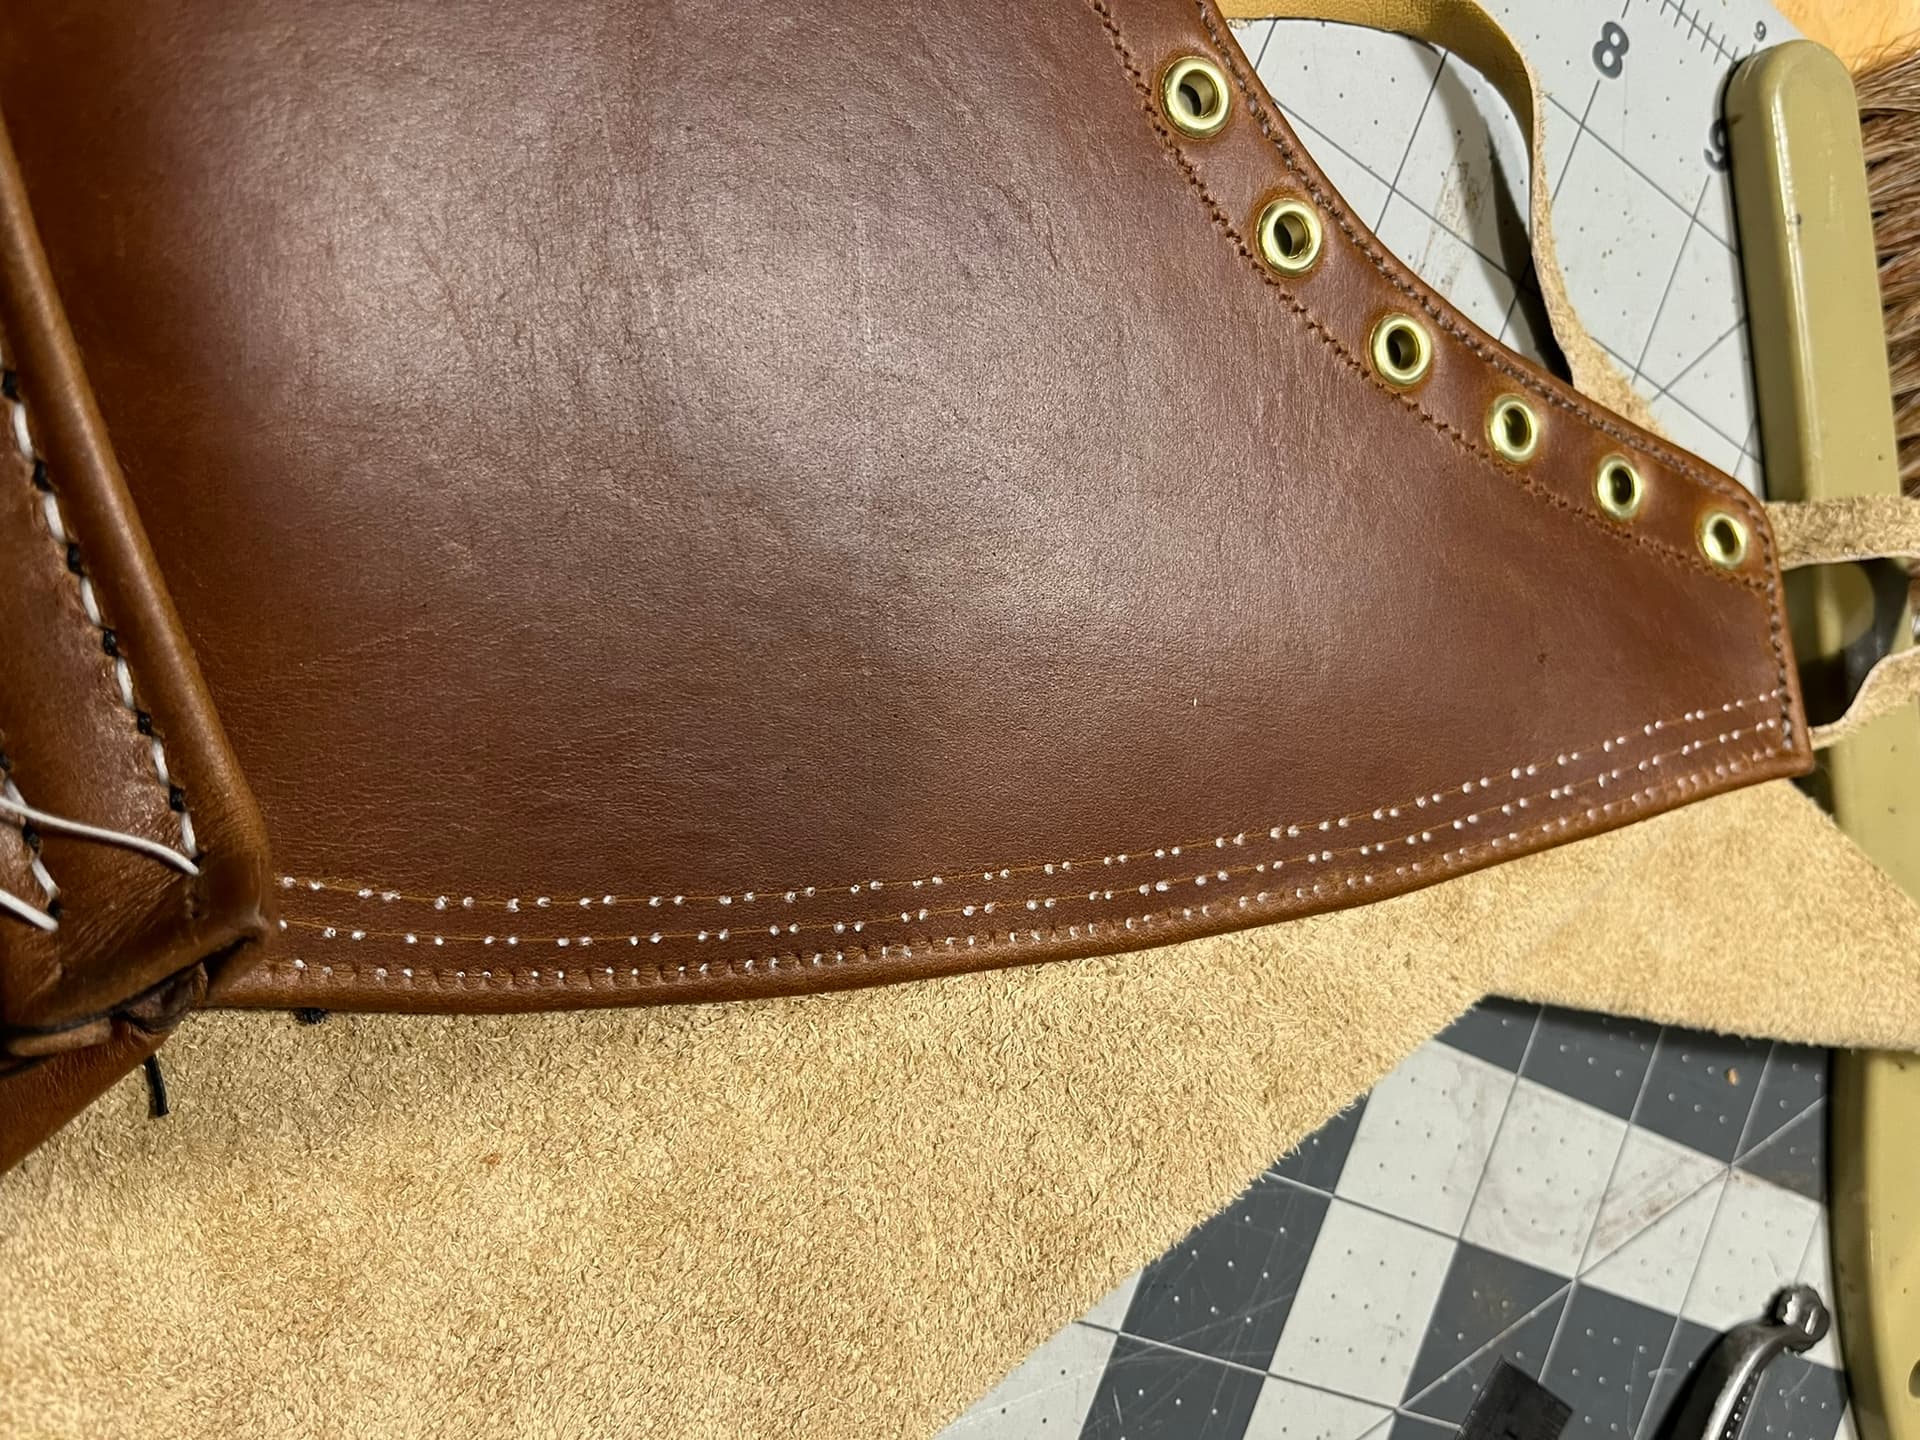
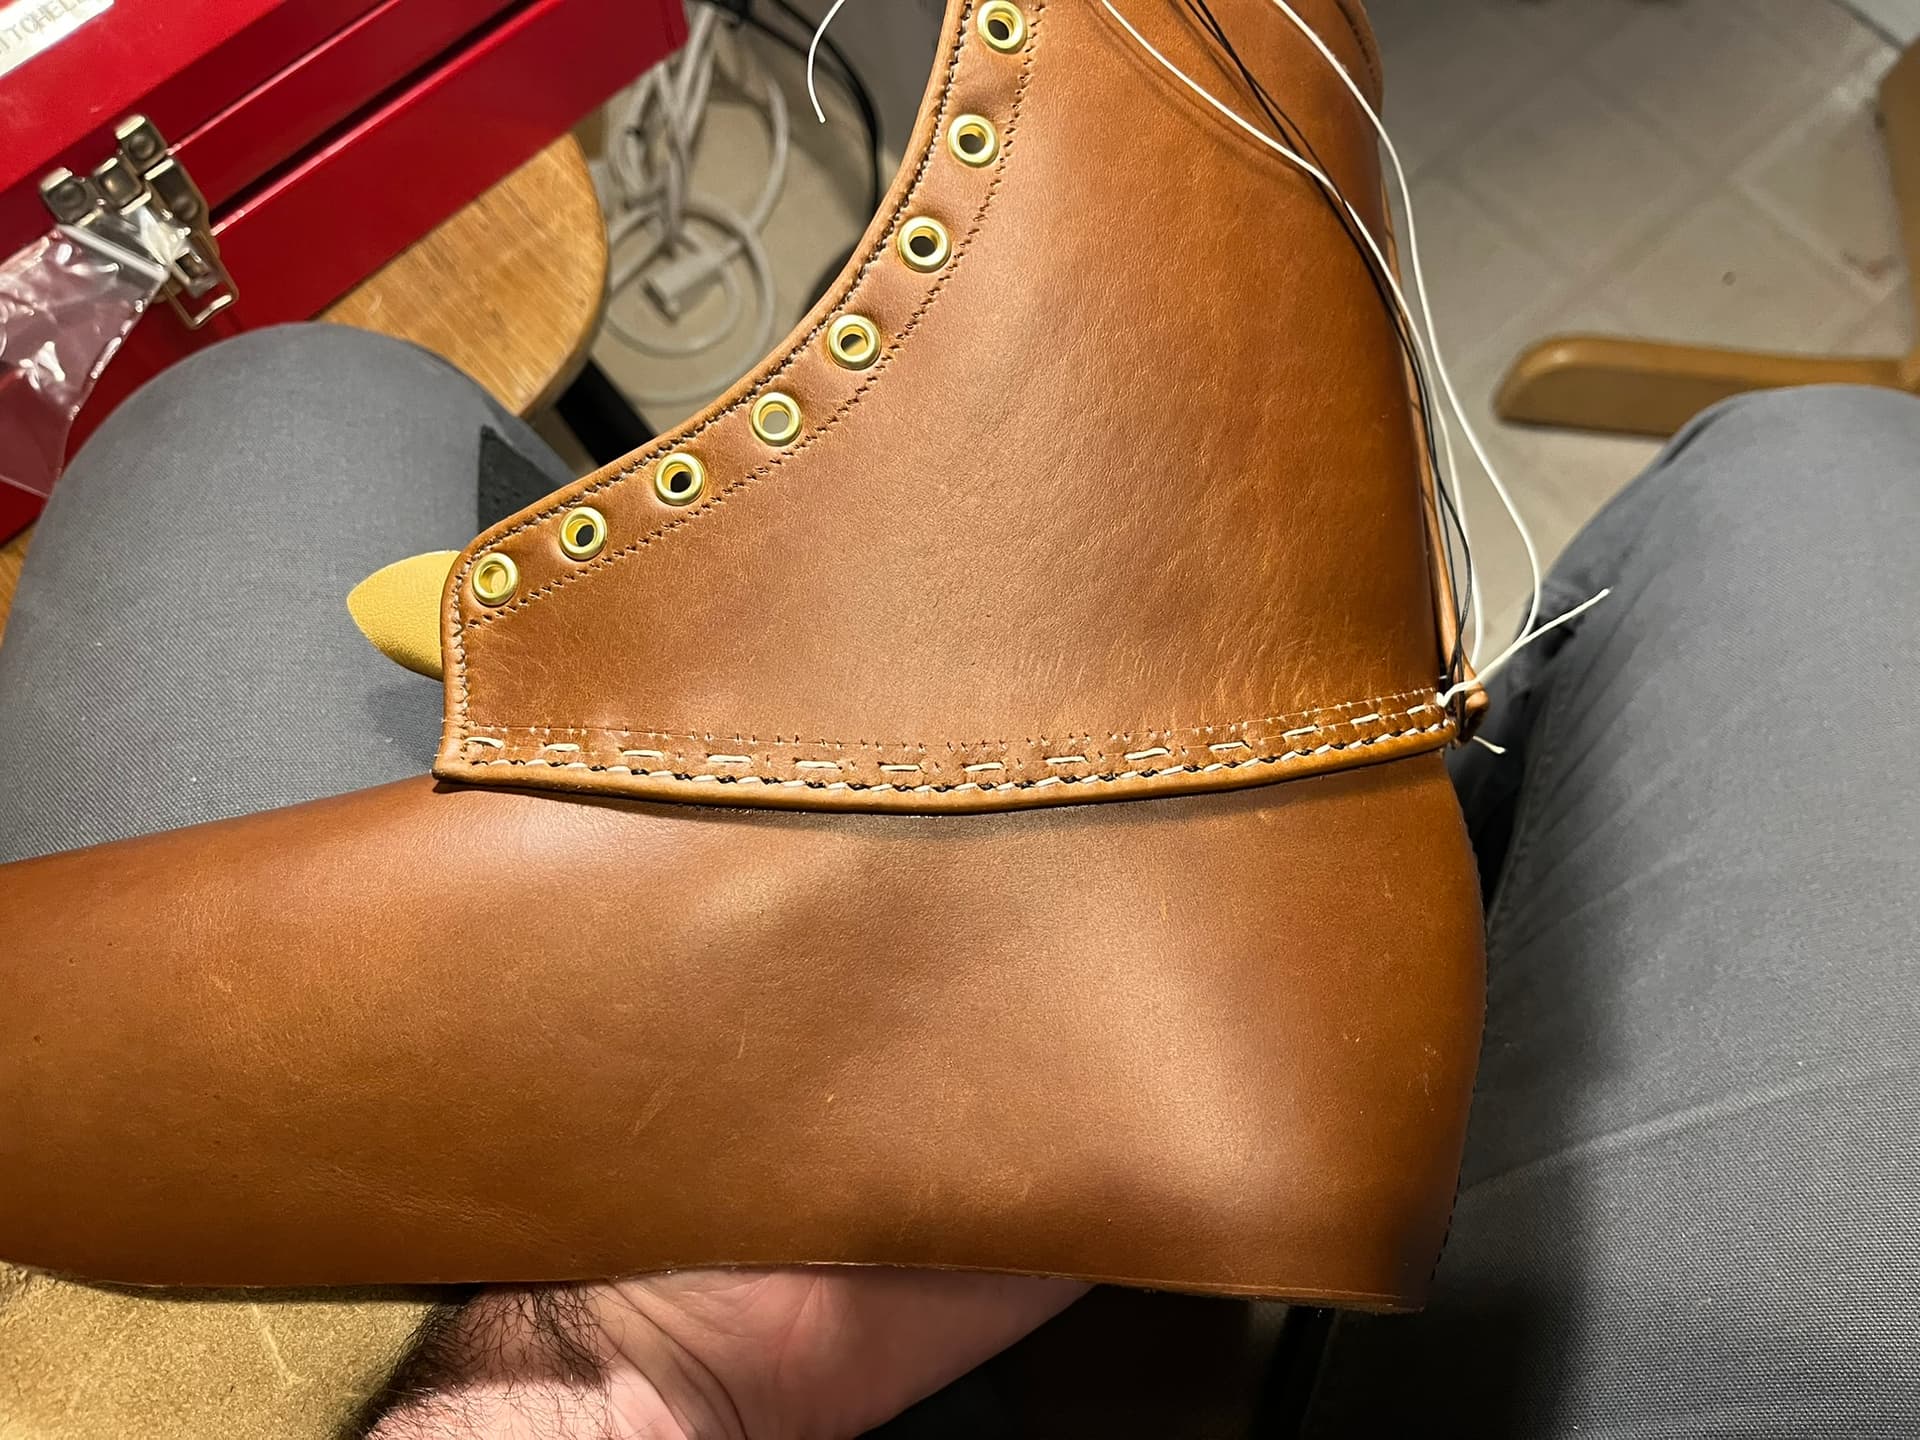
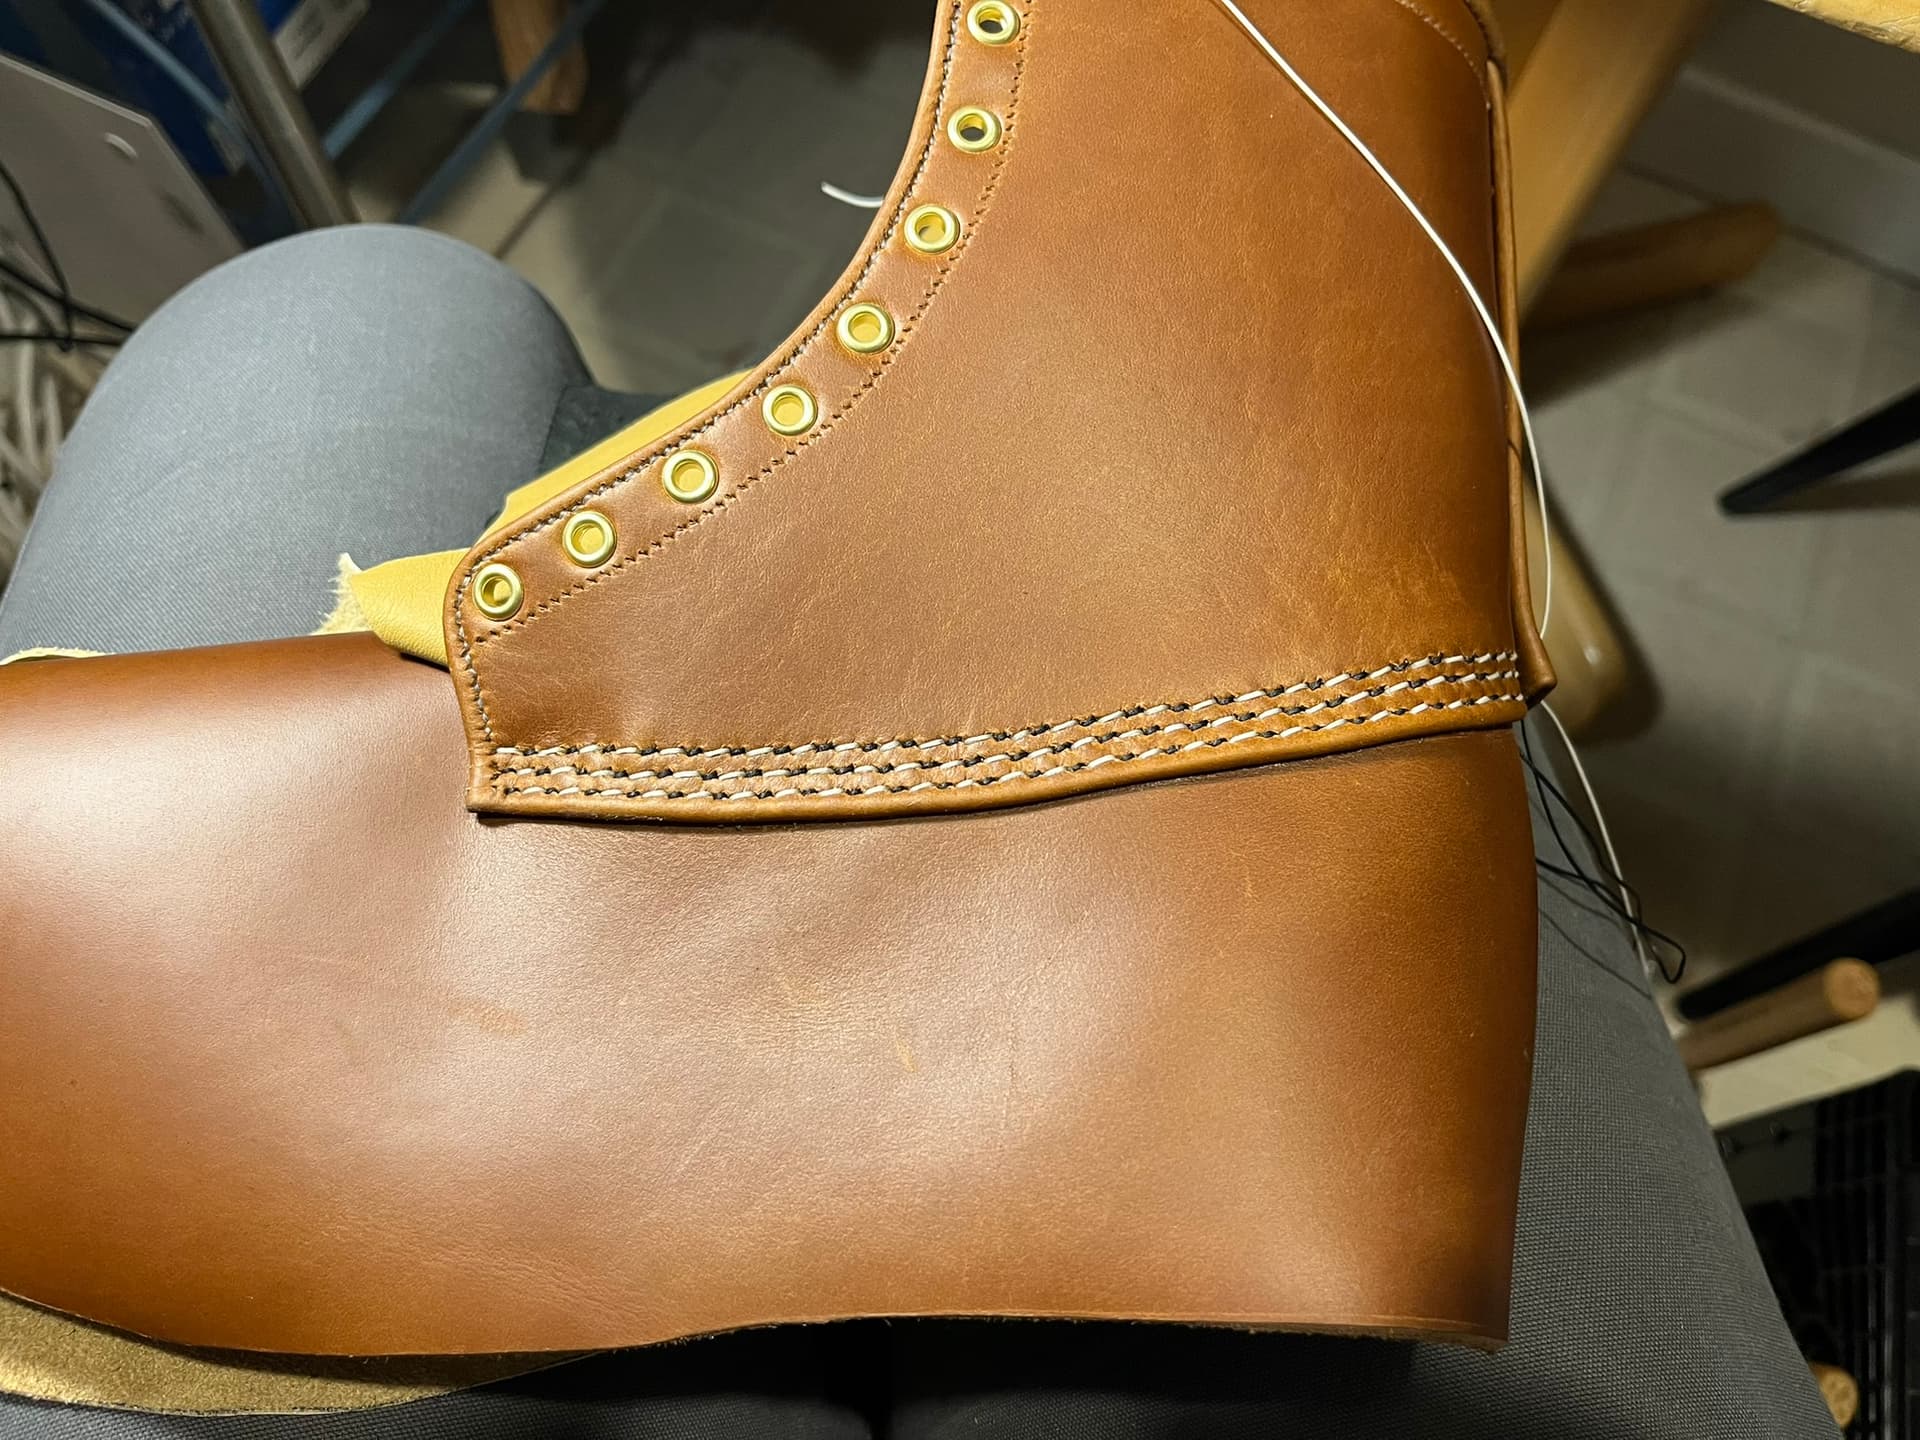
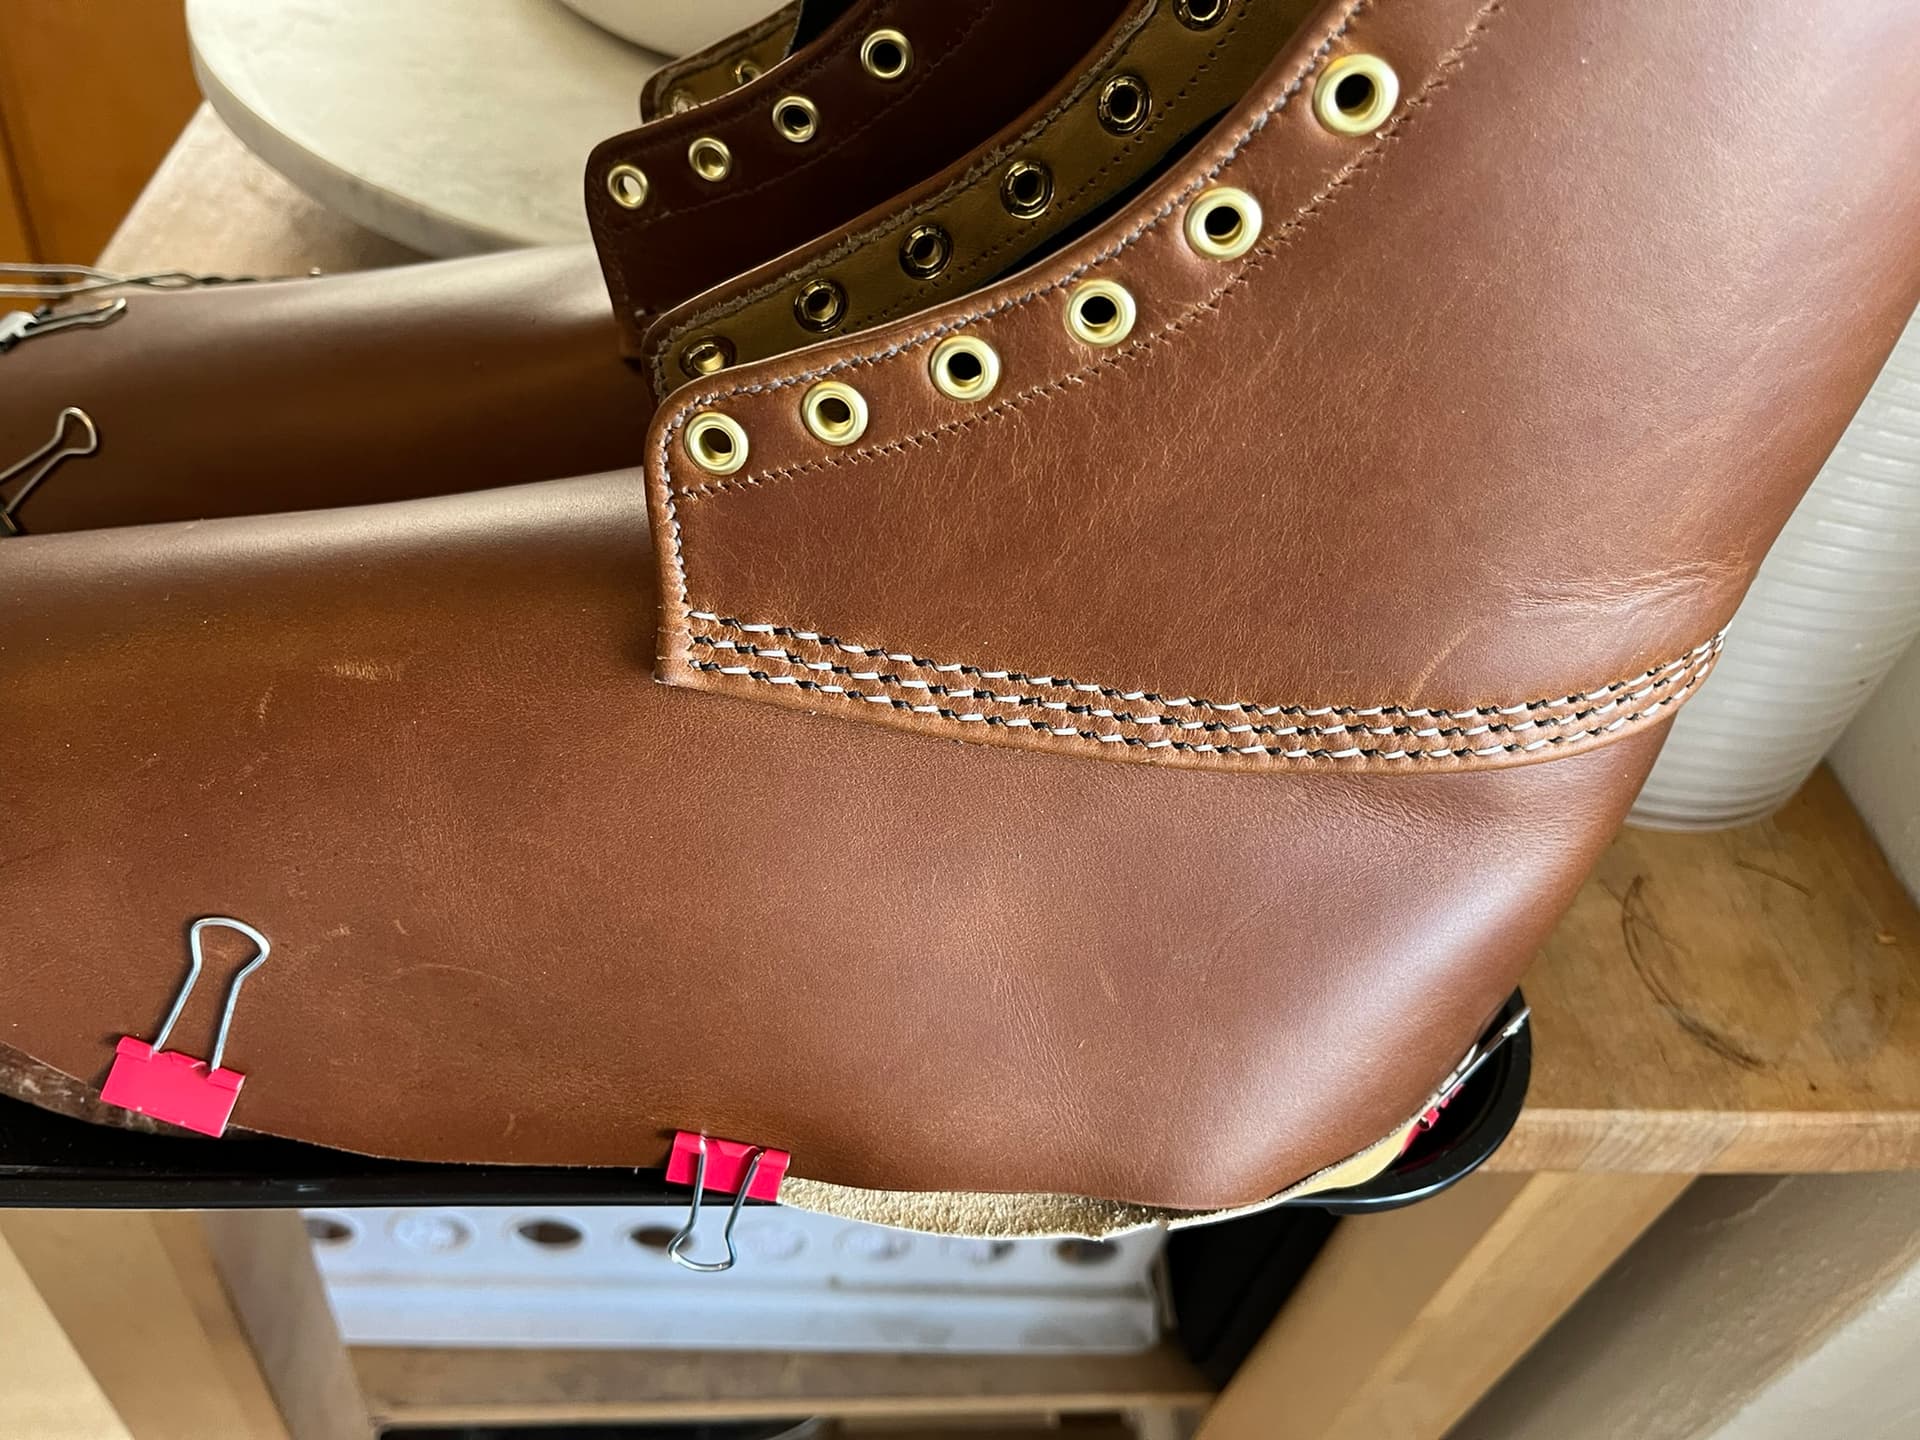
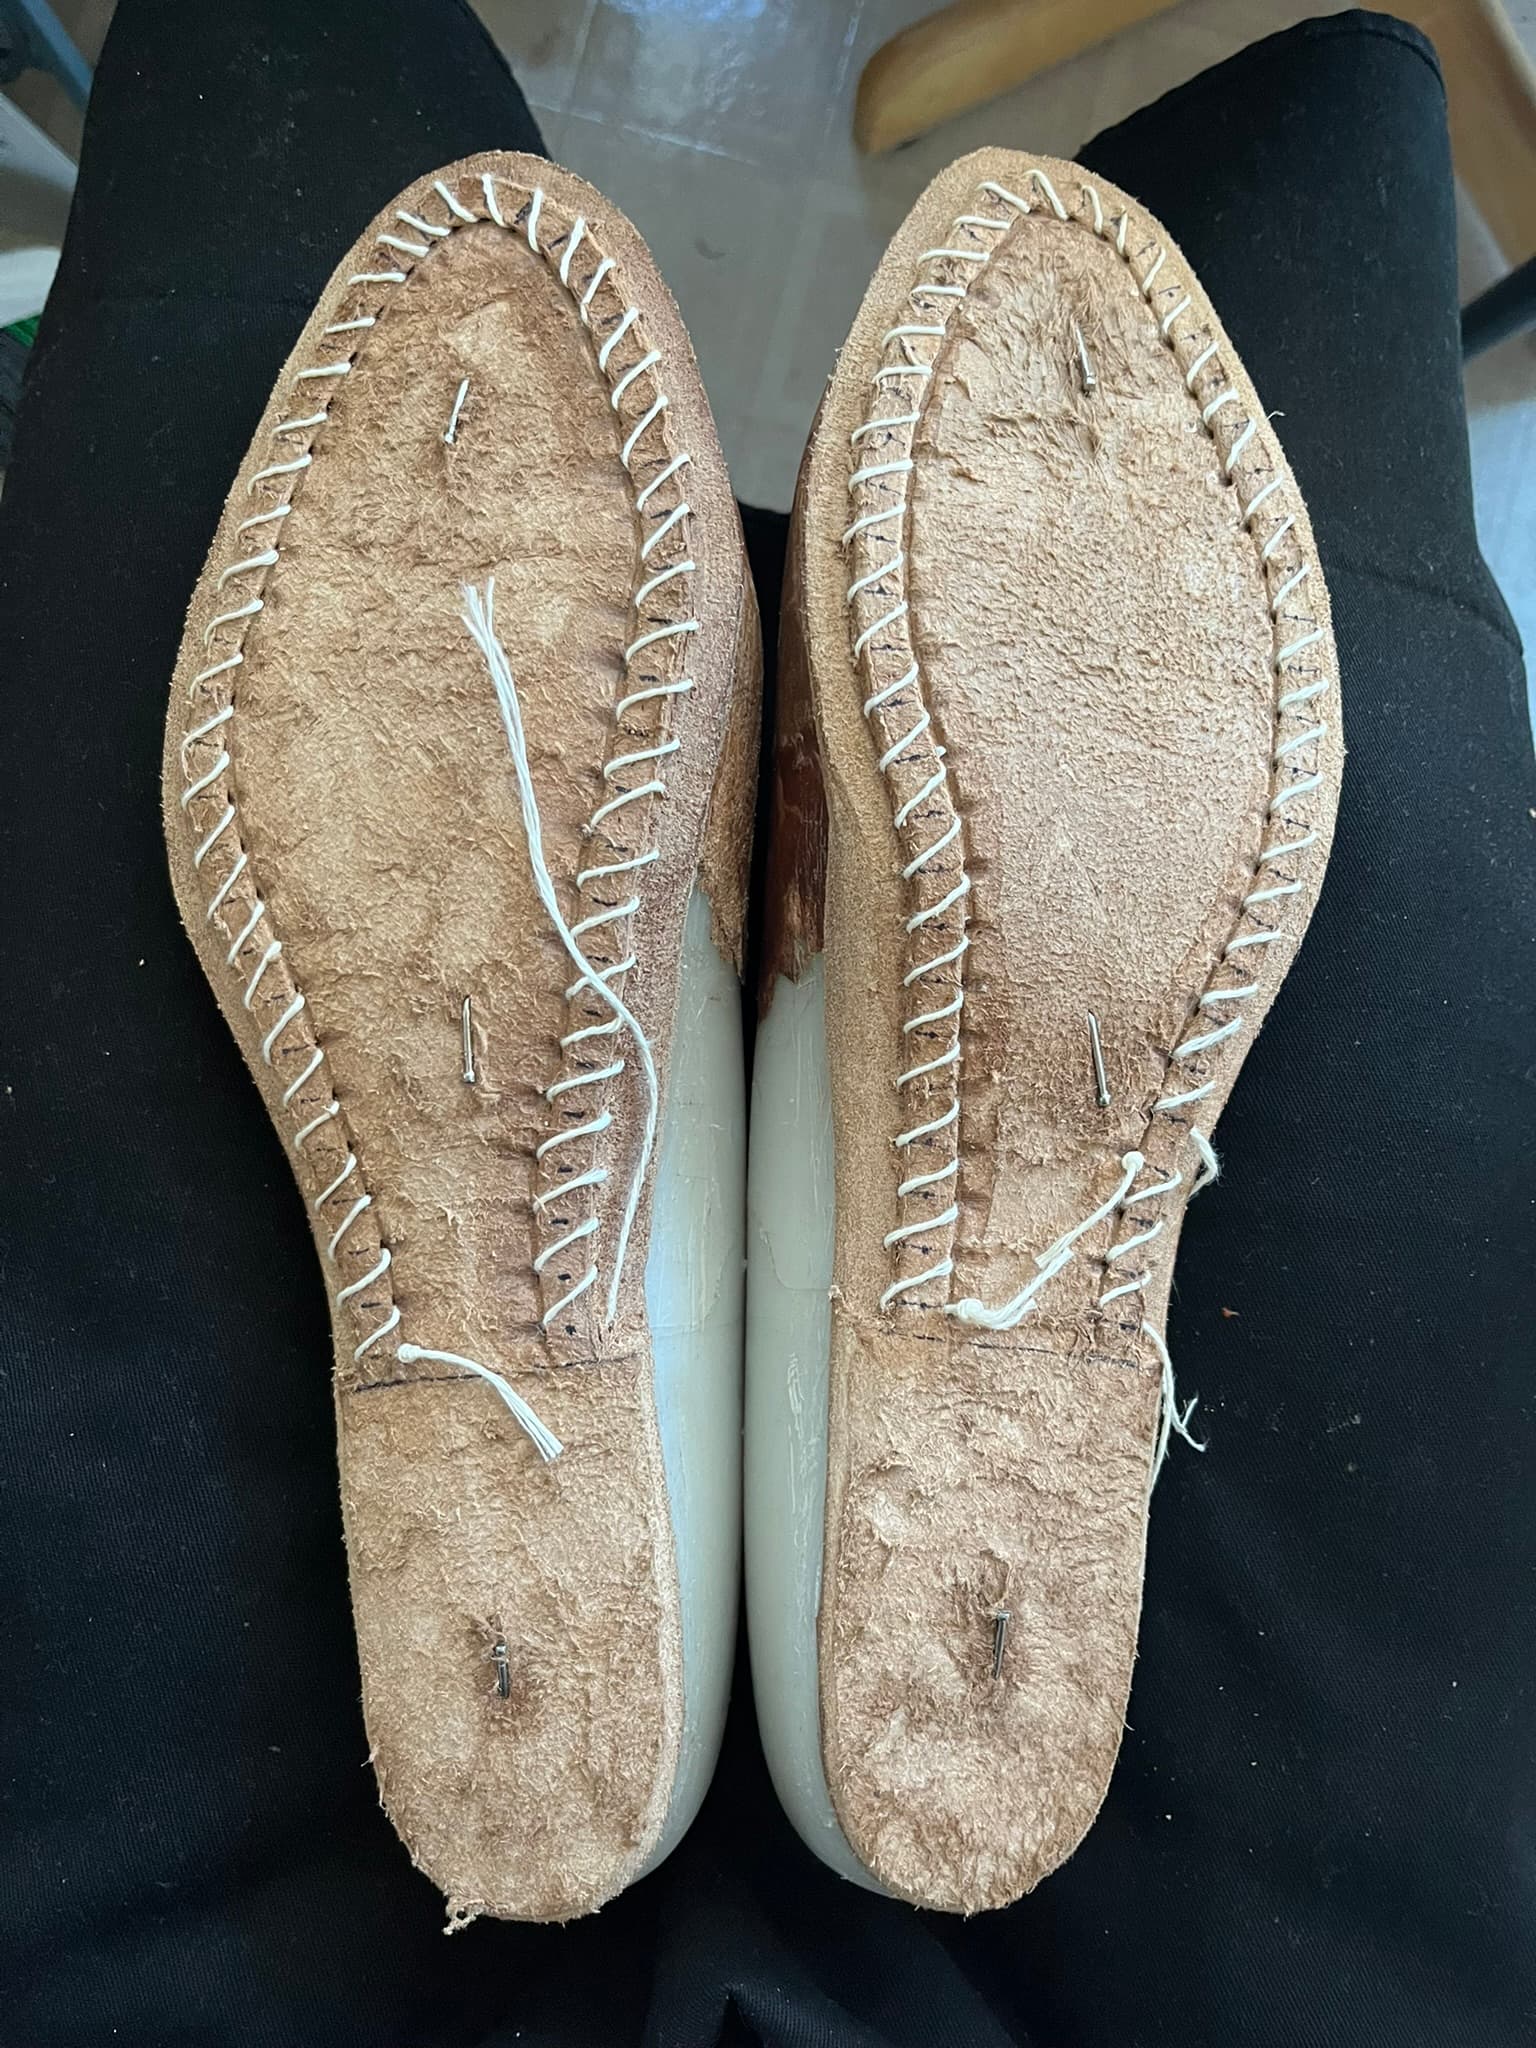
    • I spaced the stitch lines 4, 8, and 12 mm from the edge of the quarter. This was small enough to catch the turned-back edge at the bottom of the quarters and also fit three lines within the original 15mm seam allowance with some margin at the top. I marked these lines with the mini wing dividers again.
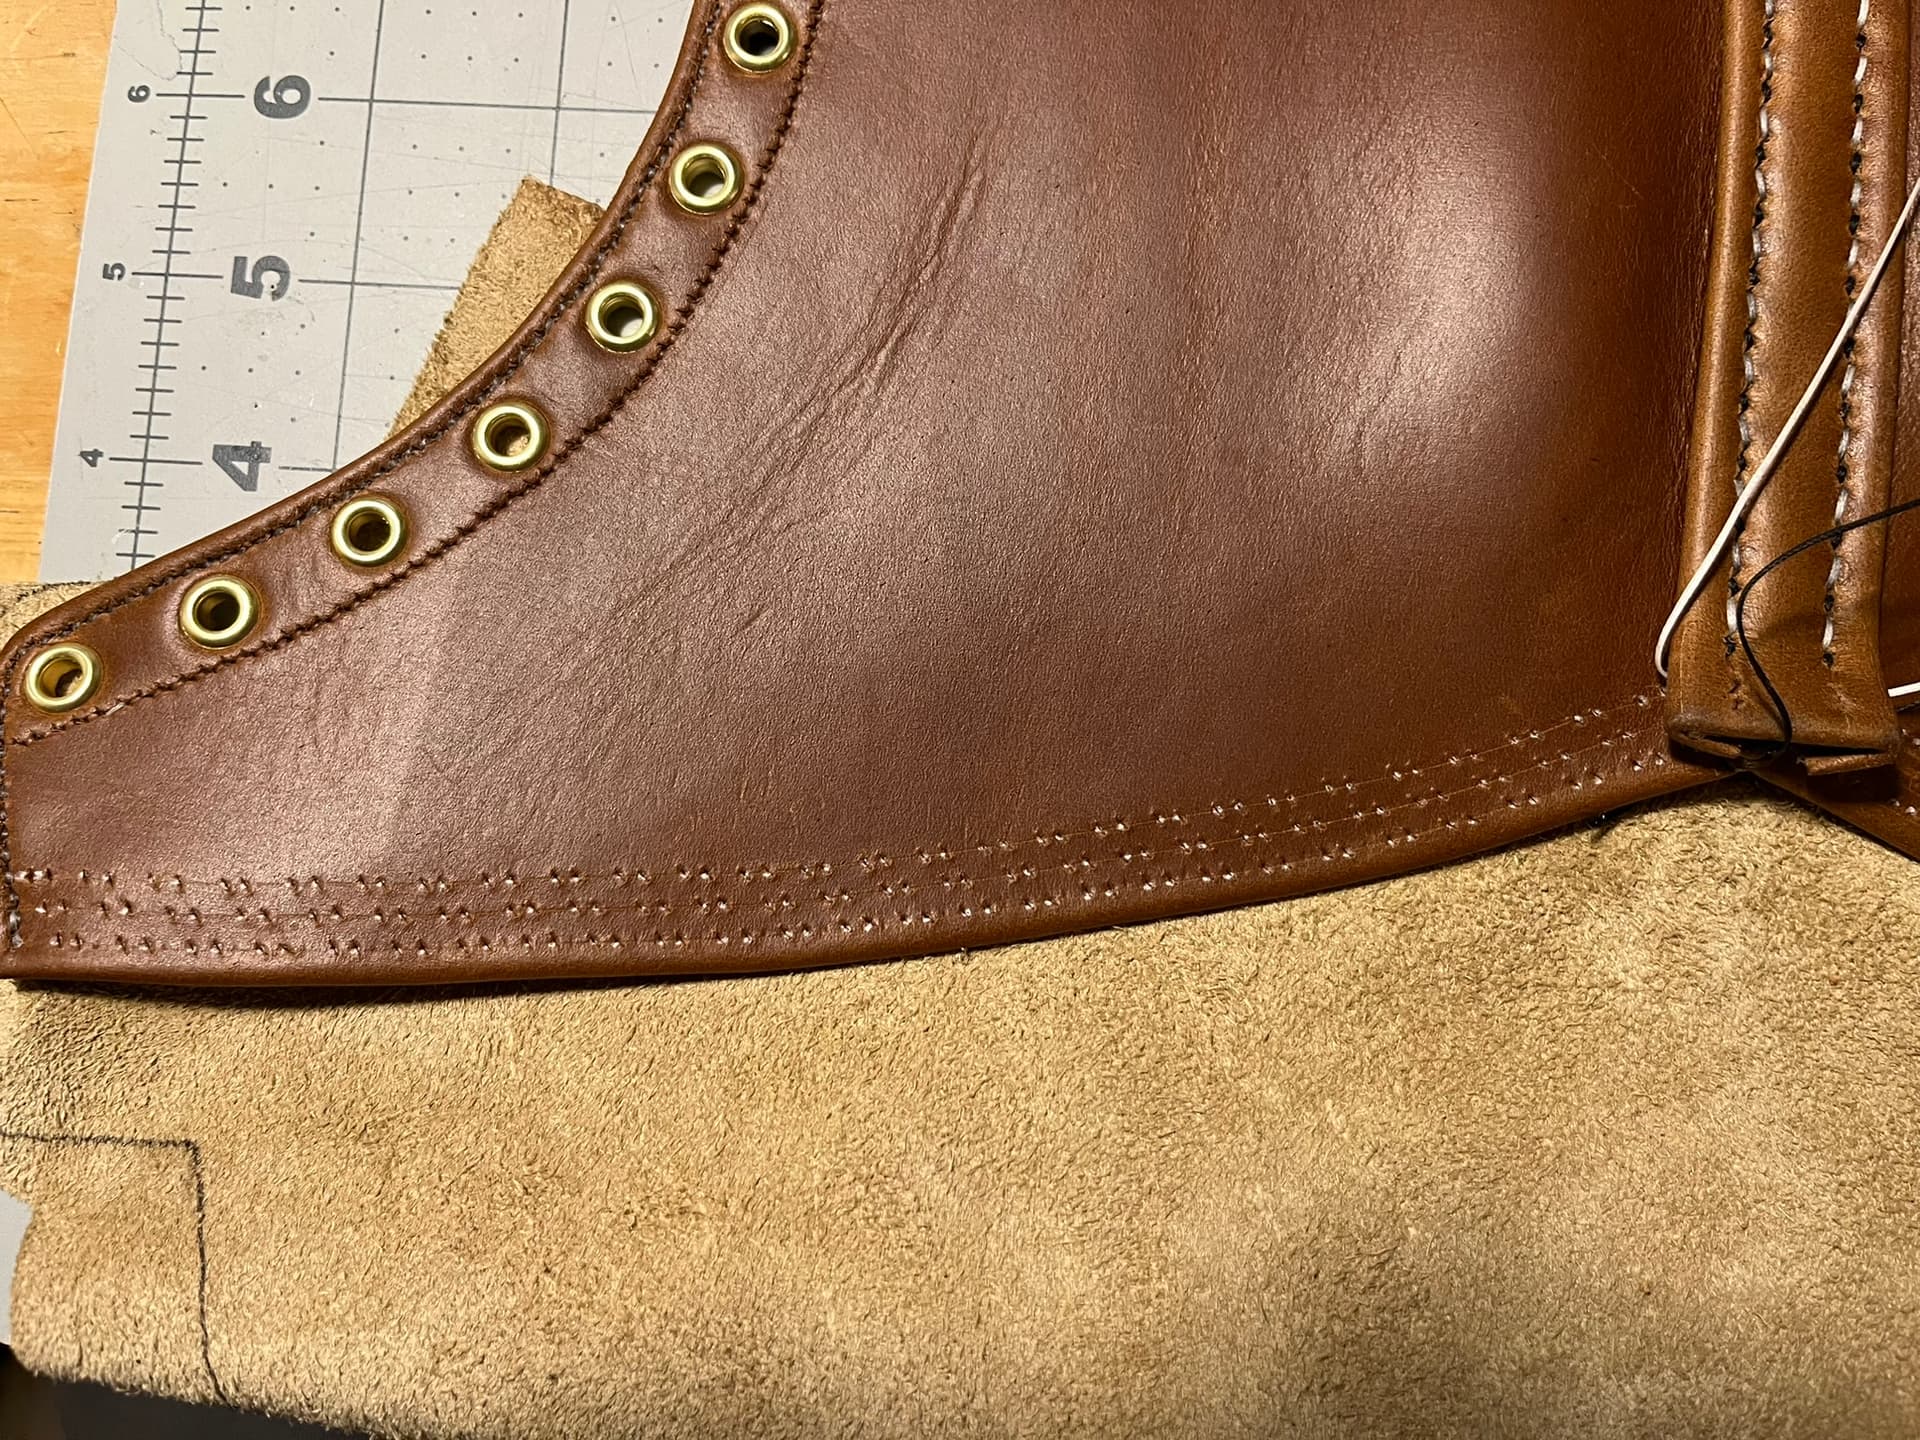
    • From some studies I did on scrap before this pair, I’d learned that they key to getting a good appearance among the staggered stitch lines, especially around curves, is to mark stitch spacing on one line, then mark the holes for the line next to it freehand, and so on. From a distance, it just likes a cool field of white dashes. Close up, it’s important for the smaller black stitches to line up in staggered rows, like slashes / / / / /. If the spacing is off, the eye will see chevrons > > > > instead.
    • I marked 10 SPI spacing on the bottom line, nearest the bottom fold of the quarter, with an overstitch wheel. I happened to find an old Osborne No. 10, but 10 SPI is not a common size. 2.5mm point-to-point pricking irons would be nearly identical, though you might have to ignore the direction of slant using a Japanese- or French-style tool. In any case, this is just pricking, not piercing through.
    • I marked the prick marks I would actually pierce with a 0.5mm white Sakura Gelly Roll gel pen from the art store. The pattern is Mark - Mark - Skip - Mark - Repeat. This will give alternating stitches of 2.5mm and 5mm in length.
    • Copy the white marks to the second and third scratched lines, staggering by one position.
    • I pre-pierced the stitching holes over a sheet of cork. As usual with slanted saddle stitch, the slant of the stitches will be the opposite of the slant of the holes.
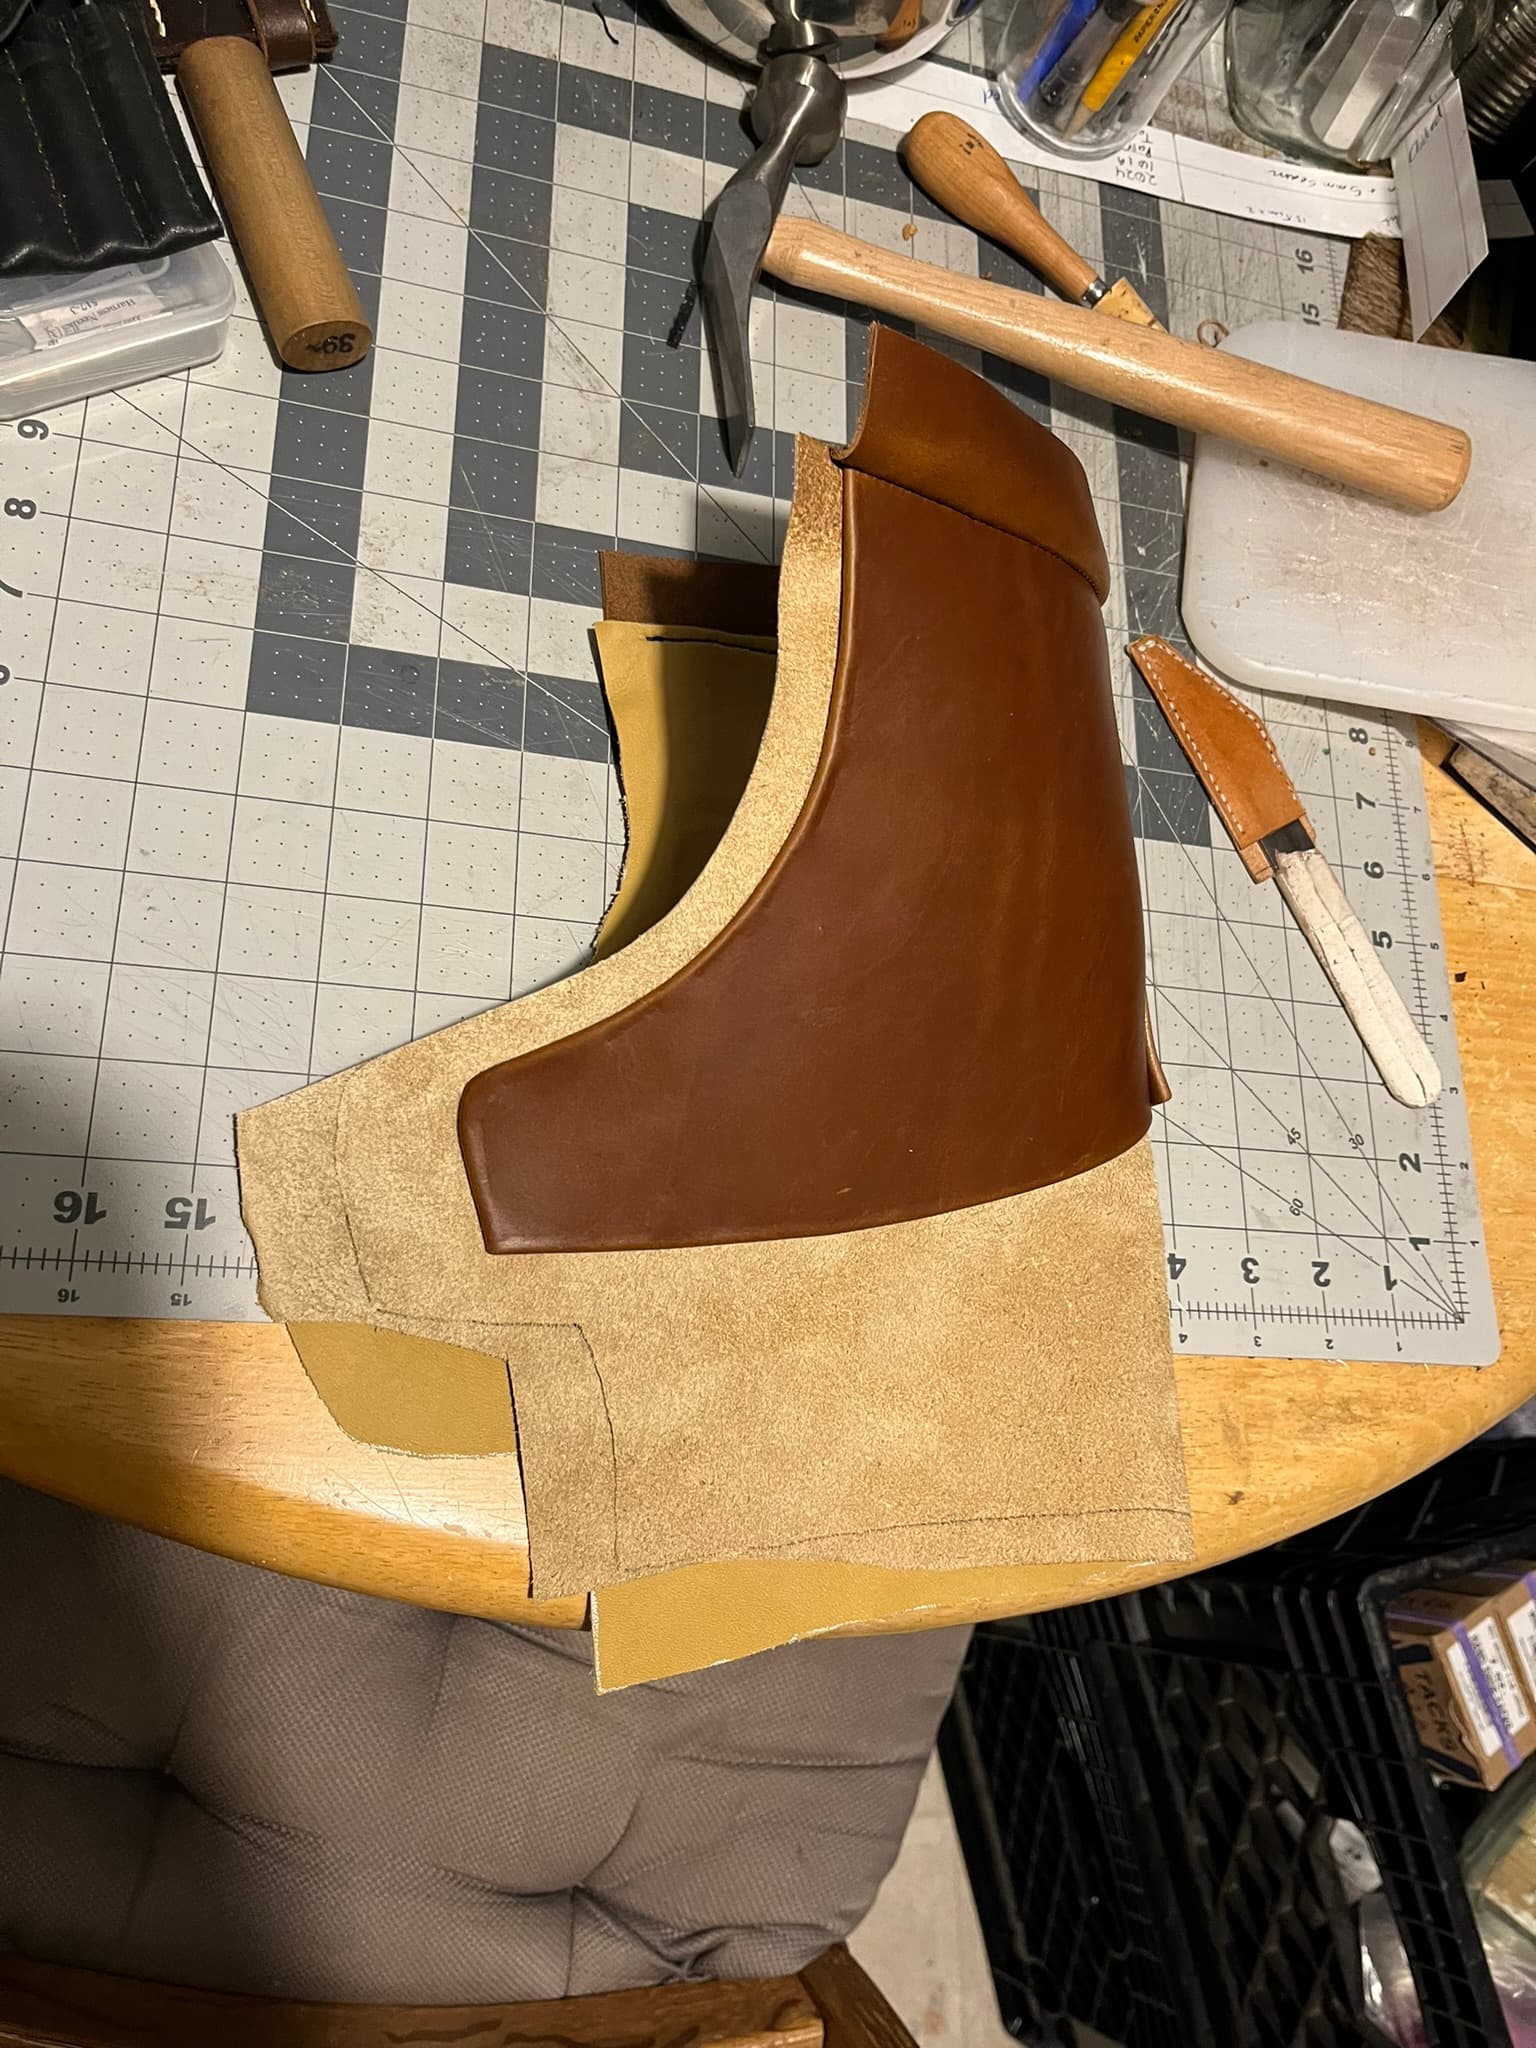
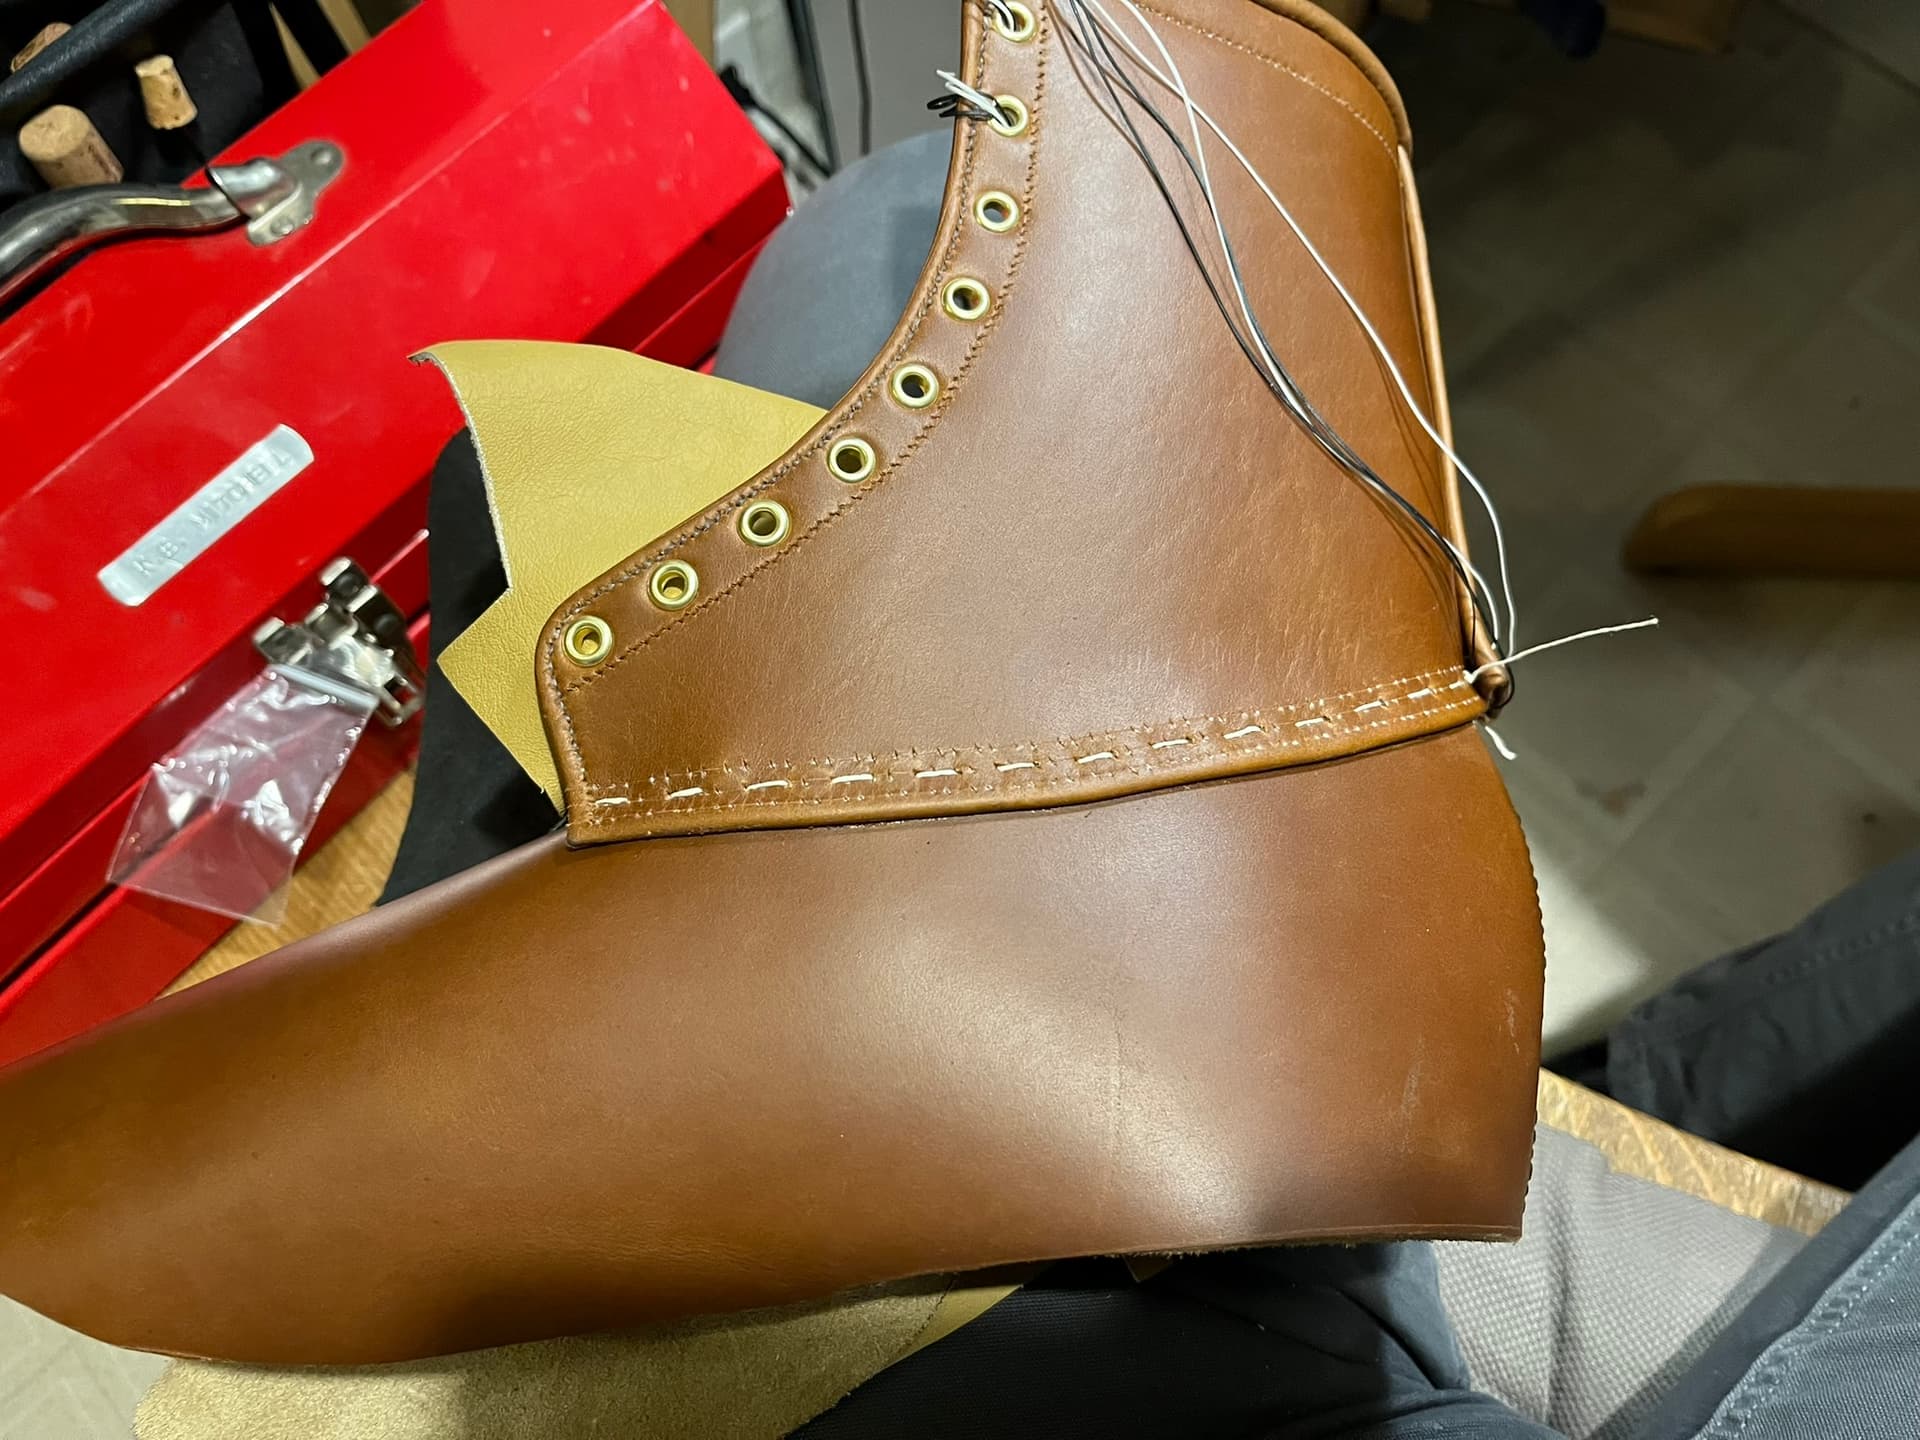
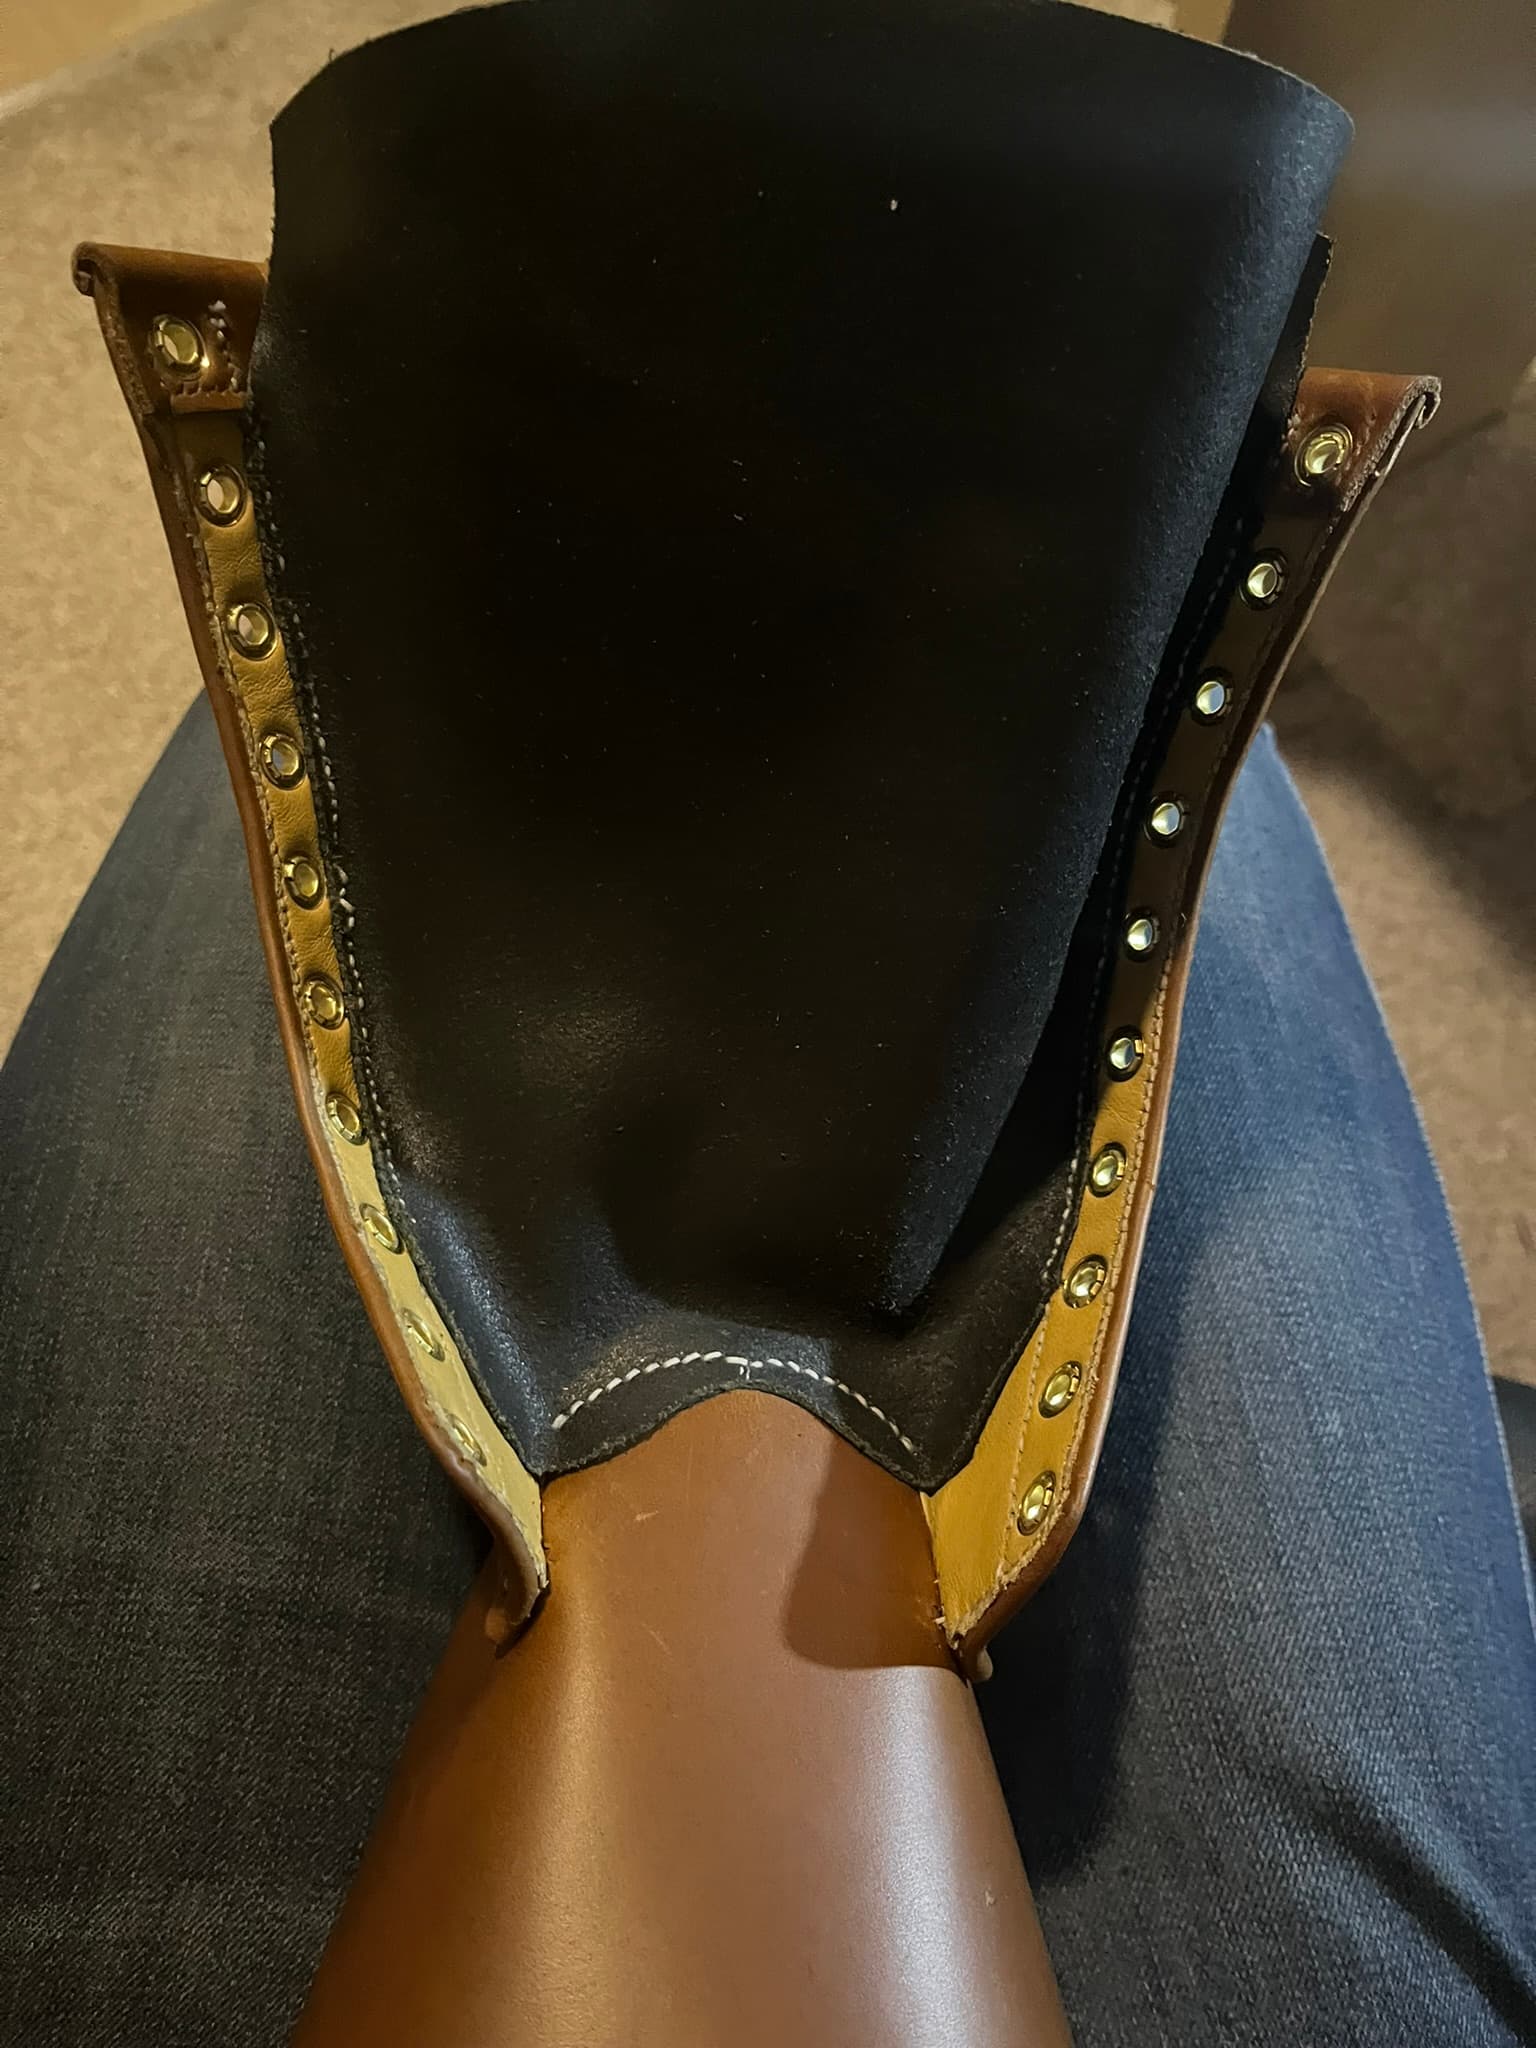
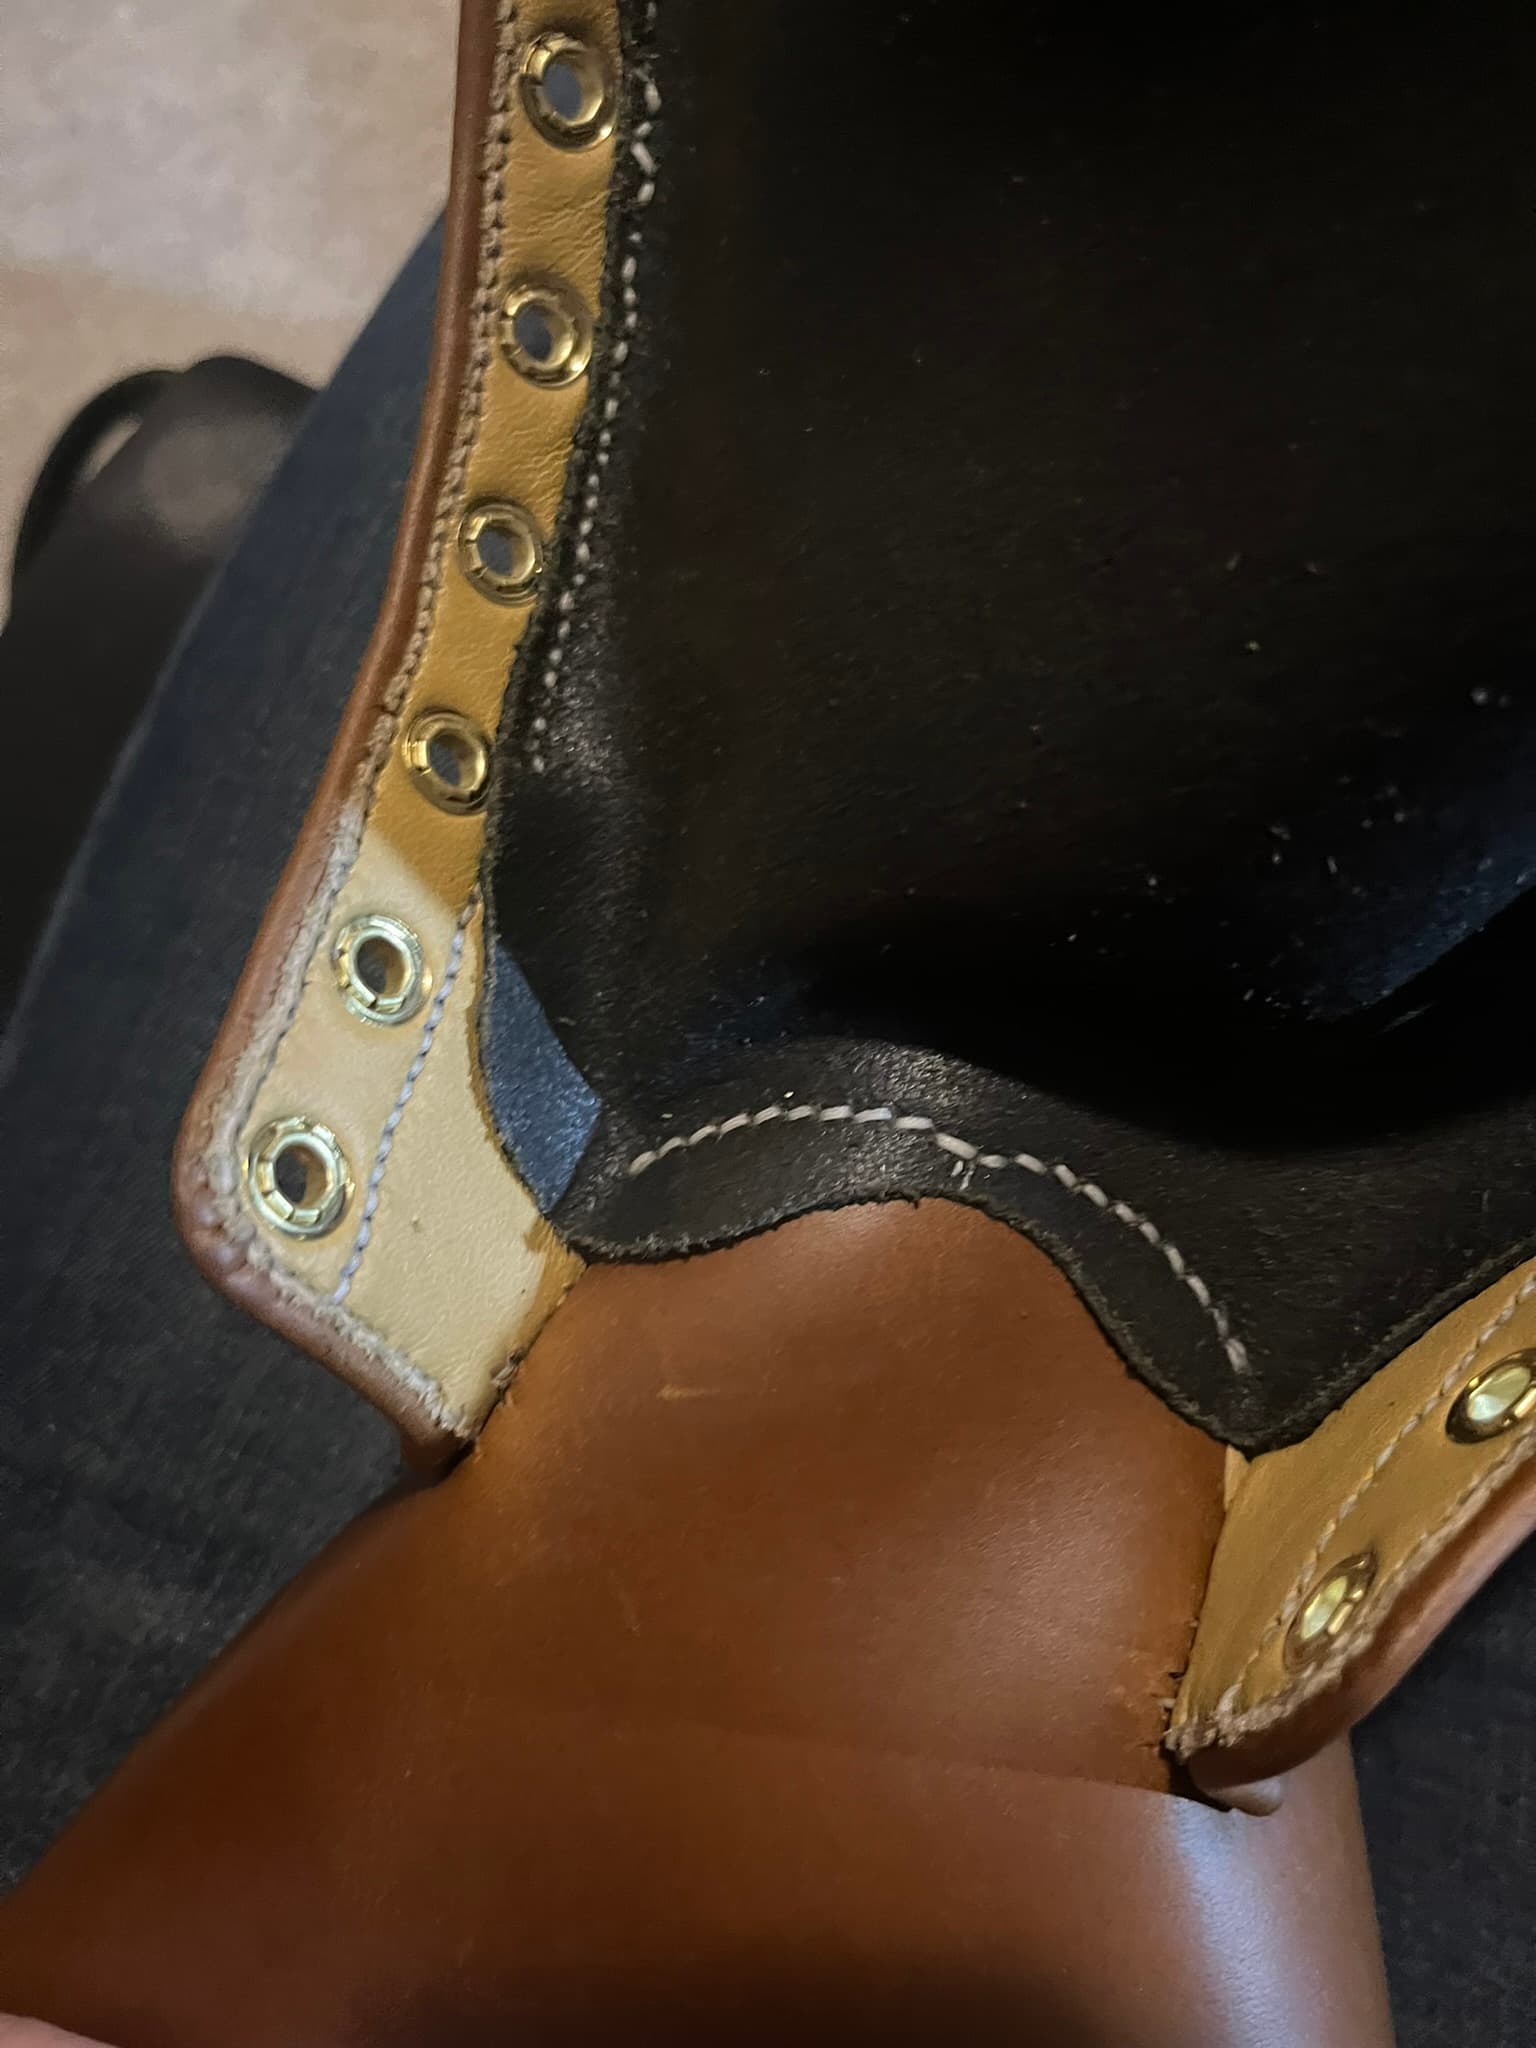
  • Mount the quarters.
    • I lightly scratched the seam allowance on the outside of the galosh. Mark the seam allowance on the flesh side of the quarters with a pen.
    • I brushed Aquilim 315 onto both the galosh and quarters and let tack. This was just to fix for assembly, since the hot stuffed leather here is full of waxes and oils and far from permanently cementable. I could have used double-sided tape or a glue with less wait time instead. And that might have created less residue to deal with later.
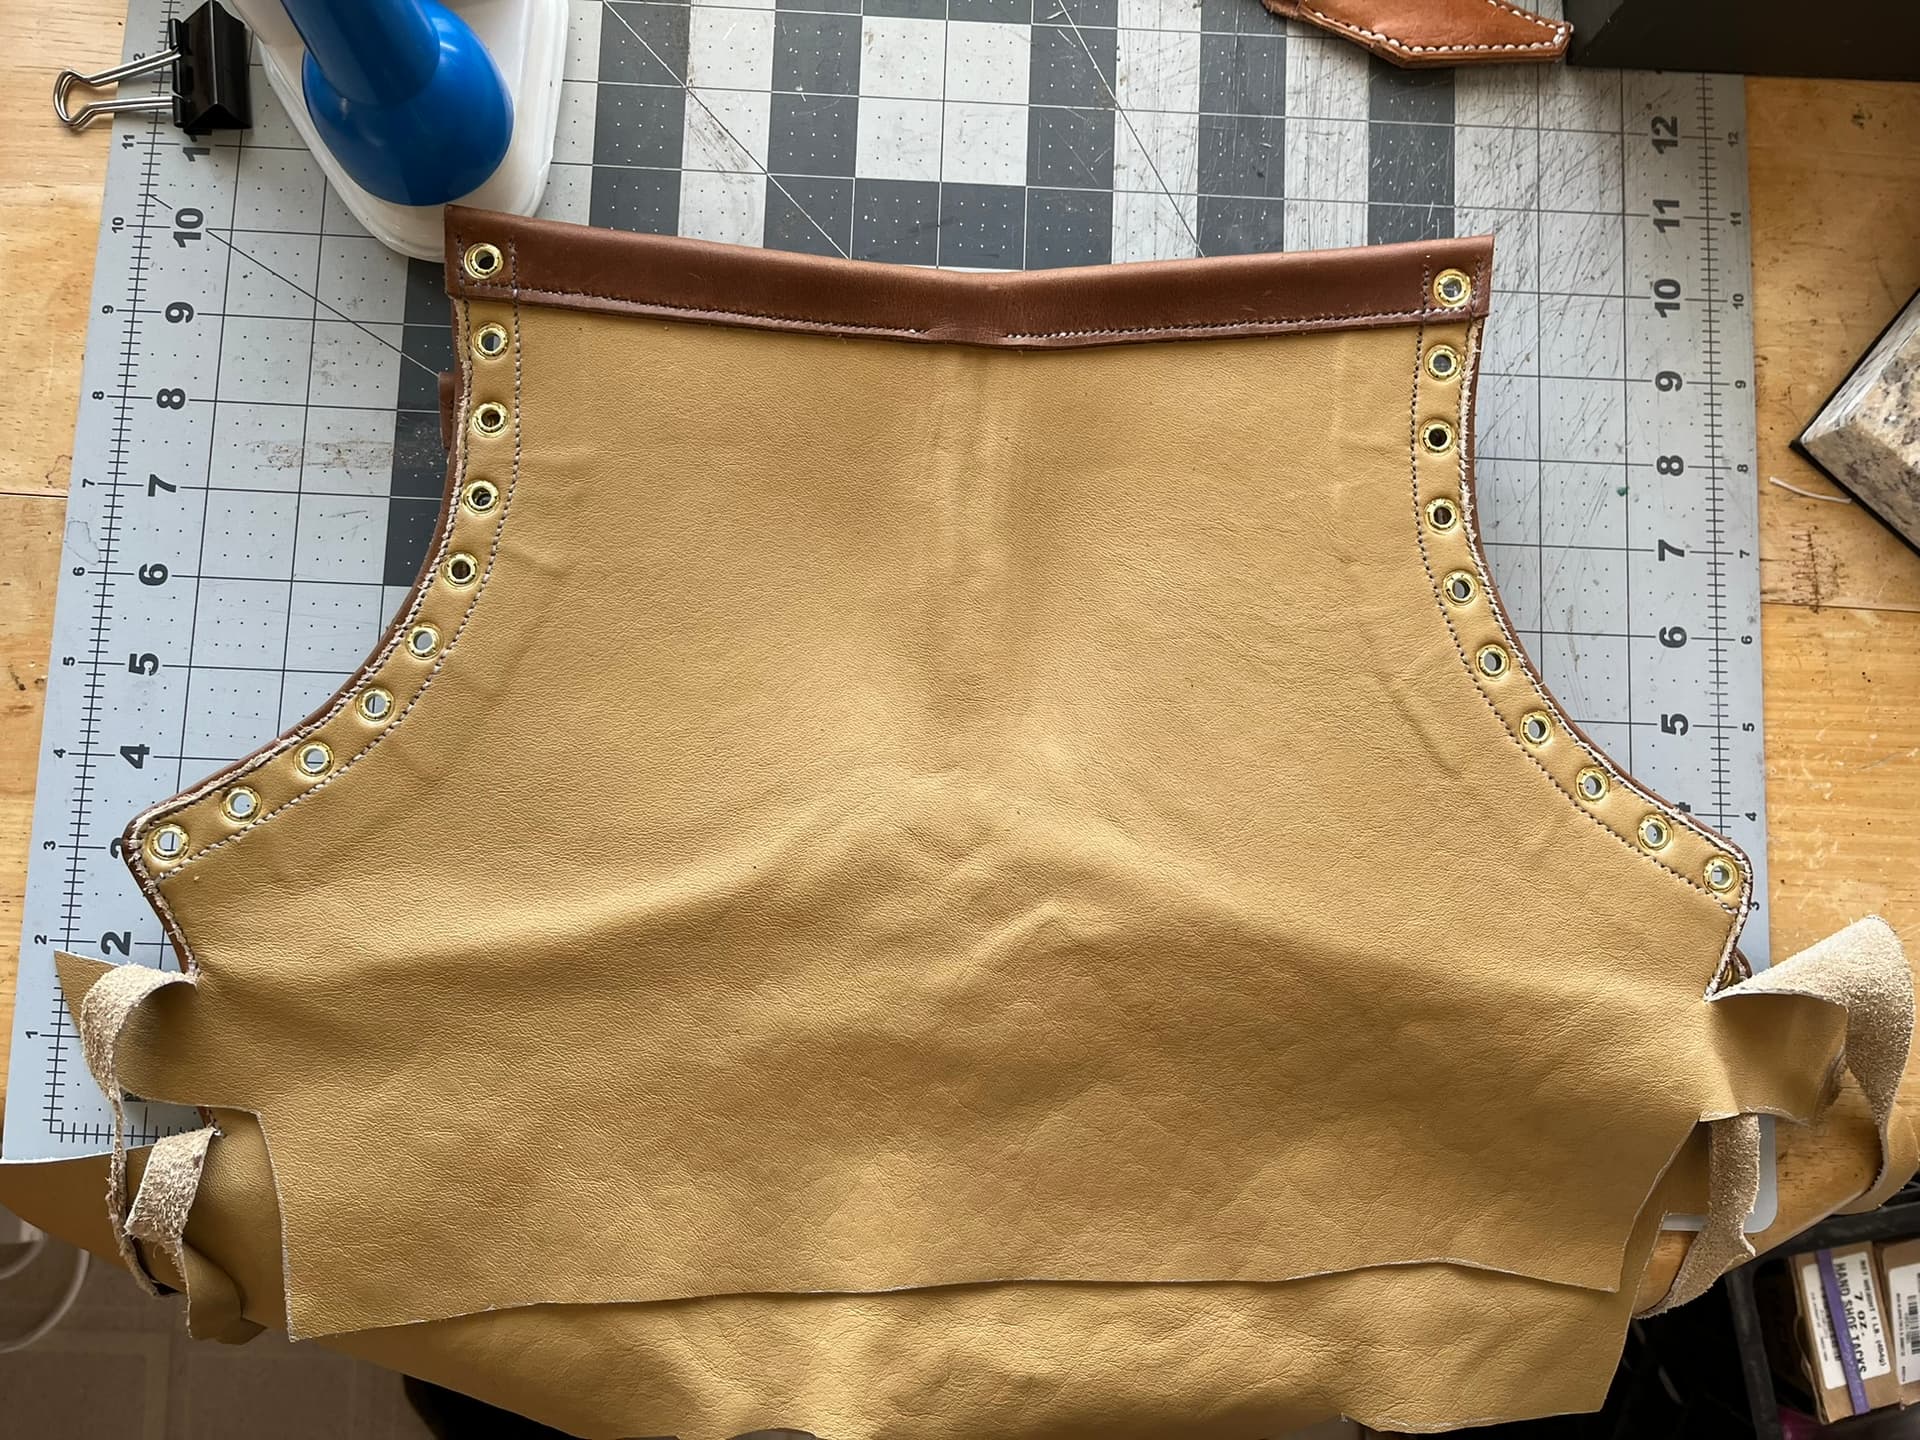
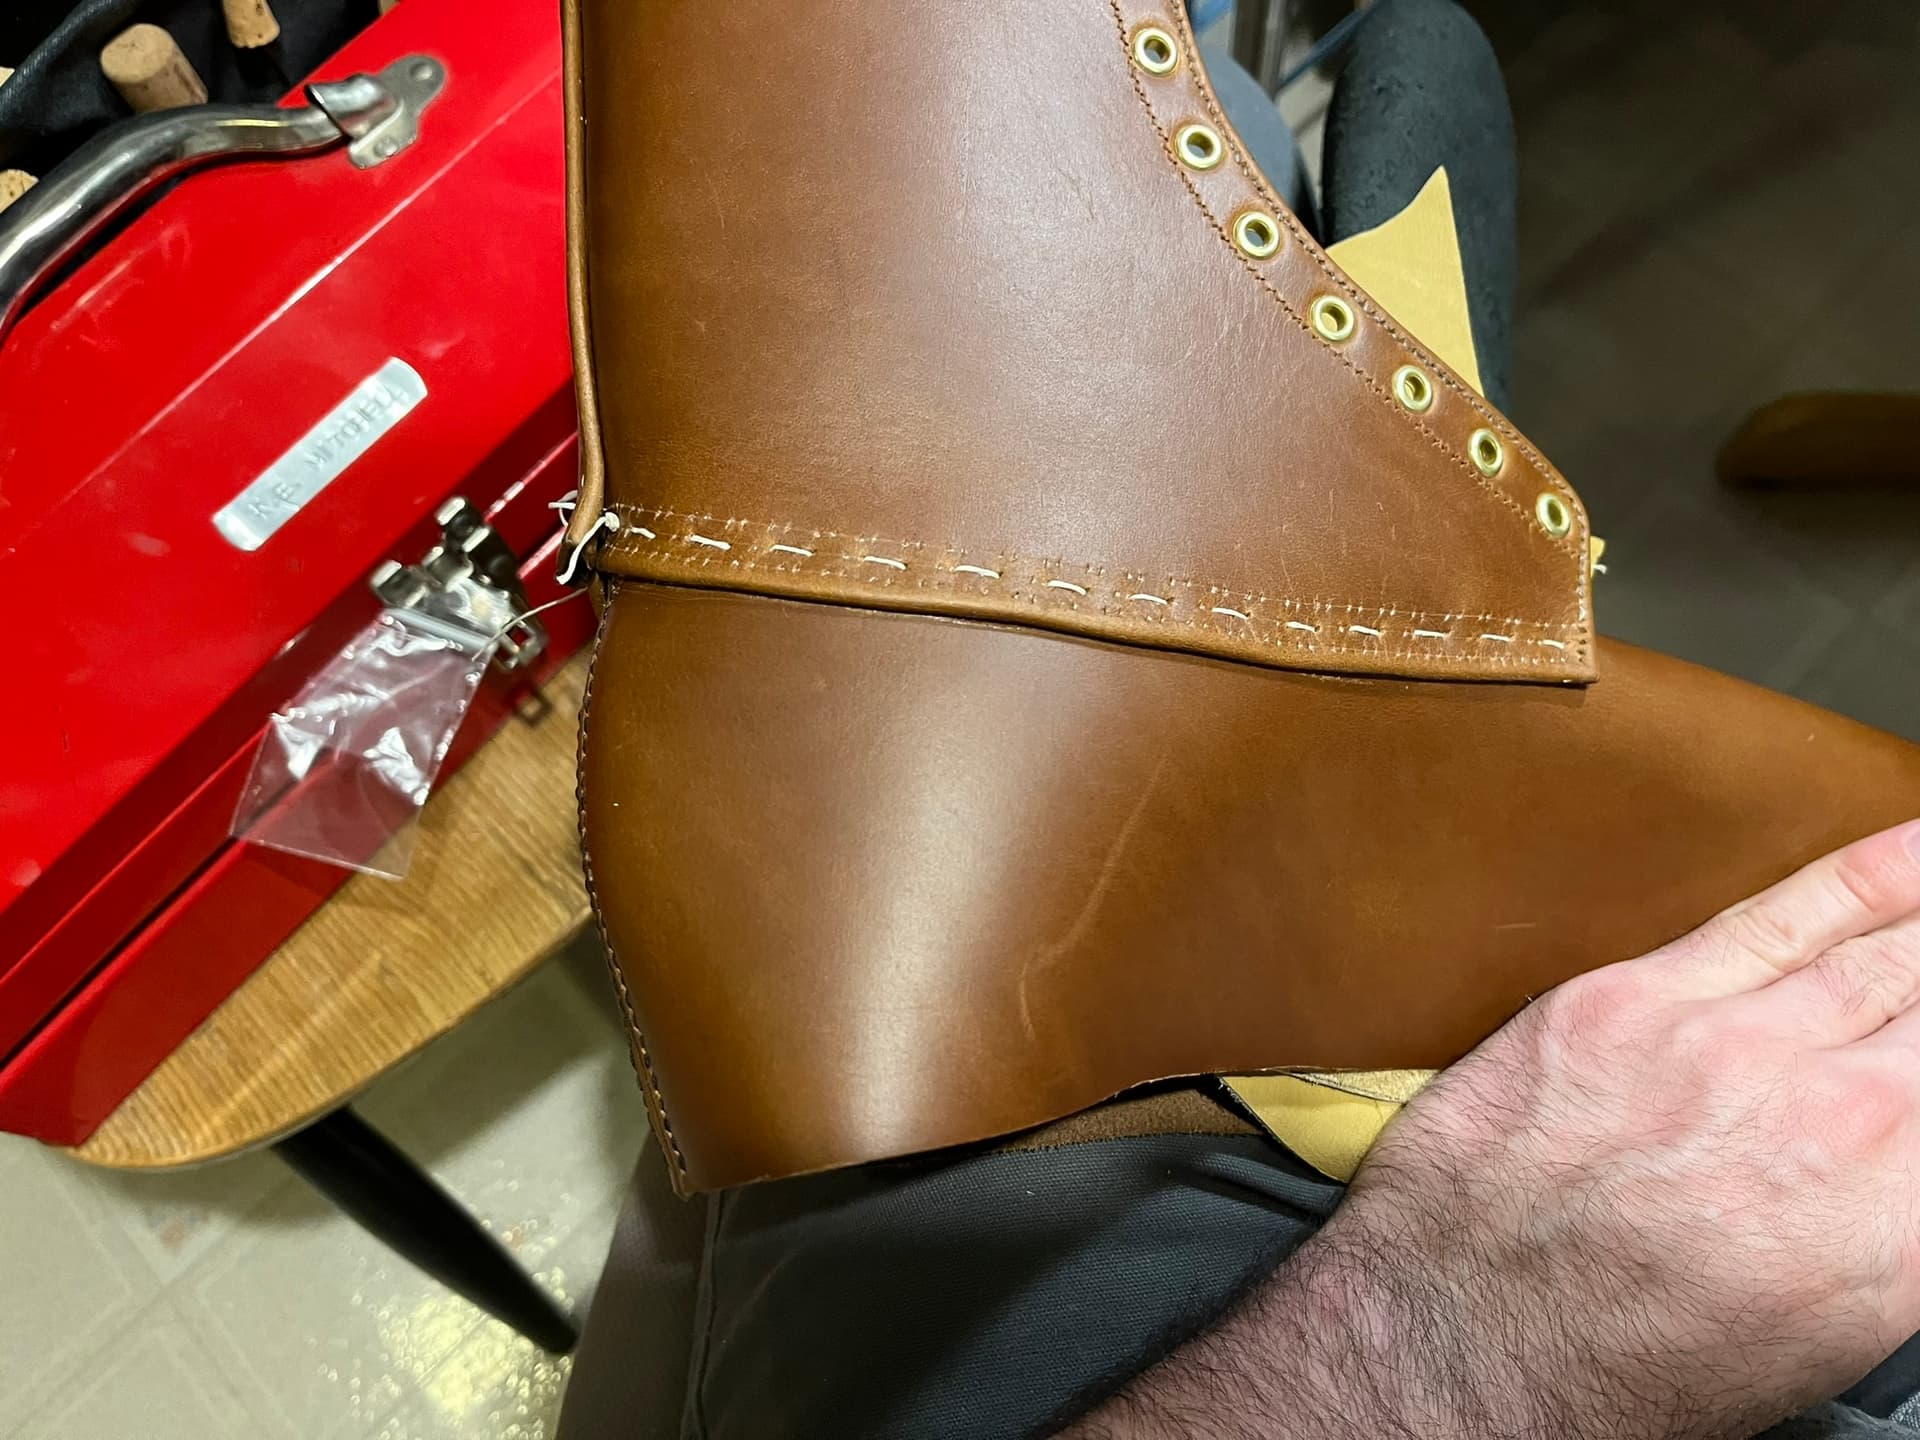
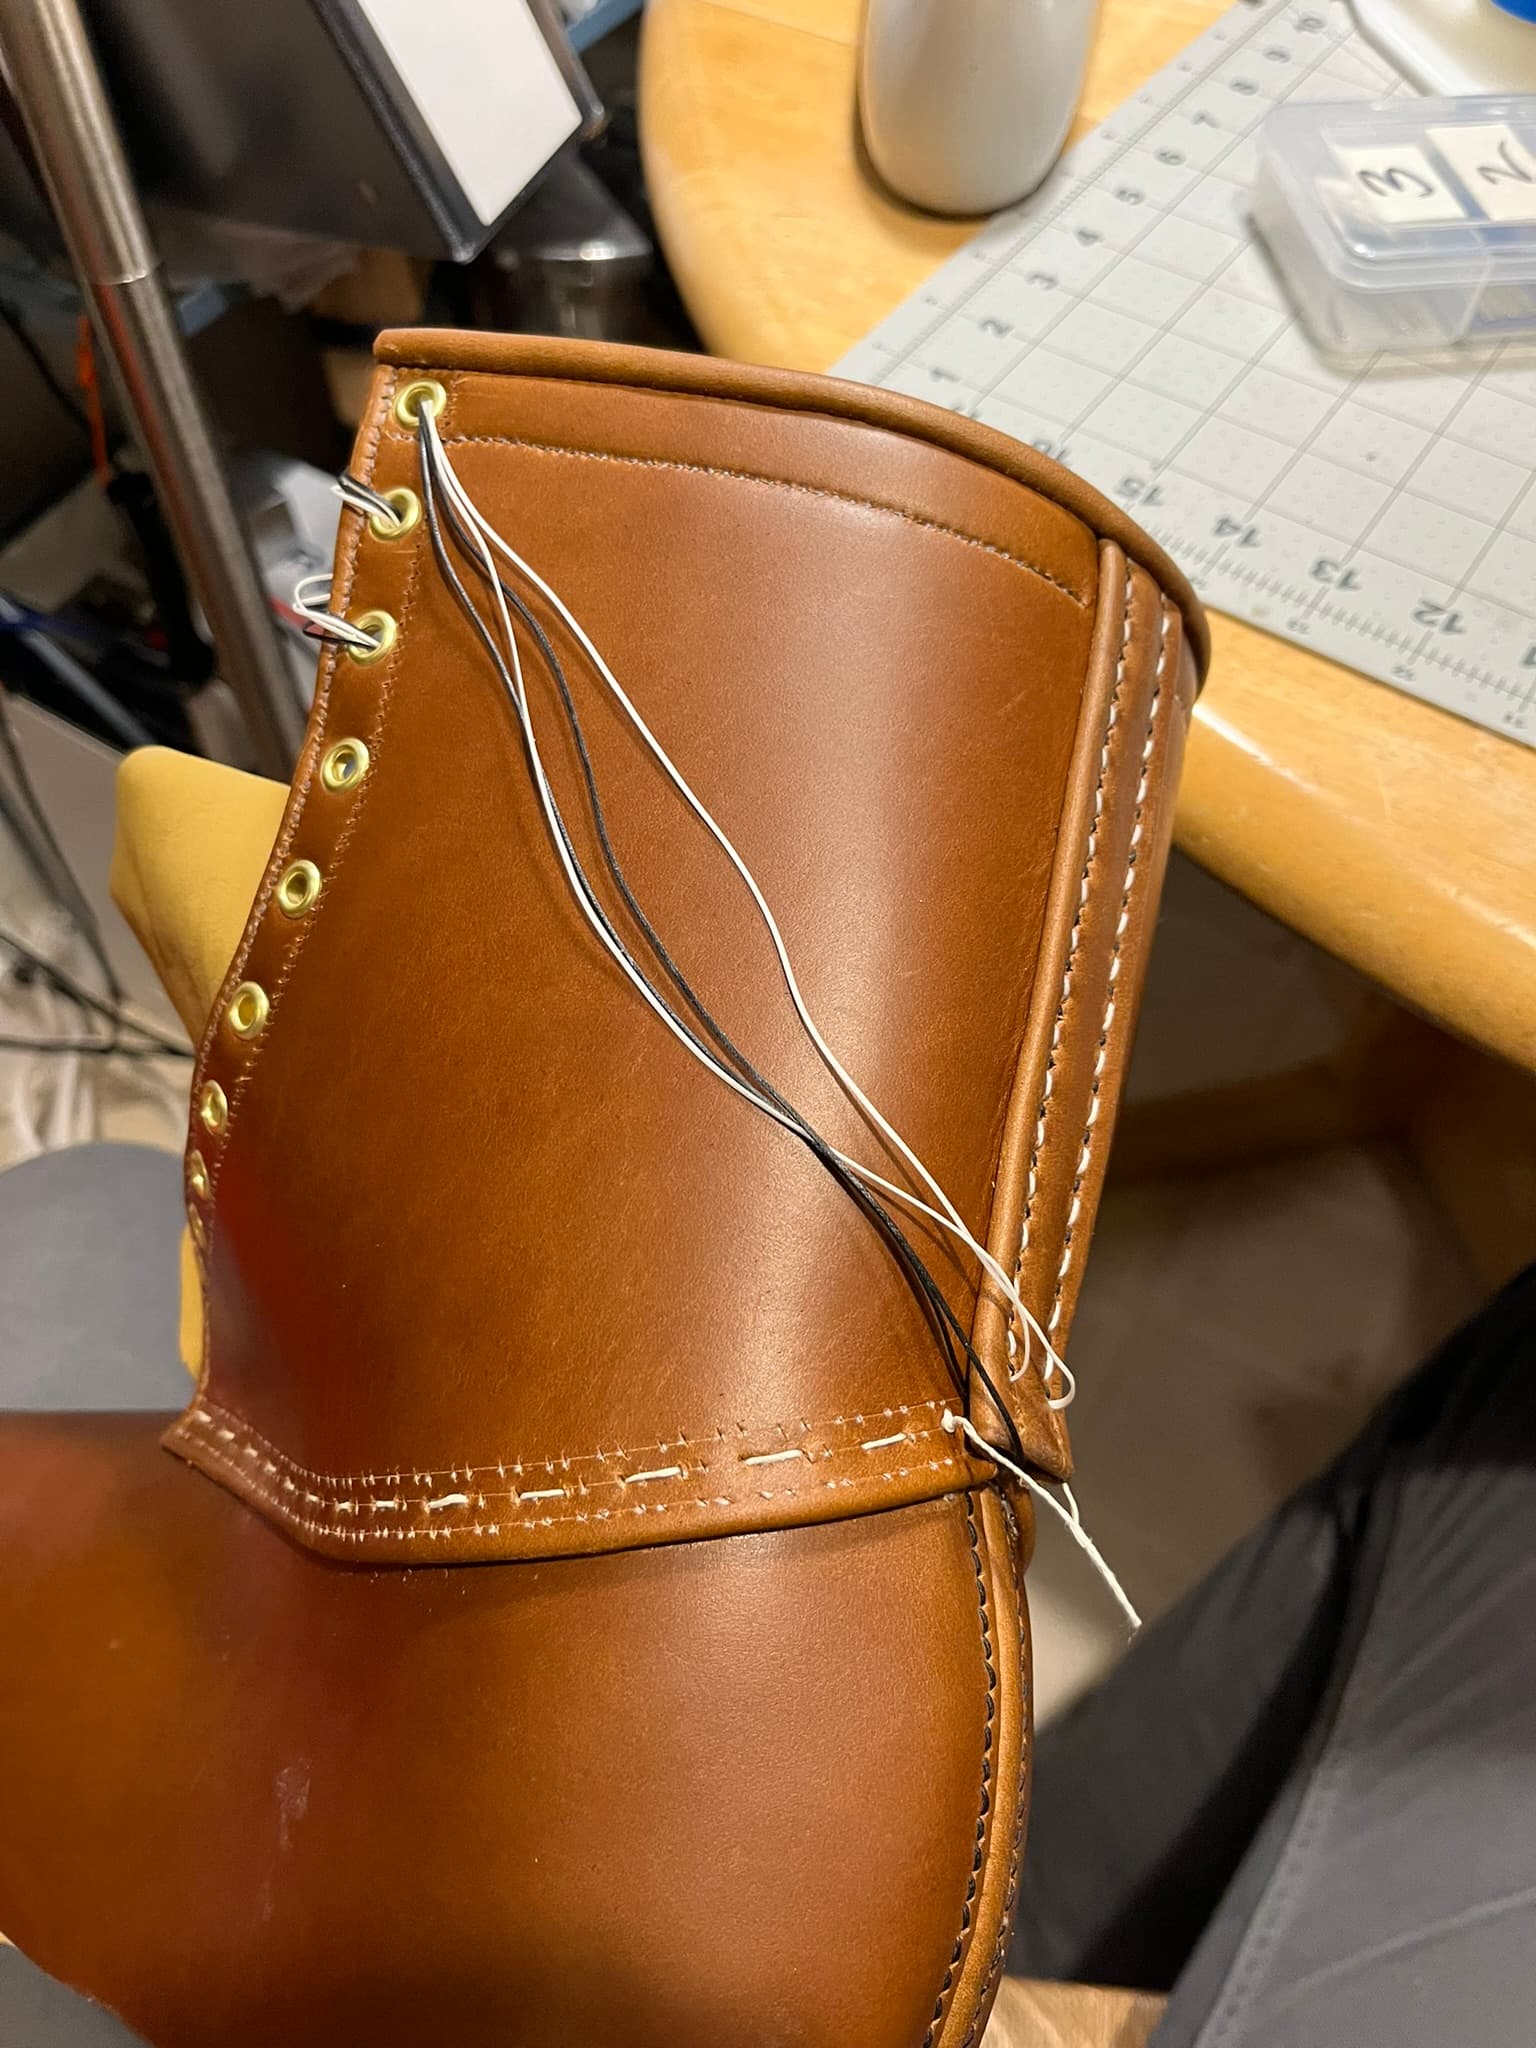
    • I lay the quarters on, starting from the backseam and working forward. There was a whole awkward dance with feeding the lining pieces and tongues through so everything could come together.
  • I basted (or “tacked”) the quarters onto the galoshes through just the second, middle stitch line. I pierced just every third hole through the galoshes and held them together with a running stitch of two-ply hemp thread with beeswax and knotted it at both ends. It help up fine and didn’t ream out the holes too wide for the 0.020" final Maine Thread.

Mistake: Forgot the backstraps would overlap the quarter seams.

I didn’t realize that by backstraps over the quarters would need to overlap the quarter seams for 15mm, and sewed them right to the bottoms earlier on.

I ended up picking the last couple stitches out of the backstraps and starting new threads from underneath. I looped those new threads through some eyelets to keep them still, but they still occasionally dangled around during quarter sewing.

Mistake: Forgot about lining under the tabs

I originally sewed the quarter seams all the way from the backseams to the tabs of the quarters, just sewing the quarters straight to the galoshes. When I then went to filp down the lining attached to the quarters, I realized that they needed to be sewn to the quarters under the tabs if they were going to be held there with anything but ahesive.

So I picked the last few stitches of each of the quarter seam lines, trimmed the quarter linings to fit the tabs, and sewed everything back, including the lining in two out of three of the quarter seam stitch lines. I didn’t sew the lining under the bottom-most seams, because I didn’t want the lining to peek out under the turns at the bottoms of the quarter tabs. Who would ever look under there besides me, I have no clue.

Mistake: Started marking the stitching from the wrong direction

I began marking the stitch pattern back at the backseams, where it would be partially covered by the backstraps. That meant I didn’t get consistency in how the pattern ended up at the tabs, where it will actually be quite visible.

I should have started marking the pattern at the tabs, choosing specifically how I wanted it to end there.

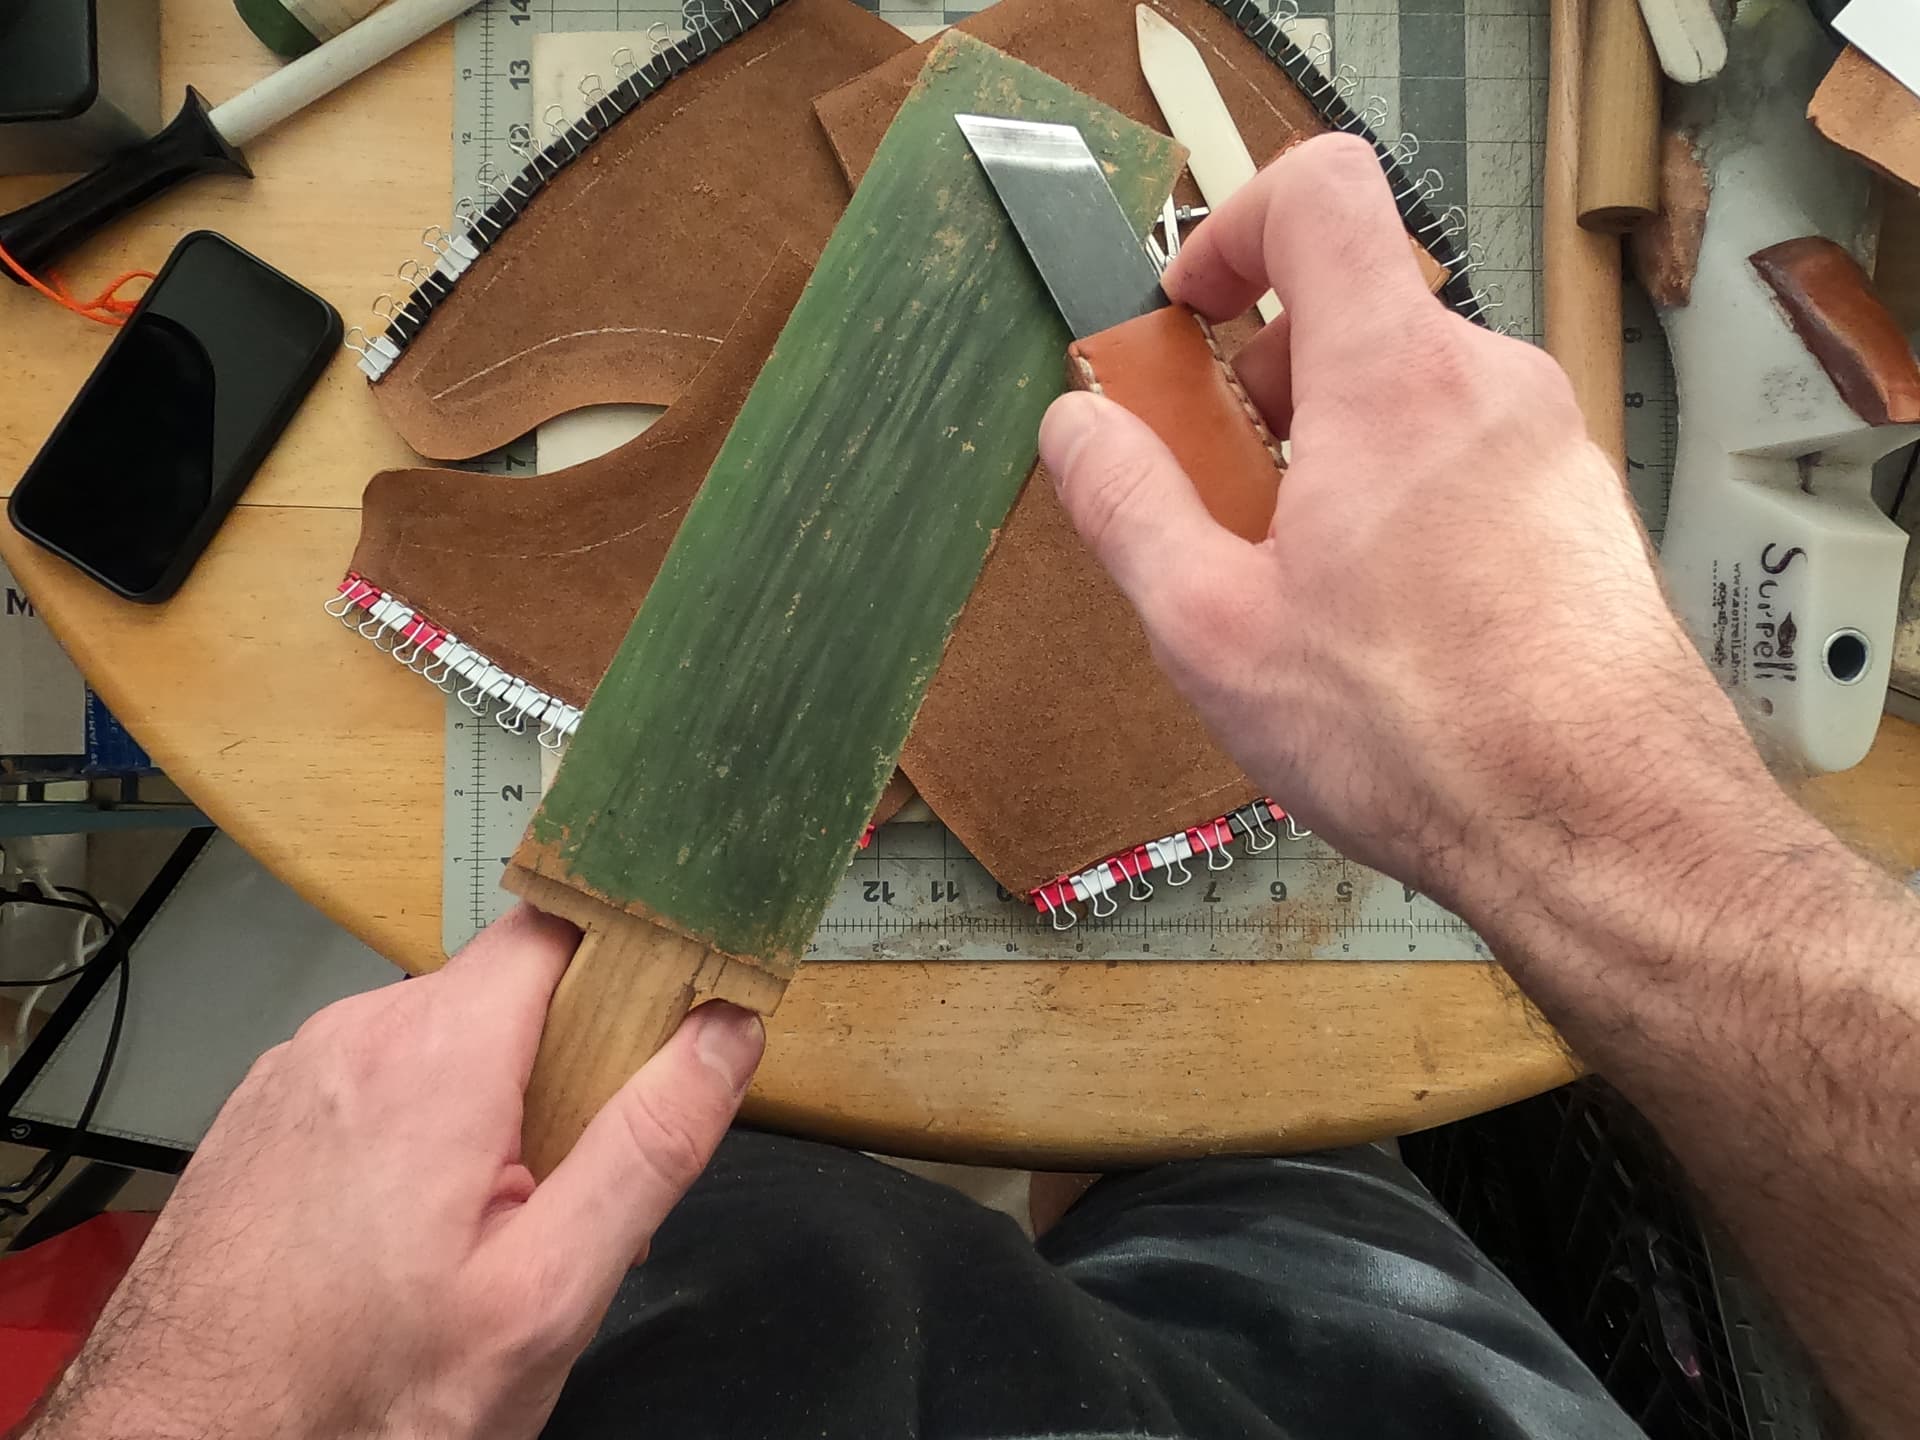
Thoughts on “Freehand” Saddle Stitching

When I did wallets and cases and notebook covers in leather in the past, I nearly always stitched in a pony. That’s not practical for most seams on the uppers I’ve done so far. Most lines curve, and even the “straight” ones like over curved surfaces.

This time, I tried doing a few lines with a couple different styles:

  • “Saddle Style”: The backside is hidden from view at all times. You pierce holes with the awl as you stitch, not in advance. Your non-dominant hand feels for the point of the awl after it comes through, and you use that feeling to find the hole and push the needle through from the backside.

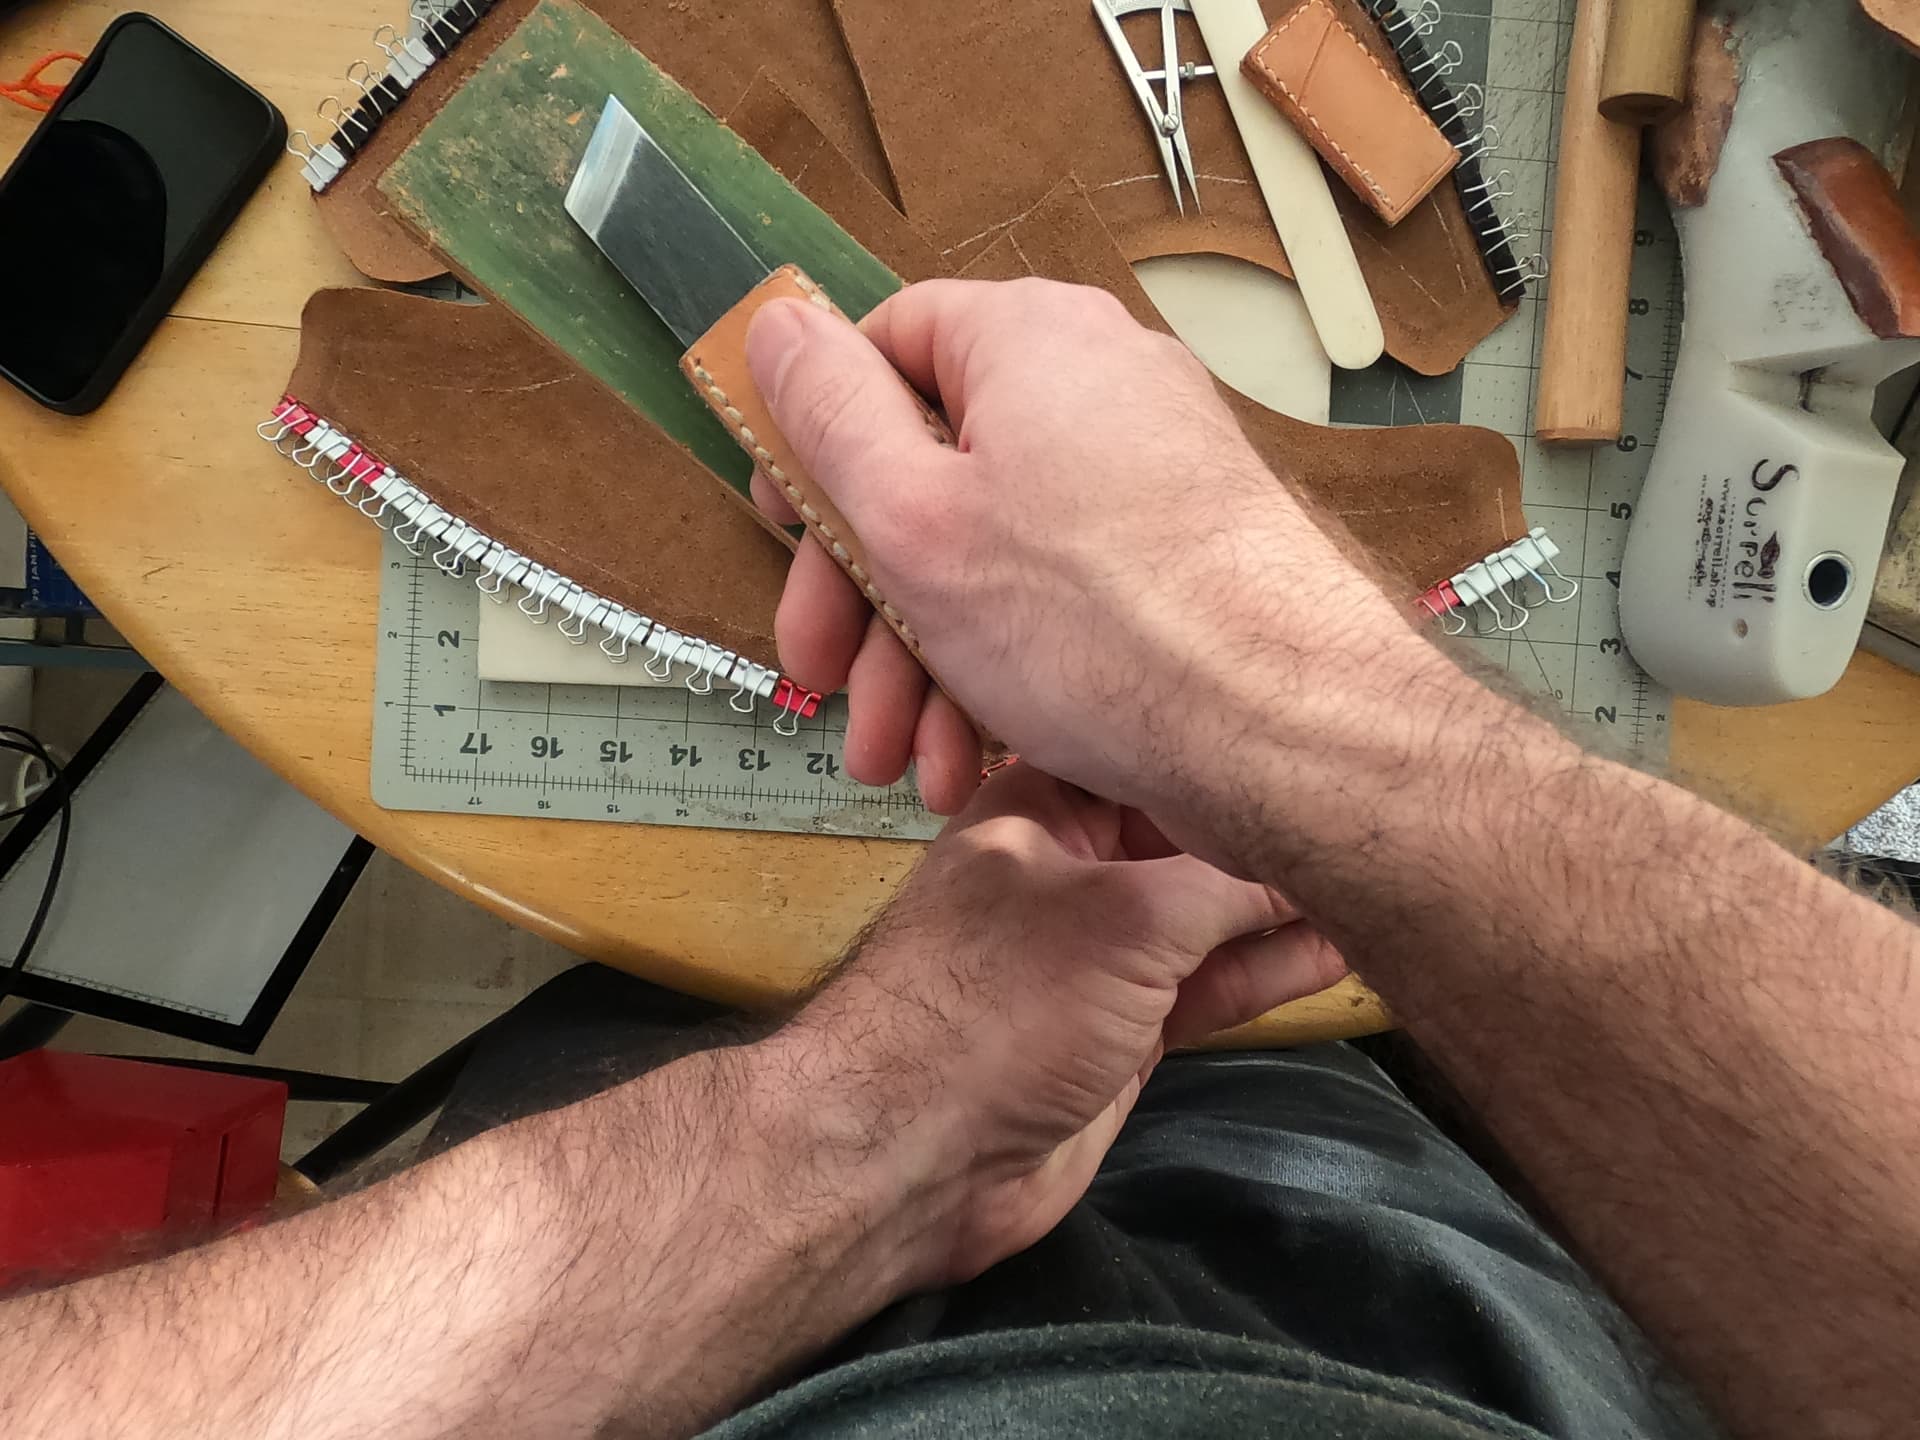
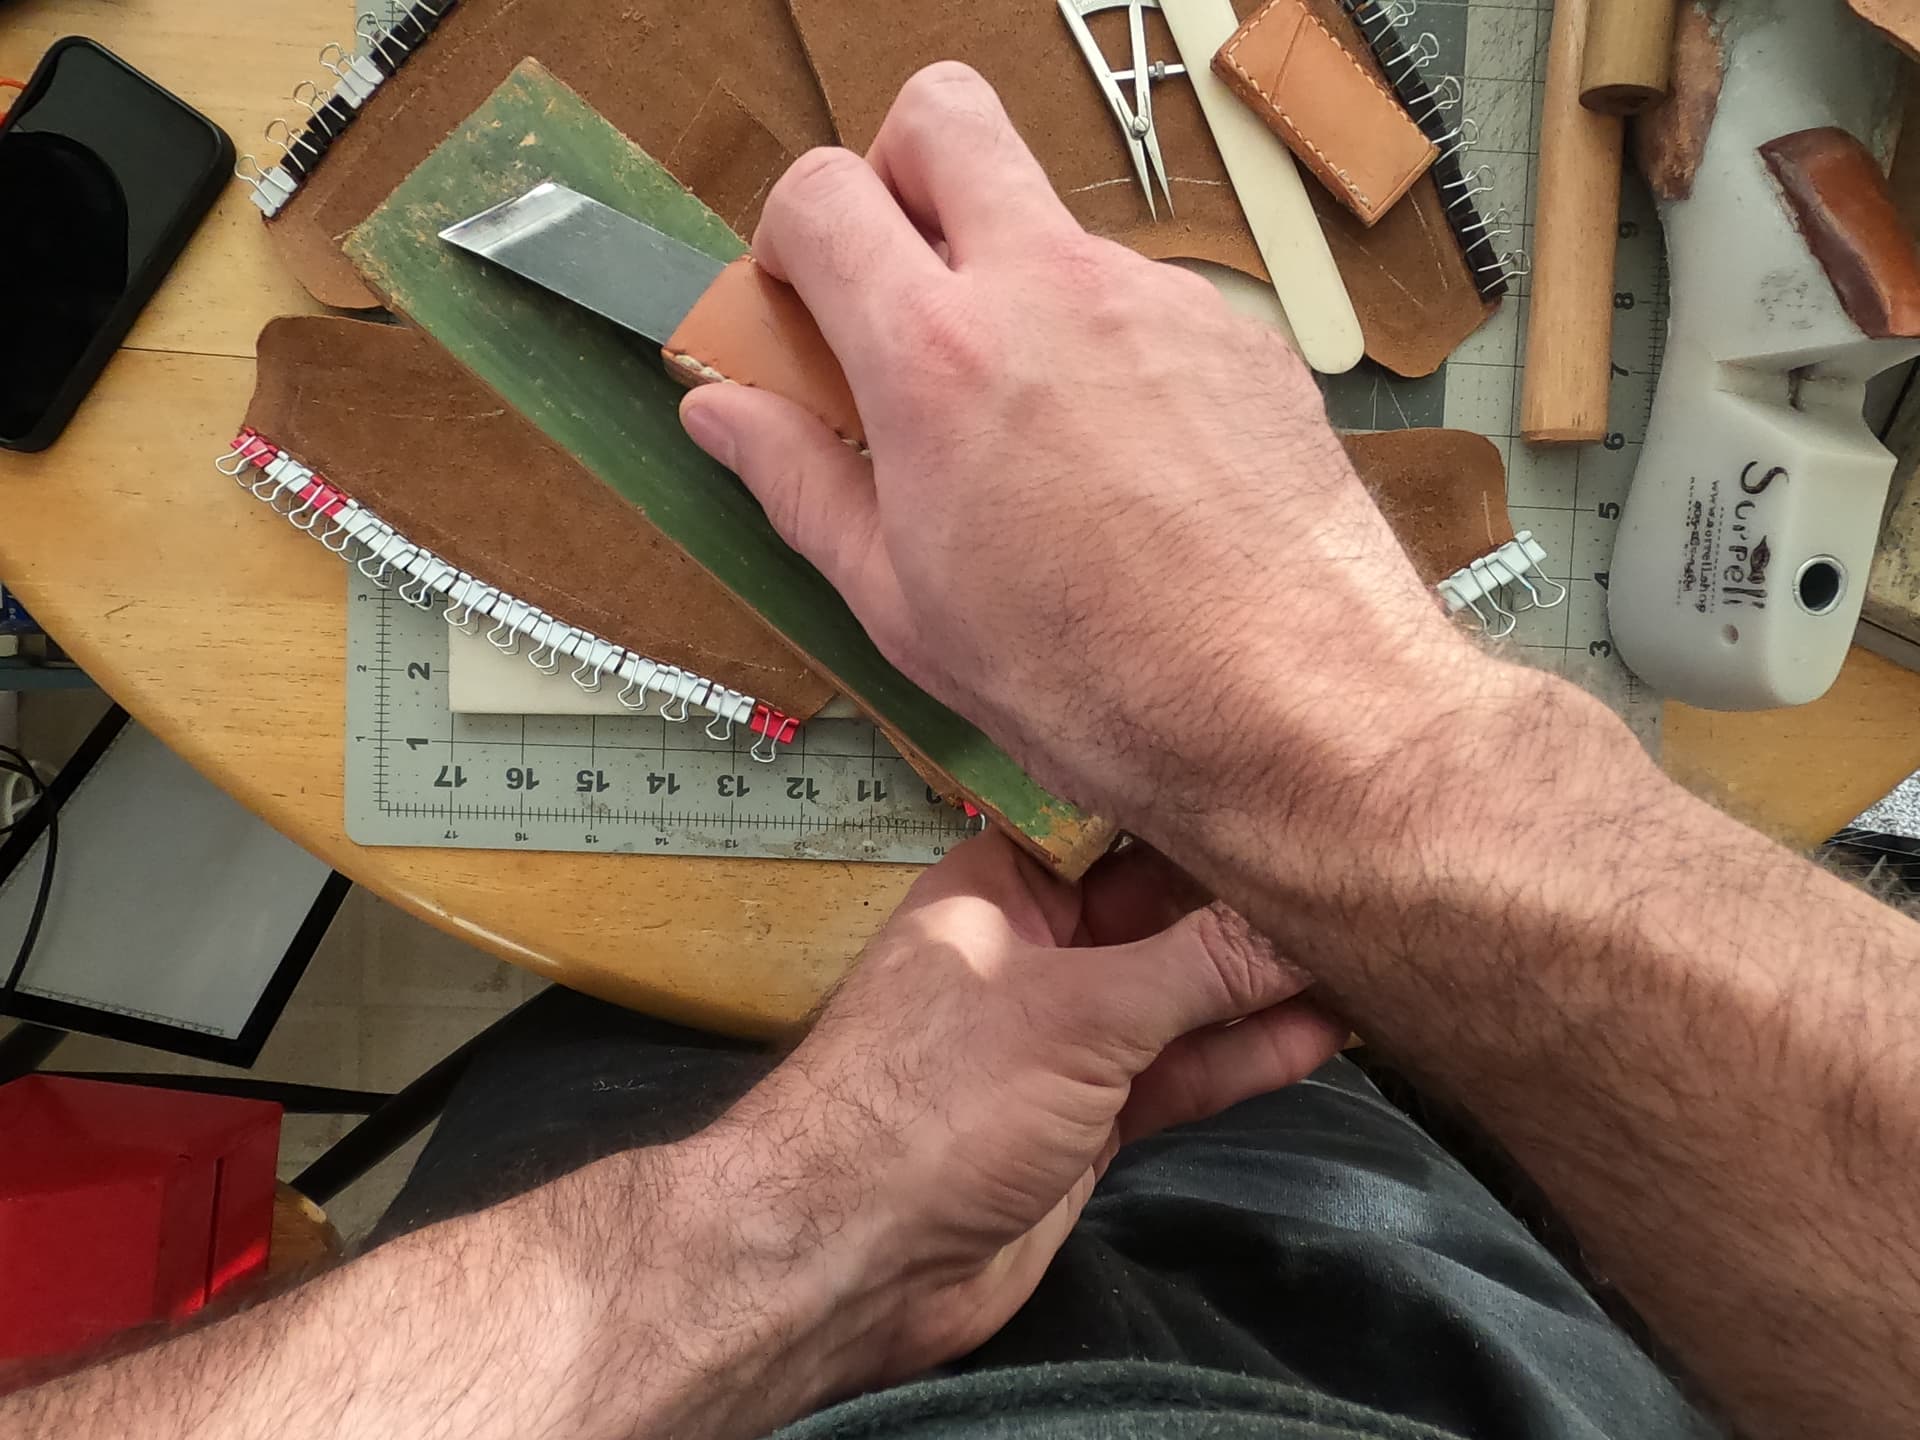
  • “Leathecraft Style”. Pre-pierce all the holes before stitching. Turn the upper back and forth so you can see the hole you’re aiming for each time. Make sure you have good light and wear any glasses you need for your eyesight.

I expected to find the saddle stitch much easier than flipping the upper around, but I had the opposite experience. I can’t tell which lines were stitched which way by appearance, but I was faster and smoother handling just two needles into pre-pierced holes. I think a lot of it had to do with how awkward it could be to handle awl and needle in my right hand. I’m pretty good in a stitching pony, after practice over several years. But the curves involved and lack of anything sturdy to push against with the awl—no big saddle on a tree, no stitching pony holding a small piece immobile—made it awkward.

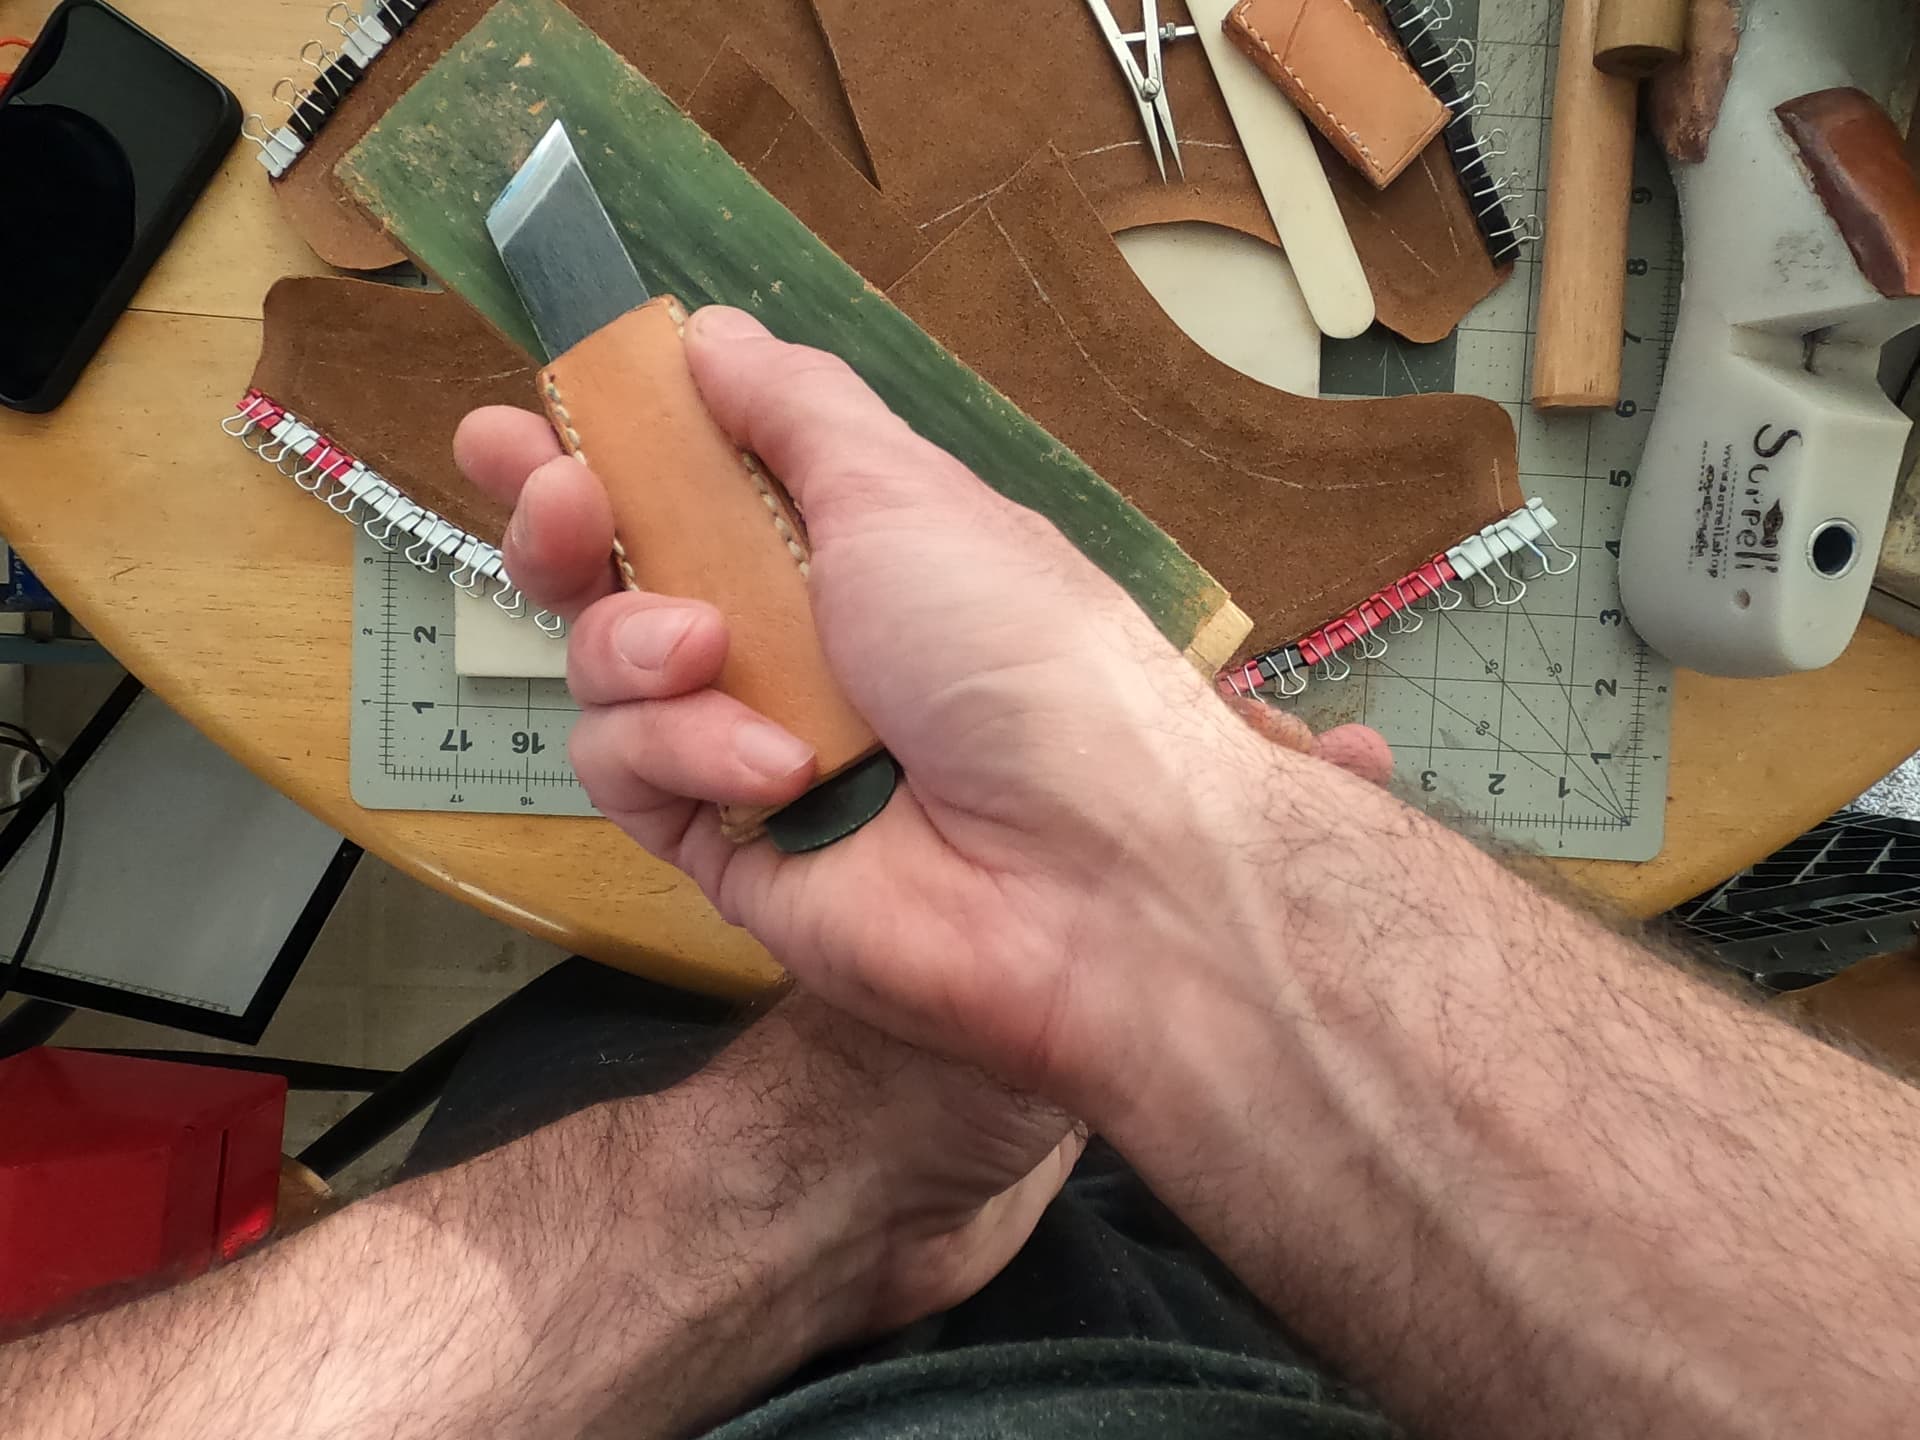
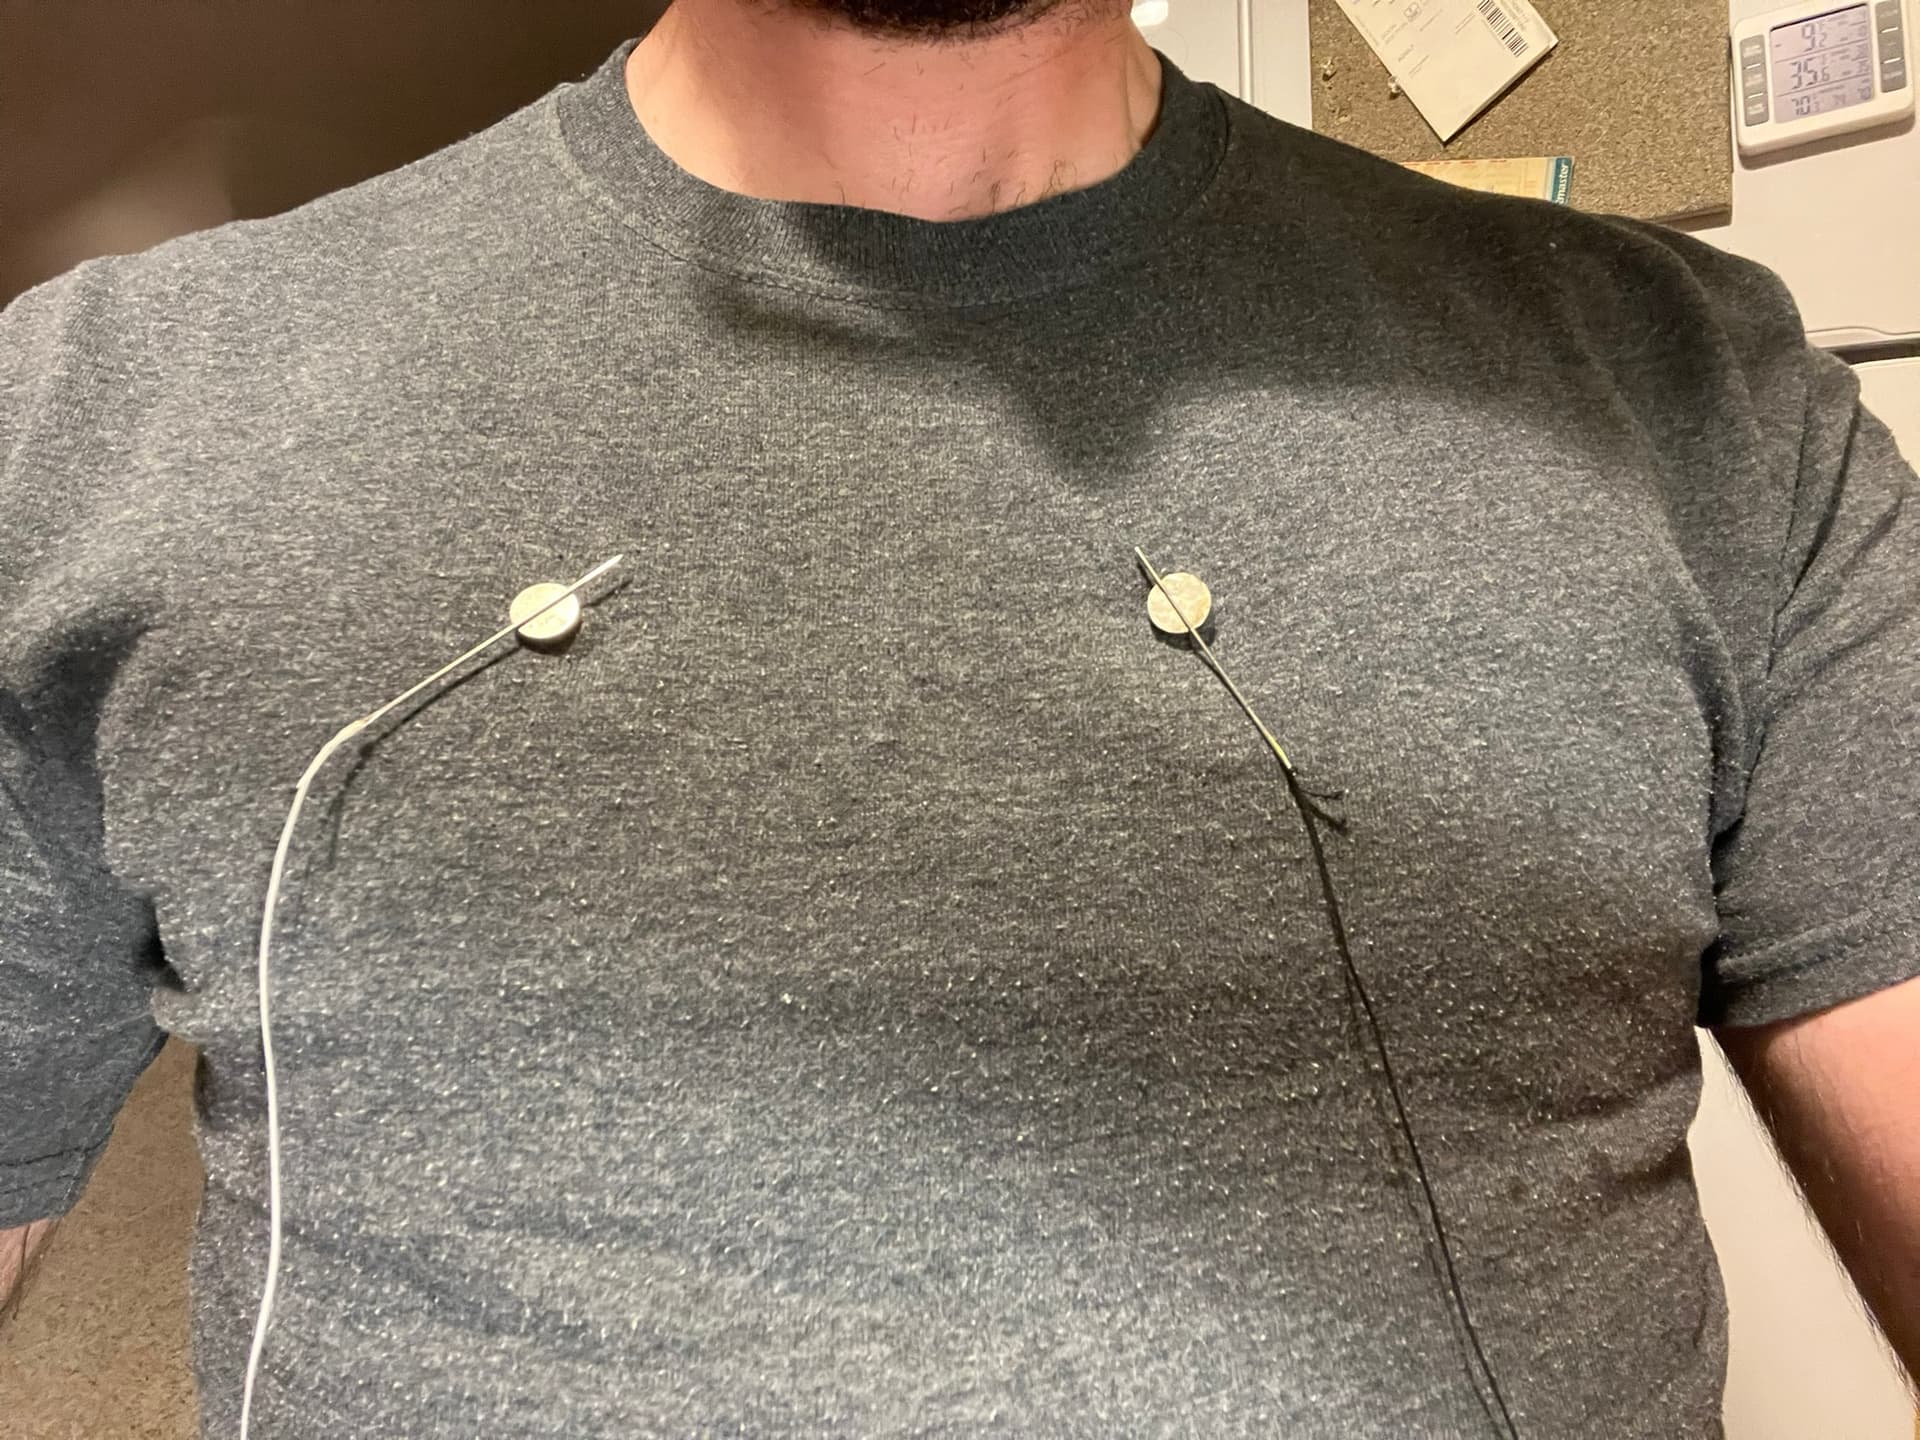
I also remembered an old trick. You can take neodymium magnets and stick them together through your shirt, creating little magnetic rests where you can park your needles, rather than sticking them in your mouth or letting them dangle:

I actually set mine lower than this, down over my stomach and closer to the work. But it was hard to get a good picture of that.

For anyone with a pony, it’s nice to countersink and epoxy some small magnets into the jaws.

1 Like

Gusset Tongues Sewn In


This was a comedy of errors. I ended up picking and resewing both of these.

Mistake: Sew gusset tongues from the bottom up.

Pretty sure I’ve made this mistake on every pair so far. If you sew from the bottom, you can decide how the material will lay in the crucial part above the instep. You can cut the gusset a bit tall and just plan to trim at the top when it’s sewed in.

Stiffeners

I was able to take the much easier route of starting with thinner leather for toe puffs and heel counters this time. It definitely made things easier, and I’m less afraid I’ve left too much bulk in the lasting allowances…at least for now.

@Customboots’ skiving knife came through again. I used a curved TINA knife a little bit, to get more of a concave skive below the featherlines. But the little, inch-wide push blade definitely did most of the work.

Speaking of skiving, I decided to try some of the tips from Bill Bird’s stiffener series on YouTube. Specifically on the heel counters:

  • I made them asymmetric, curving down differently to track the different inside and outside heads of the ankle bones.

  • I cut a little dip in the very top of the back of the counter. Bill called this the “Ferragamo Dip”.

  • I skived the top edges from the flesh side but the bottom edges from the hair side. I’m still not entirely sure of the logic behind this. I suspect it has something to do with the ease of stretching the relatively sparser flesh side as opposed to the denser hair side. In other videos of Bill’s, he seems to skive everything from the flesh side. I’ll see how it goes.

  • I’m trying longer heel counters overall, in the sense of extending further forward toward the joints. I don’t have separate heel counter covers with this pattern, so it was an opportunity to try it.

Insole Blocking

I’m finally taking advice from so many others and using Baker insole leather. I wish I’d got more photos of it before wrapping up with the bicycle tires and old physical therapy resistance bands. It certainly feels software and more malleable than the Keystone and Panhandle insole blanks I’ve used for pairs and repairs before.

I finally remembered to follow what I’ve seen from Terry Kim and actually tack the bike tires to the lasts to keep tension. Seeing him do that on video was another one of my “oh, duh” moments.

Insoles Carved and Holed

@Customboots and @Twand and others were definitely on to something recommending Baker insole leather. Between the material and a new #2 awl from Dick Anderson, carving and holing these was an entirely different experience. Much easier. No sweat broken.

Shortened Heel Length

I was looking at the photo of my insoles, and realized I’d somehow marked the heel length too long, by about an inch. So I went back, redrew it, and lengthened the holdfasts by about two stitches:

I’ve read this old guideline in a number of different sources:

\texttt{Heel Length} = \frac{\texttt{Standard Last Length}}{4}

That certainly describes many of the factory shoes I own and have measured. At the same time, it’s also clearly ignoring variances like toe shape: for the same foot, why should I pointy-toed boot have a longer heel than a square-toed one? If there’s going to be a formula, perhaps one based on heel-ball/arch length would make more sense.

In the end, I guess the better approach for custom makers who can measure actual feet is to measure the length of the actual heel of the foot. I don’t think I’ve read or seen any examples of makers actually doing that.

Just trying to think it through, a few points come to mind:

  • You want to measure the flesh around the calcaneus, not just the bone.
  • To make sure you accommodate the whole heel through every whole stride, you really want to measure it standing, under load.
  • With differences in heel degree between styles, it’s not immediately clear to me how to go about picking a point where the heel ends and the arch begins.
  • It’s probably best to give some extra length toward the front, to make sure the whole heel is covered. But no so much that you rick interfering with the arch.

For this pair, I ended up just:

  • calculating a quarter of the standard last length, which is 3"
  • extending the holdfasts back so I could fit two more stitches at 3 SPI, making the heels near enough to 3" as that allowed
  • trimming an index card to 3" long and standing on it with both feet, to sanity check it

standard last length =/= actual last length of the last you have on hand. SLL is exactly the foot length designated by the size, PLUS two thirds of an inch, and that is 2/3rd’s of an inch added uniformly to all sizes. In other materials (such as Wikipedia’s page on shoe sizes) it will be simply called ‘last length’ to mean SLL. For example, my shoe size, UK7.5/US8.5 is 10 1/6th FL plus 2/3" = 10 5/6" SLL. You can convert any shoe size - Paris point, metric, UK, US, in mm or inches to SLL by starting with the foot length and adding the 2/3"/16.93mm.

25% of SLL usually works out to about 26.5% of actual foot length, which is the standard you mention and I find to be a pleasing heel length. Of course that is arbitrary and you can make it even longer if you wish, or shorter. If I was making a woman’s shoe with a slimmer hindfoot I’d go for a shorter heel block, right at 25%FL, which would be a hair shorter than 25%SLL.

What the last is doing on the bottom is a different story, it would be up to the last designer to make sure the plantar area provides for building a heel on, especially that inner arch - but that’s also where split lifts come into play.

@cjackson, good to see a message from you again!

We must be using “standard last length” in different ways. Which I’m sure might be even more frustrating than usual, given “standard” is part of the name.

I’ve seen usages where it’s foot length plus some fixed allowance, though the allowances themselves vary. It’s often unclear where that allowance is to be added.

I’ve also seen ones that are direct last tape measurements. For example, here’s from Wade Motawi’s book:

As for “last length” without any “standard” before it, sources are all over the place. Here’s from Koleff’s book:

The old English books and manuals I’ve read vary widely, too. Most use some kind of size-stick measurement, so length projected onto the ground plane.

My point above was just that it makes sense for a rule about heel length to vary with the length of the foot, rather than the last or a shoe. I suppose if we interpret “SLL” a certain way, SLL divided by four is such a rule.

Do you have a good source on when people started saying and writing specifically standard last length, and where it came from?