Cutting Flaps for Hidden Channel Outseams

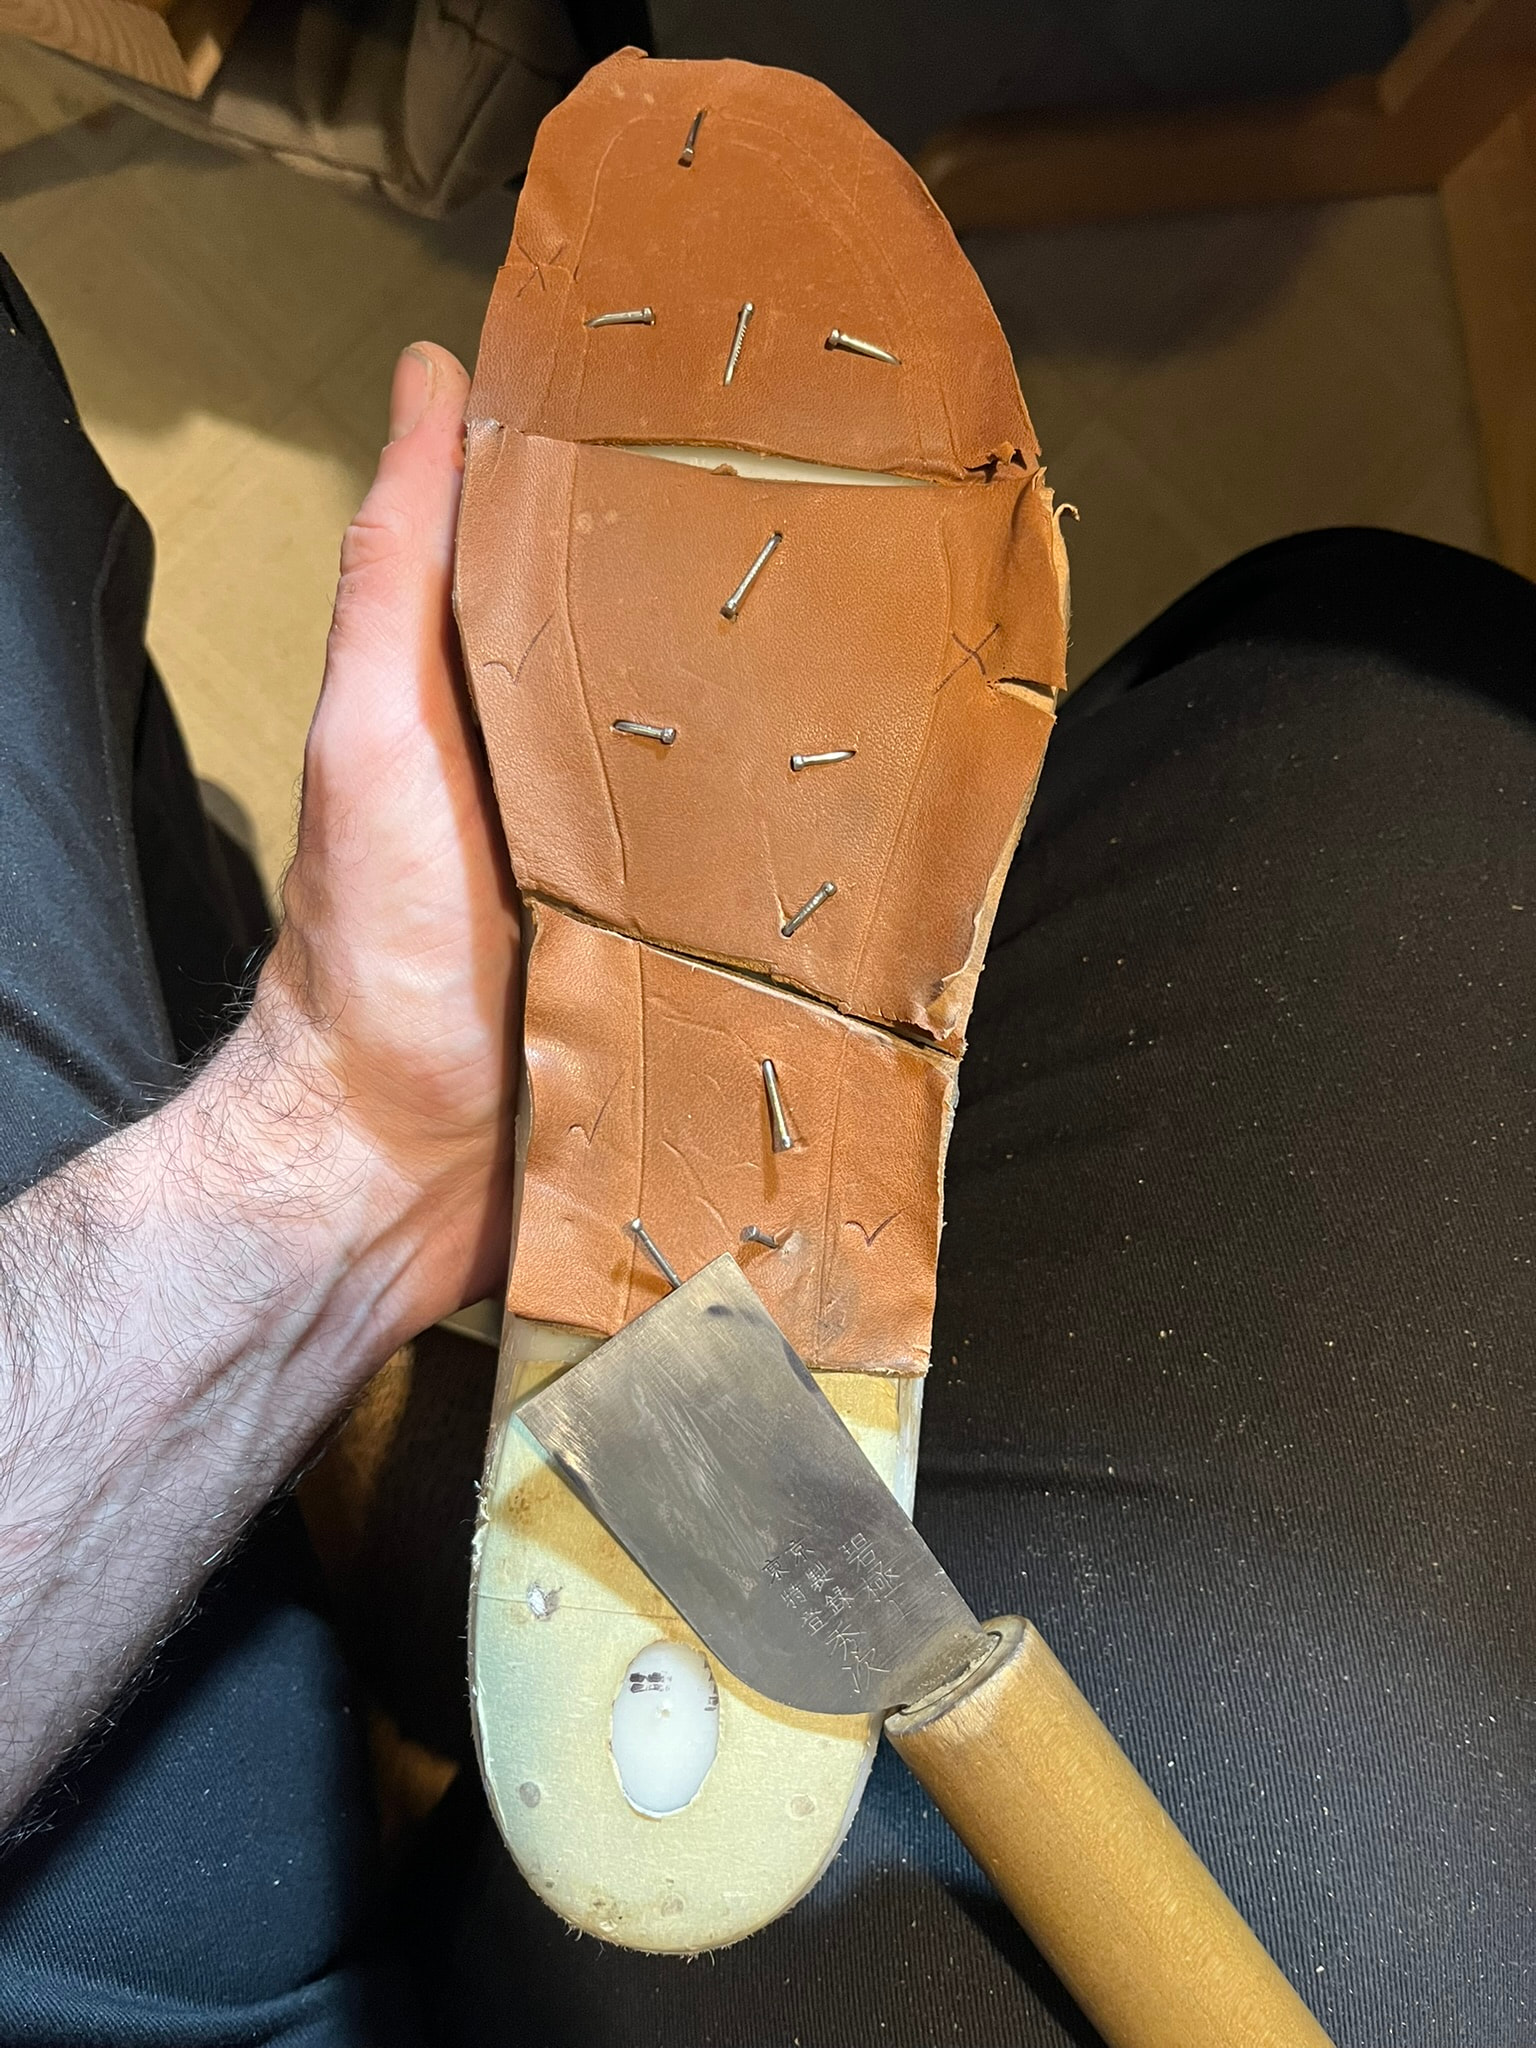
I noticed some pieces of scrap outsole leather in one of my bags the other day that seemed to fit together to make a forefoot shape, like puzzle pieces. So I dunked them in some water, wrapped them in a towel, and set myself a note to do a little flap cutting practice today.

A Practice Drill

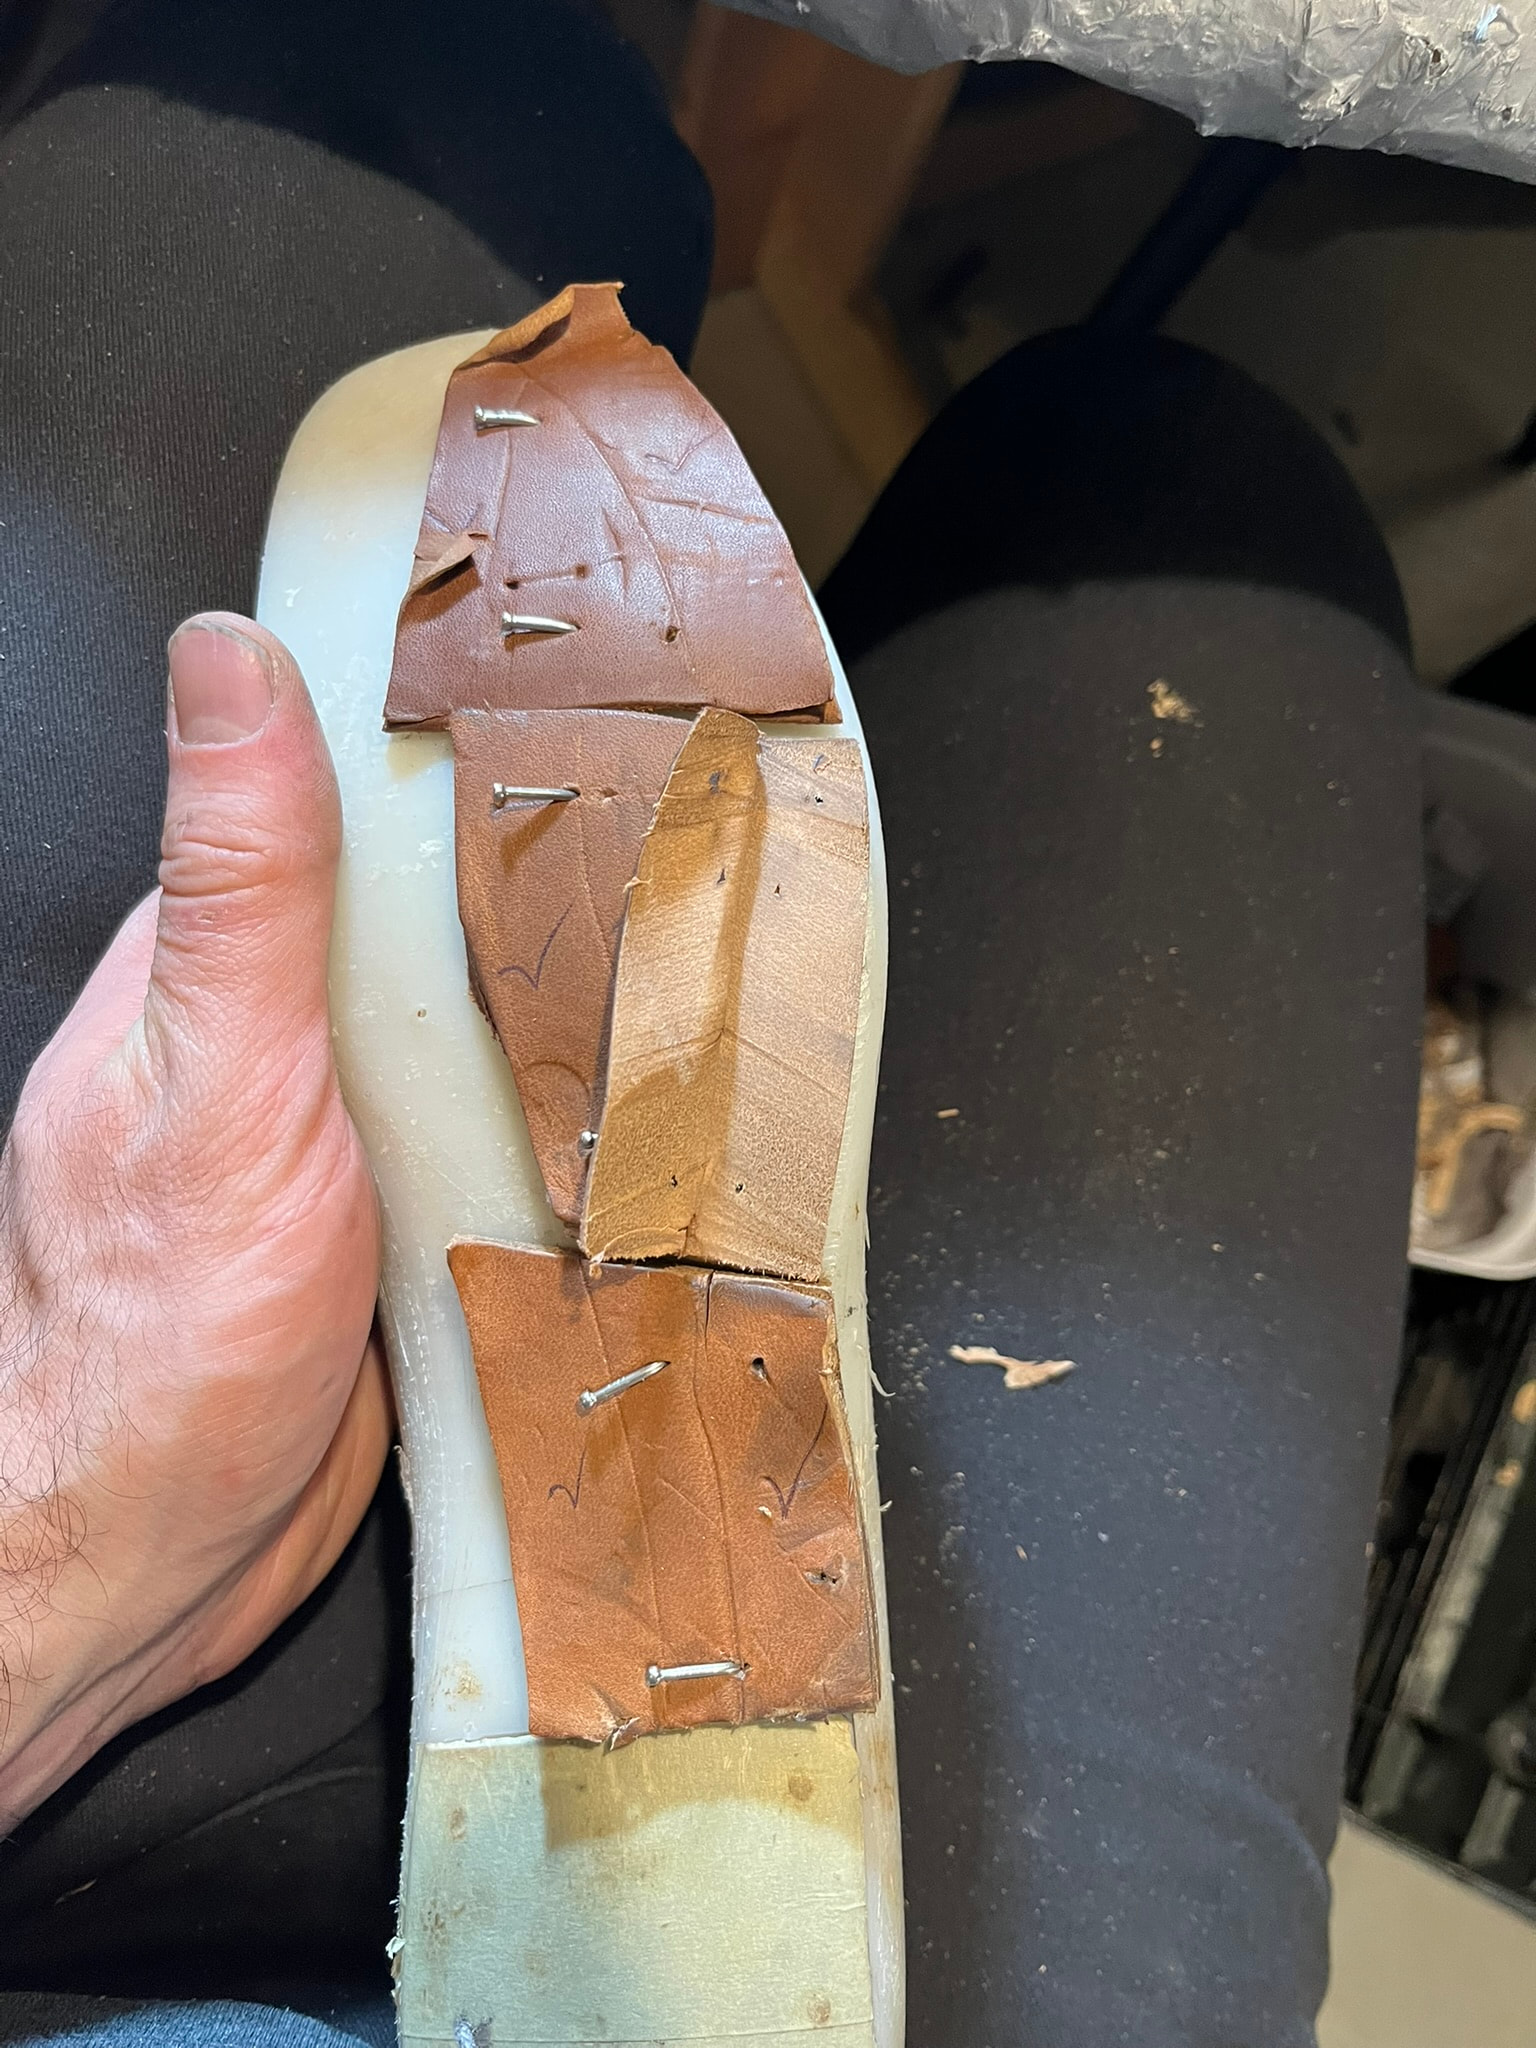
My basic process was:

  1. Trim the pieces up to roughly cover the shank and forepart of a last I had.
  2. Tack them into place, trying to keep the tacks toward the center.
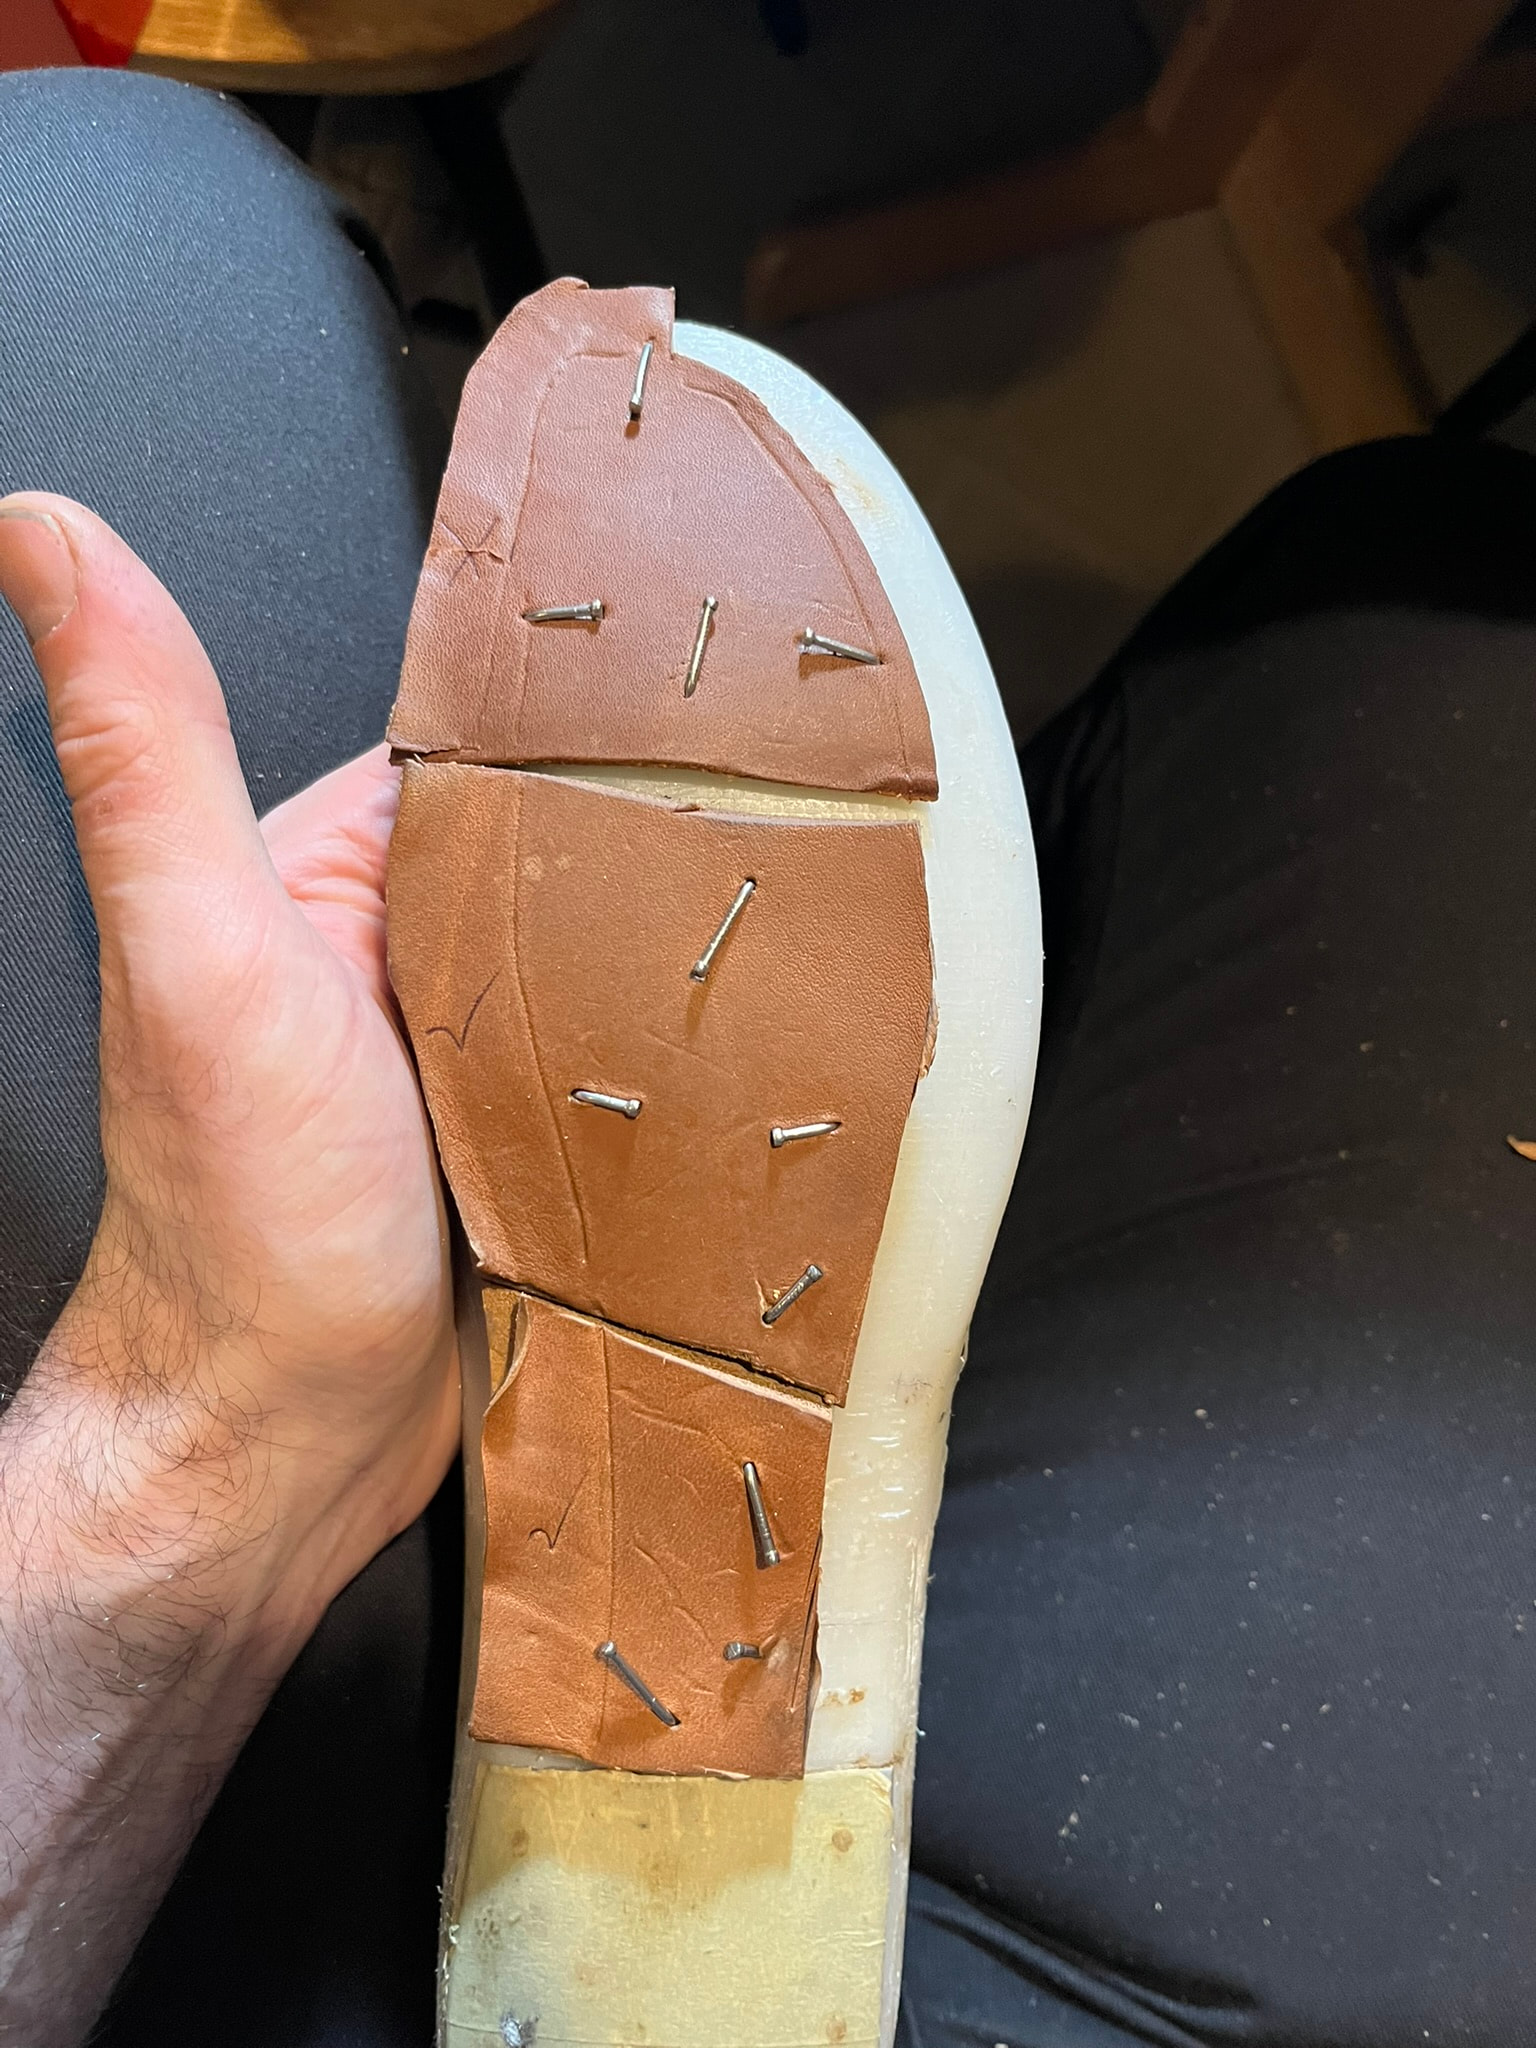
  3. Roughly whittle to the outsole shape of the last.
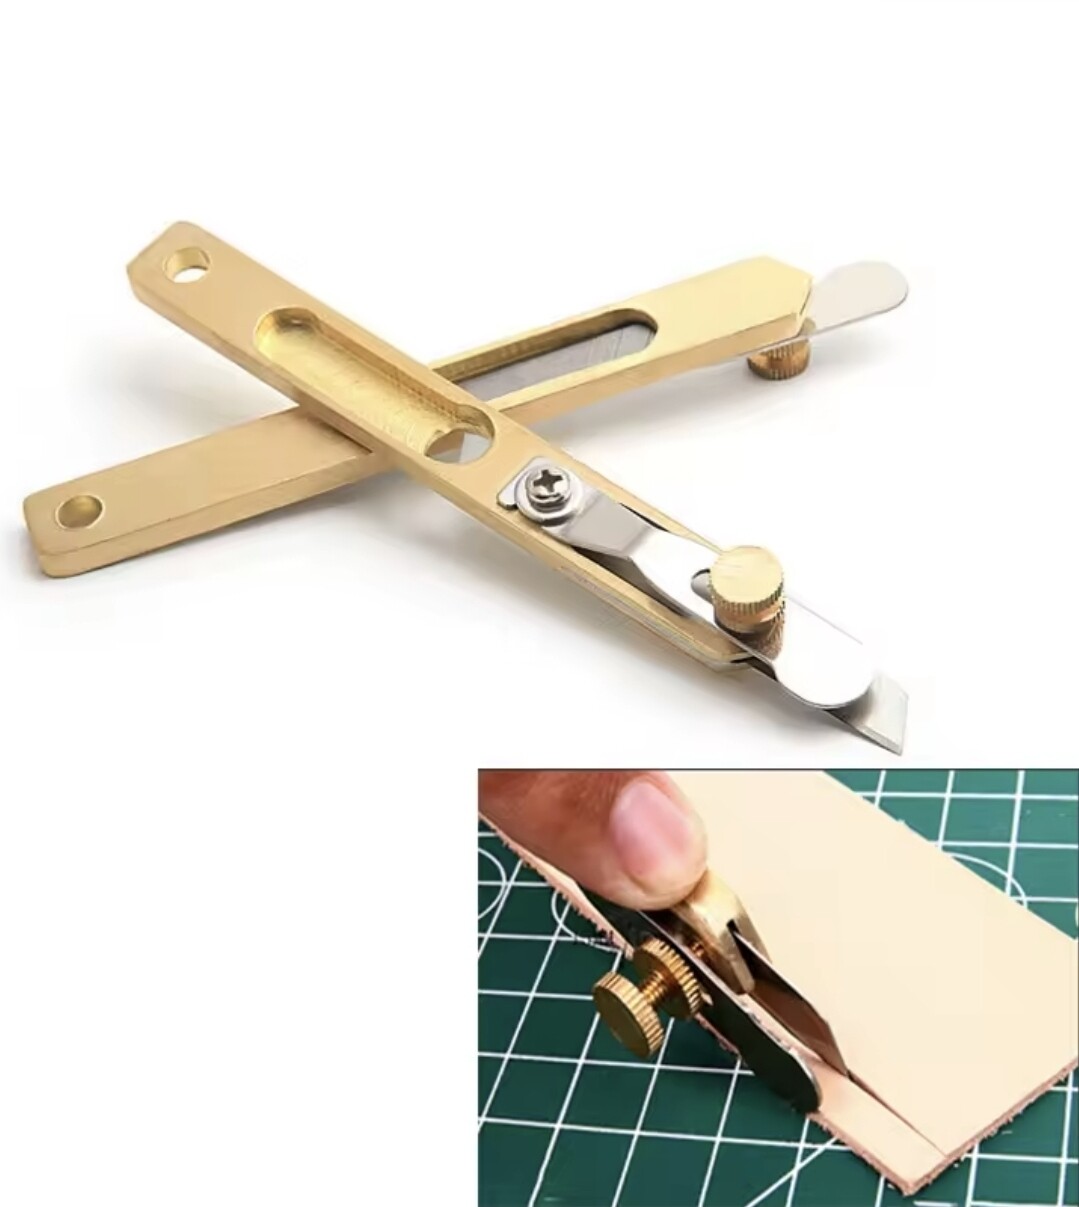
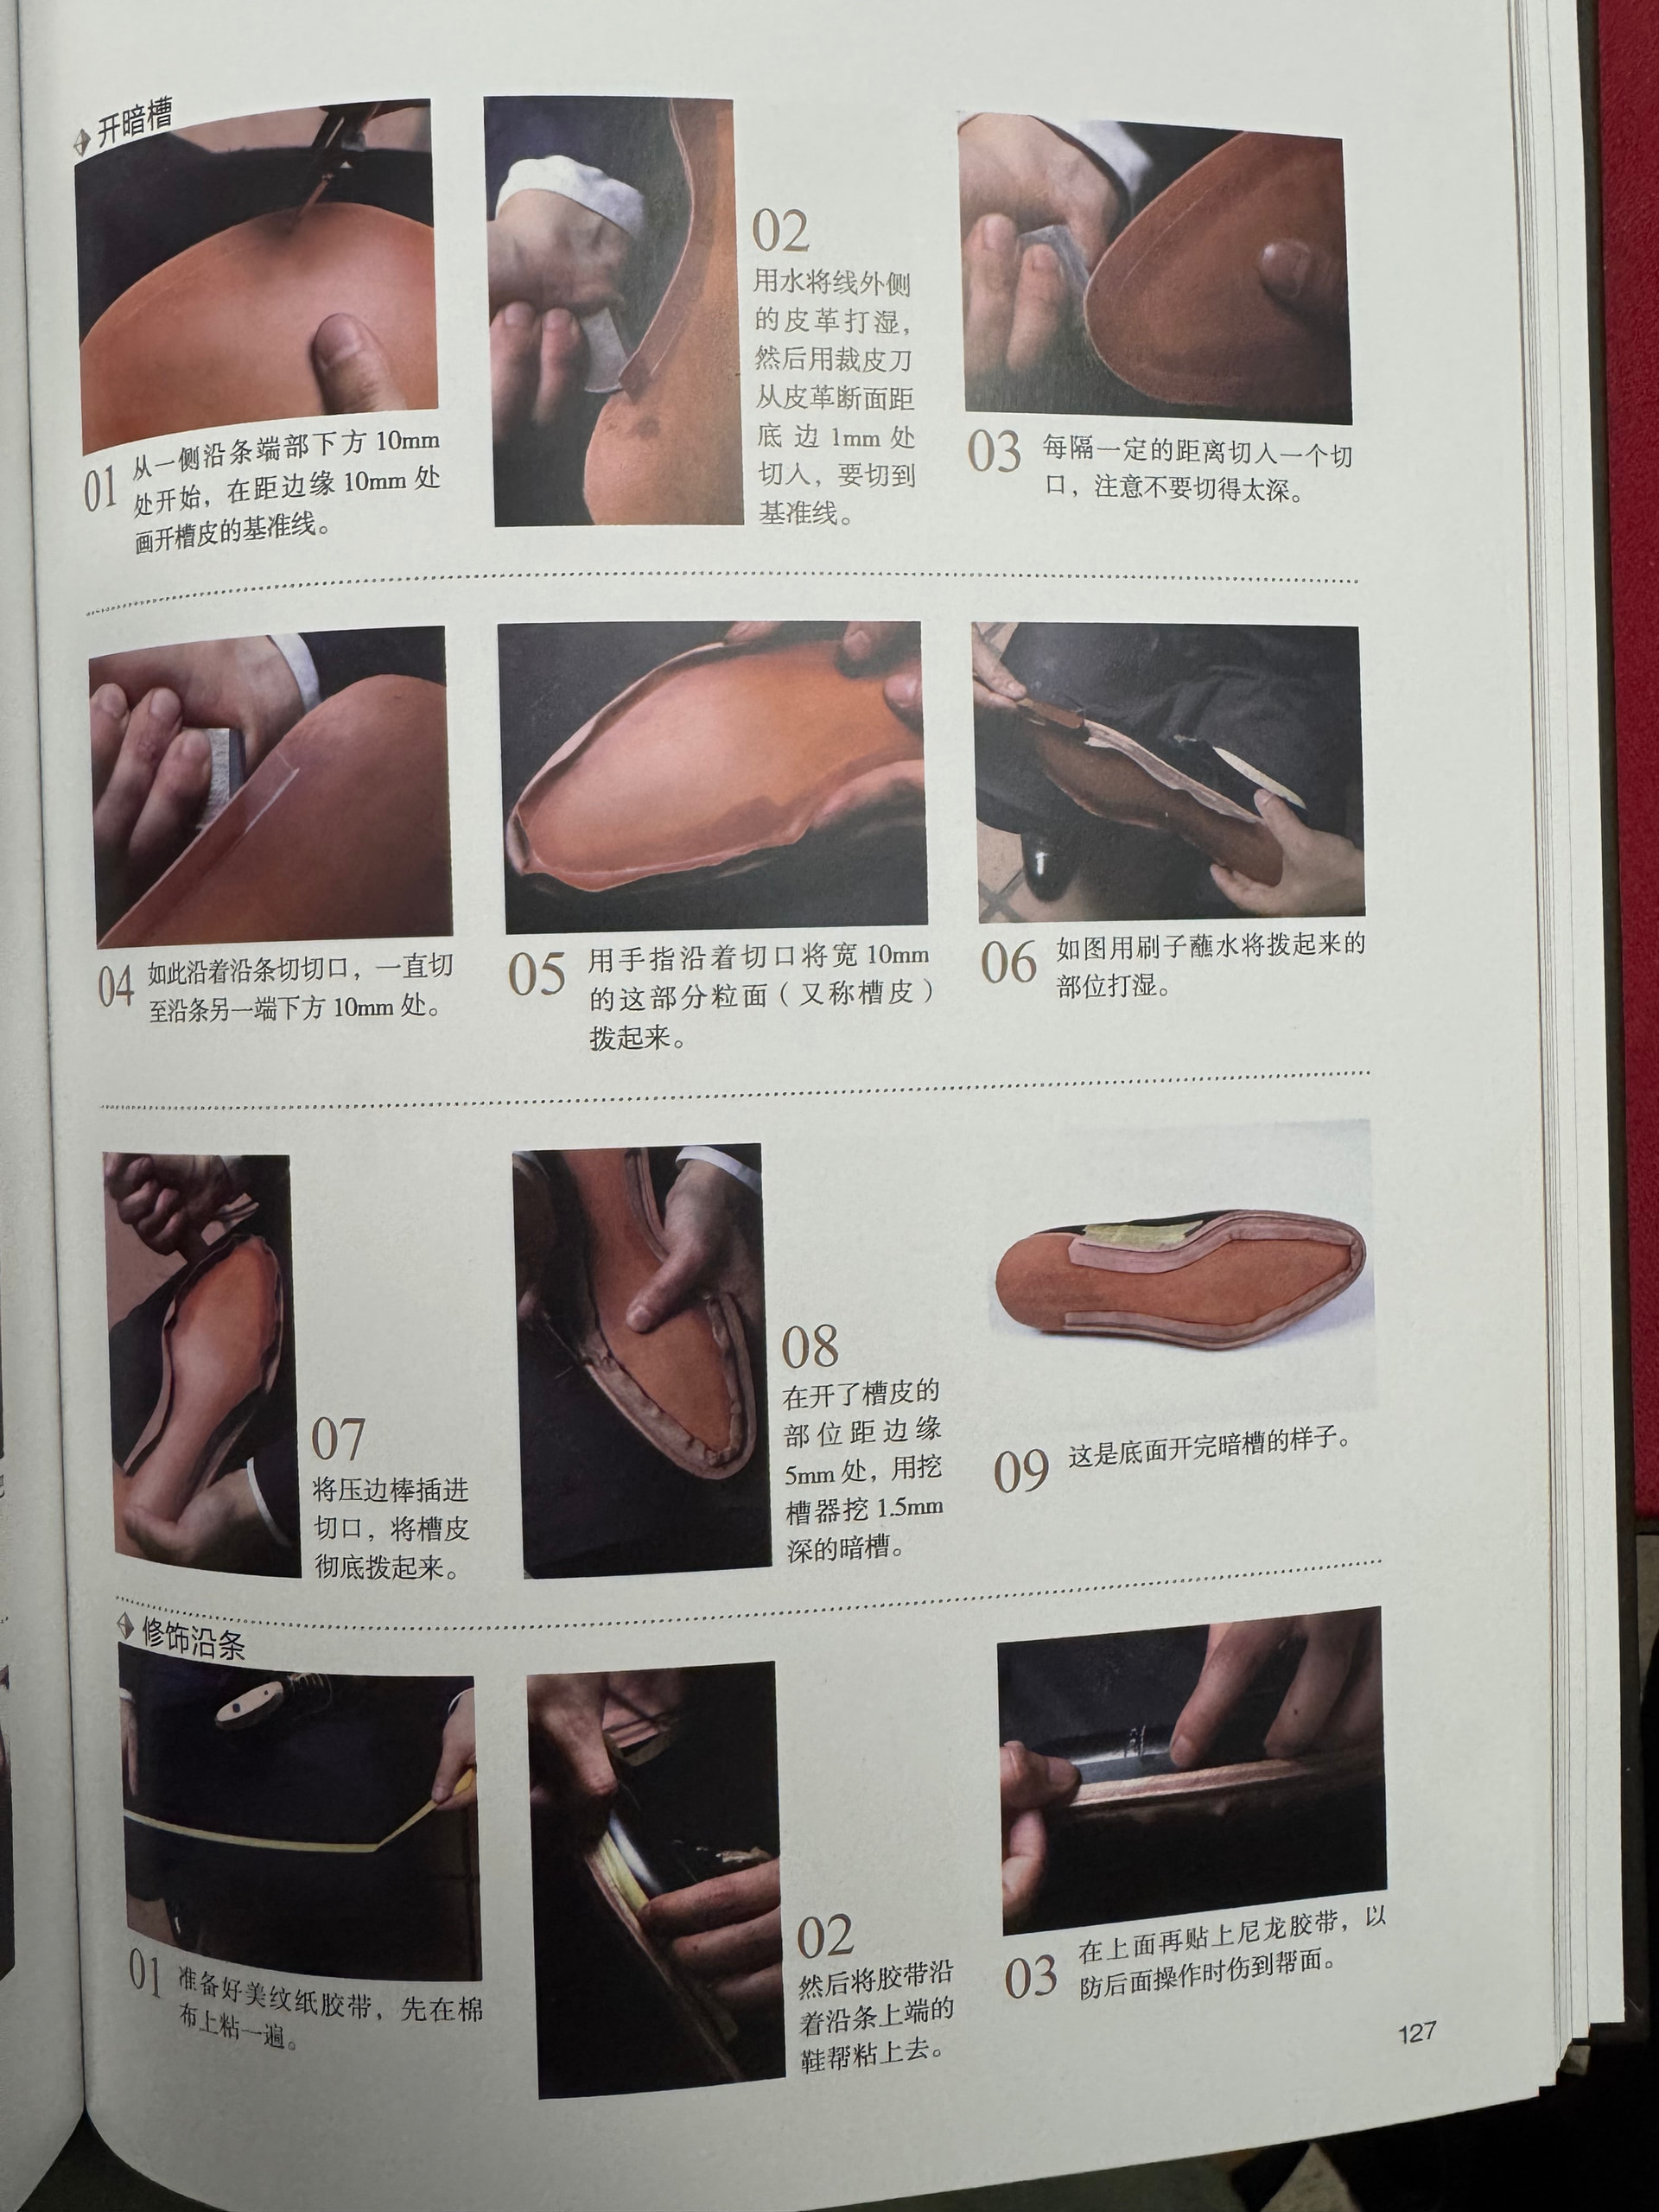
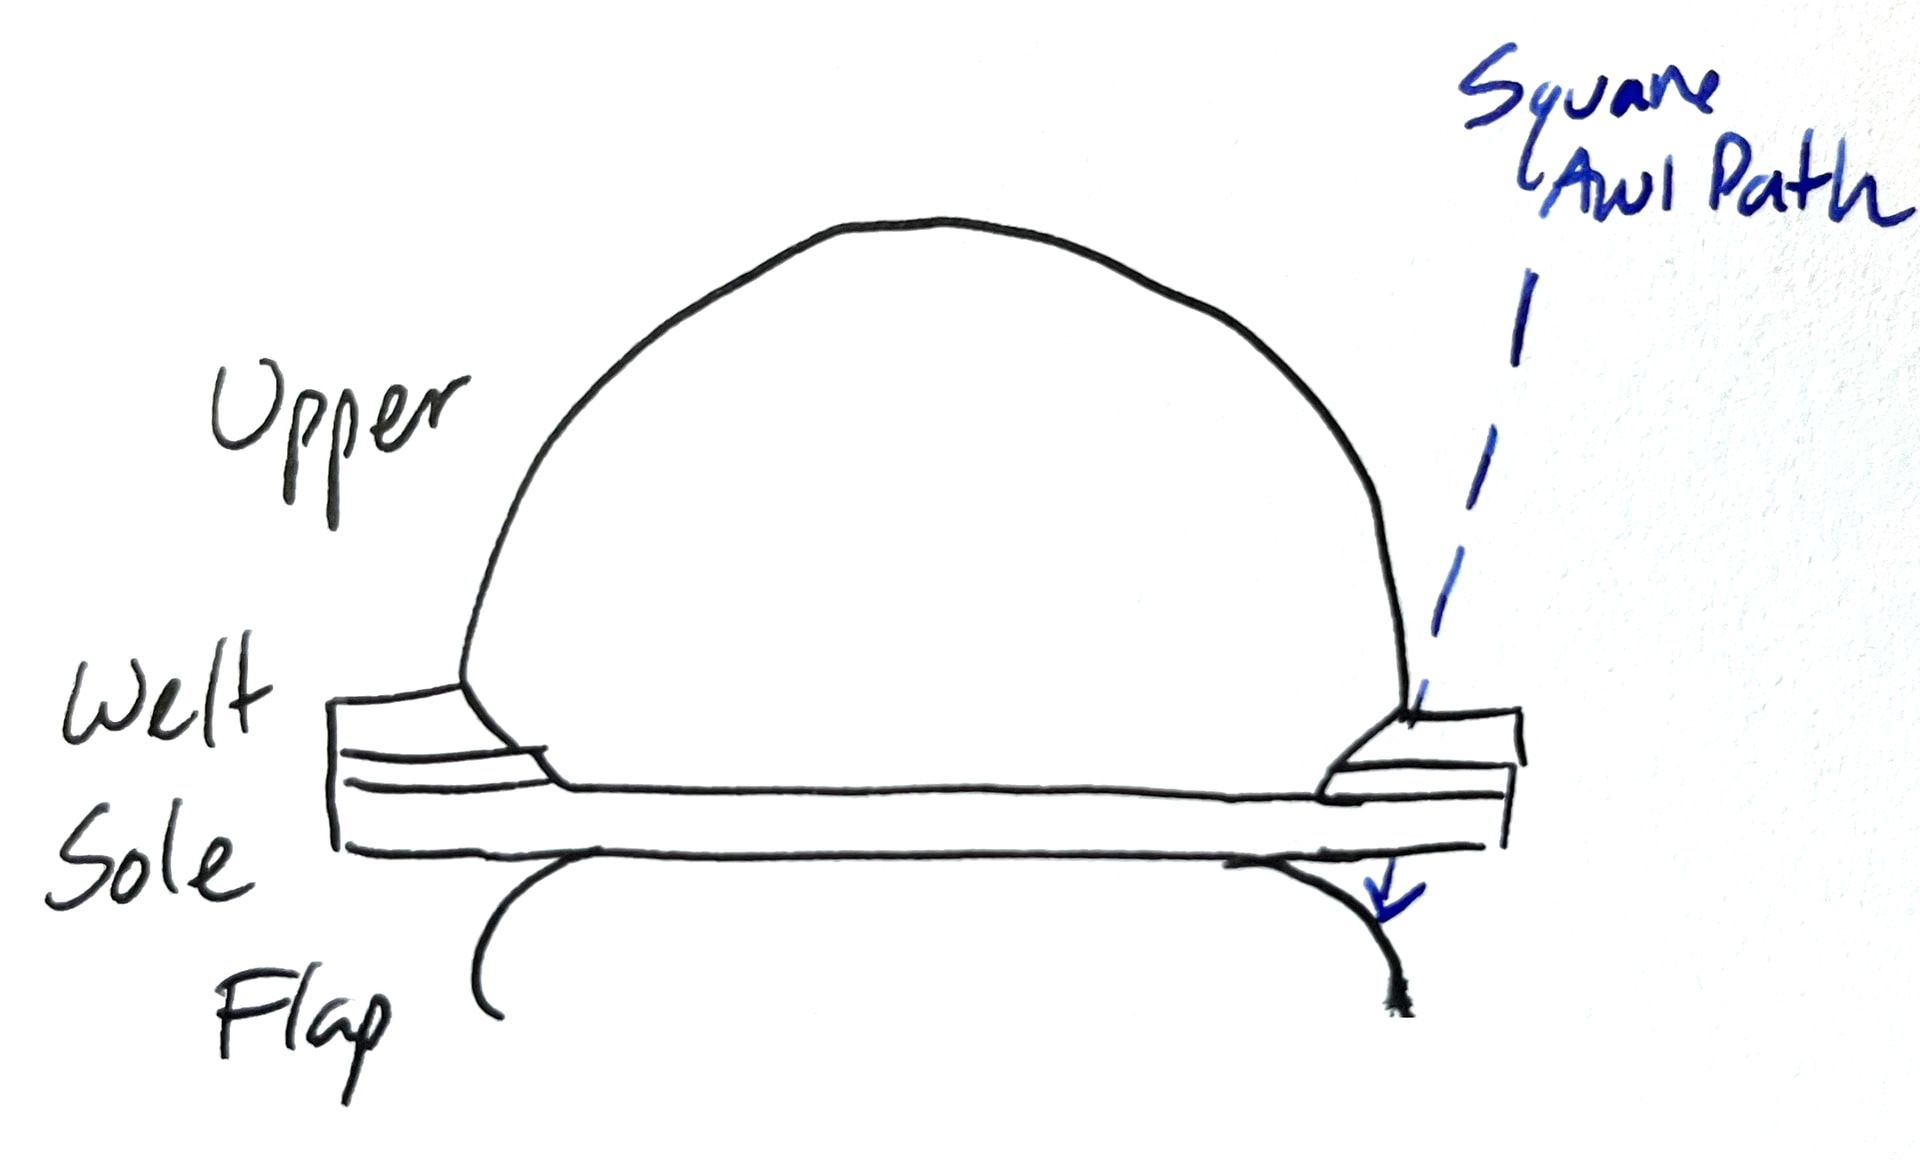
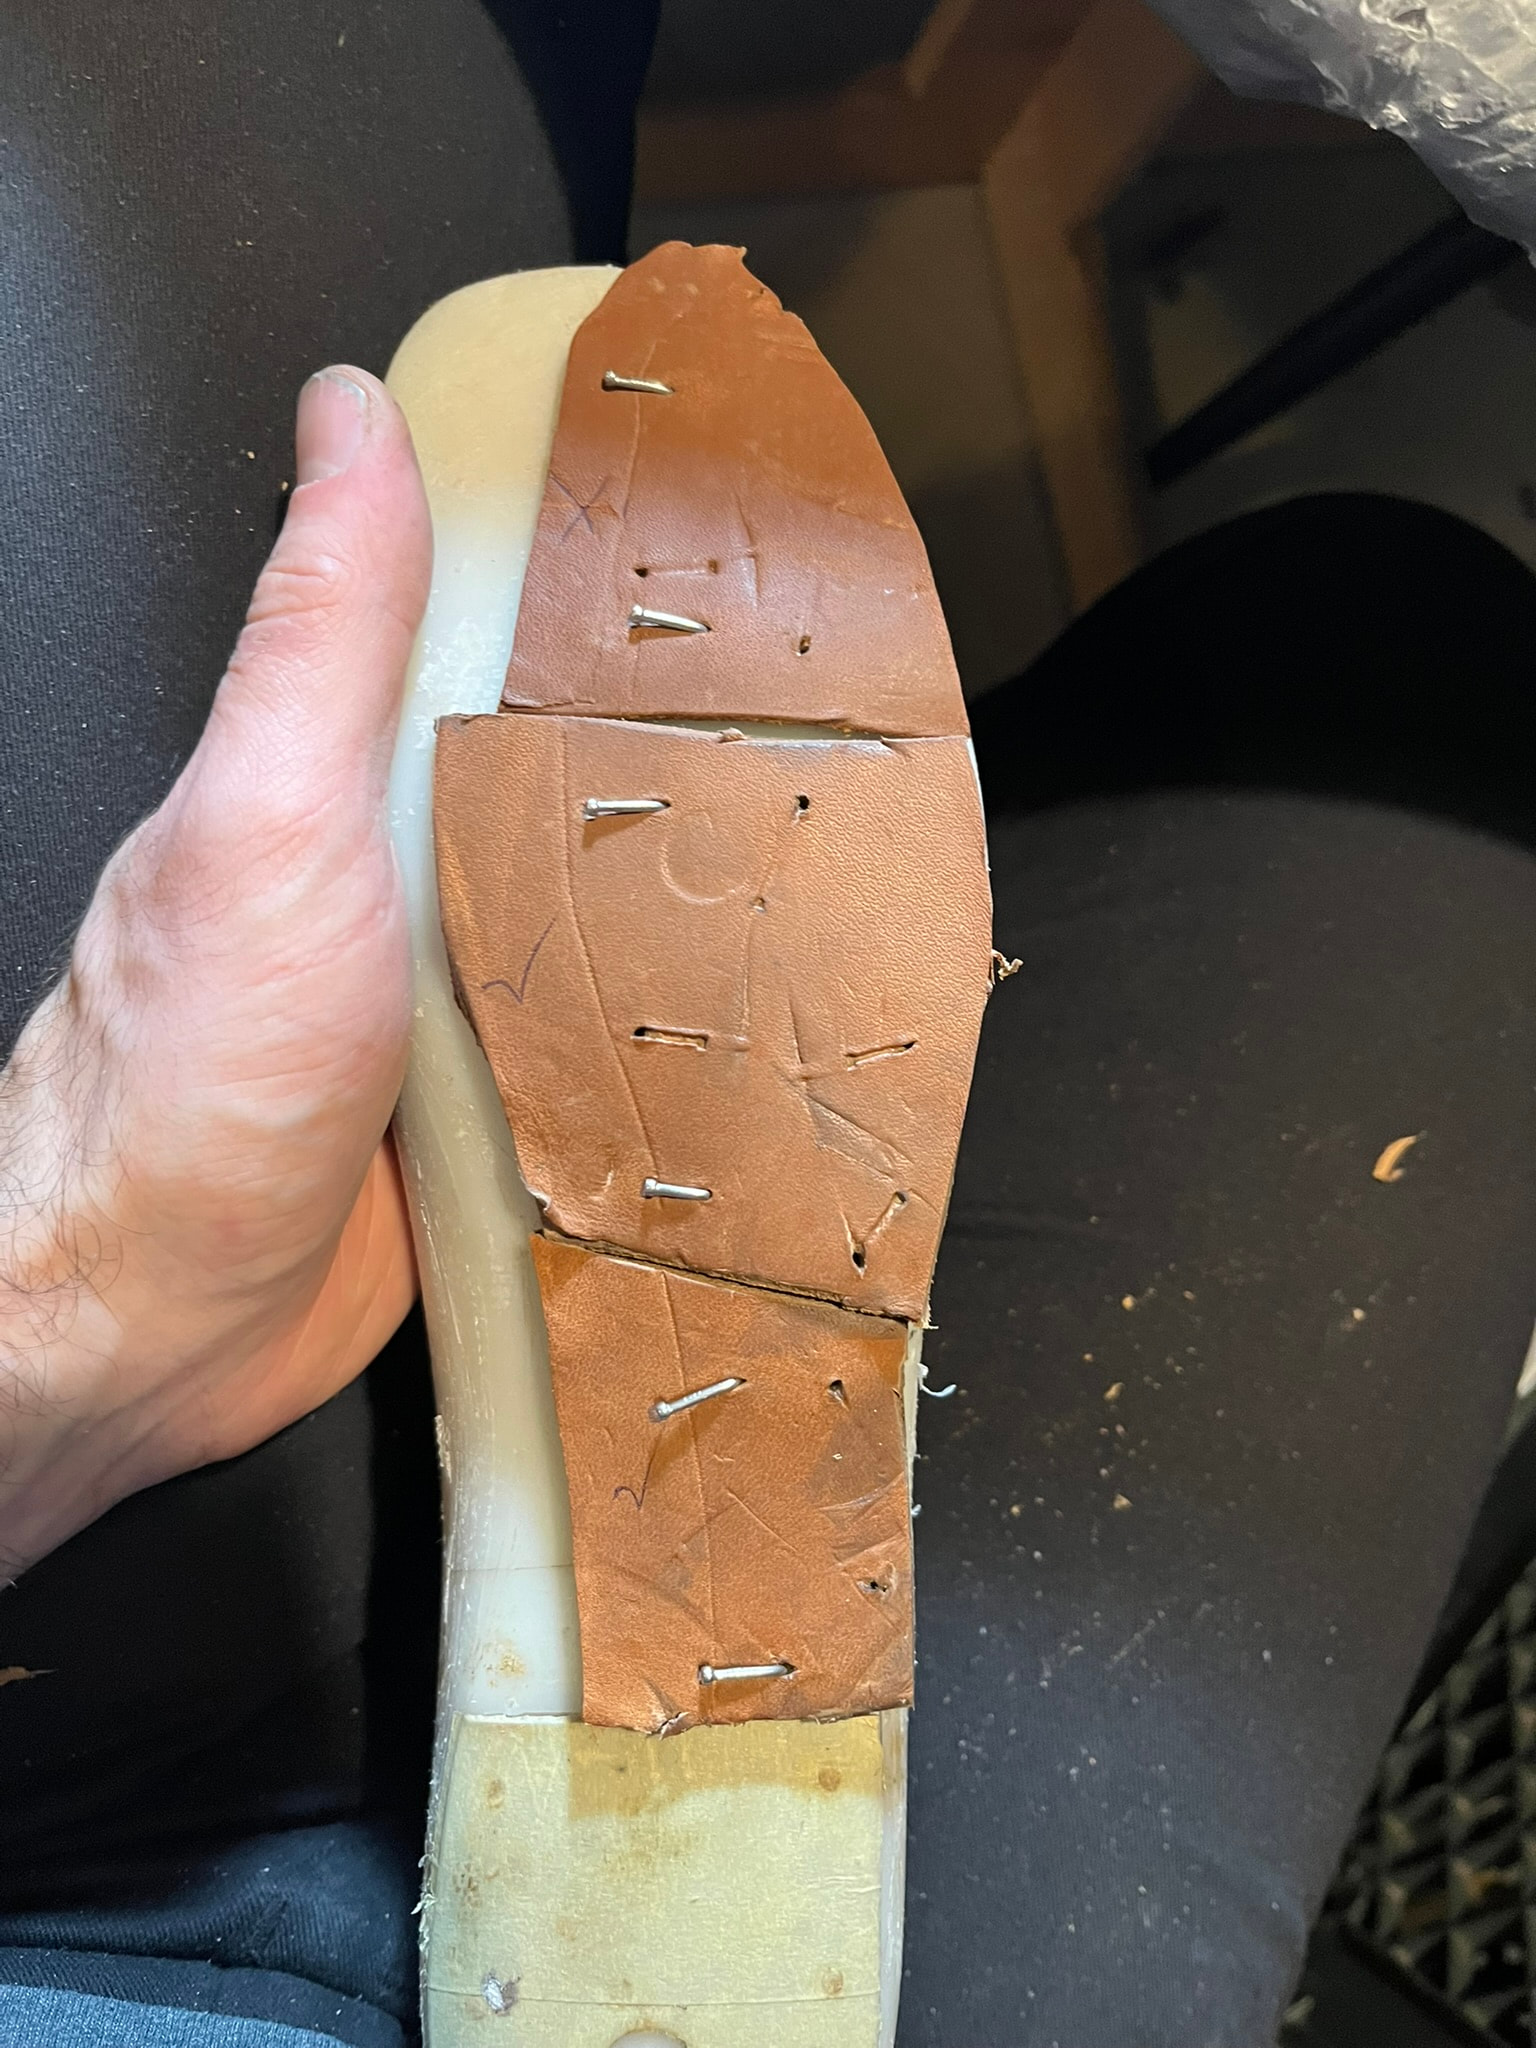
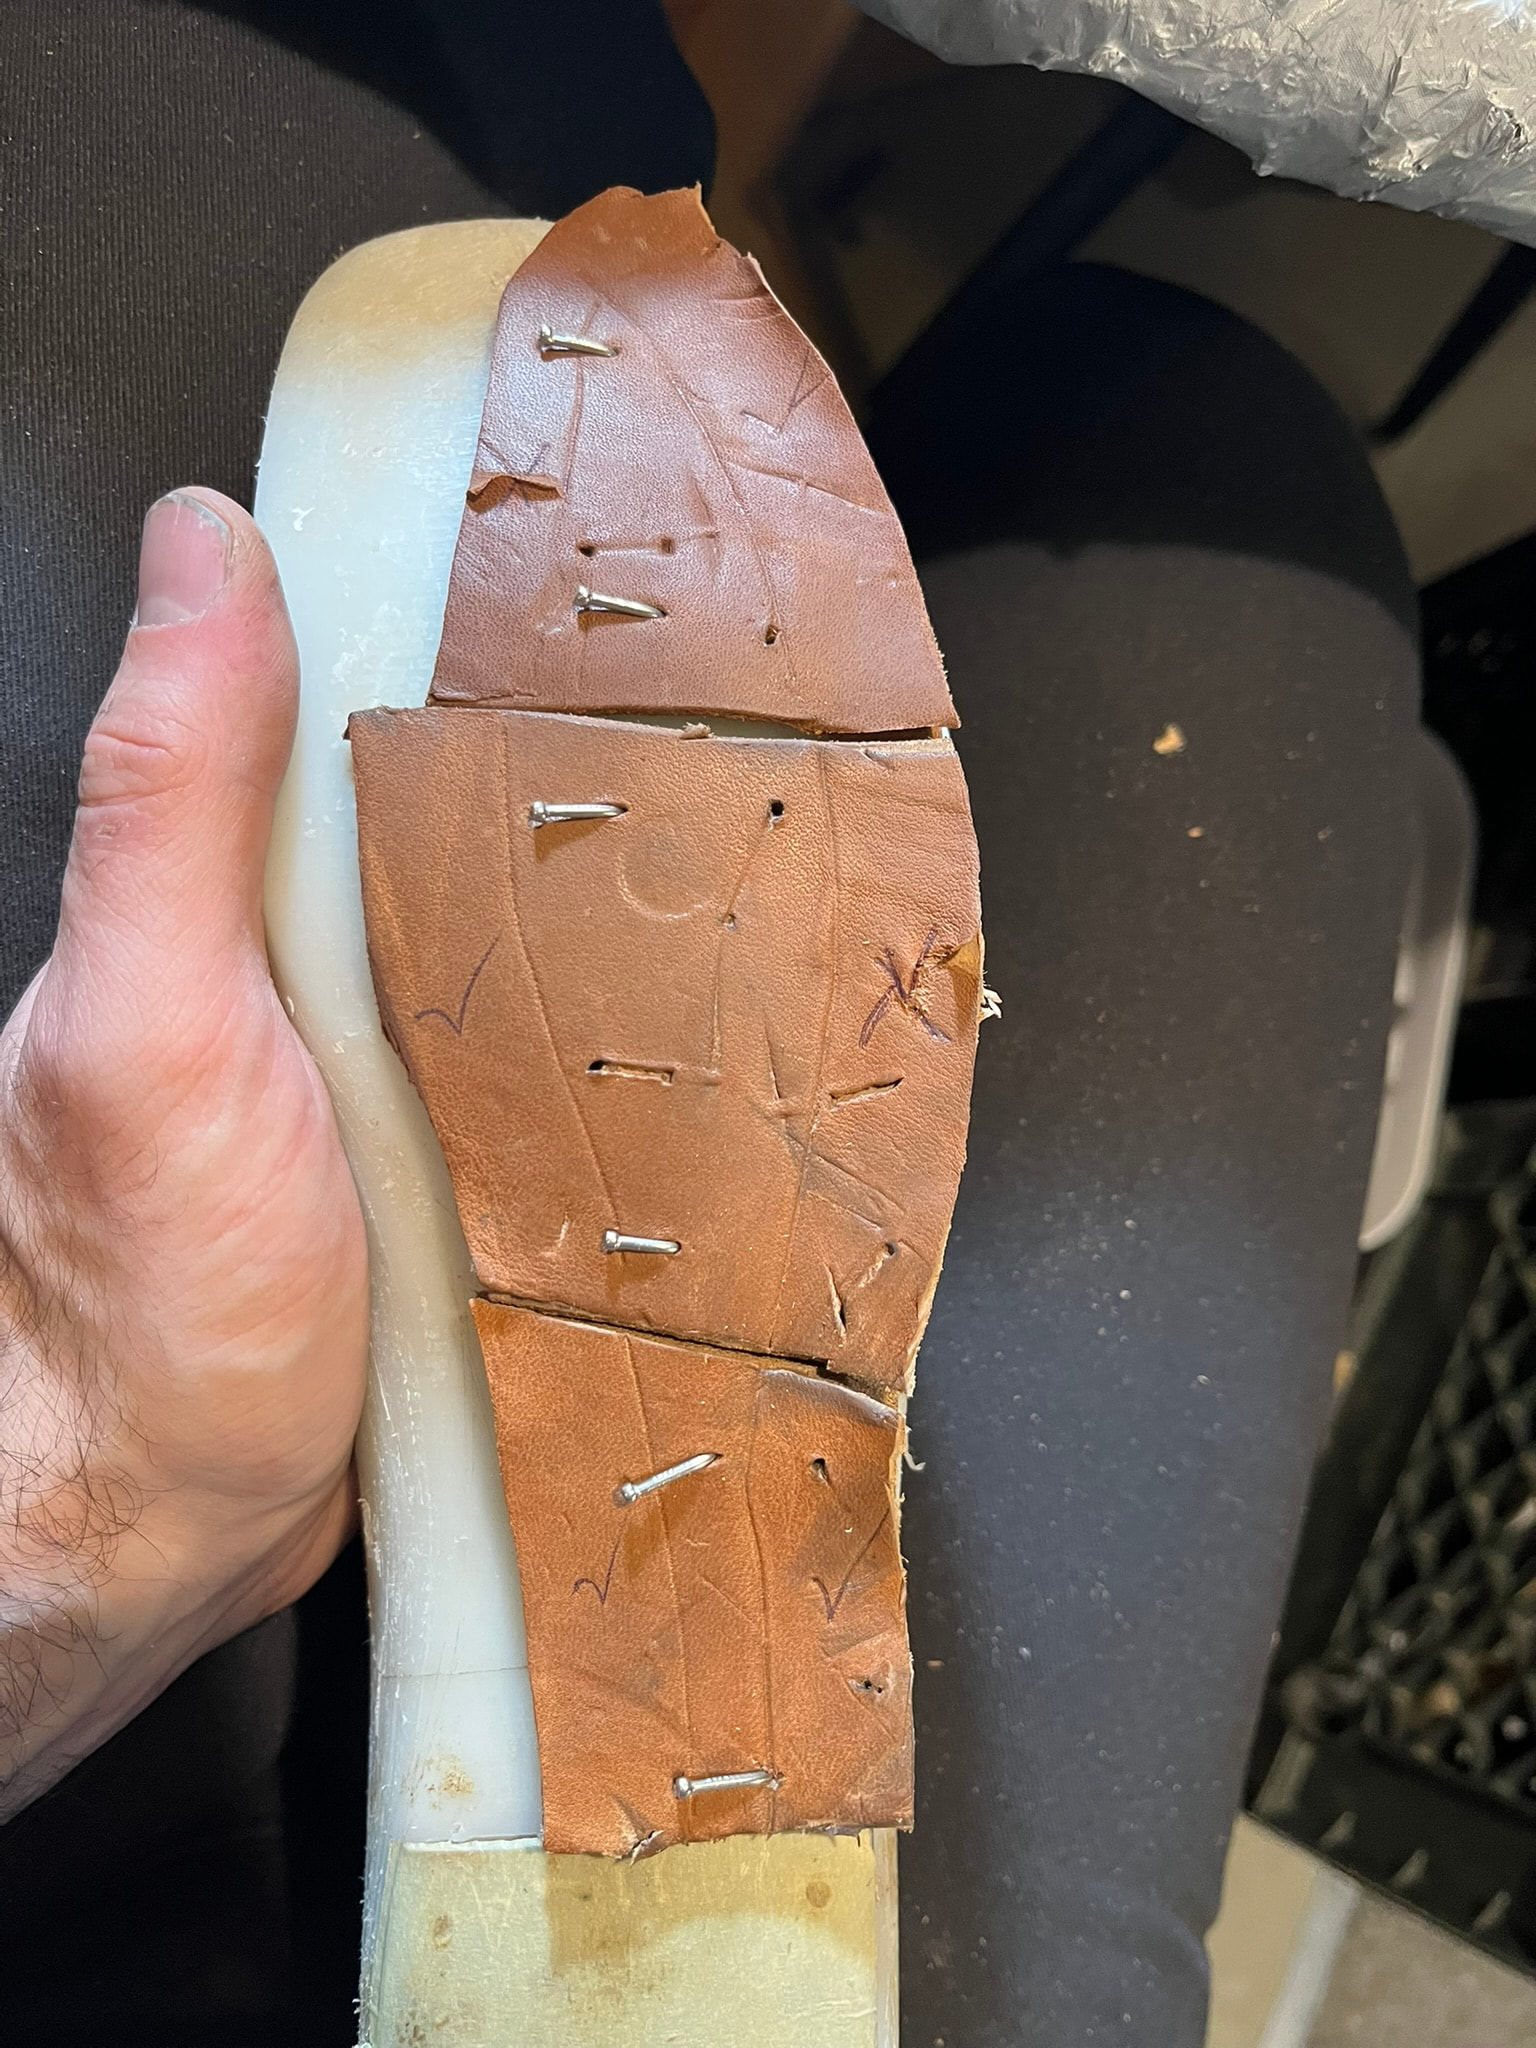
  4. Mark the inset of the flap from the outside edge with a compass. I did three quarters of an inch where I could and backed it down to half an inch where I had to avoid tacks.
  5. Cut flaps. Mark clean and torn sections.
  6. Cut away the flapped parts on the side where I made more errors. Scoot the scrap pieces over to the featherline on that side, tack in place, mark for flaps, and repeat.
  7. Keep going until all the pieces are spent.

c

A Few Thoughts

I really appreciated getting a few rounds of practice in for casing leather just once.

Apart from making little jigs to polish awls, I don’t really have a great use for this smaller-than-heel-lift-size sole scrap pieces I’ve been hoarding. I’m glad to have finally found one.

I was doing this at night this time. It really helped to turn lamps on to get light from the front and the side, as well as from up top. Otherwise, my arms and even the knife threw dark shadows over where I was working.

I tried a few approaches and techniques. I seemed to have best results when I positioned the last so the edge of the sole I was cutting pointed straight up at me, revealing both a bit of the side of the sole and enough of the top of the sole that I could watch the grain ripple next to my scored line as I cut. That allowed me to avoid angling the knife too sharply downward into the sole, creating too thick a flap, as well as to avoid tilting the knife too far upward under the flap, creating a risk of cutting up through the grain by the scored line.

That said, most of my mistakes were cutting up through the grain on the outside, by the featherline rather than the scored depth mark. Keeping an eye on the side helps here.

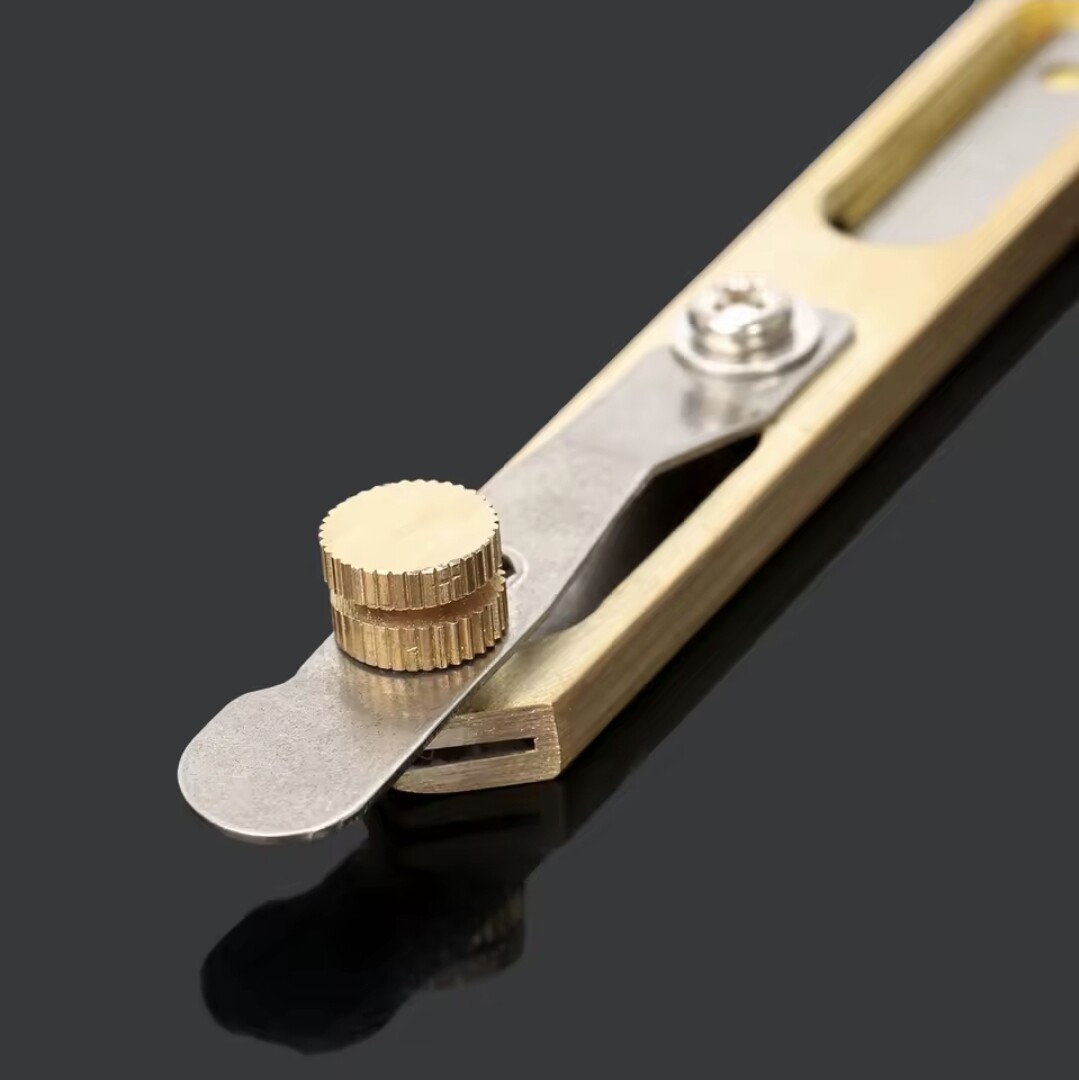
I used a Craft Sha Japanese style leather knife again. Specifically, I went back to the straight version I have, where the whole length of the cutting edge perpendicular to the long axis of the handle, rather than an “oblique” version where the edge is angled. The angled one makes more logical sense to me, since I hold the handle at an angle to the flap. But I seemed to have a better intuitive sense of where the point of the blade buried under the grain is with the straight version.

Stop, strop, and goal. I think I want to develop the habit of stropping every time I stop to reposition while doing this job. I can’t think of any other obvious, logical cue to stop cutting.

At times, I noticed myself kind of sawing or seesawing the blade back and forth, cutting mostly around one point of the edge of the other in succession. This enabled me to inch the blade forward, but created a kind of seashell-like pattern on the leather under the flap.

Other times, I’d simply pull the blade toward me along the path of the flap, cutting all along its edge at once. This was clearly smoother, but also felt much riskier. Sometimes it would cut further than I anticipated. I’d hit pots where resistance would build. Pushing hard enough to blow past that felt like a sure way to cut out or dive too deep.

I will have to rewatch some videos to get a better sense of what other makers do.

Here’s the flap-cutting part of a recent outseaming video by Hishinuma Ken. It’s only a few seconds:

No sign of any seesaw motion. He’s pulling the knife straight through.

Just a few seconds in a different video series, but showing a wider shot of his body at work:

Here’s from a very recent video by Kataoka Ken:

I notice that this maker cuts with a similar Japanese leather knife, but with the bevel down. No sign of any rocking motion here, either.

I wonder if one of these slitting knives with the adjustable guides would work?

1 Like

I’d never seen a knife like that. Do you happen to know any companies making or selling them?

I came across it on Aliexpress of all places:

https://a.aliexpress.com/_mOUV8hf

The intent of it seems to be more for cutting atrips, but seems like it would also work for this use

Interesting. Somewhere in the family of lace cutters, draw gauges, and stitch groovers.

That particular model looks like it might really better suit a left for lifting flaps. That aside, it also looks like the fence doesn’t lie parallel with the cutting blade: it’s made as a spring bar, with distance from blade set by a screw, so when it’s set really close, the spring bar will bend down toward the cutting blade.

Still, I see your very logical thought here: use a fence to set depth and run it along the surface of the sole. That would keep you seeing the surface as you’re cutting, but if it works consistently, that wouldn’t matter. Same log is the handcrank machines for the job:

One could very easily make a replacement fence for that though that sits parallel to the blade and skeletonize it so that there was still good visibility of the surface. Wouldn’t be difficult to make fences in a couple different offsets if there was a reason to, although seems like it would easily be a set it once and always use the same sort of situation.

1 Like

Bruce Johnson sells some vintage CS Osborne tools that he calls straight channelers. The description says “Channelers are used to cut a slit in the leather to sew into and then the slit is closed to protect the stitches from wear. They are mostly used by boot and shoe makers.” There is a sold one on ebay with more pictures. Seems like you can adjust the height and depth of the blade. The listing is from the lot that I bought most of the tools from a previous post. Kinda kicking myself for not getting it at such a low price. I didn’t recognize what it was since I’ve never seen another maker use anything like it.

1 Like

Another bevel down cutter there

Straight channelers are for starting a channel or groove with exposed recessed stitches. Like as opposed to a diagonal channel where you see the channel but make a flap to bury the stitches English style, or a hidden channel like in this thread where the cut starts on the side of the outsole to raise a flap inward. Frommer used his to mark the inside or outside border of a holdfast and start digging it out, then came along with a channel plow or French edger to follow that groove and clear the sides of the holdfast and make the feather

2 Likes

I wouldn’t go against Bruce’s word. If he says boot and shoe makers use them, I’m sure he’s seen and heard from them. But I haven’t seen any sign of that use, either.

1 Like

The book of men’s shoe making gives specific numbers for basically every step of making a shoe. For cutting the flaps they state:

  1. Mark 10mm from the edge .
  2. Wet the area marked and cut 1mm from the grain.
  3. Fold the cut flap up.
  4. Wet the flap.
  5. Use wooden stick (kokuri) to lift flap up.
  6. Make a 1.5mm deep groove 5mm from the bottom edge.

The instructions later say to mark the welt 2mm from the feather edge for outsole stitching. I think the this and the 5mm groove distance are probably dependent on the curve of the awl.

Here is a picture of this page. Not sure if this is allowed but I figure the pictures might be helpful. I can delete if necessary.

1 Like

Wow. Detailed indeed! I’d be feeling pretty good about the purchase of that book.

All the square awls I’ve seen have fairly sharp curves to their tips. I’ve also both found and been told that it’s best to pierce holes at angles that create entry holes farther outward on the welt and farther inward through the sole:

This allows you to stitch closer to the upper on the welt without the upper interfering with the shaft or haft of the square awl.

The angle can and maybe should vary by shoe and part of shoe. For example, you may want to go tighter through the inside waist, where the upper also creates more interference by hanging farther over the featherline. So I do test piercings with the awl I want to use, after I’ve lifted the flap but before I’ve dug out any groove. Seeing where the awl pokes out gives me a sense of where to dig the groove.

I’ve tried digging the groove as I go, every four or five stitches. That hasn’t gone well with gum tools or saddlery-style groovers. It’s hard to get a clean groove in segments, and it’s easy to accidentally nick a stitch. It might go better if I incised with a knife, opened, and widened the grooves manually.

When I dig the groove all at once, after test holes, I can get the vast majority of stitches to land inside it, but not 100%. I find it pays here to use a welt of consistent width and whittle the outsole right up to the welt, creating a consistent edge all around that I can use as a reference line and a guide for a compass or a saddle stitching groover.