Engineering some engineers

I have had someone request that I make him a pair of a pair of engineer boots, with the understanding that I have never made any before, so figured I would start a new thread (because why not have multiple concurrent projects going?).

I will probably take foot measurements for him this week, but in the mean time, I started working on a last template for an engineer, complete with a 10” shaft. This is loosely based on the last I designed for my wife’s boots, but with a 26mm heel height, 14mm toe spring, and some softer toe box geometry. Last template is currently sized to a men’s 10D. I will post up some more pictures when I get the heel mock up printed and actually assemble.

2 Likes

Some more shots now that I have the heel and some comparisons between this and the last for my wife’s boots.

Had some discussion with @thenewreligion and others on refining the shape a bit. Tossed some leather on the toe for a more realistic look.

Side profile looks pretty good.

Top view looking at little too thick

Was given an interesting suggestion for validating the last contact point. Draw aggressively on a piece of paper with a pencil and then rub the last on it to see where the contact point is.

Comparing to the ball line and where the contact should be.

Conclusion being that my mock up heel is a little too tall and the foot bed geometry needs a little adjustment to pull the lateral side up a bit.

1 Like

Some do the same for finding ball points on the featherline. You can do it on a straight side of a bench or on top.

It’s all style, of course, but I was thinking the downward view of the toe was shaping up pretty frumpy. It’s rare to see even sandal toes quite that round.

It’s one of the benefits of printing up the CAD model and holding it in your hand at full scale. Things you don’t really notice on the computer end up being painfully obvious.

I did the opposite with my wife’s last. Started way too narrow and tapered then needing to make it wider and wider. Over compensated when I did the initial layout here.

2 Likes

Been working on the last for these and having a grand ol time getting the toe geometry right. Person I am making them for has a big toe longer than the 2nd toe, with a big toe that swings out pretty wide on one foot. Getting decently close with the CAD model here. Still want to pull a little length out and give the lateral side a bit more room.

Also did a mock up with a sample of the leather I am planning on using for these; Virgilio Margot fog.

Has an over wax, so took some photos after light brushing, heavy brushing, and eventually hitting it with a heat gun to fully melt the wax.

1 Like

Little more tweaking to the toe box

1 Like

Many thanks to @thenewreligion for turning my attention to Furuse Shoe’s Instagram (https://www.instagram.com/furuse_shoe?igsh=MTUwajJmaWd5aGpsZQ==) for a lesson in interpreting foot geometry.

Gave my best attempt at applying it

Very different results for things like the heel angle, ball angle, etc, as the center line reference ends up a bit different.

End result is a much better looking shape with a lot more intention of the foot bottom geometry, etc.

2 Likes

Before on the right, after on the left. Much sleeker looming. Still needs some minor tweaks to a couple of the radii.

1 Like

Looks like they’re willing to compress the big joint for a sleeker shape. Dress shoe maker?

Envying your 3D printer again!

Looks like these were printed whole, rather than divided. Were you planning to use them just to check fit, or can you cut them into pieces after printing?

They seem to do a little of different stuff, but definitely sleeker styles. I try not to cut nearly as much.

1 Like

These are just hollow, light weight prints. I like being able to actually hold the shape in my hand. They’re like $1.50 worth of material at this density, so it’s a cheap and easy validation thing. Strong enough to tape up and make patterns off of and maybe drape some leather over the toe, but not enough to actually last on.

1 Like

As much as I recoil at the thought of bringing one-time-use plastic blob production into my life, those costs are just incredible, even amortizing the cost of a printer. Throw in the ability to share precise copies of 3D shapes online, and it’s hard not to like the look of 3D printing for low-volume lastmaking.

There are some materials you can use that are more biodegradable than others, so if lifecycle is a big concern, choose your filaments with that as a driver. Or at least don’t pick the ones that are bad ones.

For someone approaching it from a hobbyist perspective, the big thing to me is how quickly I can iterate. The last I would design today is very different than the one a week ago because of how quickly I can churn through stuff and try new ideas.

1 Like

Hard to capture in pictures, but new last is looking way more streamlined.

1 Like

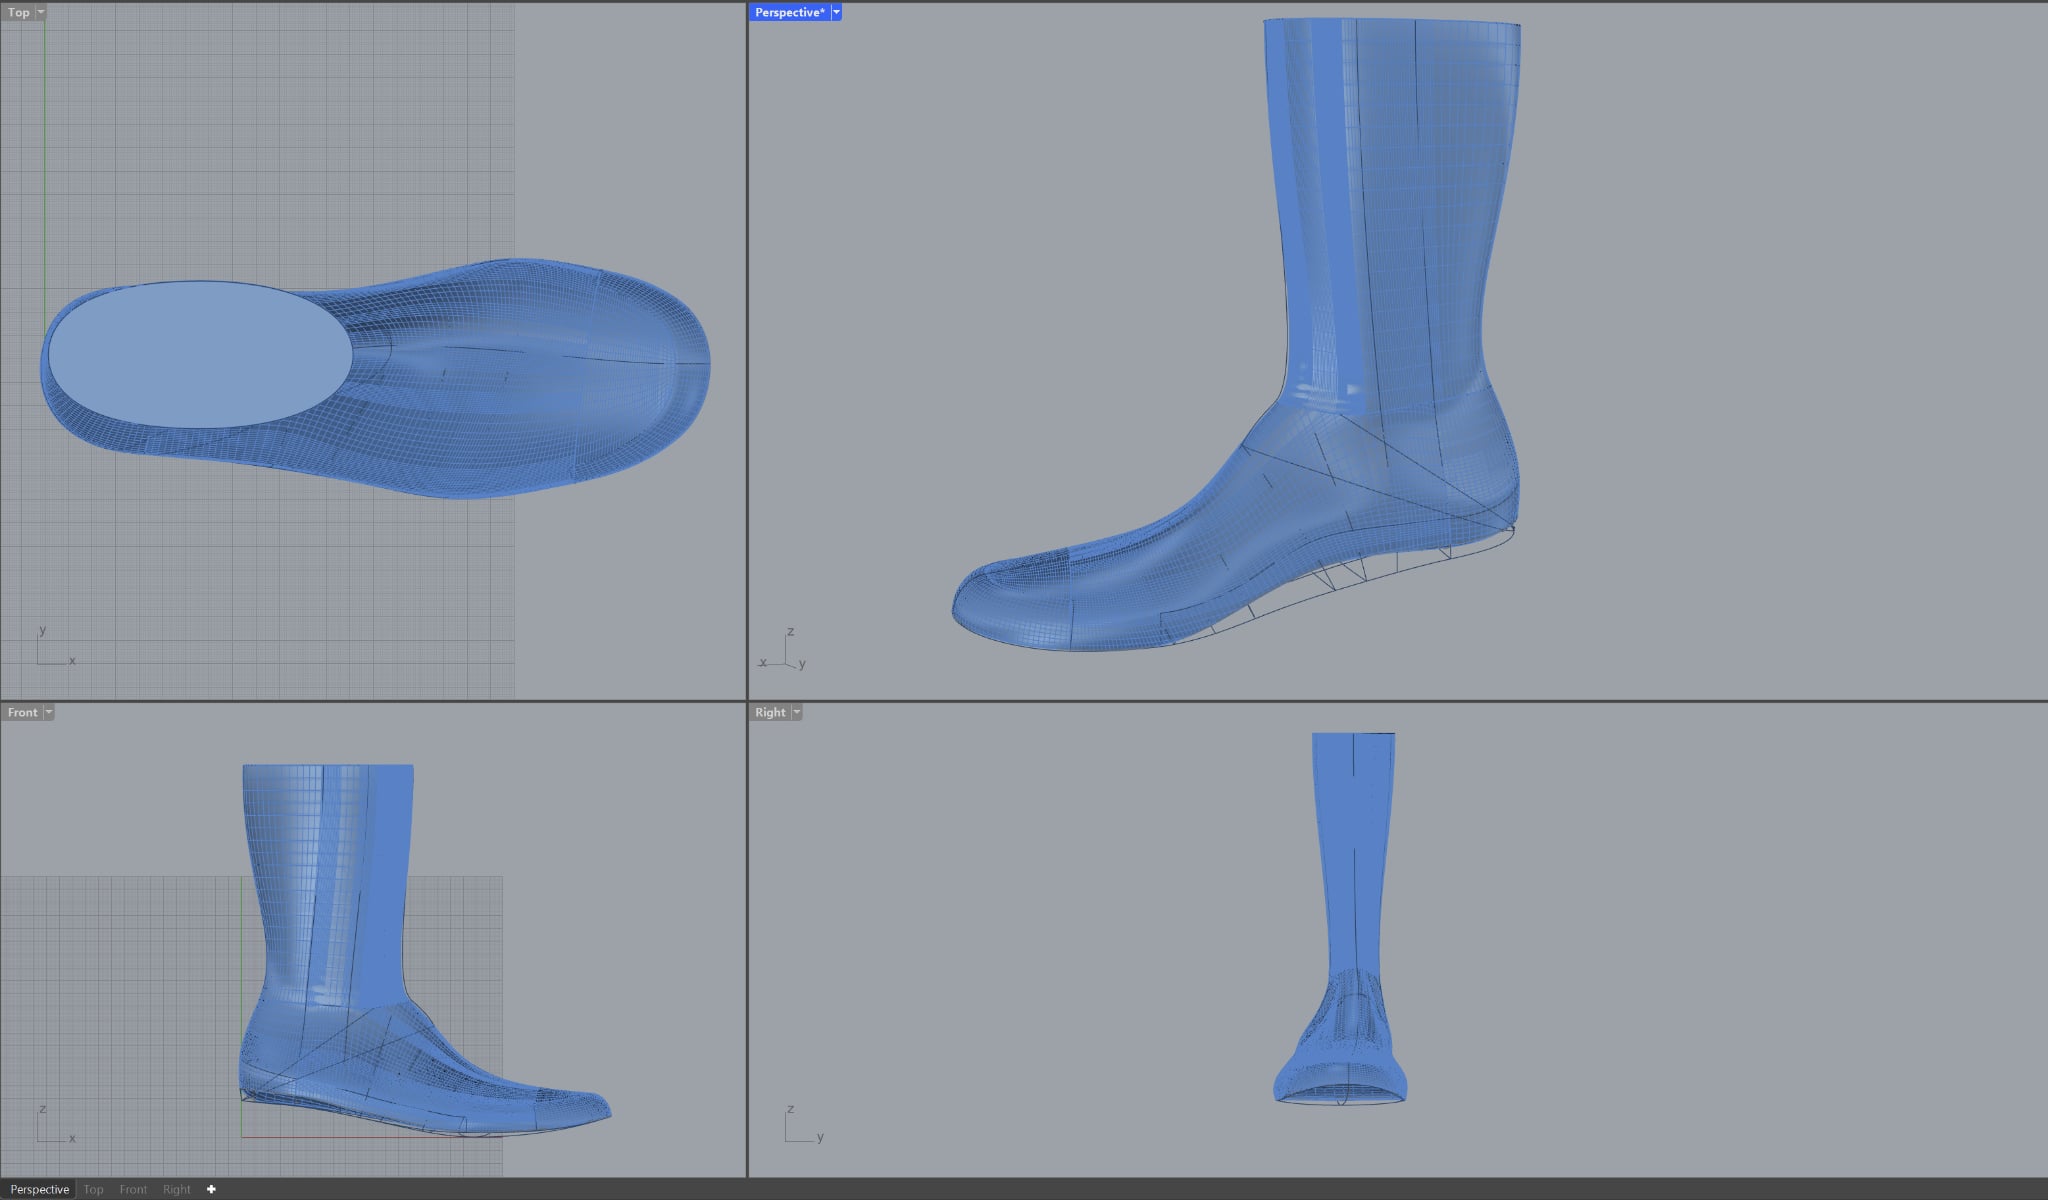
I came across some interesting discussion regarding difference in last designs for an engineer boot vs a lace up boot, particularly in the context of placement of the break point. The differen d being that an engineer boot wants the breakpoint behind the ball line by 5-10mm rather than a lace up (particularly with a lower heel height) wanting to be ahead of the ball line by 5-10mm.

Here is the chatgpt summary of why:

The **break point** on a boot last is not arbitrary—it’s a functional location driven by how the foot actually bends during gait. If you get it wrong, the boot will either fight the foot (causing creasing in the wrong place) or feel stiff and fatiguing.

Here’s how it’s determined and how it relates to the **ball line**:

-–

## 1. What the break point actually represents

The break point is the **axis where the boot flexes during toe-off**—essentially where the vamp will crease.

Biomechanically, this corresponds to the **metatarsophalangeal (MTP) joint axis**, not just the widest part of the foot.

-–

## 2. Ball line vs. true flex axis

The **ball line** is typically placed at the **center of the first metatarsal head (1st MTP)** or slightly behind it, depending on the lastmaker.

However:

* The **functional flex axis** runs **obliquely** from the **1st to 5th met heads**

* It is **not perpendicular** to the long axis of the foot

* The **center of flexion** tends to fall **slightly forward of the ball line** in most natural gait patterns

-–

## 3. How the break point is determined on a last

### A. Start from foot anatomy

From a footprint or scan:

* Locate the **centers of the met heads**

* Draw the **toe-off axis** (1st → 5th met head line)

* Identify where peak pressure occurs during push-off (usually medial-biased)

### B. Translate to the last

On the last:

* Project that axis onto the bottom

* Adjust for **toe spring and last curvature**

### C. Adjust for footwear geometry

Now the key part—**the last modifies where the boot *should* break**, not just where the foot does.

Factors:

#### 1. Heel height

* Higher heel → foot is already plantarflexed → **break point shifts rearward**

* Lower heel → more natural gait → **break point closer to or slightly ahead of ball line**

#### 2. Toe spring

* More toe spring → reduces required flex → **break point can move slightly back**

* Less toe spring → requires more flex → **break point moves forward**

#### 3. Last stiffness / construction

* Stiffer boots (work boots, engineer boots):

* Break point often **intentionally set slightly behind anatomical axis**

* Prevents excessive vamp collapse

* Flexible footwear:

* Break point aligns closely with **true MTP axis**

-–

## 4. Typical placement relative to the ball line

For most boots:

* **Standard lace-up boot (moderate heel, moderate toe spring):**

→ Break point ≈ **5–10 mm forward of ball line**

* **High heel / high toe spring boot:**

→ Break point ≈ **at or slightly behind ball line**

* **Stiff pull-on / engineer boot:**

→ Break point ≈ **5–15 mm behind ball line**

* **Highly flexible footwear:**

→ Break point ≈ **directly on the anatomical flex axis (often slightly forward of ball line)**

-–

## 5. Why misplacement causes problems

### Too far forward:

* Boot collapses at toe

* Excessive vamp creasing

* ऊर्जा loss during gait (inefficient push-off)

### Too far back:

* Boot resists flexion

* Heel slip increases

* Forefoot pressure spikes (especially under 2nd–3rd mets)

-–

## 6. Key insight for last design

The **ball line is a sizing reference**, but the **break point is a dynamic function**.

A well-designed last:

* Uses the ball line to anchor proportions

* Uses the break point to tune **gait mechanics and flex behavior**

-–

## 7. Practical rule of thumb

If you’re designing:

> Start with the anatomical flex axis → then shift it **slightly rearward** as heel height and toe spring increase, or as stiffness increases.

What did you give the LLM to summarize?

Mainly was just posing it general questions and it went down a rabbit hole, citing your wiki. Of course, now, it’s giving totally contradictory information so who knows what the realy answer is.

1 Like