After flubbing the patterning on a pair of derby boots, I decided to take a few hours and play with the patterning again, starting from new tape forms. One of my goals was to try out some of the concepts I had in notes from the Seidich family’s Uppermaking book:
I also went back and reviewed notes from D.W. Frommer II’s Western Packers.
All the USA-made, work-style boots I own have completely unlined quarters. They essentially just double the vamps with some lining leather and sew those stacks as if they were single pieces of leather. Here’s that being done at Nicks:

It’s also possible to line both vamp and quarters this way, at the cost of potentially creating fairly bulky vamp-quarter seams, even if you skive. But that doesn’t seem to be a serious issue for lighter leathers. I have some Allen Edmonds “Higgins Mill” boots lined this way. AE’s derby shoes that I’ve seen also line quarter this way, though they often have a separate lining pieces at the back, in the same of a heel slide.
By contrast, the Uppermaking book diagrams of lining patterns all show completely straight vamp lining to quarter lining seams, placed ahead of the upper vamp-quarter seams to avoid any overlap.
Goals
Pulling things together, a to-do list for fancier Derby lining patterns:
-
Completely cover the underside of the vamp.
-
Afford some trim allowance around the tab for the tongue on the vamp.
-
Completely cover the undersides of the quarters, with the possible exception of the tips of the tabs that come under the vamp-quarter seams. But definitely cover the parts of the quarter tabs that come under the stay stitches, so those stitches bind all four layers.
-
Afford some trim allowance around the facings and toplines.
-
Avoid overlapping vamp-quarter seams.
-
If the seam between vamp lining and quarter lining is a lapped seam, lay the quarter linings under the vamp linings so any exposed edge faces toward the toe and doesn’t hang the foot up when putting the shoes on.
-
If heel counters will be placed between upper and lining, take the quarter linings in toward the backseam to make room for them.
Edit: One might also add:
- Avoid any seam running up and down the middle of the heel, ankle, and Achilles. This can be done by making a third lining piece, like a backstrap, running down the middle, by making the quarter lining pieces asymmetric, so one wraps around the heel, or by overlaying a heel slide.
Papercraft
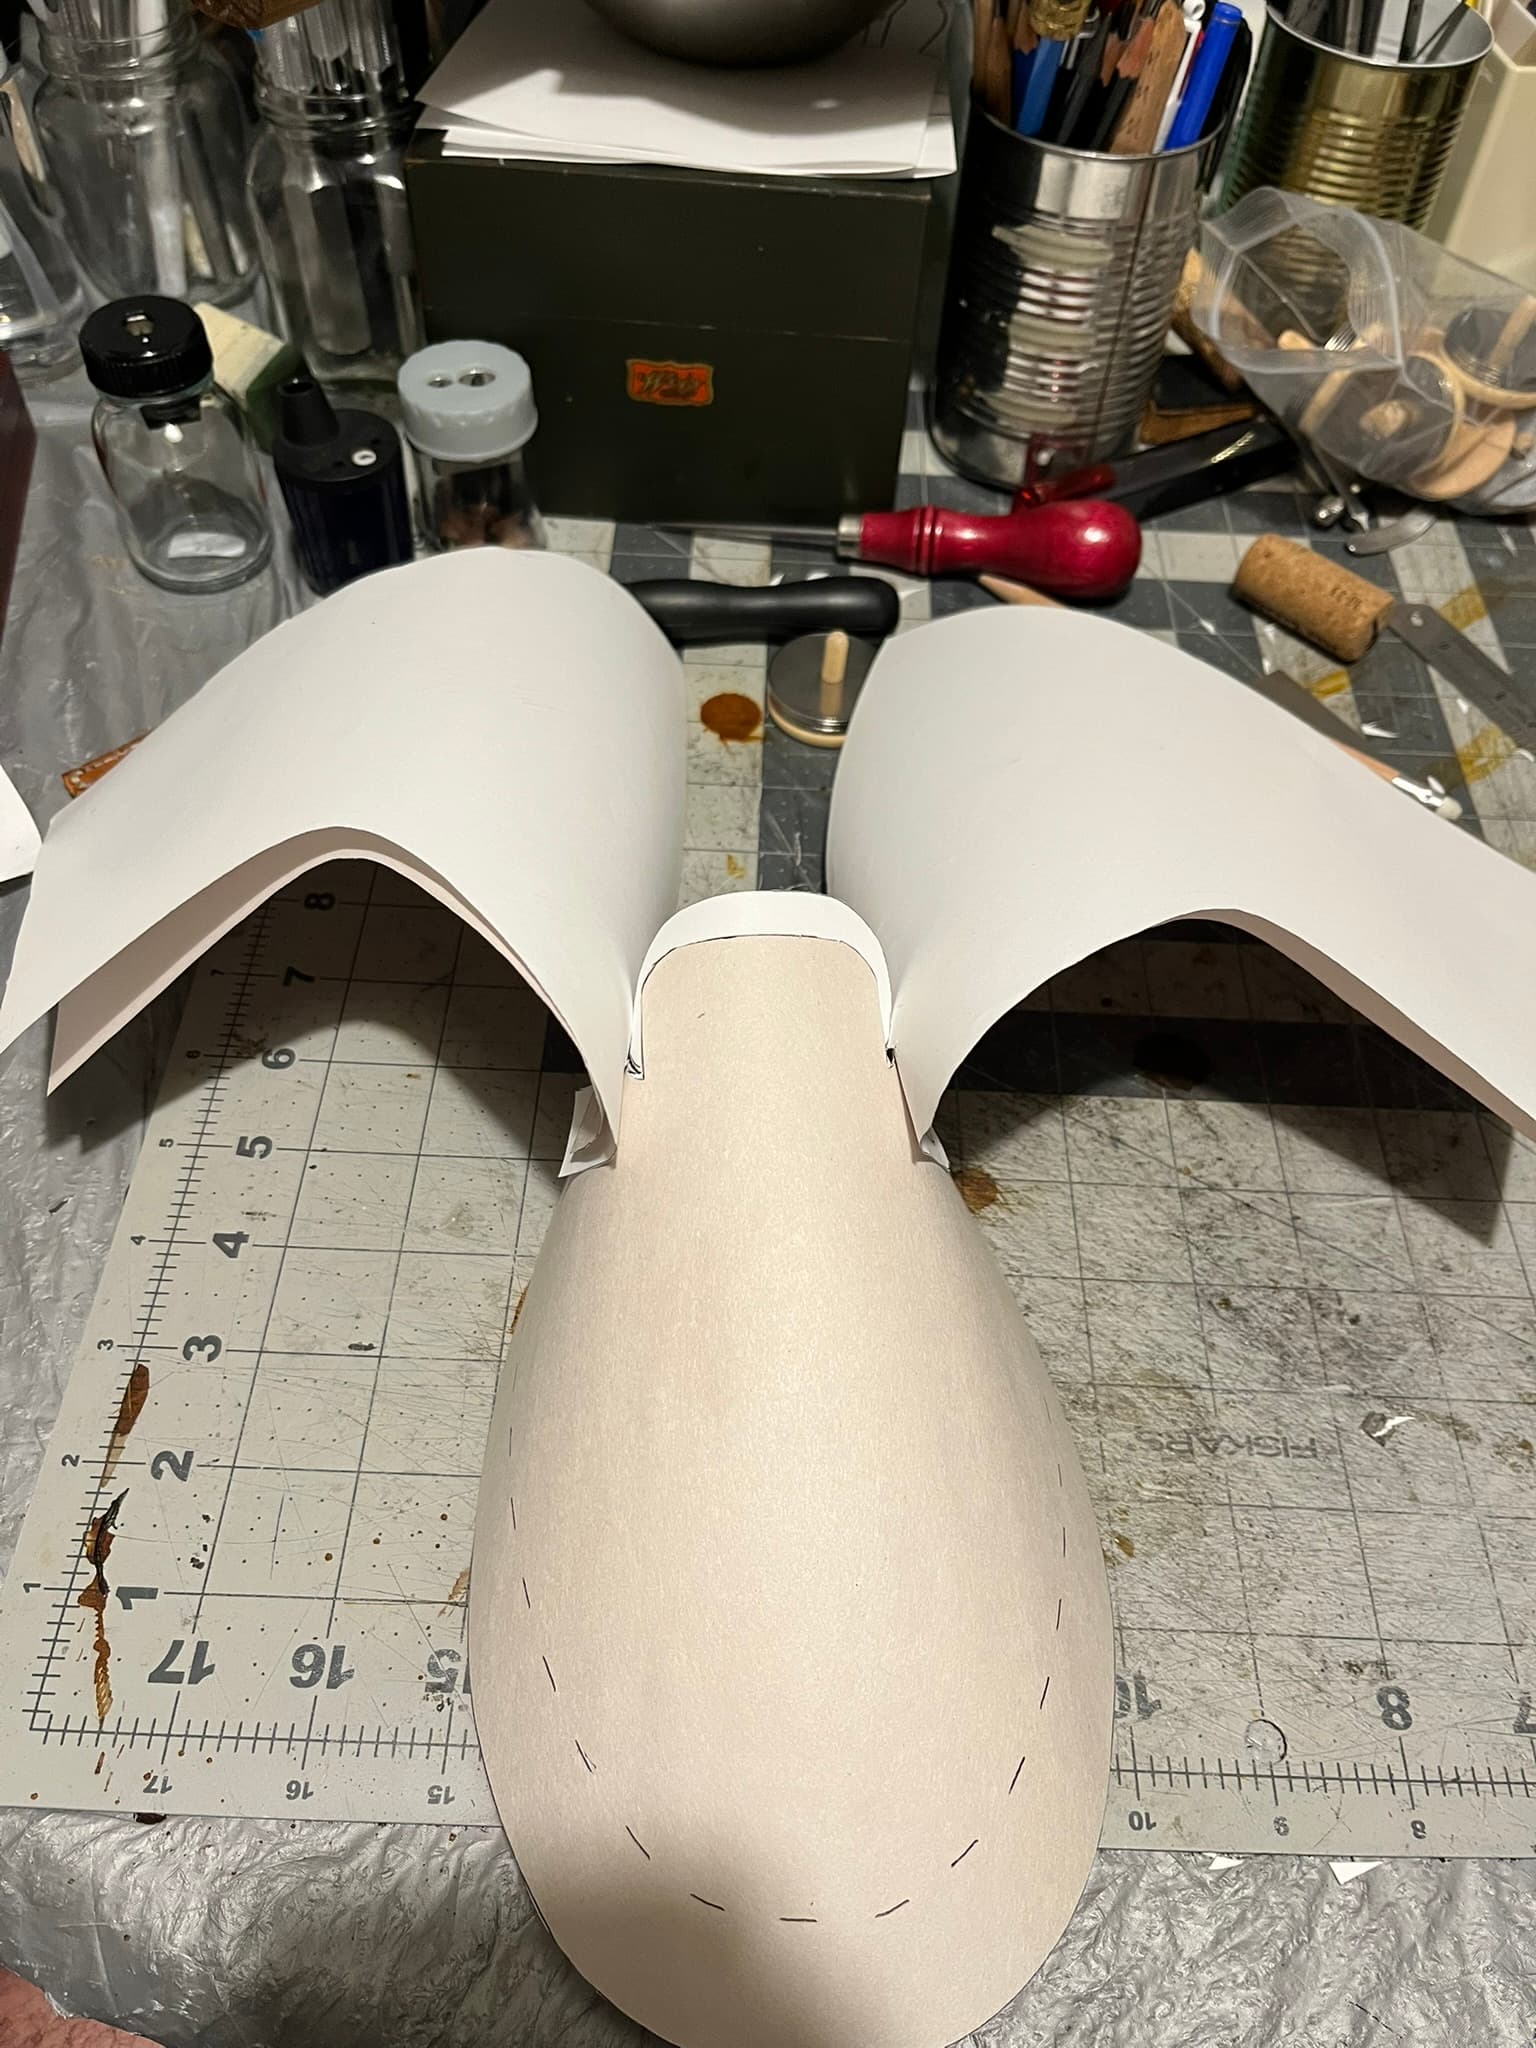
I went back and did new tape forms from my last for the failed pair number 4. My first mock-up in foam failed, but I think I eventually got it in paper:
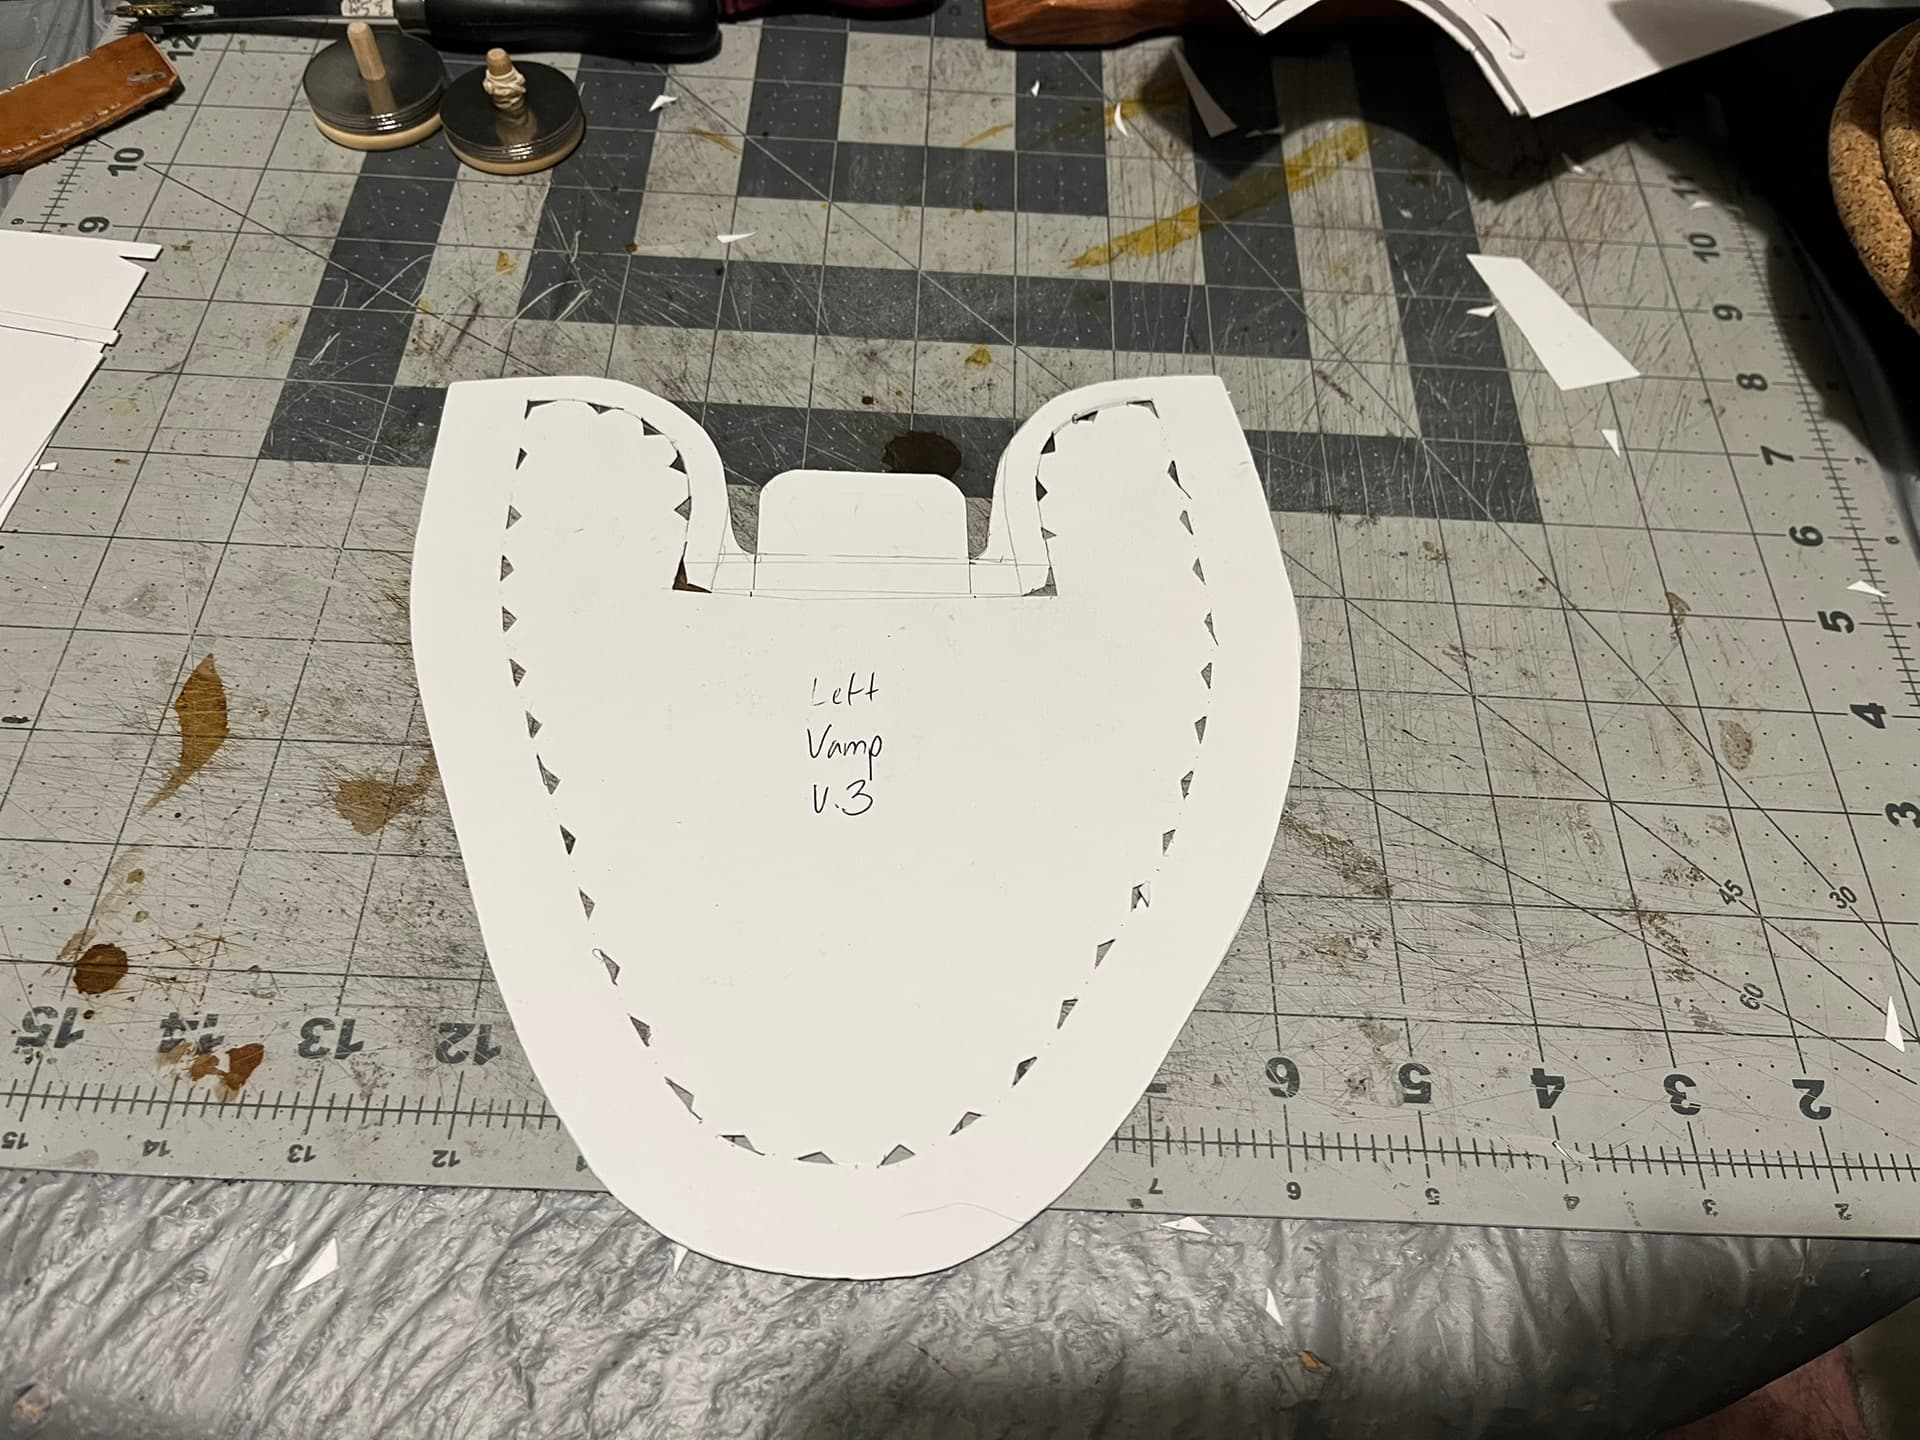
The critical points on this vamp pattern, which the Seidiches call the “fitting points”, are right at the corners where the swooping curves from the quarter seam intersect the bottom of the tongue tab. The Seidiches actually punch small holes here, I believe in every pattern piece but the quarters. The points mark the leading edges of all the various tabs and slits that allow the “noses” of the quarter linings to pass from the very bottom of the stack, nearest the foot, through the vamp lining and vamp, and up under the quarters.
The line inside the tongue tab is 5 millimeters of trim allowance. This reaches out and overlaps the seam allowance, so there are sliced slits along the curved lines.
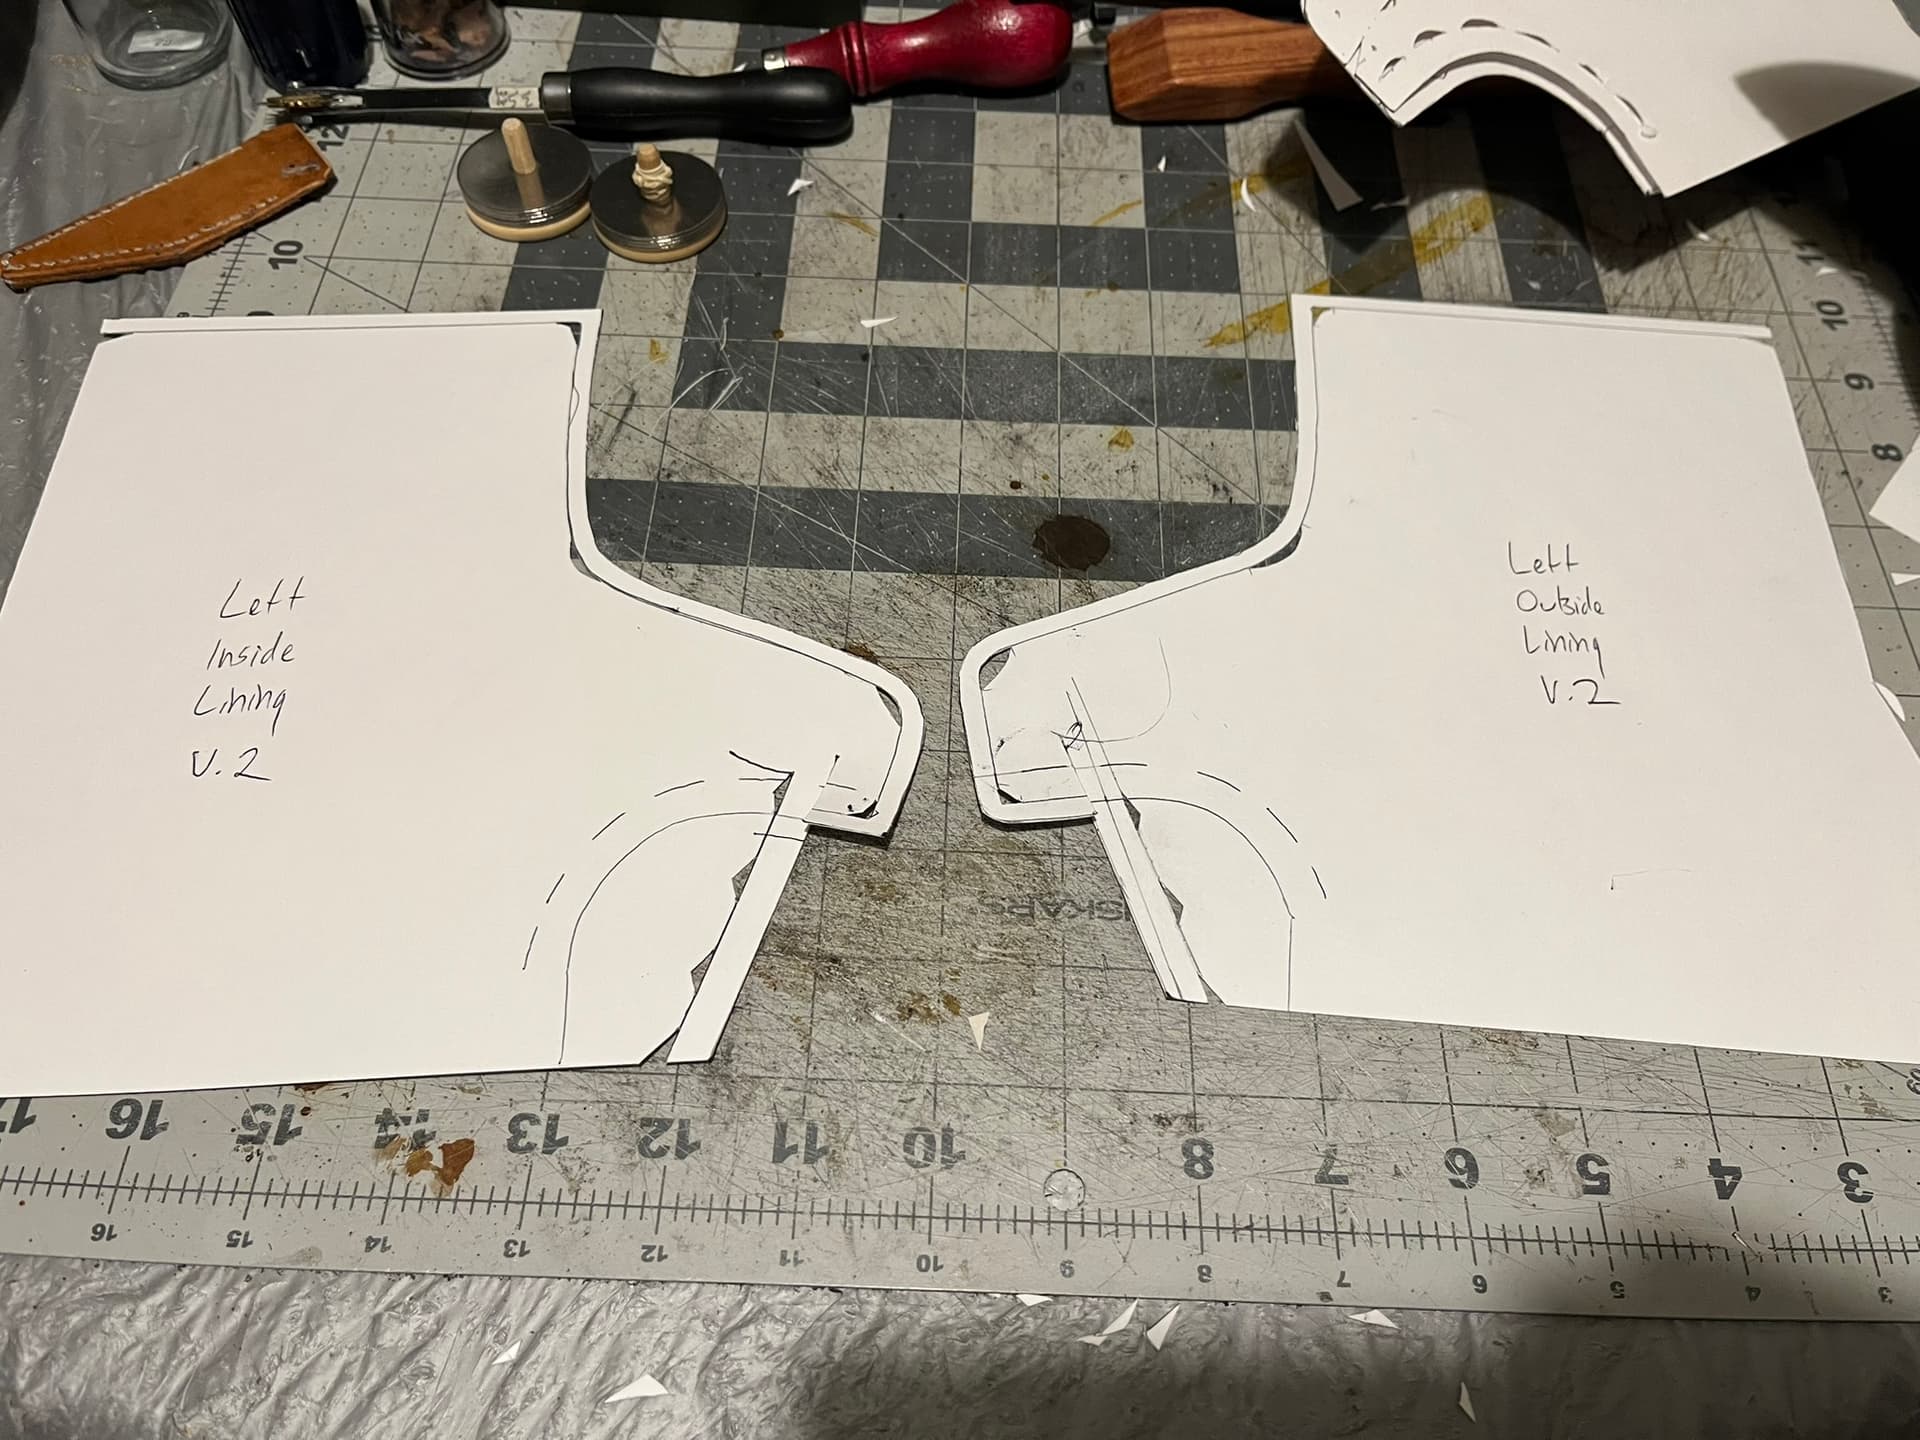
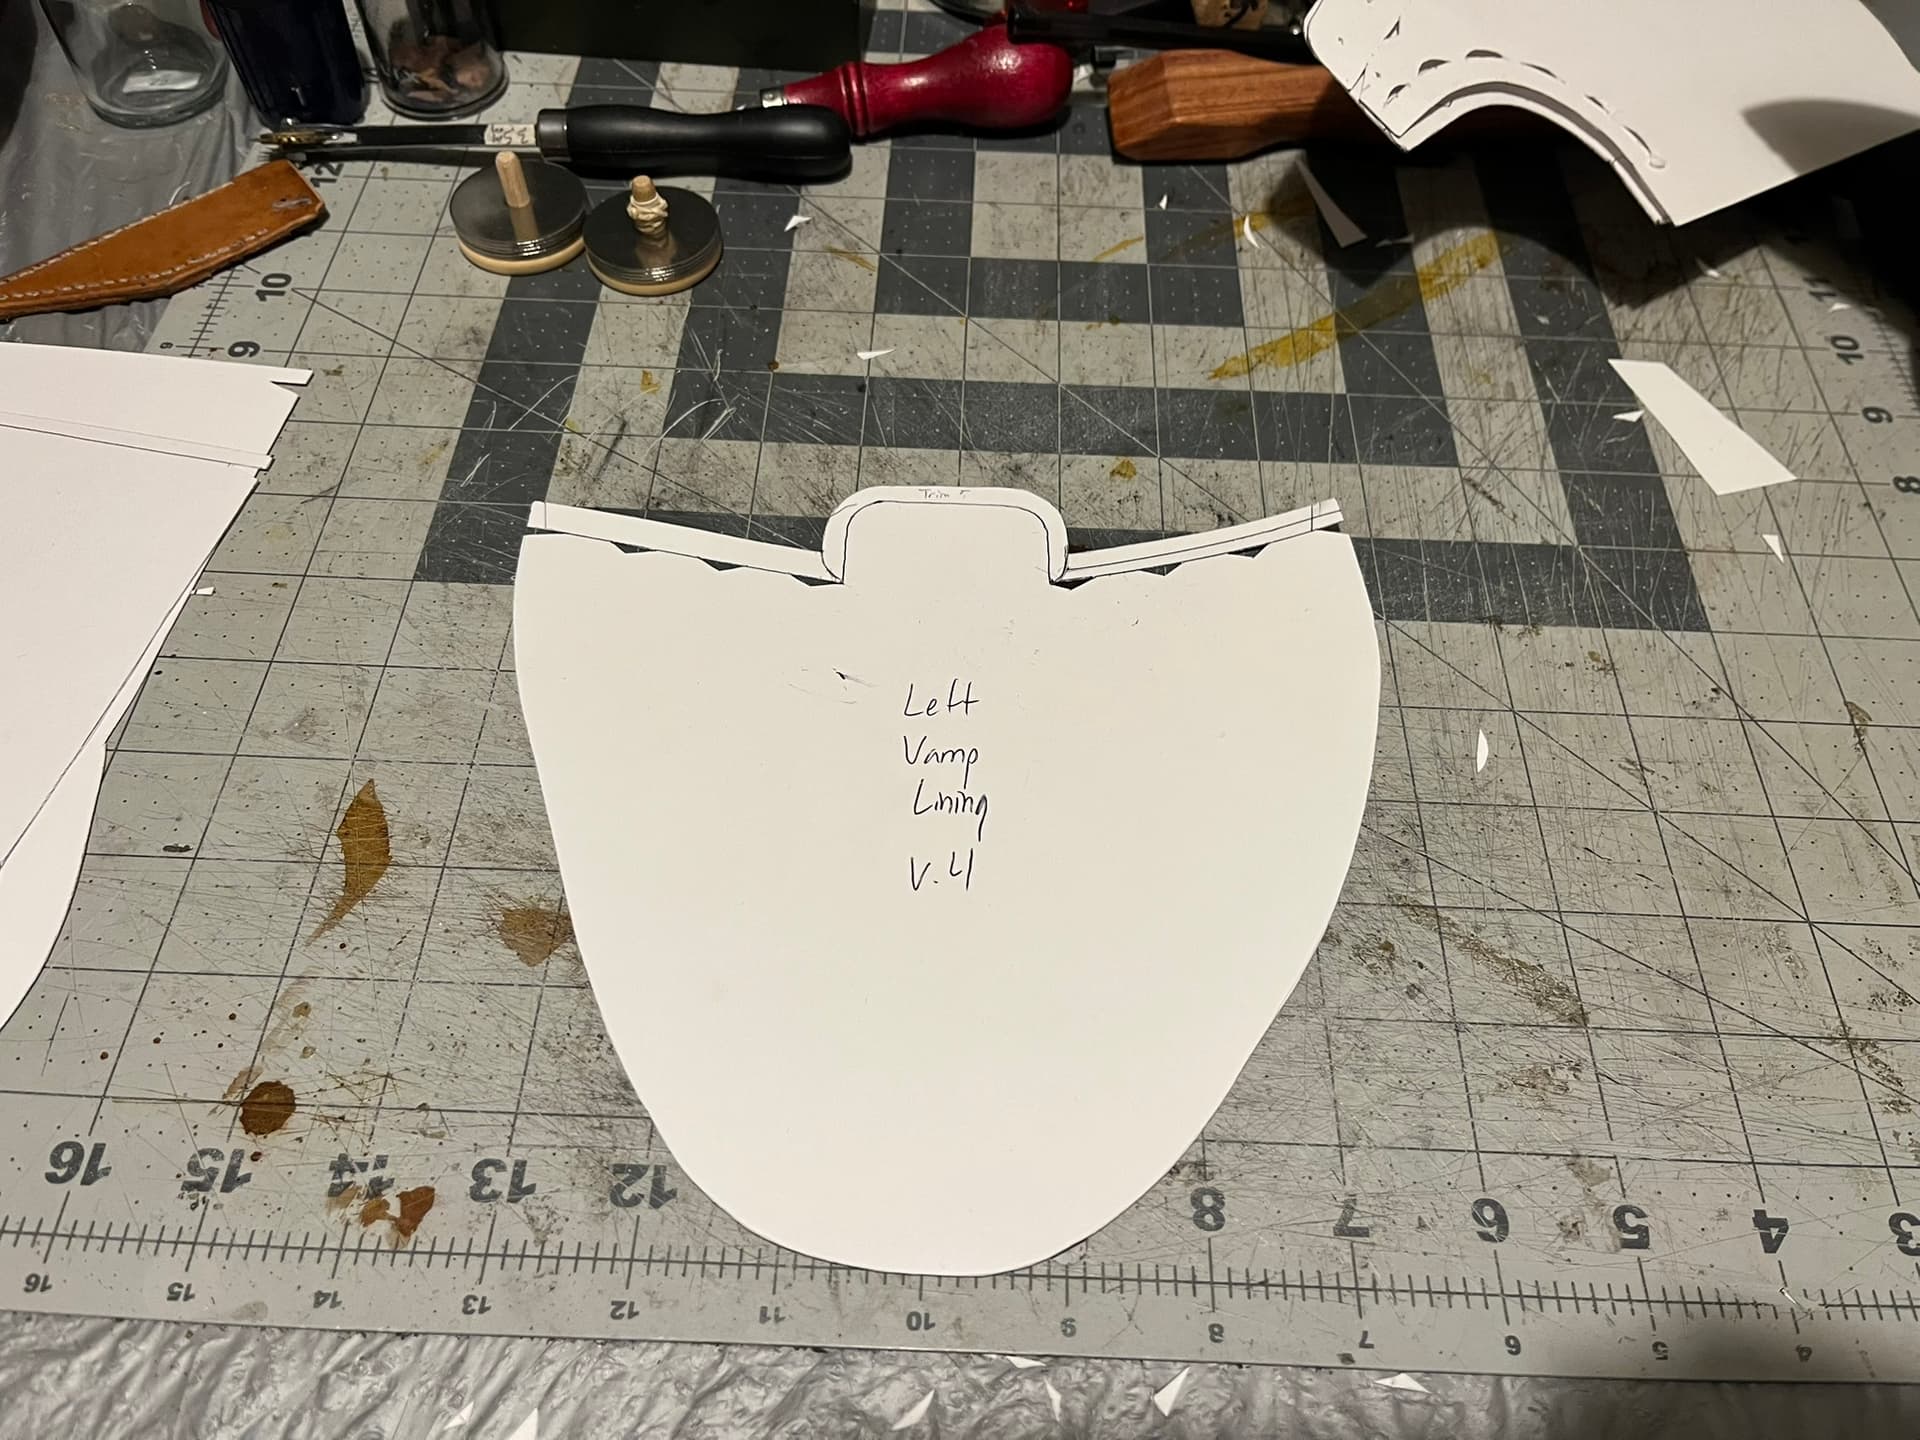
I made these quarter lining patterns in part by tracing the upper quarter patterns. You can see the dashed lines for the quarter curves still on them, and the way straight lining seams are placed ahead of them.
I tried to lift up the noses, so the photo would show the slits. On each side, the line starting from the leading edge of the seam allowance up to the marked “fitting points” are cut open.
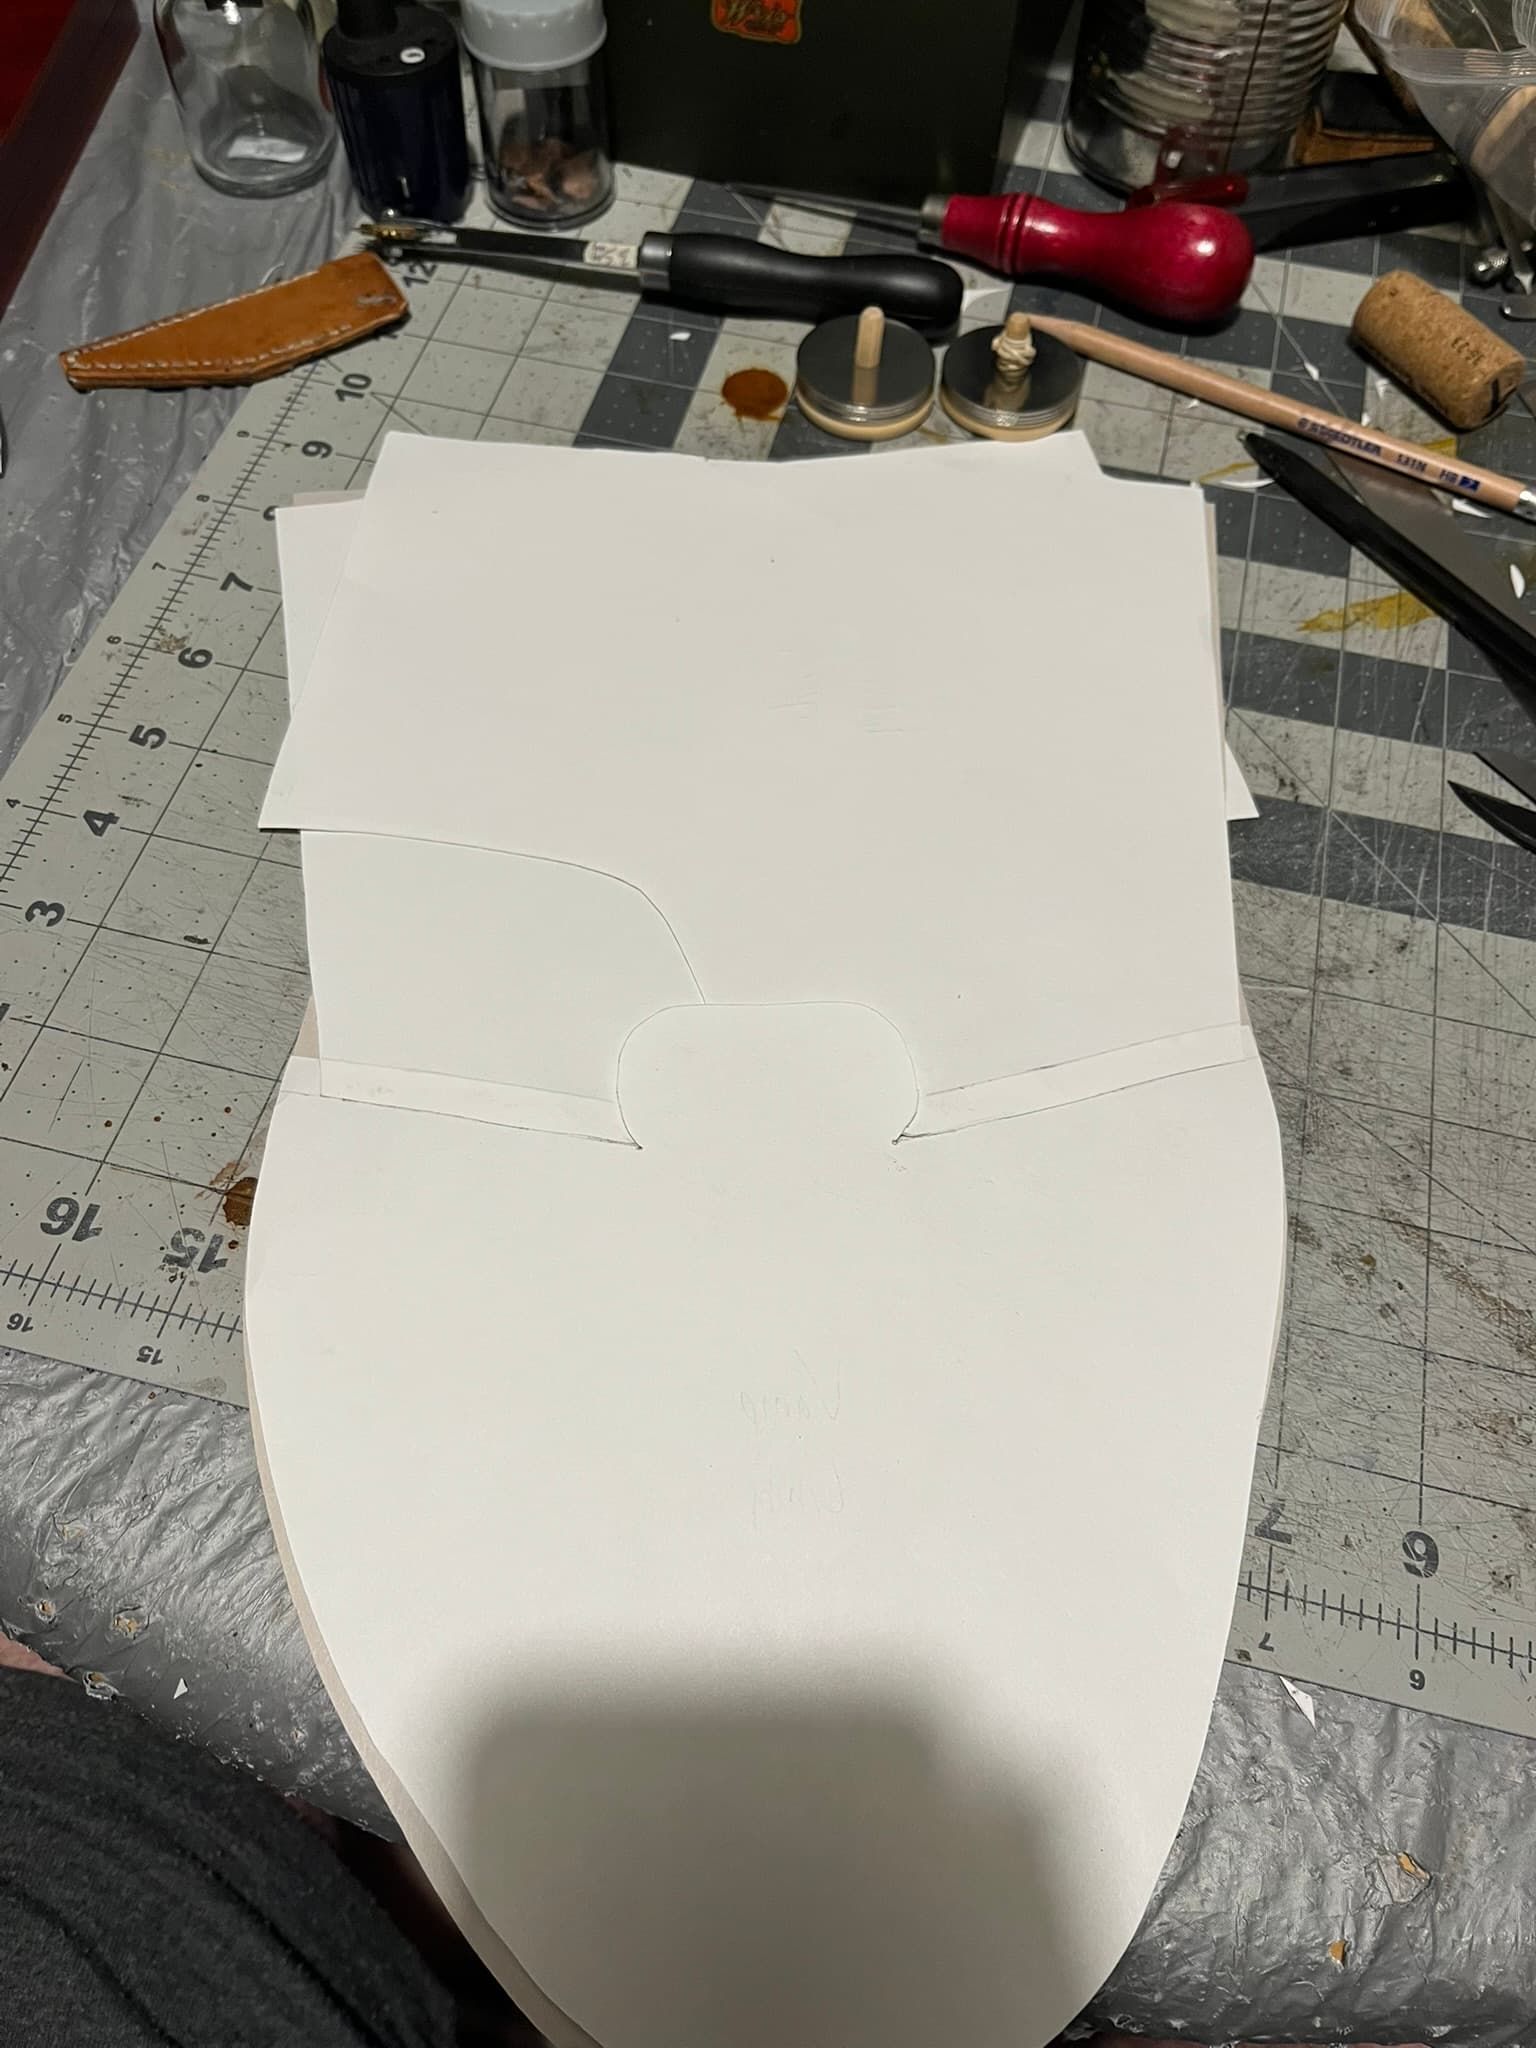
This is hard to make out, but shows the quarter linings over the vamp lining along the seams.
Here’s the stack fully assembled, showing the trim allowance of the vamp lining under the tongue tab of the vamp, as well as the “noses” of the quarter linings coming up, through, and under.
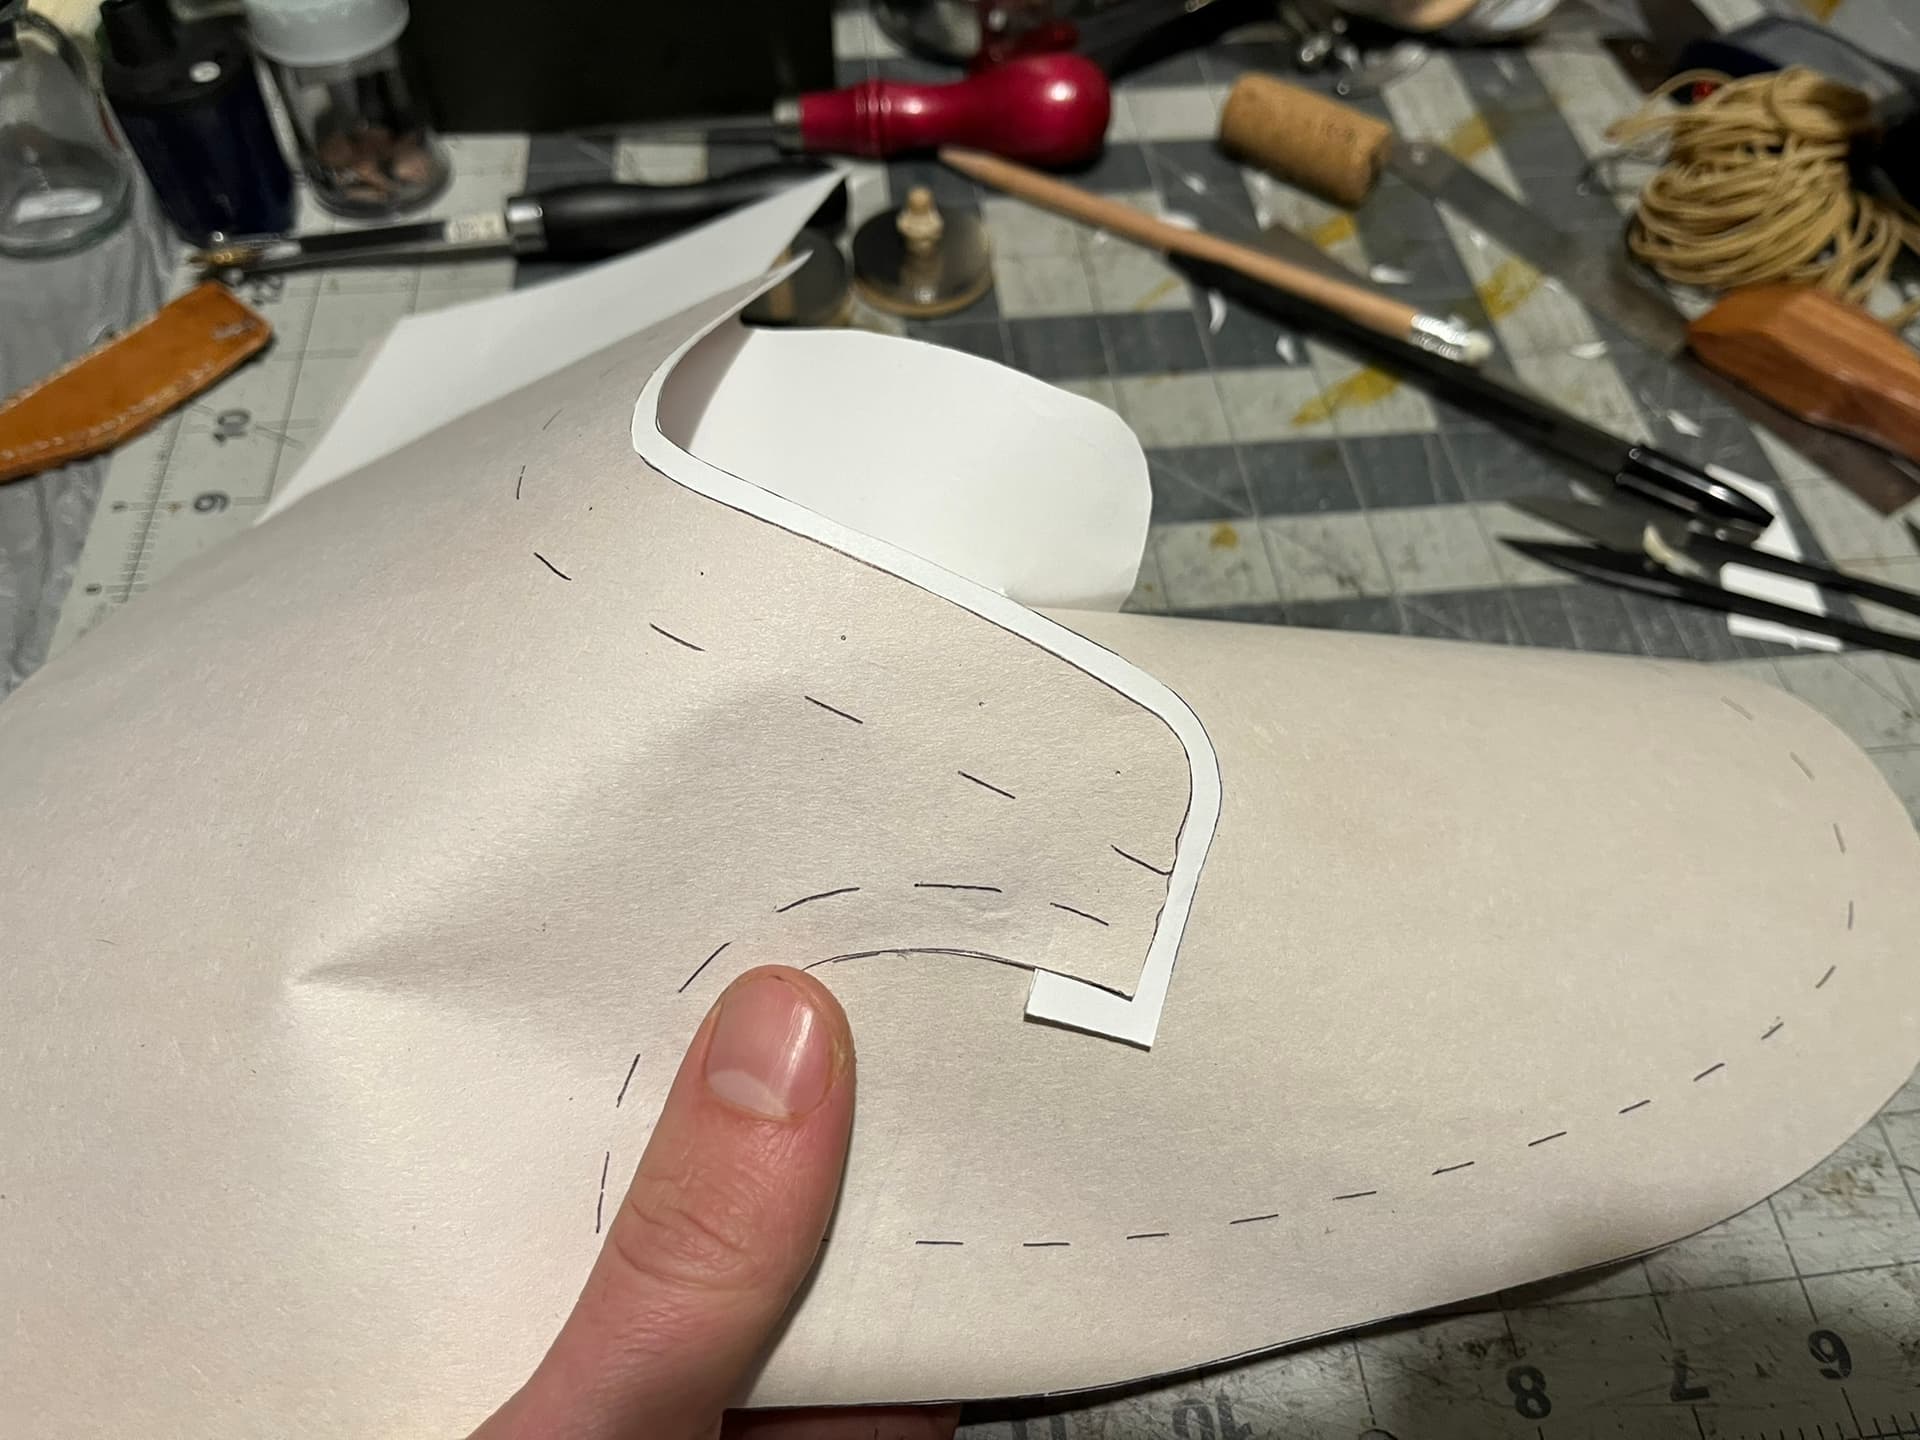
Here’s a side shot of a quarter tab, showing the 5 mm of trim allowance on the quarter lining showing all around.
I’m not totally sure, but I think the Uppermaking book describes a slightly different approach, where the quarter lining stops short of quarter seam allowance, rather than extending all the way down below the tab. This lets the quarter lining fall under the stay stitches, but might let you close the quarter seams of the upper before fitting up the linings.
First Thoughts
I’m really glad I did mockups of this. It’s easy enough to understand the idea of the “noses” in the abstract, but I feel like I know my way around much better for having played a bit in paper.
I’m concerned there may be additional nuances with the thicknesses of leather involved. I’m also really hoping I remember not to finish sewing the quarter seams all the way to the front before fitting everything up.
I don’t know whether or when it’s worth the trouble to avoid doubling up the quarter-vamp seams. Clearly people are wearing and enjoying shoes and boots in lighter leathers with the seams doubled. Still, the contrasting seams appeal to me, as a refinement.