Unfortunately, the last I am using doesn’t fit my foot and I made some rookie mistakes, but I posted them up on reddit and had someone contact me wanting to buy them.
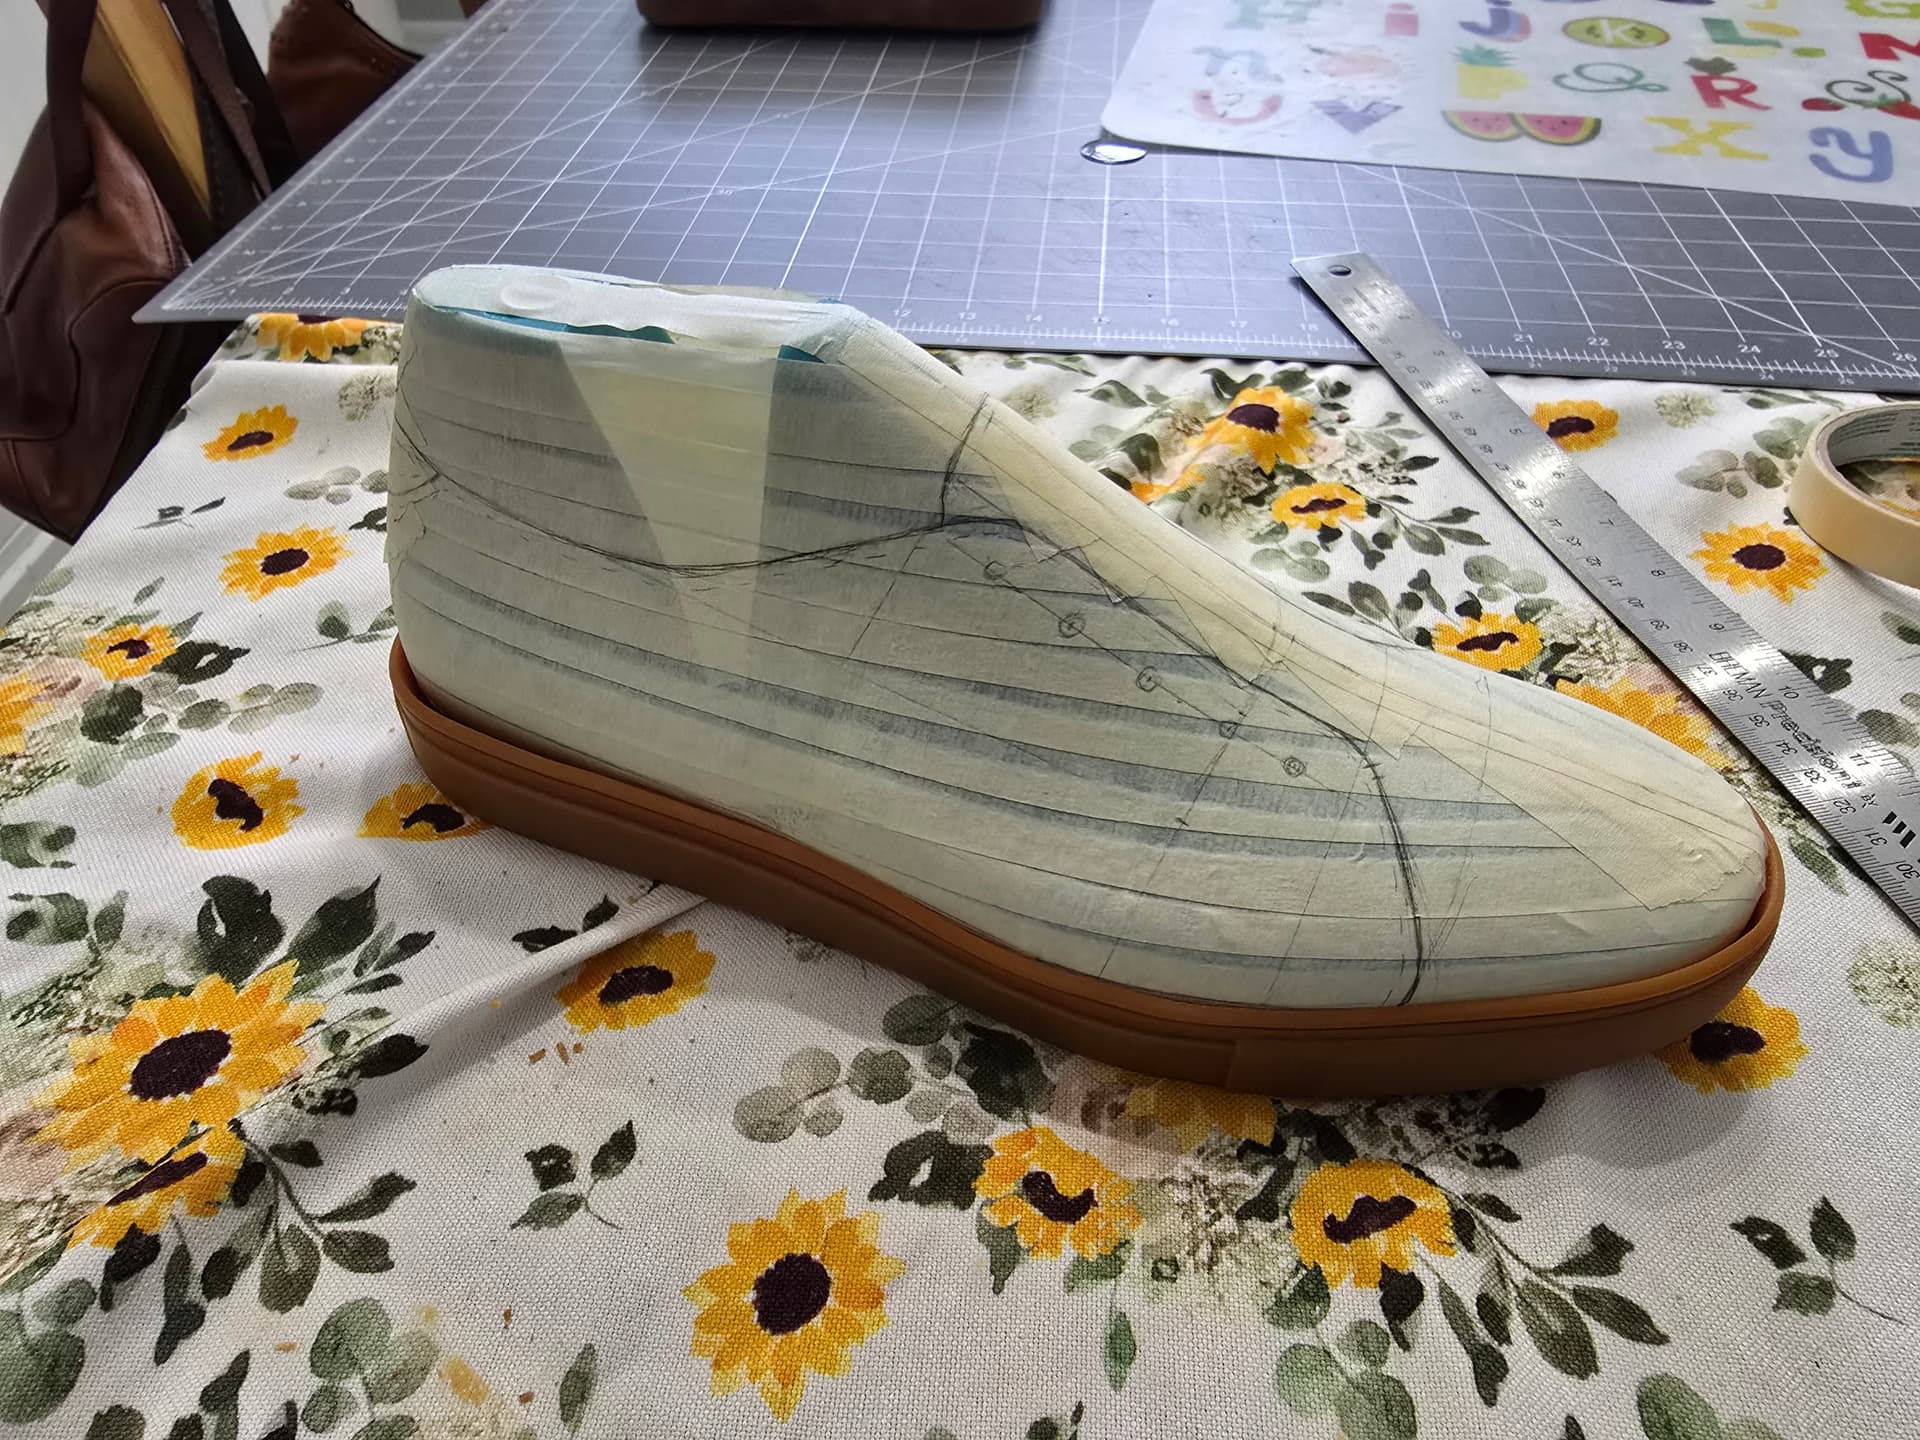
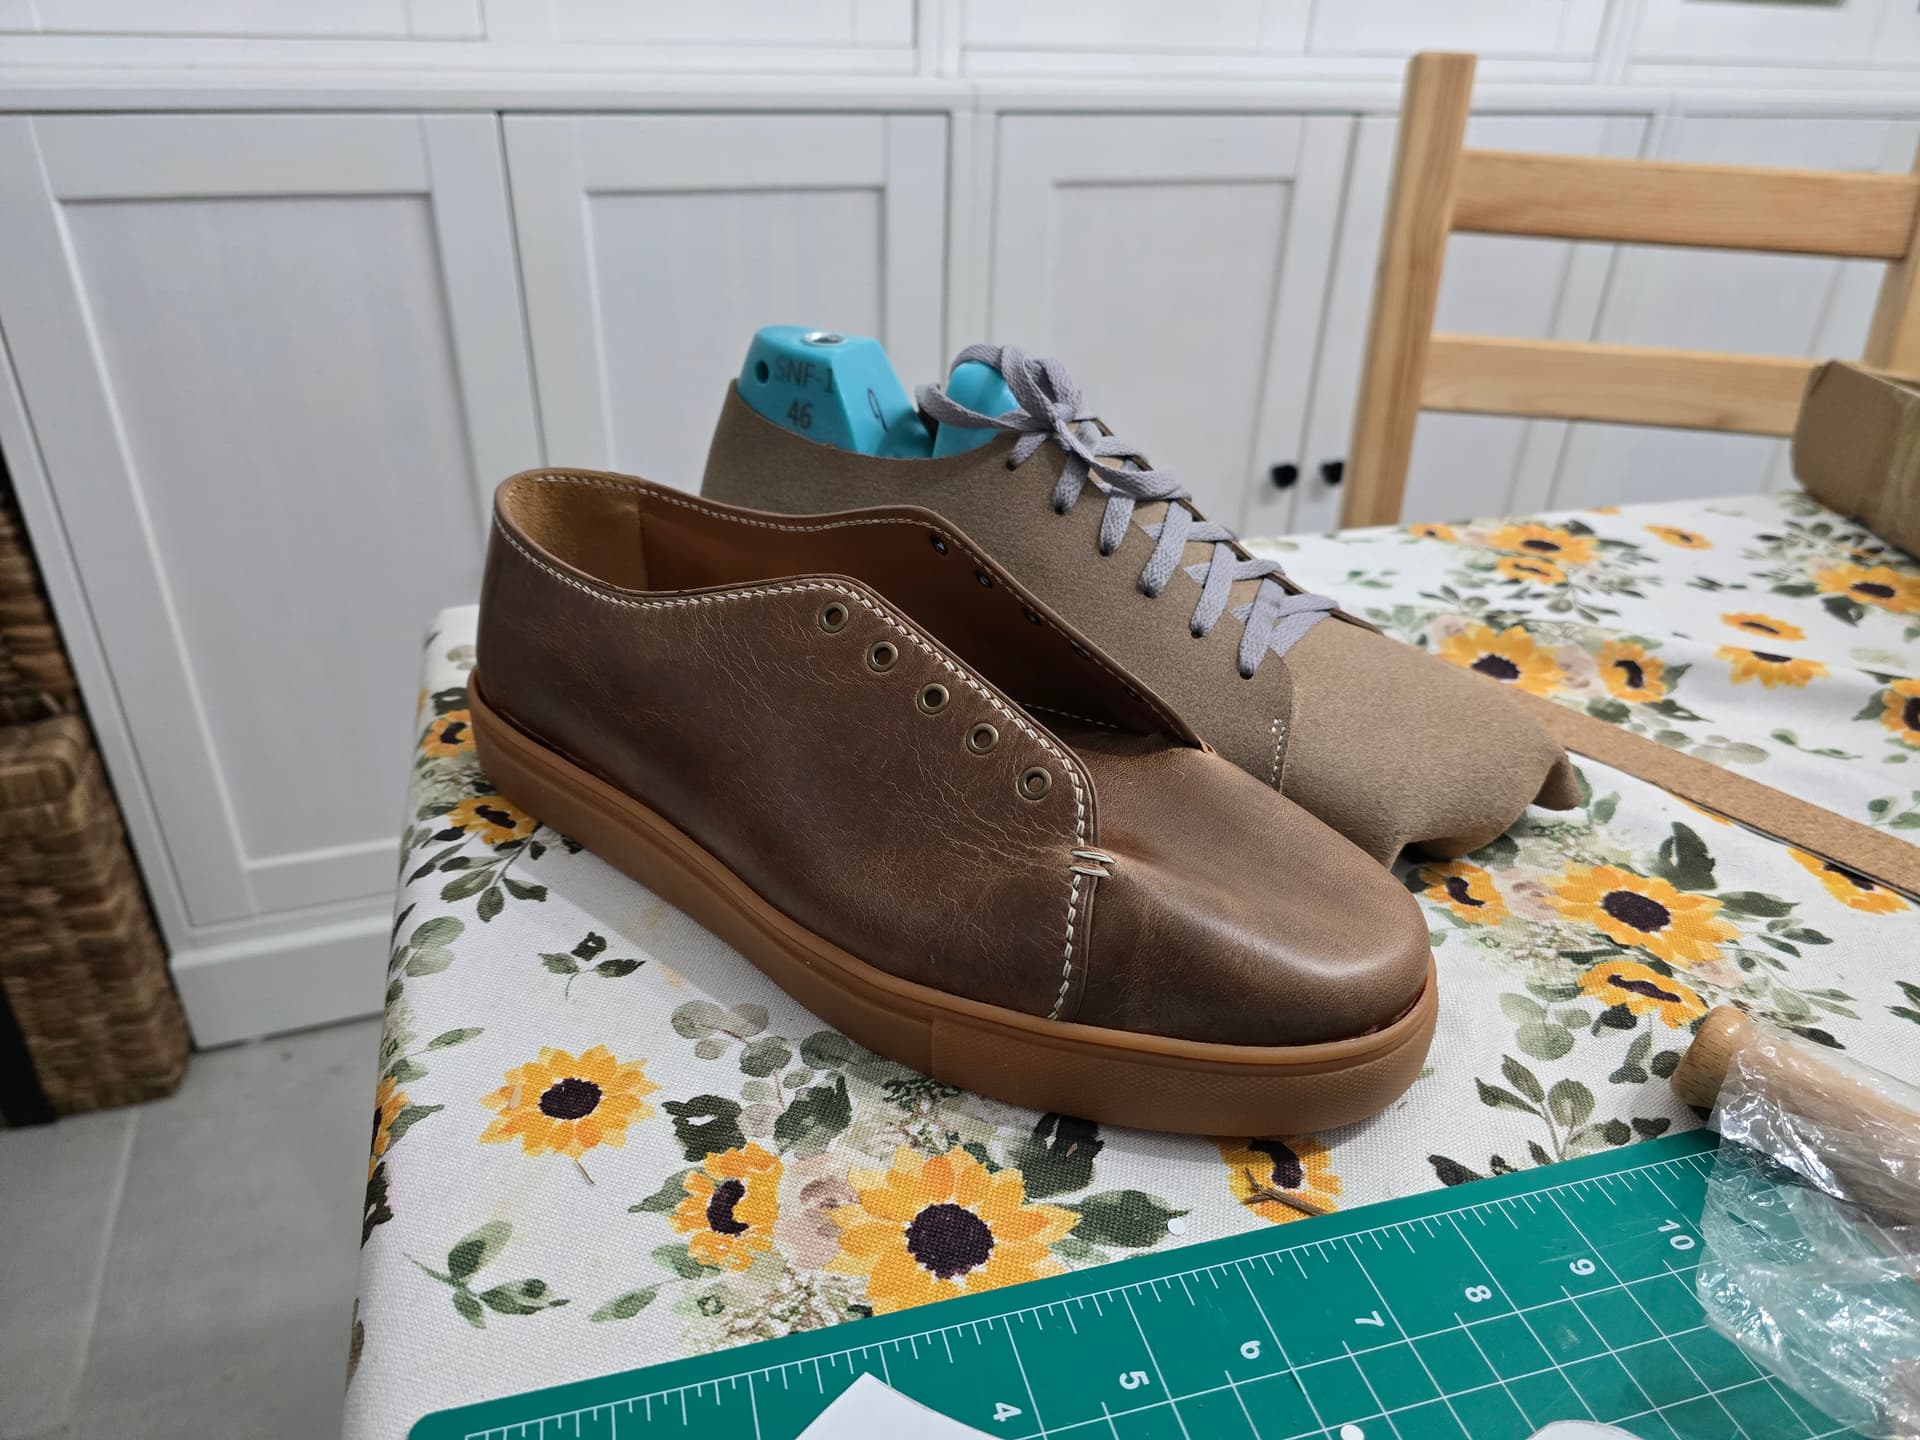
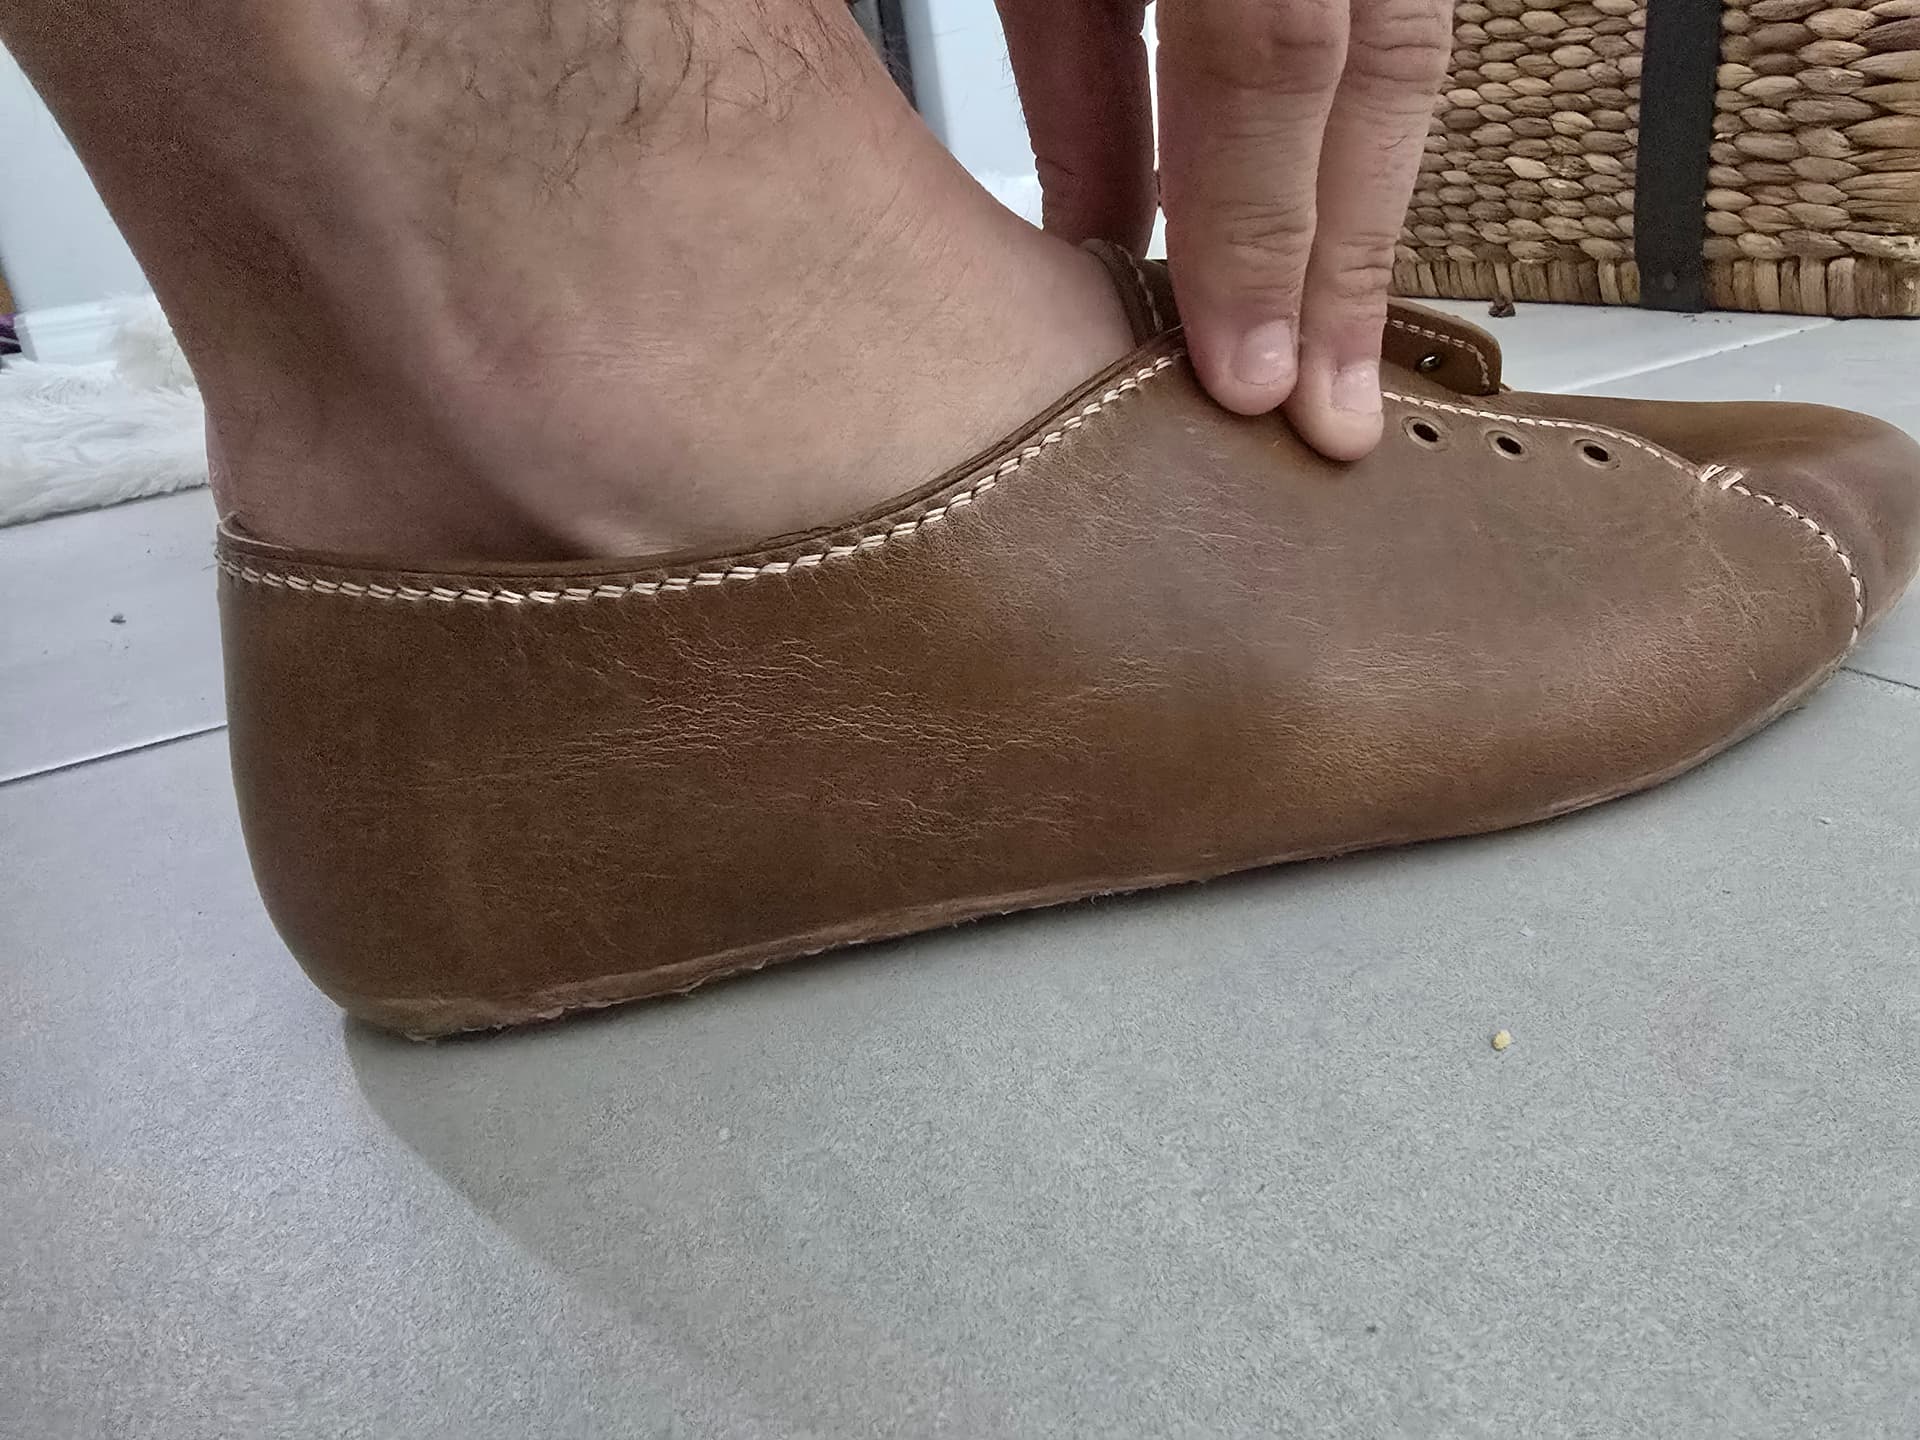
So I am doing a rev 2.0 to correct some of my mistakes from the first time around. They’re very much a super low, show all your ankle summer shoe. I want to add an extra eyelet up top to come up higher in the ankle. Also debating if I want to revisit some of the edge finishing. Currently, the uppers were made like I would a watch strap, with the edges creased and painted, etc.
The topline itself is only very slightly taller, the change is more of how far up the top of the foot it comes. I might add a little more dip for the outside malleolus, but not sure it is all that necessary.
Not sure if you find comparison helpful, but I found these free patterns (I have different rubber cup soles than this website, mine is like yours) and I am starting from there in felt, adding a backstrap, and adjusting as needed.
How did you do that lining in there? Is the back center lining thicker veg tan than the rest in there? Would a toe box stiffener be weird in sneakers?
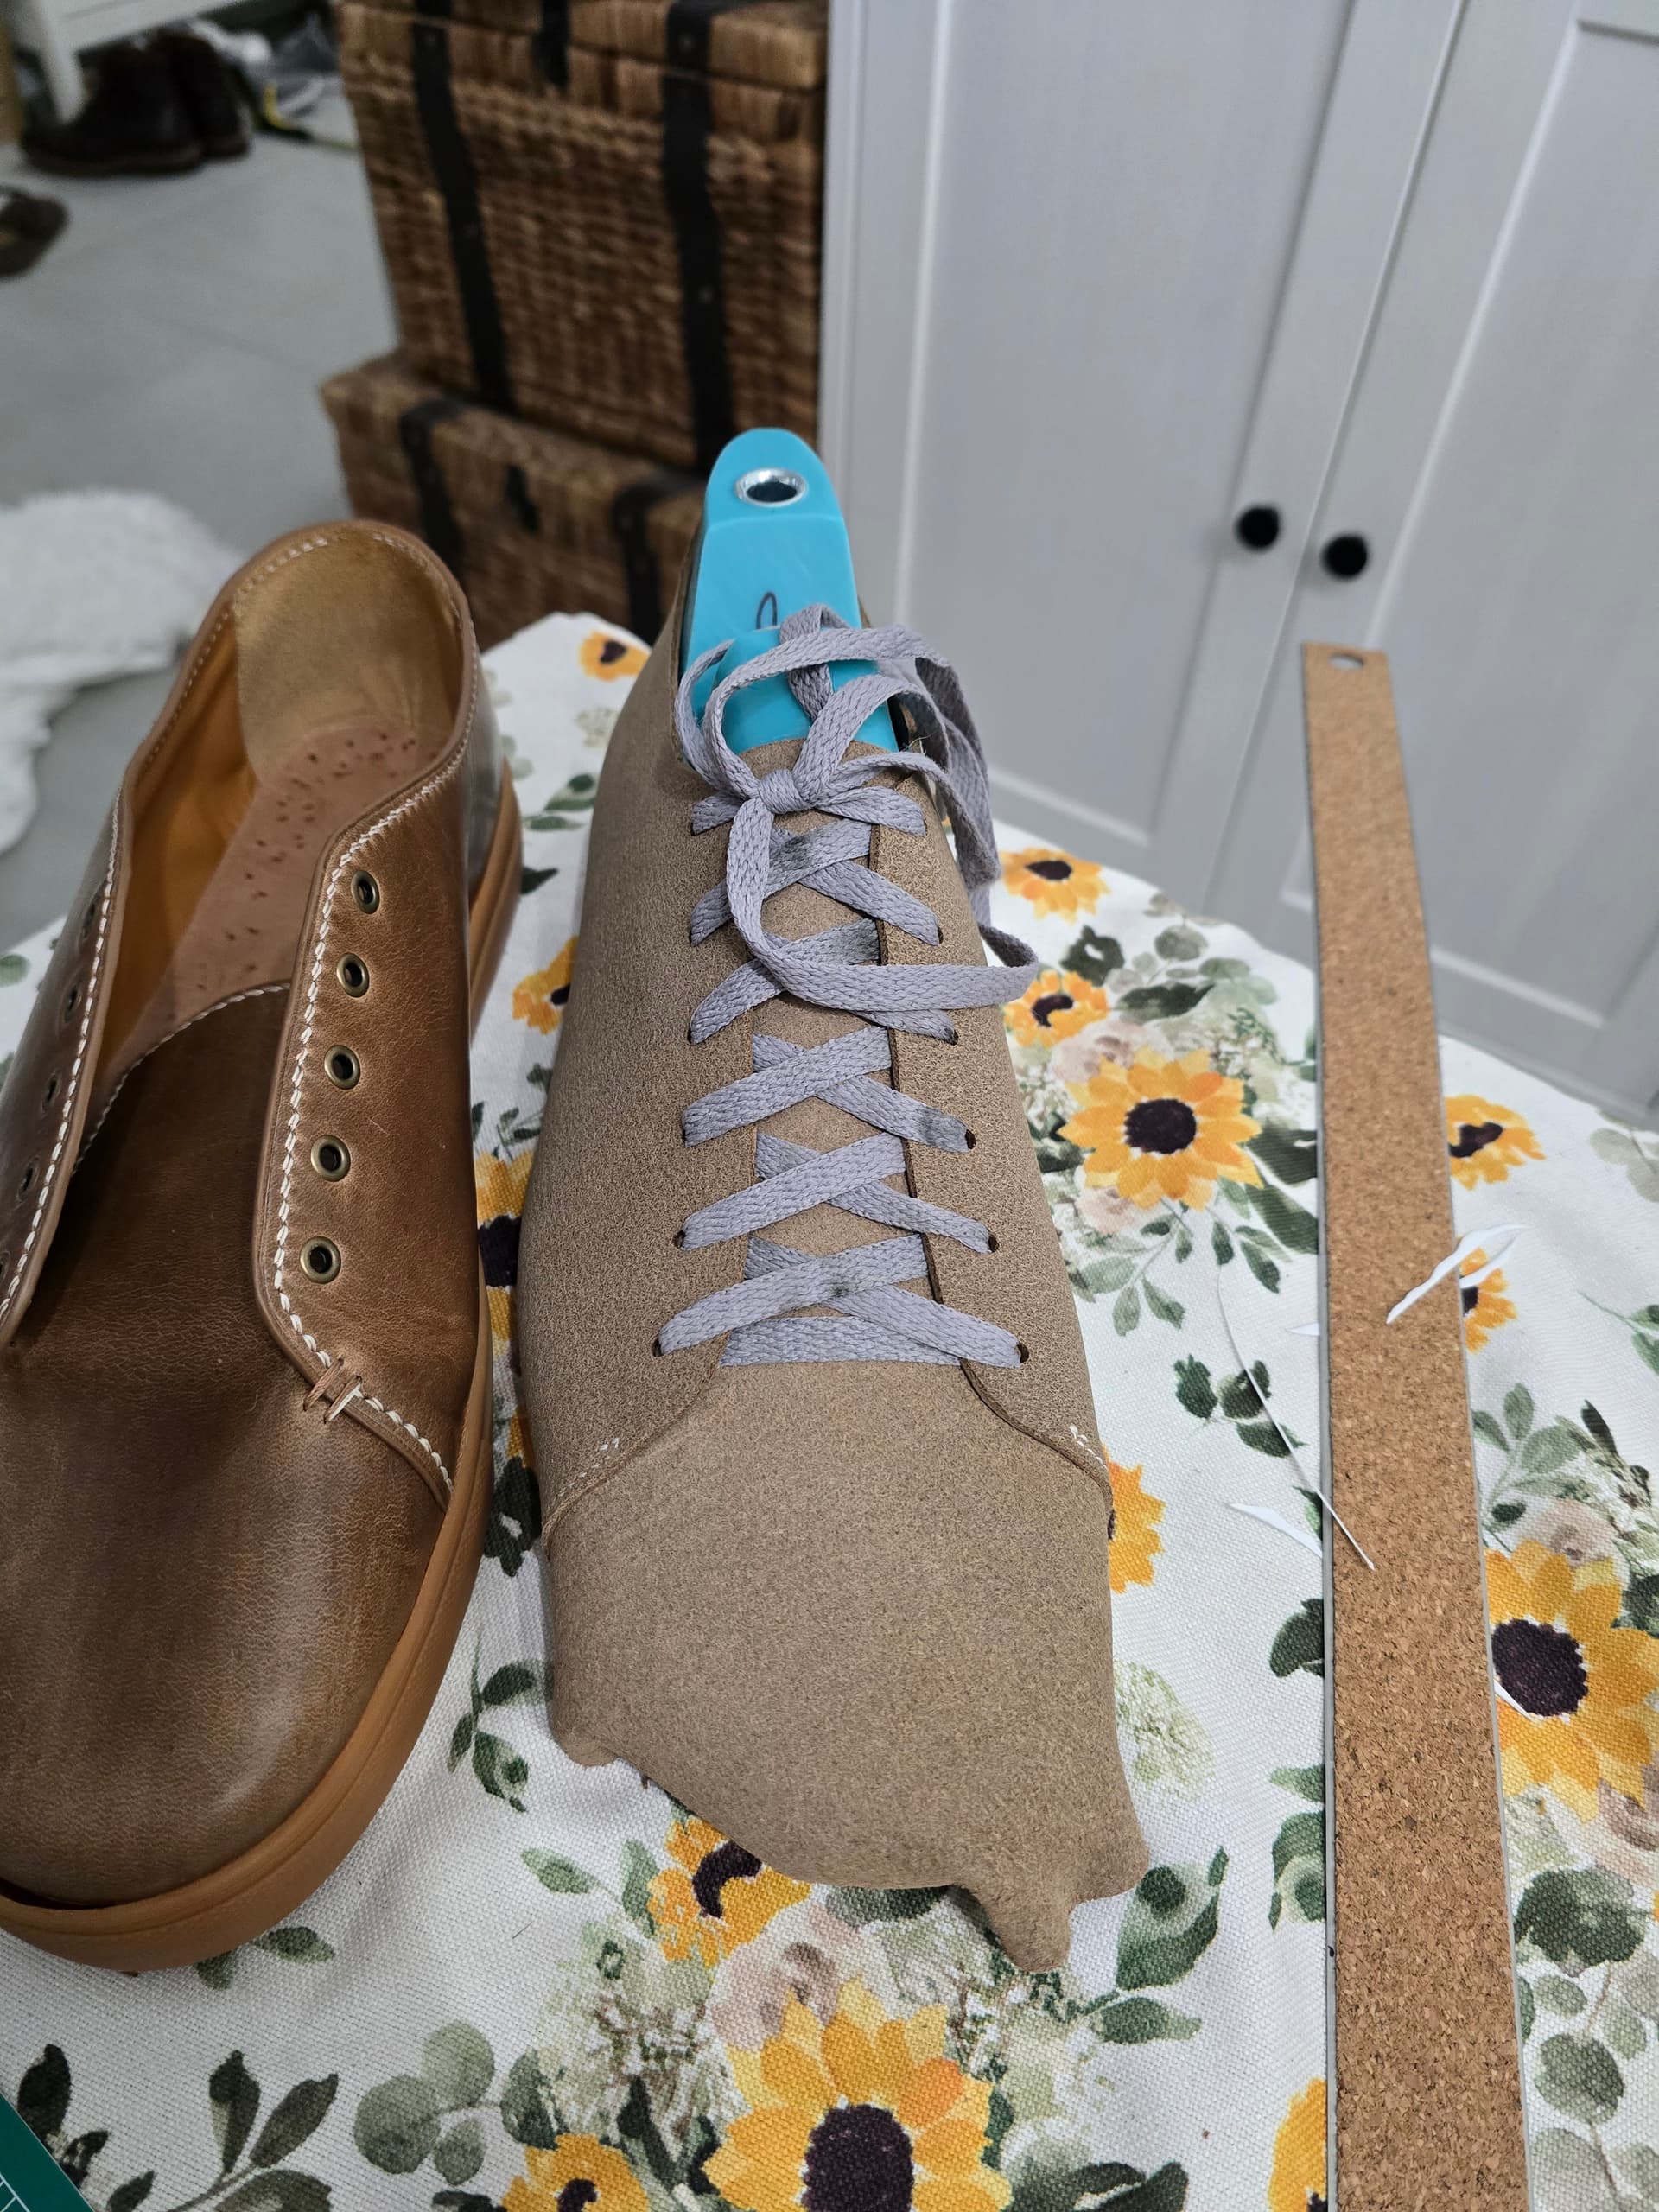
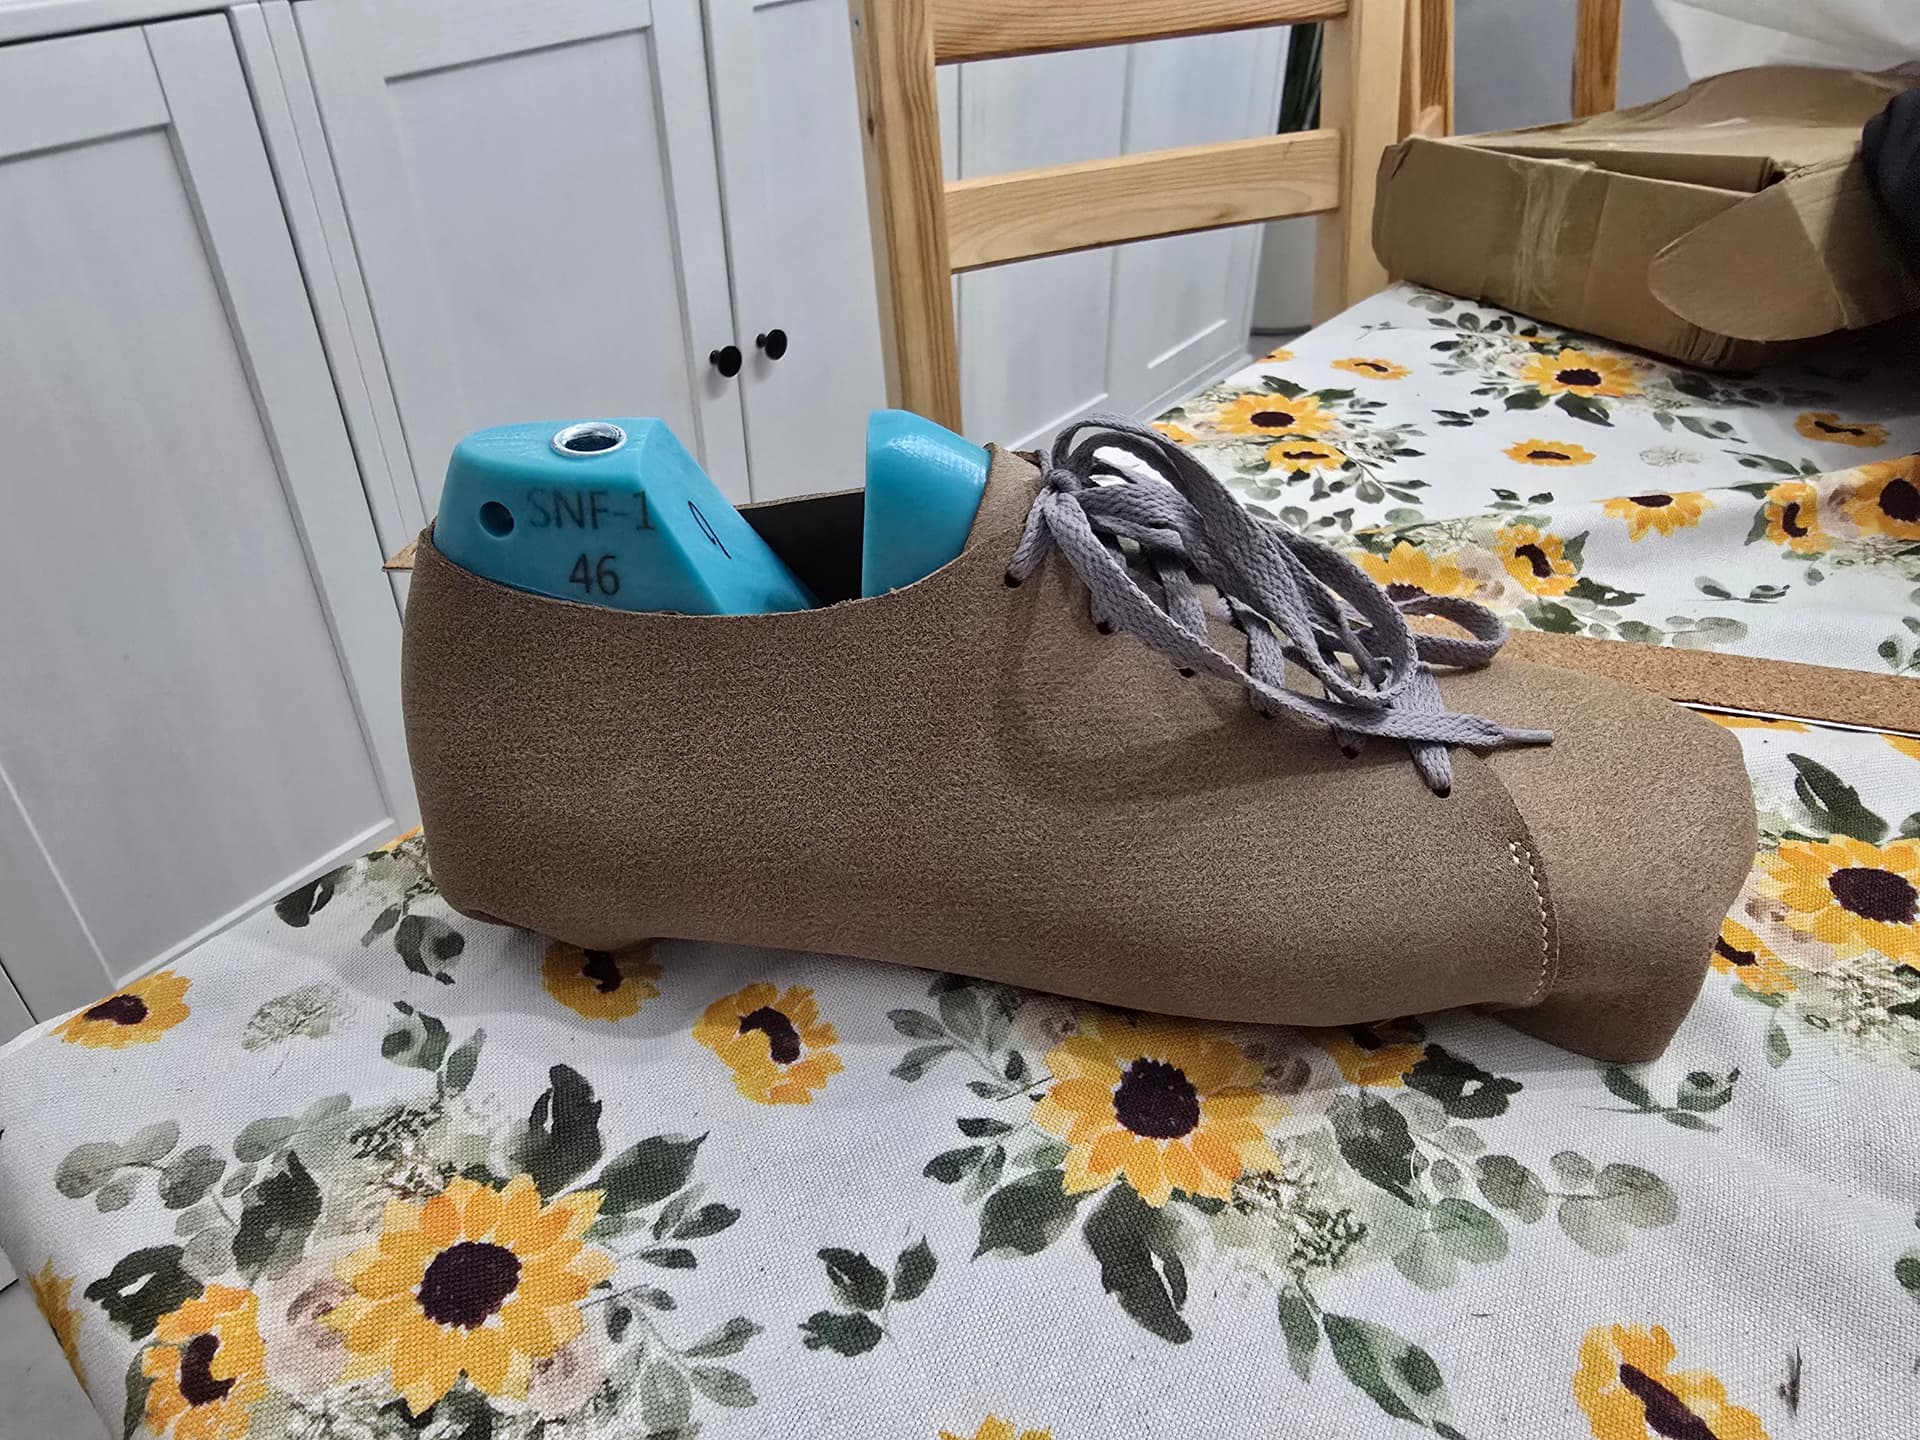
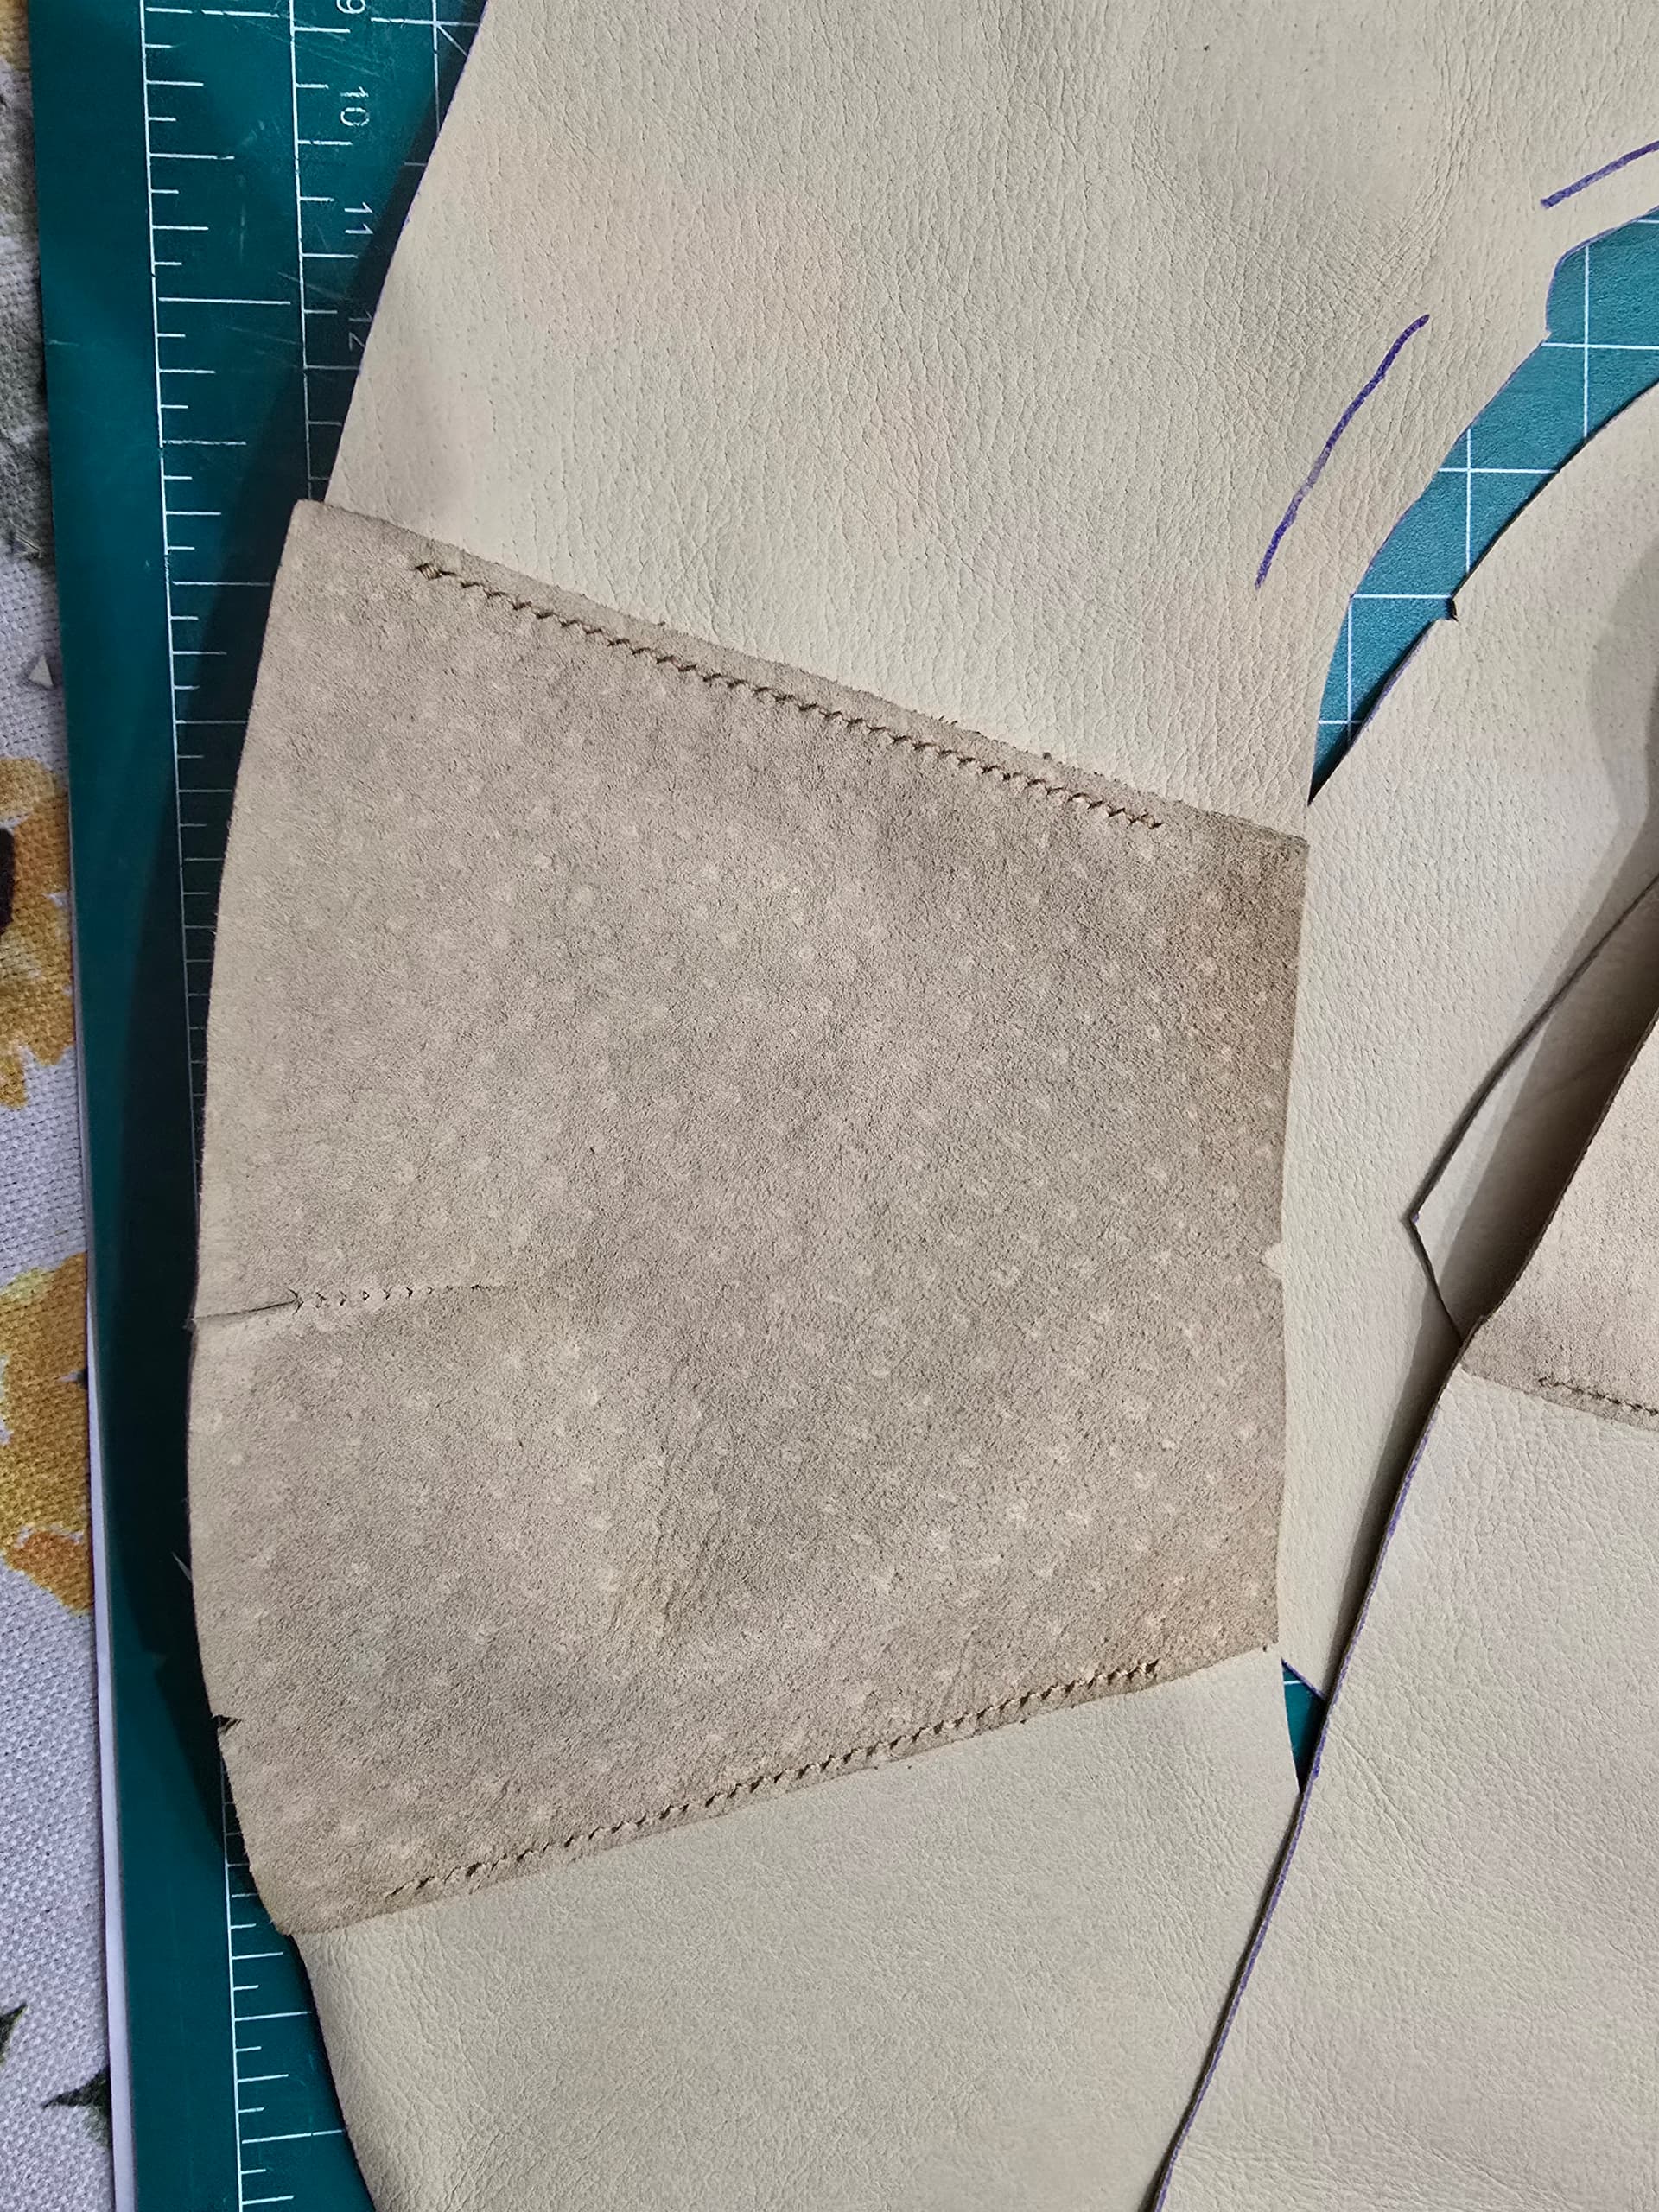
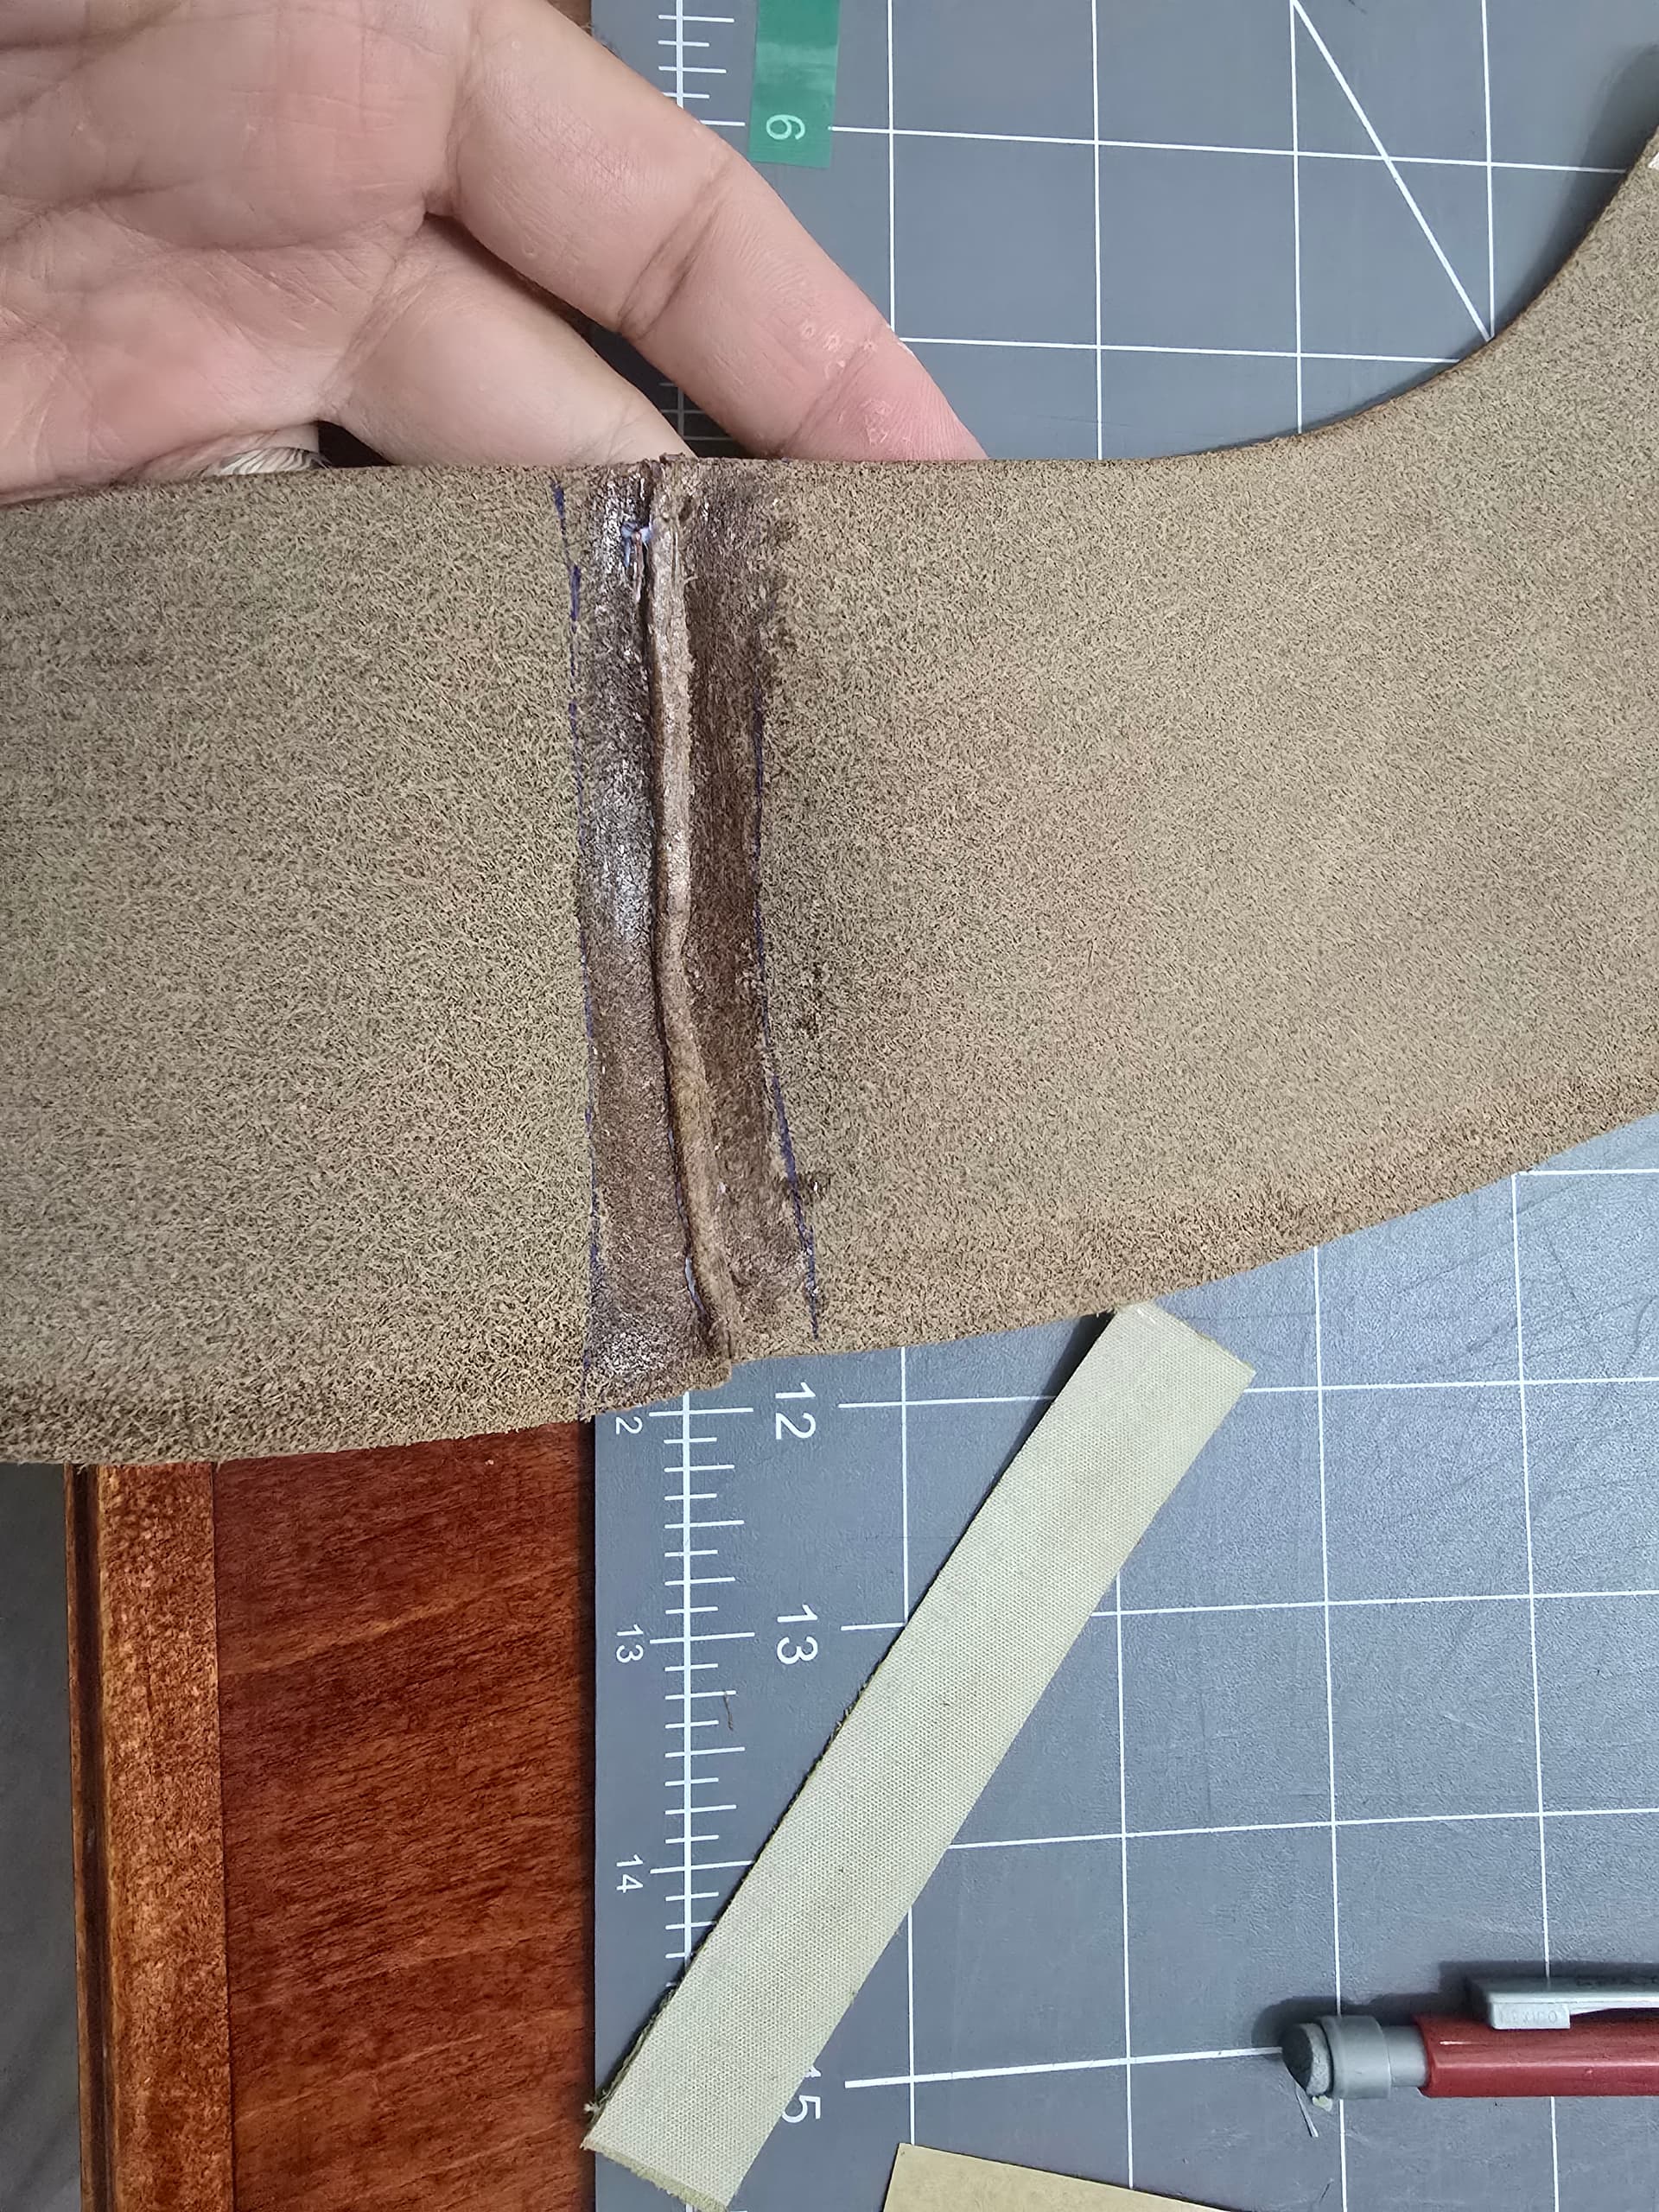
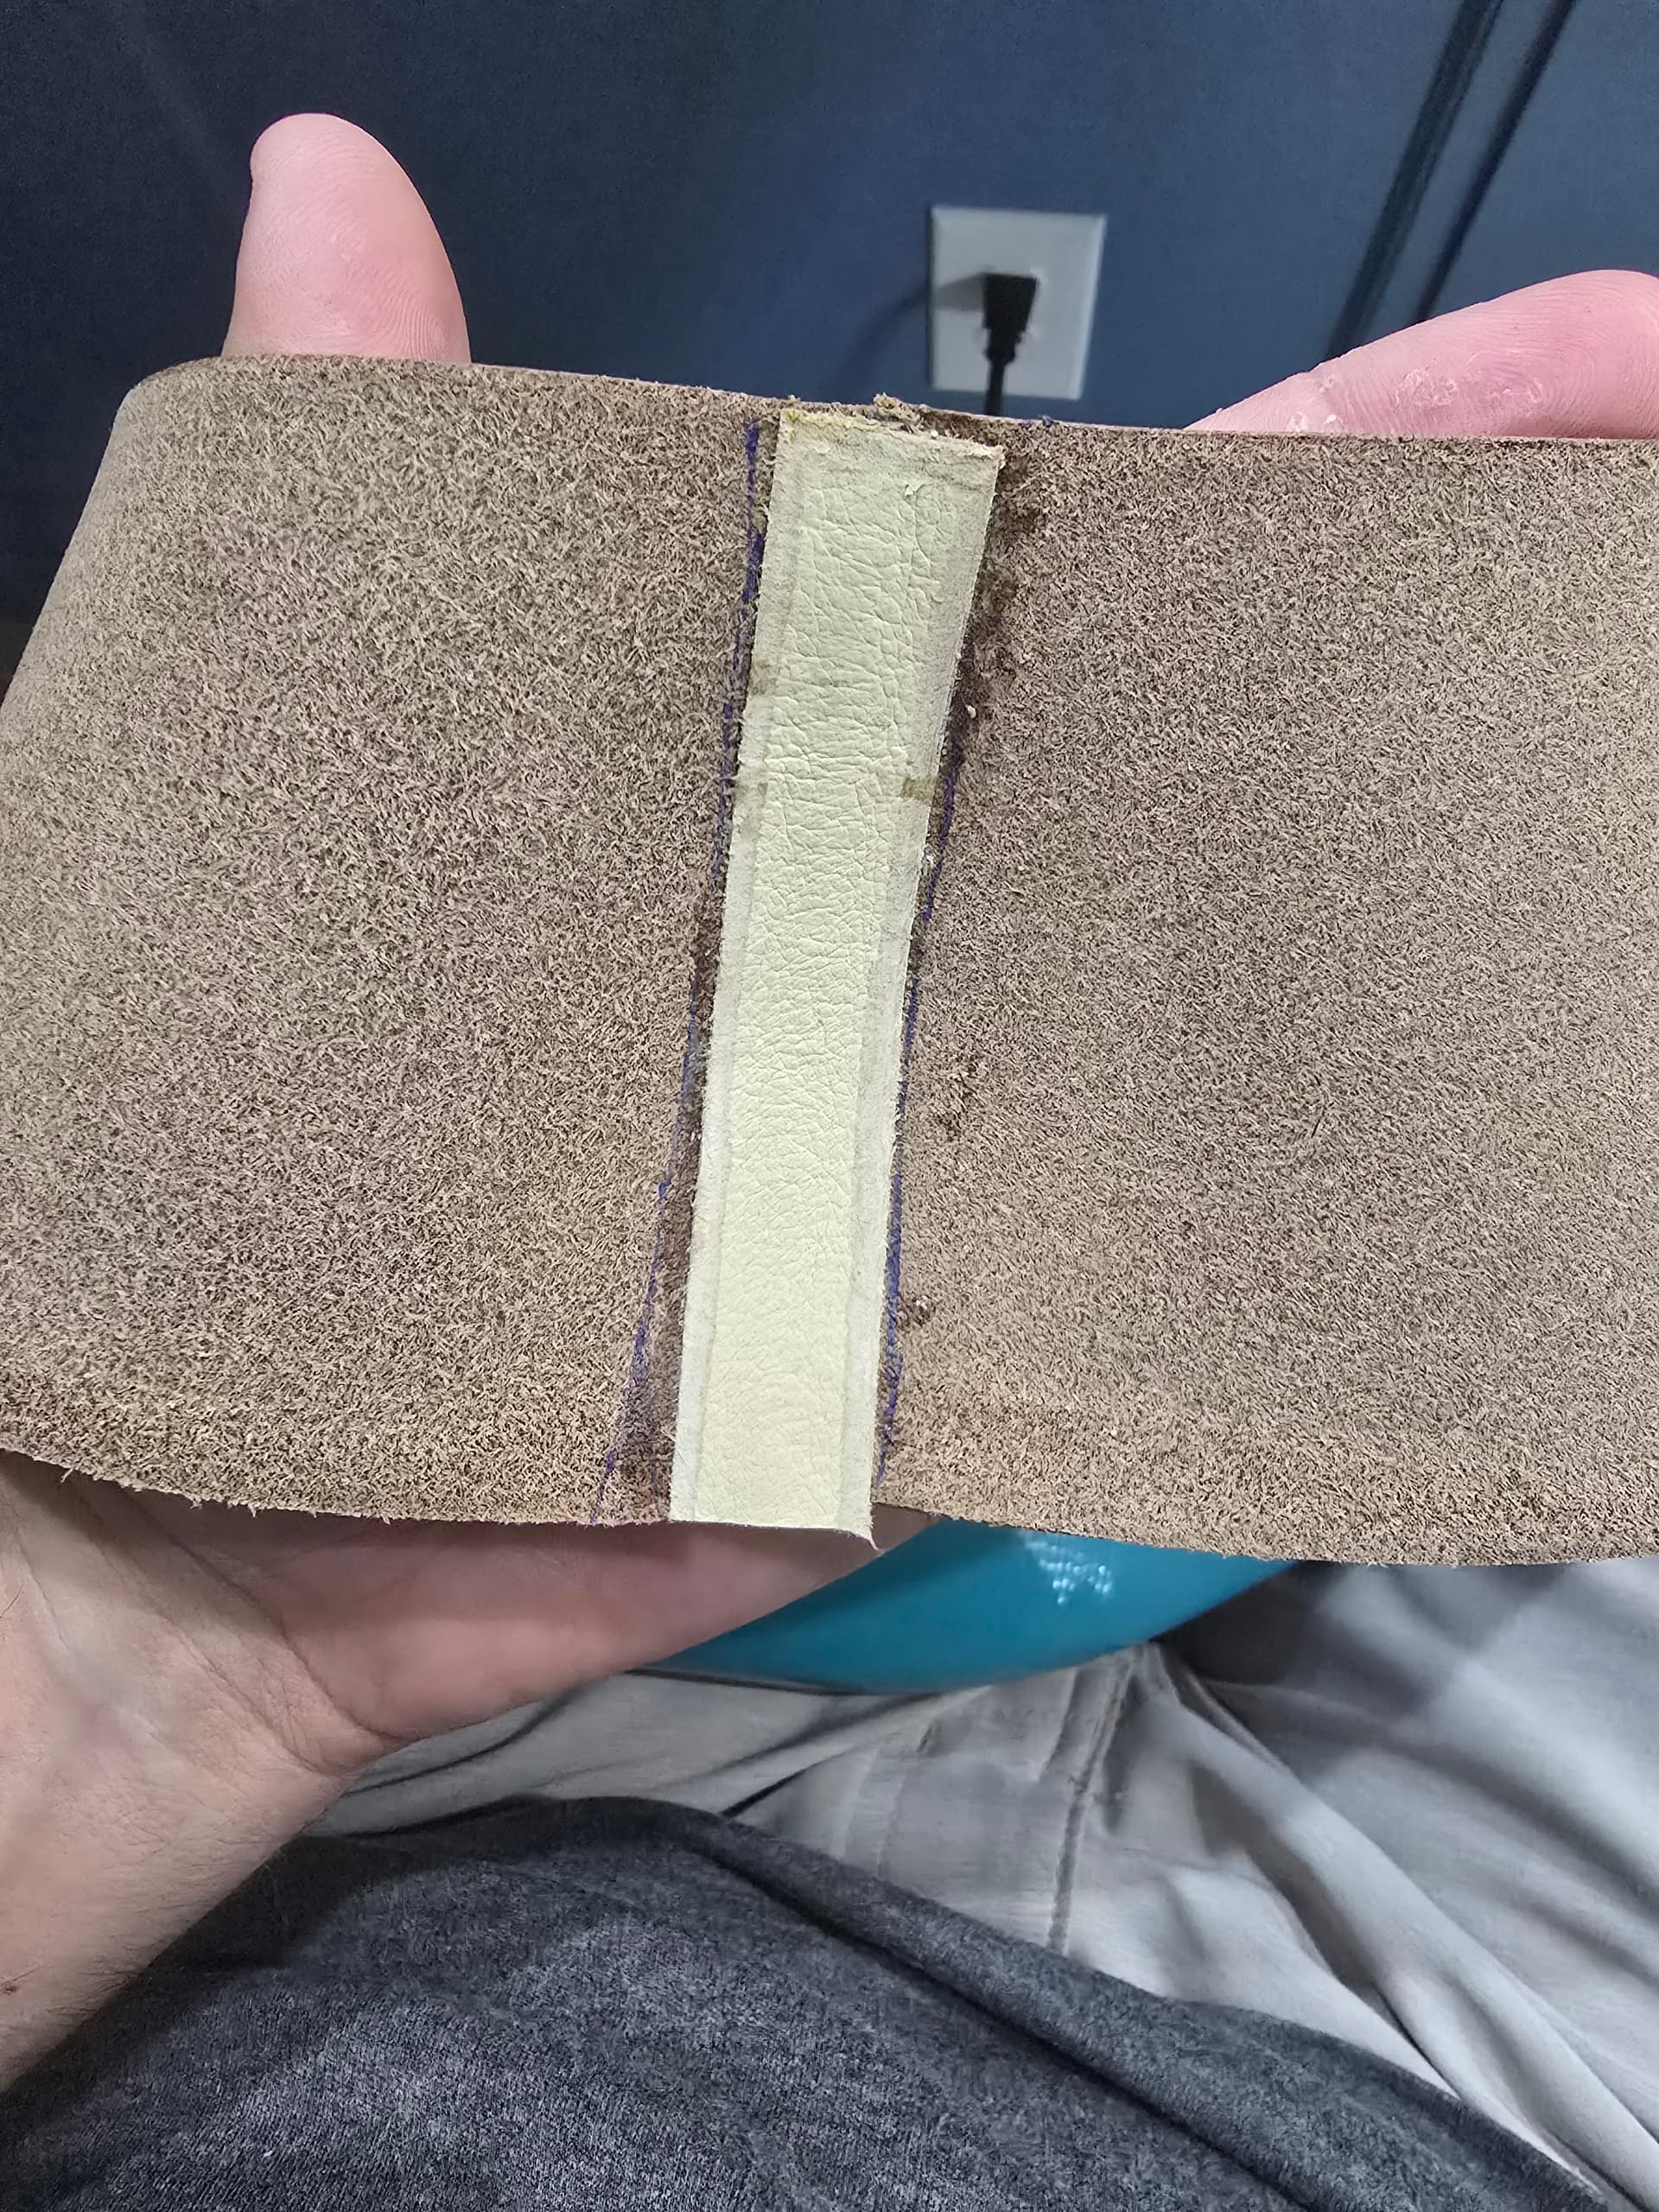
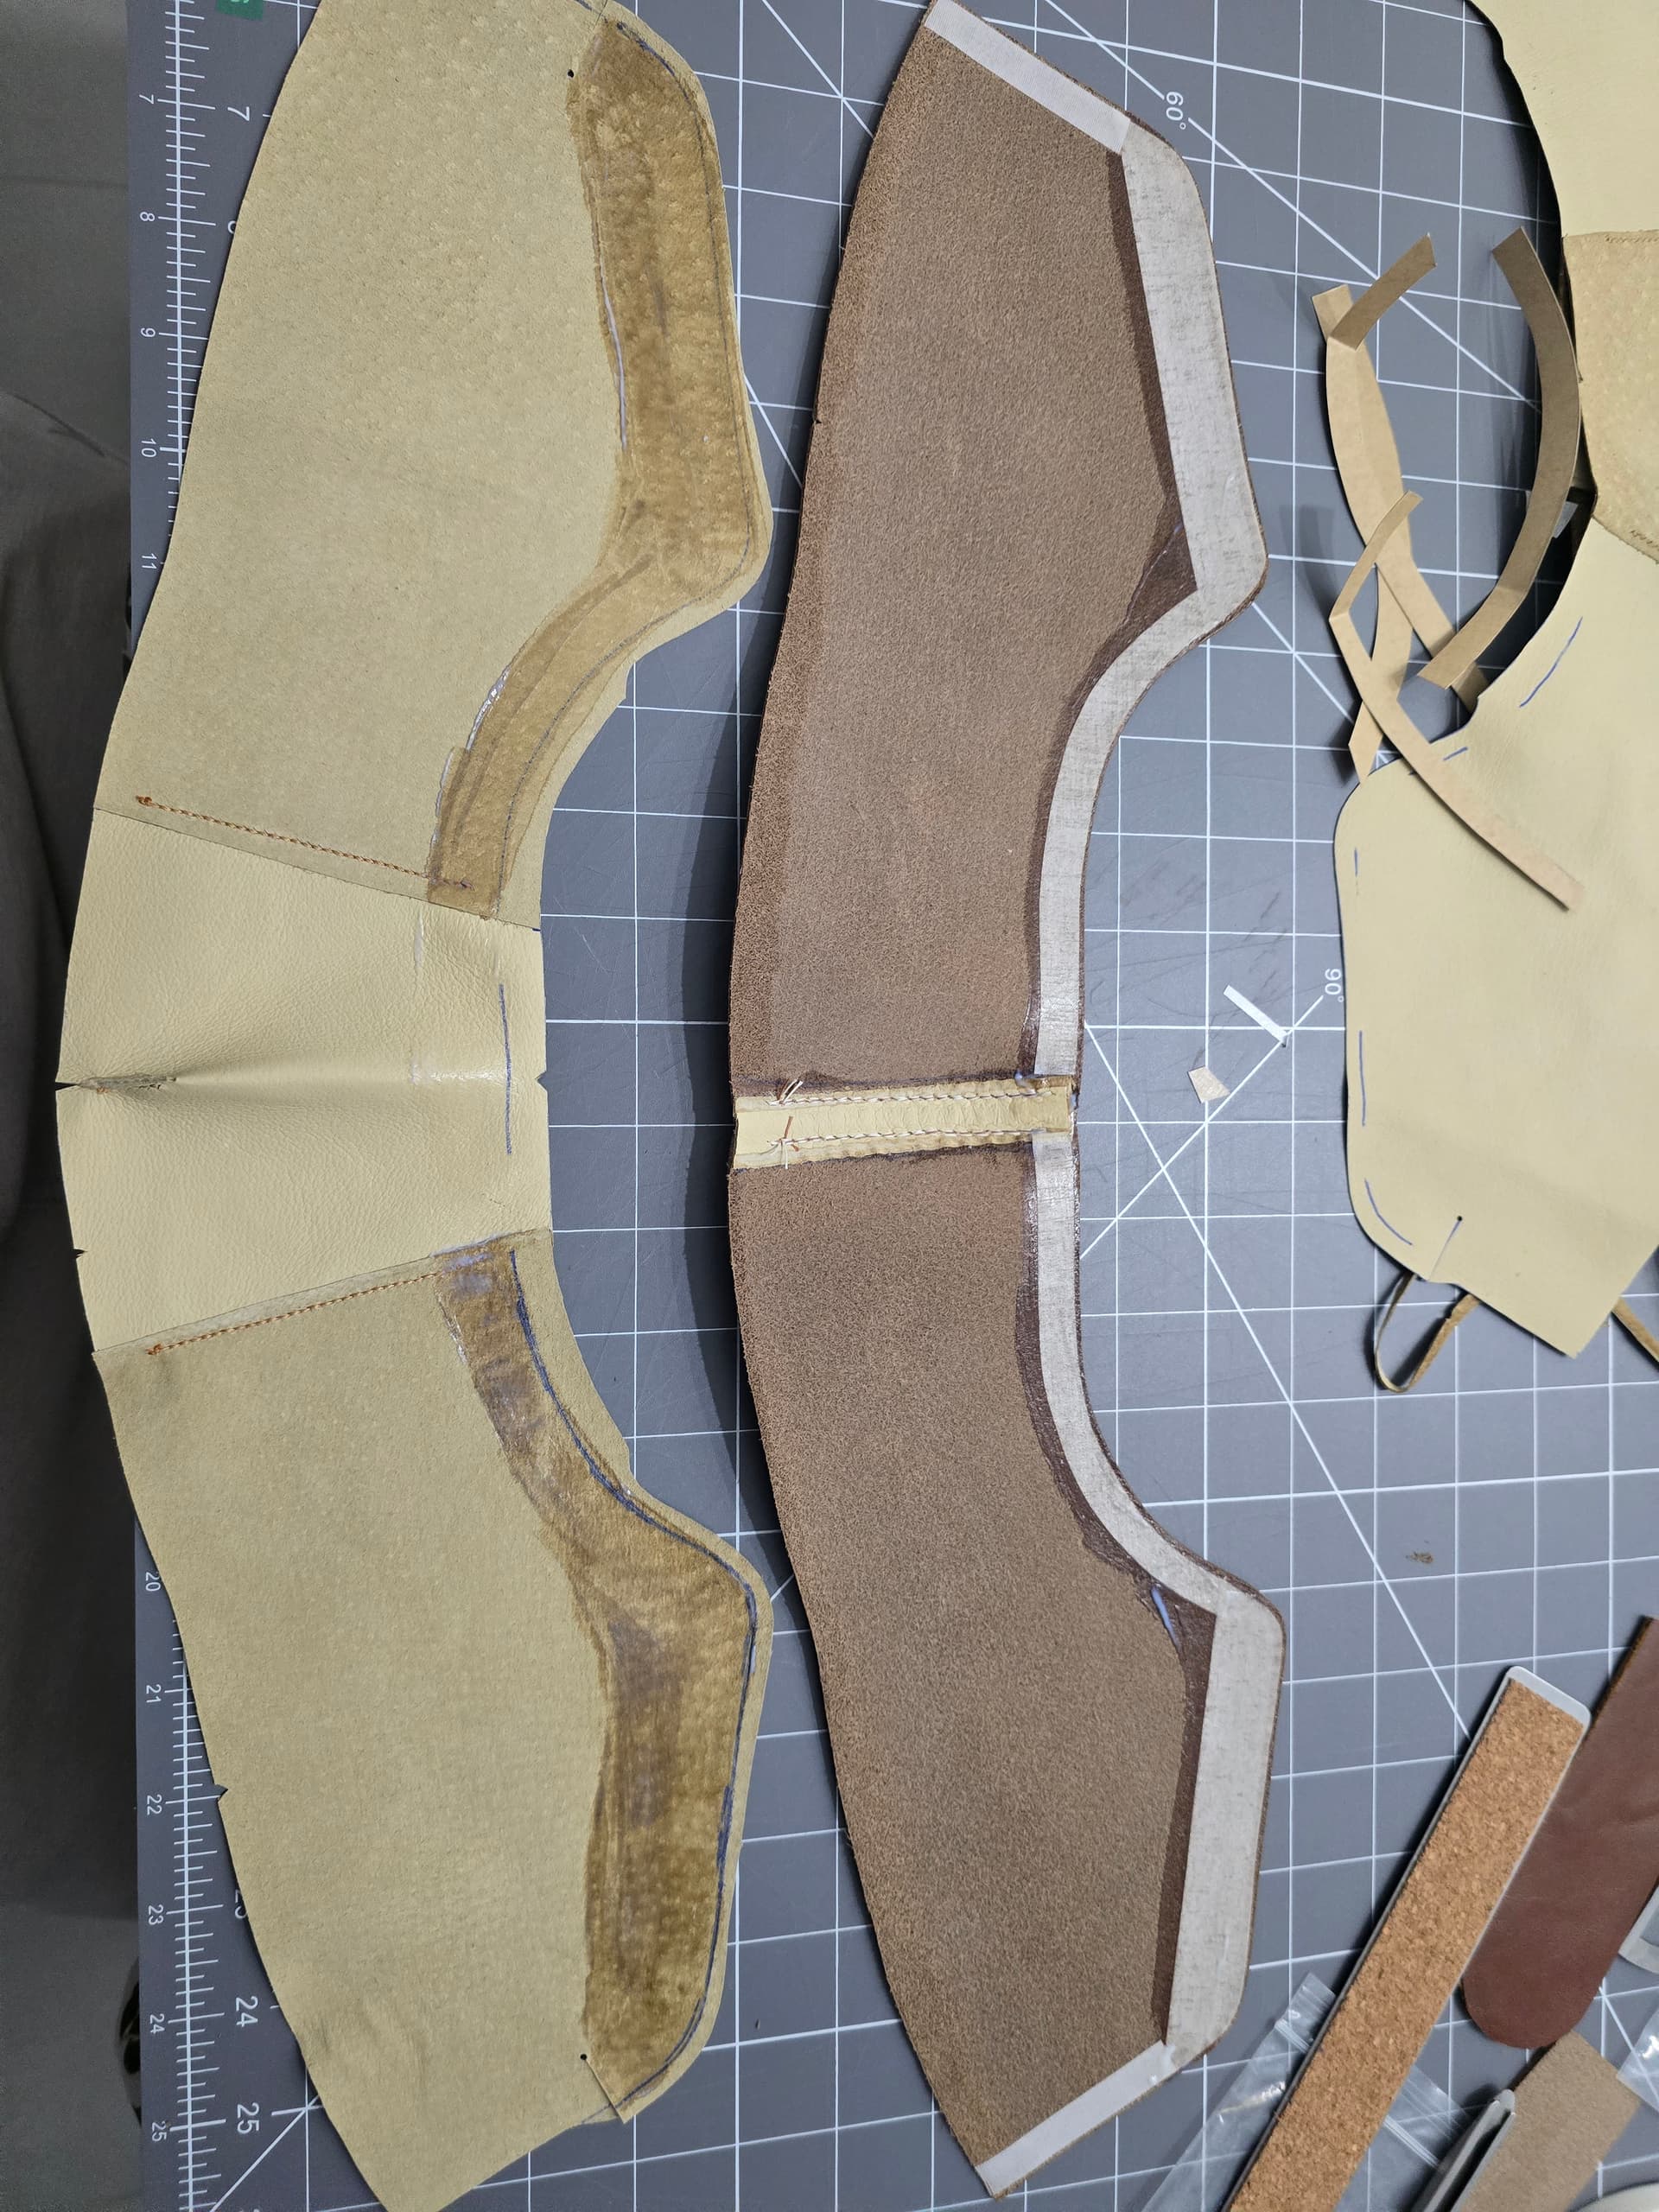
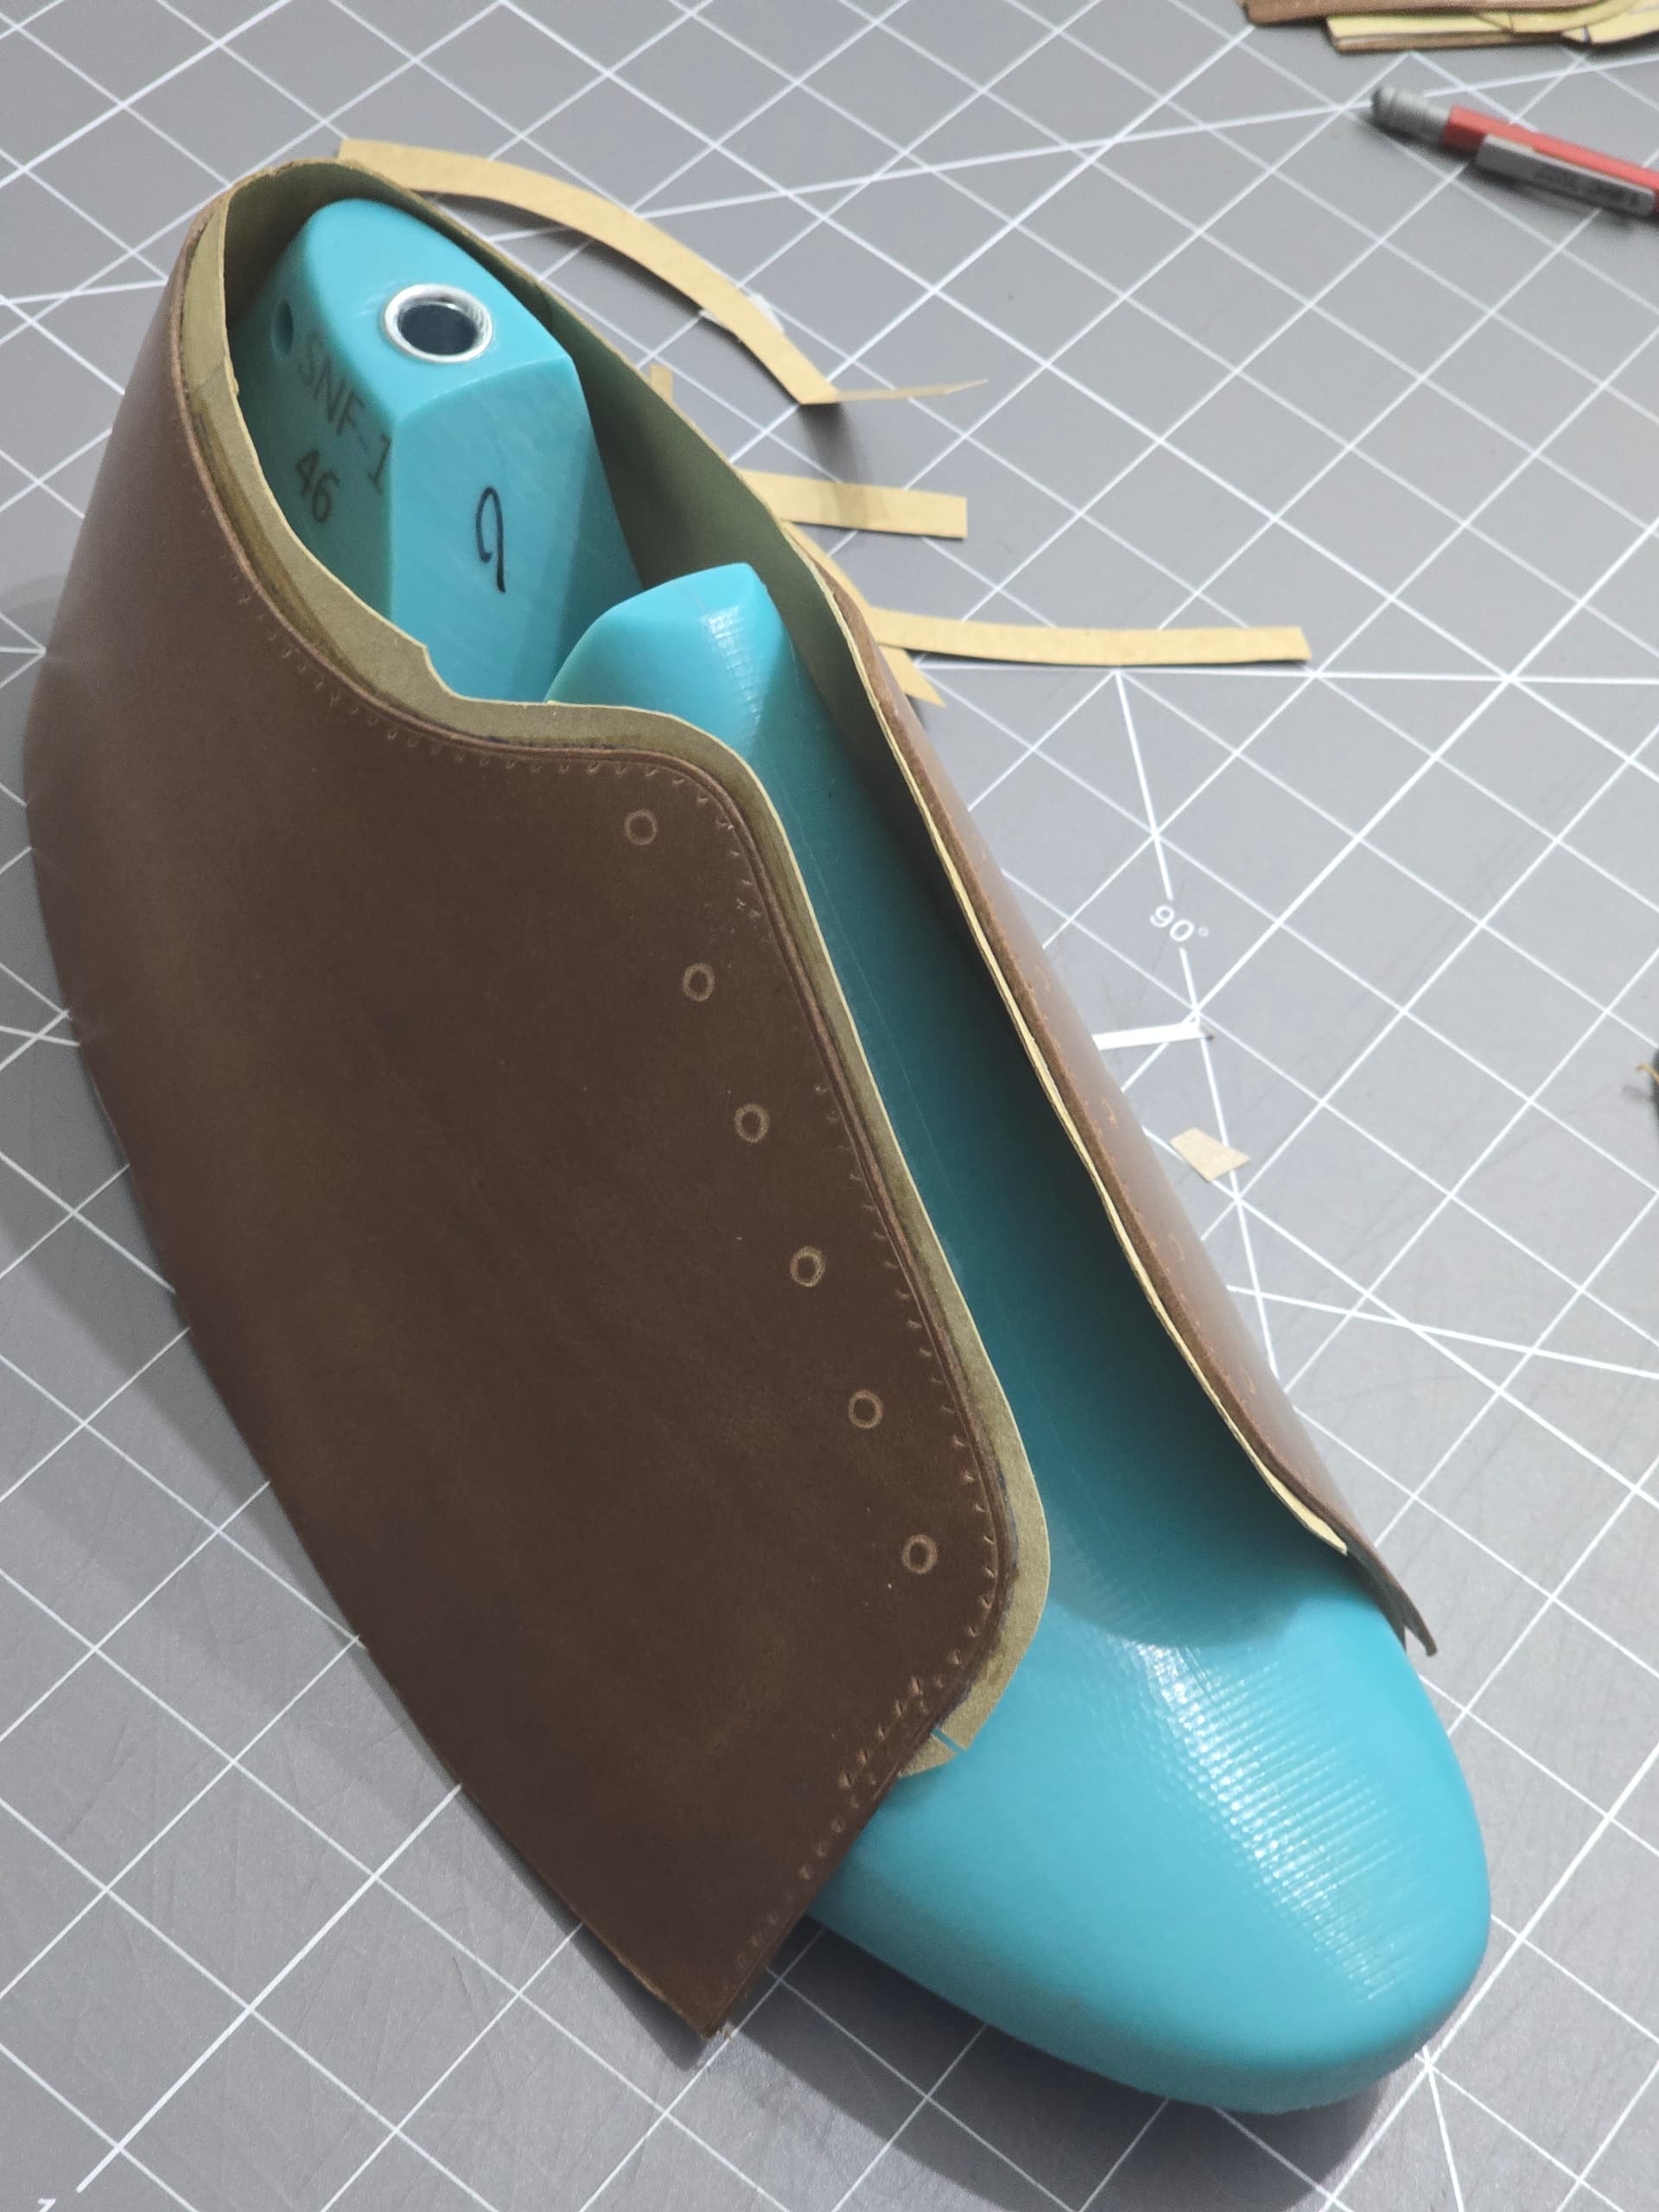
Right now, the lining is all the same thickness. The back ankle area is just inversed so the roughout side of the lining is expose to give a bit more grip. Beyond that, what are you curious about on the lining? I can take some more pictures clarifying as I start to assemble the uppers.
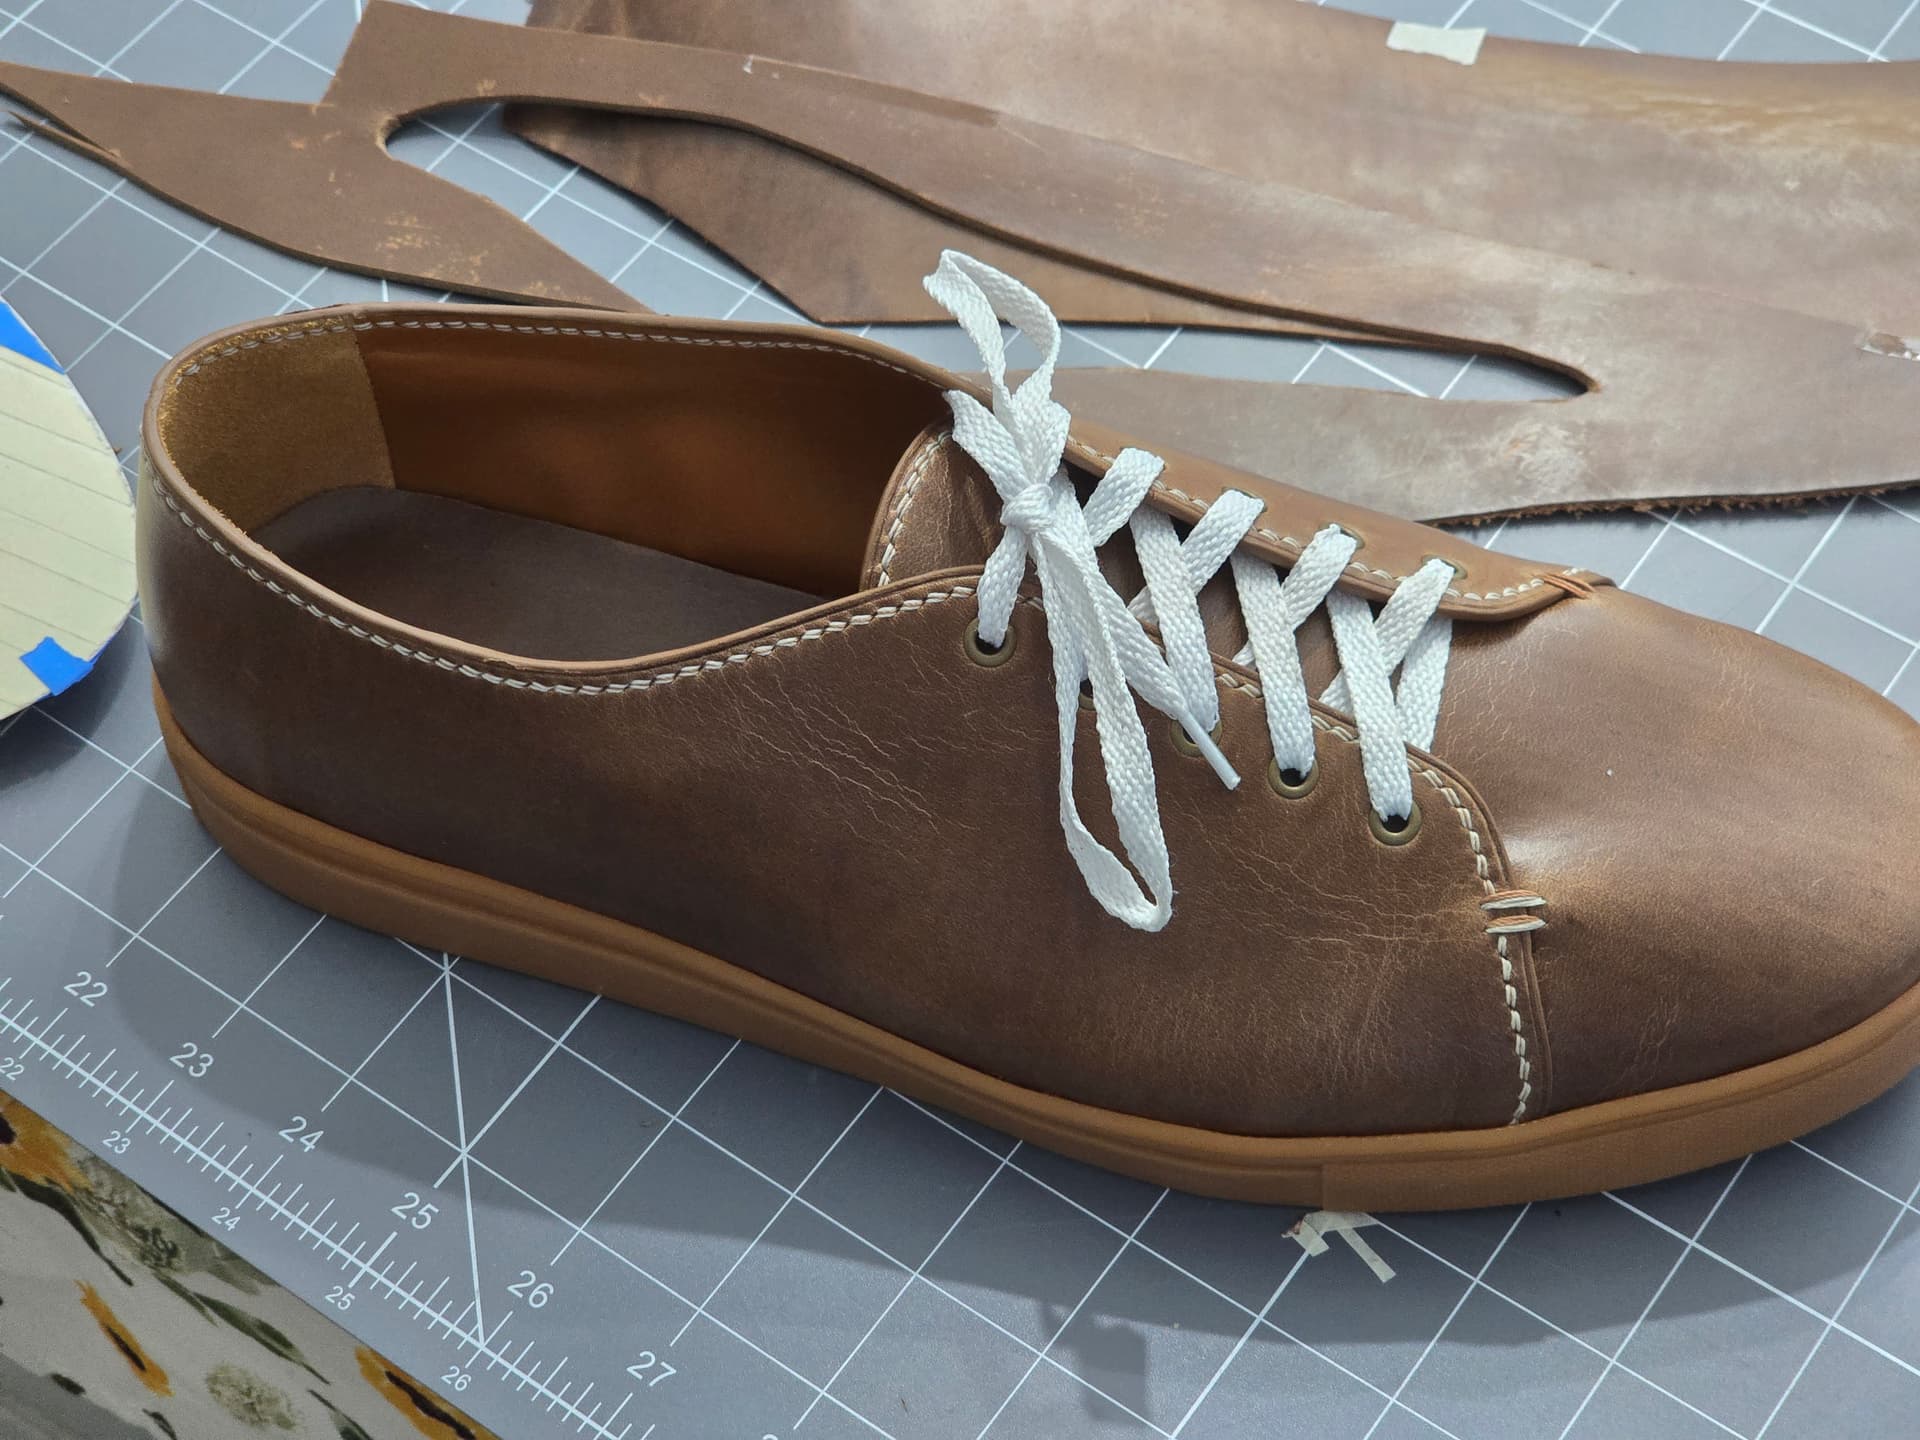
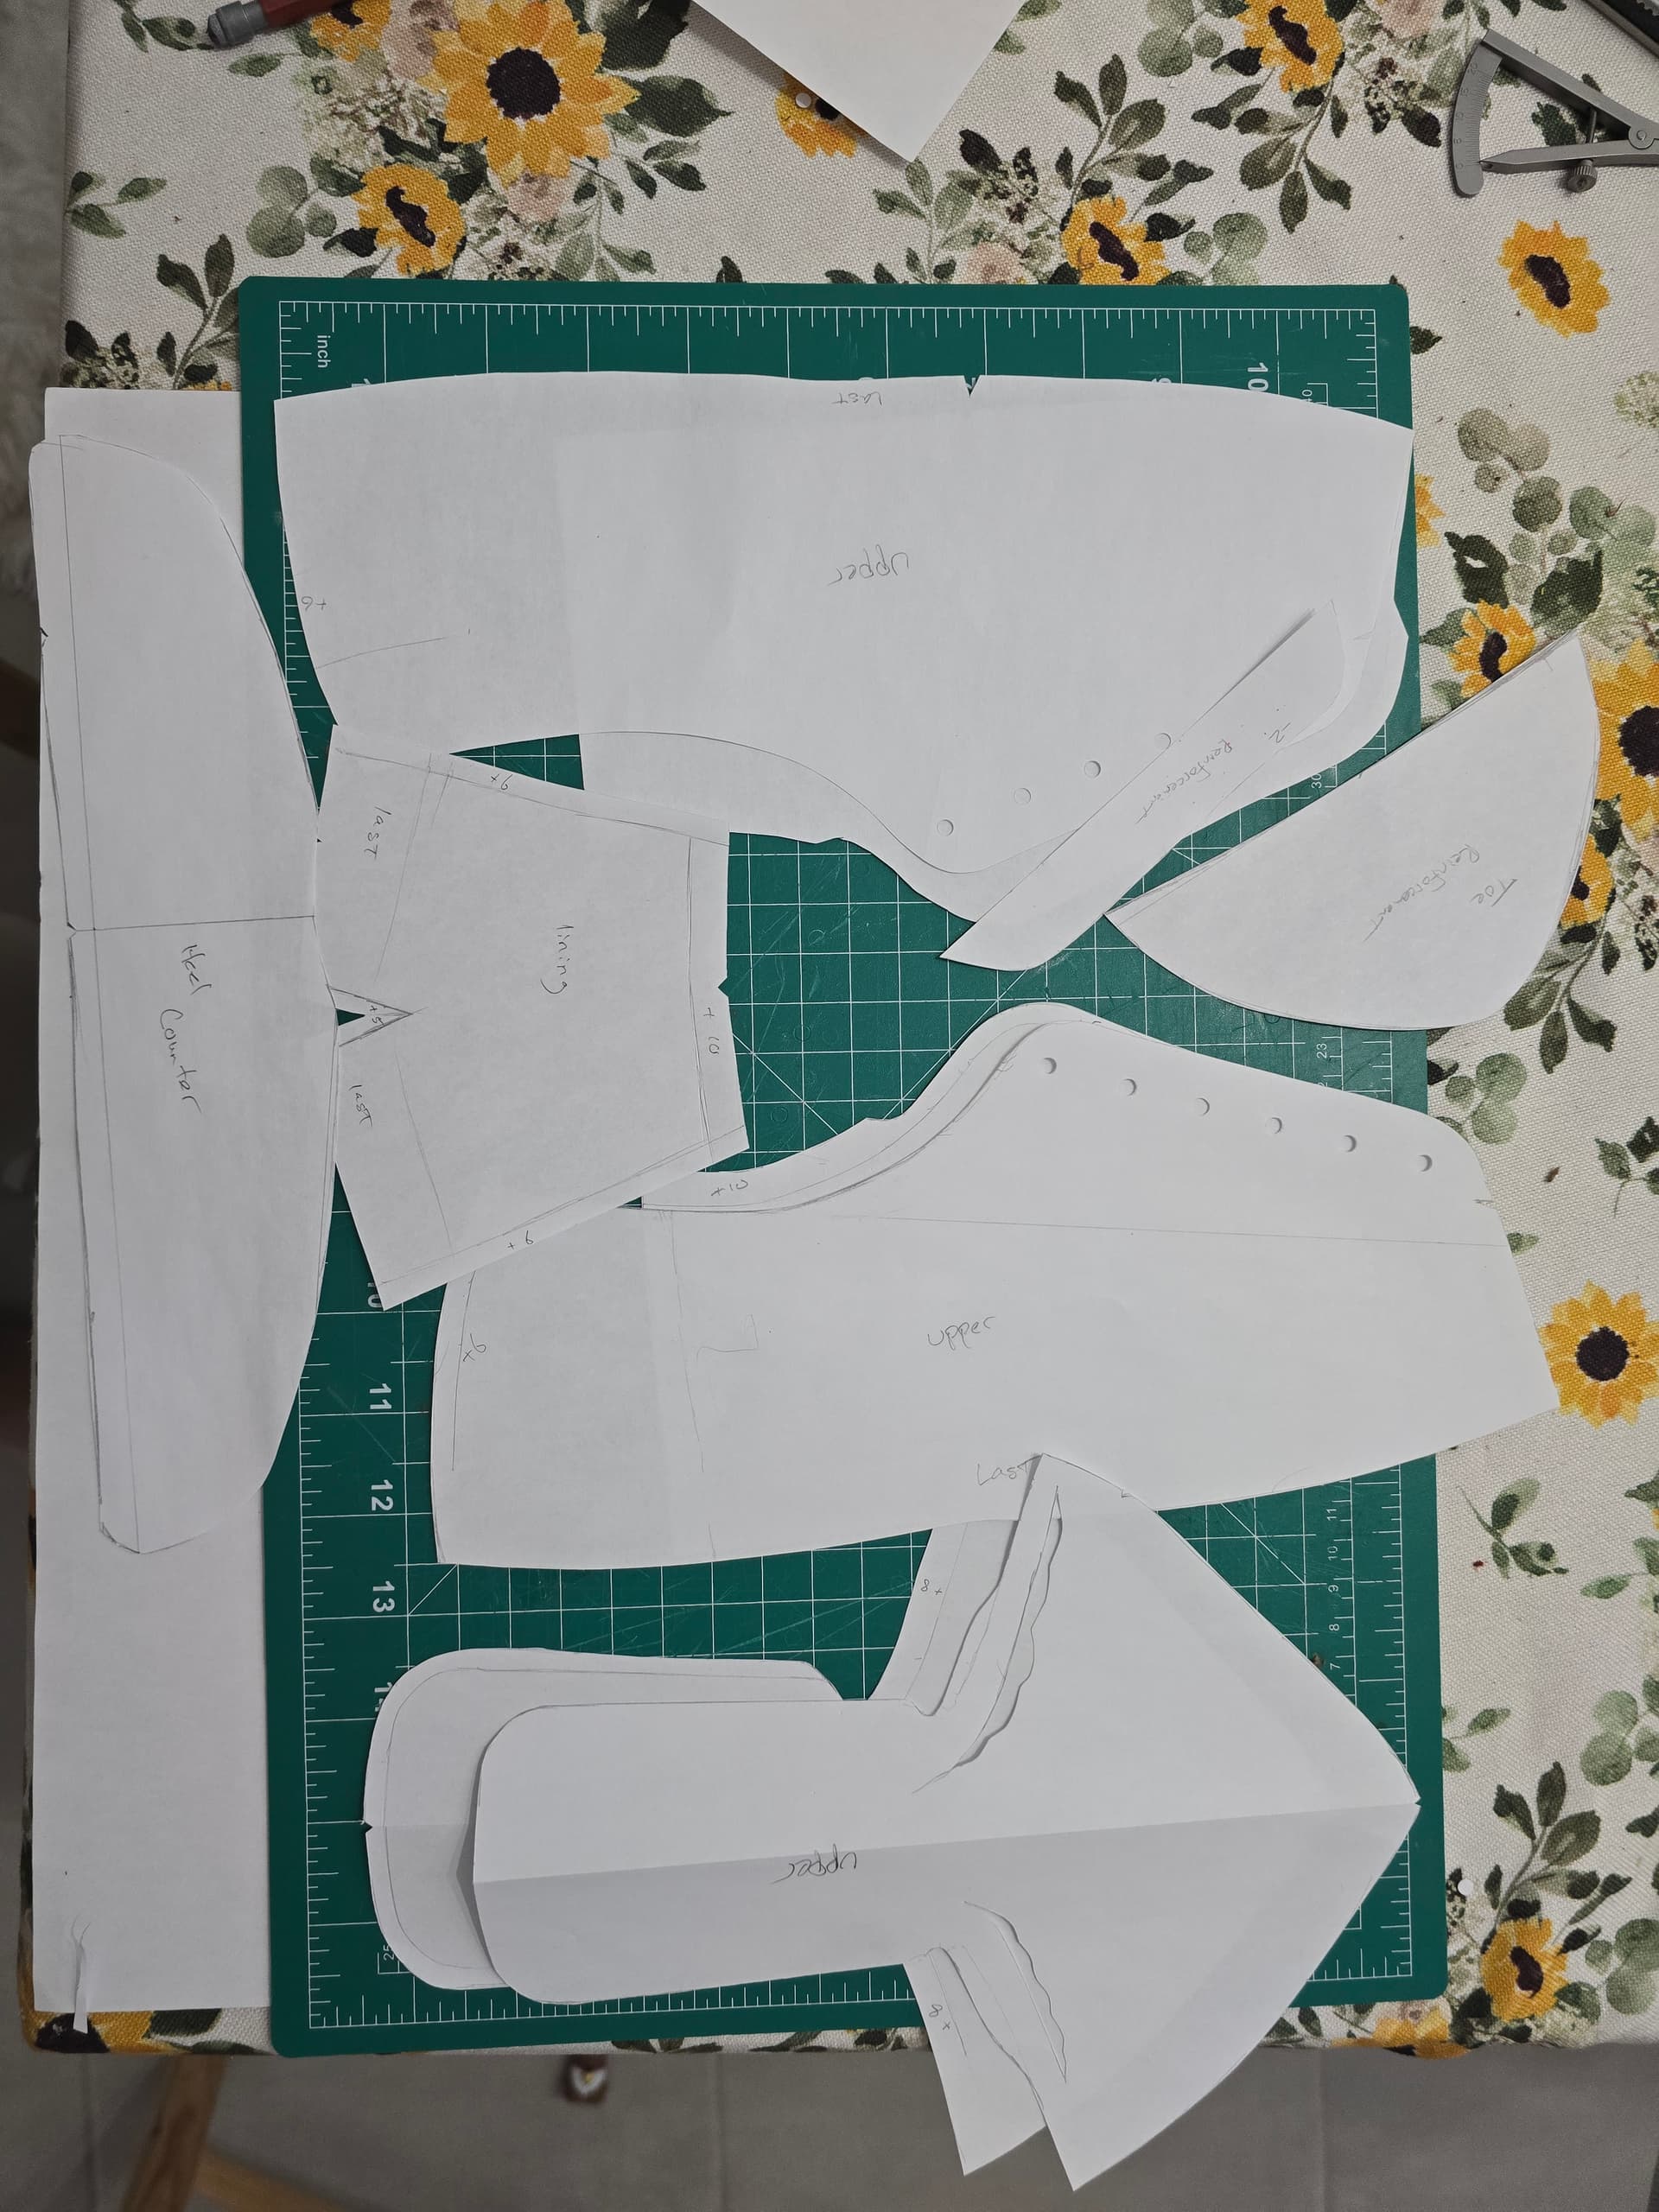
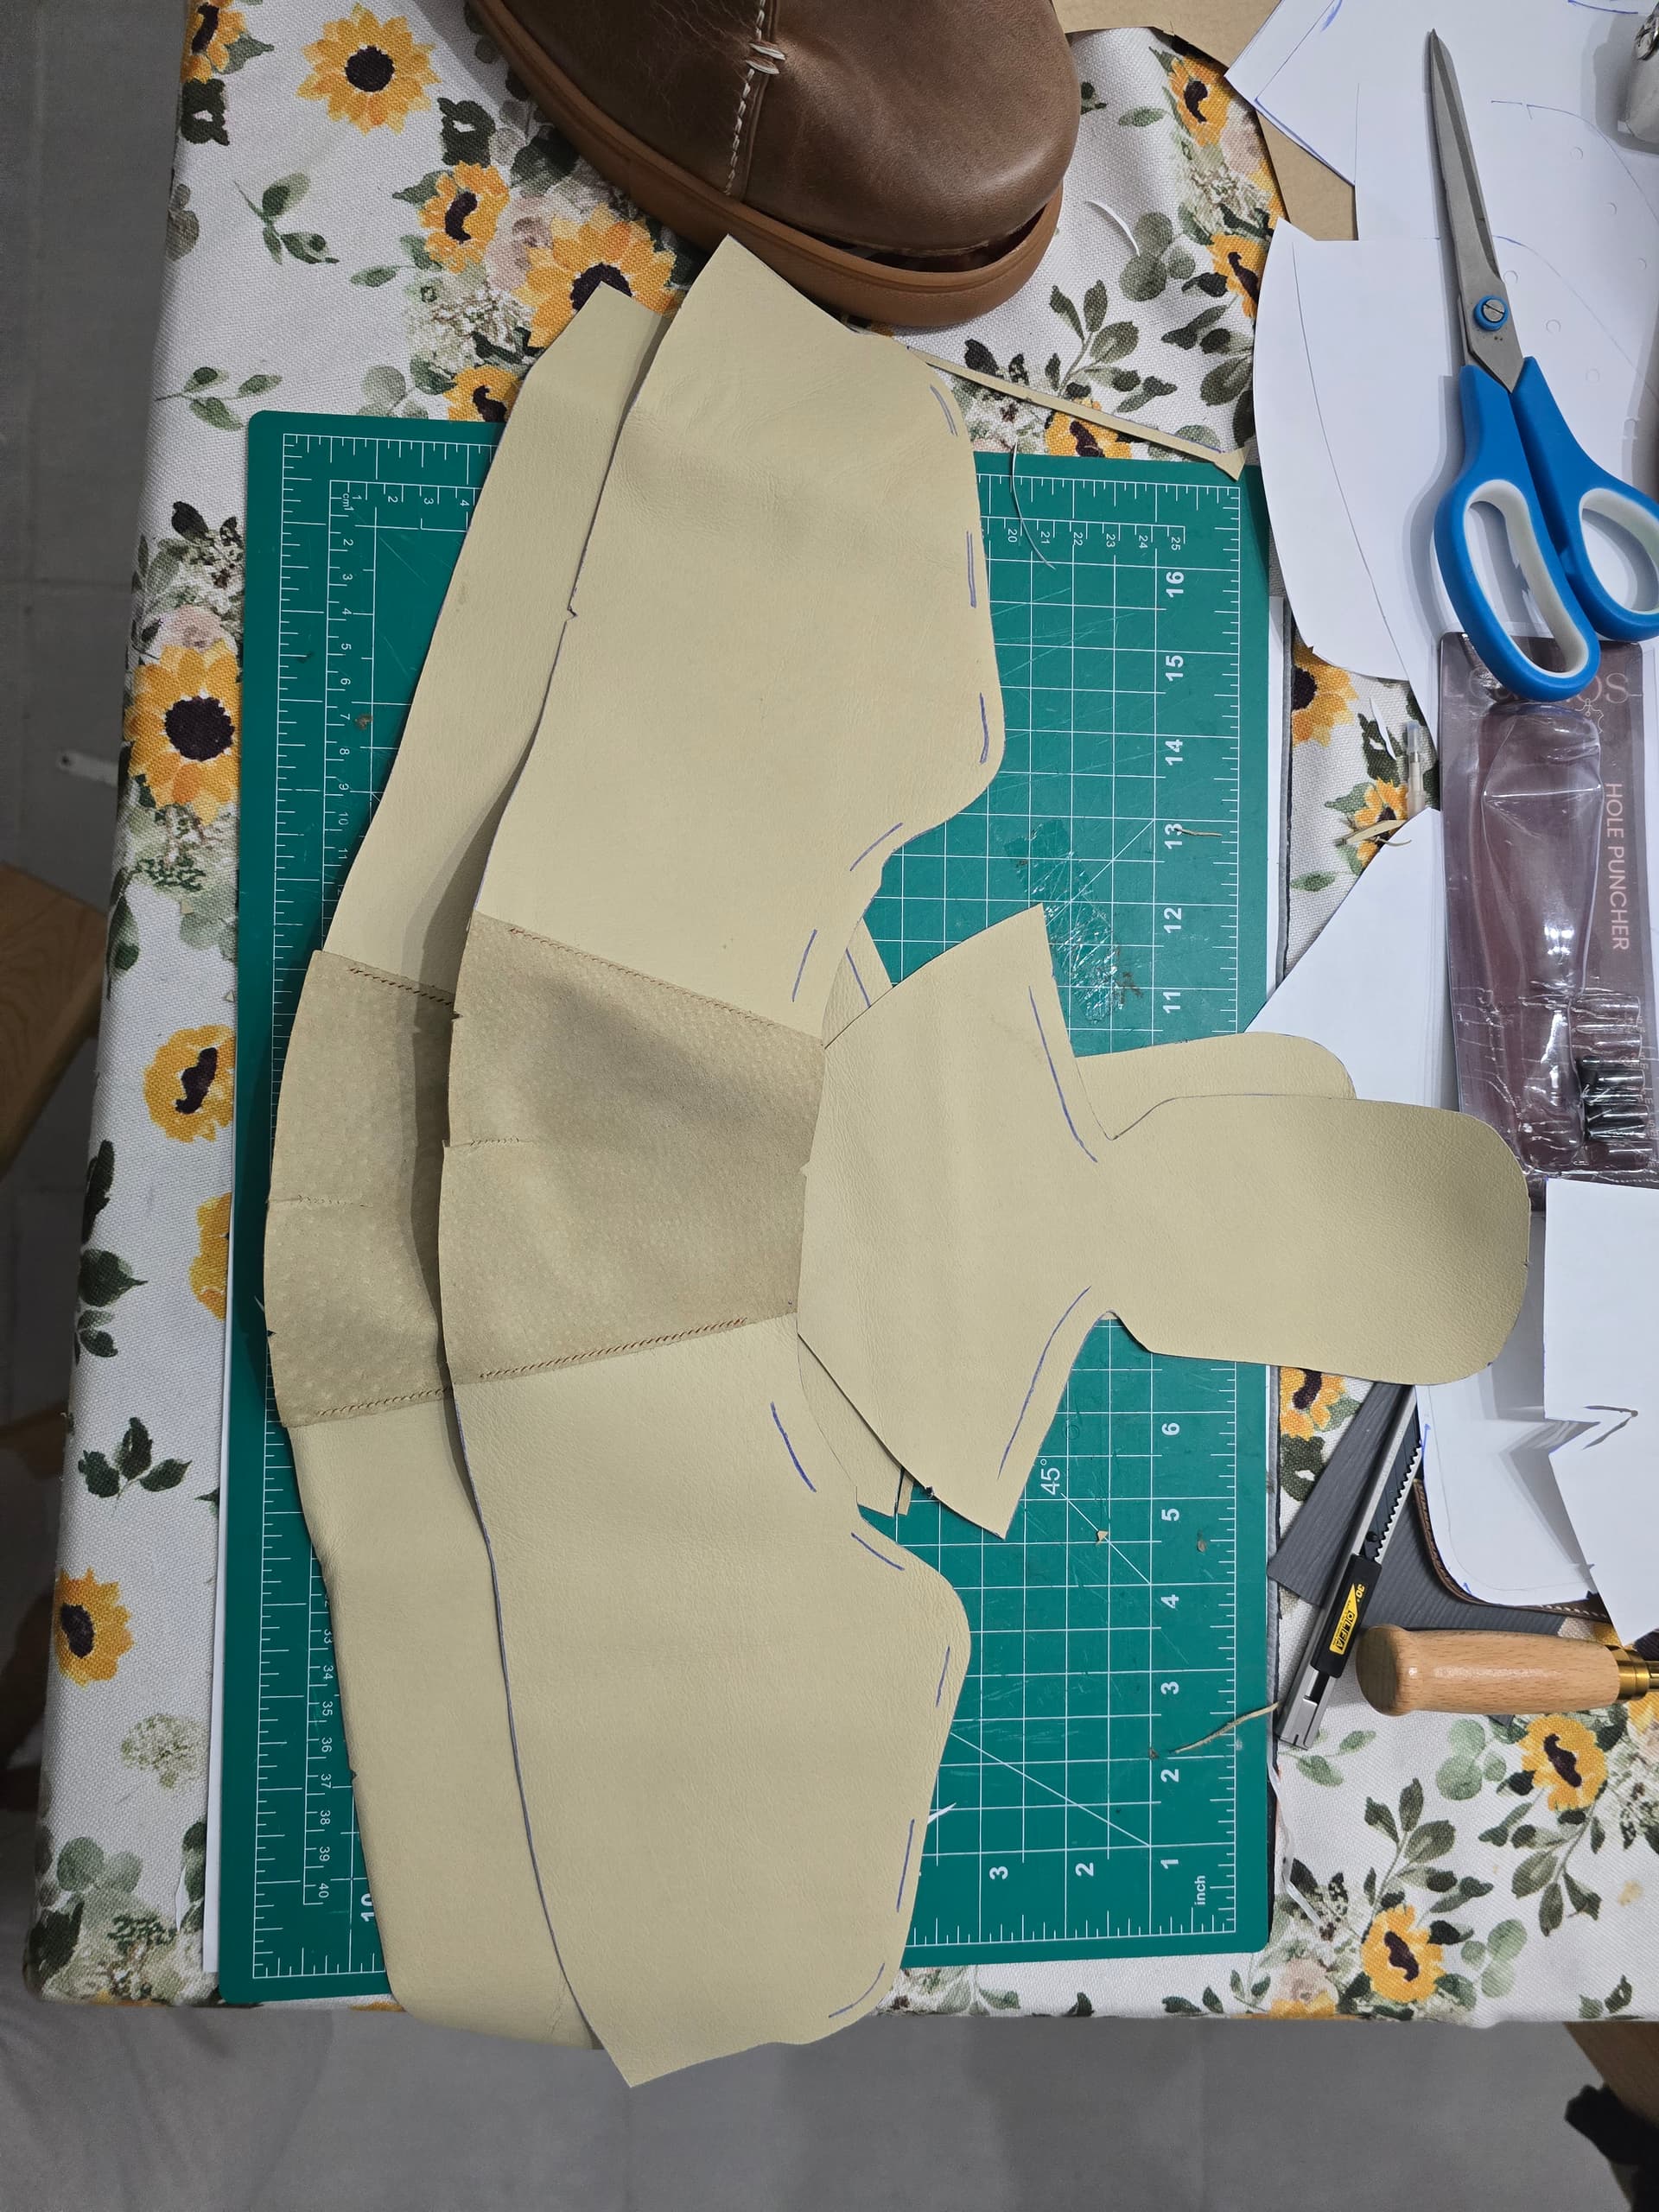
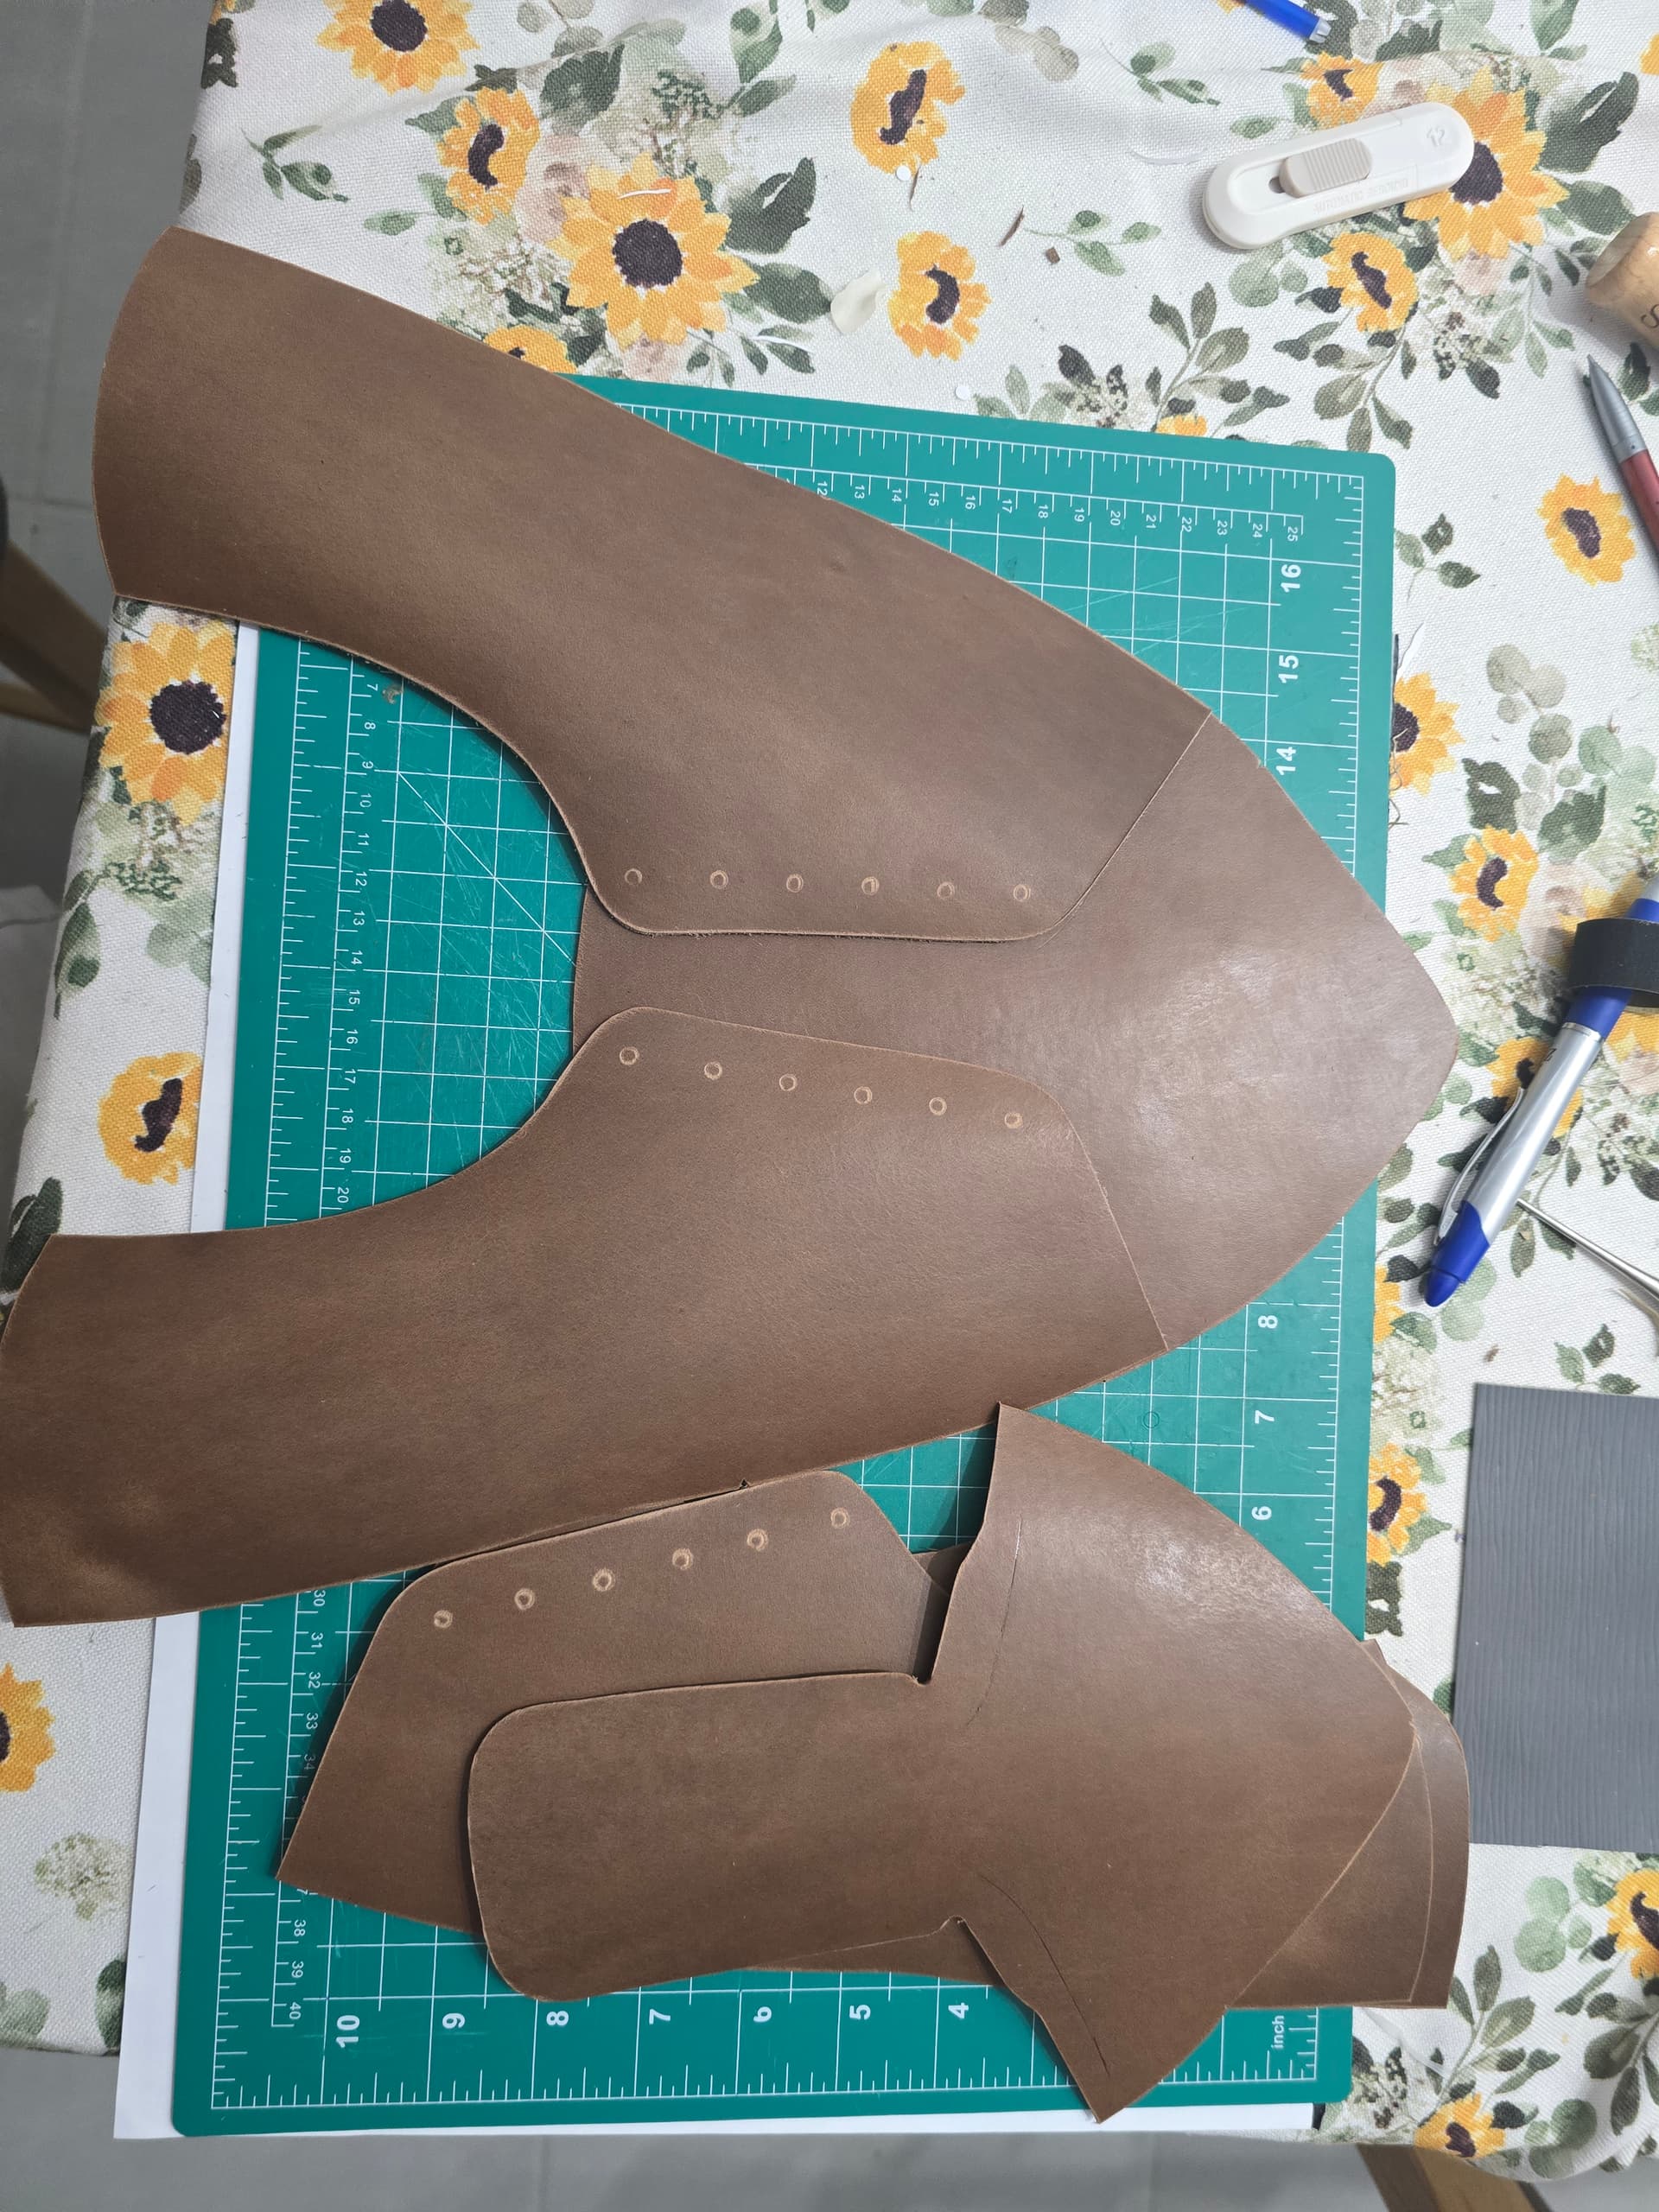
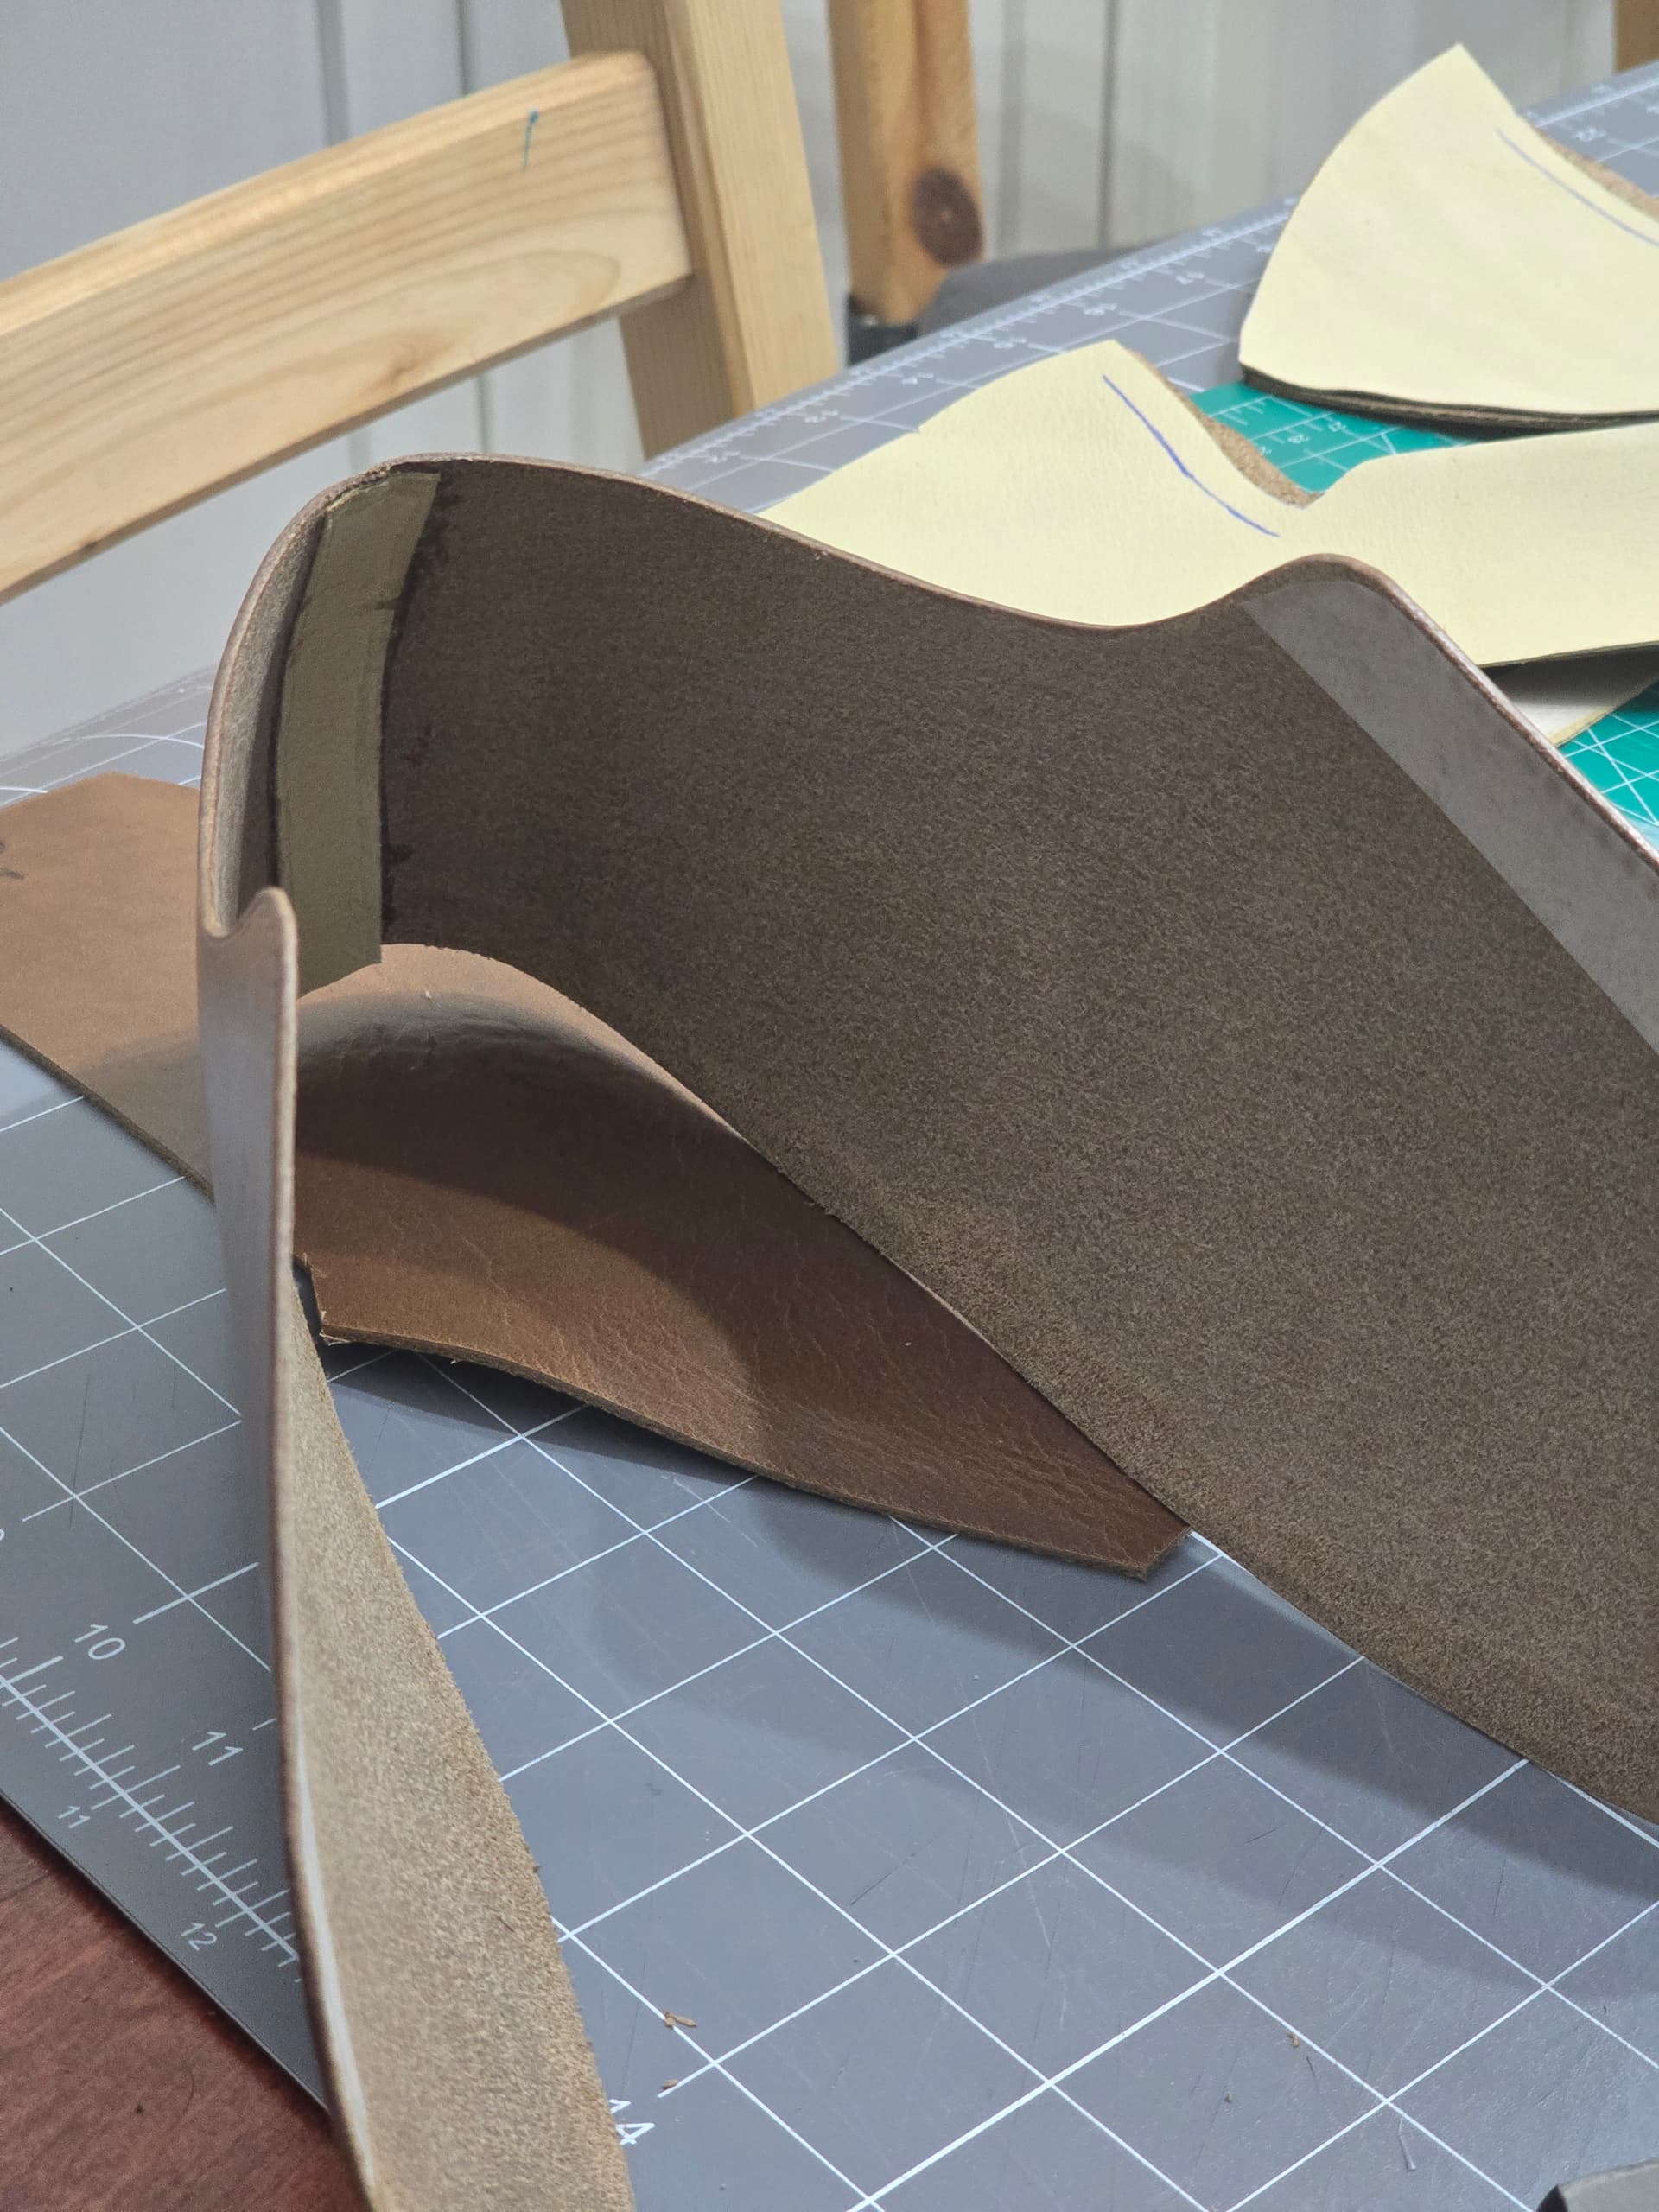
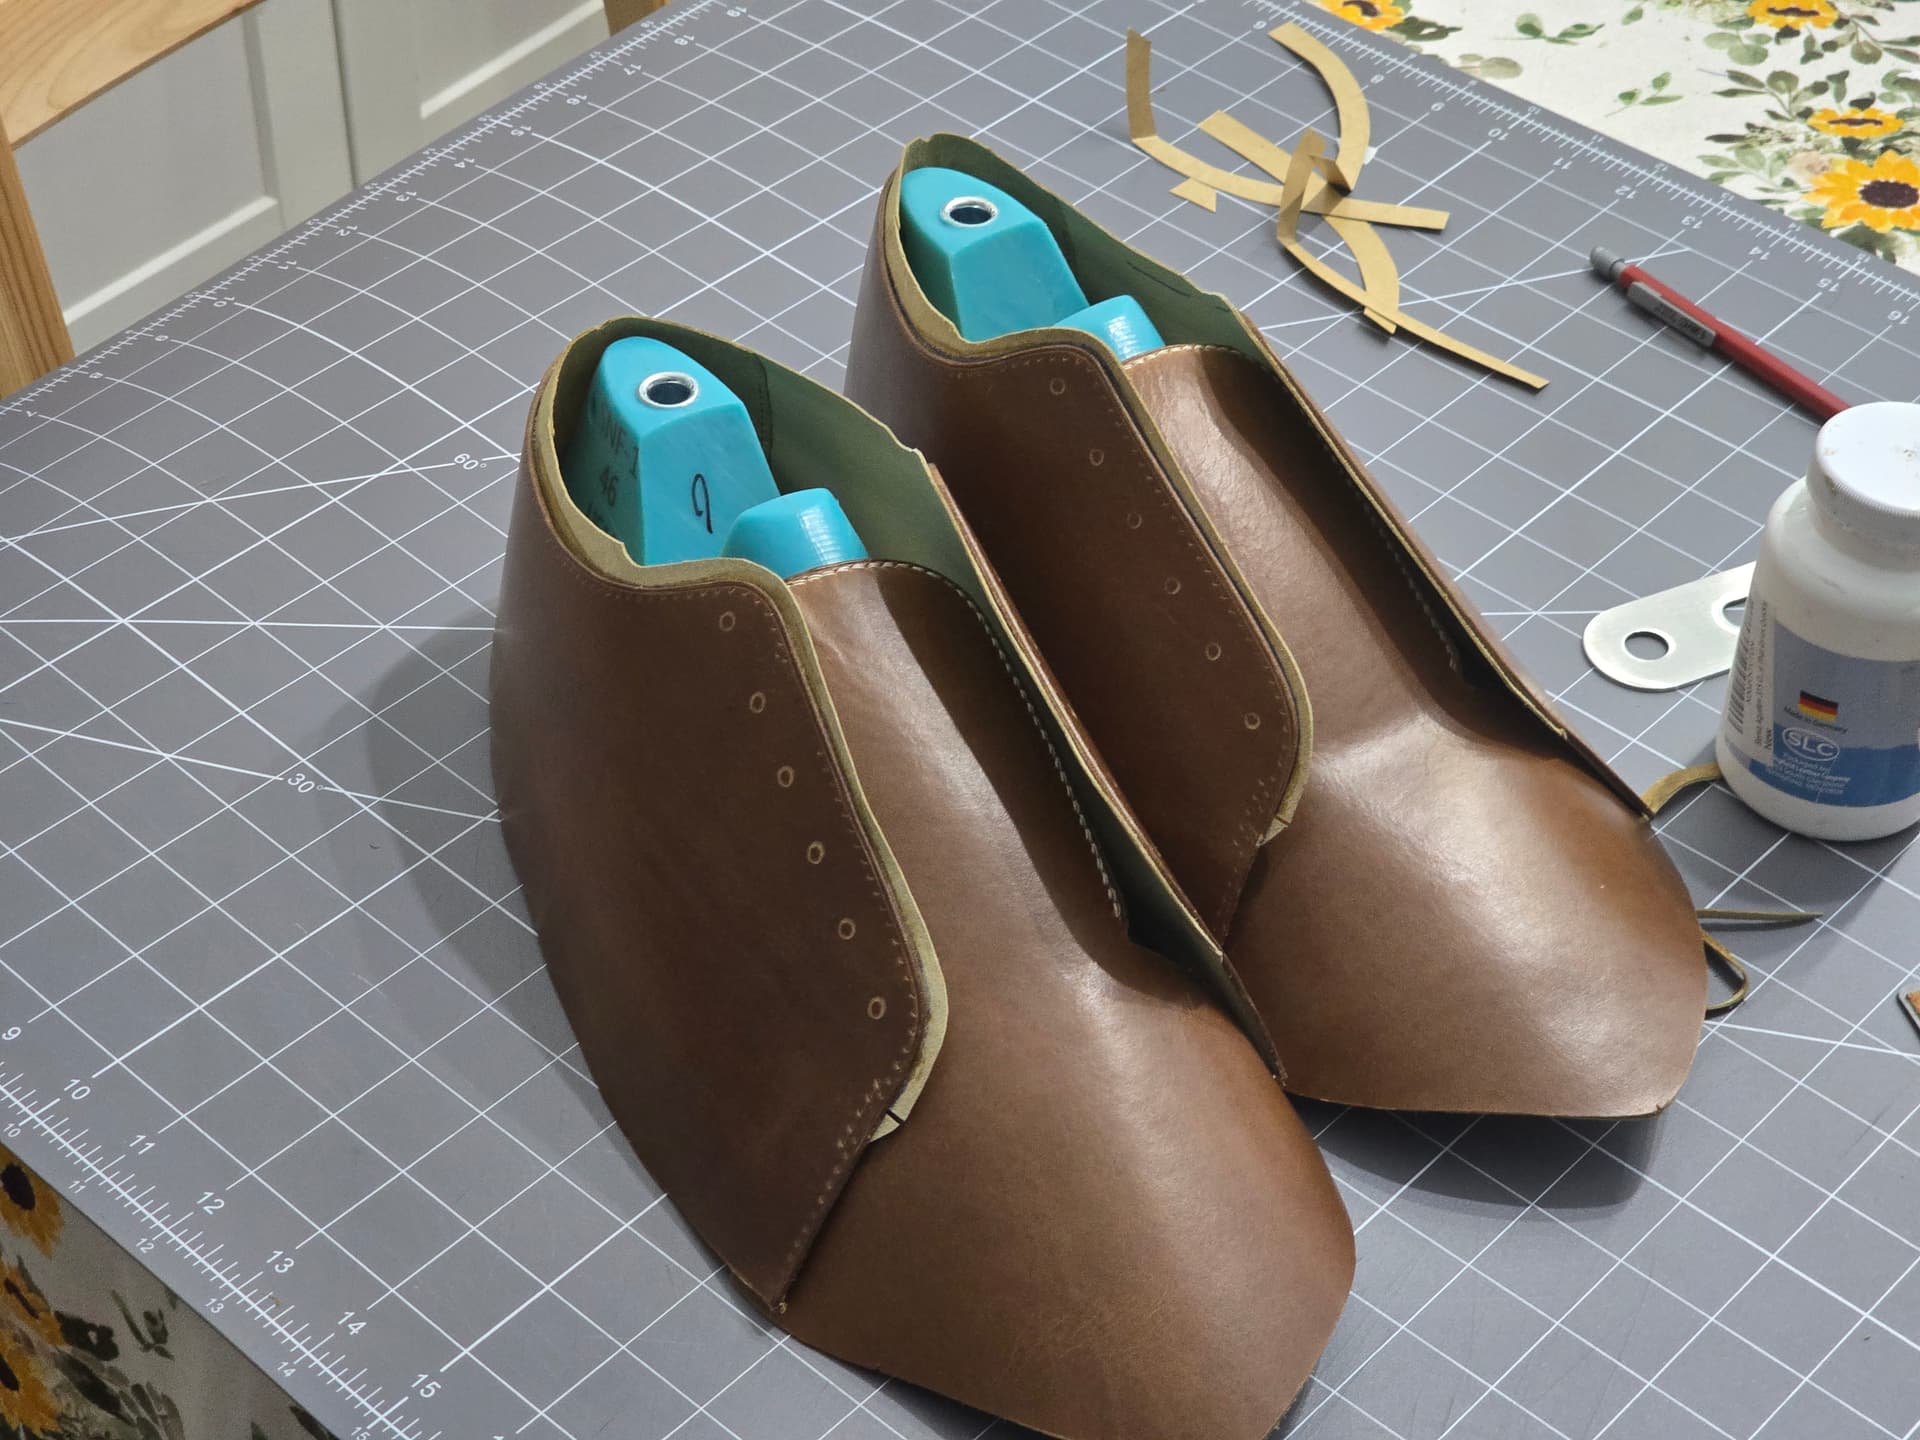
The first time through I didn’t have a toe puff or heel stiffner. It definitely needs them. This time around, i will be using some thin thermoplastic material for those stiffners. I have the templates for them cut, but haven’t cut/skived yet.
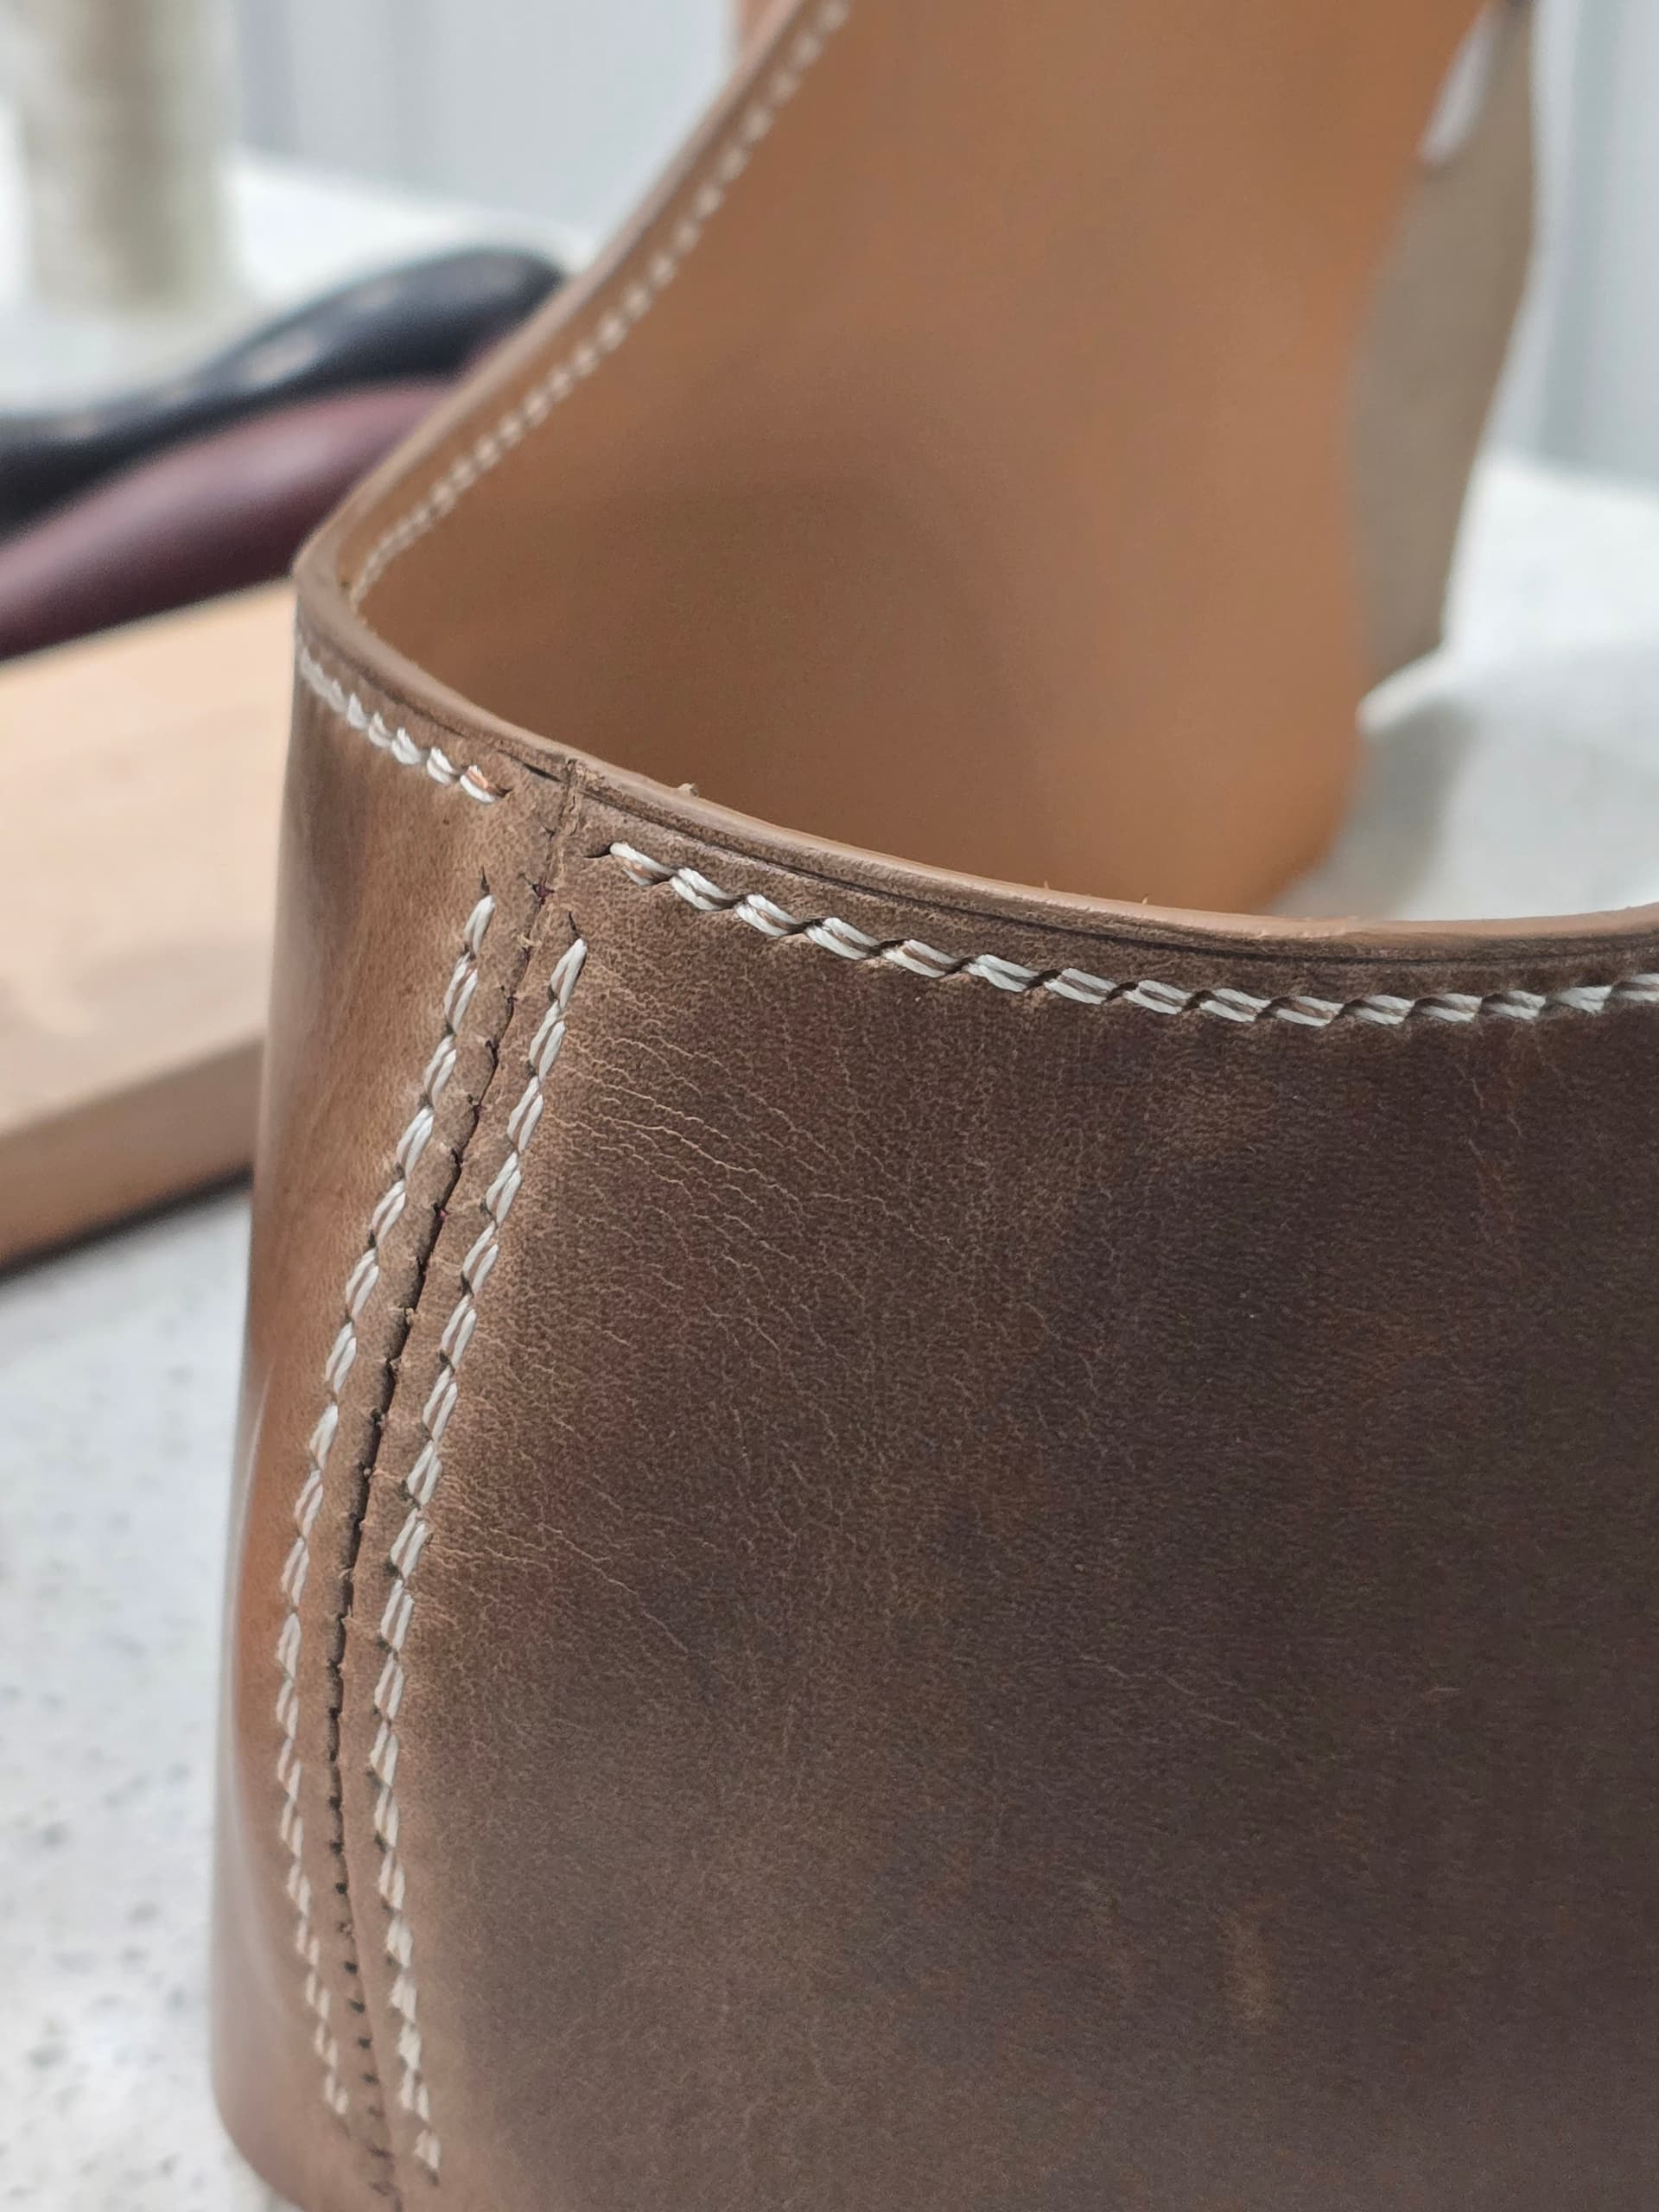
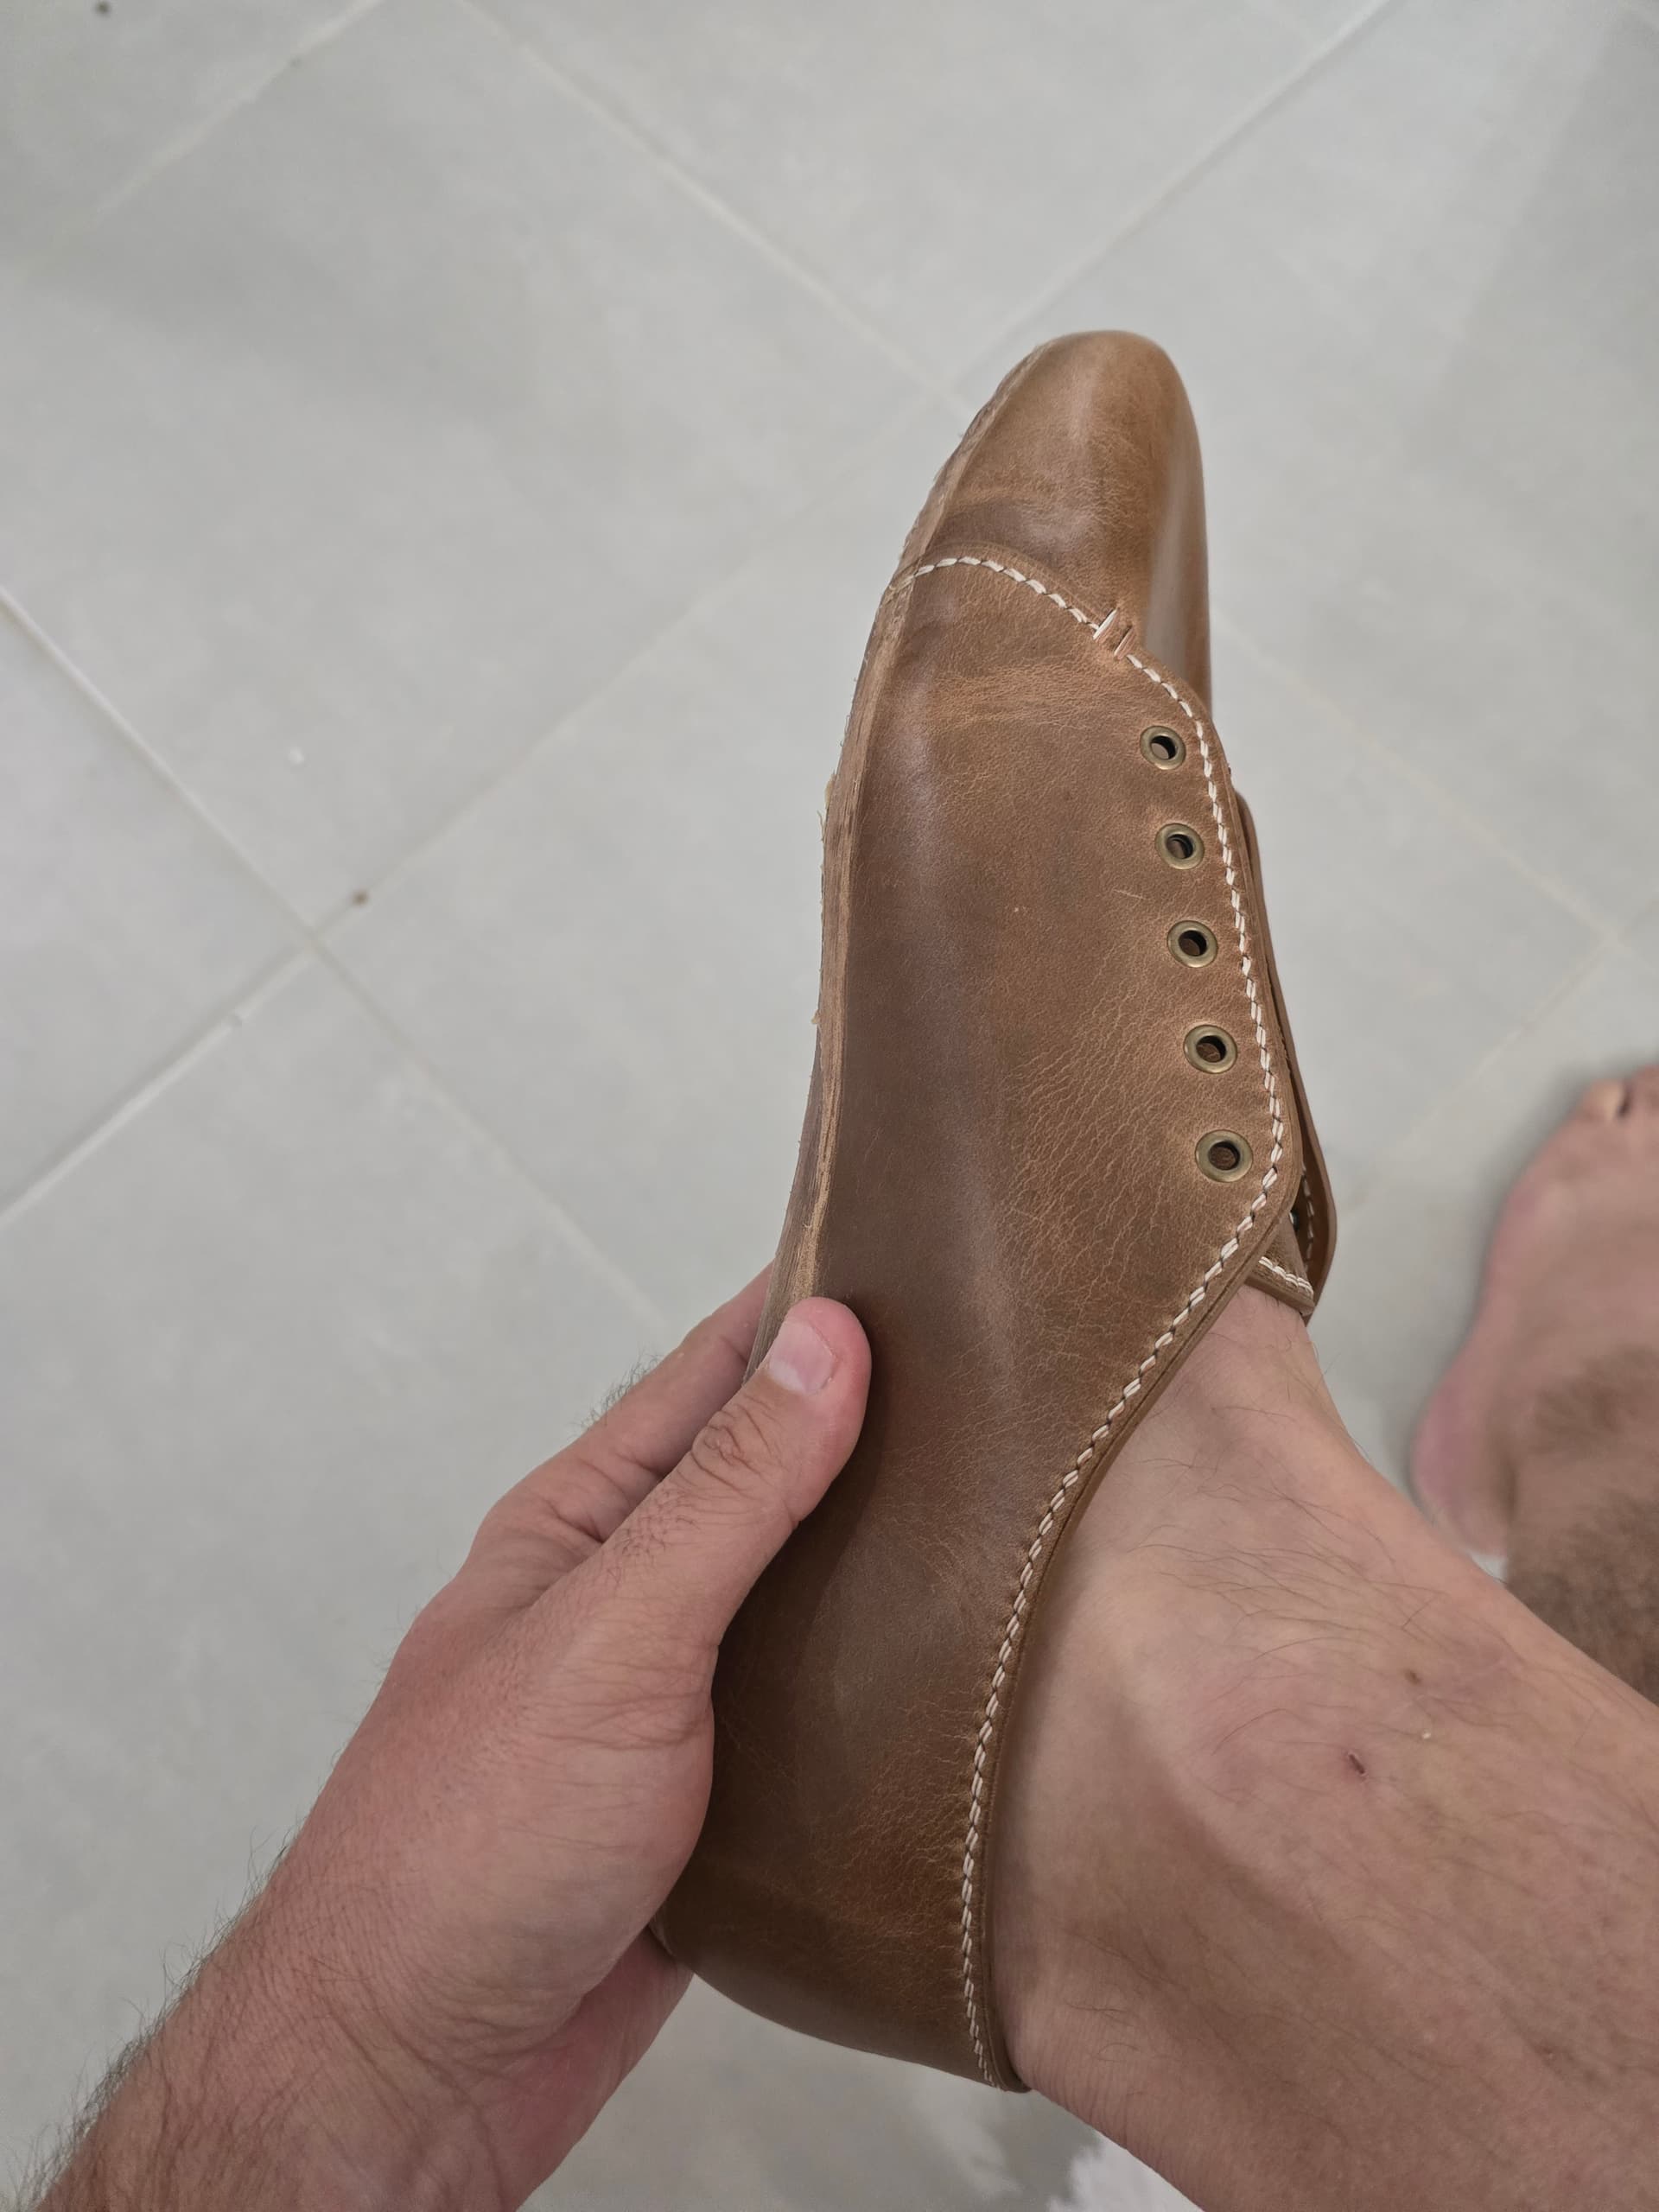
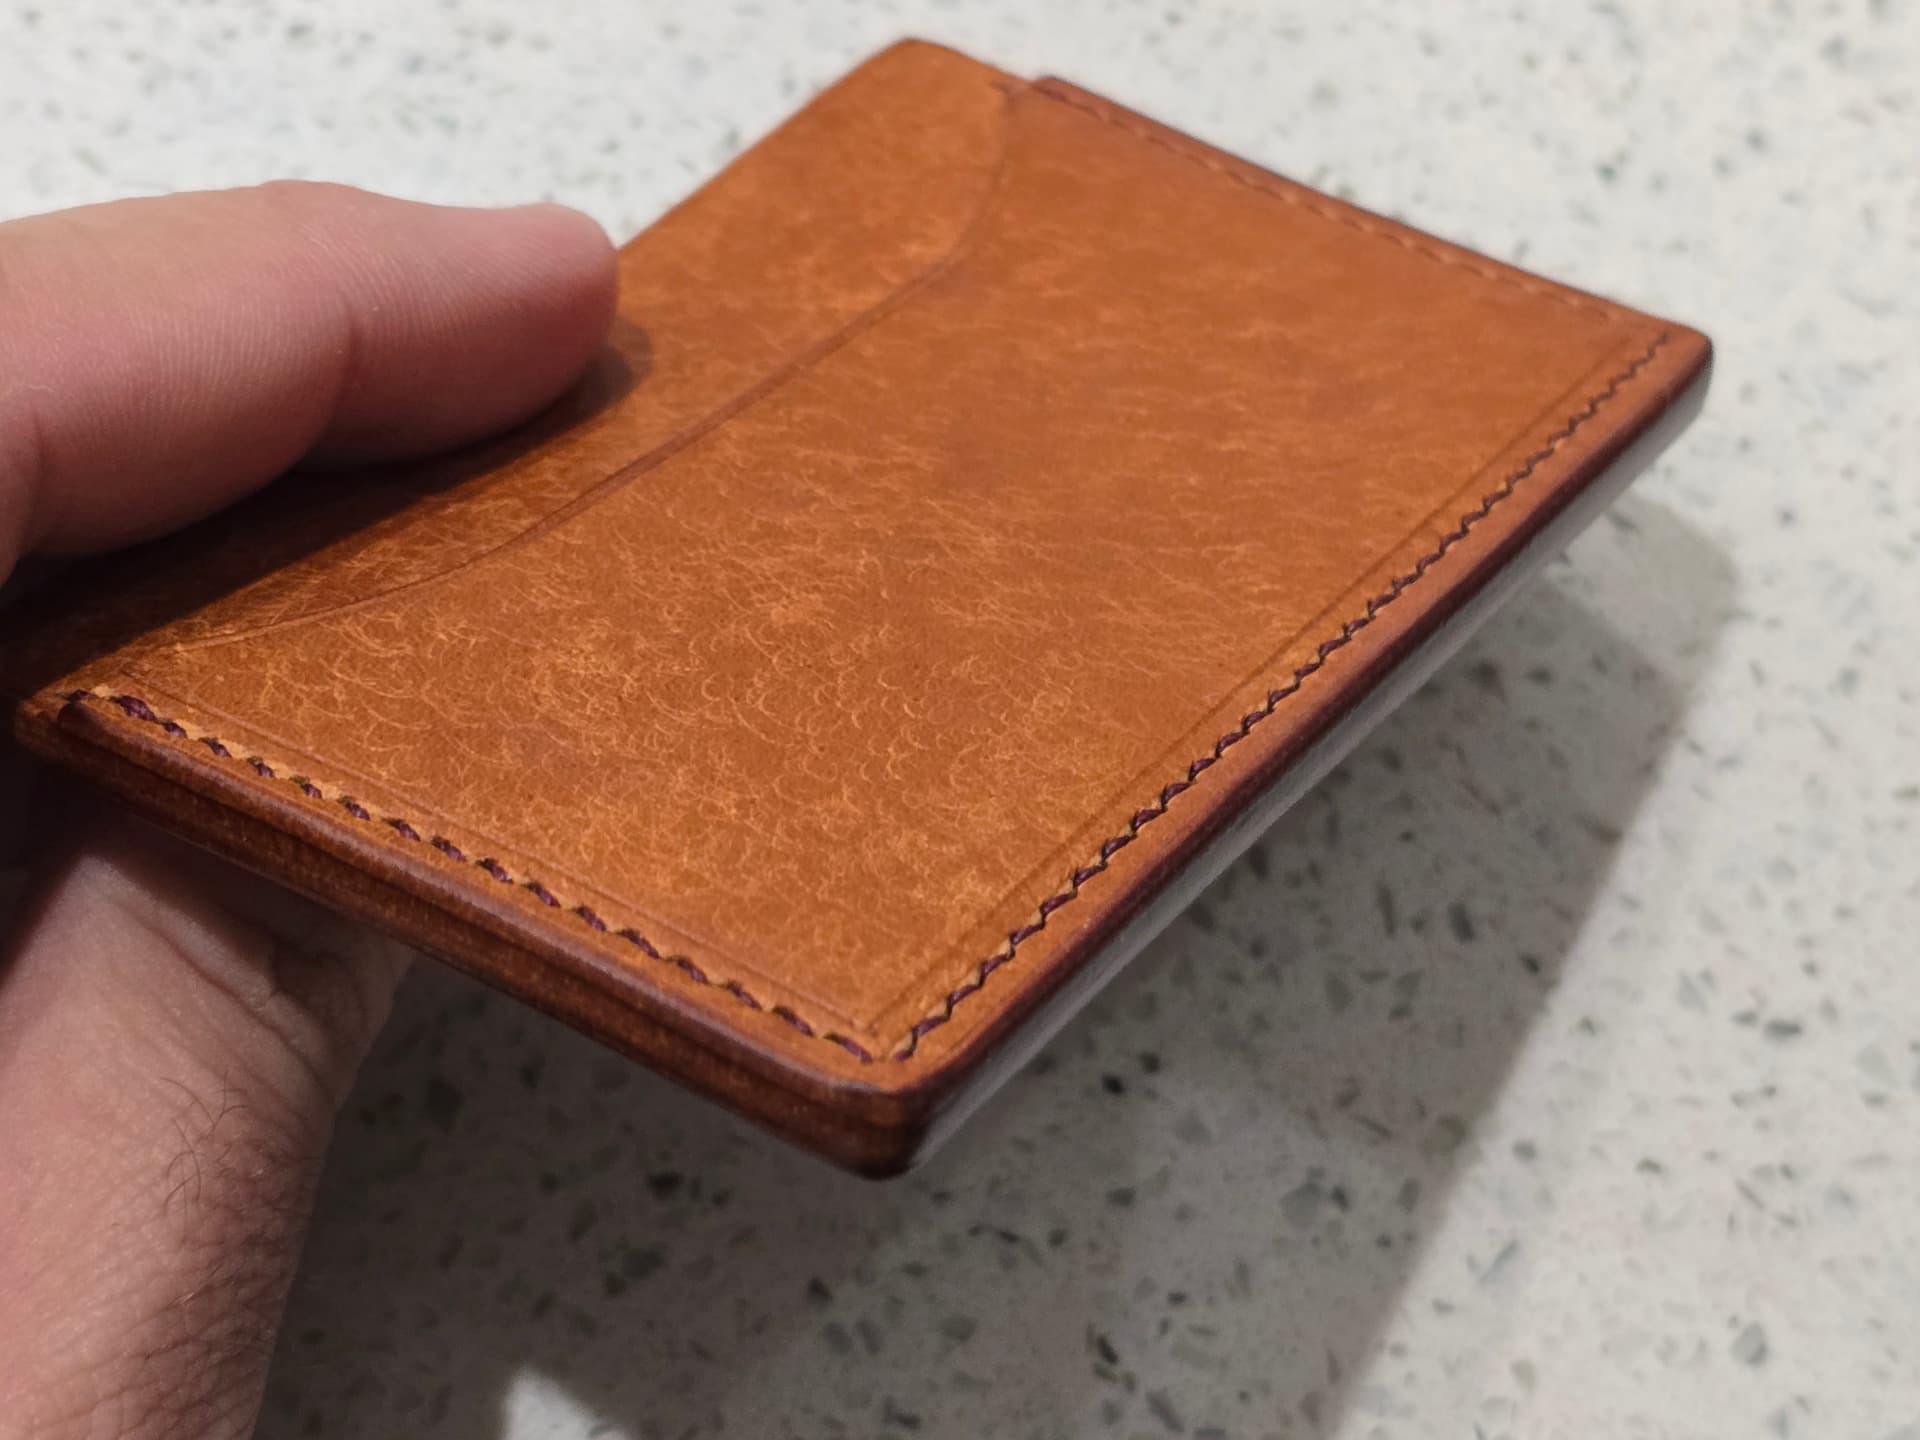
Speaking of uppers, I am starting to prepare them. Rather than doing edge paint like I did on rev 1, I plan on burnishing all the raw edges this time. Chromexcel isn’t the easiest to burnish, but you can still get decent results out of it.
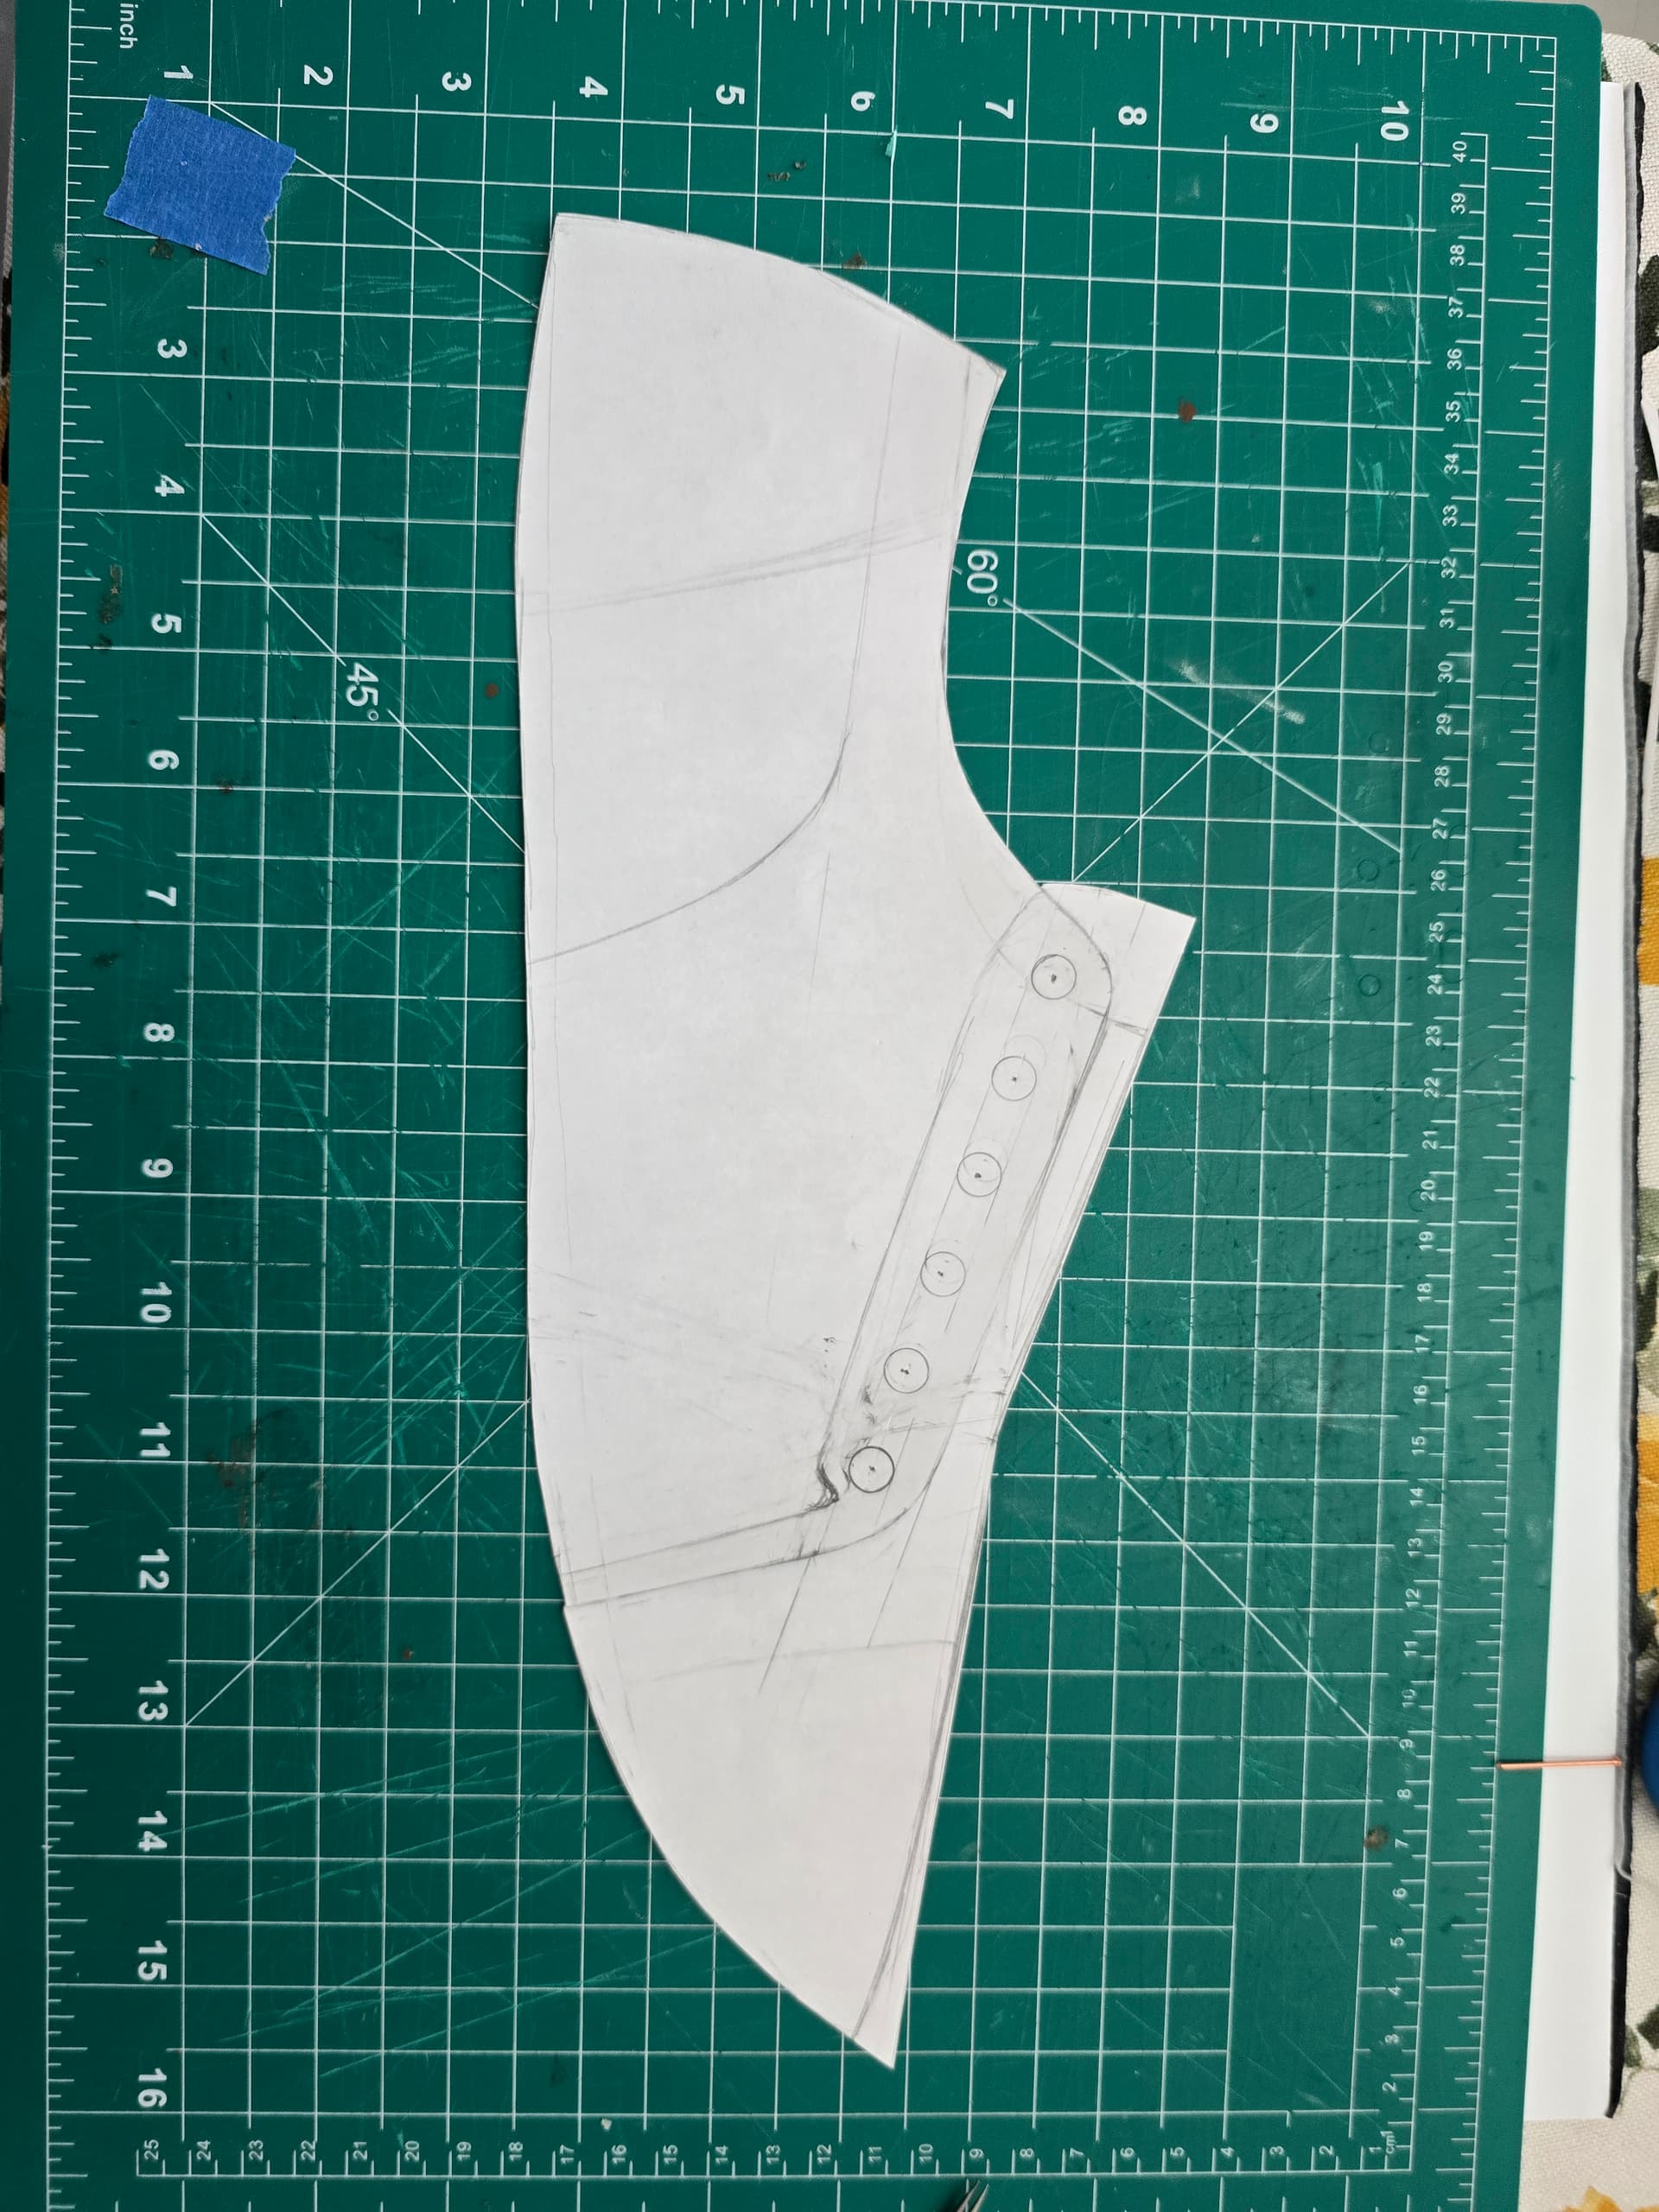
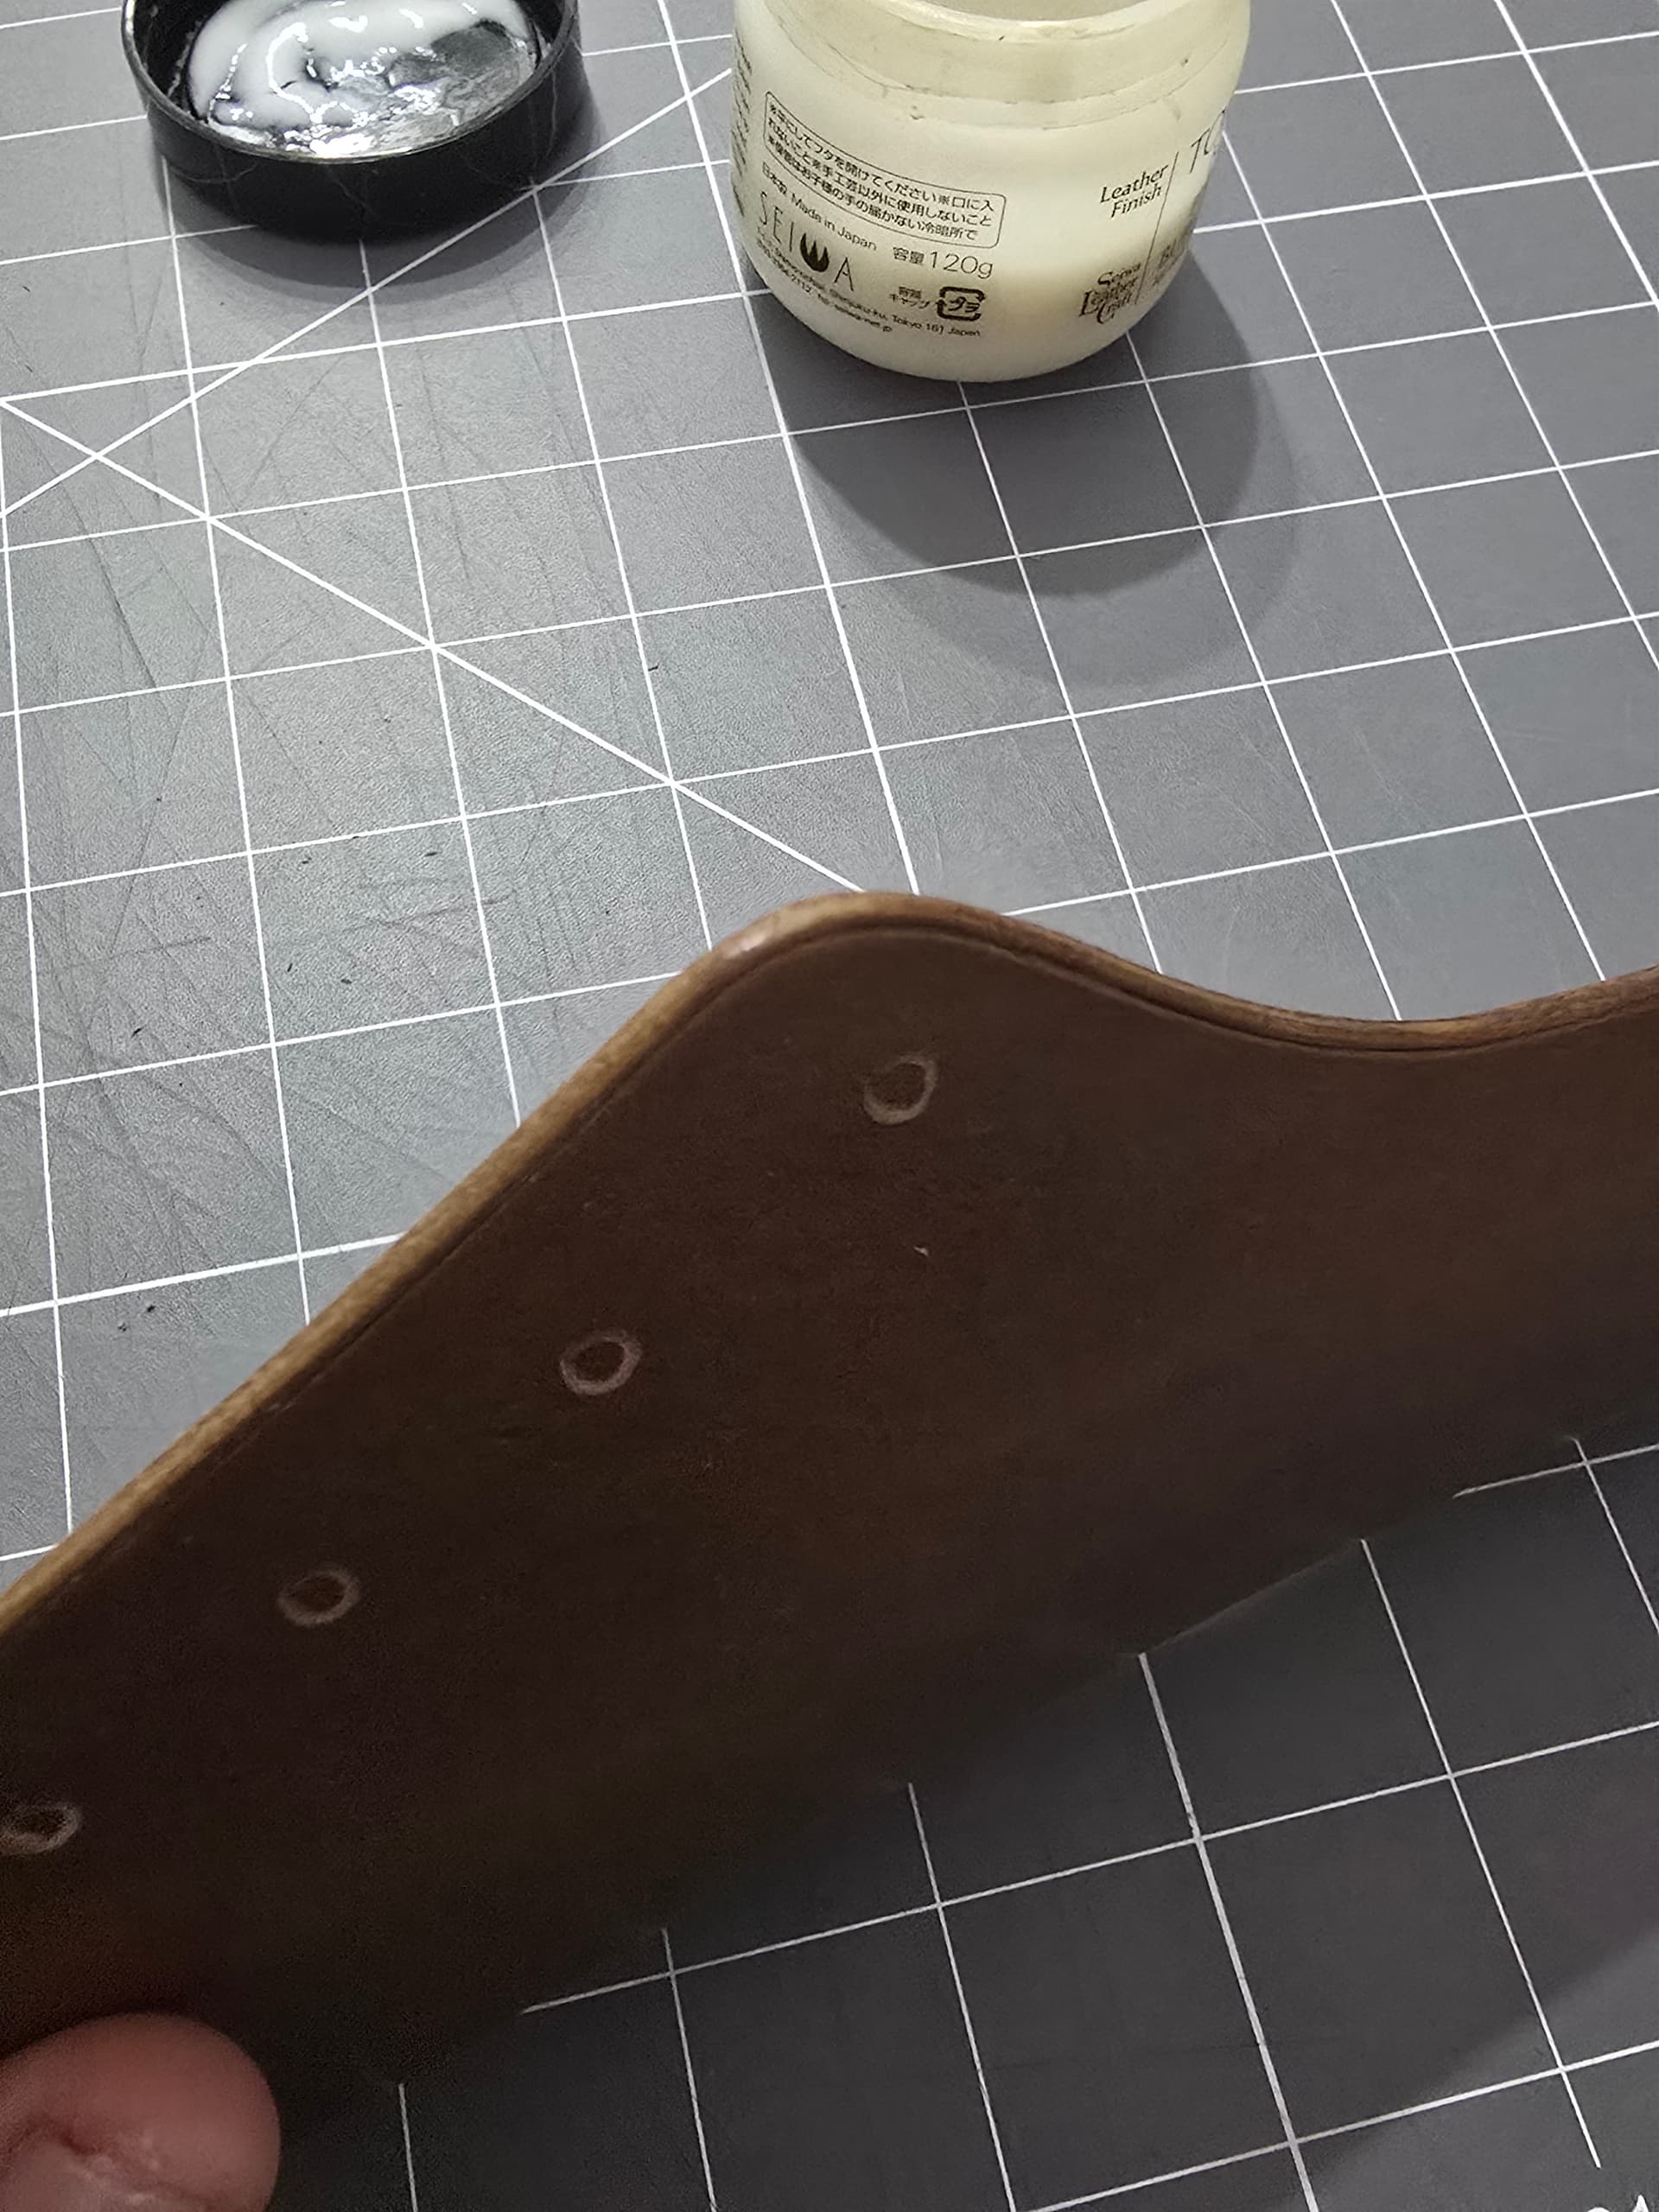
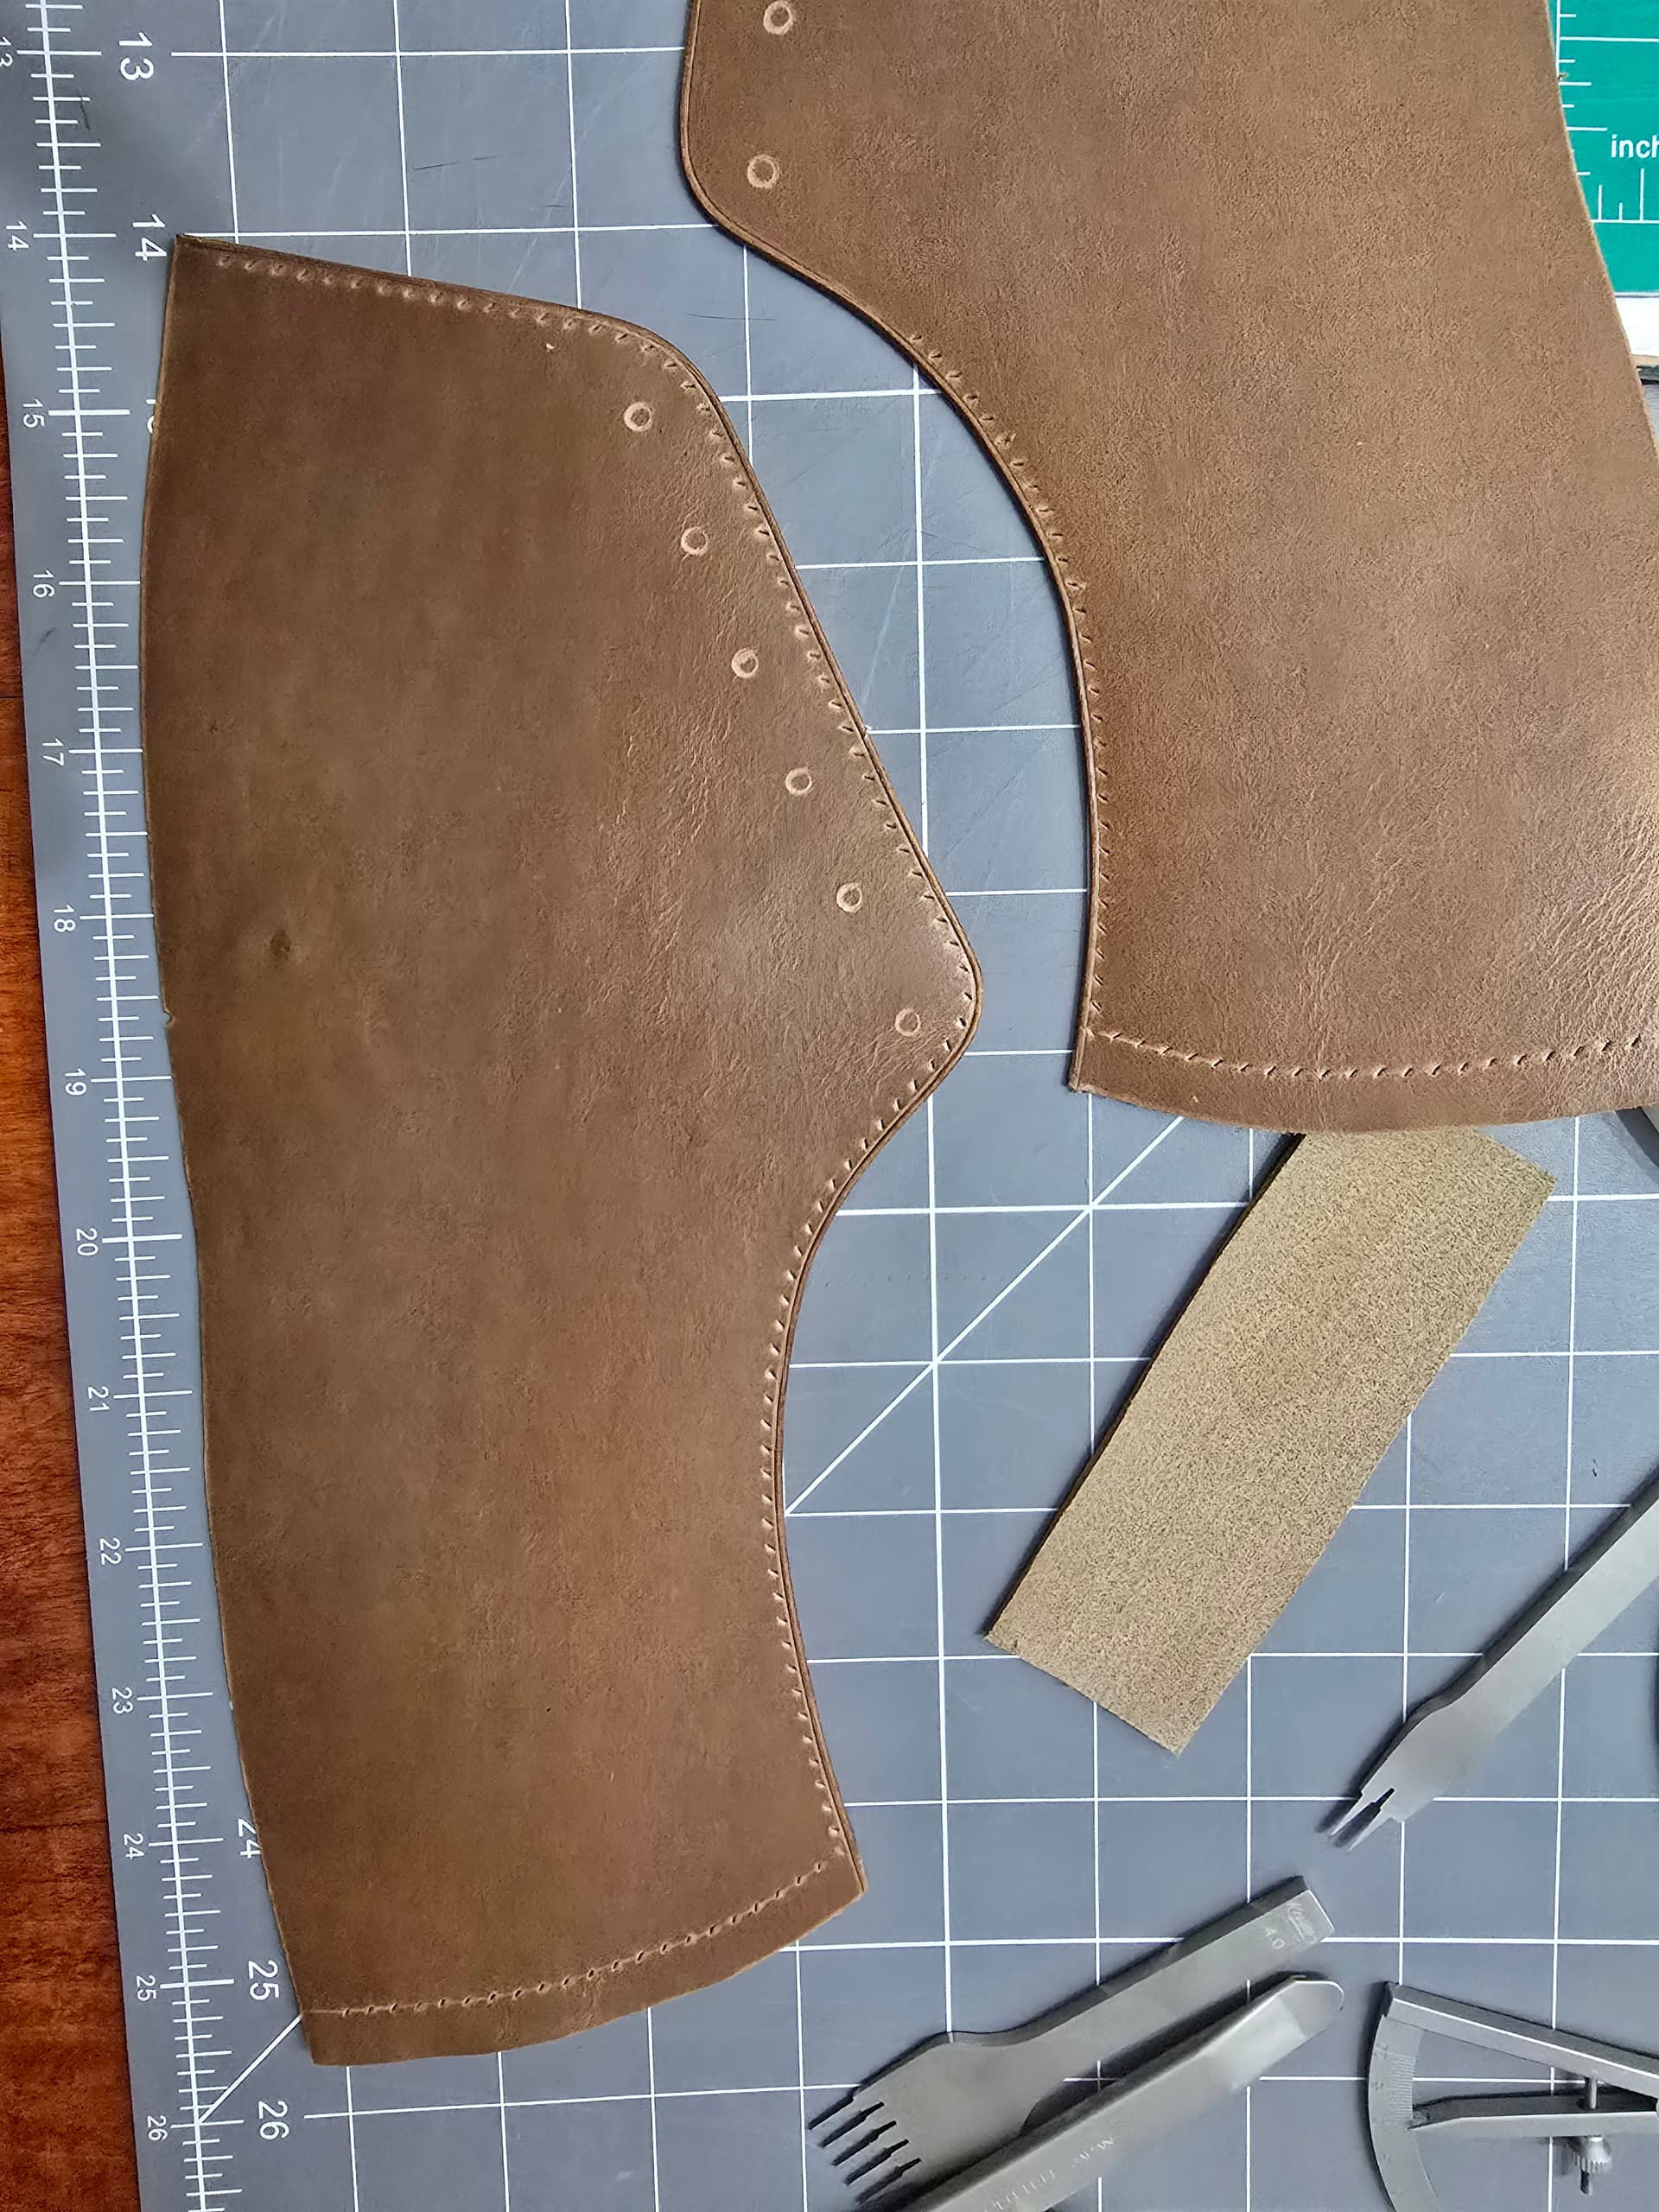
Process wise right now, I wet the edges with diluted tokenole, then sanded with 320 grit. Raising thw edge a bit helps with edge creasing. I then ran a 1.5mm heated edge creaser along all the exposed edges then edge beveled. Wet with dilluted tokenole again, resand with 320, then sand with 600, burnish with straight tokenole, sand with 1000, burnish again. Then start to lay out stitch hole placement.
Stitching is a 4mm pitch and will get the same triple stitch with .45mm alternating thread.
I guess I am used to dress shoes, and I’m just thinking about how you would usually offset where the vamp attaches to the quarters so it’s not lumpy in that spot. But the way these sneakers are, it doesn’t seem like you have any room for that?
Also is there some particular size of edge beveler you used, after creasing the edges on the uppers?
The first time through I offset the liner seam and the outer vamp seam. I have seen a lot of back and forth over how to do it, so opted not to this time. Can be done either way though.
I will have to double check, but I believe the edge beveler I used here is a #2.
I’ve yet to try Tokonole, and that may explain why I’ve always just done edge pain on chromes, including Chromexcel. I understand Tokonole is resin and wax, mostly. So I suppose you’re sealing leather with a coating and burnishing that coating more than burnishing the leather. The photo certainly looks nice!
Chromexcel will definitely take a burnish way better than something that’s just chrome tanned; the veg re-tan seems to help. Definitely nothing like what you can get out of some of the veg tan only though. Stuff like pueblo you can see your reflection in.
I learned burnishing on tooling veg, Tandy style. So my impression on Chrome was always that it pretty much wasn’t working. I don’t really like edge painting, so I’d focused more on binding and rolling.
Really cool to see you bringing more of the style I associate with watch straps to shoes. I’m not a sneaker guy myself, but I’m enjoying reading you and @citizen go back and forth here!
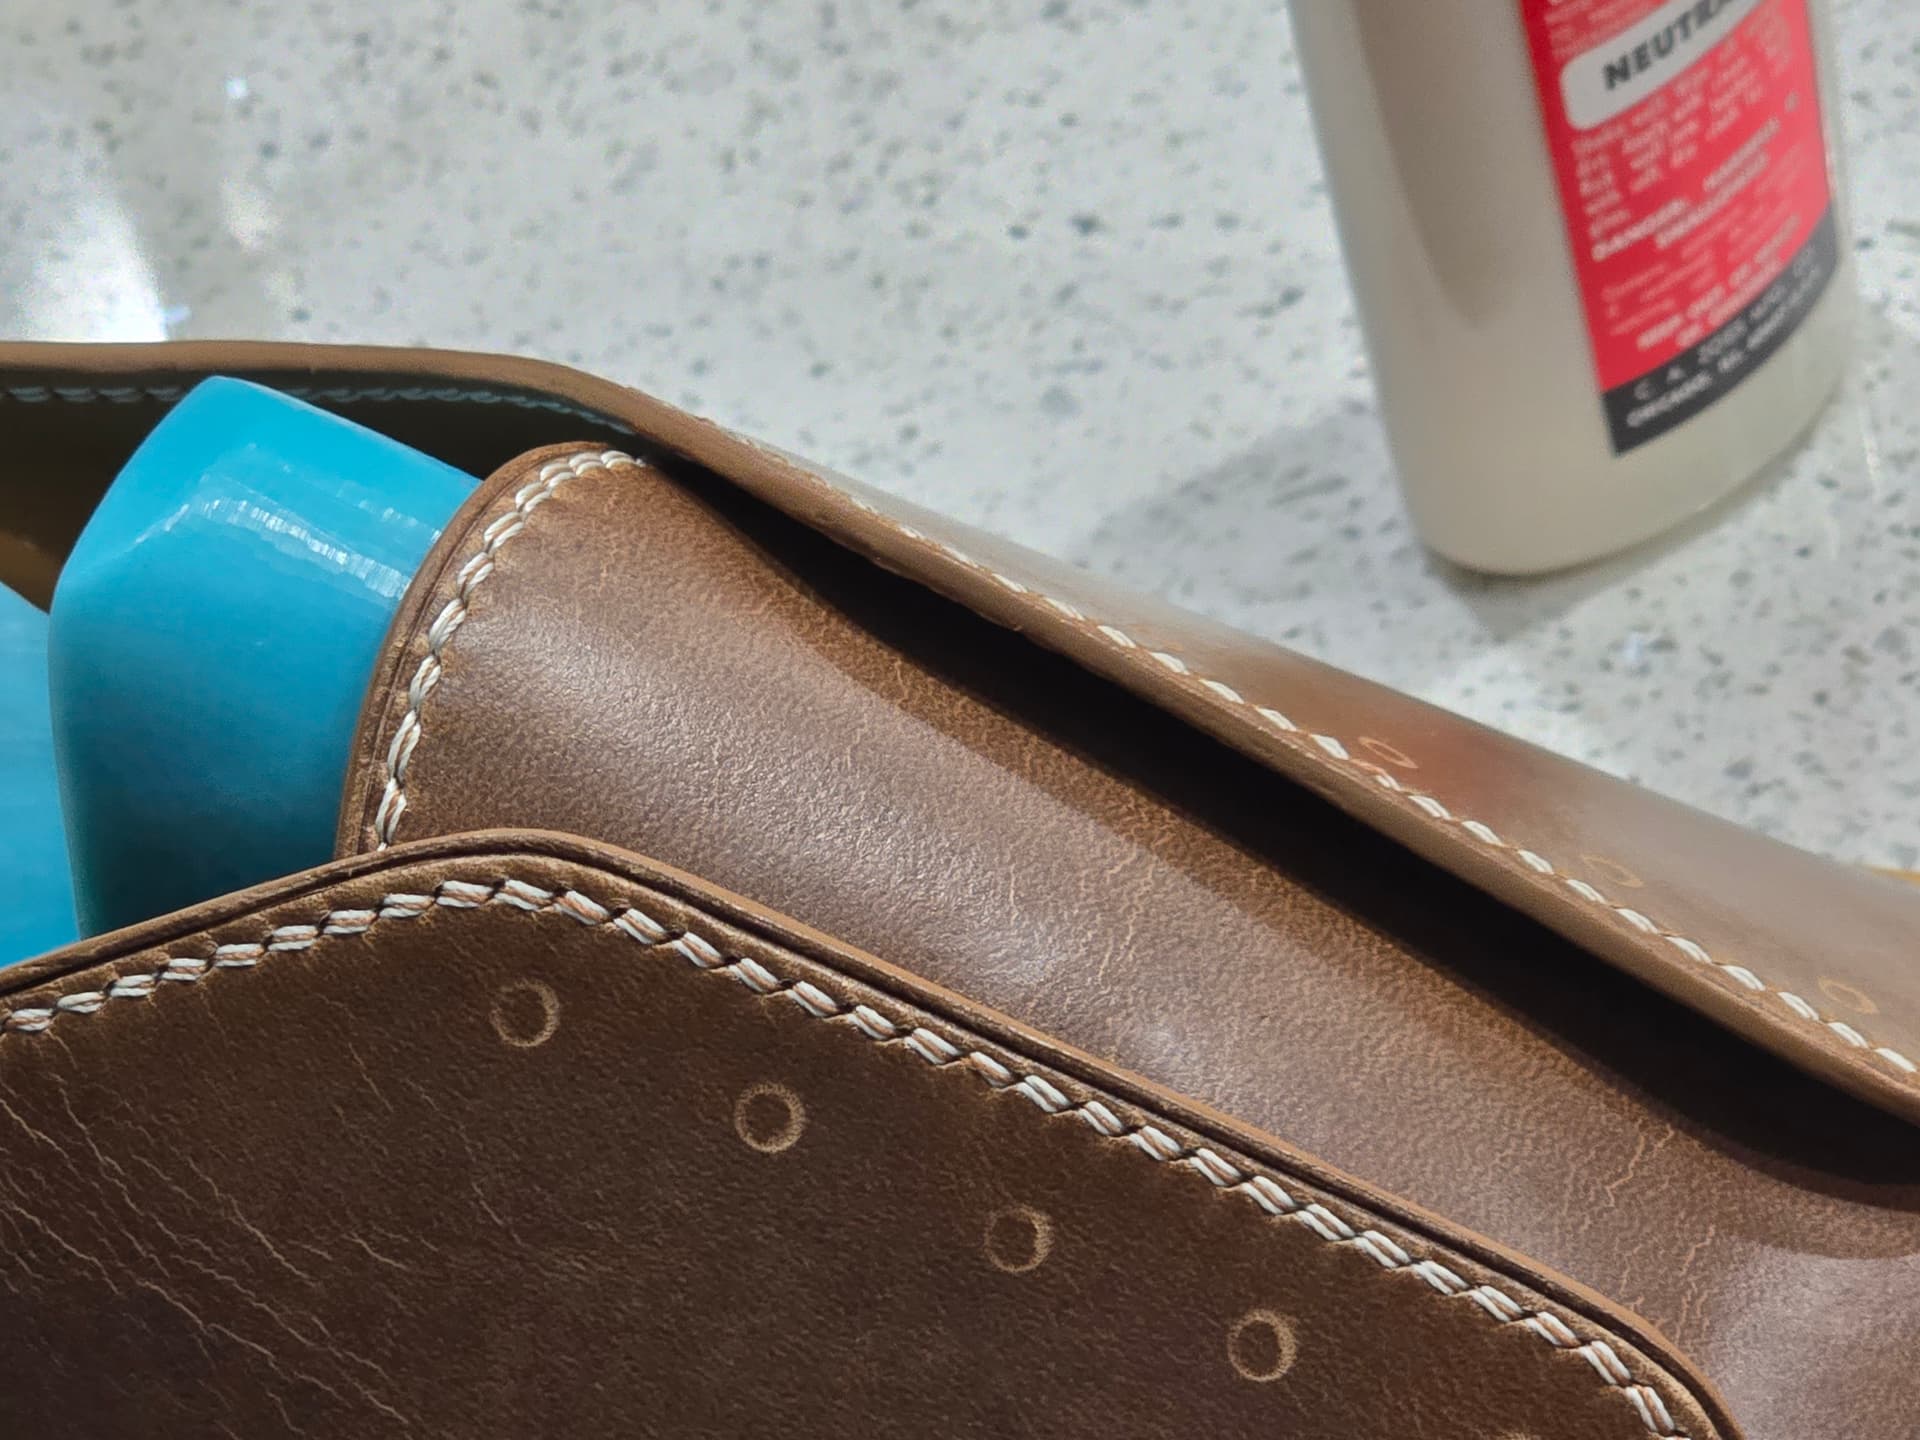
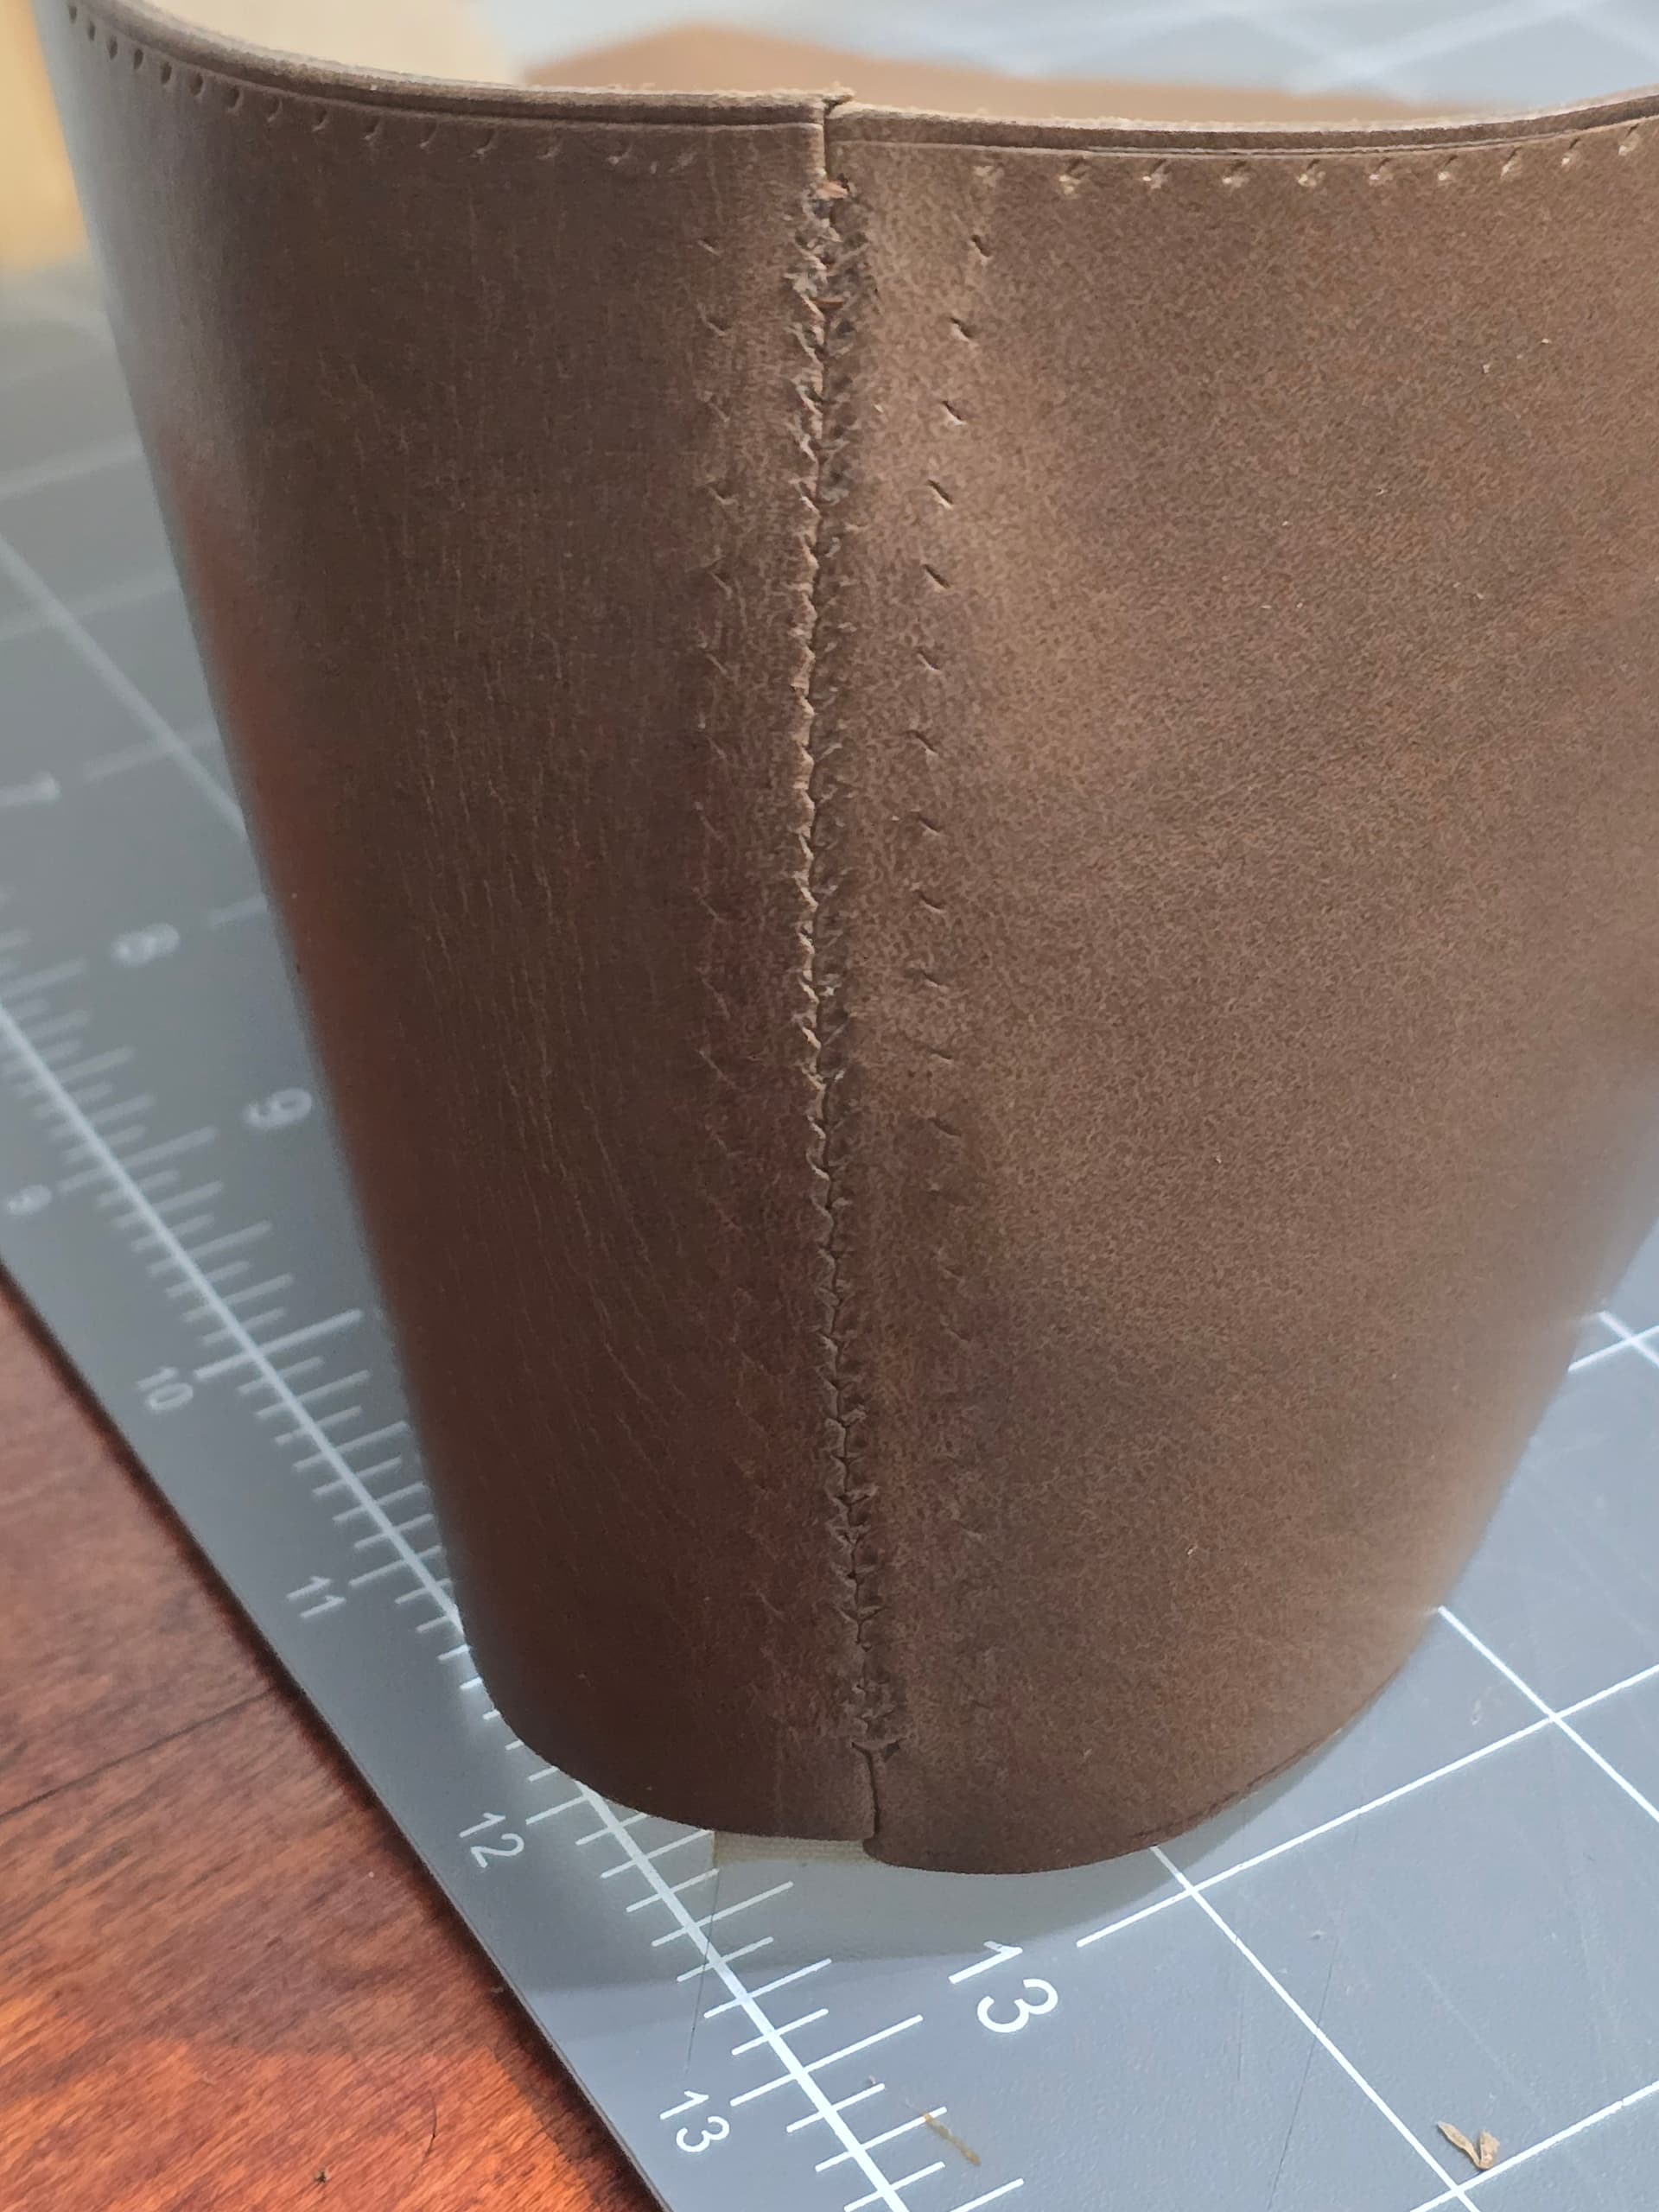
Starting assembly on the uppers. Didn’t quite leave enough trim allowance to do a full french seam on the back of the heels, but can at least get a reinforcement in for the seam.