My first boot

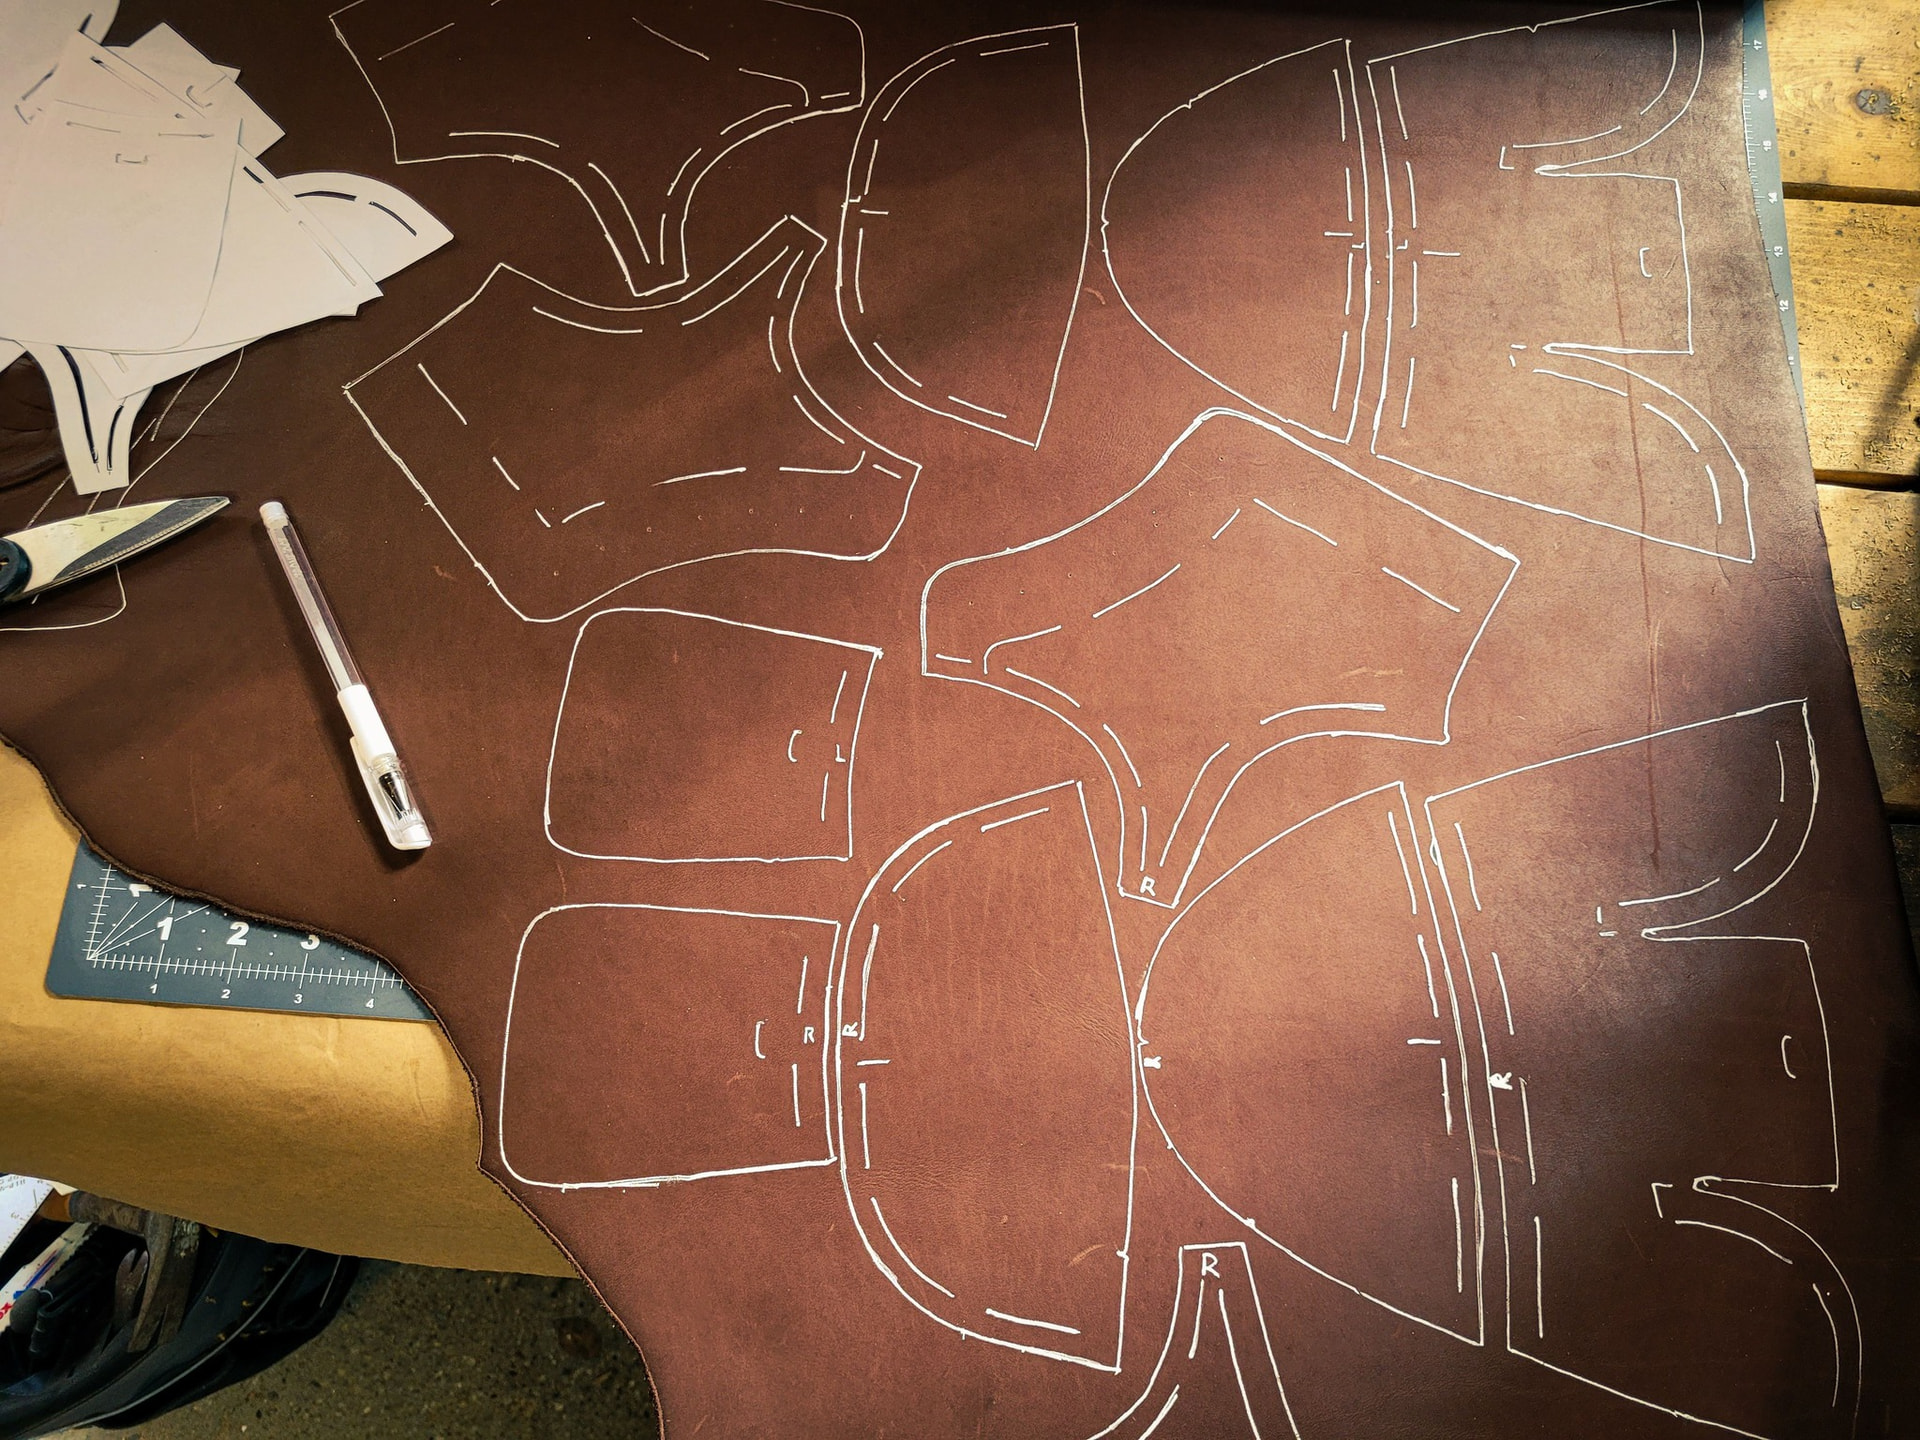
For my first project, I decided to start with a basic cap toe boot, using a bundled last, pattern, and video series by Justin Valevro, who you may be familar with. I believe he lives in Romania, and he operates an online shop where he sells lasts, patterns, and instructions, which you can buy individually or as a bundle. I figured buying a last, along with a pattern designed for that last, would be a a good starting point, rather than diving into pattern making on my first attempt. I’ve been happy with the pattern and instructions so far.

I bought some SB-foot 5-6 oz leather from Maverick leather on sale. I think they may have sent the wrong leather, because it was supposed to be a light-medium brown “taos red oak” leather, and this seems darker than the pictures. some kind of amber harness maybe?. But it’s hard to tell from an online picture, and I guess it depends on the lighting. Maybe it is the right color? I liked the color enough to keep it, so it’s all good.

The leather I used is a bit thicker than the pattern recommends. it’s a fully lined boot, and they recommend 4oz leather for the outer, and 2-3 oz for the lining. I think the lining leather is around 3 oz, and the outer is closer to 6. So it will be a pretty sturdy boot.

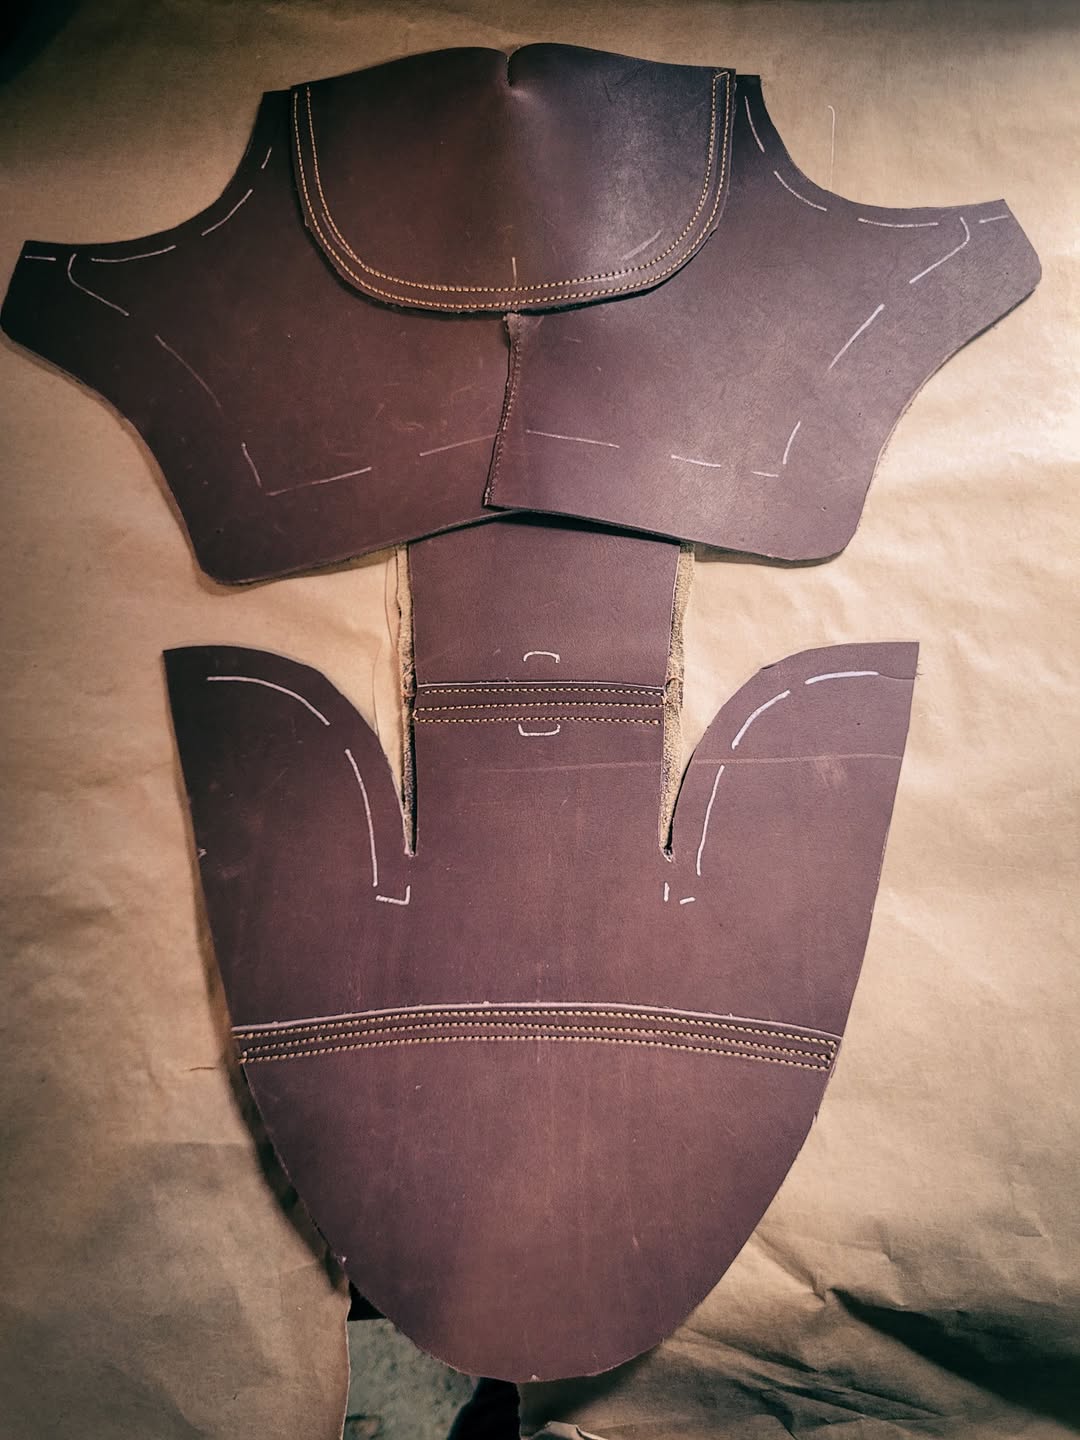
I have access to a maker-space, so I’ve been taking advantage of that. They have a flat-bed industrial sewing machine, which handles thick leather very well, but is a bit awkward for some of the final stages of closing a boot. I’m realizing why post-bed or cylinder arm machines are preferred. The machine has a very sensitive foot pedal, so getting a slow stitch speed takes some finesse. Some of my stitches are a bit crooked, because the machine stitched a bit faster than I could handle.

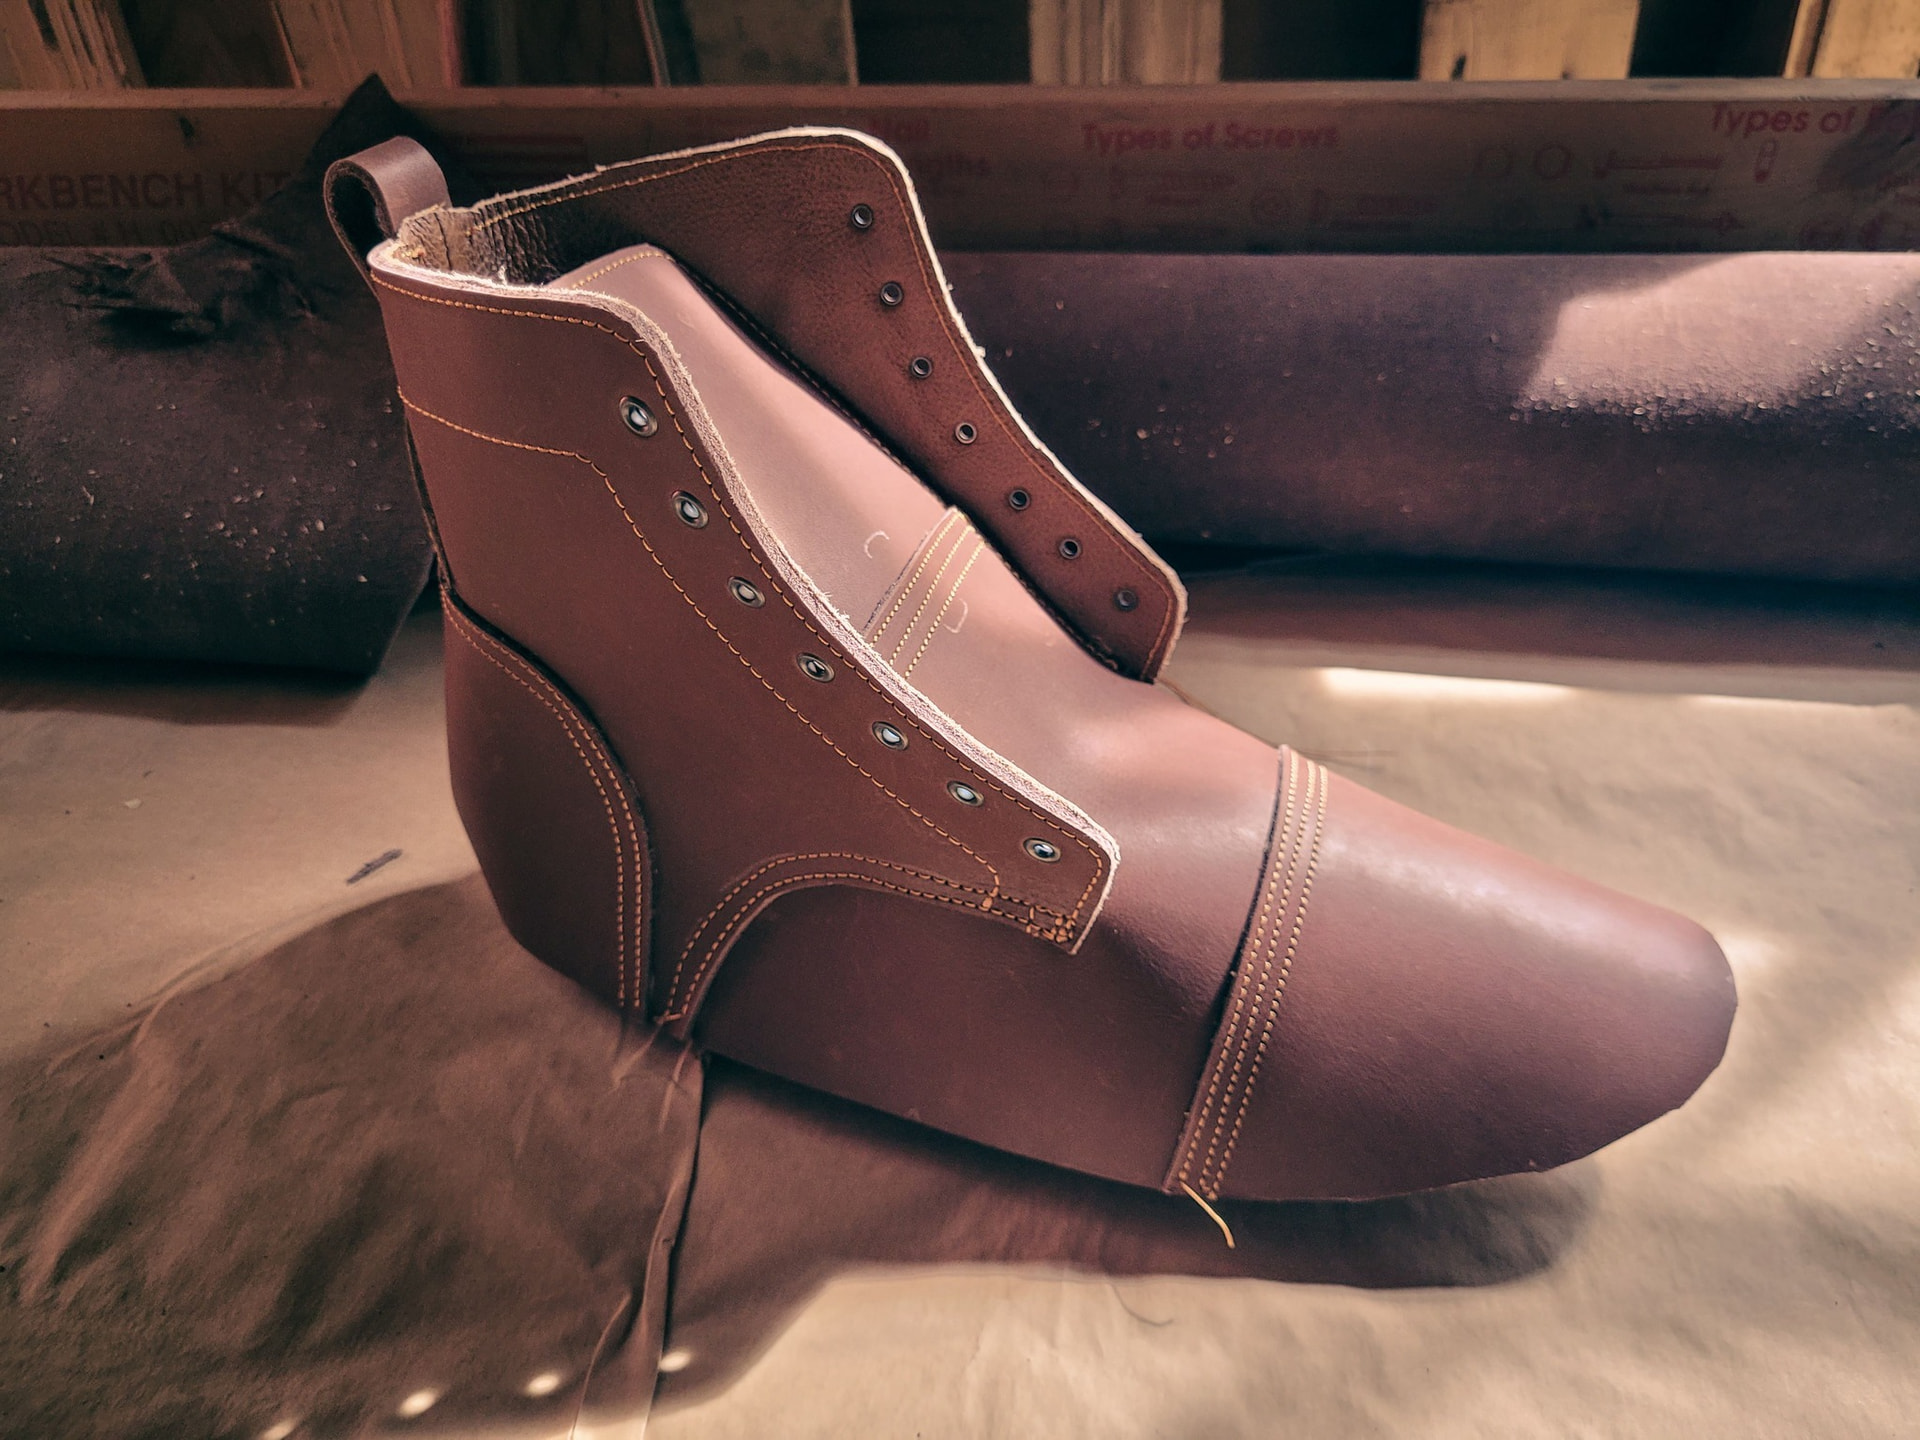
At this point I’ve closed both boots, the eyelets are in, and it’s ready for lasting.

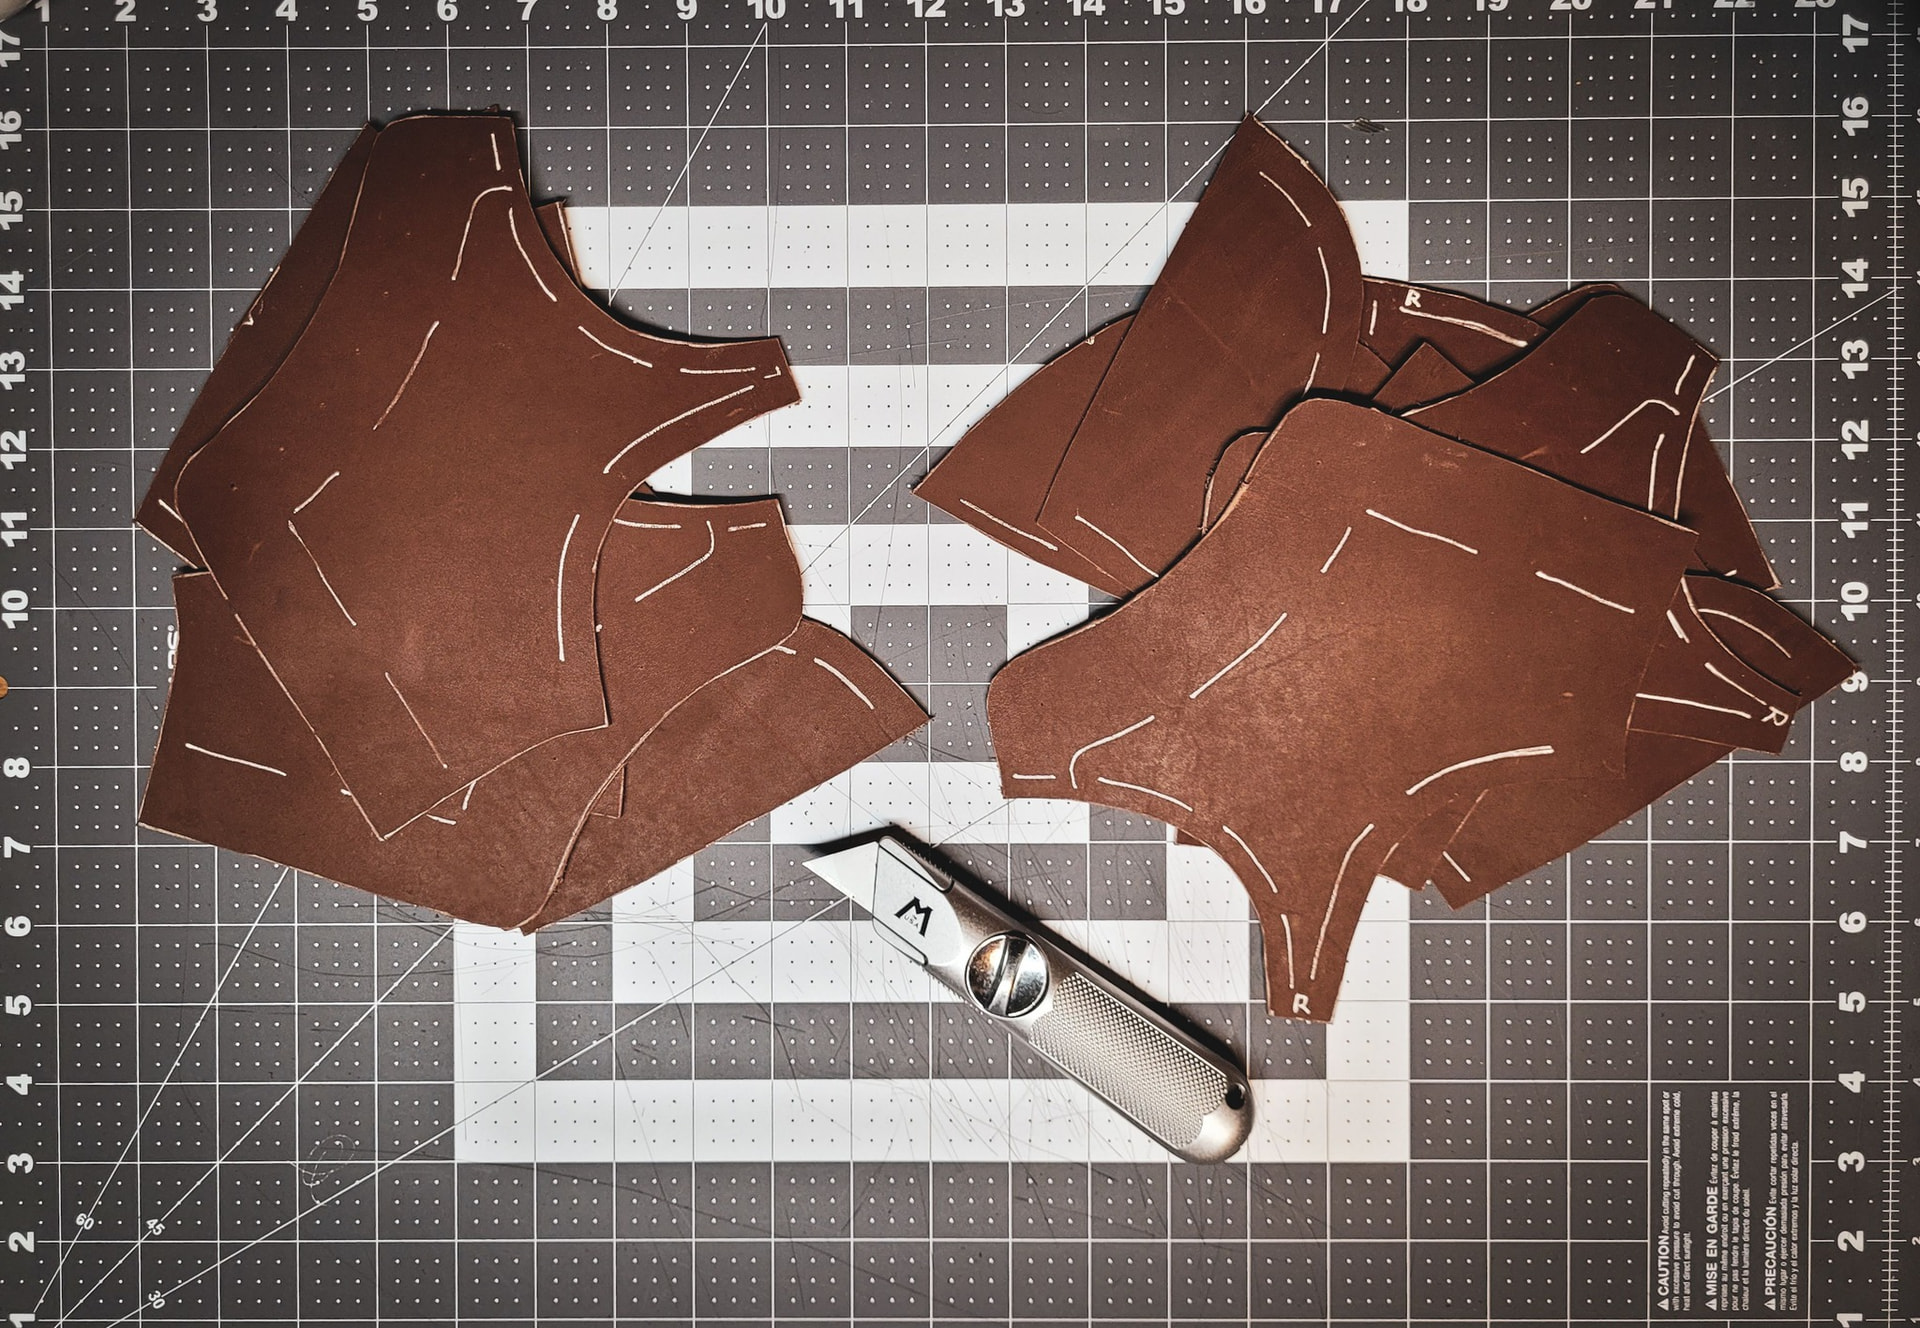
I’ve been working on both boots in parallel, even though most of the pictures show only one.

1 Like

Looking good!

I personally didn’t start with a pattern-last combo, but I agree that’s probably a very good idea. I don’t know Valevro, but I follow what he puts out, and I appreciate how clean and organized it all seems to be.

You may already know that SB Foot tans mostly for Red Wing. Oftentimes the hides that resellers like Maverick get are lower-grade or irregular in some way. I personally really like working with that kind of material.

6 oz on 3 oz will indeed be quite a sturdy upper. Unless you’ve handled very stout work boots, you may not have felt uppers with so much substance before. If it’s going to be tough on feet for the wearing, it’s even tougher on hands for the making.

How do you plan to construct?

Regardless, lasting may a bit more challenging, but rest assured it’s perfectly doable with 9 oz+. You might seriously consider both pre-lasting and wet lasting. If you go that route, try wetting a scrap first as a test. At a minimum, it will give you confidence that you can bring back from wet to the tone and texture you see now.

at this point, I’m not picky about exactly what shade of leather I use. I figure my first few pairs are mostly for practice, so I just buy the cheapest decent looking sides I can. But I also don’t want super low grade leather, because I might get lucky and make a wearable pair by accident.

this leather seems very high quality. extremely uniform grain side and the flesh side is good enough to use as roughout. there’s nothing wrong with it, as far as I can tell. It’s a nice matte medium/dark brown. when I look up pictures of redwing amber harness it looks like a perfect match.

The instructions for bottoming use 270 degree stitchdown construction, with a blake stitched heel portion, leather midsole and a single leather heel lift, with full rubber sole and heel cemented to the midsole. So that’s what I’m going to do. Although I may add some nails to the heel. I’m just using a basic vibram lug sole.

I happen to like the stitchdown style at the front, but I do like a more streamlined heel, so that seems like a good style to start with.

It’s meant to be a fairly sturdy boot, but the leather seems fairly pliable. I do plan on starting with a “practice toe” to see if it needs soaking. the lining and outer are lasted separately, so I won’t be lasting both layers at once.
I’m currently absorbing every bit of information on lasting I can find. I found this video interesting, because they mention that lasting with thick leather doesn’t require as much strength or stretching as peopla assume. Just a lot of small pulls, hammering to smooth the curves, and removing and replacing nails as you slowly tighten the leather a little bit at a time. (edit: I just noticed Kemitchell in the youtube comments for that video, so I guess he’s already seen it, lol).

I also have valevro’s “work boot” pattern, and it’s very similar except that the lines are more similar to an Iron Ranger, especially around the ankle where the collar angles down towards the laces.

1 Like

I feel like most all of the Valvero patterns could really benefit from some massaging of the back line. It always seems very vertical without a lot of boots.

After this pair, I would recommend making the appropriate modifications to the last for your feet and then give making your own pattern a go. Get something truly made off the last shaped to your feet.

1 Like

I’ll have to see how this last fits. I measured my foot, and compared it to the last, and it’s fairly close. I may add a bit of girth in the ball and instep.
I’m strongly considering ordering a custom last from podohub or 3d, but I’m a bit skeptical of the durability and nail holding of 3d printed lasts.
I also have access to some very nice 3D printers at the makerspace at my university, so I may just try to print them myself.

1 Like

They work just fine. As long as you’re not trying to clinch nails (which any last without a metal plate wouldn’t work for), the printed lasts totally get the job done. Are you going to get 20 pairs out of one? Maybe not. For under a dozen? Absolutely.

1 Like

@proudfoot stitchdown seems a good way to start. It should also be more forgiving of your thick uppers, at least around the toe.

I haven’t followed any Valevro tutorials, but Blake around the heel could be tricky by hand. See my notes here: Inside Sewing | shoemaking.wiki

For lasting more generally, there are many good videos on YouTube, though they can be hard to find. Have a look through the “Entries Linking Here” section of this page, looking for little film-slide emoji: Lasting | shoemaking.wiki

If I had to pick one to share, it would probably be Bill Bird Lasting Up a Derby Shoe Series | shoemaking.wiki

More recently, I also found So Tsuchiya Pre-Lasting Video | shoemaking.wiki and So Tsuchiya Lasting Video | shoemaking.wiki, which have no narration, but show lots of good detail from excellent angles.

1 Like

That wiki should keep me busy for a while. The annotations and cross-referencing of everything is impressive. it must have taken ages.

I’m currently deciding whether to soak and block the insoles before I start lasting. my last is has a relatively flat plantar surface, so it shouldn’t be too hard to get the insole to lay against it. I see a lot of videos where they don’t bother soaking the insole at all.

The other issue is that the insoles I got (from panhandle) have a rather fuzzy flesh side. I’ll have to figure out a way to remove some of that fuzz. maybe glass them?

1 Like

The panhandle insoles are quite tough and they are definitely very fuzzy. Sometimes soaking them will make the fuzzy “crisp up” a bit when it dries which can make it a lot easier to remove with a skiving knife and then clean up with some glass/a sander.

1 Like

The wiki is my personal notebook of shoemaking, with generous contributions from other folks I’ve met along the way. If you see anything that belongs there, let me know!

The best entry is probably Books | shoemaking.wiki

I would recommend learning to do this, especially if you think you’ll want to welt in the future. Make sure you allow the insoles to dry completely before whittling/cutting to shape. The leather will swell somewhat when wet and shrink again as it dries. If you cut before dry, insoles can shrink to undersized.

Lots of leather used for insoles has a pretty shaggy flesh side. Including all the fancy J&FJ Baker I’ve ever bought from @Customboots.

You can scrape it away if it bothers you. Just be careful not too thin too much—the large grains can tear out more than you expect.

I’m not sure that’s really necessary for stitchdown boots. A smooth working surface is more important for carving channels, holdfasts, and narrowed waists.

especially if you think you’ll want to welt in the future.

I think the next step after stitchdown would be Norwegian stitching, which seems like sort of a hybrid between goodyear and stitchdown. similar holdfast carving technique, but without the need for an actual welt strip.
plus it looks cool.

1 Like

To be pedantic, goodyear welting doesn’t get a holdfast at all. It gets a gemming strip glued on and the welt is stitched to that.

For some reason, people have developed a habit of using the term “goodyear welting” when describing hand welting, which is fundamentally different.

Be warned that this can take a lot longer than you think. Ask me how I know…

1 Like

Early iterations of the Goodyear process used machines to carve holdfasts. Both old hand-crank and newer motor-driven carving machines are still in use: at White’s in Spokane, Viberg in Canada, Bridlen in India, Matt Paker in Russia. Insole Carving Machine | shoemaking.wiki

I don’t have documents tracing the full evolution, step by step. But I suspect it went something like hand carving → hand-crank machine carving → carved with canvas reinforcement → premade canvas and leather ribs glued on → entirely canvas ribs.

Well if we’re going to pedantic… :wink:

Is it really a holdfast at that point? Certainly not the same sort of holdfast we’re talking about in this context. More of a raised flap.

Brian/Roleclub does a weird variation of how he cuts his holdfast/flaps too that’s an extra bizarre hybrid approach.

Either way, I still believe people often use the term “goodyear welting” in reference to stuff that is very much not goodyear welting.

I have to disagree.

Machines vary, but some, and especially the older hand-crank ones, cut holdfasts just like some handwelters. I can only expect the earliest machines were specifically designed to replicate the hand process.

Here’s the machine at White’s, for example:

They use this on the hand-sewn line. No channel, but with an incision that consistent, it’s not needed.

Modern machines will often cut flaps rather than gouge out strips of leather. Turning them up makes for a taller rib, which better suits curved-needle inseaming machines. But a handwelter can use the very same carving without turning up, because they can sew much more accurately through a shallower “rib”. That’s what the handsewers at White’s do. It’s the sewing process that differs, not the insole carving.

Shoe fans I see online often talk about “Goodyear welt” as if it’s one, specific process: cemented canvas gemming and a lockstitched inseam. That’s not even true just today: machines and processes vary across factories, and even across lines of single companies.

It’s definitely not true over time. Early on, and in the USMC era, “Goodyear welt” was short for “Goodyear welt process”. It meant basically whatever combination of machines and processes Goodyear, later Goodyear-McKay, later USMC, sold as a line for that style of construction. It began with the sewing machine, then expanded to mechanize surrounding processes. Factories would buy a whole integrated line of machines from USMC, complete with installation engineers and a network of service technicians, then pay a royalty per pair.

As of 1923:

The insole also receives further preparation; it is channeled on the Goodyear Universal Channeling Machine. This machine cuts a little slit along the edge of the insole, extending about one-half inch towards its center. It also cuts a small channel along the surface.

The lip which has been formed by the Goodyear Universal Channeling Machine is now turned up on the Goodyear Lip Turning Machine, so that it extends out at a right angle from the insole, forming a lip or shoulder against which the welt is sewed. The cut which has been made on the surface inside this lip serves as a guide for the operator of the Goodyear Welt Sewing Machine, when the shoe reaches that stage.

Perhaps this is a better fundamental definition for goodyear welting and how it is destinctively different. A vertical piece of material extending perpendicular out of the insole surface (be it a flap cut and folded up or gemming added) that is then stitched through to attach the welt.

I personally don’t see any need for strict definitions. Those clearly aren’t necessary for shoes to get made, or for the ways we make them to improve.

But I’d push back on manufacturers marketing shoes with applied gemming as “handwelted”. And I’d encourage hand makers calling their work “Goodyear welted” to take more credit.

There are some different implications for the actual shoe though. Something that is Goodyear welted (or stitched with a raised flap to be more generic) will require one to build up the cavity, so there are extra materials involved. Something handwelted can be done without the build up, but may require different selection for the insole material/thickness. For someone trying to learn, those nuances can be misleading.