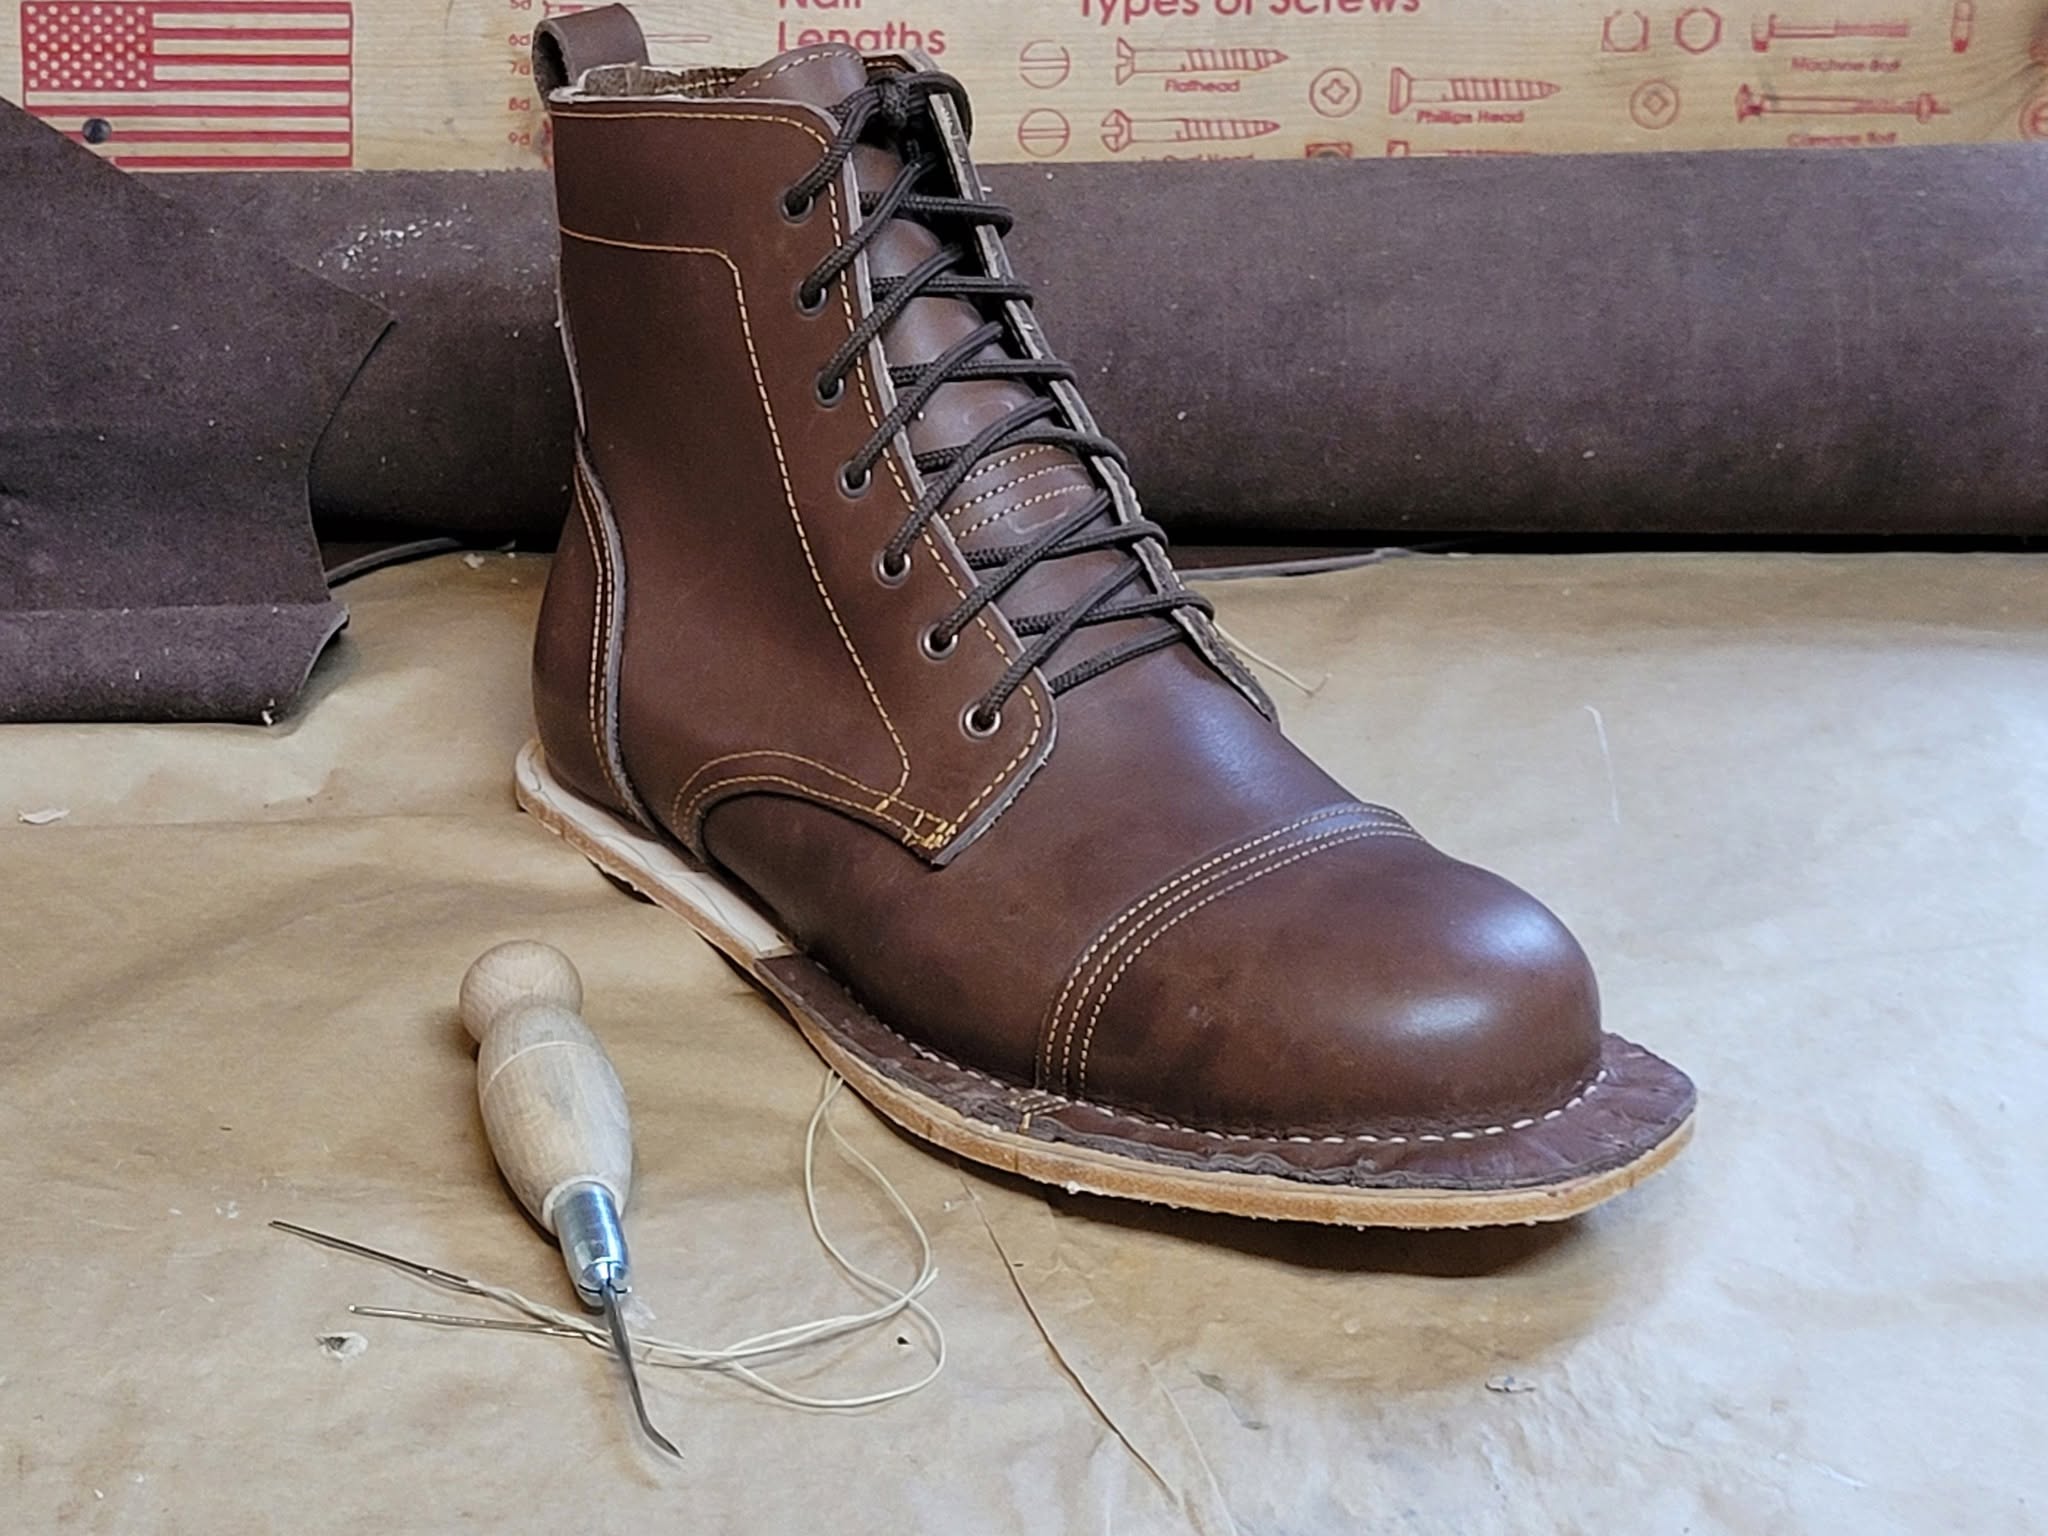
My first boot

so you apply a base coat of glue and then soak it after the glue dries?

I’m using Aquilim 315, which is water based. I believe once it dries it becomes waterproof, but I should probably glue and soak a test piece to be sure.

I plan on only stitching the leather midsole and a second leather midsole layer. the rubber outsole will be glued.
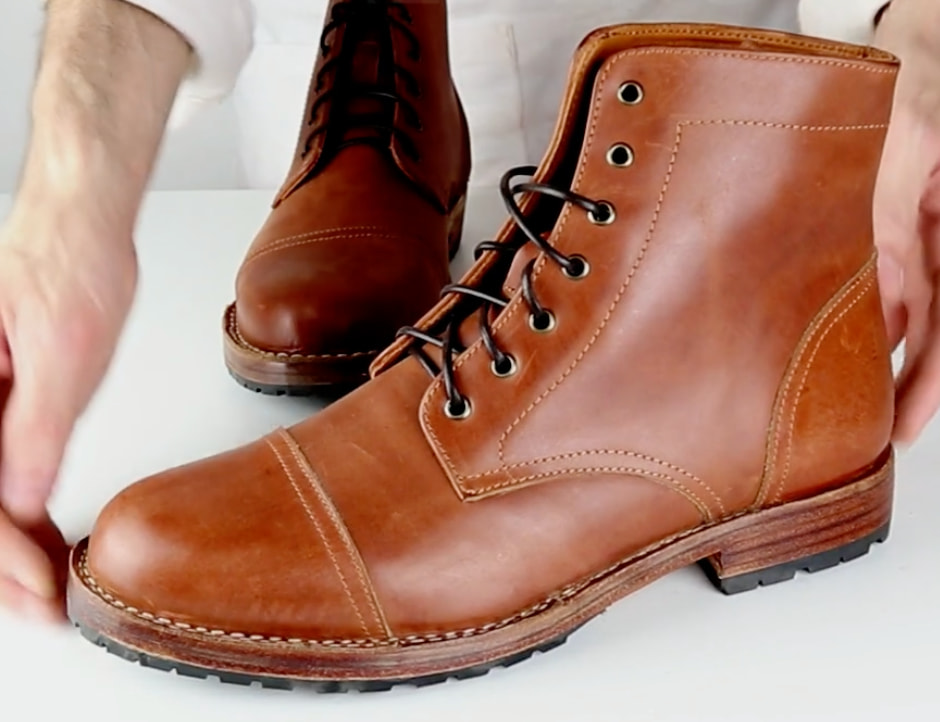
Here’s what I’m aiming for, except I’ll be using a full rubber sole instead of a half-sole.

I know it’s an honest question, but this is very hard to answer as you put it.

As @lexar4h1 mentioned, makers have certainly stitched good outseams using blades that other makers use for inseams. The main thing is that it’s sharp.

An inseaming blade doesn’t know it’s an “inseaming awl” or a “stitching awl” or a “heel awl”. Some makers, like Osborne, don’t even market their blades with those labels. A blade is made from a particular steel, in a particular thickness, bent in a certain way, ground a certain way, &c. &c. &c. Some call particular combos of those characteristics “inseaming awl” or “sewing awl” or “outseaming awl” or “stitching awl”, based on their preferences and expectations.

Your best bet is probably to find someone who’s handstitched stitchdown boots and ask them what they used and liked, in terms of thickness, curve, grind, point, and sharpening. Dennis Kieback, for example. Then find that, or something close to it, for yourself.

I haven’t done stitchdown myself. But I wonder whether outseaming those is really all that different than outseaming welted. Especially if you’re not trying to stitch welted really close in, under the upper.

I’ve personally had best results with square awls—that’s a grind style—from Tom Carbone and Dick Anderson. Either of those are readily available mail-order in the USA. They’re both clearly inspired by older English and European blades. Japanese toolmakers also seem to follow those patterns for stitching awls. The ones I imported from Mamoru, for example—you can find photos of those here on the forum.

If square awls weren’t available, I would probably look for thicker diamond-point awl blades, like saddler’s awls, but curved. Especially for robust rather than dressy styles. Some diamond-shaped, curved awls get called “German” in various sources. That might be another search term for those.

If you’re looking for inspiration, there are tons of great videos with hand sole stitching on YouTube. Including some doing boots. Dennis I mentioned. Bad Hat Brothers and Songlim in Korea.

I didn’t mark my notes of videos as having hand stitching from the start, because the beginning I was focused exclusively on handwork. But I’ve gone back and updated a few entries to flesh out the list here: Hand Outseaming | shoemaking.wiki
I’m not sure how well it would work with aquilium, I used Renia topfit.

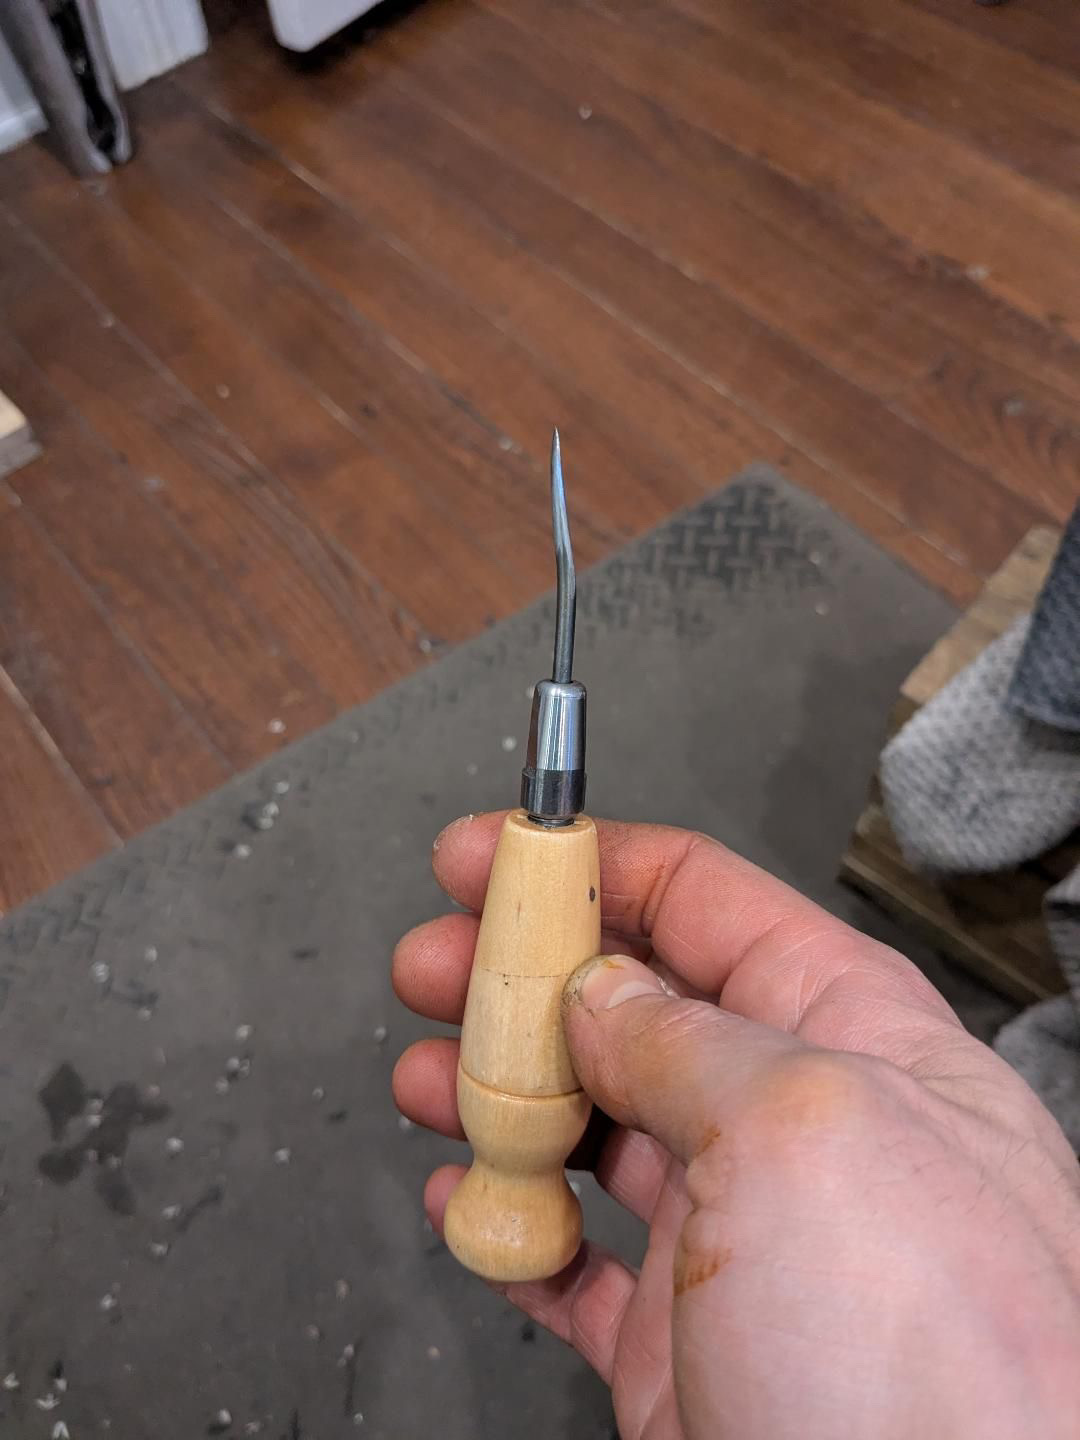
I looked through my messages and found a picture from unsung house of the awl they use to resole stitch down boots. They said it is a modified inseaming awl.

Is unsung on this forum?

looks like they took one of those German diamond awls with the sickle shape, and just ground it down to about half it’s original length.

1 Like

I’m not sure. I messaged them on instagram after they posted a story of them hand out seaming.

1 Like

What length do you recommend. I see the Tom Carbone awls come in sizes ranging from 2 5/8” to 3 3/8”

1 Like

They’re not, but both Grant and Issac are both super nice and always great at sharing knowledge

1 Like

I’m no expert, but if you’re doing big, chunky boots, I’d get the big one.

Tom has been very generous with me by e-mail. If you ask him what size awl you should get in a way that’s easier to answer, I wouldn’t be surprised if he does.

lasting the upper / toe went… ok.

the leather I used for the toe-puff was a bit too thick. about 3mm tooling leather. I should have skived further back from the edge. It took a lot of hammering to get the puckers out. They also slid around a lot. I used white school glue, and the first puff slid forward about a centimeter as I was lasting it. For the second puff I secured it with a two nails on top before attempting to shape it over the toe. Fortunately this little bit of asymmetry doesn’t seem to show through the uppers and hopefully won’t be a problem as far as fit. After that ordeal, lasting the toe portion of the upper went relatively easily.

But as expected, stitching down the midsole was a time consuming process. Just stitching one toe I broke an awl blade and two needles, and kept puncturing the thread when inserting the second needle for my saddle stitches. I think I may try using a hooked needle or speedy-stitcher next time.

so I’ve got one toe stitched.

1 Like

Now I have to decide the next steps for the sole.

The instructions I’m following have

  • a leather midsole,
  • a leather outsole,
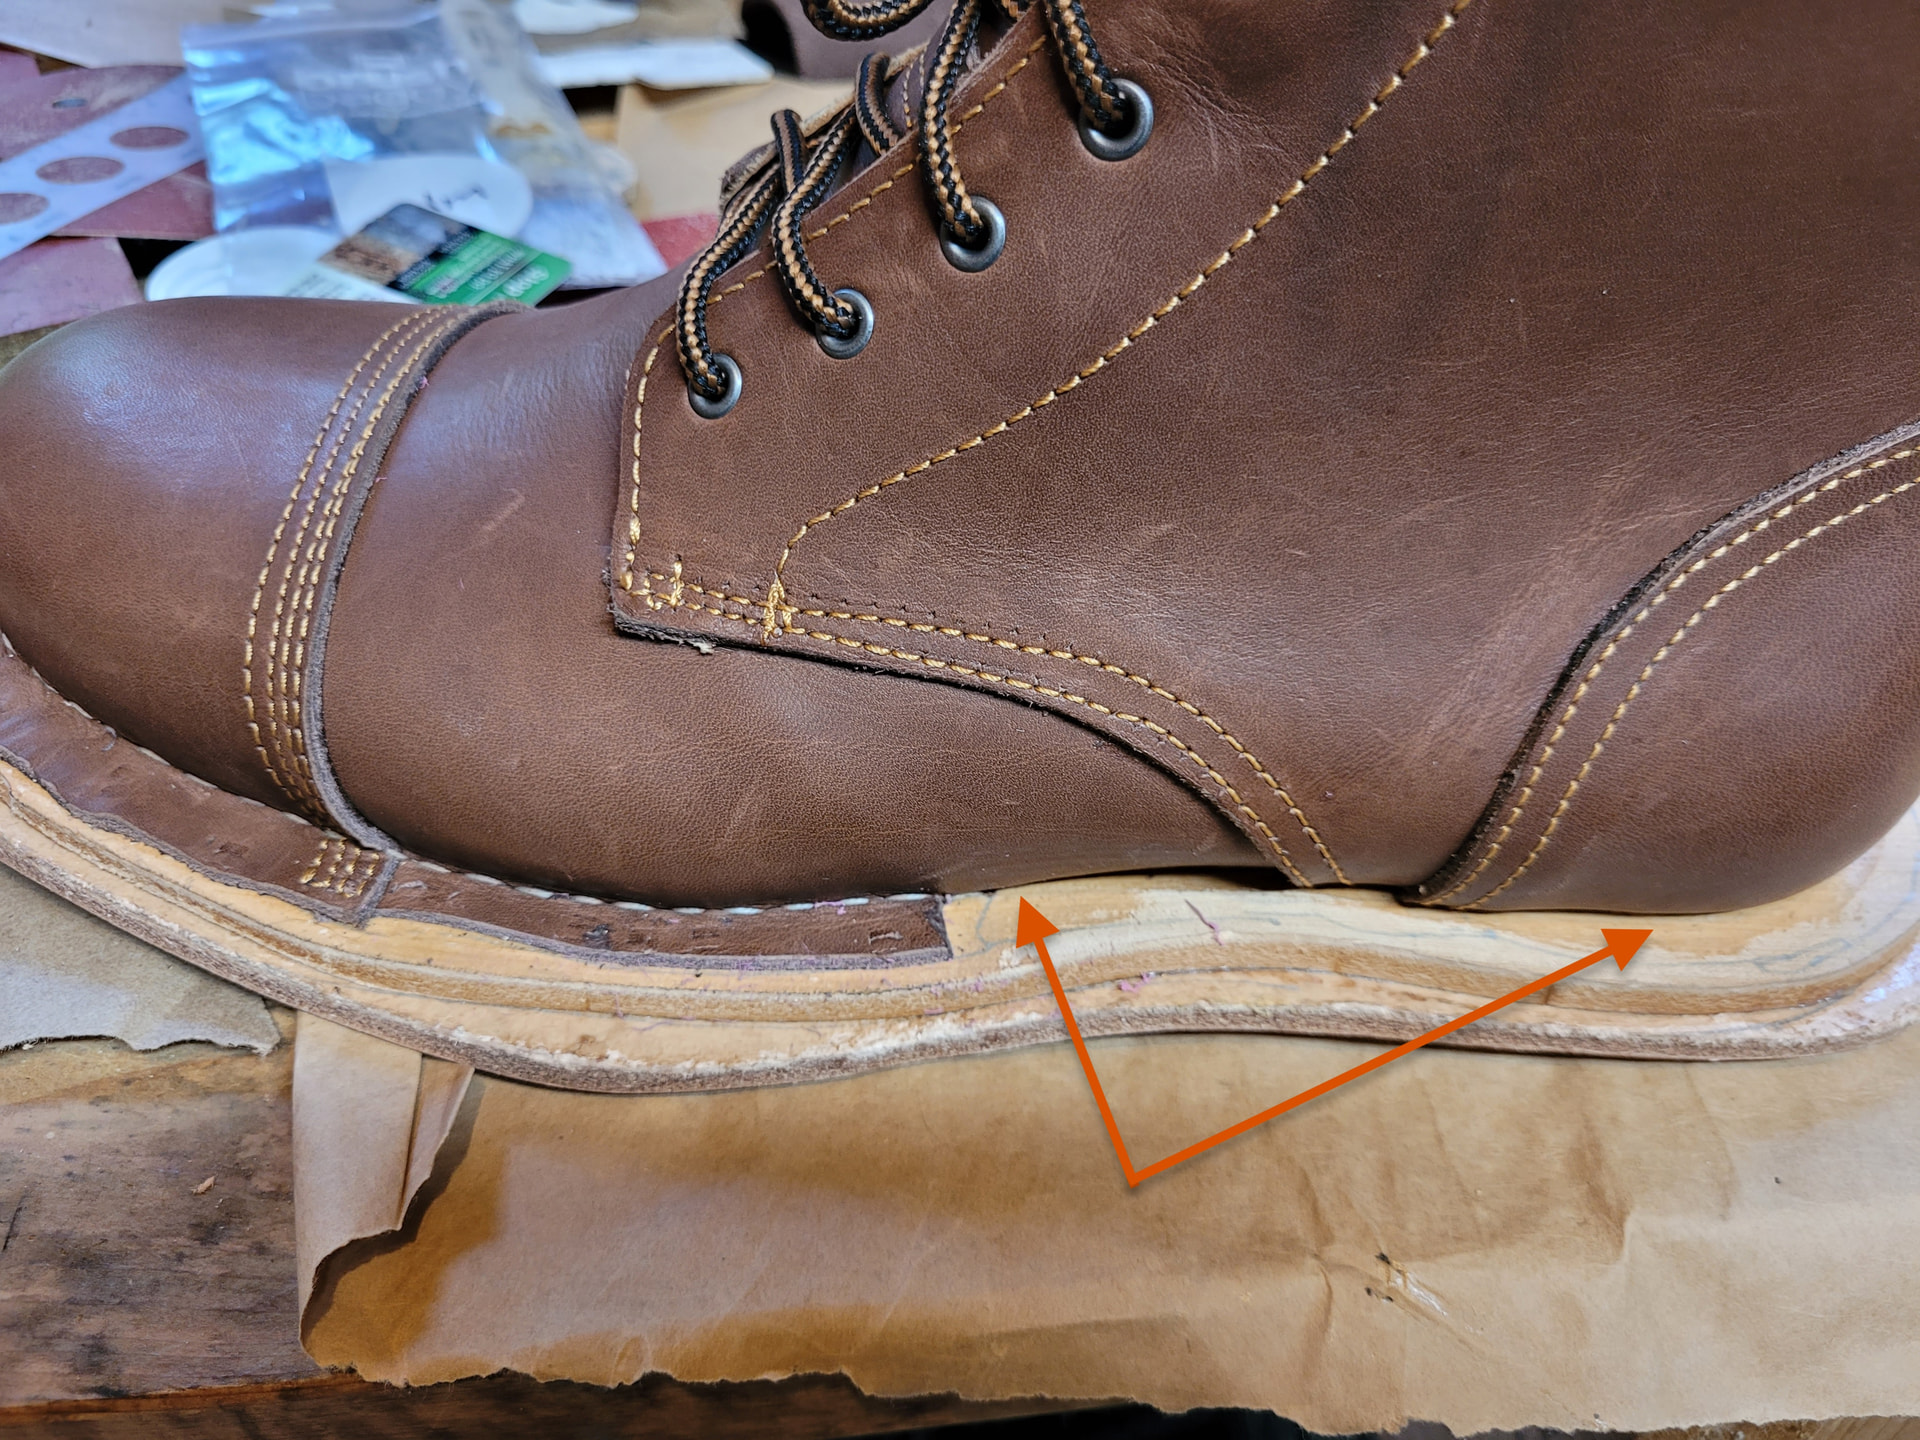
  • a rubber half-sole and heel (with a 3 layers of leather heel stack). you can see that in the picture up above.

The half sole used in the instructions is a 5mm sole.
My sole is a 11mm thick full sole. twice as thick as the ones in the instructions.

So if I add a second layer of leather, as per instructions, my sole will be 5mm thicker than intended.

I’m considering skipping the second layer of leather, and applying the rubber outsole directly to the midsole instead. This would be more similar to brands like Nicks or Kustom Kraft, who use only a single layer of leather for their midsole.
But I would be gluing to a much rougher, fluffier surface, with exposed stitching from the stitchdown construction. I worry that resoling would be much more difficult.

Thoughts?

1 Like

Outsole to midsole is fine, but be mindful of if your midsole is grain side down for finishing the area between the heel and the halfsole

1 Like

I’m not using a half sole, so that’s not an issue.
The instructions I’m following specify a half sole, but I bought a full sole so i’ll have to adapt.

Although I’ll probably have to scrape off the fluff to get good adhesion to the midsole. I guess I’ll use glass to avoid damaging the stitching.

1 Like

Looking pretty good!

I’d forgotten you were using a Valevro pattern, but looking at your photo, I thought of Valevro immediately. Couldn’t tell you why!

it’s a good pattern, although I would probably increase the lasting allowance slightly.

1 Like

I can almost always pick his patterns out when they’re used. Typically it is the very vertical backline without much curvature and oversized facings that stand out.

1 Like

I decided to add that second leather midsole layer. This will have some very chunky soles.
Now I need to do the second round of hand stitching parallel to the first.

A few more questions.

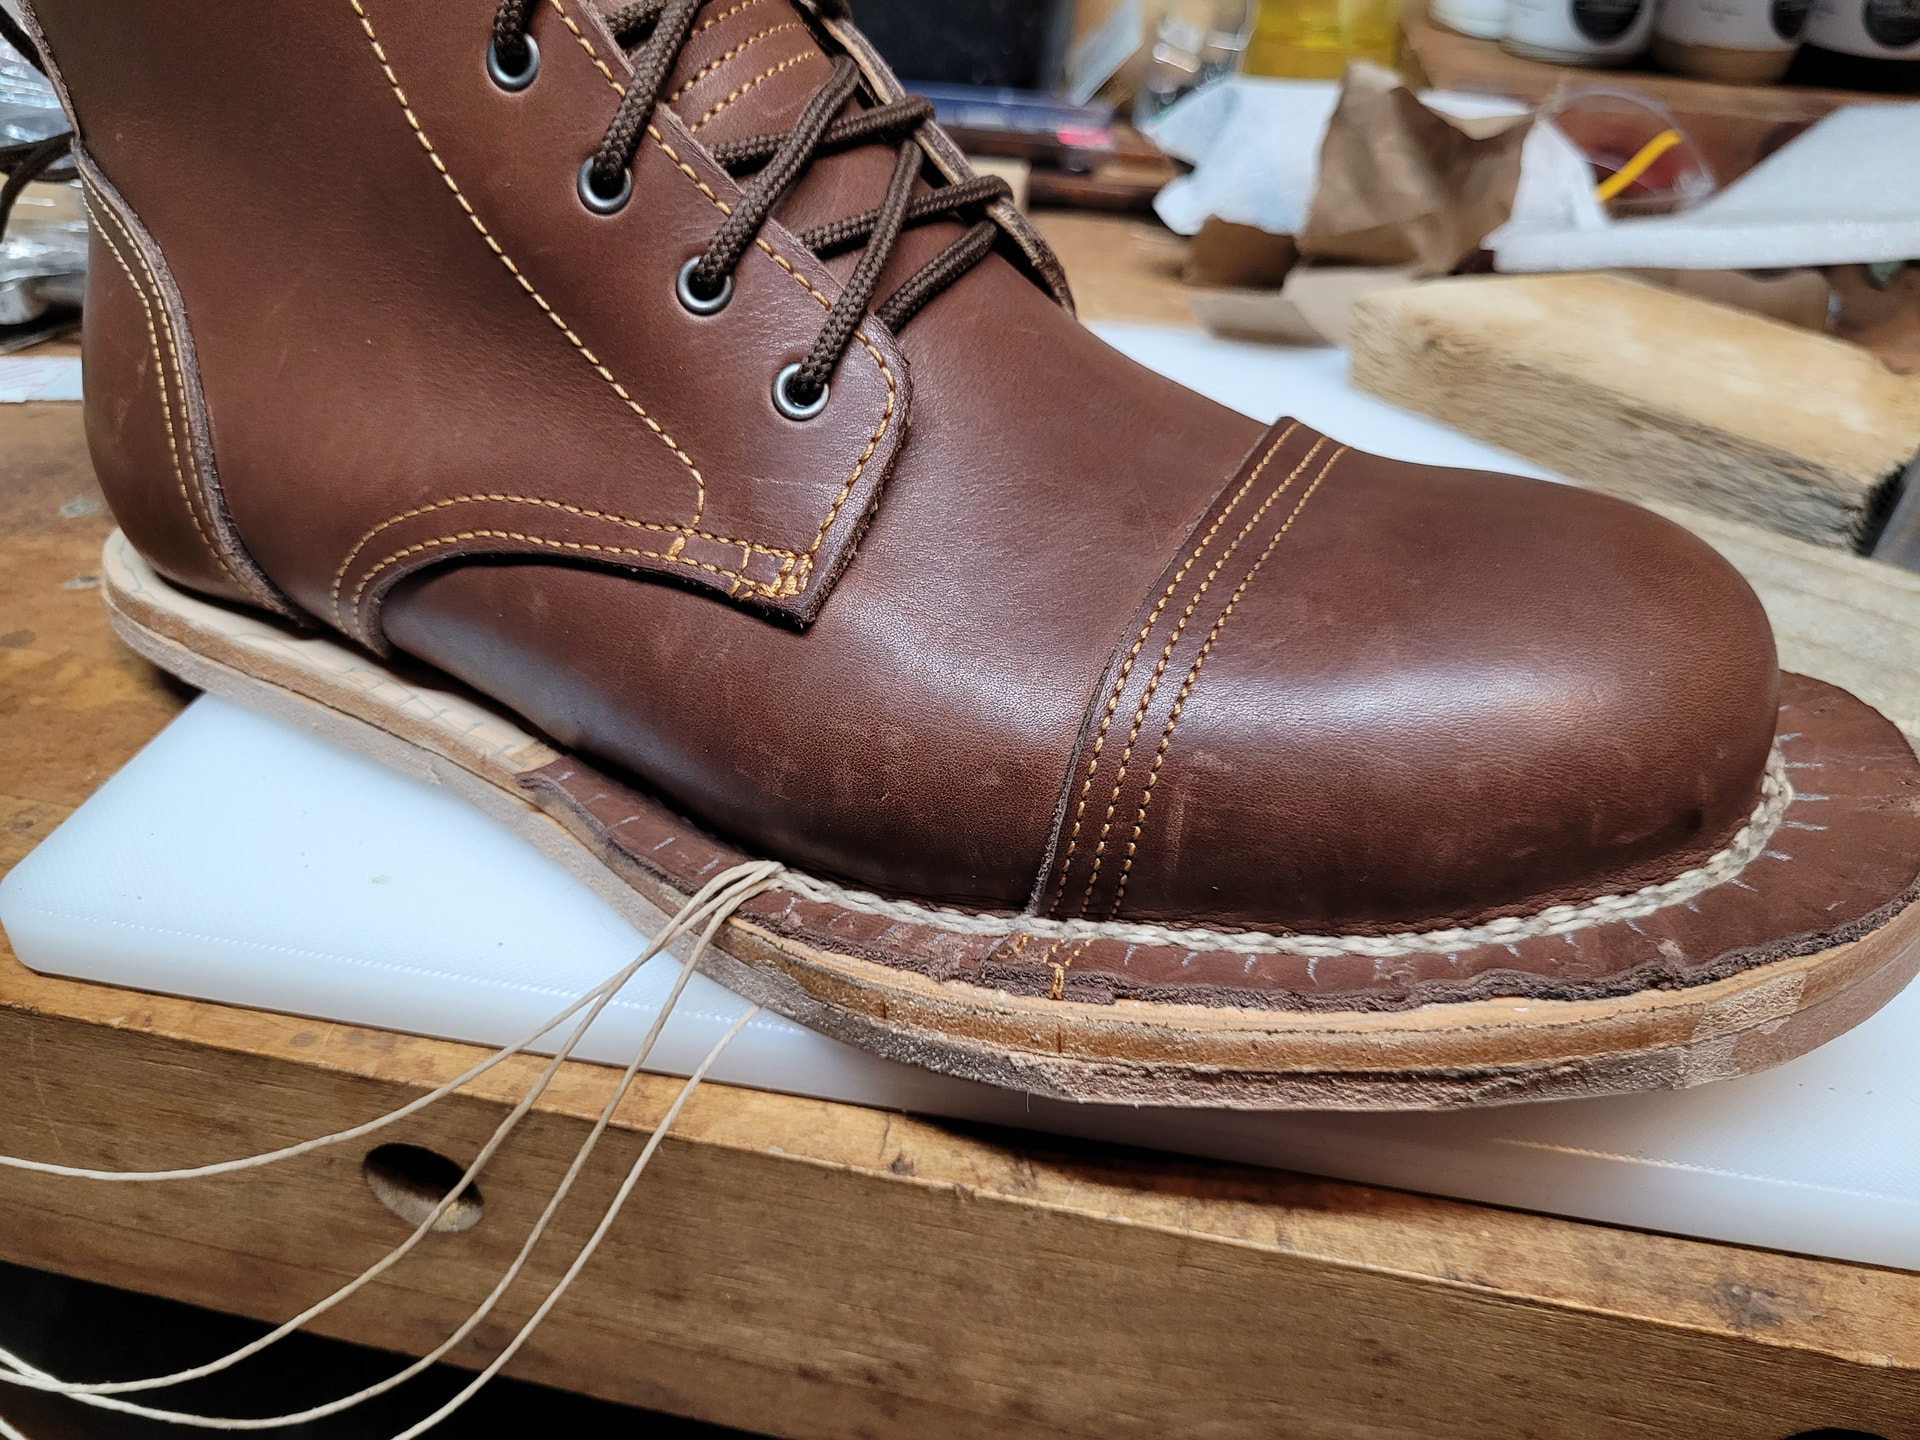
  1. How do you get contact cement off the midsole (see picture). It’s not doing any harm, but it’s unsightly, and I’m worried it will attract dirt and age differently compared to the bare leather.

  2. Should I use a thicker thread than I used for the firIst row of stitching? For the first row I just used some waxed thread I had left from previous non-shoe leather projects. It’s probably .3mm but it looks a bit thin to me. I was considering buying something thicker from Maine Thread co. I wonder if I should get the tapered ends, or if the spools of twisted or braided waxed thread would be more economical. Any outsole thread advice?

Might have to rub it off with your fingers.

Can use whatever thread you like. Maine Thread tapers and Maine Thread twisted are the same product. Only the ends differ.

That’s good to know. They looked the same, but I wasn’t sure.

1 Like

Finally getting back to these boots after waiting for some thread to arrive.
I decided to go for a decorative chain stitch on the second row of stitching, using a much thicker thread (0.045" twisted Maine Thread) than I used for the first row of stitching.

I’m having a bit of a problem with discoloration of the thread. It’s their natural color, so it’s not supposed to be bright white, but it’s definitely picking up some dye or oil from the leather.
I also suspect the thread has some kind of “pull-up” effect, much like waxy leather. when I pull the thread tight I can see it darken a bit.

I’m also debating how far back I should continue the stitching, and I’d like your opinions. Should I continue to the quarter seam? The heel seam? Should I go all the way around for a 360 stitch?

And I’m getting a bit of delamination of the midsole and outsole just forward of the heel. My improvised sole press (many layers of elastic bandage) must not have provided enough pressure, or maybe I did something else wrong. I’ll need to address that before I continue the sewing

1 Like