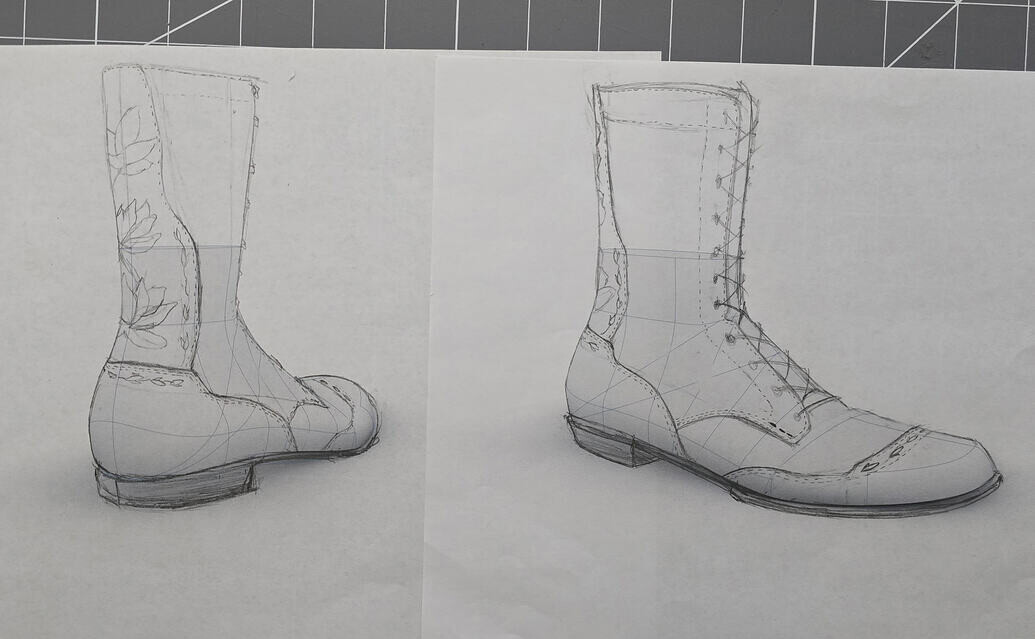
I was primarily using that for the fitters to put her feet at the right angle, but works really nicely for positioning the last as well.
1 Like
Running through another rev on the fitter. Wanted to basically pull out the shape as a template and recreate to clean some stuff up and validate the process of making a new last. Definitely looking better.
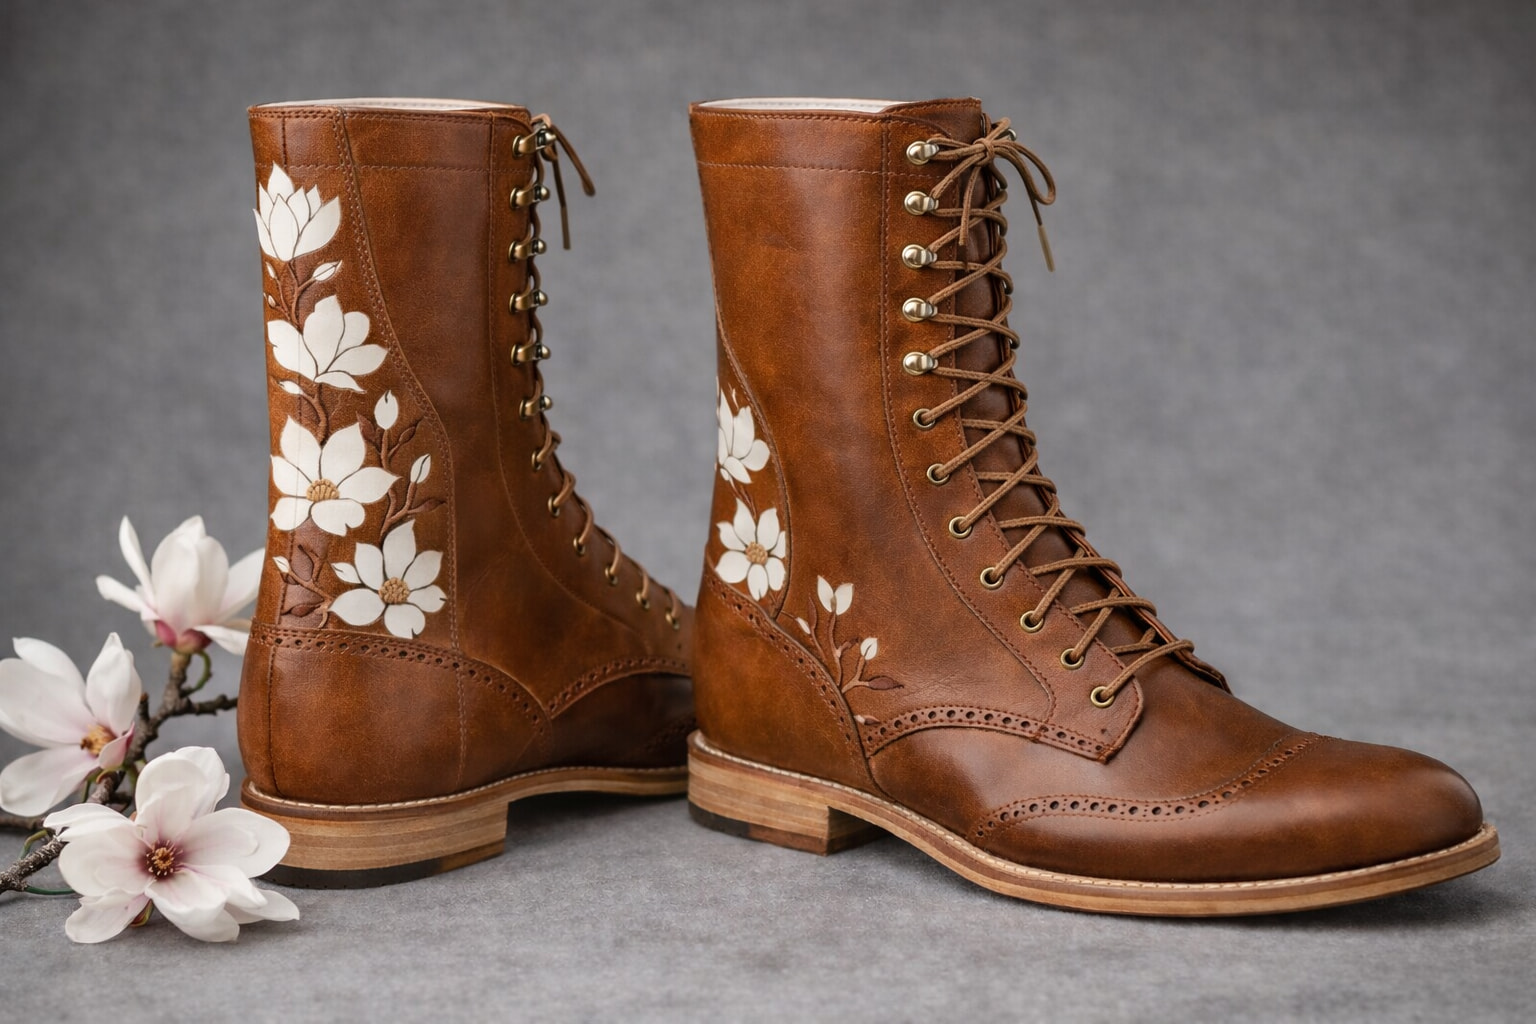
For giggles, I plugged one of the design sketches I did into chatgpt to see how well it would interpret it. Not a bad way to visualize color schemes.
Sketch:
Chatgpt:
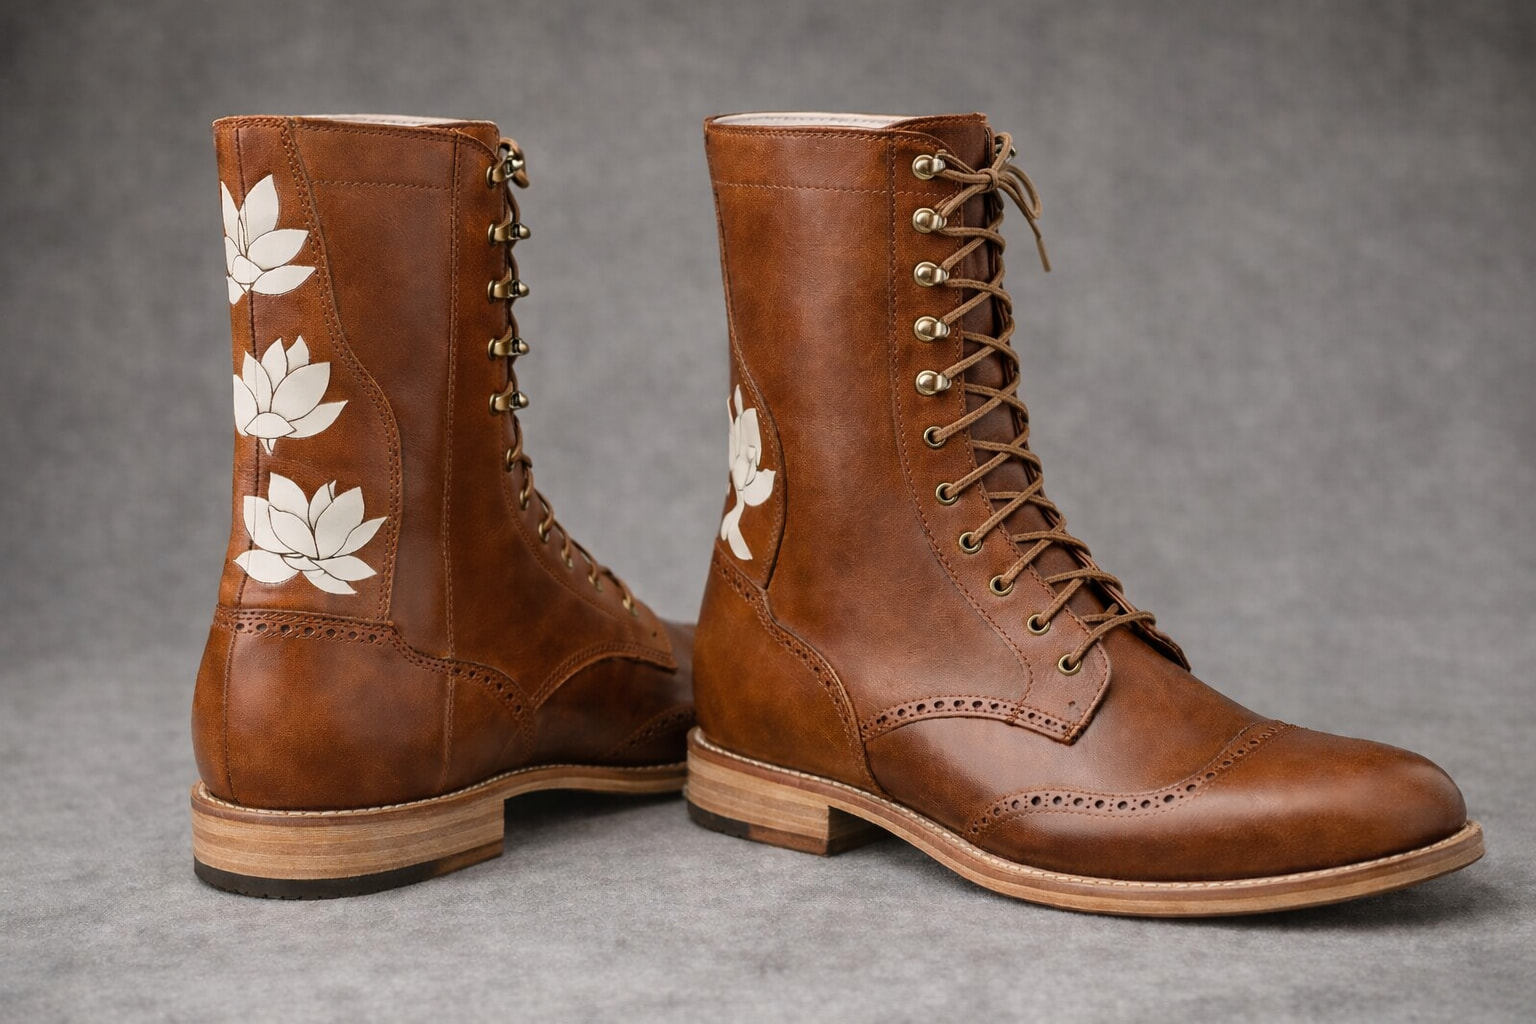
Interesting use of an image generator! It certainly imitates how product photos make leather look in beauty shots.
I couldn’t help noticing that it turned wireframe lines into seams on the left boot. I think it also put hiking boot lace hooks on the left, and completely made up new hardware on the right. The lacing goes through the “hooks” on the right, as if they were eyelets.
Hardware is tricky ![]()
There are definitely a lot of weird oddities like that in the image. I have seen it do really weird masking lines, merge two stitch lines into one, etc.
Gives a good general idea though as long as you step back and squint.
1 Like
I’m told I’m actually pretty handsome that way!
Ha!
Interestingly, I was planning on keeping the inlay totally limited to the backstay, but it did one version with a little bit making its way out onto the quarters. I actually really like it and may need to incorporate it as I finalize the design.
1 Like
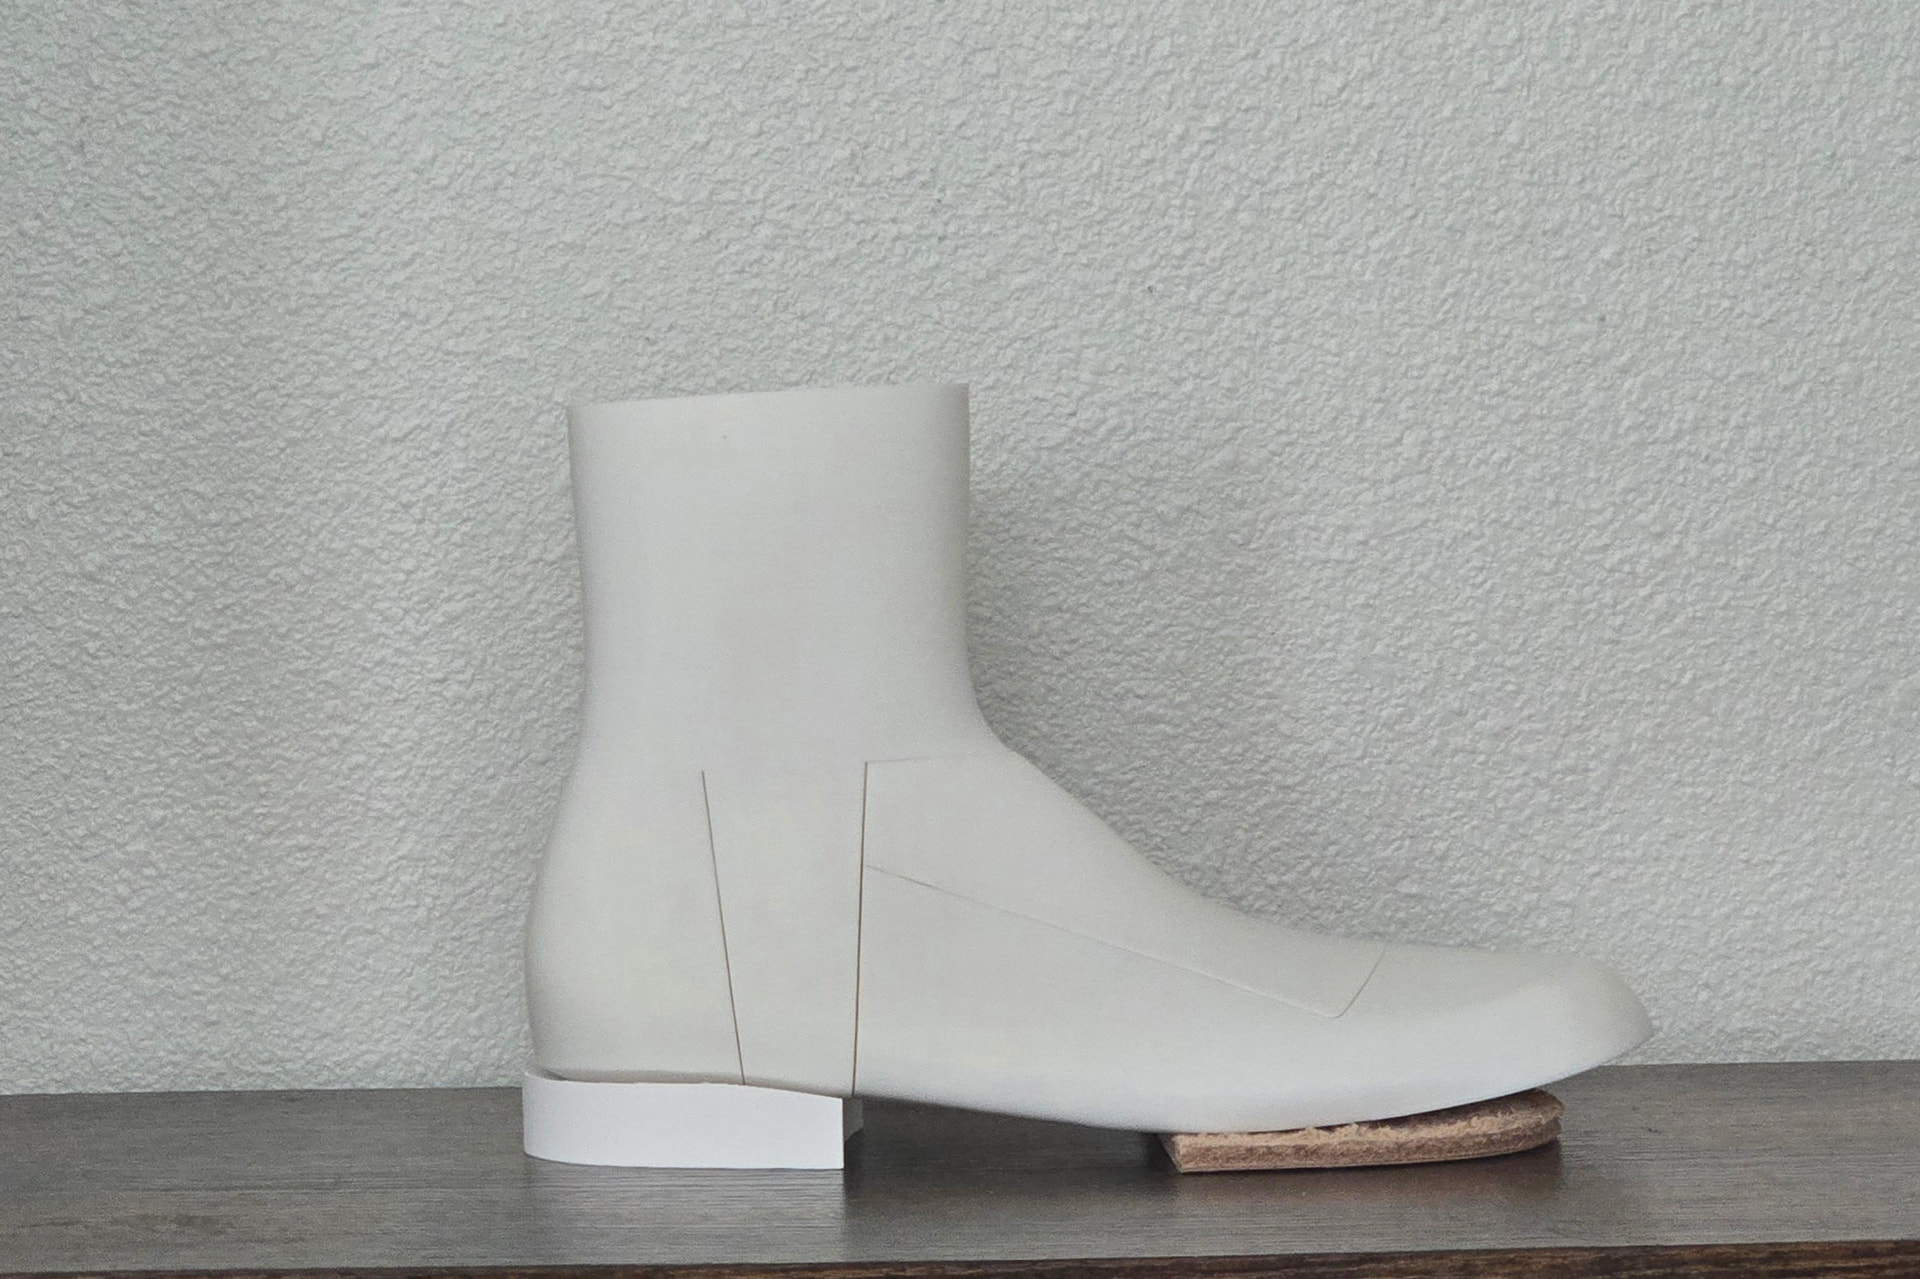
Looks to be standing on the tread line there.
Is the heel block the height of heel plus outsole?
Was a block from one of the fitters which had the insole thickness included in the model, so it’s not the right height for the actual last.
1 Like
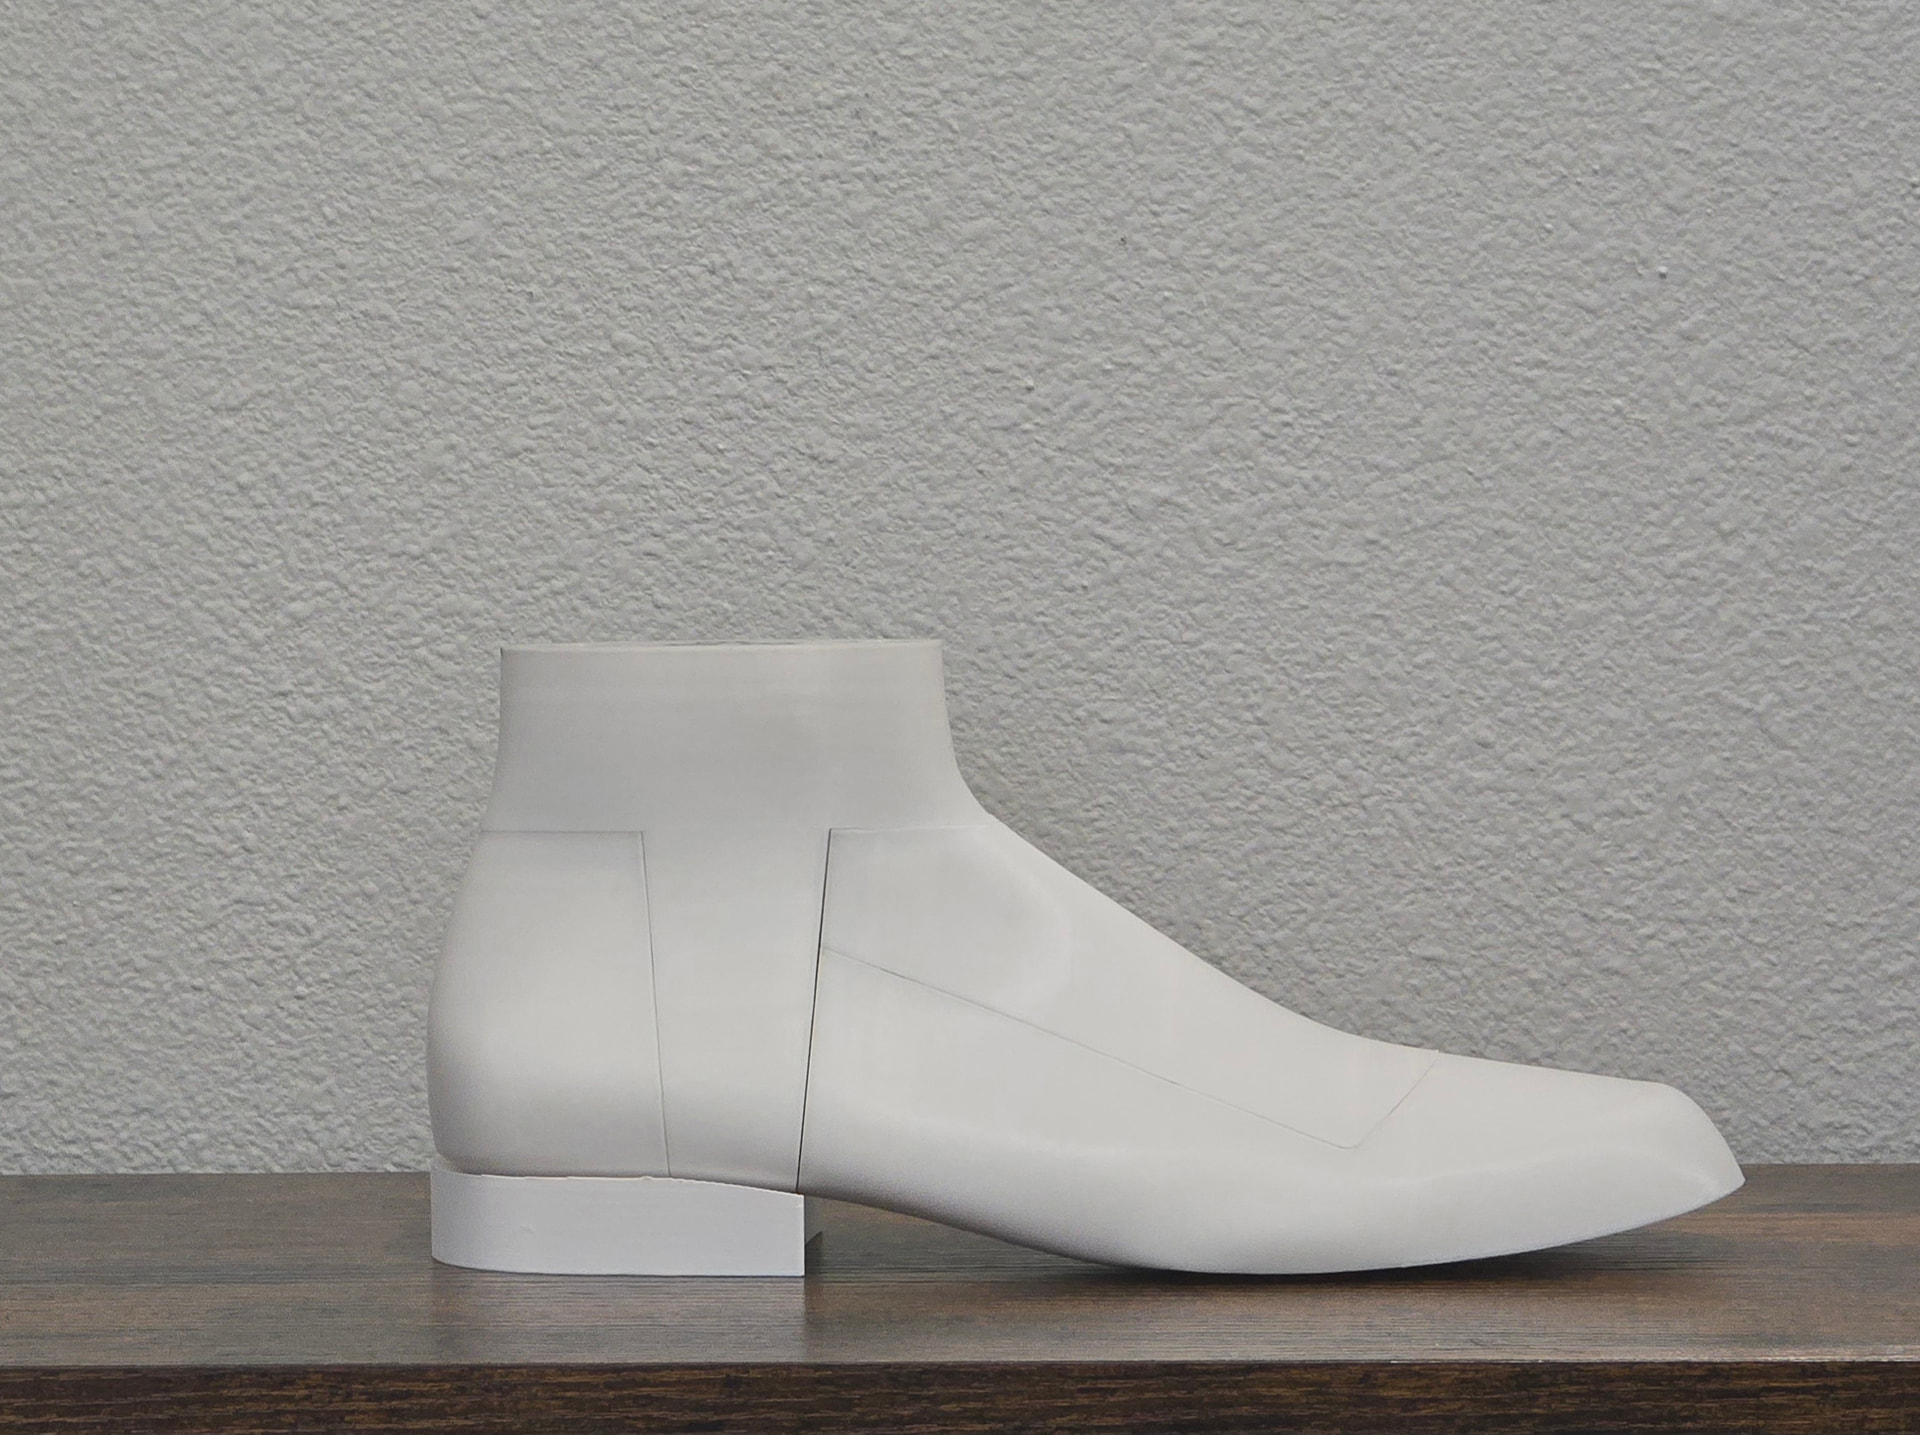
Ran into some weird software issues that timed with updates to Rhino and 3dshoemaker. Not sure if it’s how I was doing layers before not playing nice or what, but I opted to recreate the base CAD model. Was a good chance to clean a few things up too, so ended up doing another rev of fitters and such.
While I was at it, I increased the heel height a little to 20mm and added an extra mm of toe spring. Definitely like how it’s sitting now.
As an interesting aside, I keep finding that I really need more ball girth than I would expect for comfort. Fitter wants about 8mm of extra ball girth for it to feel right to my wife. Everything else tracks right, but she needs the extra ball girth for some reason.
1 Like
I’m no pro when it comes to toe caps, but I’d worry about putting seams that close to the joints, especially on the irritable pinkie side.
Design wise, I was basically following the layout if a long wing cap toe when I did that sketch. I definitely was thinking the exact same thing as I was laying things out on the last today though which is why the cap toe changed.
1 Like
Most of the wingtips I’ve seen extend a bit further back, past the ball, so the seams fall well behind it.
Here’s Allen Edmonds’ take, for example:
Those definitely are further back that what I was looking at.
H. J. Patrick puts them about an inch and a half in front of where the quarters meet the sole, which is what I measured off of when I was sketching on the last today. Granted, this boot is basically a women’s 7.5-8, so some of his measurements probably need to be scaled some.
How did you go about drawing the pattern on the last? In Terry Kim’s videos he usually draws some reference lines and makes the design from there. Are you just using the instructions from the HJ Patrick book but doing it on the masked up last instead of the 2d mean form?
1 Like
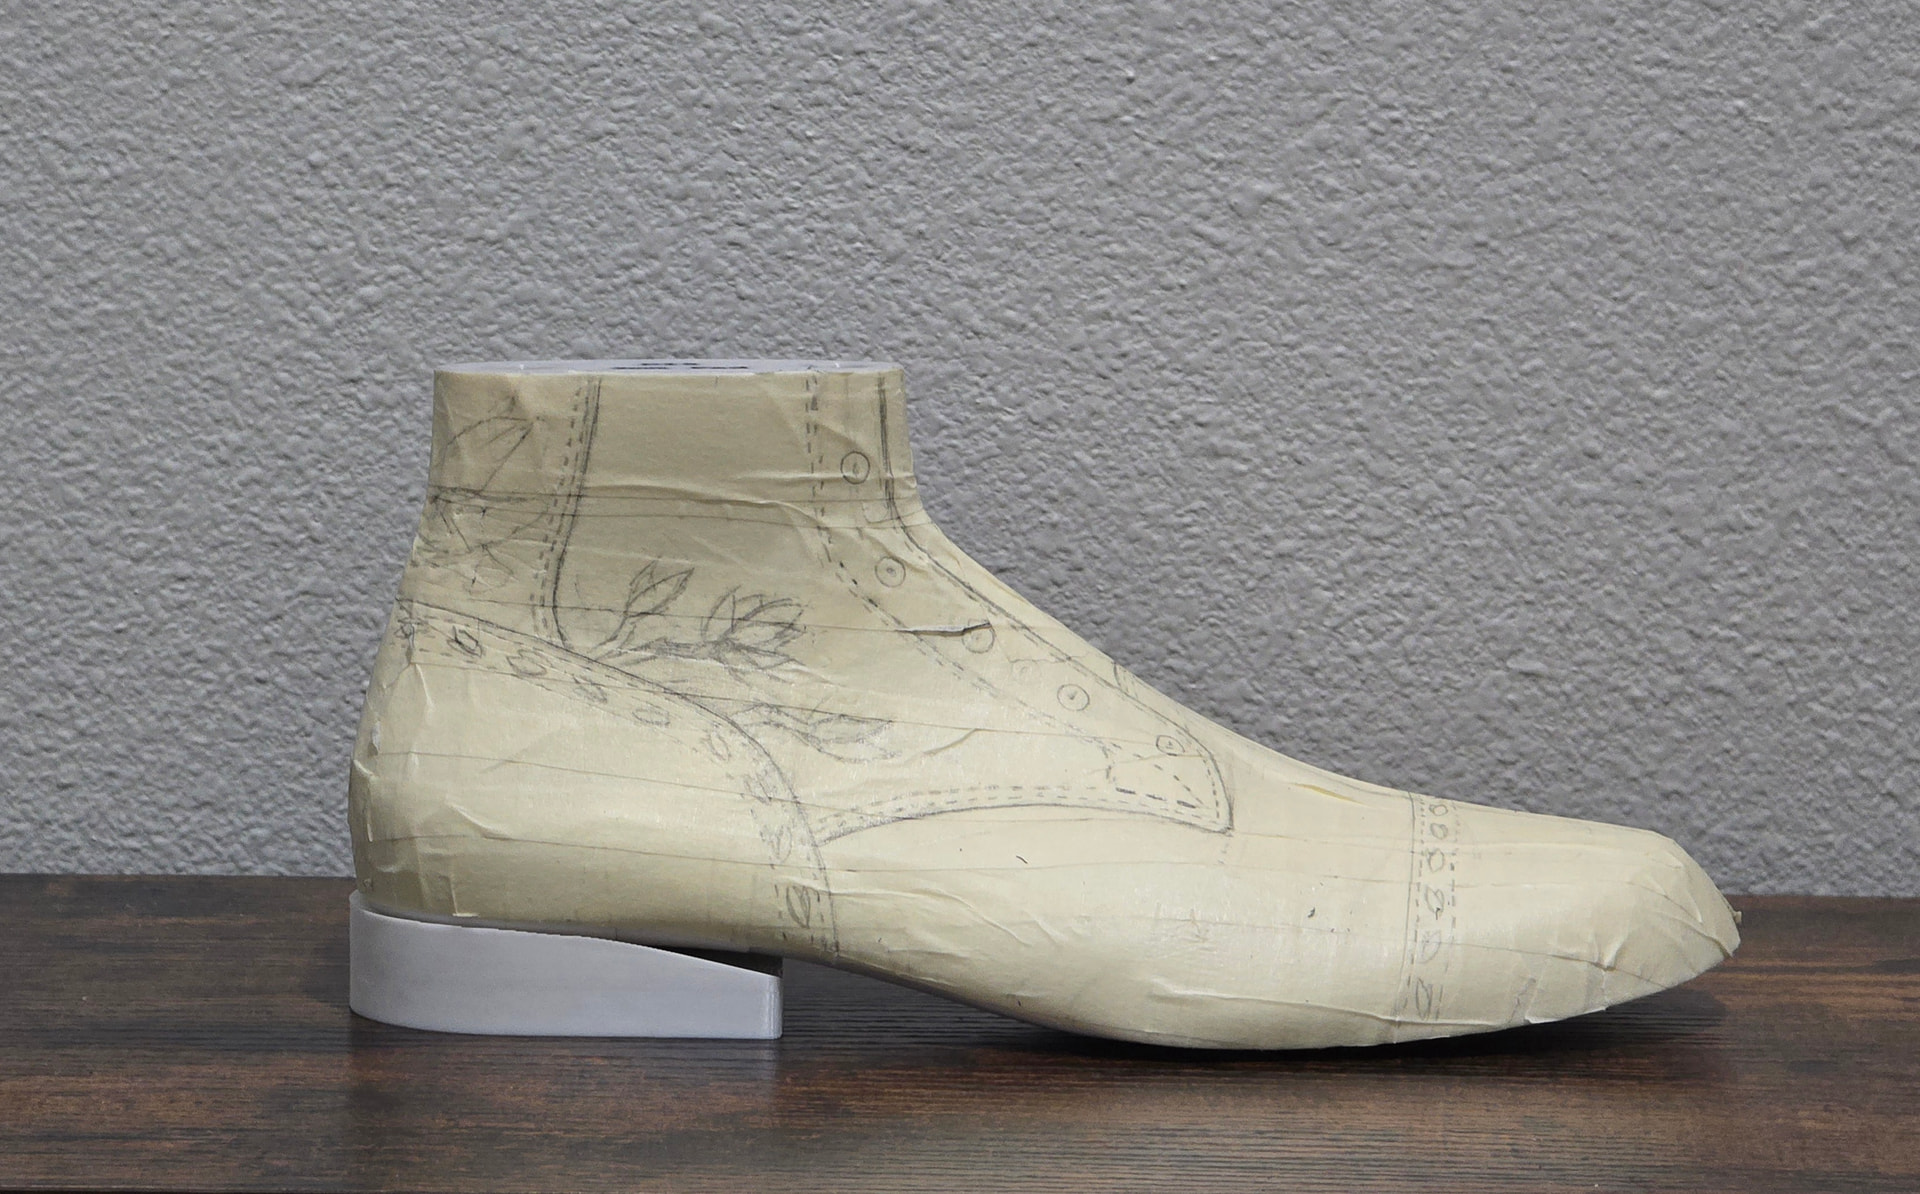
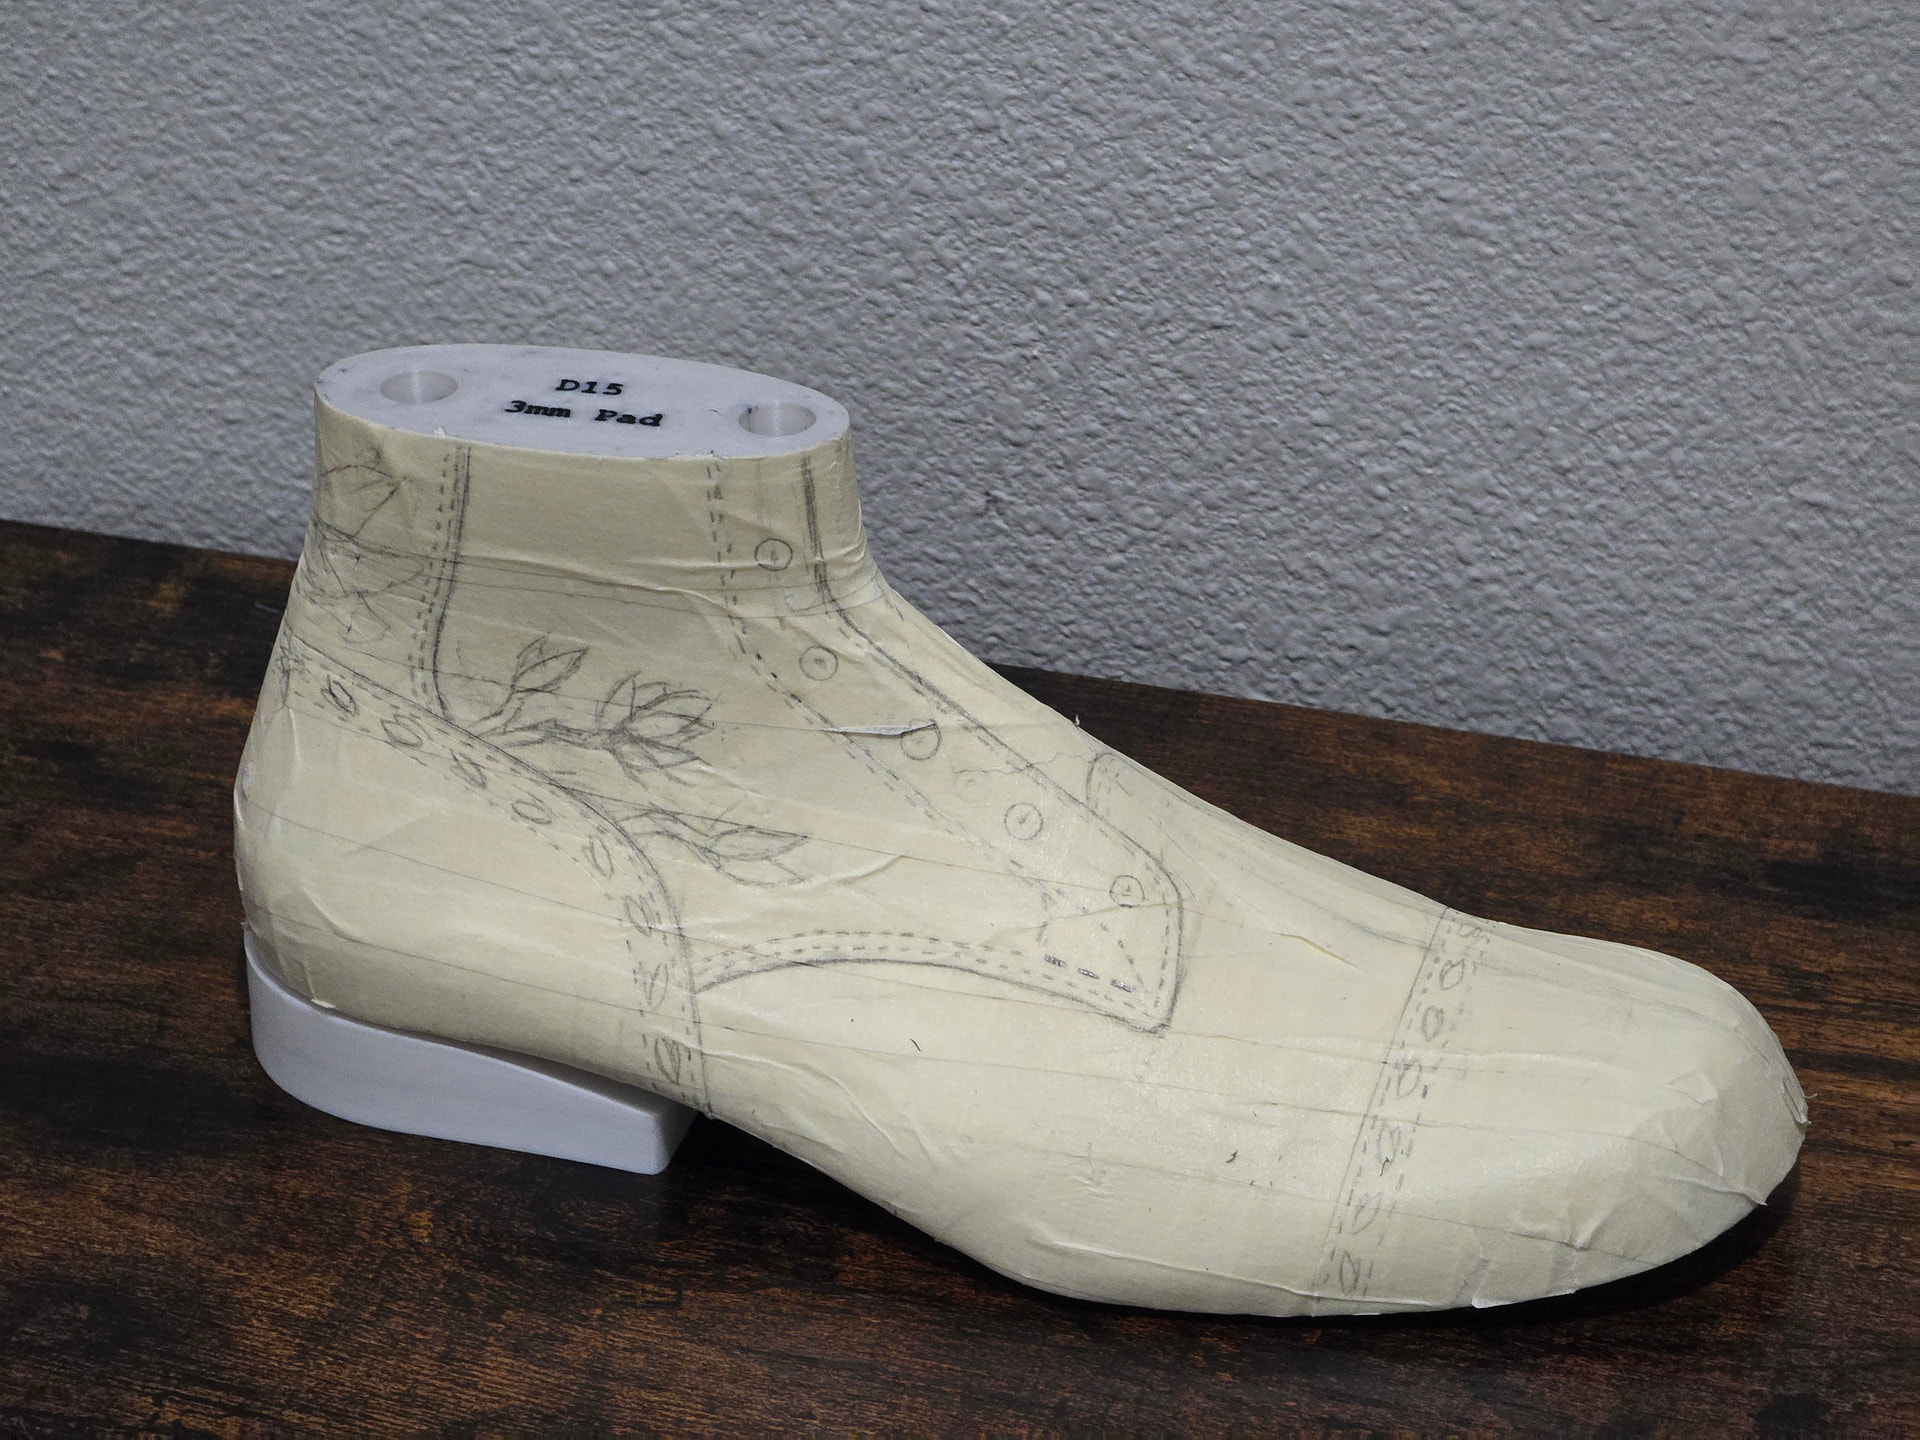
Taped up, scribed the center line. Measured where the ball line intersects the centerline, came up 5 mm and made a perpendicular line for the front of the facings. Found the mid point on each side with an adjustment for the insole and marked points. Connected those to the counterpoint in the rear. Marked out the front of the heel on each side. That laid out some basic construction geometry and worked from there.
2 Likes
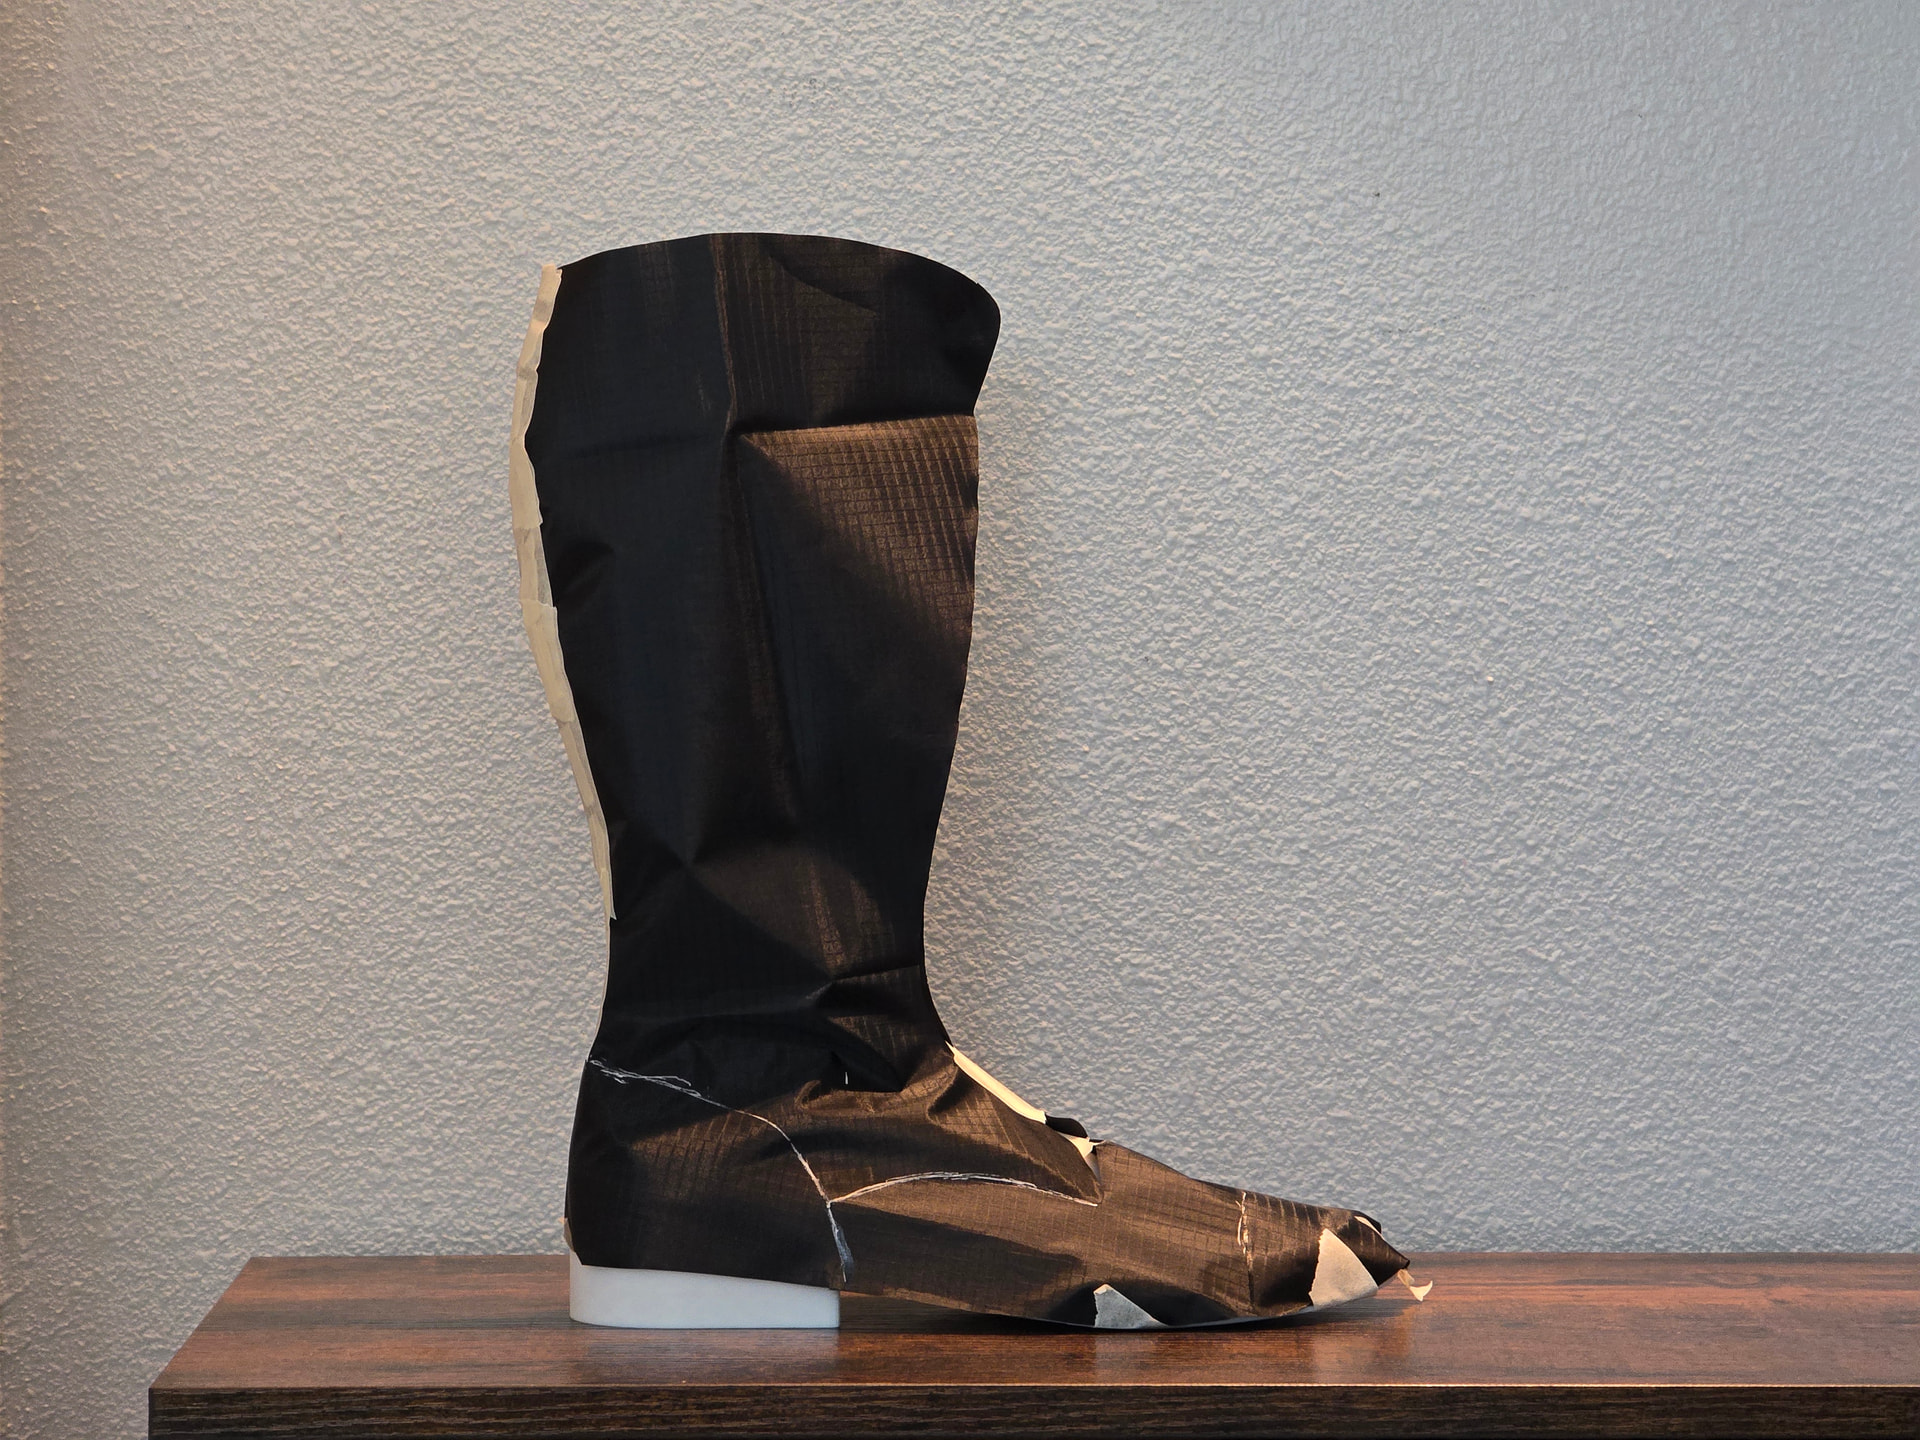
Rough pattern mock up in tyvex. Upper calf curve at the top line needs go not cut in quite as much. I will add a little girth there. Otherwise, feeling pretty good about it. Next is to start working out the shape of the backstay to sort out how much space is available for doing inlays without looking unbalanced.
1 Like
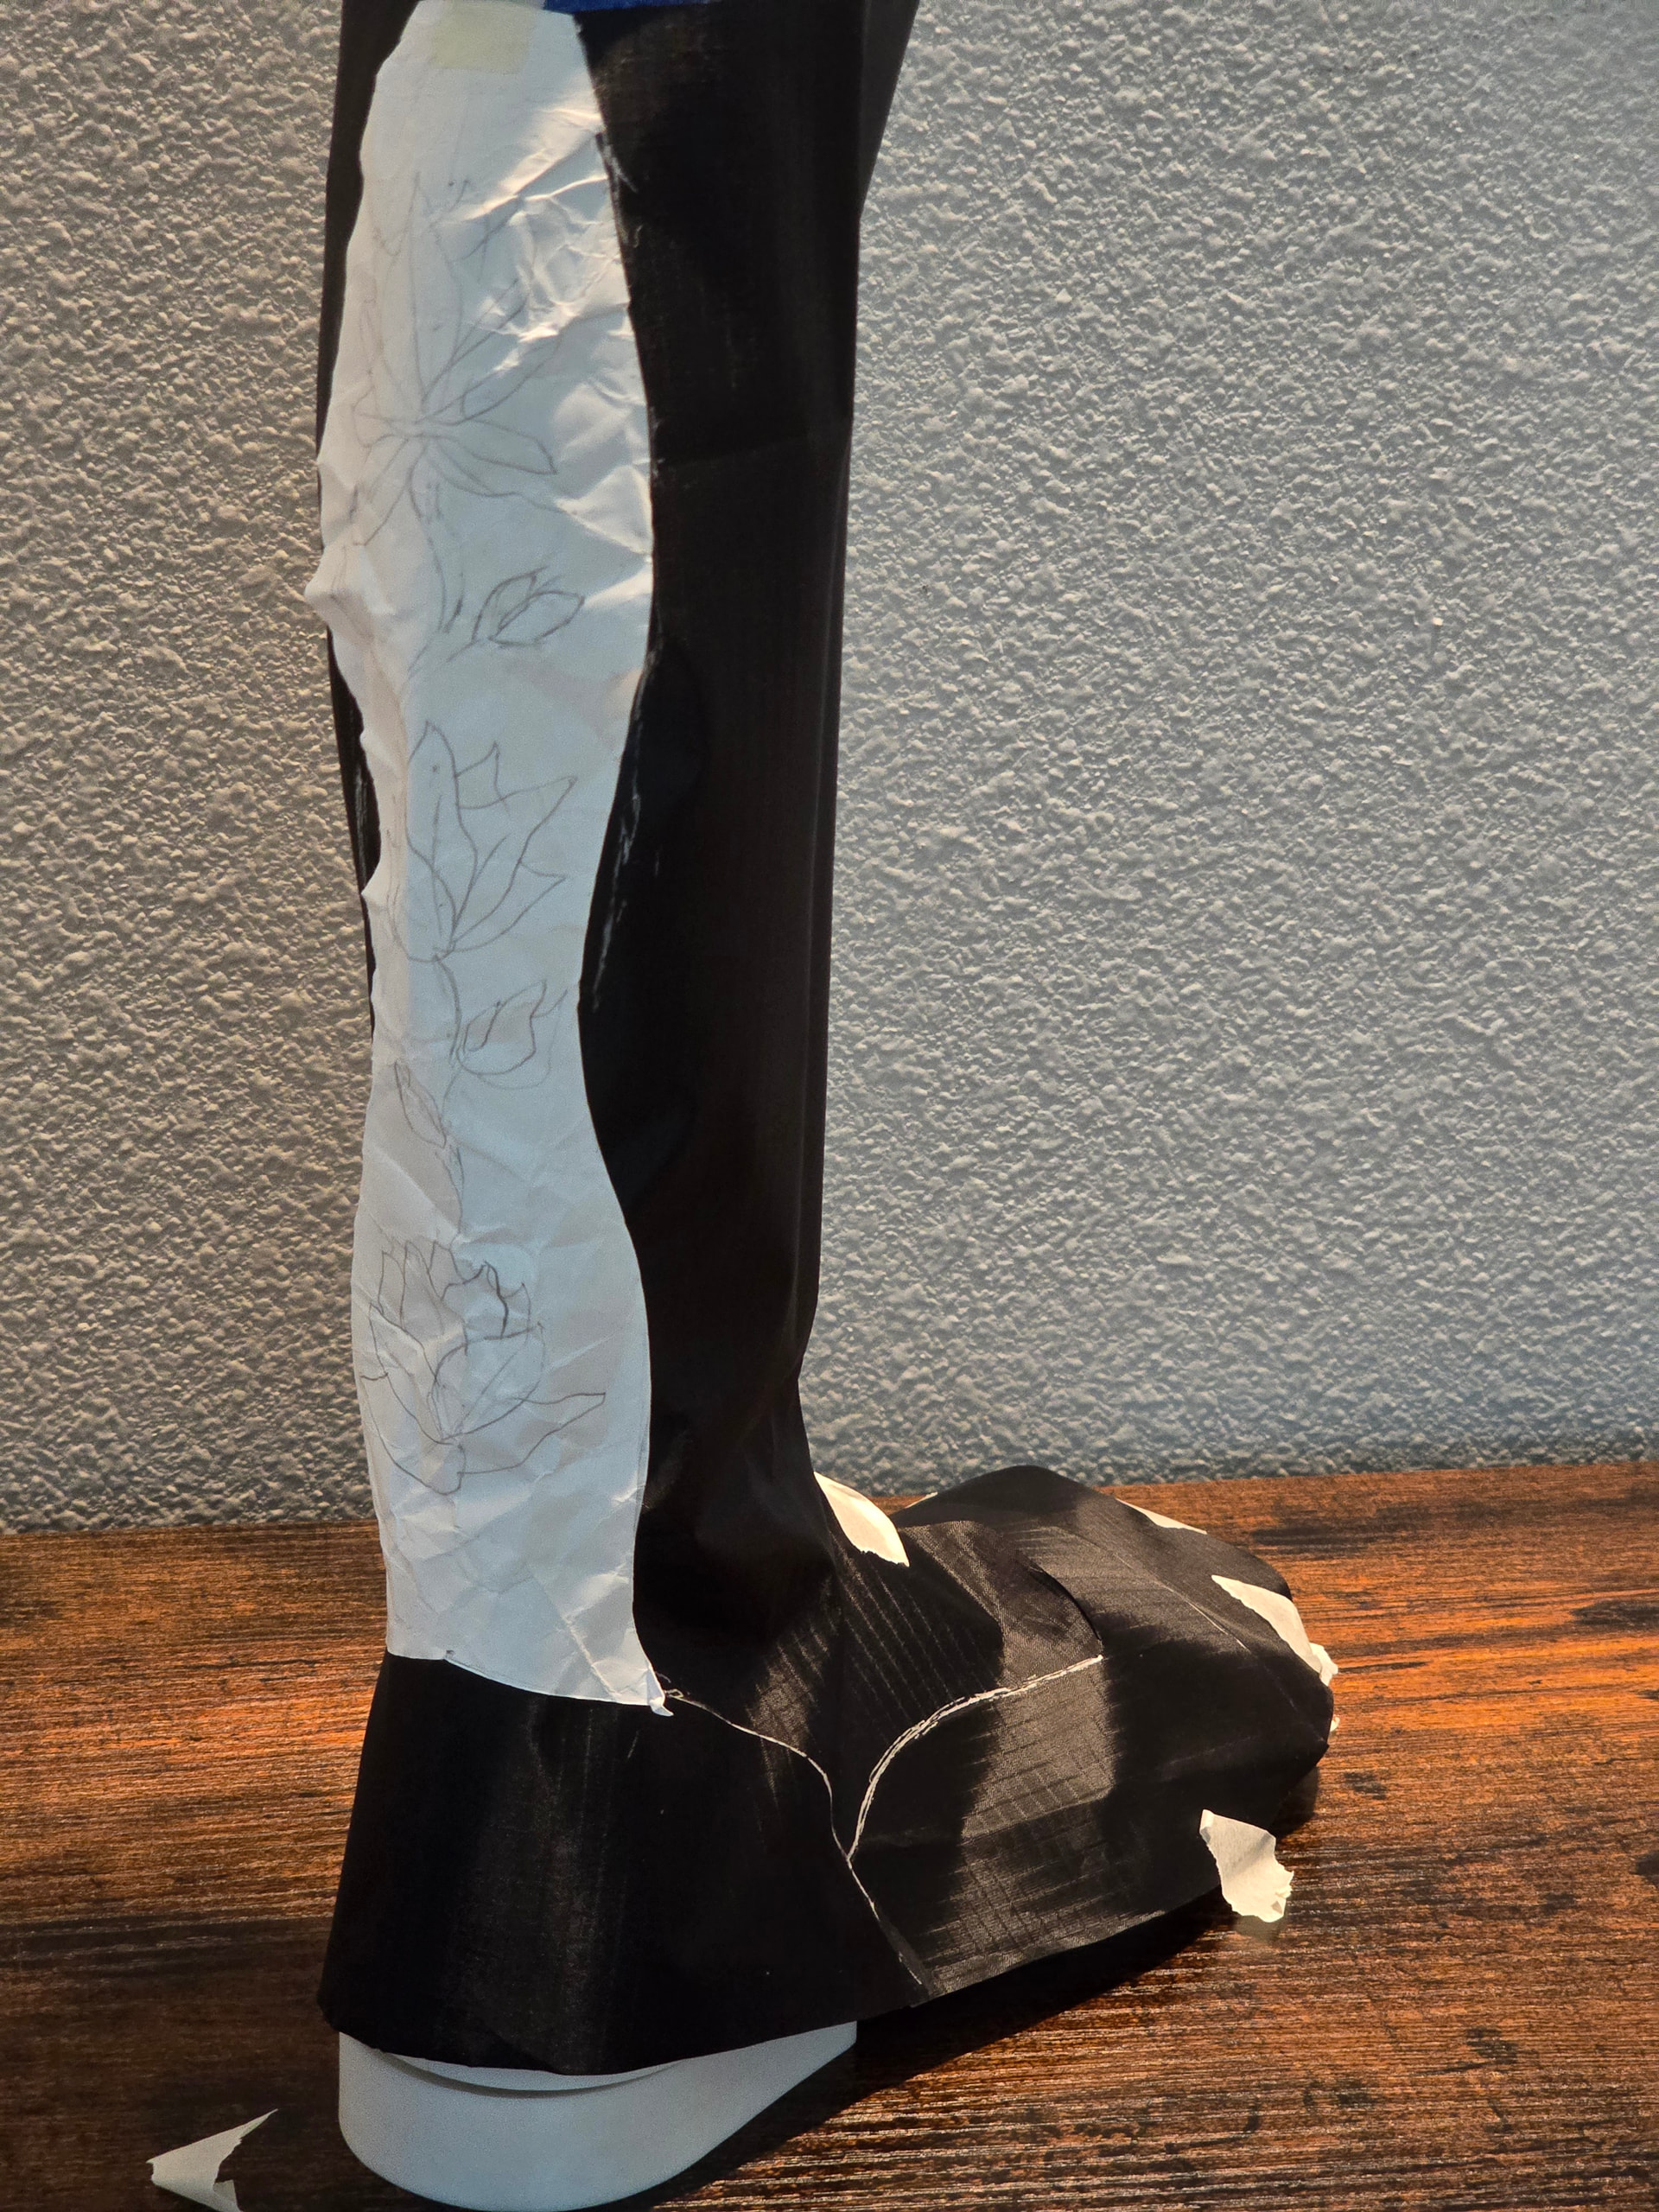
Needs less taper in the “waist” of the backstay, but definitely enough space to work with.
Shockingly, paper doesn’t glue onto tyvex very well. ![]()
1 Like
Yes that wrap looks great
1 Like