Pair 4: Obligatory "Service Boots"

Good Idea: Using white beeswax.

I bought some white beeswax pellets online, without the usual golden hue. I understand this can be done by bleaching or by filtering, but I’m not sure which one yielded the pellets I got and melted down.

The lighter color lets me wax light threads, like white and “natural”, without big color change. But I still get the same working feel and smell as beeswax, rather than paraffin.

Bad Idea: Dunking in white beeswax.

I knew it would probably fail going in, but I tried coating some 11-7 Maine Thread Teklon thread in white beeswax by melting the wax and briefly running the thread through the wax. Even after rubbing and scraping off the ready excess, this still left way too much wax.

That was unpleasant stitching, and also badly affected the clean appearance and color of the thread once stitched. The white thread I dipped looks way dirtier and duller than the white thread I simply rubbed against a pat of wax.

So my process with the linen, was to leave the winter wax solid, and pull my thread through it until there was an entirely even coat on it, briefly hit it with a heat gun and then start at one end with my foot on it, and twist it in its direction of lay until it reduced the overall thickness by about half, and took it even further about the last 6" or so.

Maybe a little non-traditional, but i built tar coated leaders that way for fishing halibut for years. It left me with a super tight end that wound the bristle nicely, and after attaching it, i lubed it with beeswax. I found that if i applied the beeswax before twisting the bristle on, it wouldnt hold.

1 Like

I just love when folks share stuff like this. Thanks, @KBayCustomLeather!

This has really got me thinking. Direct flame heat is a no-go, since it’ll just melt the plastic. But a heat gun, or even just a hairdryer, could make perfect sense.

I think there’s definitely a gap-filling action to the rosin and tar that helps prevent tapered plies getting rubbed off the cord while pulling through. But I find pulling over my tar-rosin mixture tends to flatten out the tapered plies into a kind of ribbon shape. I usually have to twist the taw from there, and then try to smooth out with more rosin and tar.

This has been my experience, too. I suspect a top coat of hard wax, like beeswax or paraffin, makes it easier to draw through when stitching, and might also prevent rosin and tar smearing down onto the main body of the thread so much.

I just haven’t got to the point where I’m confident enough in the stick parts of my tapers holding well enough to feel comfortable adding wax.

1 Like

I definitely tweaked my right forearm outseaming the first boot here. It’s not constantly hurting, but certain movements bring out the soreness.

It’s giving me time to really think through and plan the second boot better. In particular, I’m seeing it’s really worth the time to mark the point where the awl is going to go in for each hole, to pin down consistent spacing along the width of the welt from the inseam to the edge.

My first go with a fudge wheel also went about as well as my first time doing anything. So I’ve gone back with a seam detailer to correct, reinforce, and sometimes correct each line.

Good Idea: Tapering polyester cord with sandpaper.

I’ve made a few tapers with unwaxed Maine Thread 11-7 now, inspired by @Carsten and D.W. Frommer II.

The method I’ve landed on:

  1. Use a bulldog clip to fix a foot or so from the end to a cutting board.
  2. Pull one end to the side and another straight forward to work on.
  3. Untwist the working end by sticking a blunt awl or pointer through at the bottom, near the clip, and then teasing it forward, helping the plies to unwind as you go.
  4. Lay the plies out in a fan shape.
  5. Leave the first plie full length. Trim each next one about 1½ inch or 3 to 4 cm shorter than the last.
  6. Taper the end of each ply by tearing off a small patch of coarse sandpaper or emery cloth, pinching the ply in the sandpaper between your fingers, and pulling the sandpaper away in a single stroke. I think I used 80 grit paper, but I don’t the exact grit matters.
  7. Once every ply has been tapered, gather up the plies and pull them through the top of a pat of tar and rosin / coad / hand wax / whatever you use / whatever you call it. The sticky stuff, not the slide-y stuff.
  8. Once you’ve got some sticky on all the plies, twist them together in the same direction they were twisted in the first place, in line with the untwisted center of the cord.
  9. Draw the retwisted taw through the sticky a couple more times.
  10. Burnish the taw by pulling through a patch of leather to smooth out any irregularities in the coating and retwist. Don’t bother trying to smooth the wispy tip. It’s delicate, easy to break, and will only get doubled back and twisted again when you mount your bristle or needle. Focus instead on making sure that the shortest plies, the ones ending furthest from the tip, blend smoothly into the cord without their ends sticking out and away from the rest of the taw, where they can get caught and separated during stitching.

I lay the black cardboard under just to make the plies show up in a picture. I don’t find I need it actually doing the work.

You can see little tendrils of the plies caught in the sandpaper patch.

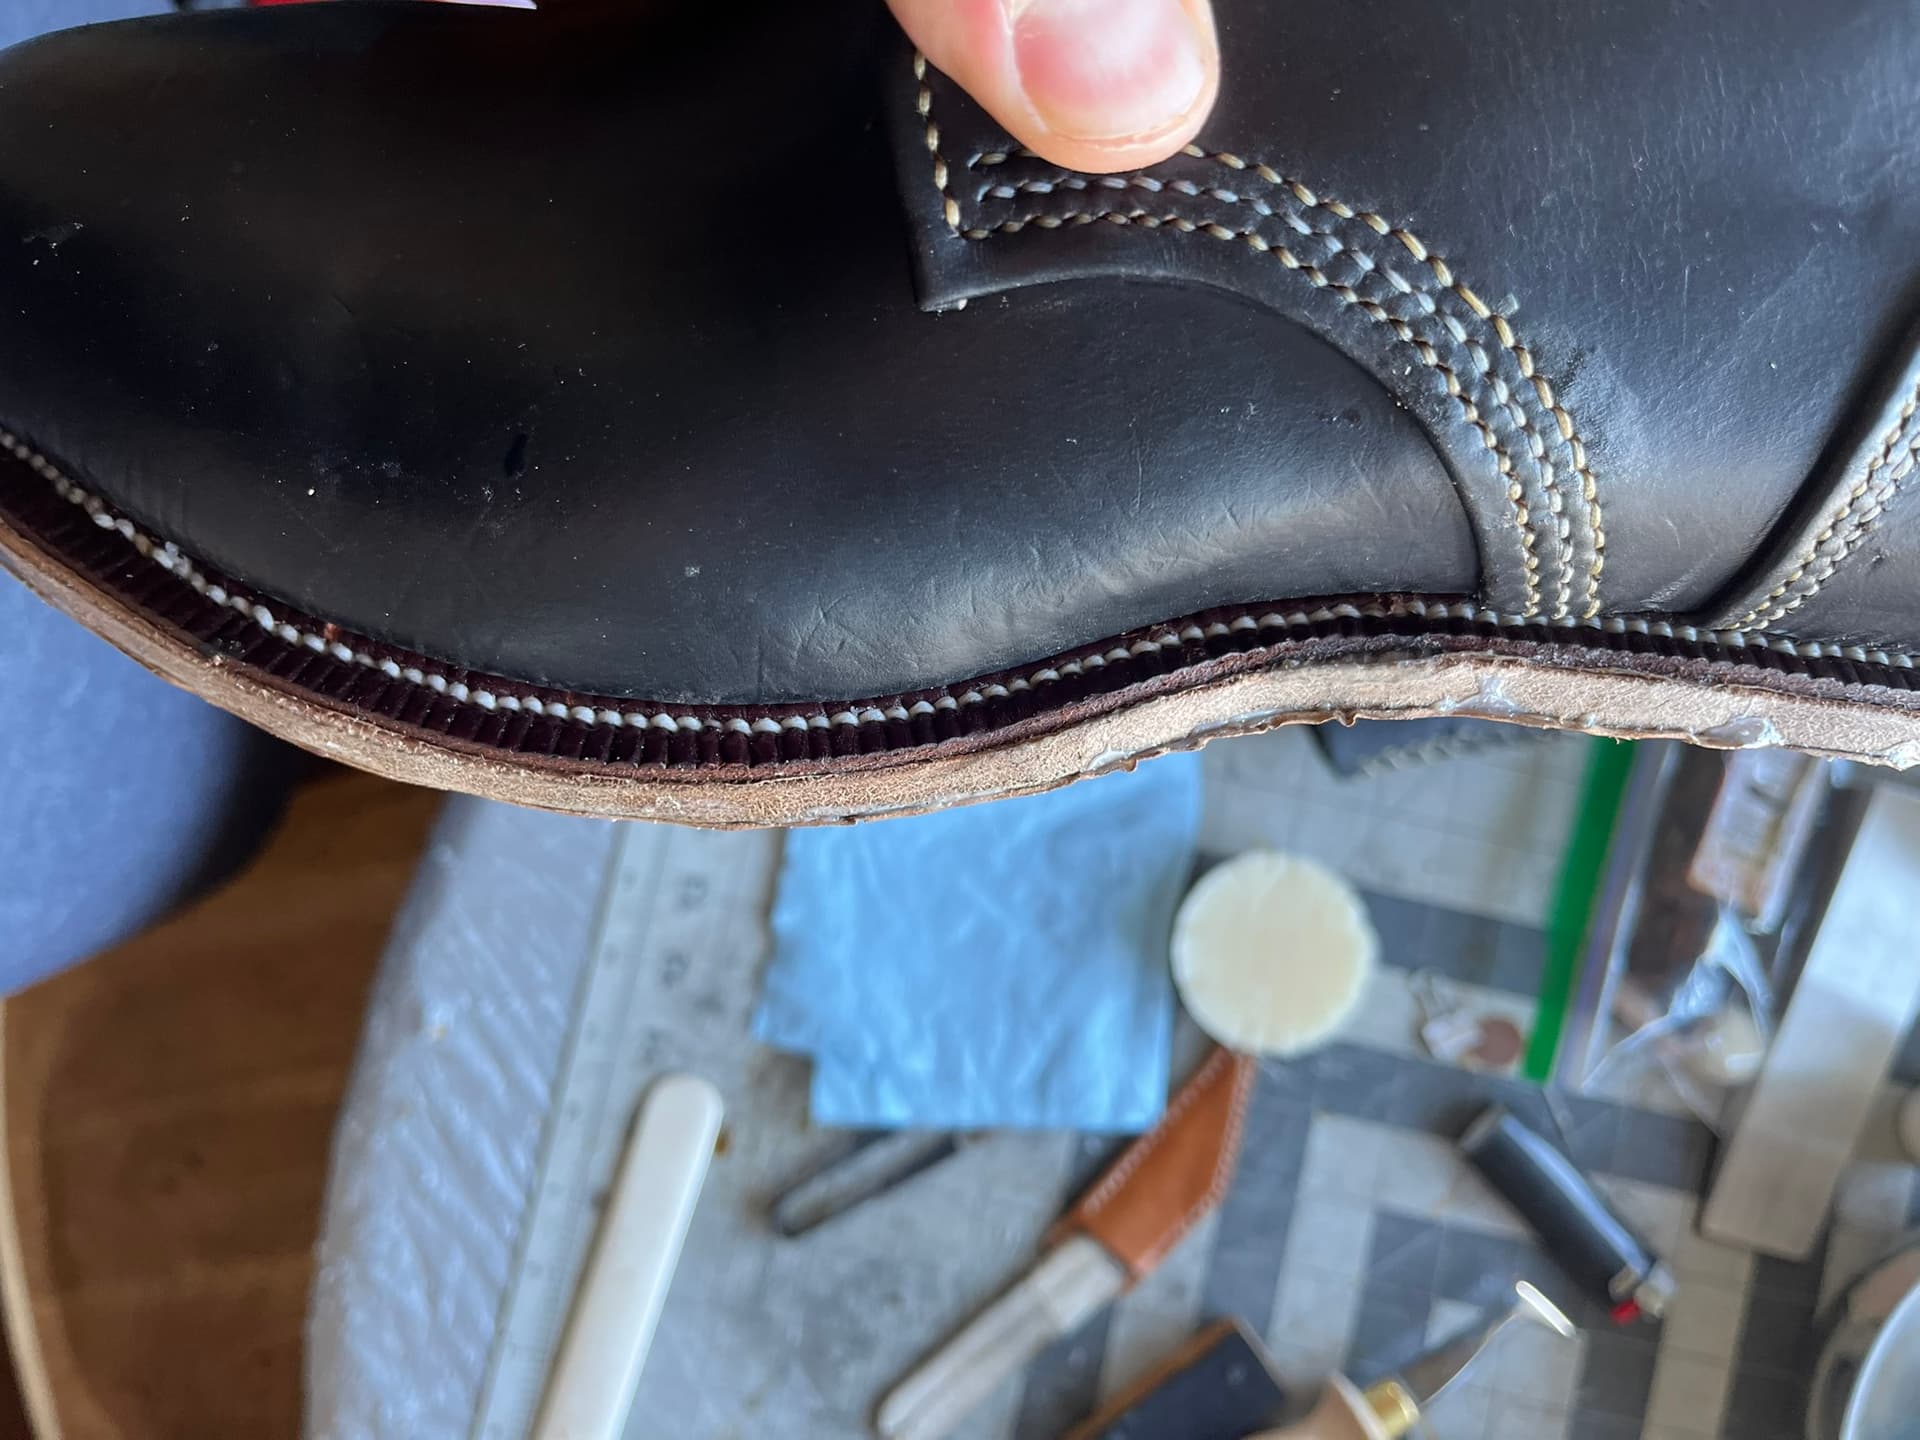
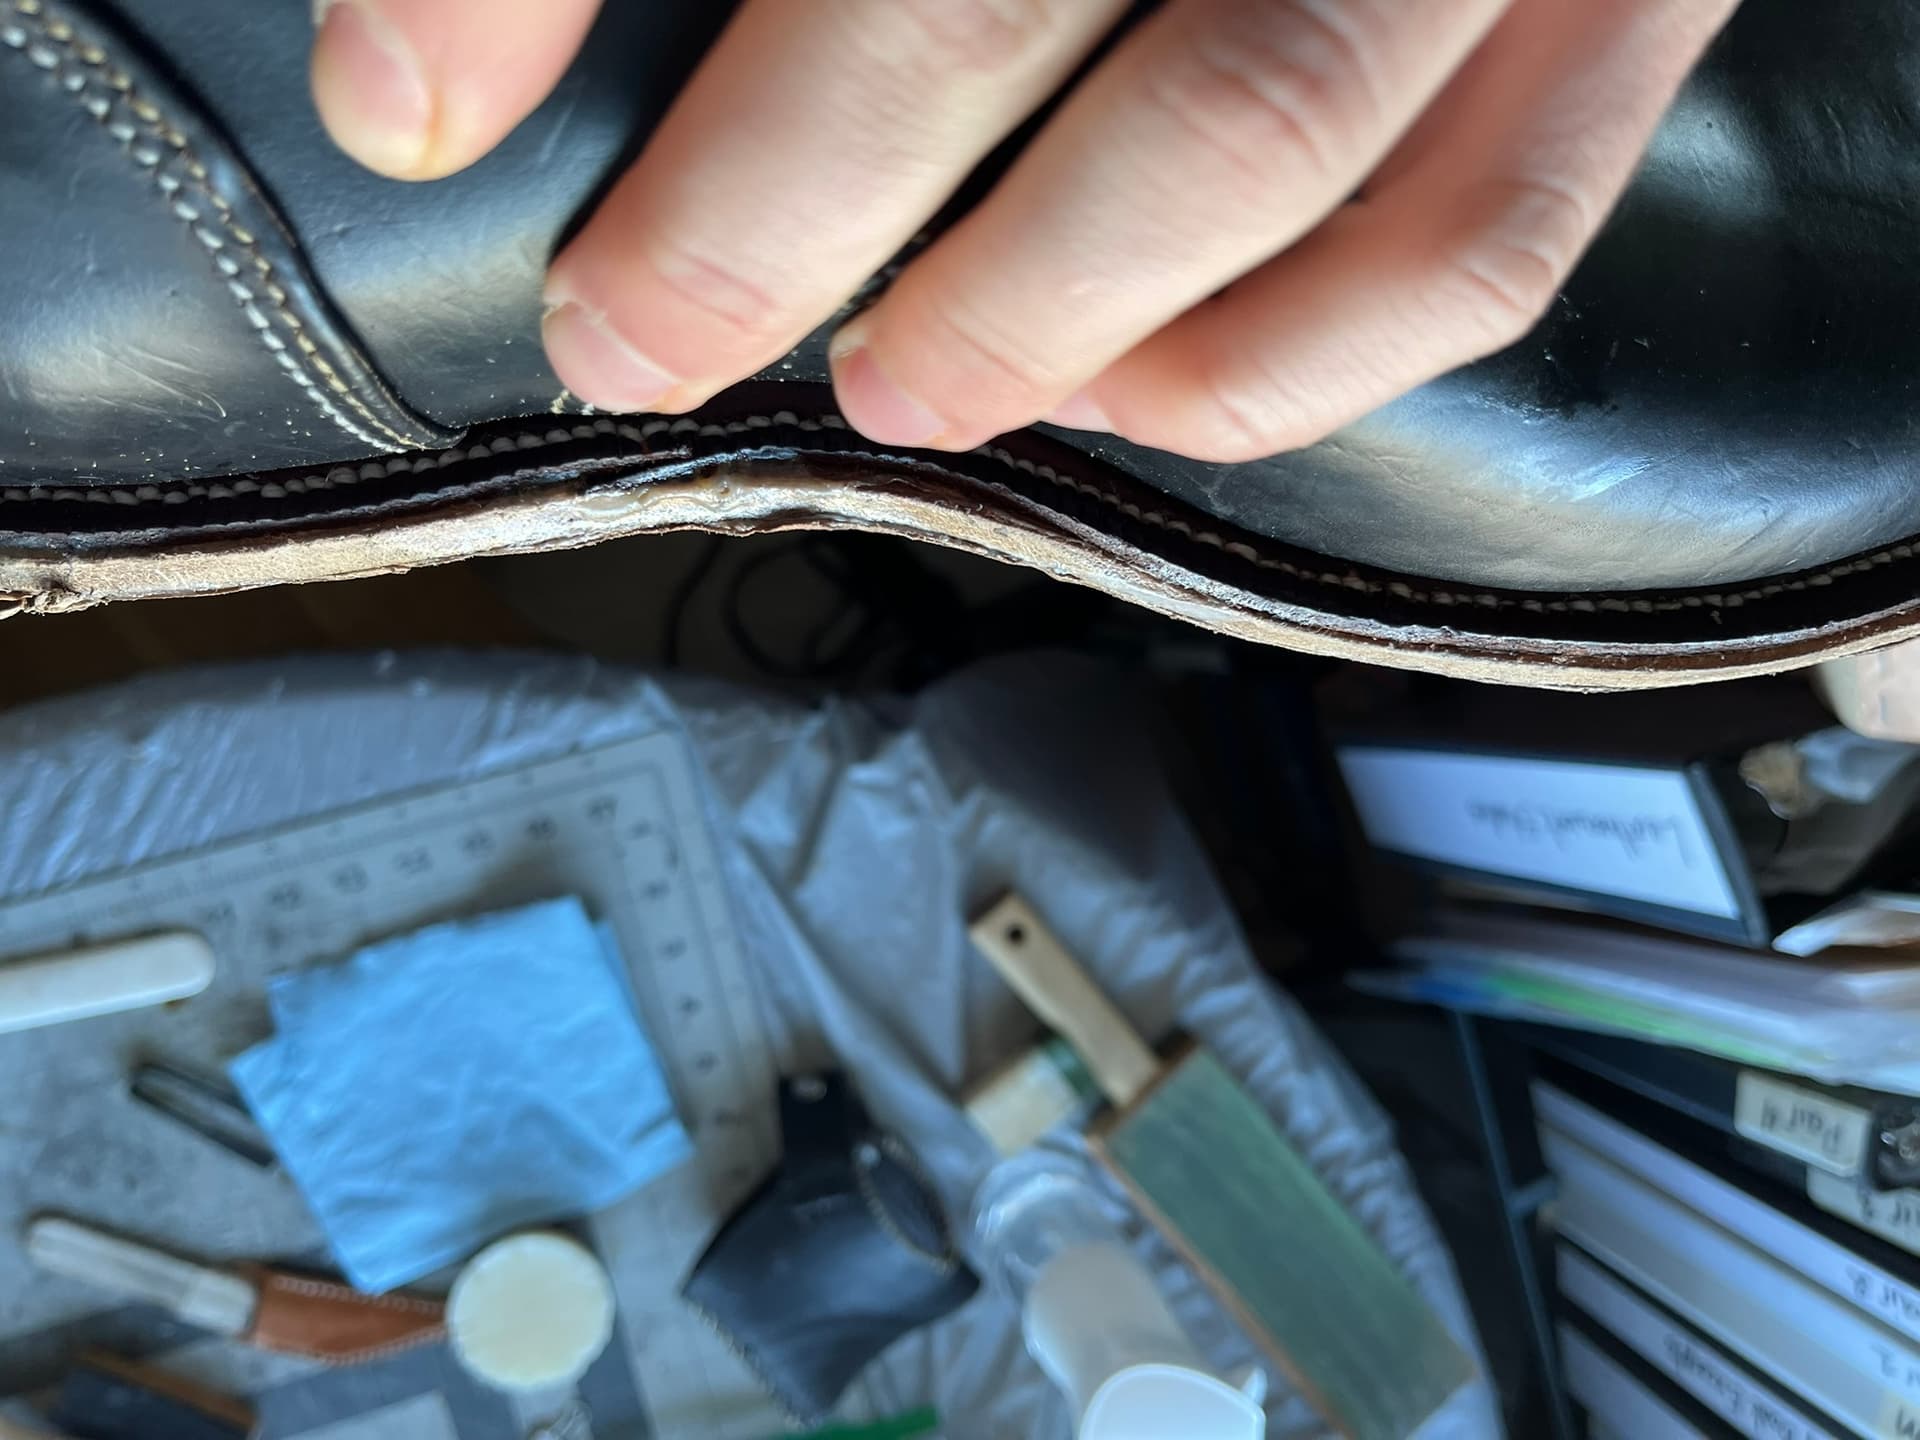
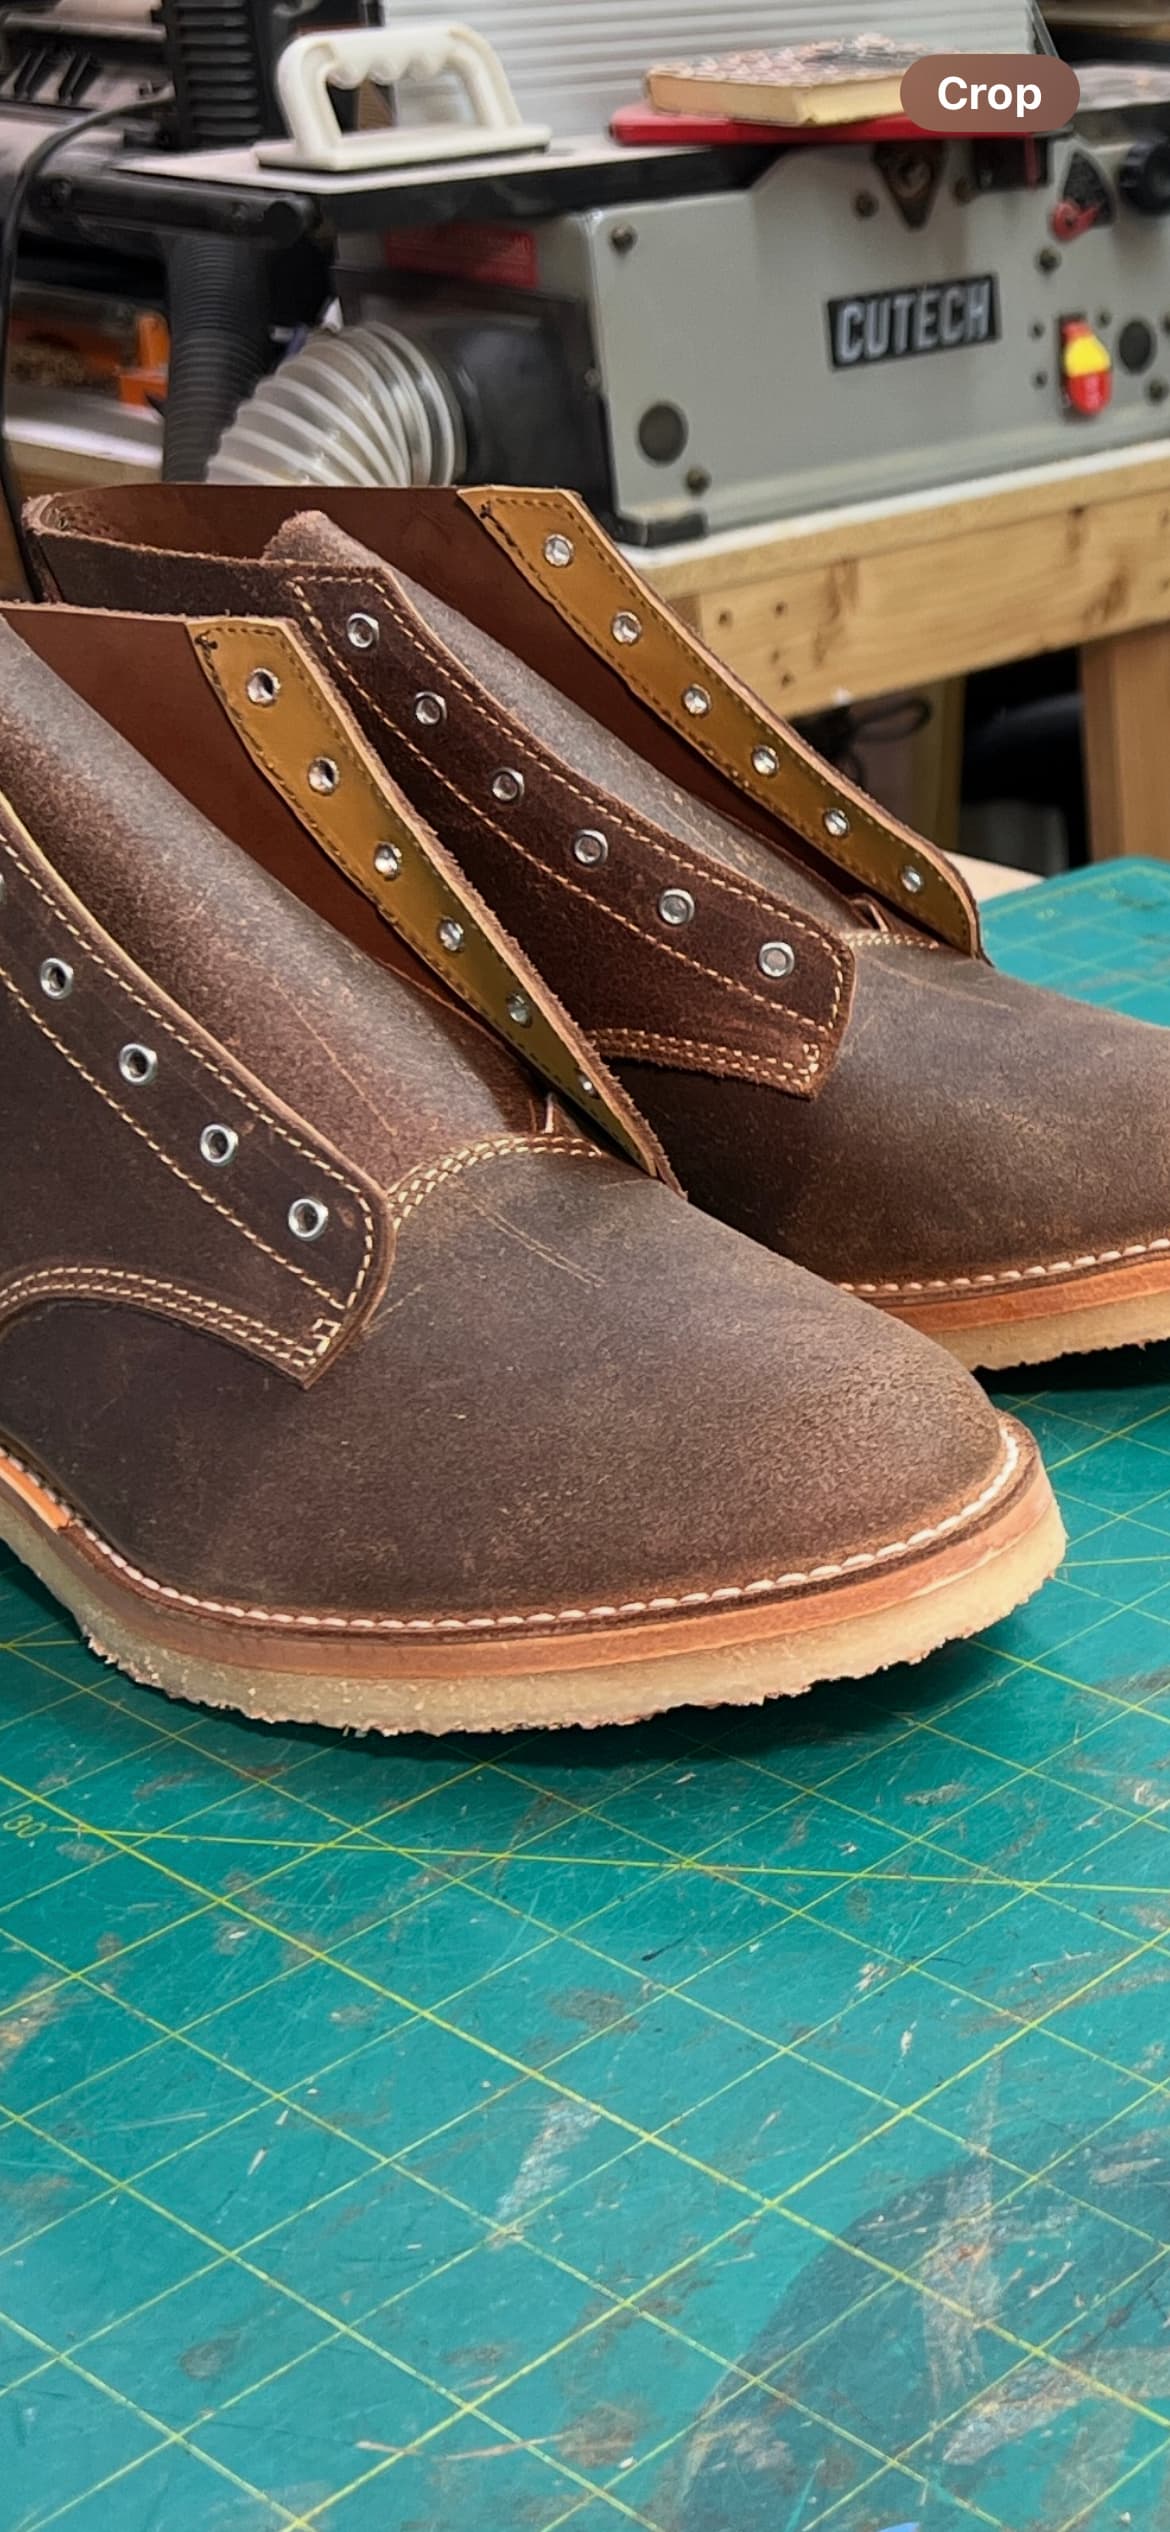
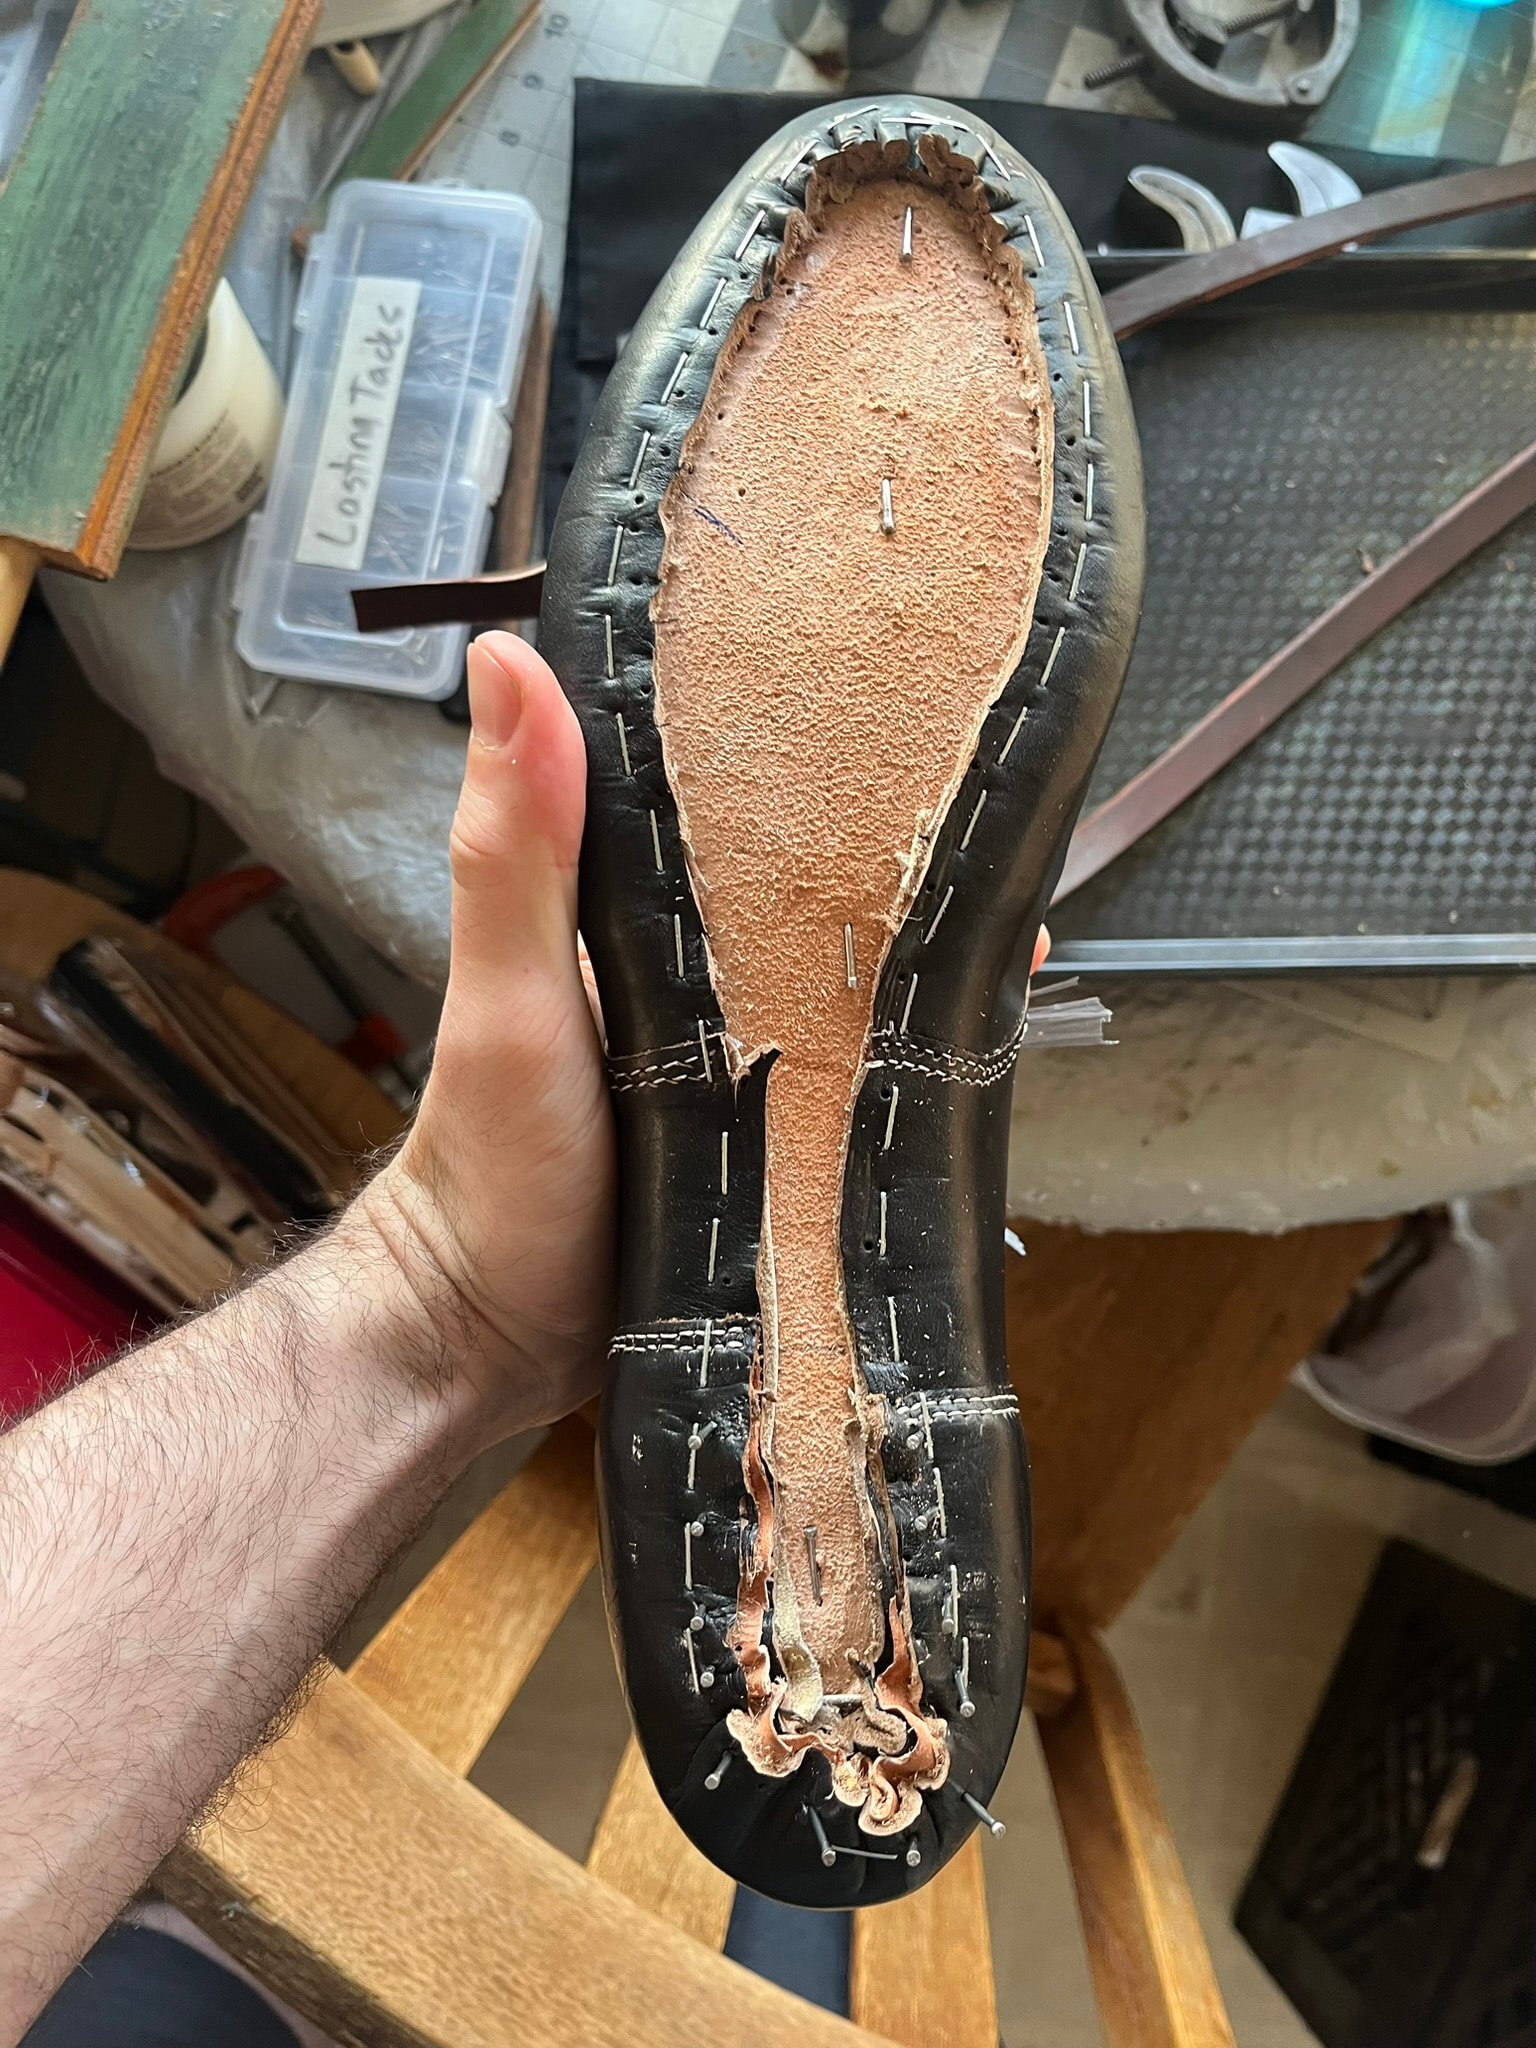
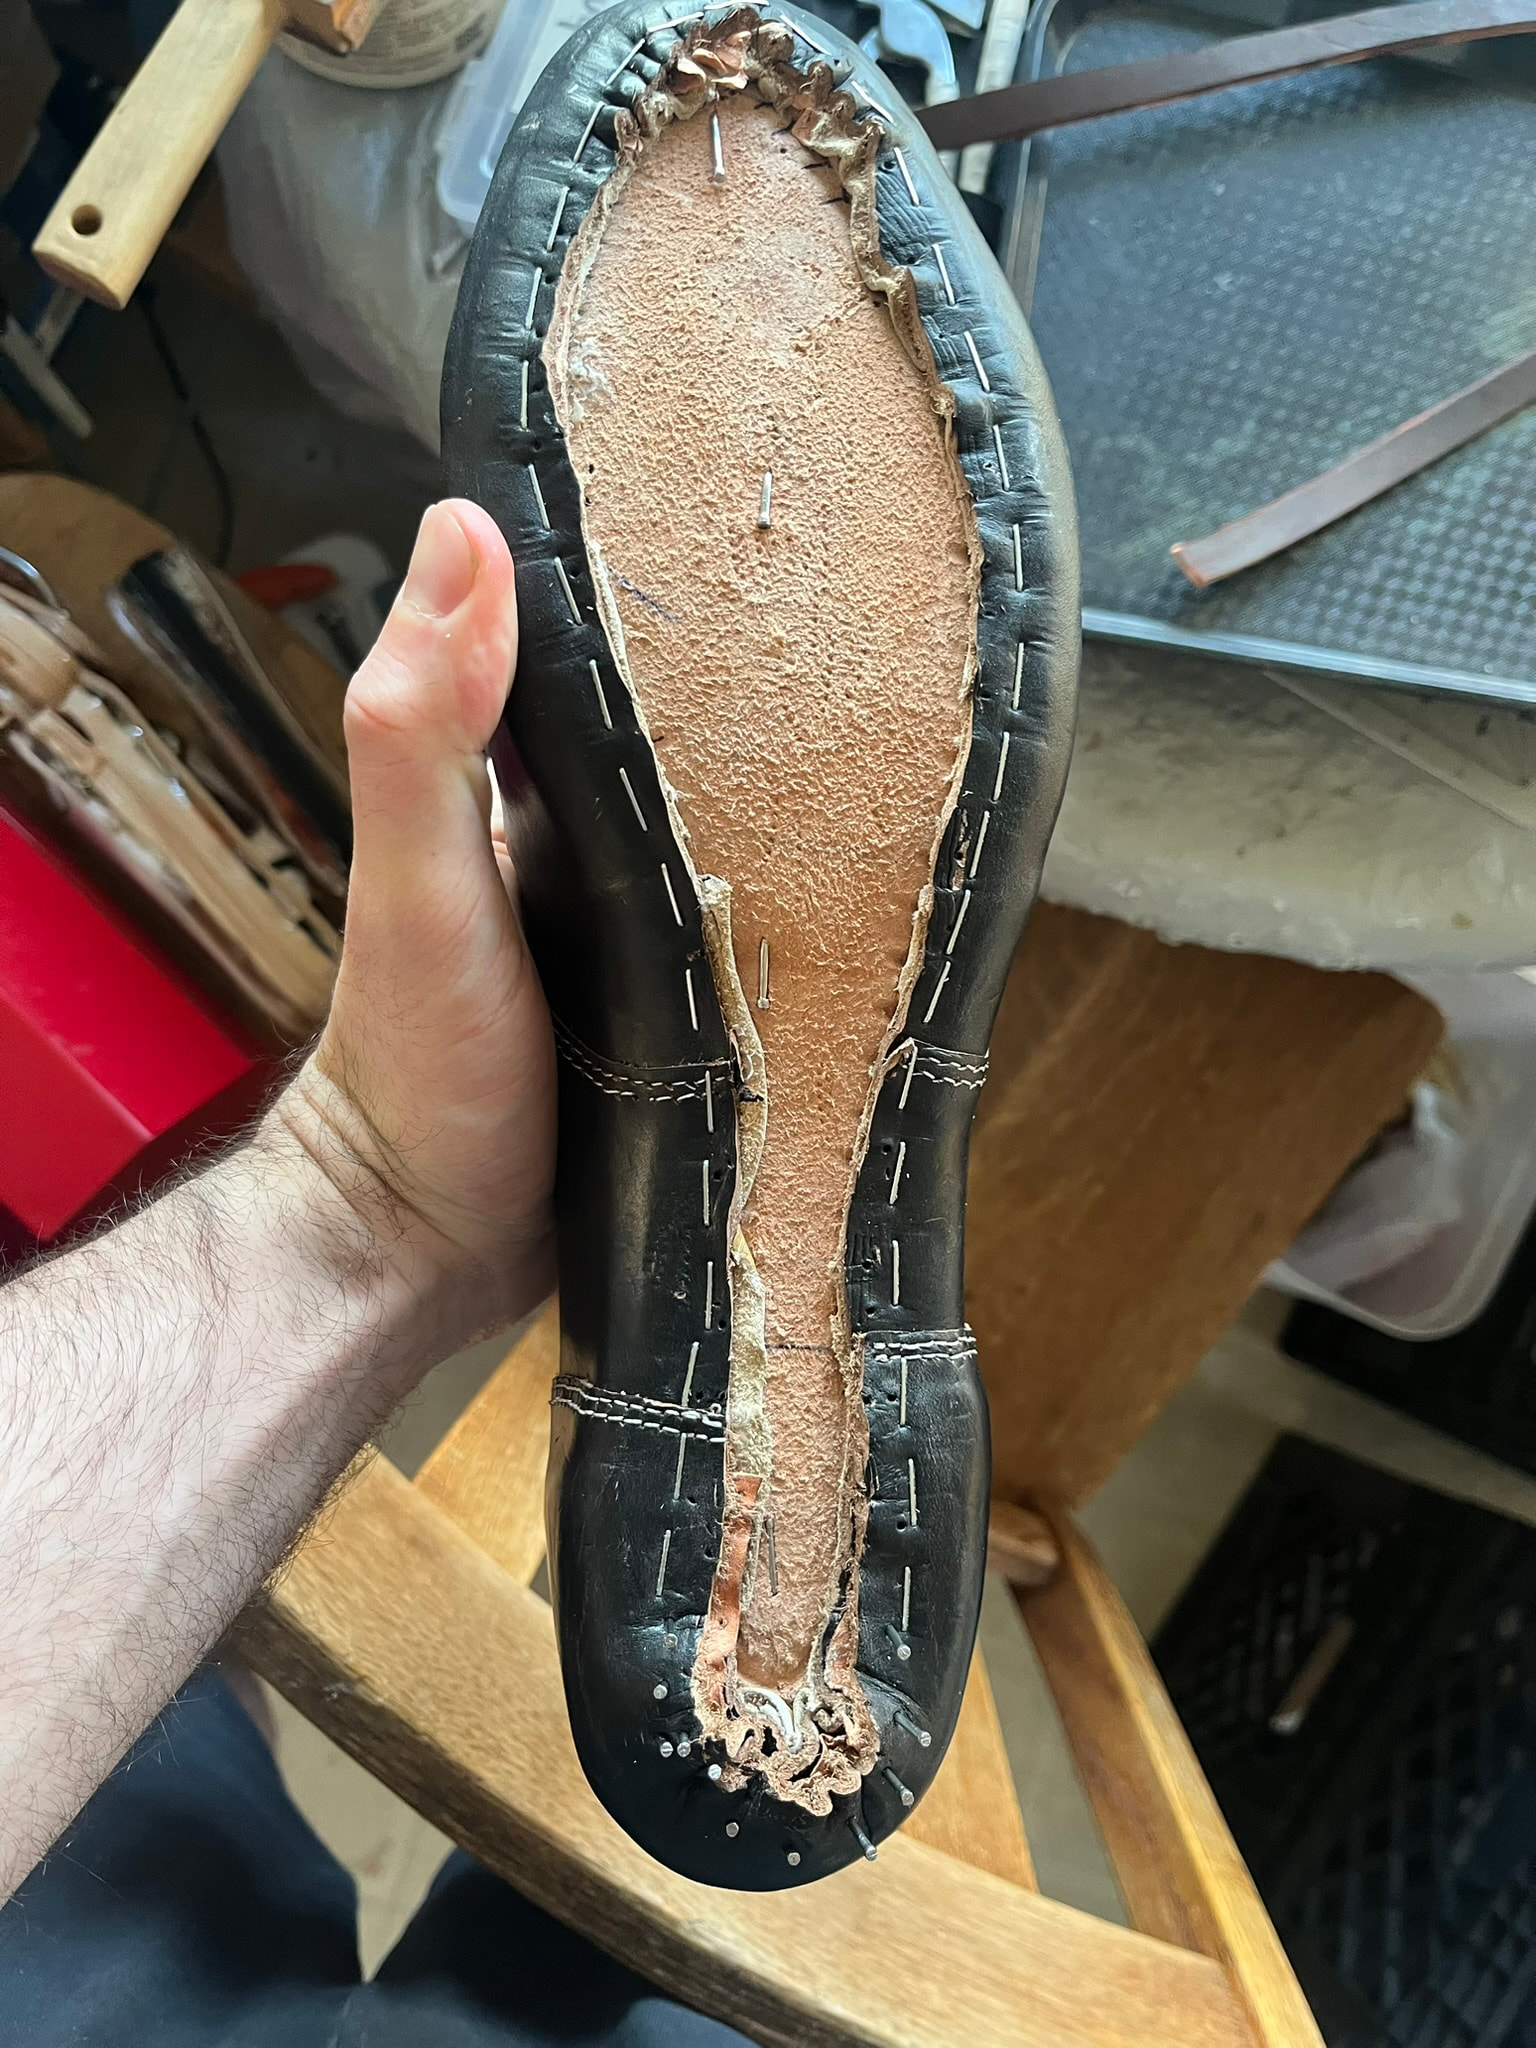
I’m starting to get close to outseam lines that I actually like.


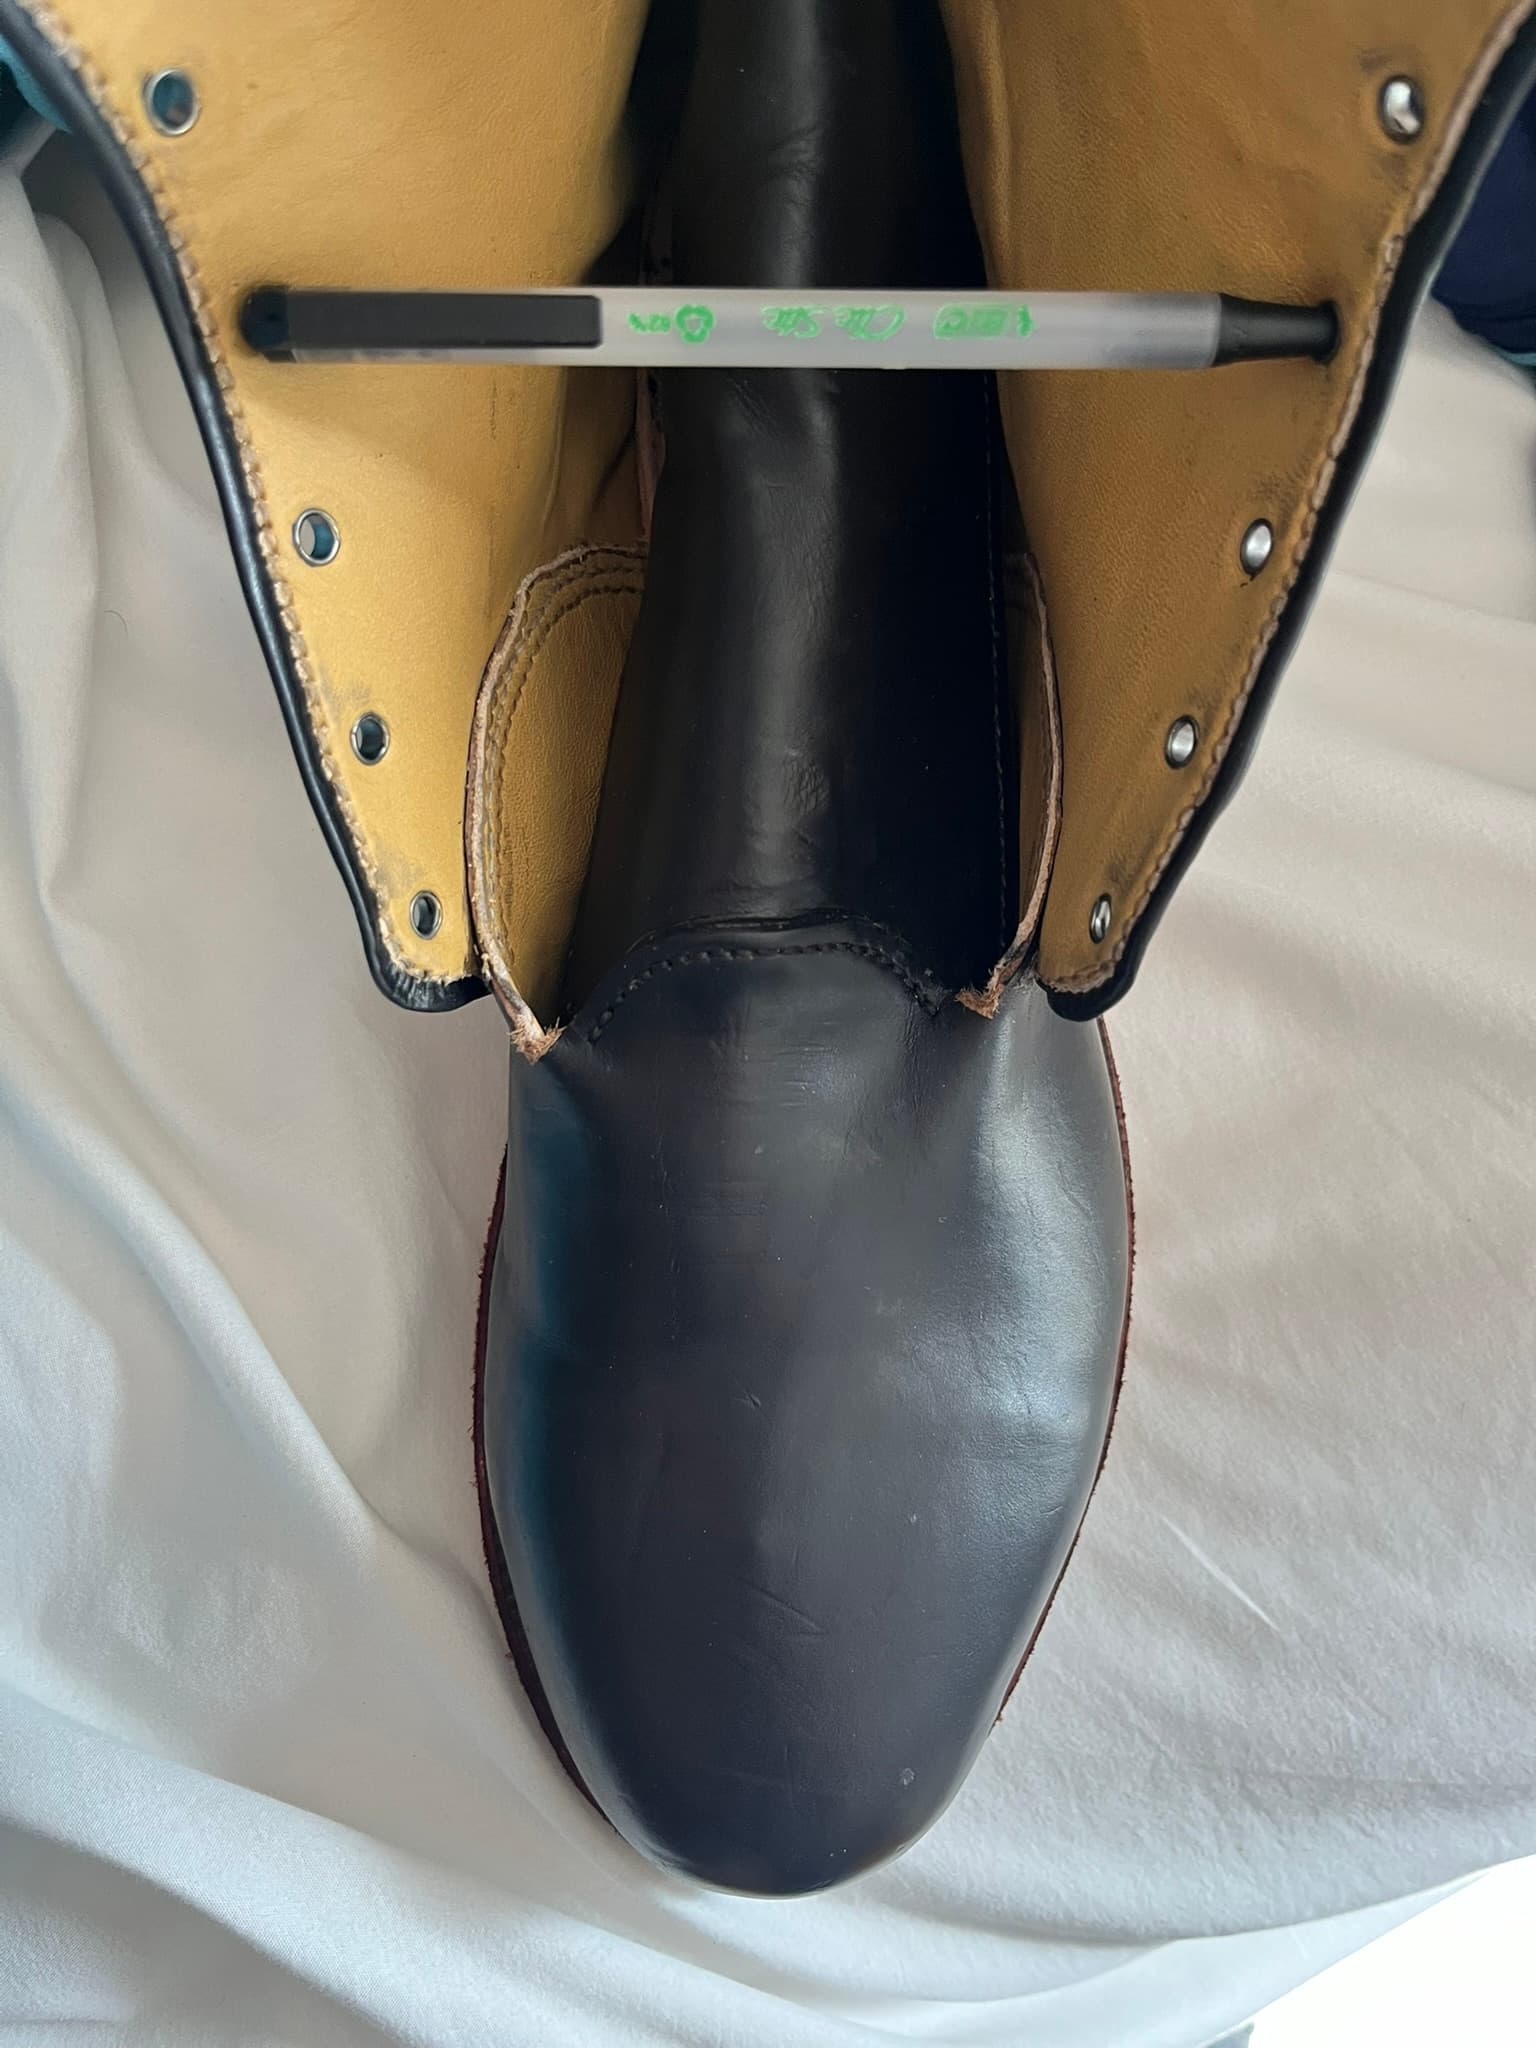
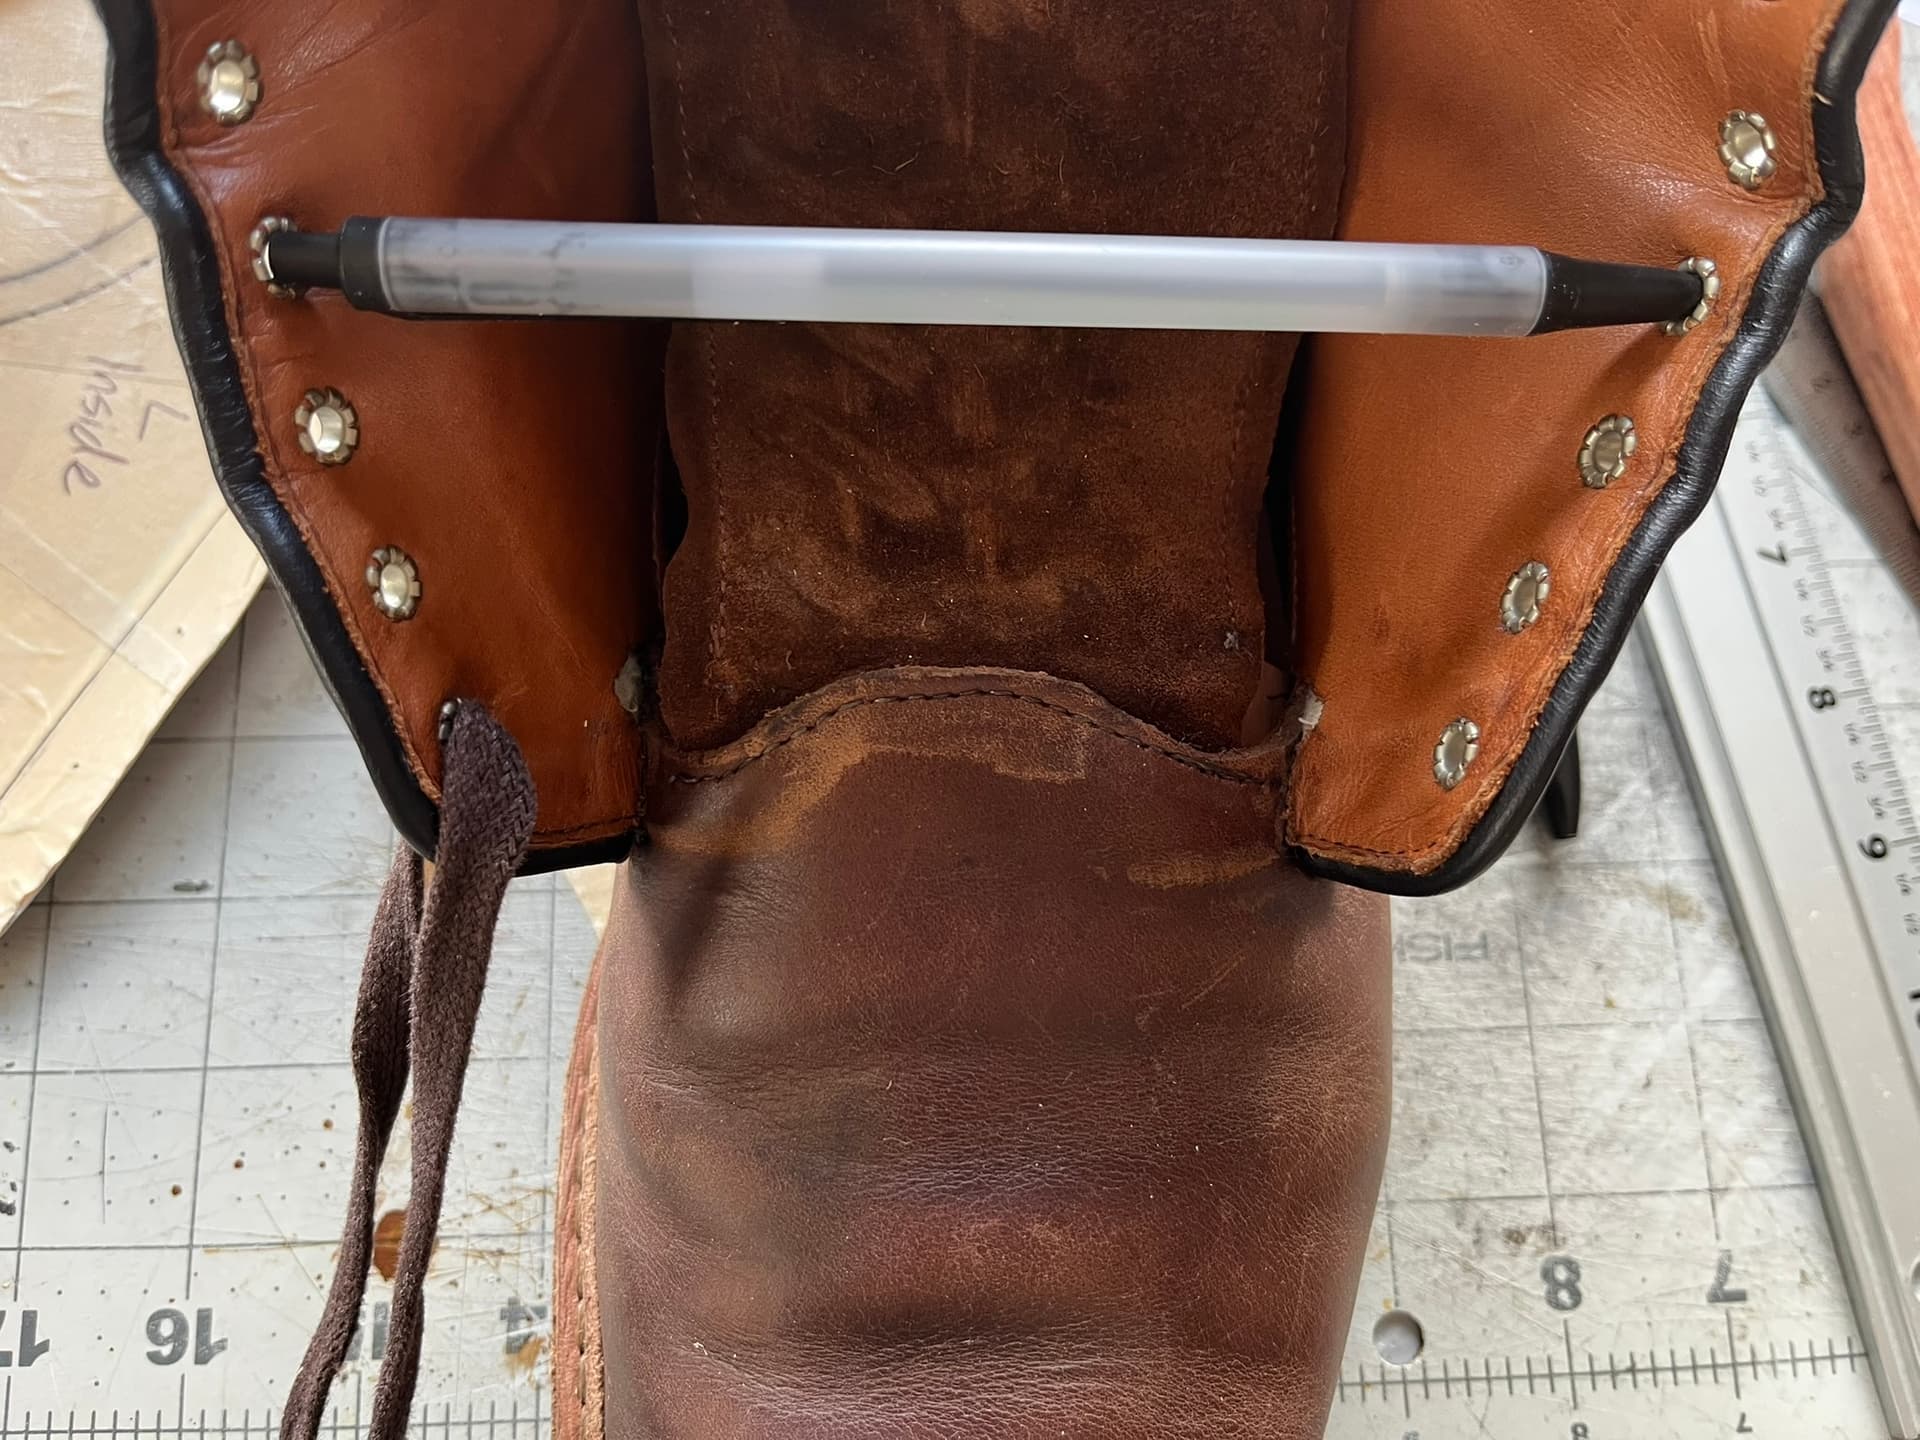
Really Good Idea: Marking every hole with the awl first.

As expected, this markedly improves the appearance of stitching.

I marked one pair here just with a scratch awl. But I got even better results using the square awl itself. That gave me a better chance to check how practical the piercing angle would be. It also seemed to make it even easier to place the awl back just exactly where I’d pricked the mark beforehand.

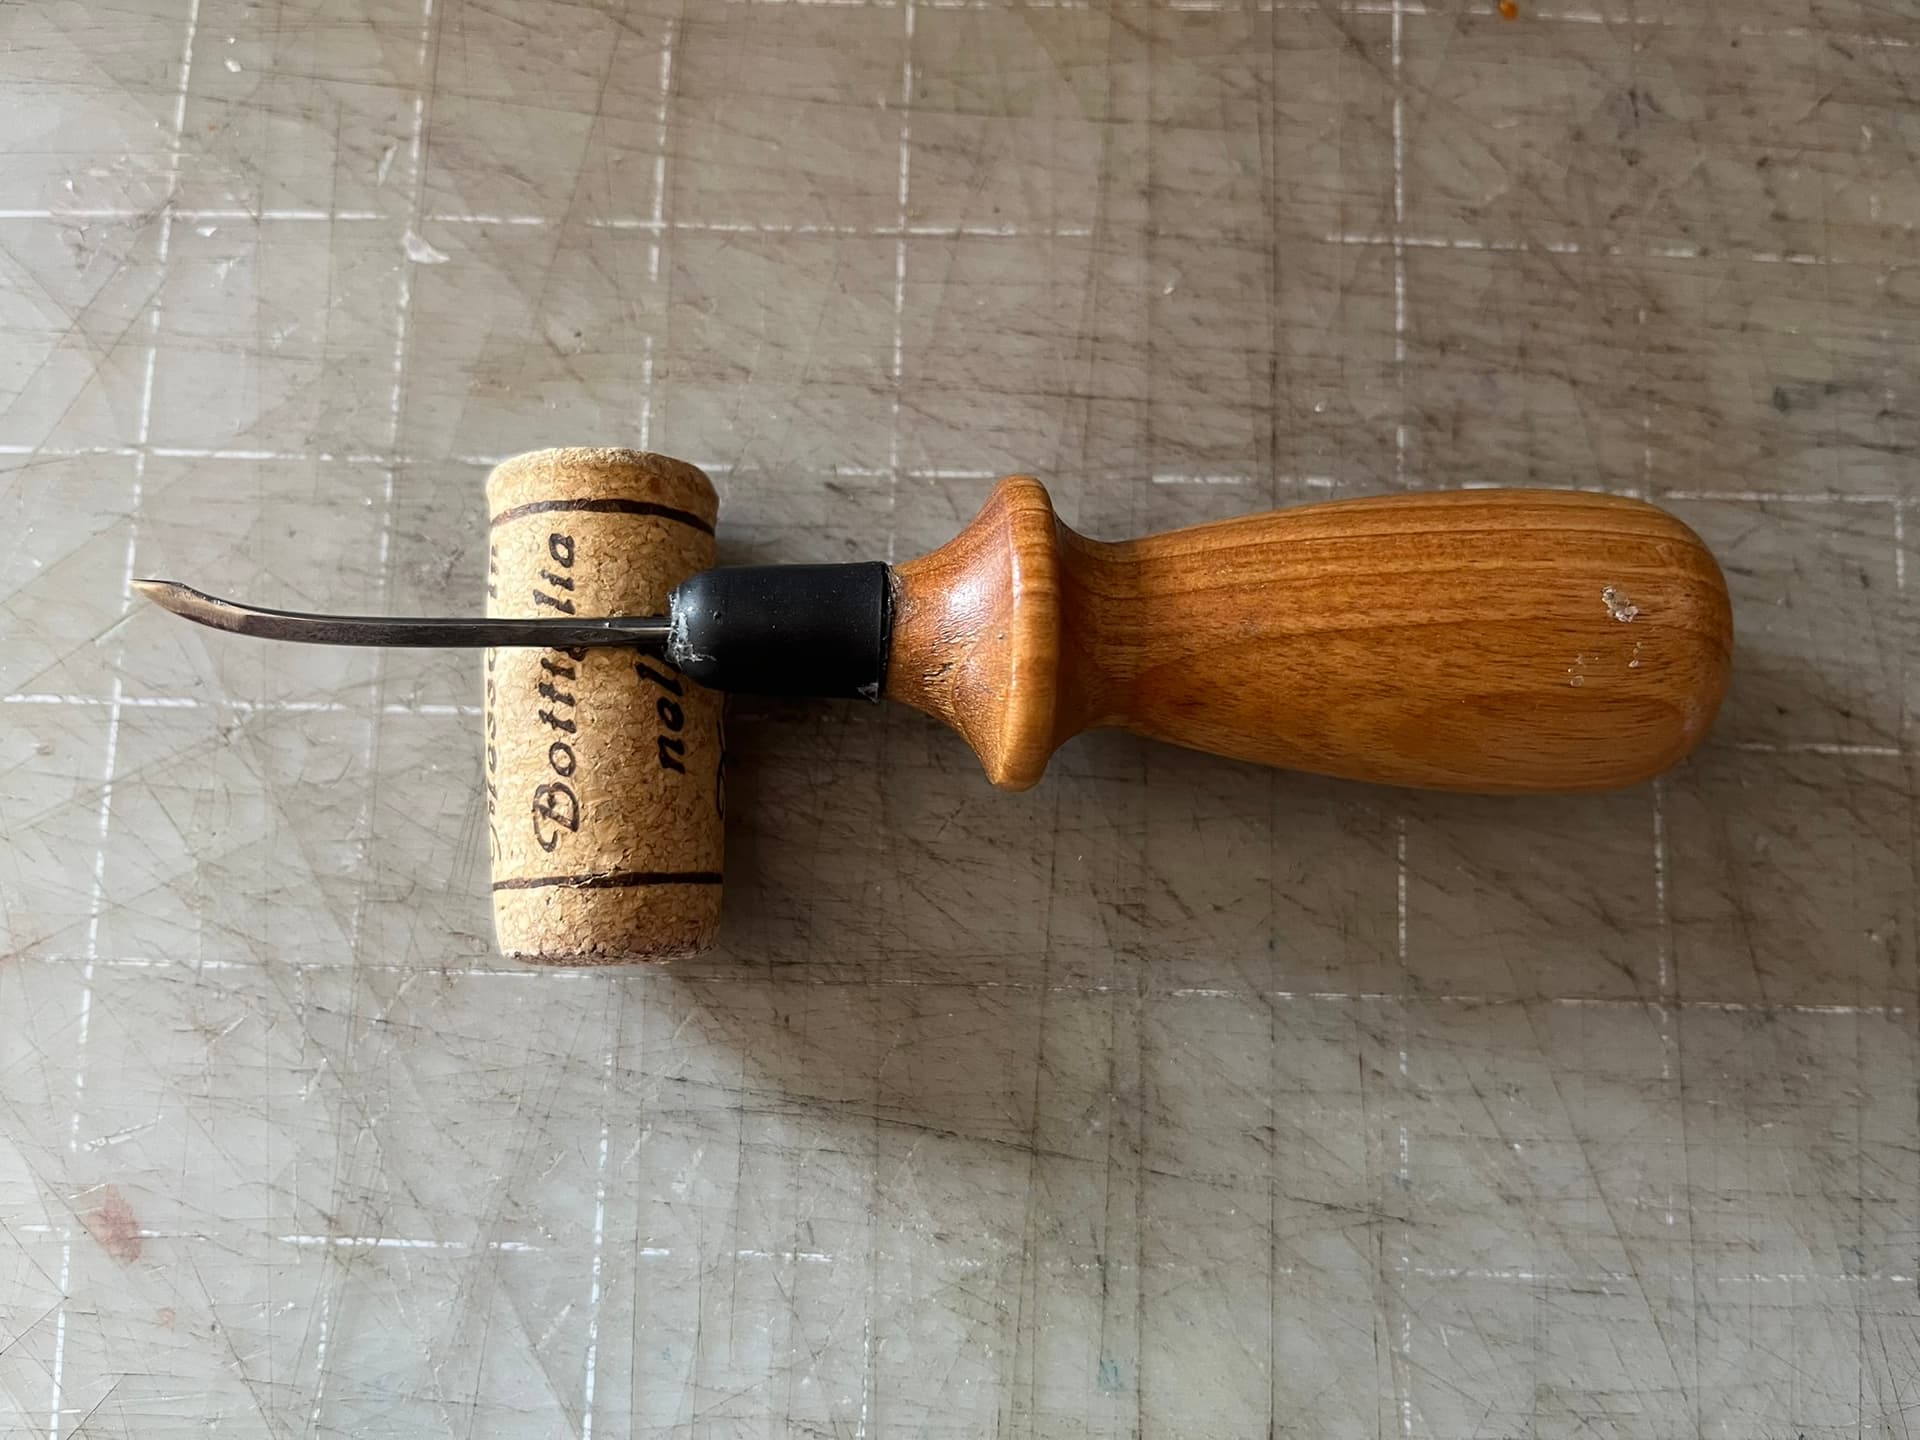
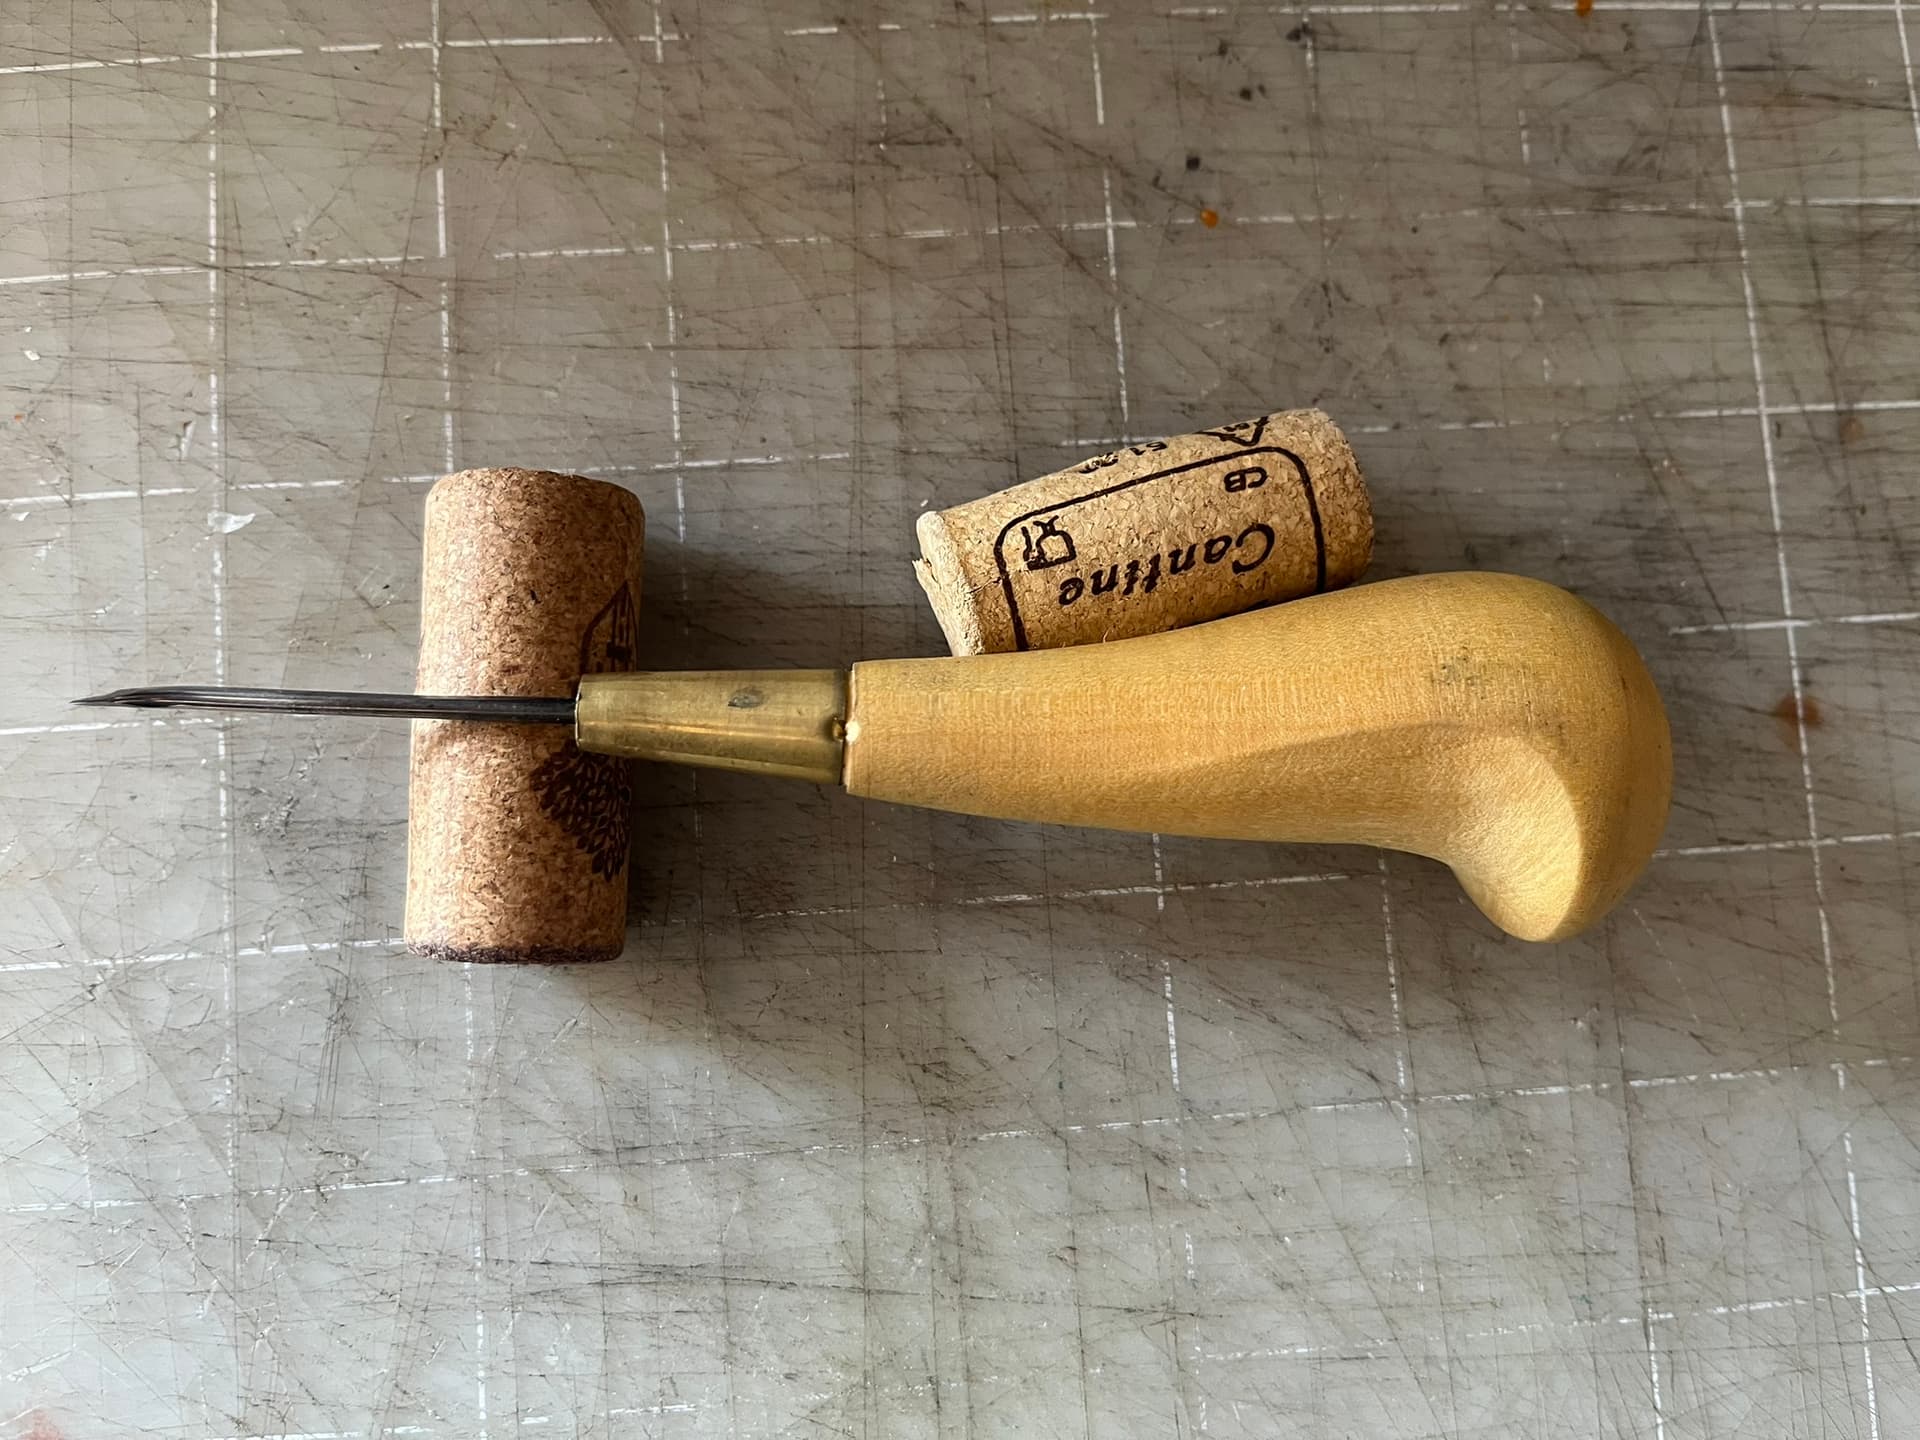
Good Idea: Fat pommel on awl haft.

This was my first try with a pistol-style, asymmetric awl haft with a wide butt end. I still got some irritation in the palm of my hand…after doing a whole 360 welt all the way around a US size 13-ish boot in a day. But it didn’t blister, and I definitely had an easier time pushing through.

I do suspect that the first, cheap sole bend that I’m just now coming to the end of may be somewhat to blame. It’s definitely been rolled very hard. I’m not paying for JR soles anytime soon. I’m still kind of shocked how pricey those are, even from my local shoe supply. But I’m going to try some cut stock outsole blanks next time I’m by, probably from Keystone. I’d frankly trade some durability to keep hand outseaming fun.

Bad Idea: Feeding bristles back through to fix wrongly twisted stitches.

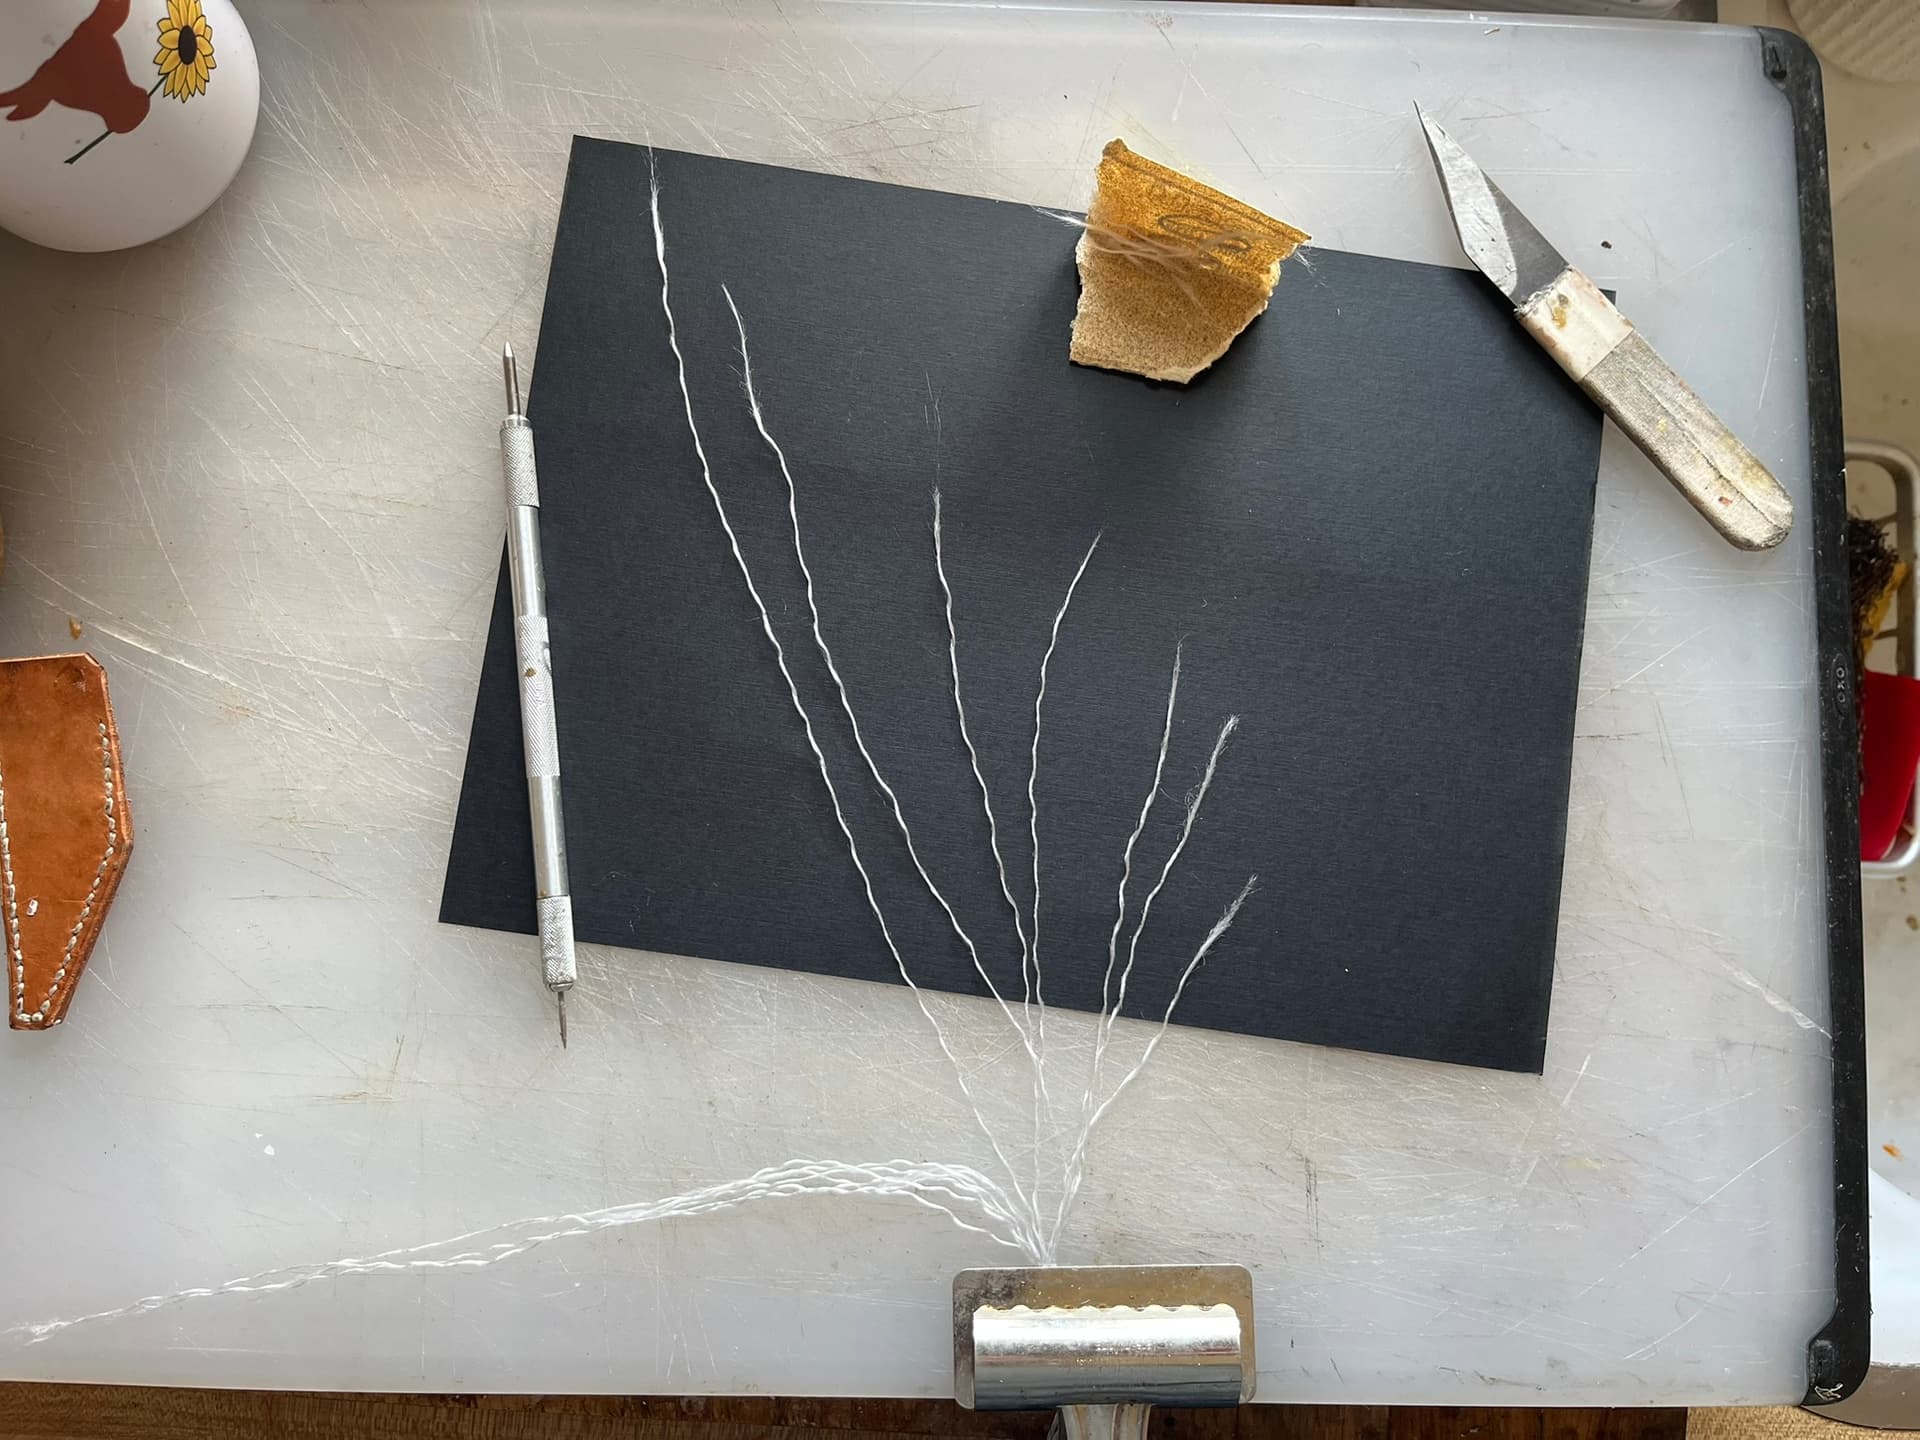
I’m pretty good about guiding the twist of each stitch that I make, but occasionally I’ll pull one tight, look back, and see the threads just didn’t cross the way I wanted. I fixed a small handful of these by passing the bristle through to unstitch and using thread already through to help pull back. But in the end that turned out to be a mistake.

It’s been way easier, cleaner, and faster to just remove the bristles—in my case, bent wire—pull the thread out, and get the bristle mounted up again. Maybe that’s just because I’m using poly thread and even the tapered plies of the taw hold up so well. Maybe it would work for hemp or linen, too.

I suppose I shied away from this because I’m touchy about how well my bristles hold on.

Good or Bad Idea?: Fusing the Taws with Glue

I keep wondering whether there isn’t some adhesive I could use to just glue together and harden the taws of my PET tapers into usable bristles themselves. Why go through the rigamarole of wrapping and binding a bristle that’s thicker than the fine point of the taw—like nylon monofilament—when you can just fuse the thread itself? Unfortunately, it seems cyanoacrylate is not great at bonding PET, and adhesives recommended for PET seem to be specialty industrial products. But I’m wondering whether I couldn’t just mix up a little puddle of two-part epoxy and drag it through. Perhaps I’ll give it a try today.

Good Idea: Setting the square awl in the haft right.

My go-to square awl up to this pair was this Tom Carbone blade in an Osborne 140 haft:

My goal here was basically to put the square awl in the haft with the widest pommel I could find, to spread the pressure and friction of pushing it through the shole leather to widest part of my palm possible. The ring this haft has closer to the front is also nice to push against and to twist, but can rub against the upper when pushing through too far.

The black around the tip of the haft is a a couple layers of heat-shrink tubing. I only added that because I originally drilled the pilot hole for the blade too narrow, leading to the start of a crack from the very tip when I set the blade. I forced a bunch of glue into the crack from the side, wrapped it with heat shrink, widened the hole, reset the blade, and so far it’s held up. I’d recommend drilling the pilot hole big enough in the first place instead.

My newer setup is this pistol-shaped haft, I believe the 110 mm version from shoemakercraft

I believe the awl blade is an old Maeder, 90 millimeters tip to end of shaft.

The pommel is even wider than the Osborne’s, which I do find more comfortable. But it took me a couple tries to figure out how to clock the blade.

I ended up setting the blade at nine o’clock, if the top of the haft is noon and center of the carveout at the bottom is six. I’m right handed, so this means the blade points up and toward me when I hold the awl with my palm toward my stomach. This isn’t always exactly right when the shoe is between my legs, upper to my right and bottom to my left. The angle changes a bit around the curves of the featherline. But it seems to work well for pushing with the well of my palm and doing a little twisting.

Well, it seems this pair will be another learning experience, rather than a wearing one.

I was concerned about the way the quarter tabs on one side got pulled back during lasting. Delasting today started big tears that split right open when I pulled the tongue back to lay in sock liners. They’re now very visible. I wouldn’t be able to hide them under a false tongue, even.

I might set this aside a while, before I come back to write up more lessons.

On the flip side, Dick Anderson called me out of the blue today, saying he was about to ship the order I thought had fallen through. So at least I’ll have new awls for sewing and stitching next time 'round.

1 Like

Bad Idea: Mis-Patterning the Tongue

My fundamental, eventually fatal error with this pair seems came down a patterning flaw where the tongue meets the vamp, under the quarters. It was bad as drafted, then got worse through both closing and lasting.

Most basically, I drew the concave tab on the vamp for the tongue attachment too far forward, right between the tabs. I also drew it too short, as a narrow, crescent-moon shape, not extending far enough back between the quarters. I also made hard, right-angle cuts on the vamps where the tongue tabs met the seam allowances for the vamp-quarter seams. It all set up for tears.

It also would have helped to do additional stay stitches further up from the vamp-quarter seams, rather than just rely on multiple rows of stitching in the vamp-quarter seams.

Here’s the left side, by far the worse of the two. This shot really brings home just how bad a job I did fitting the quarters before closing.

For comparison, here’s a pair of secondhand Allen Edmonds boots that I should have used more of for reference:

Note the scallop- or wave-like shape of the tongue tab. It’s still very narrow, but it’s curved to avoid sharp corners. There are ugly, circular gaps where the lining doesn’t cover the quarters. But they’re hidden way back, where they’ll only be seen spreading the quarters unnaturally apart like this.

The Pacific Northwest boots I’ve seen all have much taller tongue tabs. The gusset tongues hide them from the outside, but you can see the shapes in their videos:

Fundamentally, I need to be more systematic about how I pattern this area, including the linings. I also want to try punching a small locating hole in each piece that I can use to make sure everything gets fit up right. The Seidich Uppermaking book mentions this a few times.

Glad to hear Dick is still alive!

Me, too.

I’m guessing at a puzzle without all the pieces, but he might have had trouble getting up and filling orders through the winter, until the Sheridan show came in sight. I got my package yesterday, and today when I called he was already on the road to Wyoming.

A couple thoughts from skimming the last month of posts (sorry for not keeping up!)

  1. Regarding fixing the bristles to the thread: ain’t no law against superglue, it’s a miracle of modern science. But I wonder if anyone has used a very small heat-shrink tube (for elecrtical wiring use) because that would certainly lock the bristle in place. Just a thought. Also, from context it sounds like you don’t have a heat gun? If so, you should order one today, I use a cheap harbor freight one literally every single day, it has endless uses and probably cost $15.

  2. Tongue patterning: My solution was to put the gusset on the vamp. Photo attached, you can see the gusset right under the quarters. Also, just leave more allowance where you’re not sure you have enough. As long as you skive it you won’t notice the extra leather when wearing the shoe.

1 Like

CA Glue

I’d just made a note for myself to try flexible CA glue on my next set of bristles! I have some of this around, and will give it a try:

I hesitated the last time because I’d run a bit of beeswax on the taws to keep them together while pitching the body of the thread. I’m guessing adhesive should come before any lubricant.

Heat-shrink tube is a thought. I have experience with wider diameters for electrical wiring and other projects, but haven’t used any of the really thin stuff. I do wonder whether you’d get a lip on the leading edge that could snag or pull apart. But there’s no telling 'til someone tries.

If you can find really narrow tubing, it might even make sense to just shrink half a length over the end of the thread and shrink the other half on itself, to use as a bristle.

Heat Guns

I do have a heat gun, as well as a hairdryer. Sometimes I’ll use the heat gun to speed things along with contact cement when bottoming in the garage.

As it is, I end up working a lot in my apartment, at night. It’s a bit noisy, so the heat gun isn’t the first tool I reach for. Thanks for encouraging me to give it more thought!

Tongues

I ended up fitting tongue over vamp, just as you said, in my redo of this pair. I have photos of the process starting here.

I’m about to last those uppers, so time is still to tell how I did. Patterning-wise, I chickened out a bit by intentionally cutting the tongues too tall, essentially giving trim allowance.

You crepe-sole low boots look great!

1 Like