Distinctive Hand Stitches

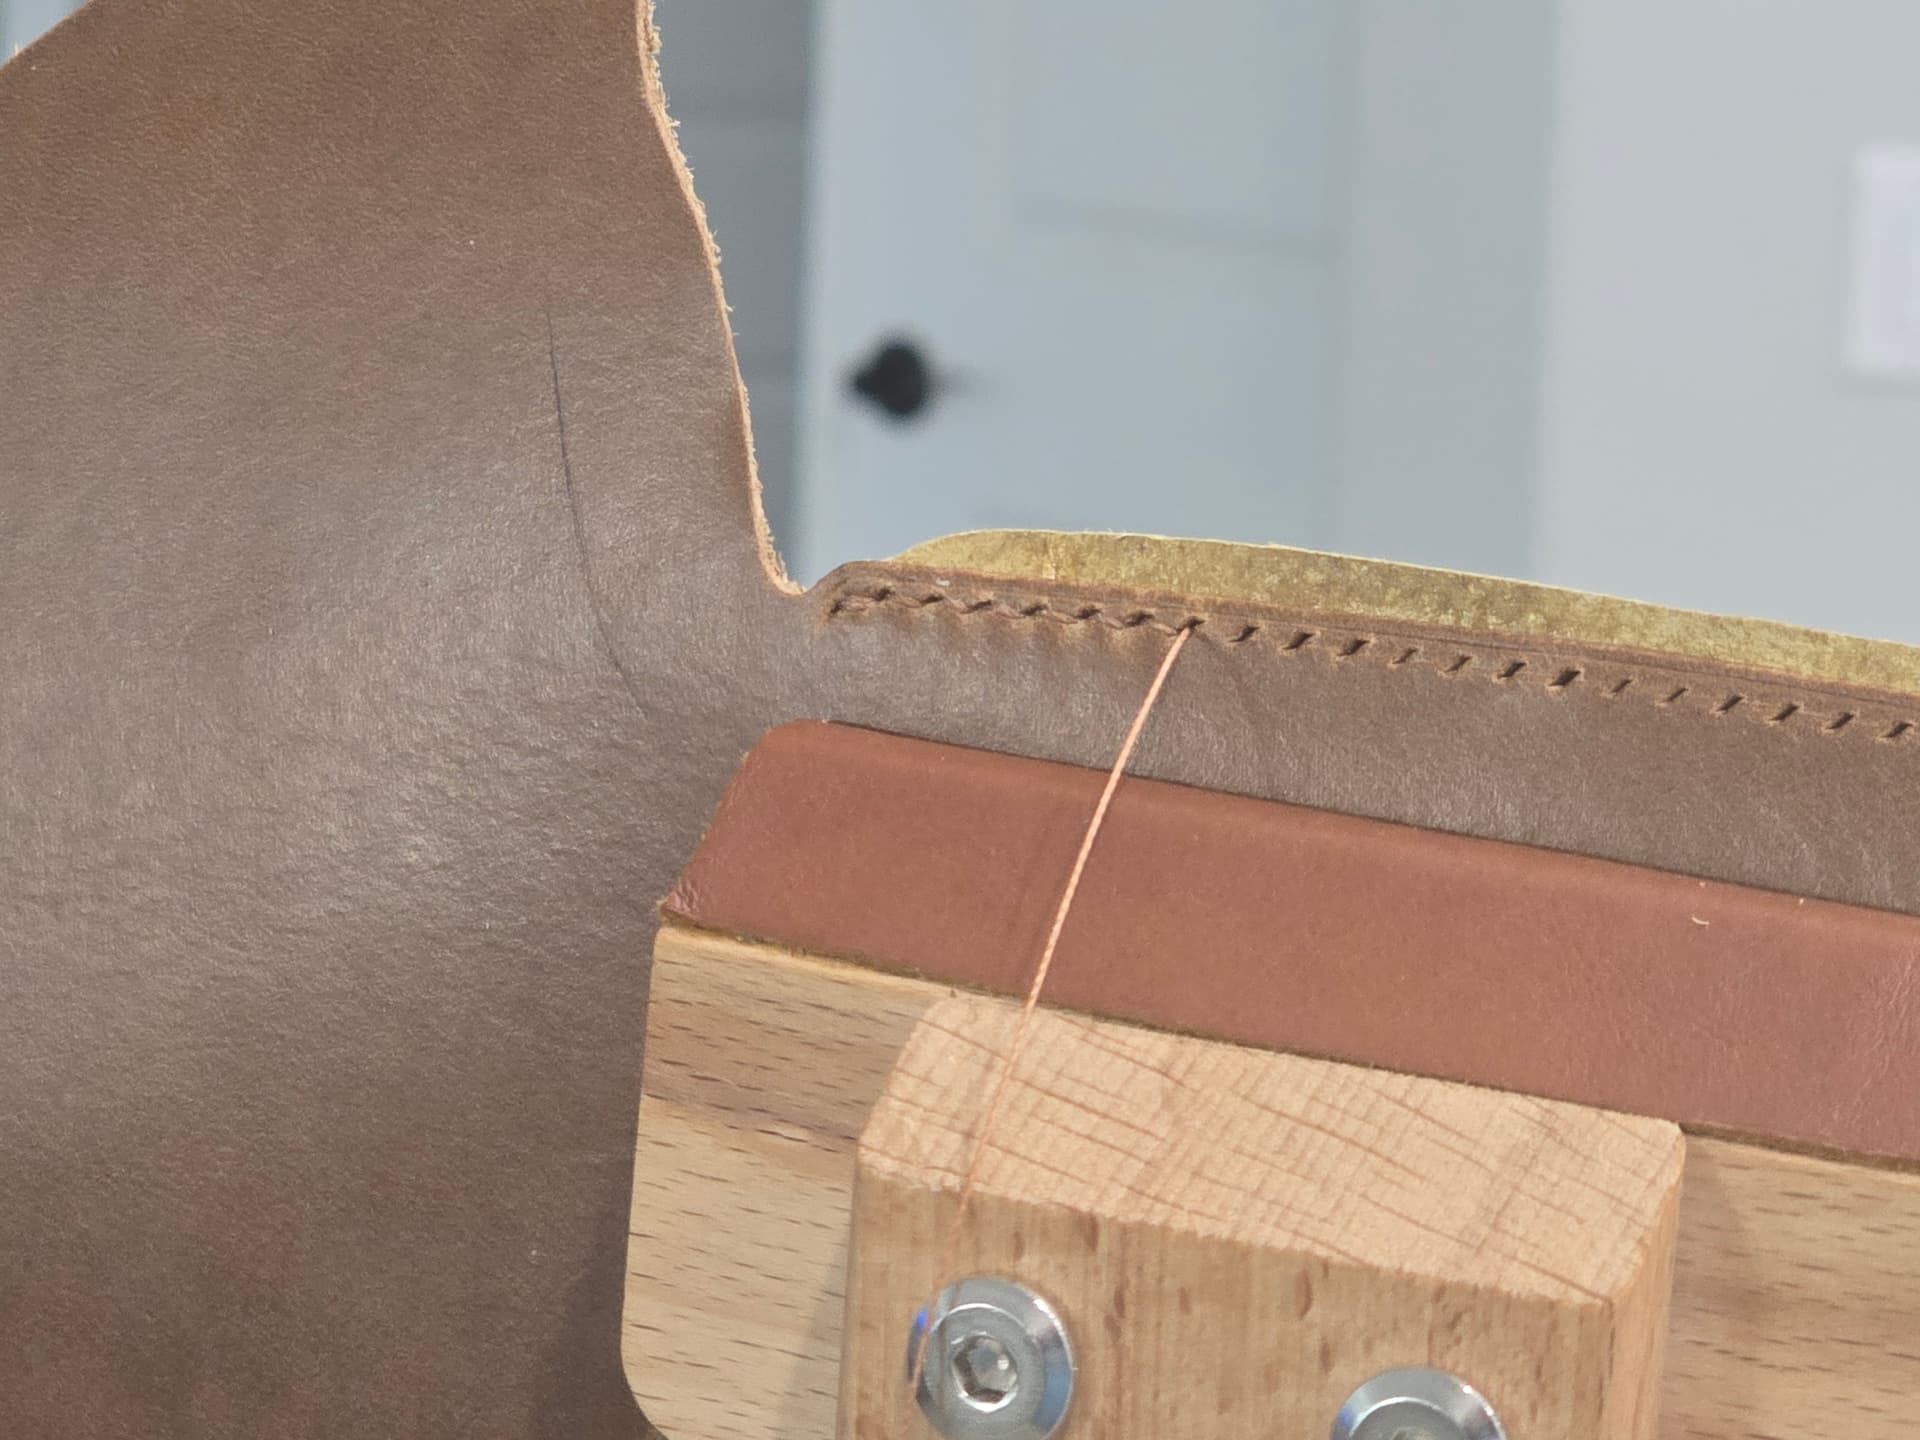
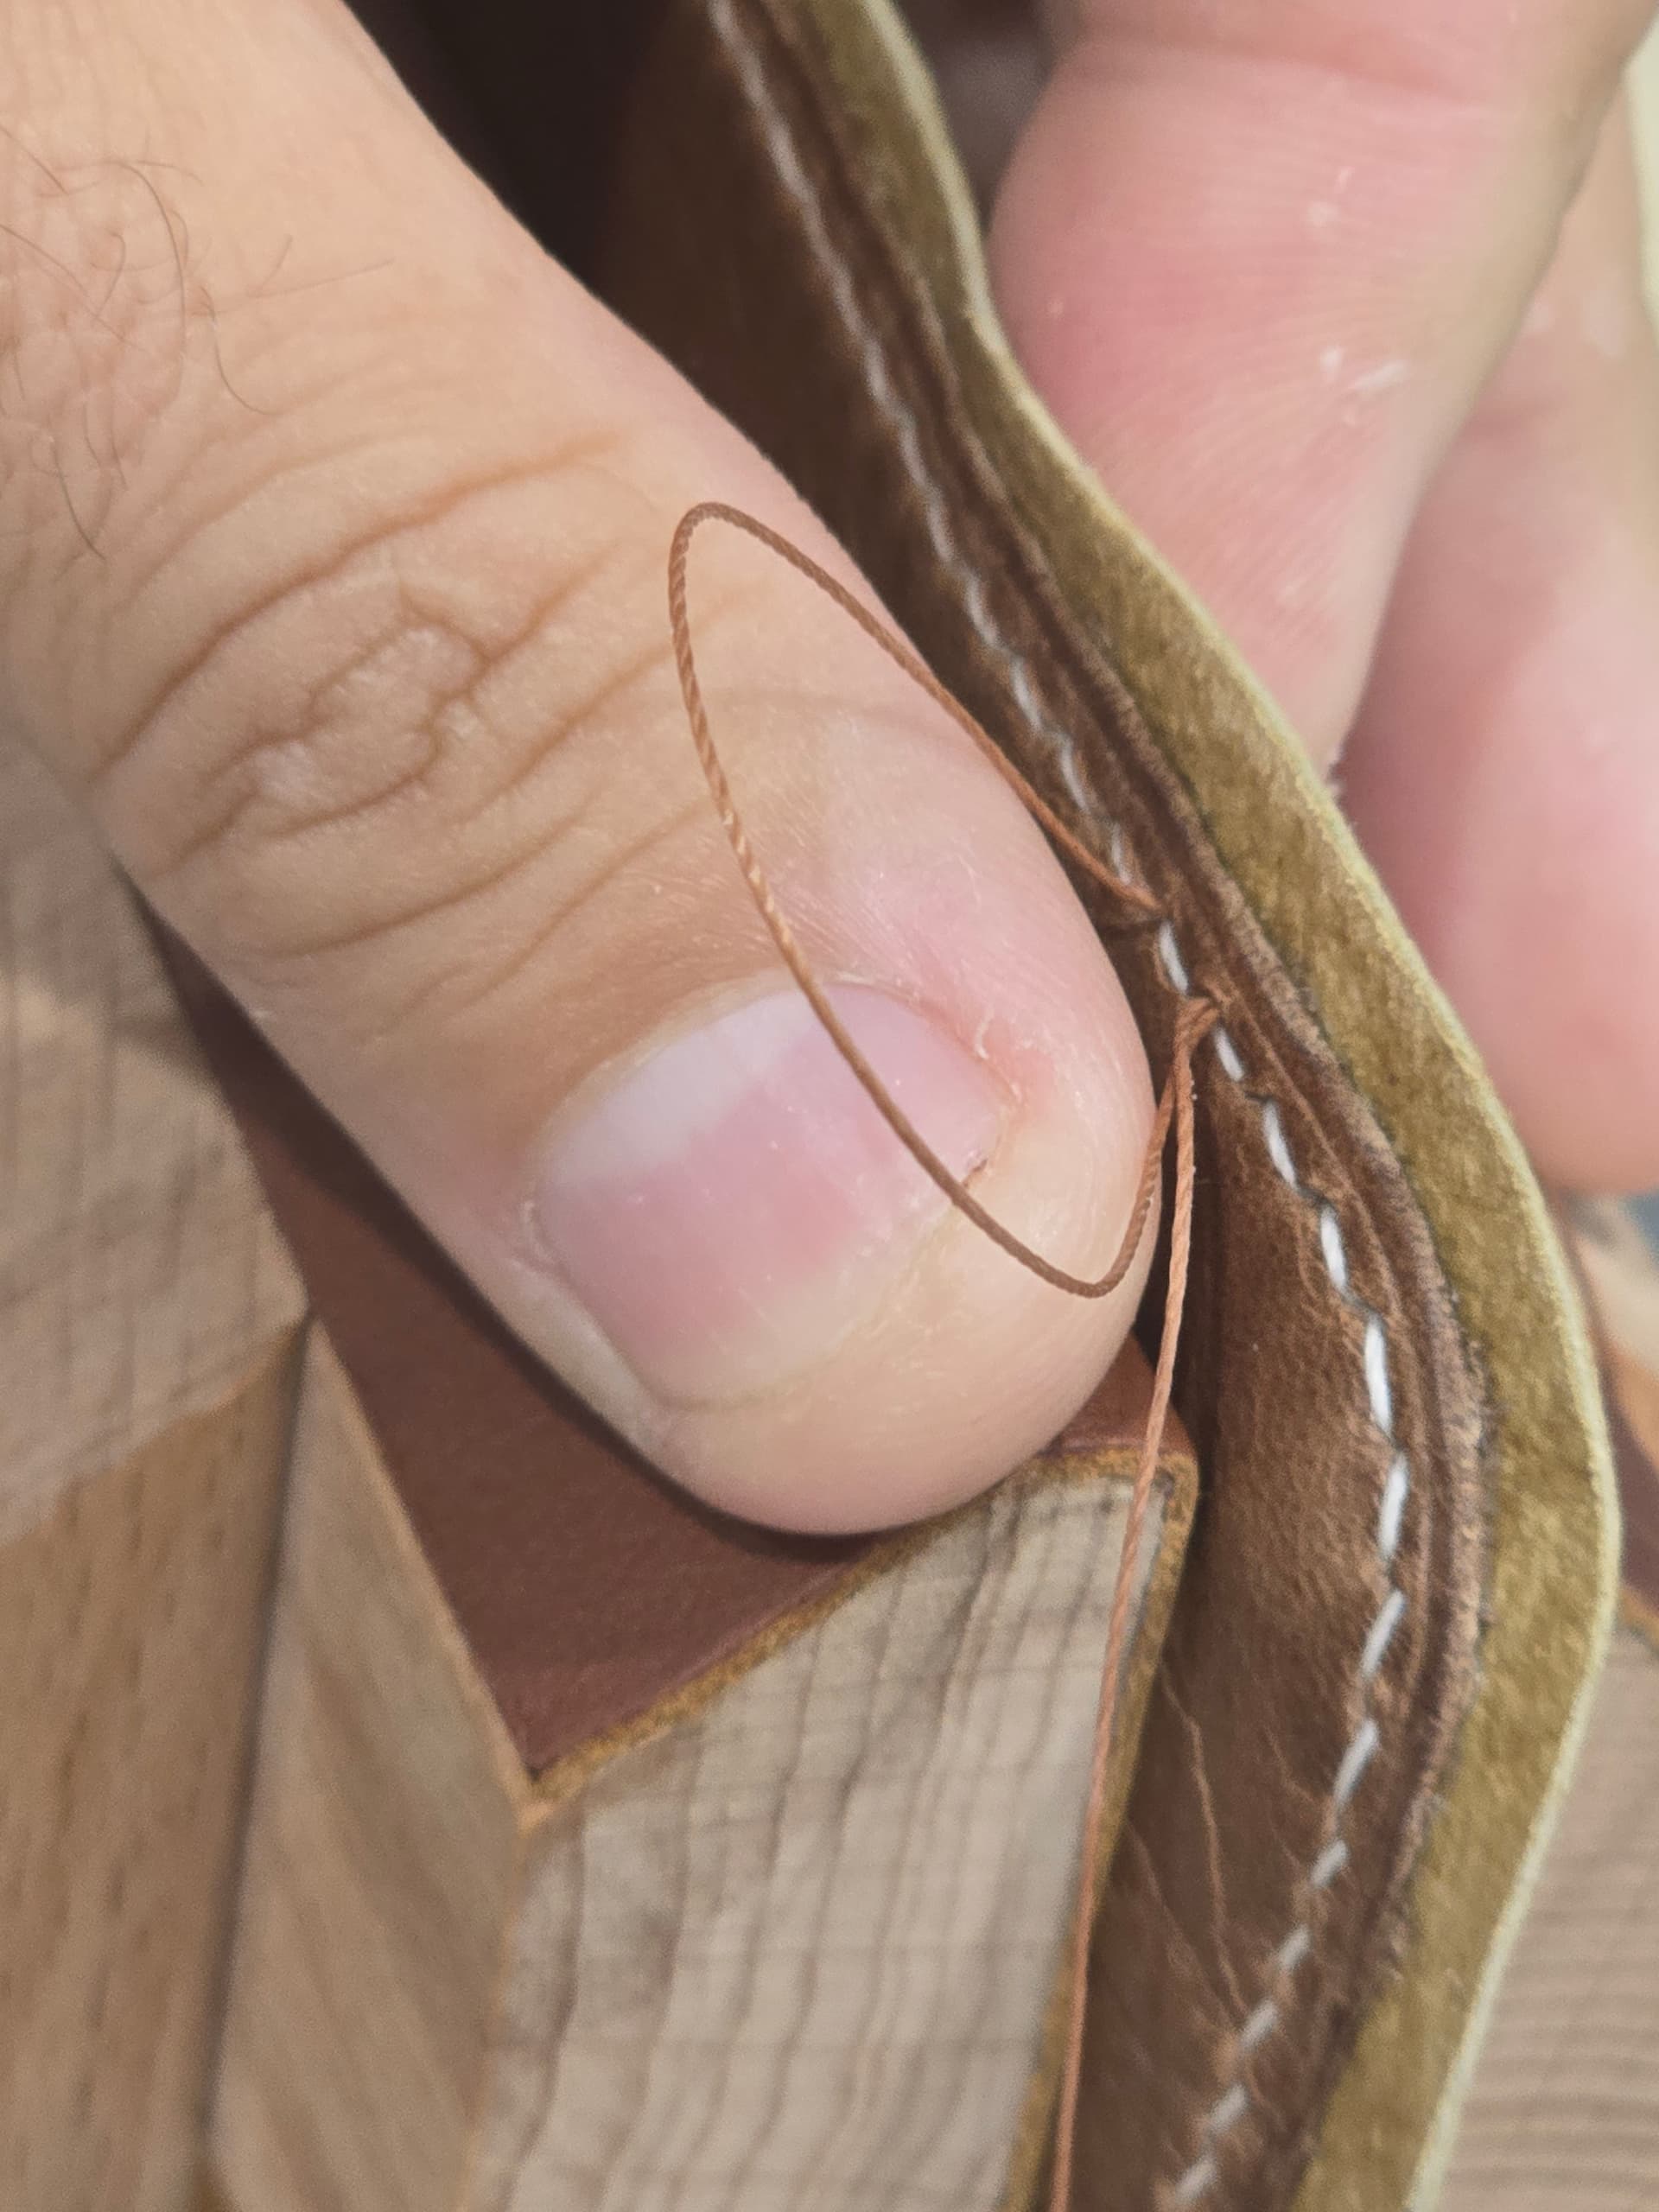
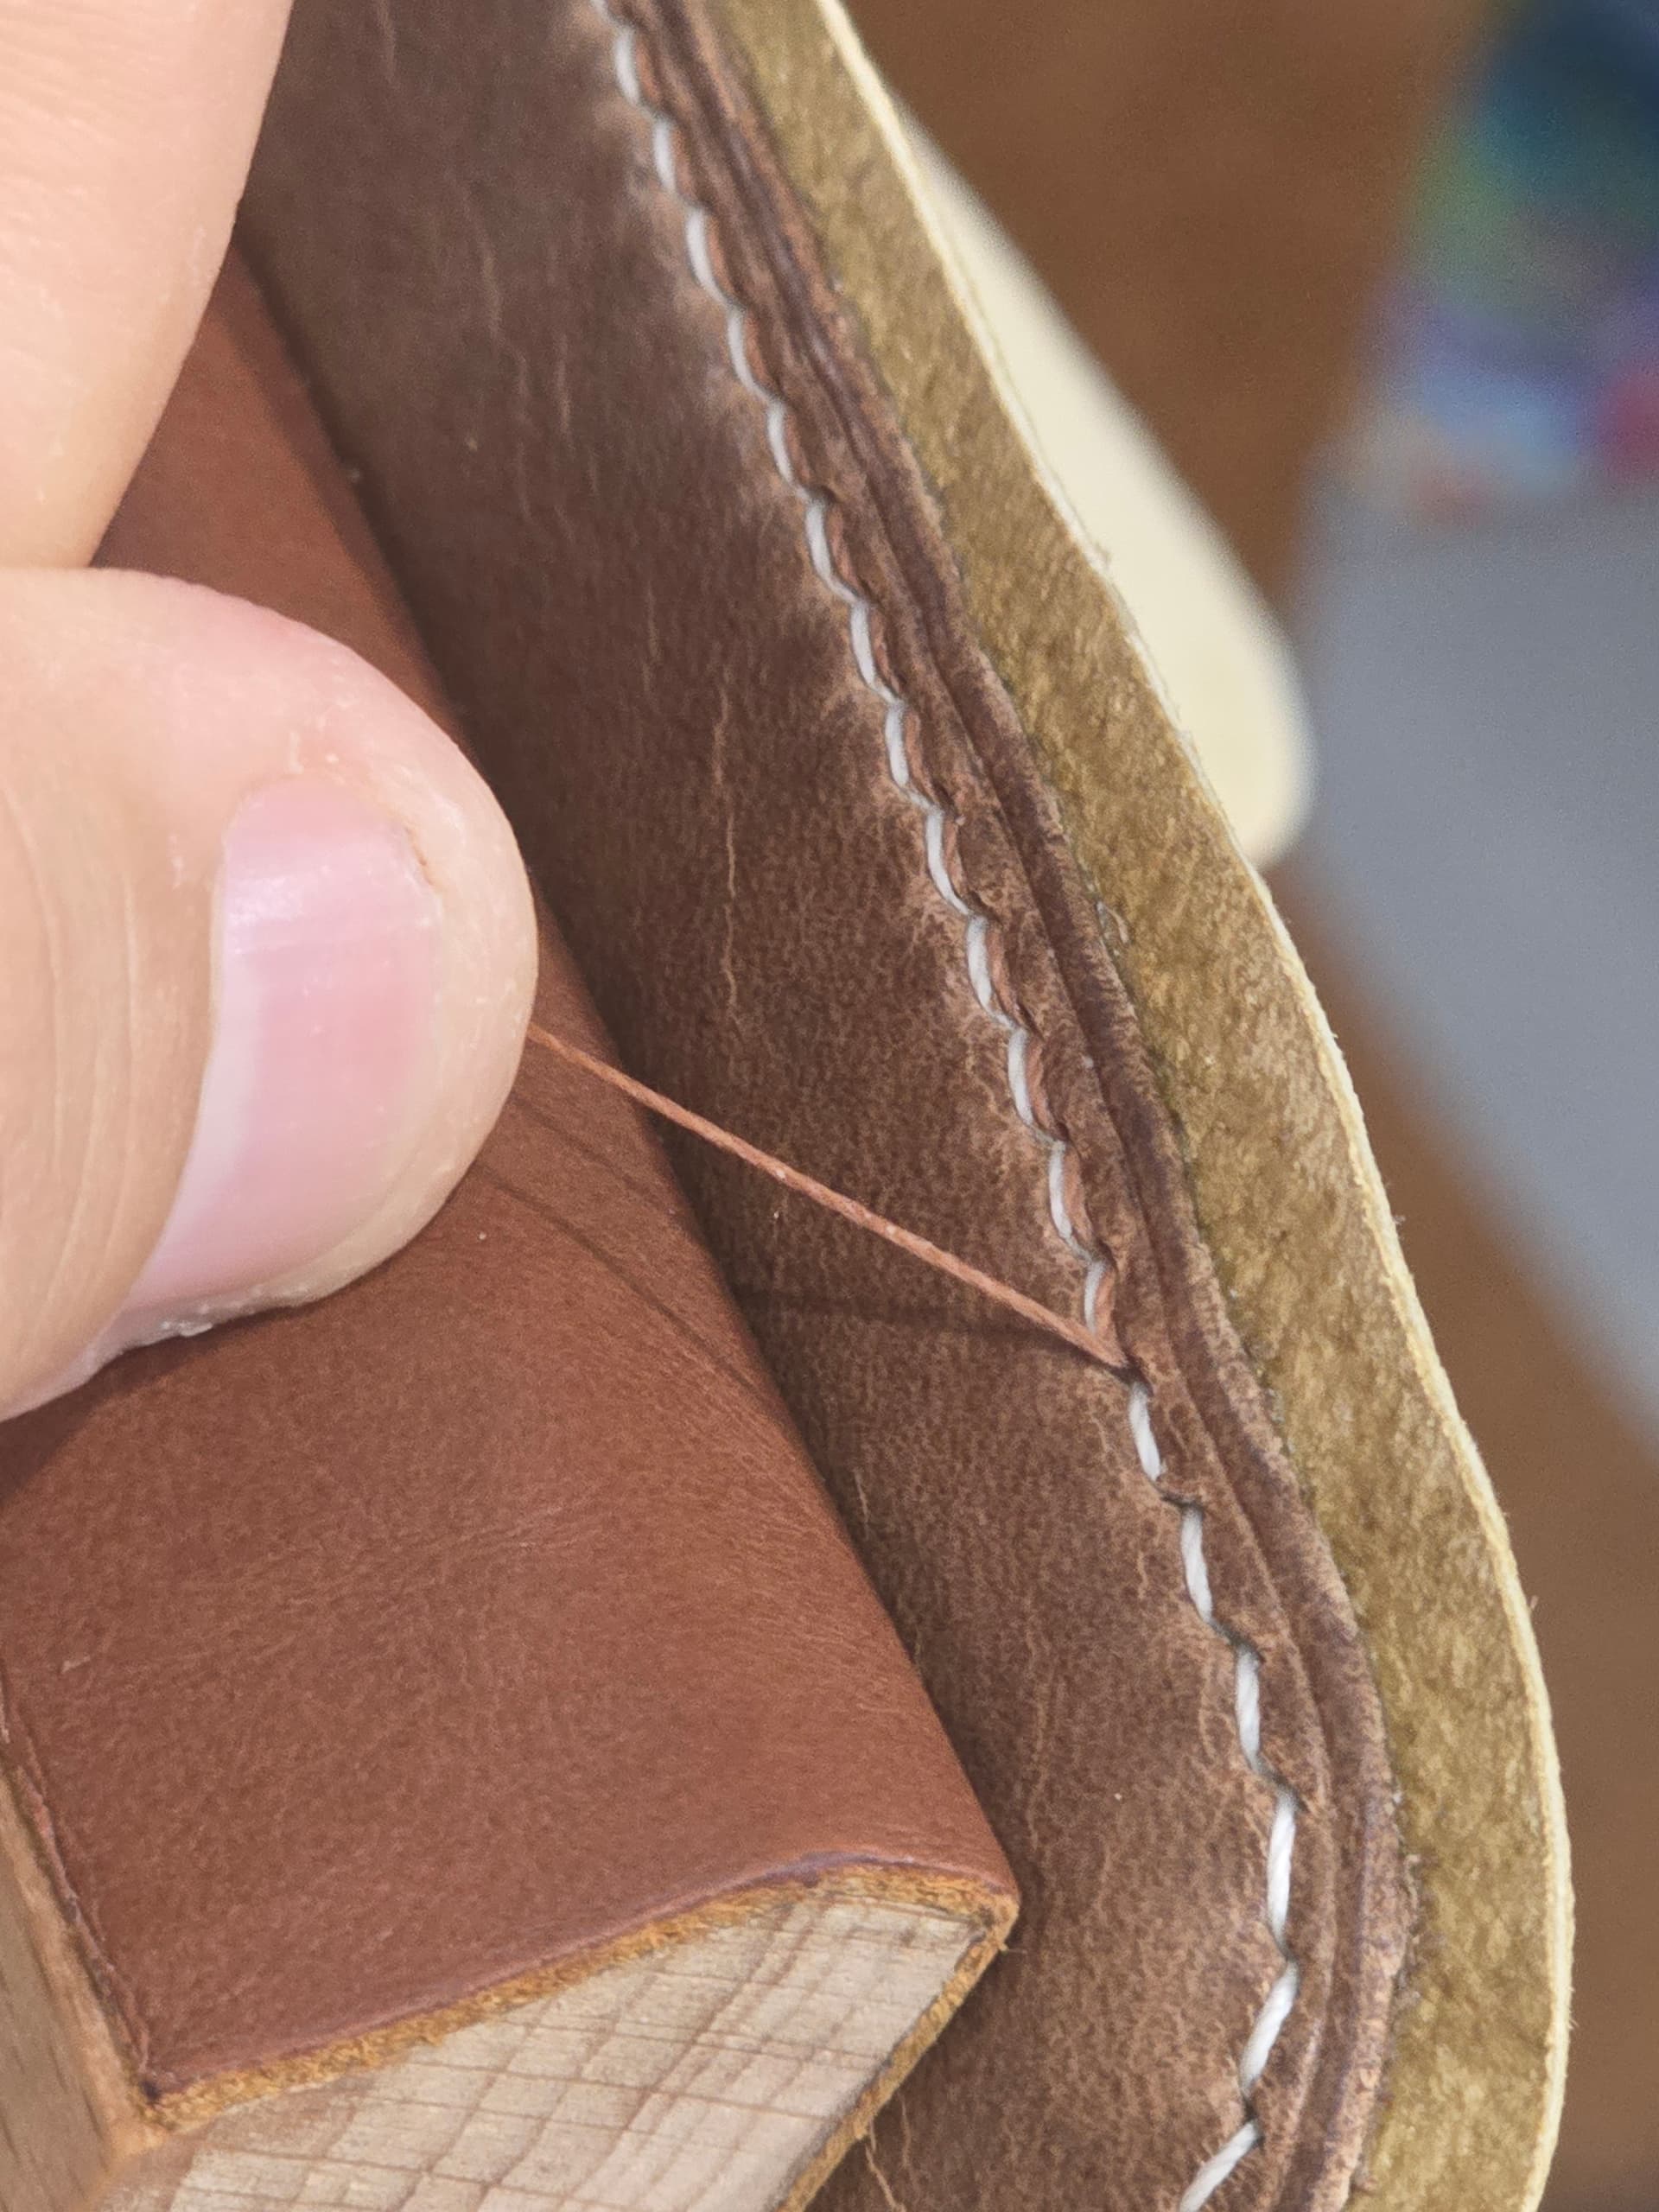
I continue to really enjoy closing my uppers by hand, a practice once known as “binding” that got killed off by Singer’s sewing machine. One of the fun parts of it has been finding and trying stitches that aren’t practical or maybe even doable by machine.

Thinking about it more systematically, what I’m looking for are stitches that:

  1. can’t be done by any common machine
  2. meet or beat the strength and durability of machine lockstitch or chainstitch
  3. create stitches that don’t look any like stitches made by machine

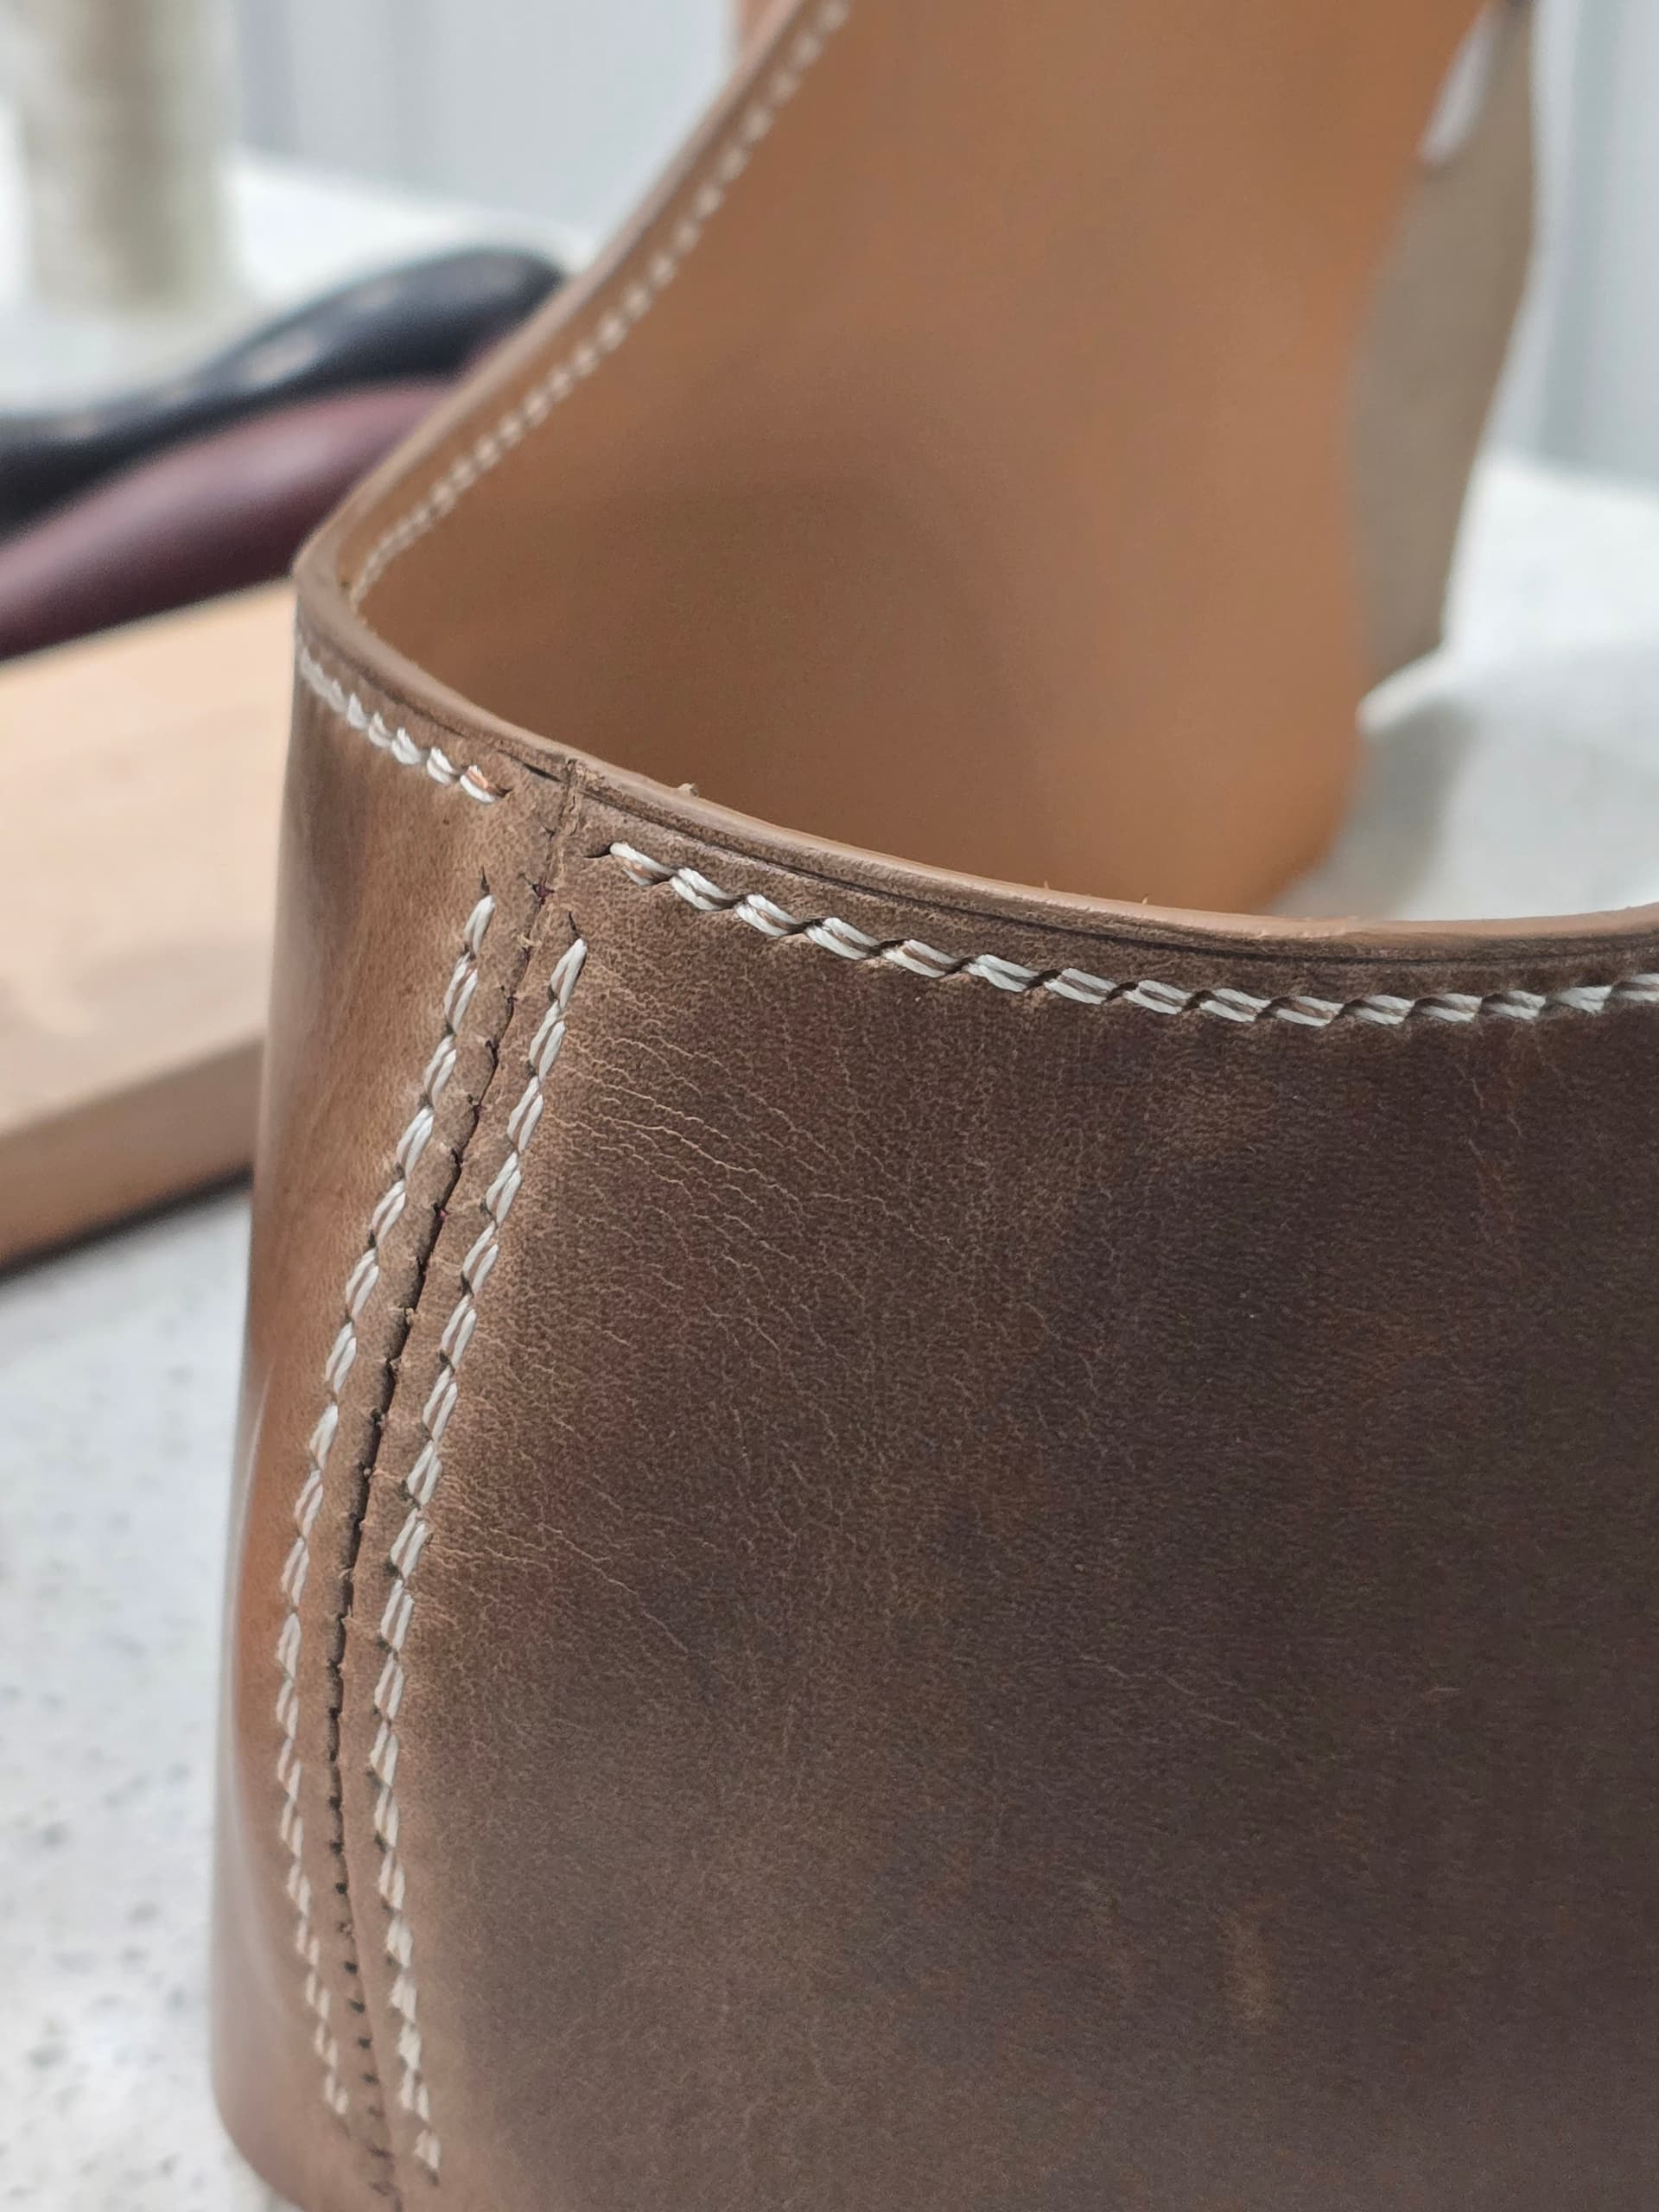
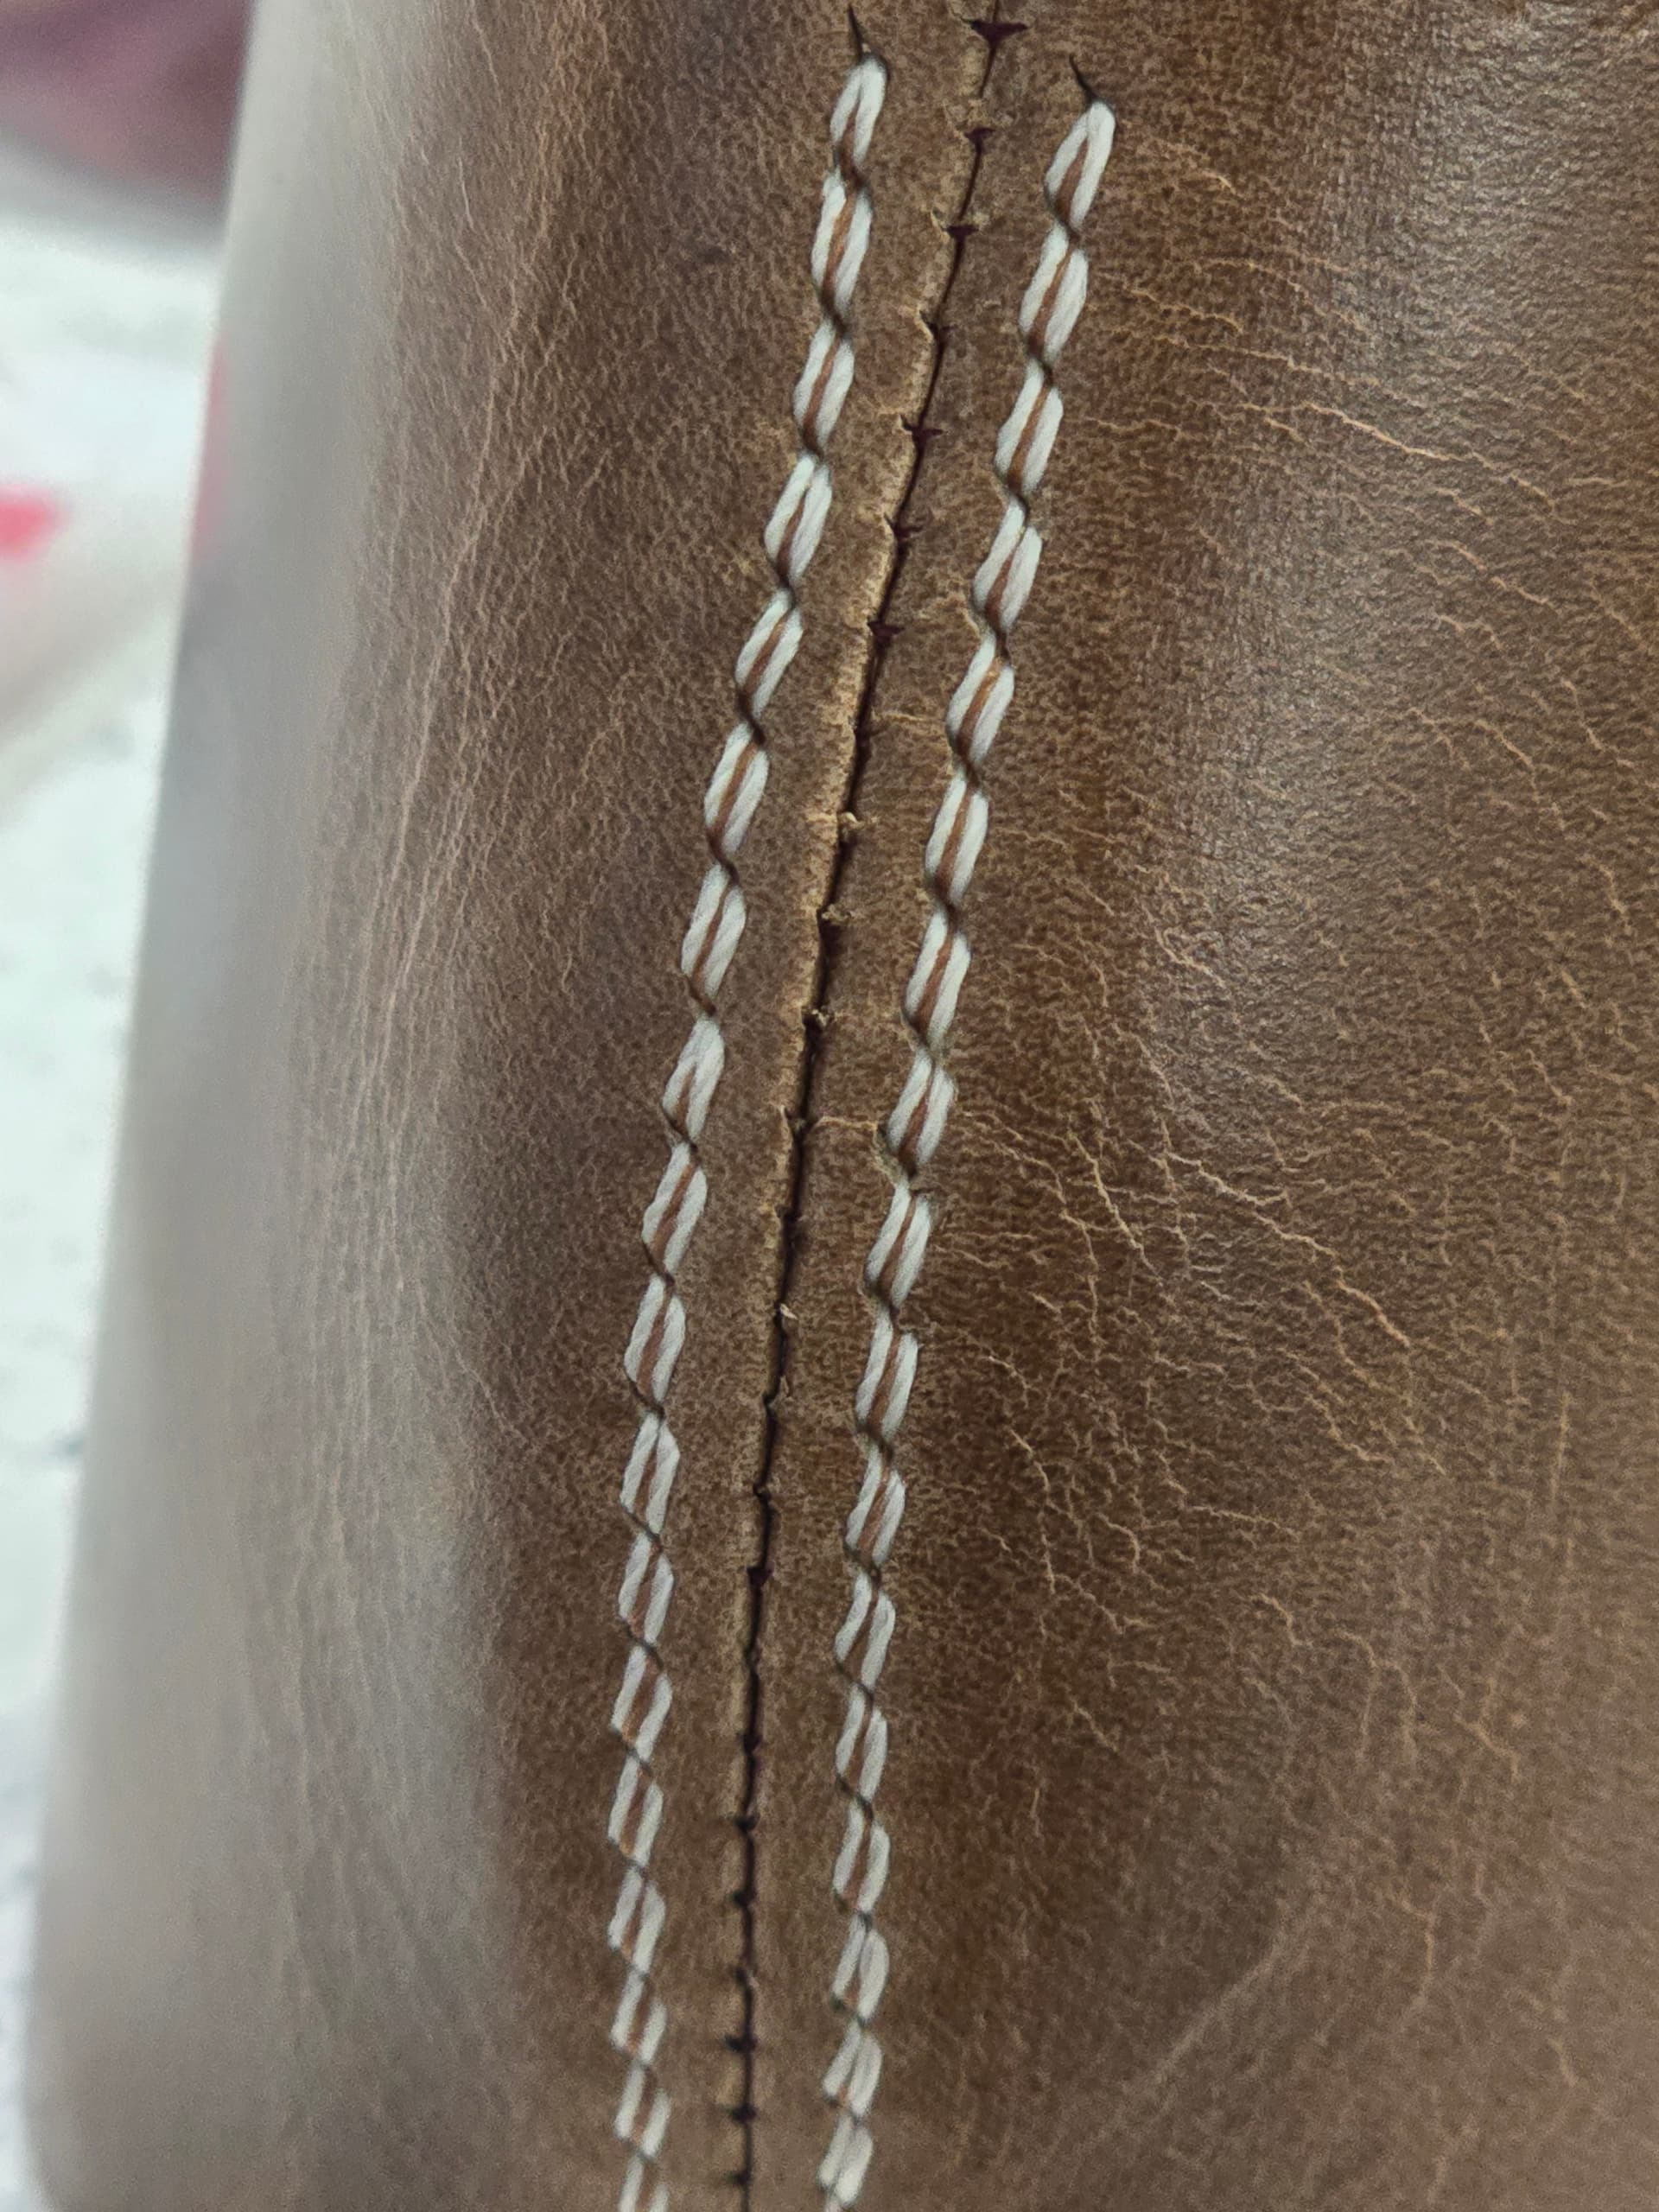
As a negative example, simple two-needle “saddle” or “shoemaker” stitch wouldn’t count, because while it can’t be done with any common machine and beats lockstitch on strength in many cases, it doesn’t look that different from machine lockstitch. Even if you pierce slanted holes and twist the threads for a highly slanted look on one side, lockstitch machines can get much the same effect with relatively large elliptical-point needles and relatively narrow thread.

However, there are some stitches that qualify:

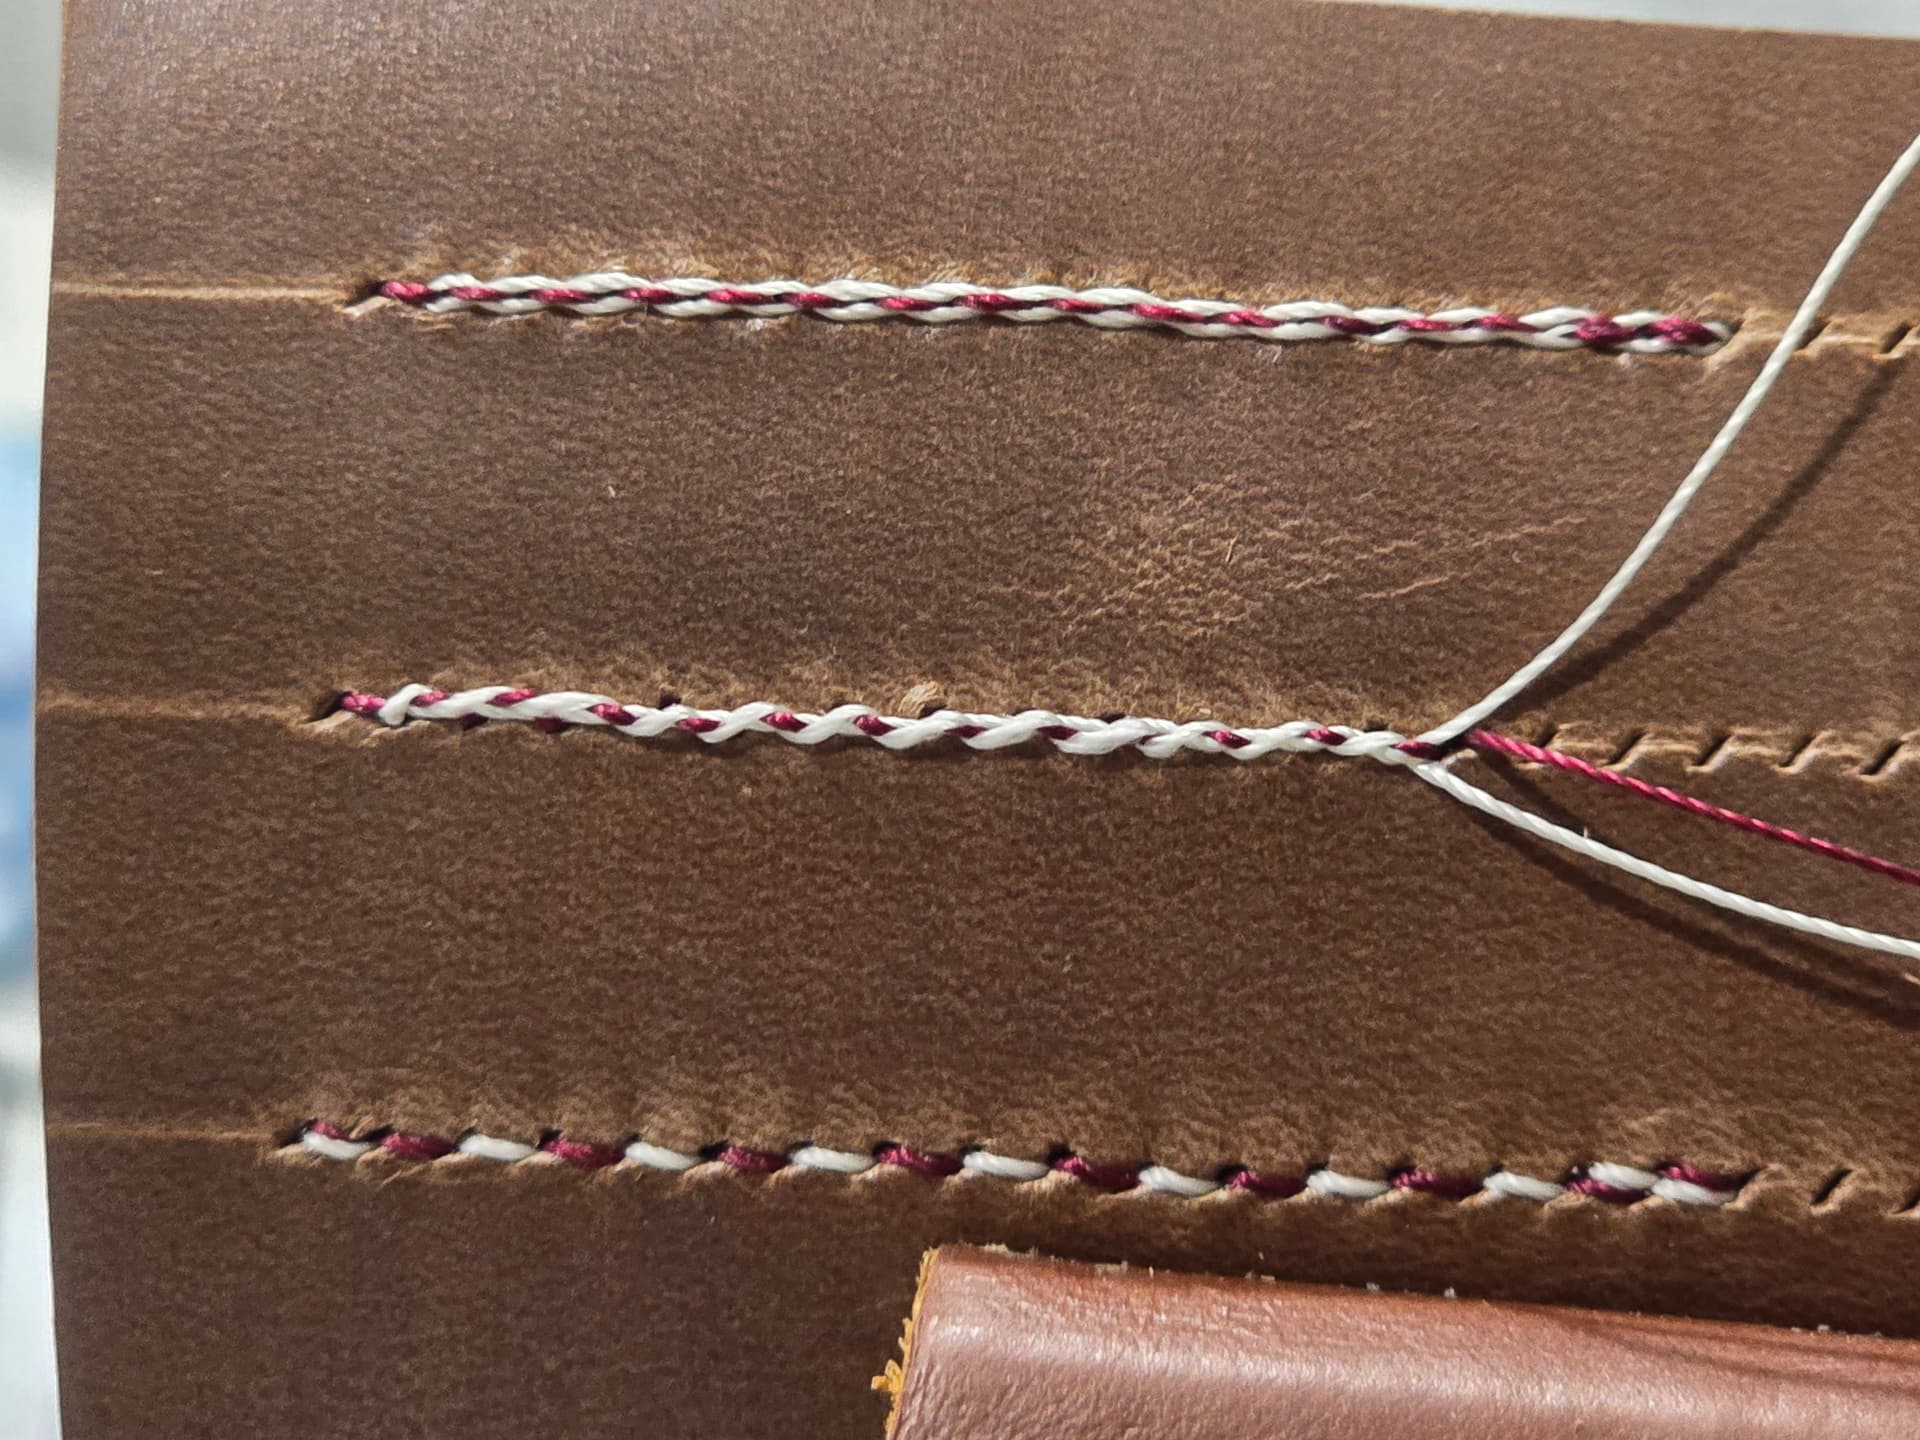
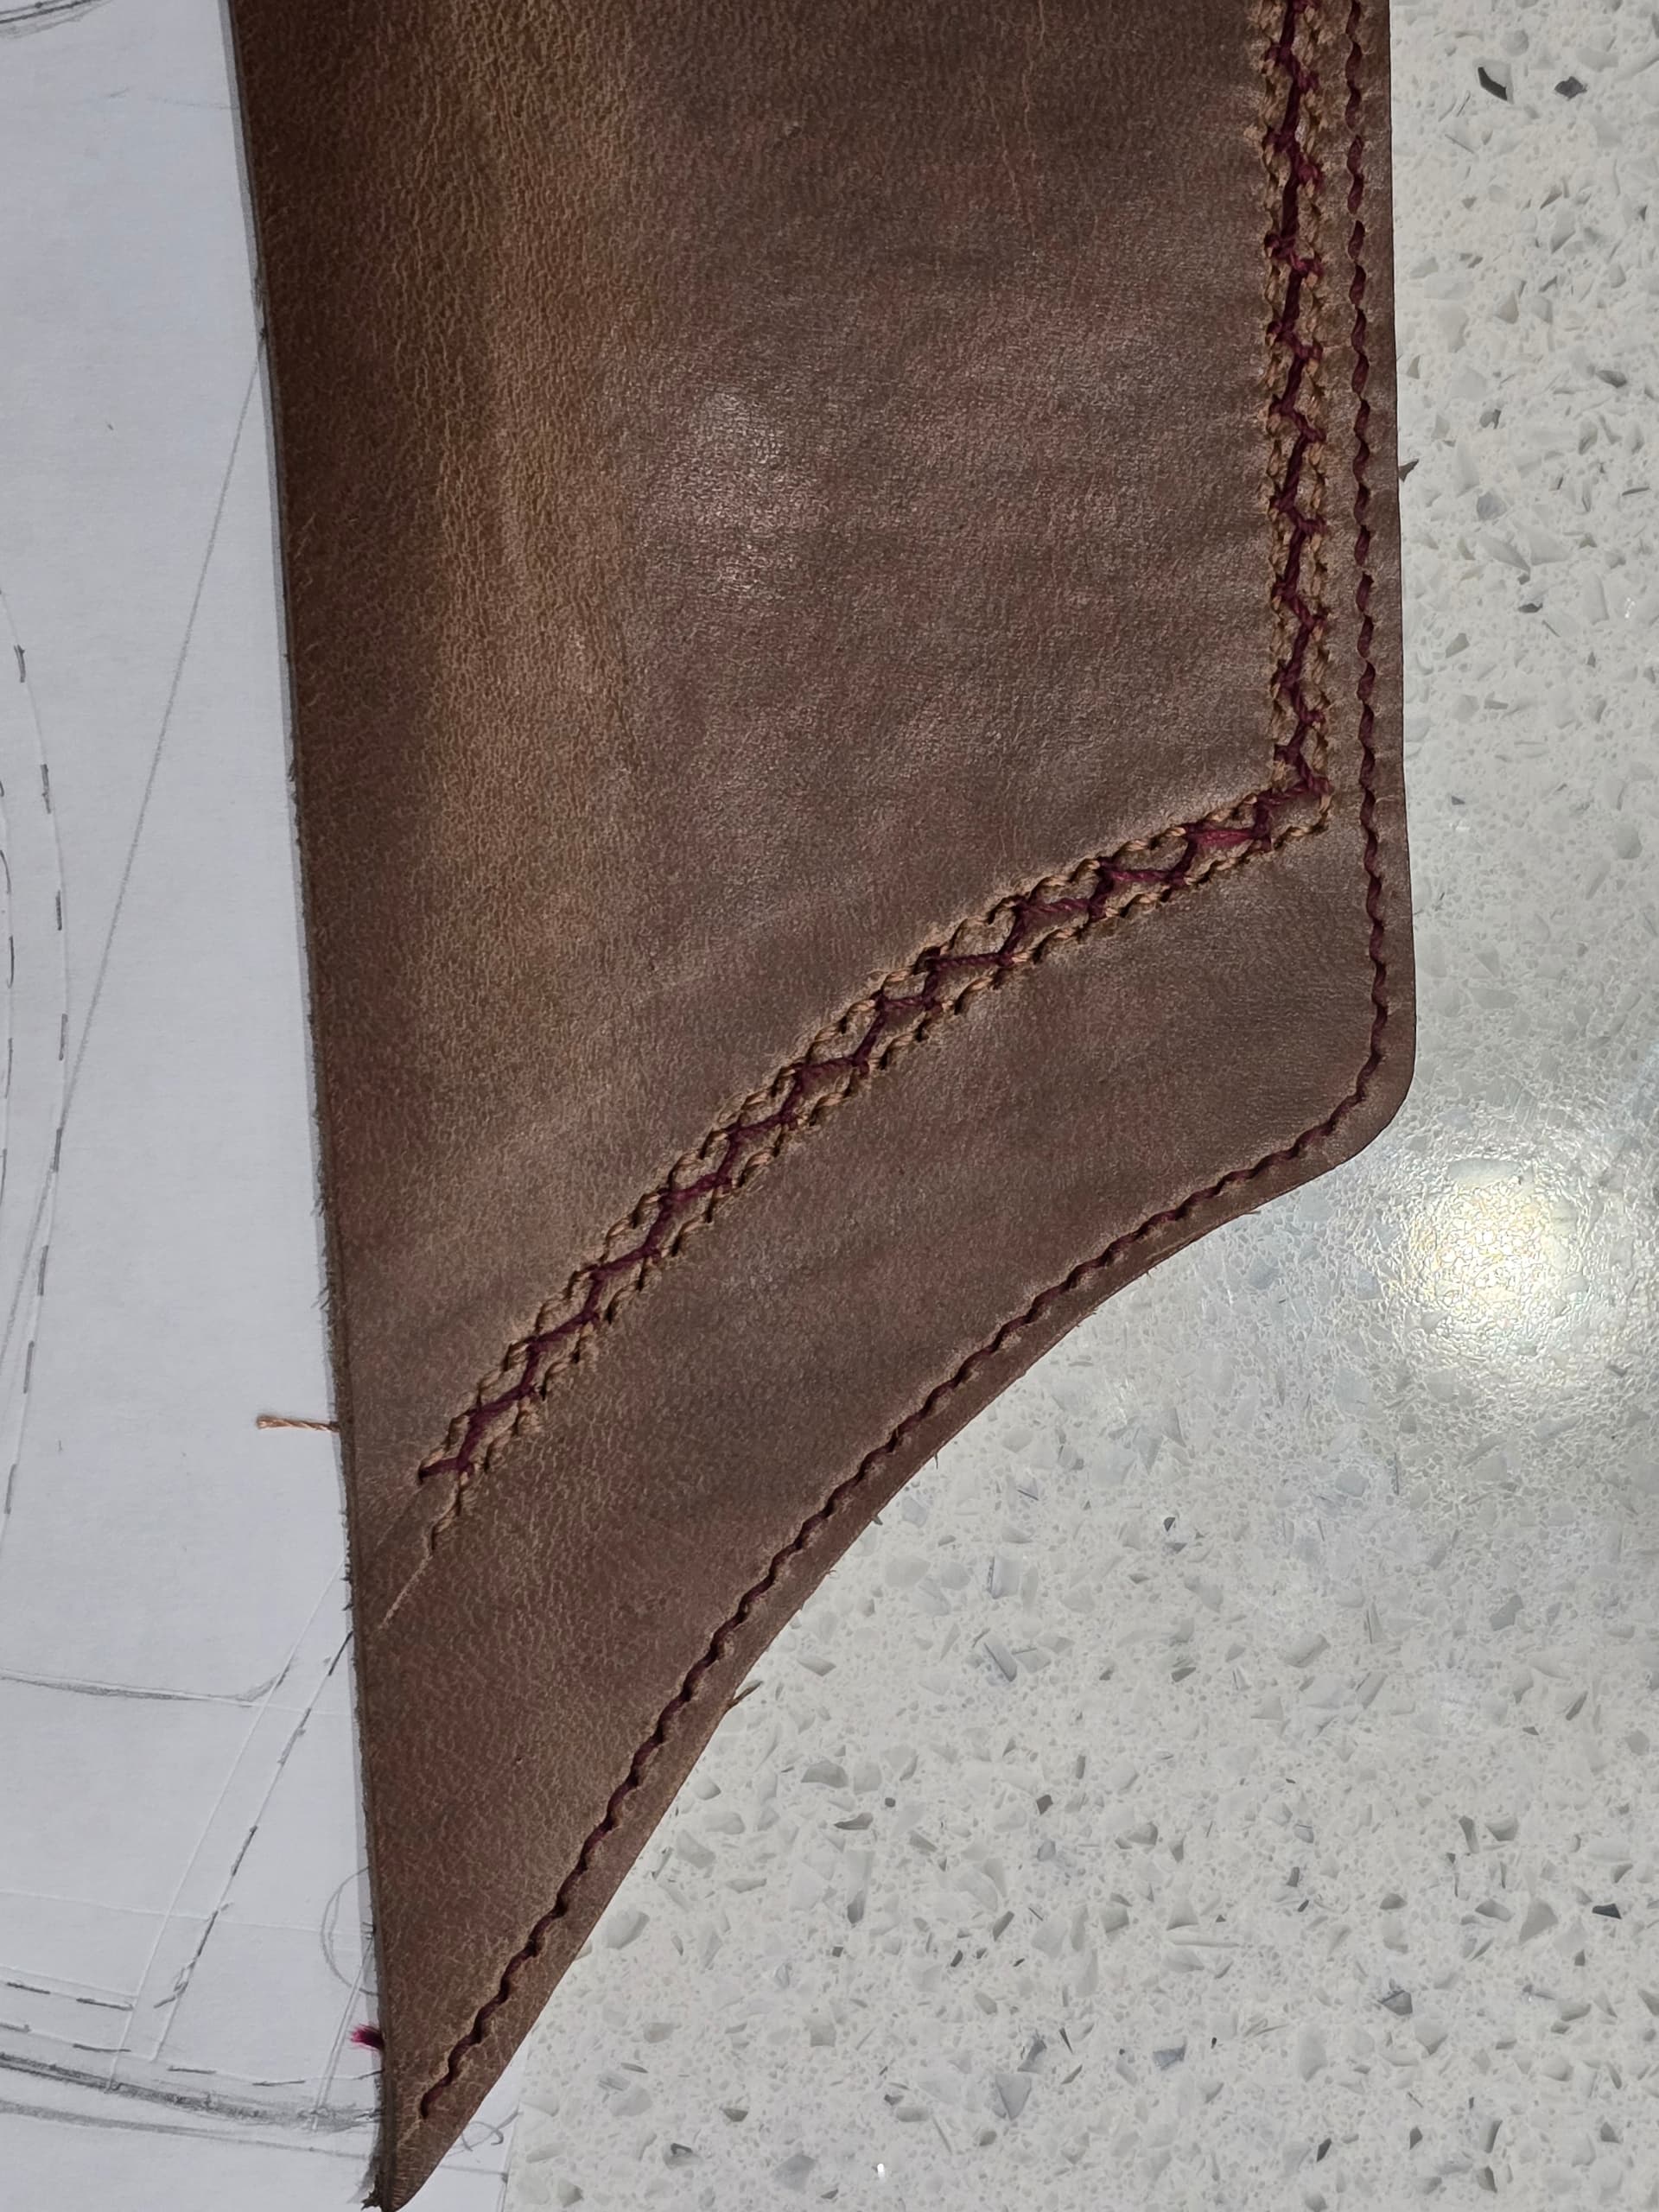
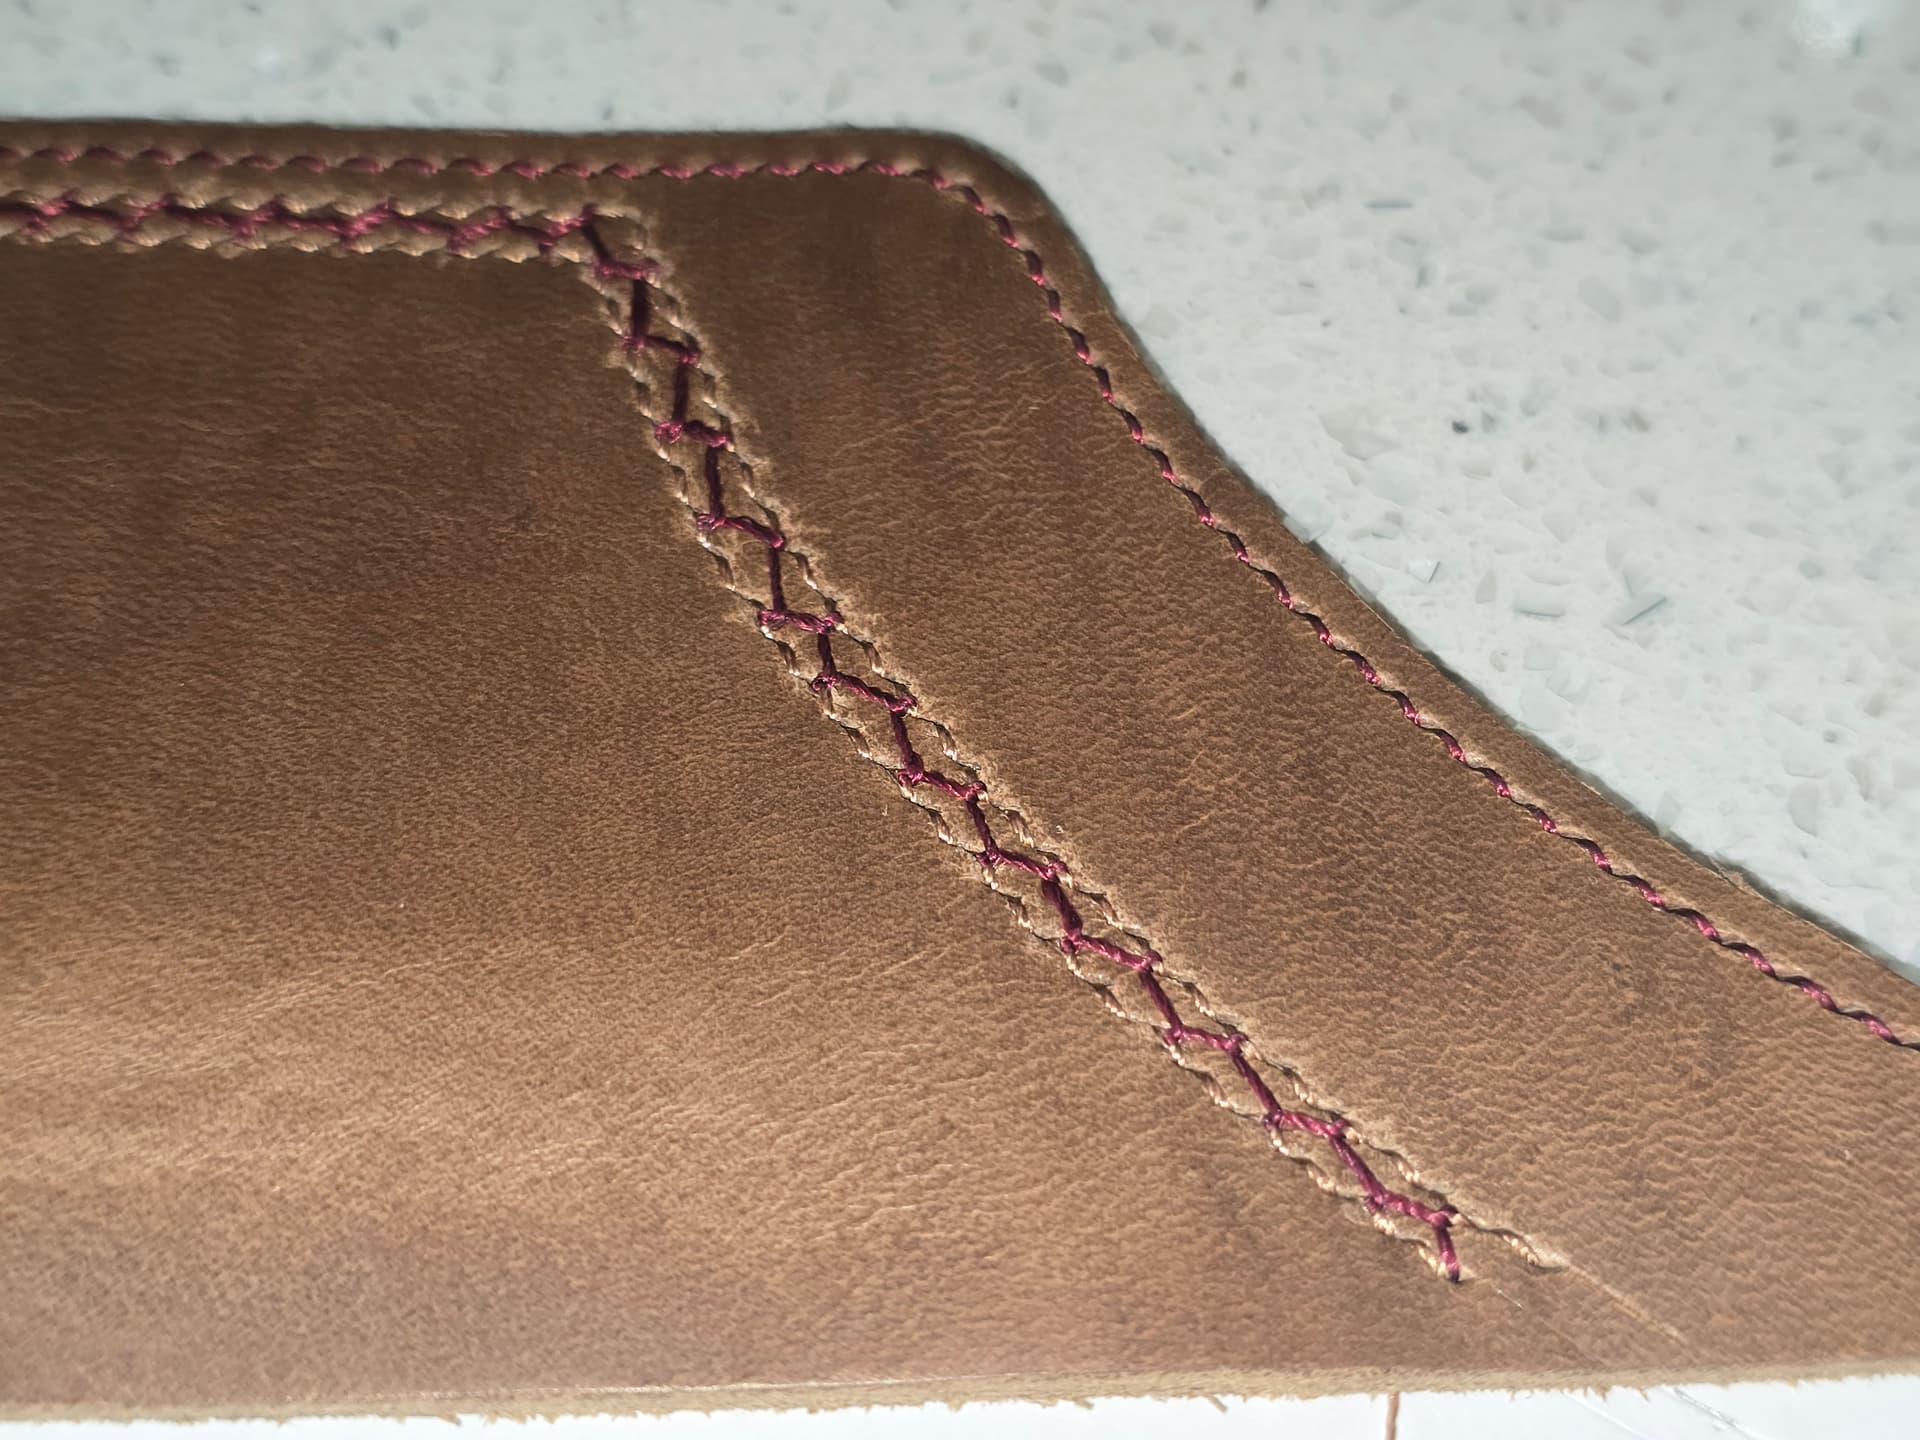
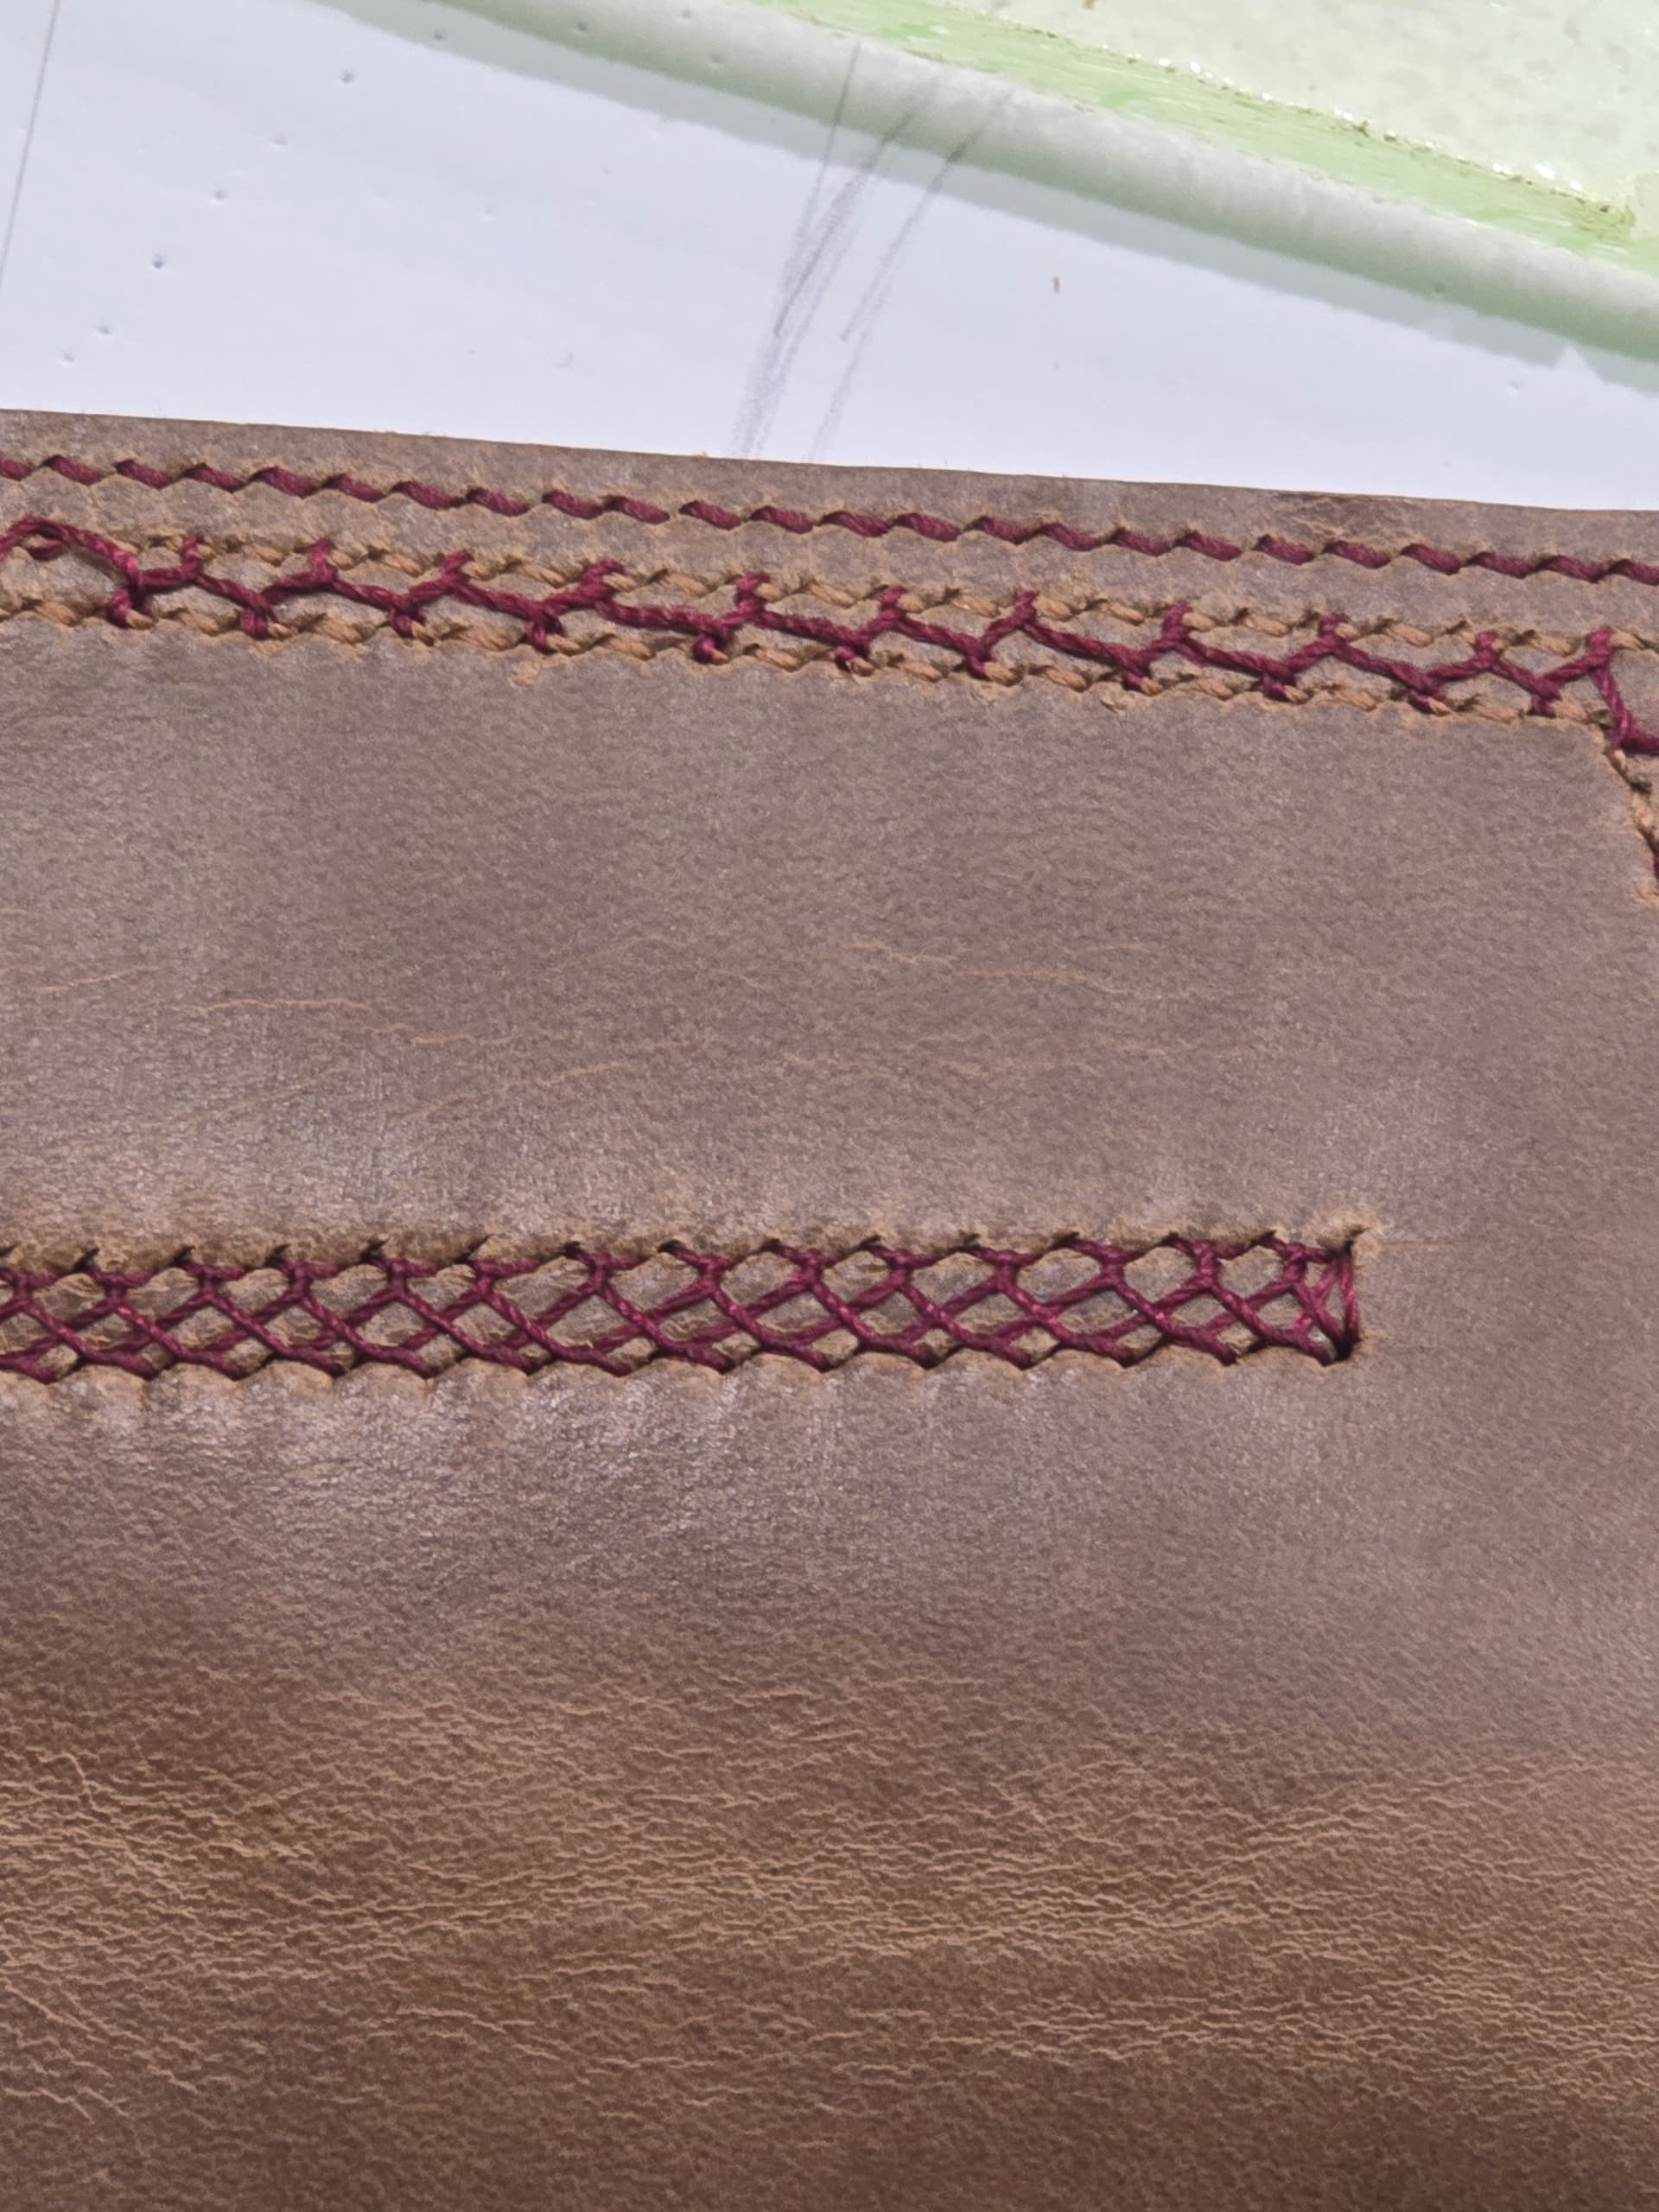
  • saddle stitch with different color threads, top and bottom
    This gives straight stitch in alternating colors.
  • saddle stitch with alternating stitch lengths, especially also with different color threads
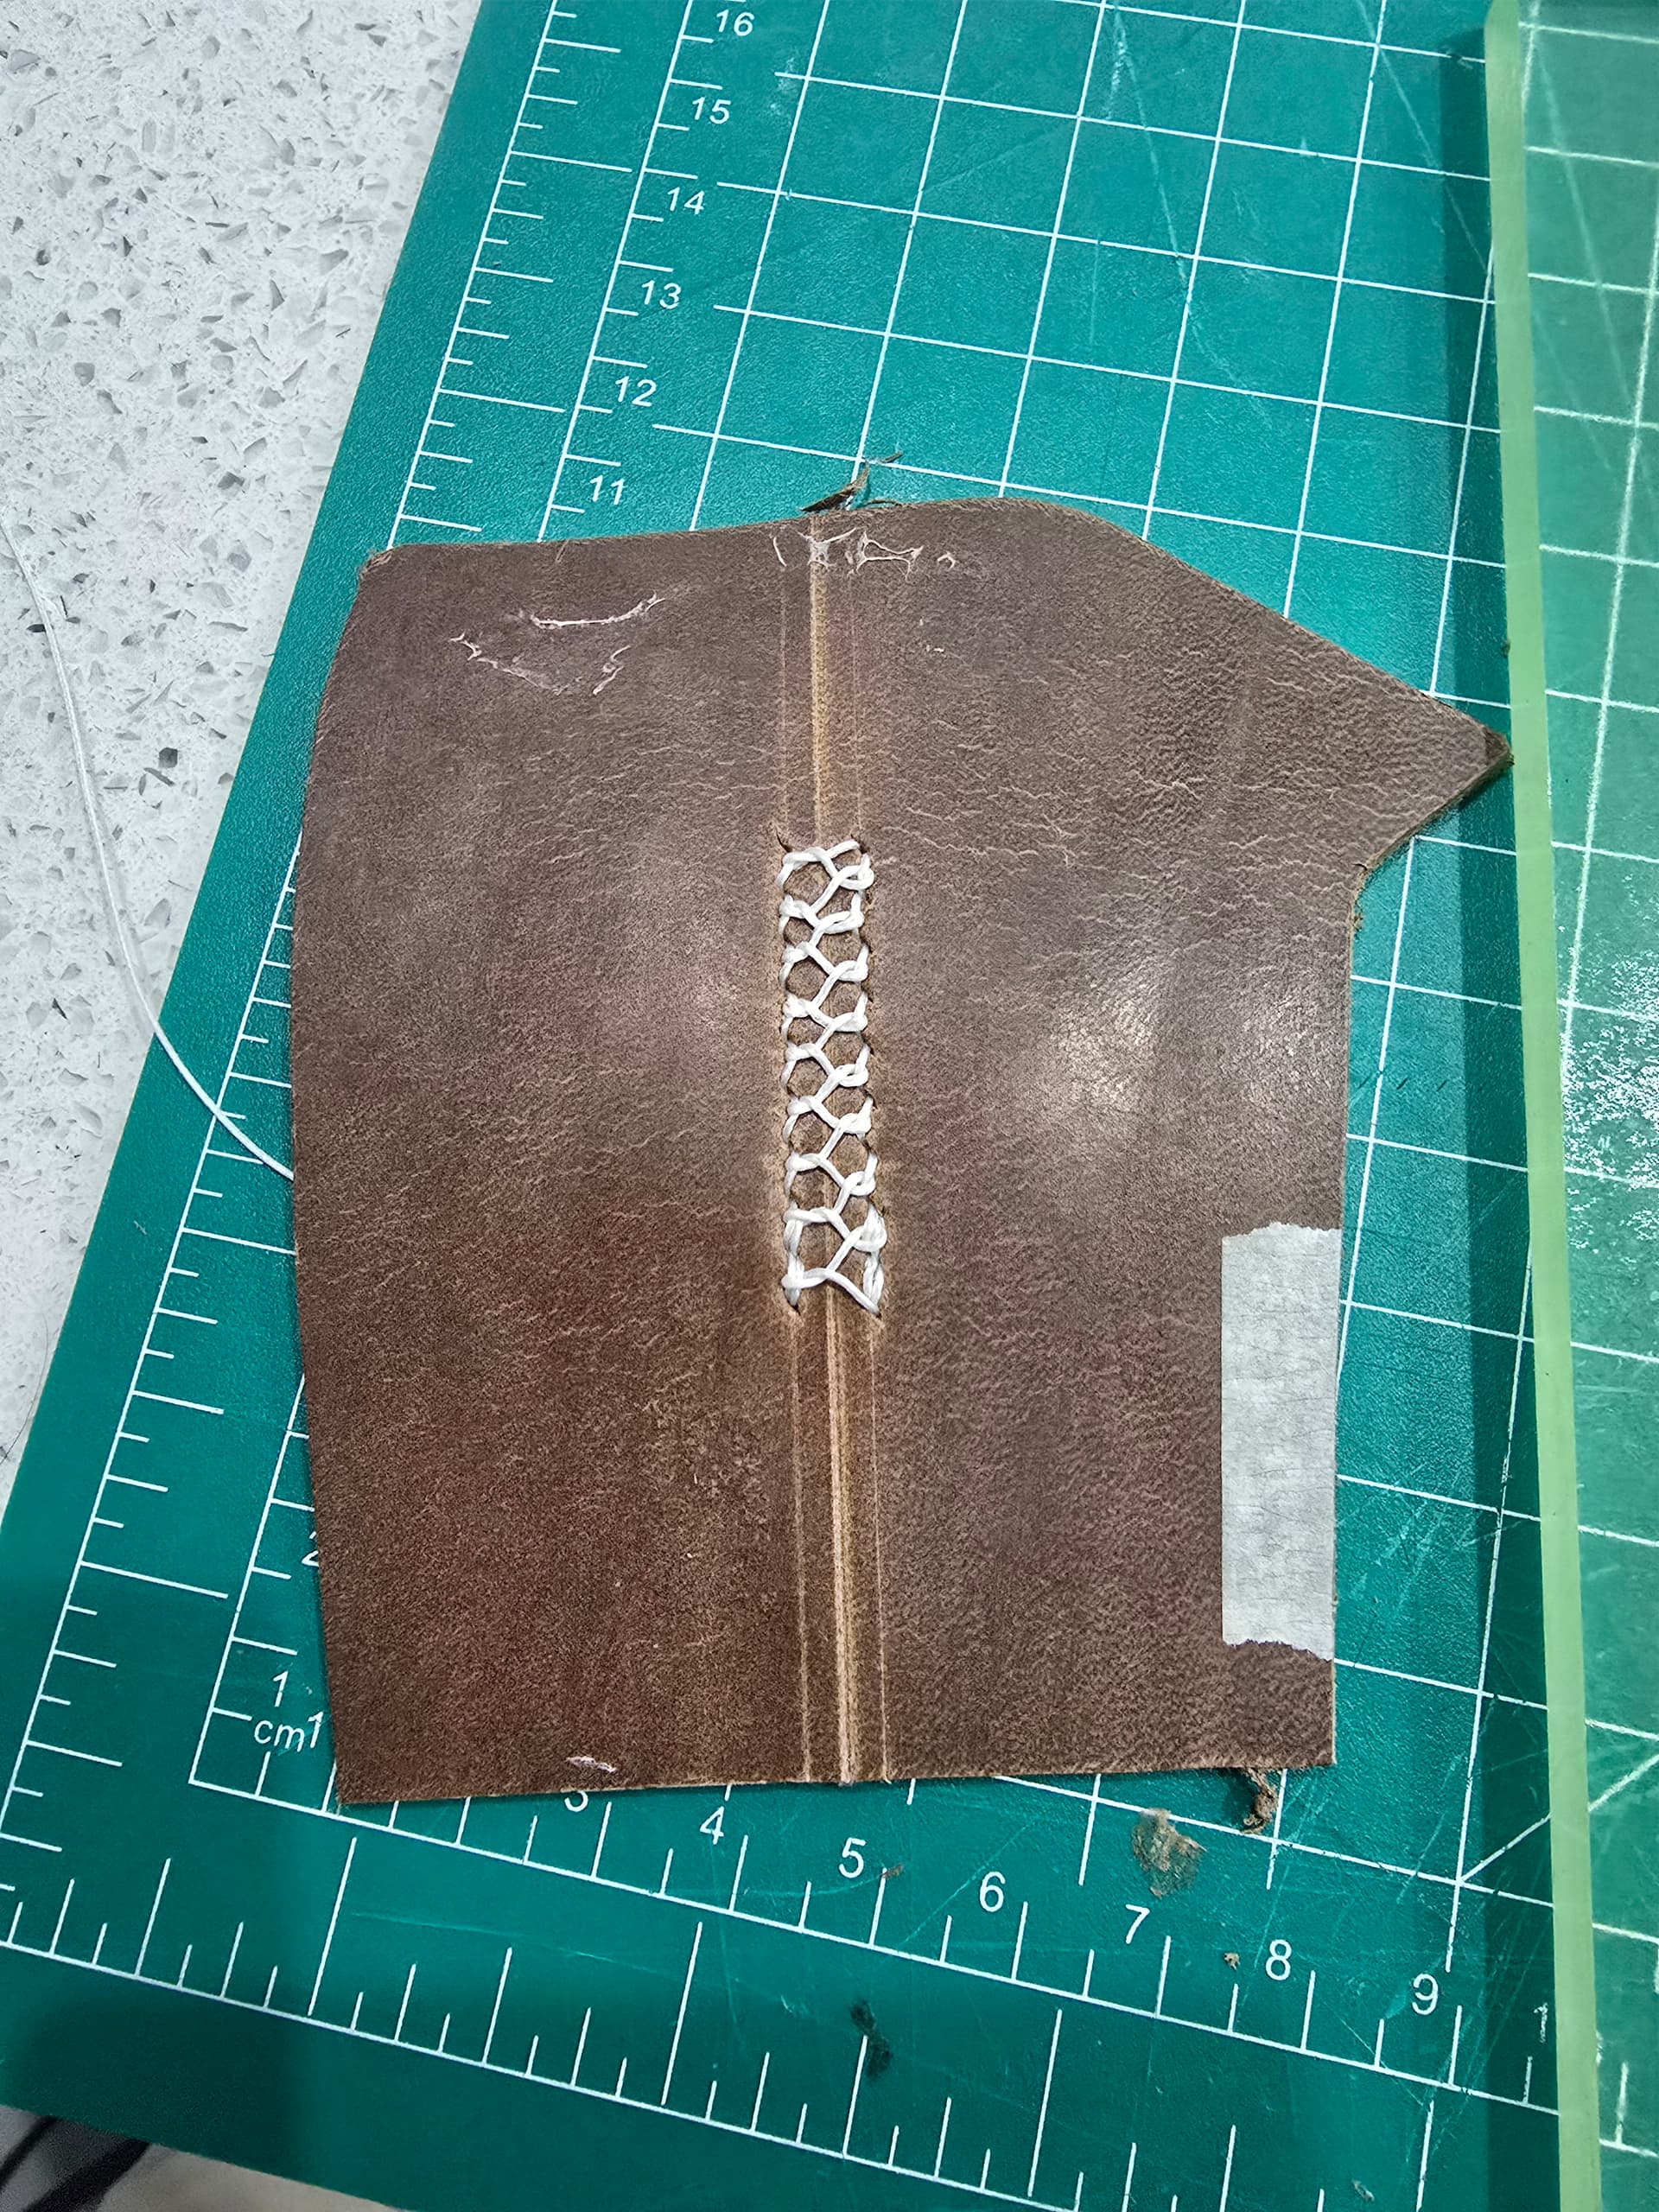
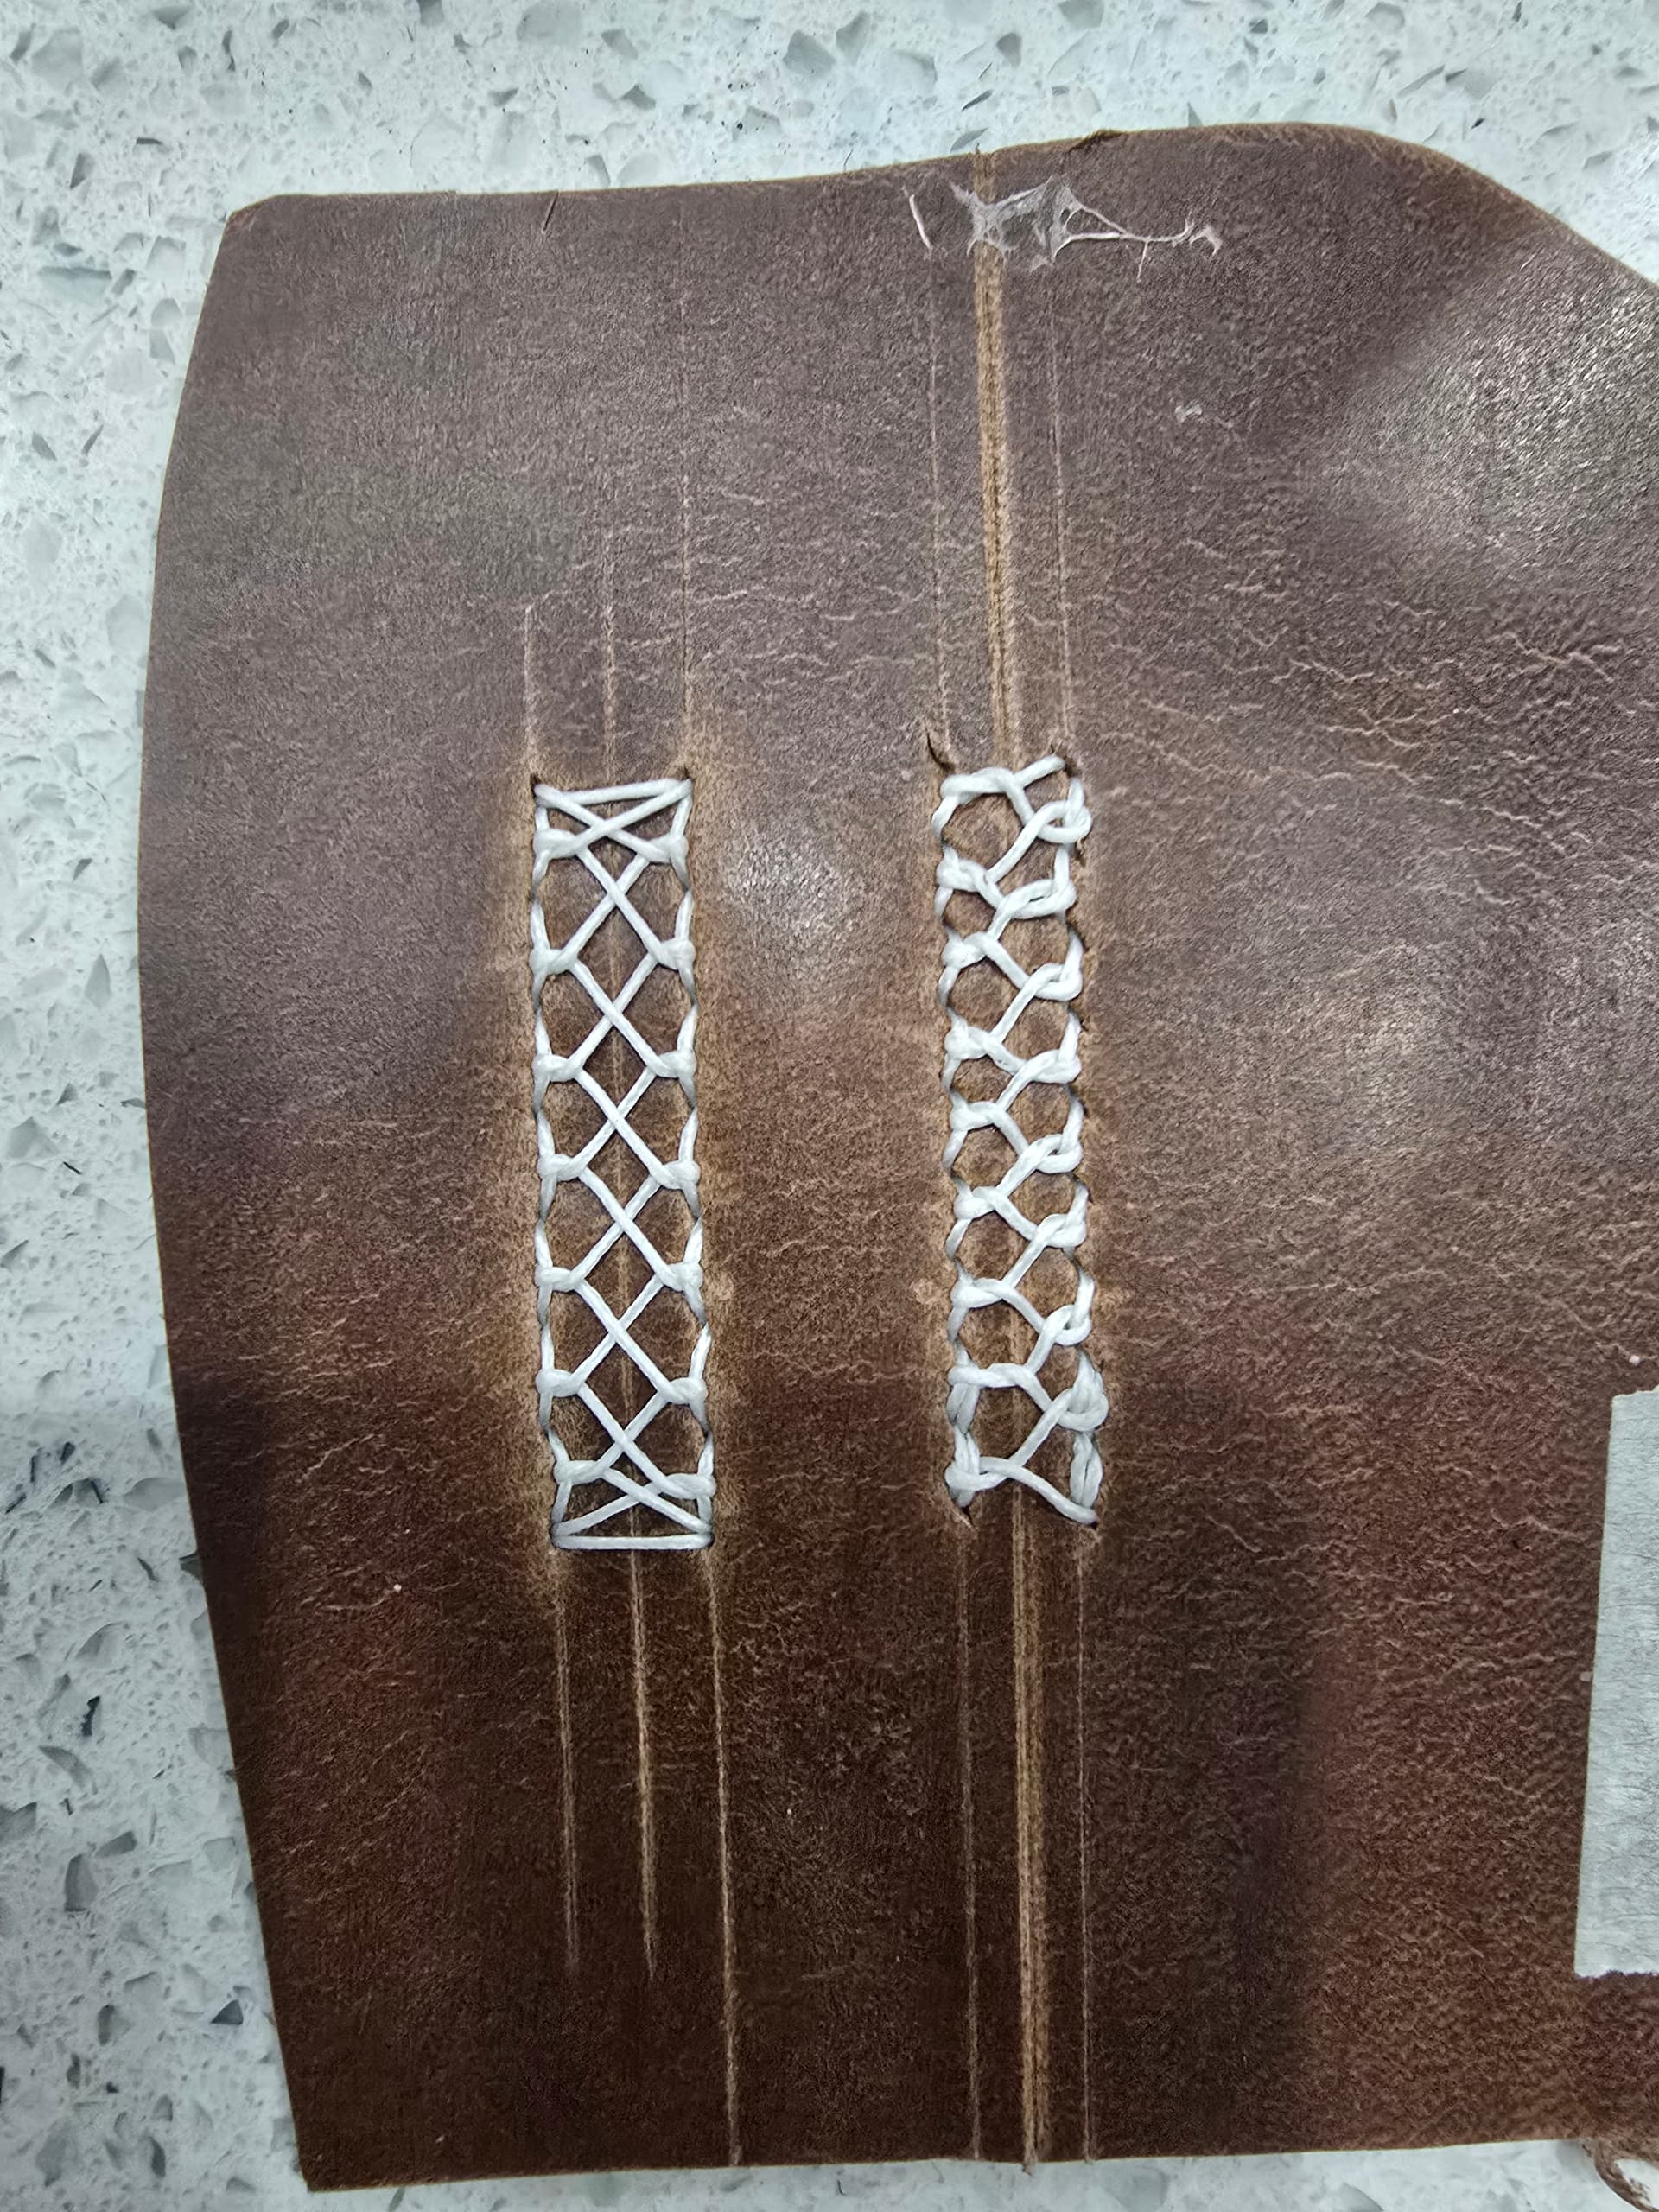
    I did these on my third pair and am still really happy with the effect.
  • most composite stitches
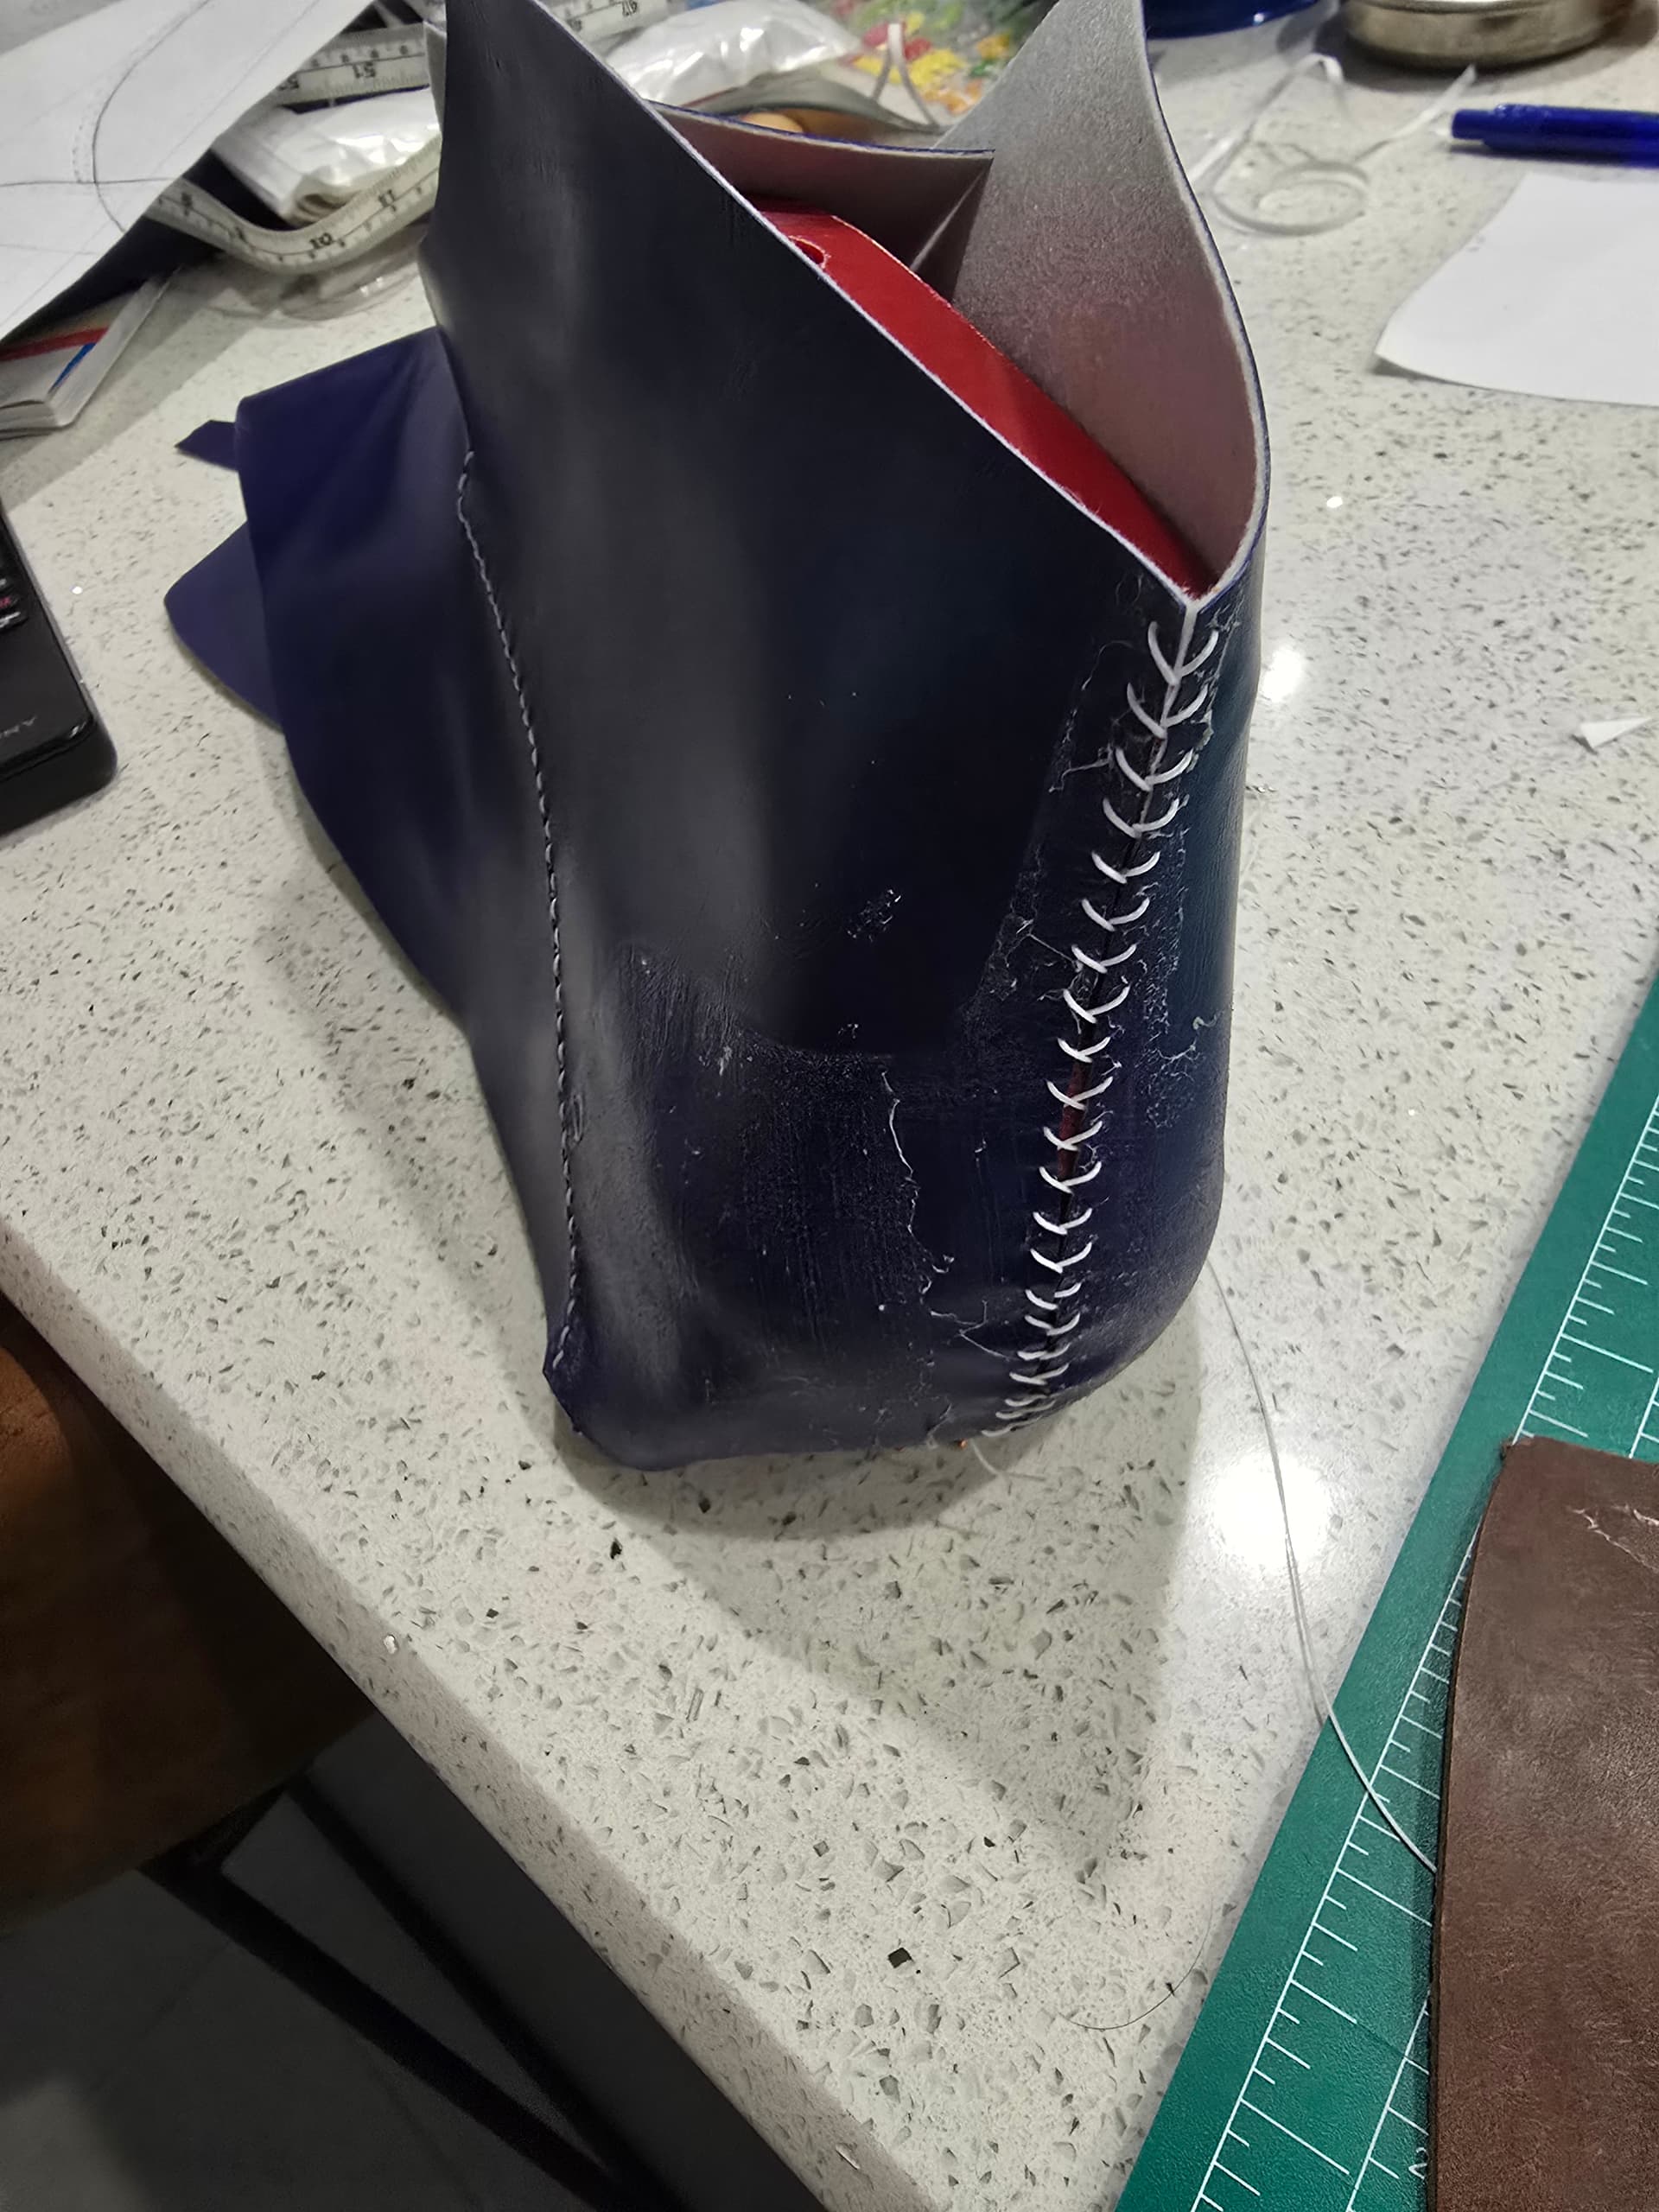
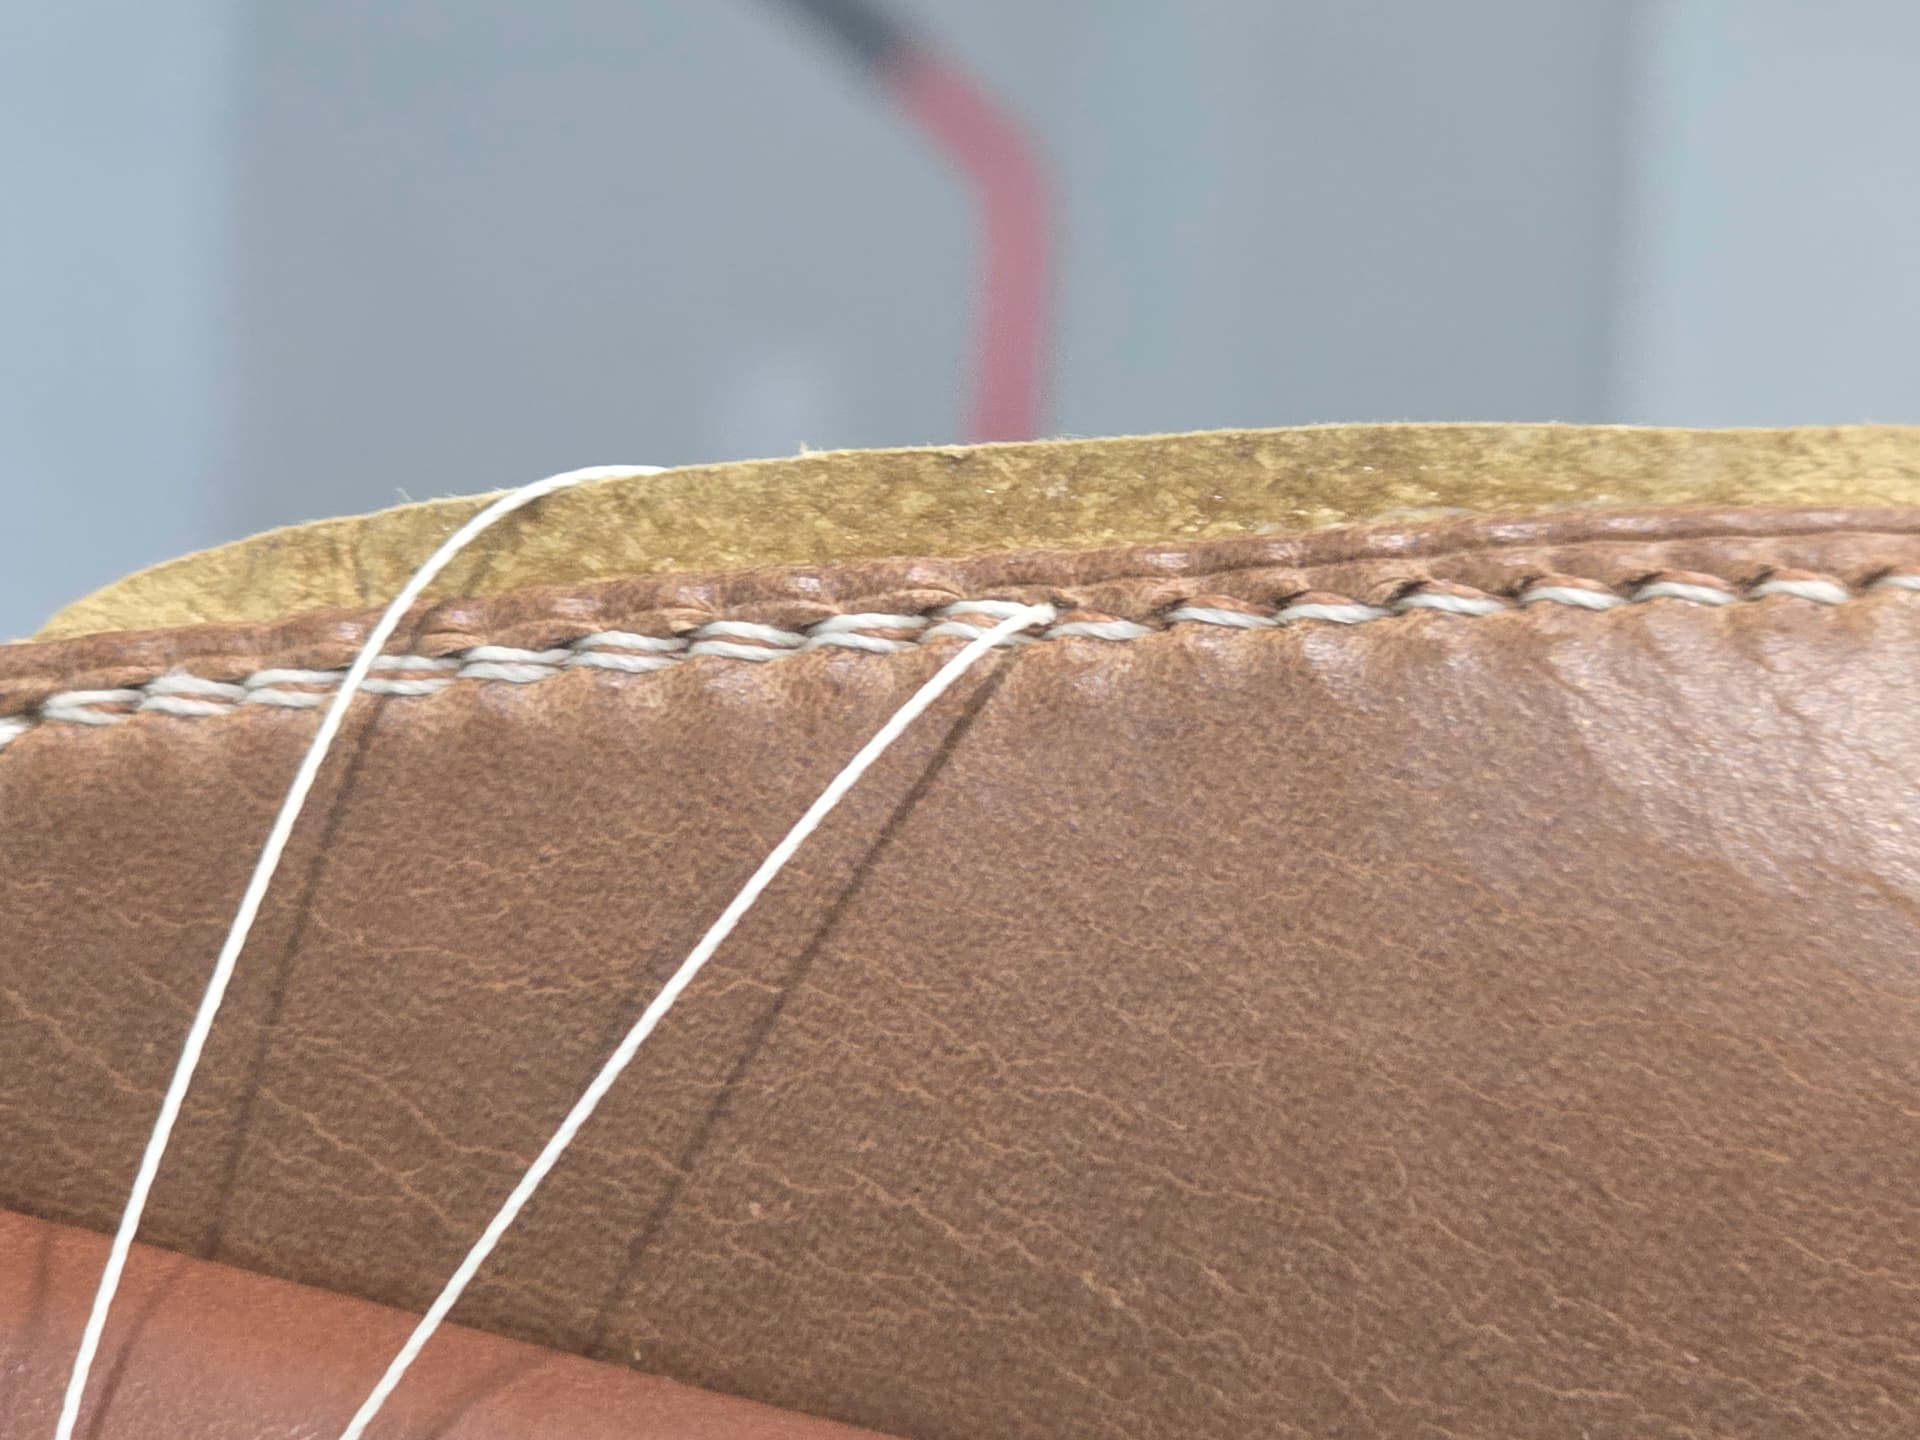
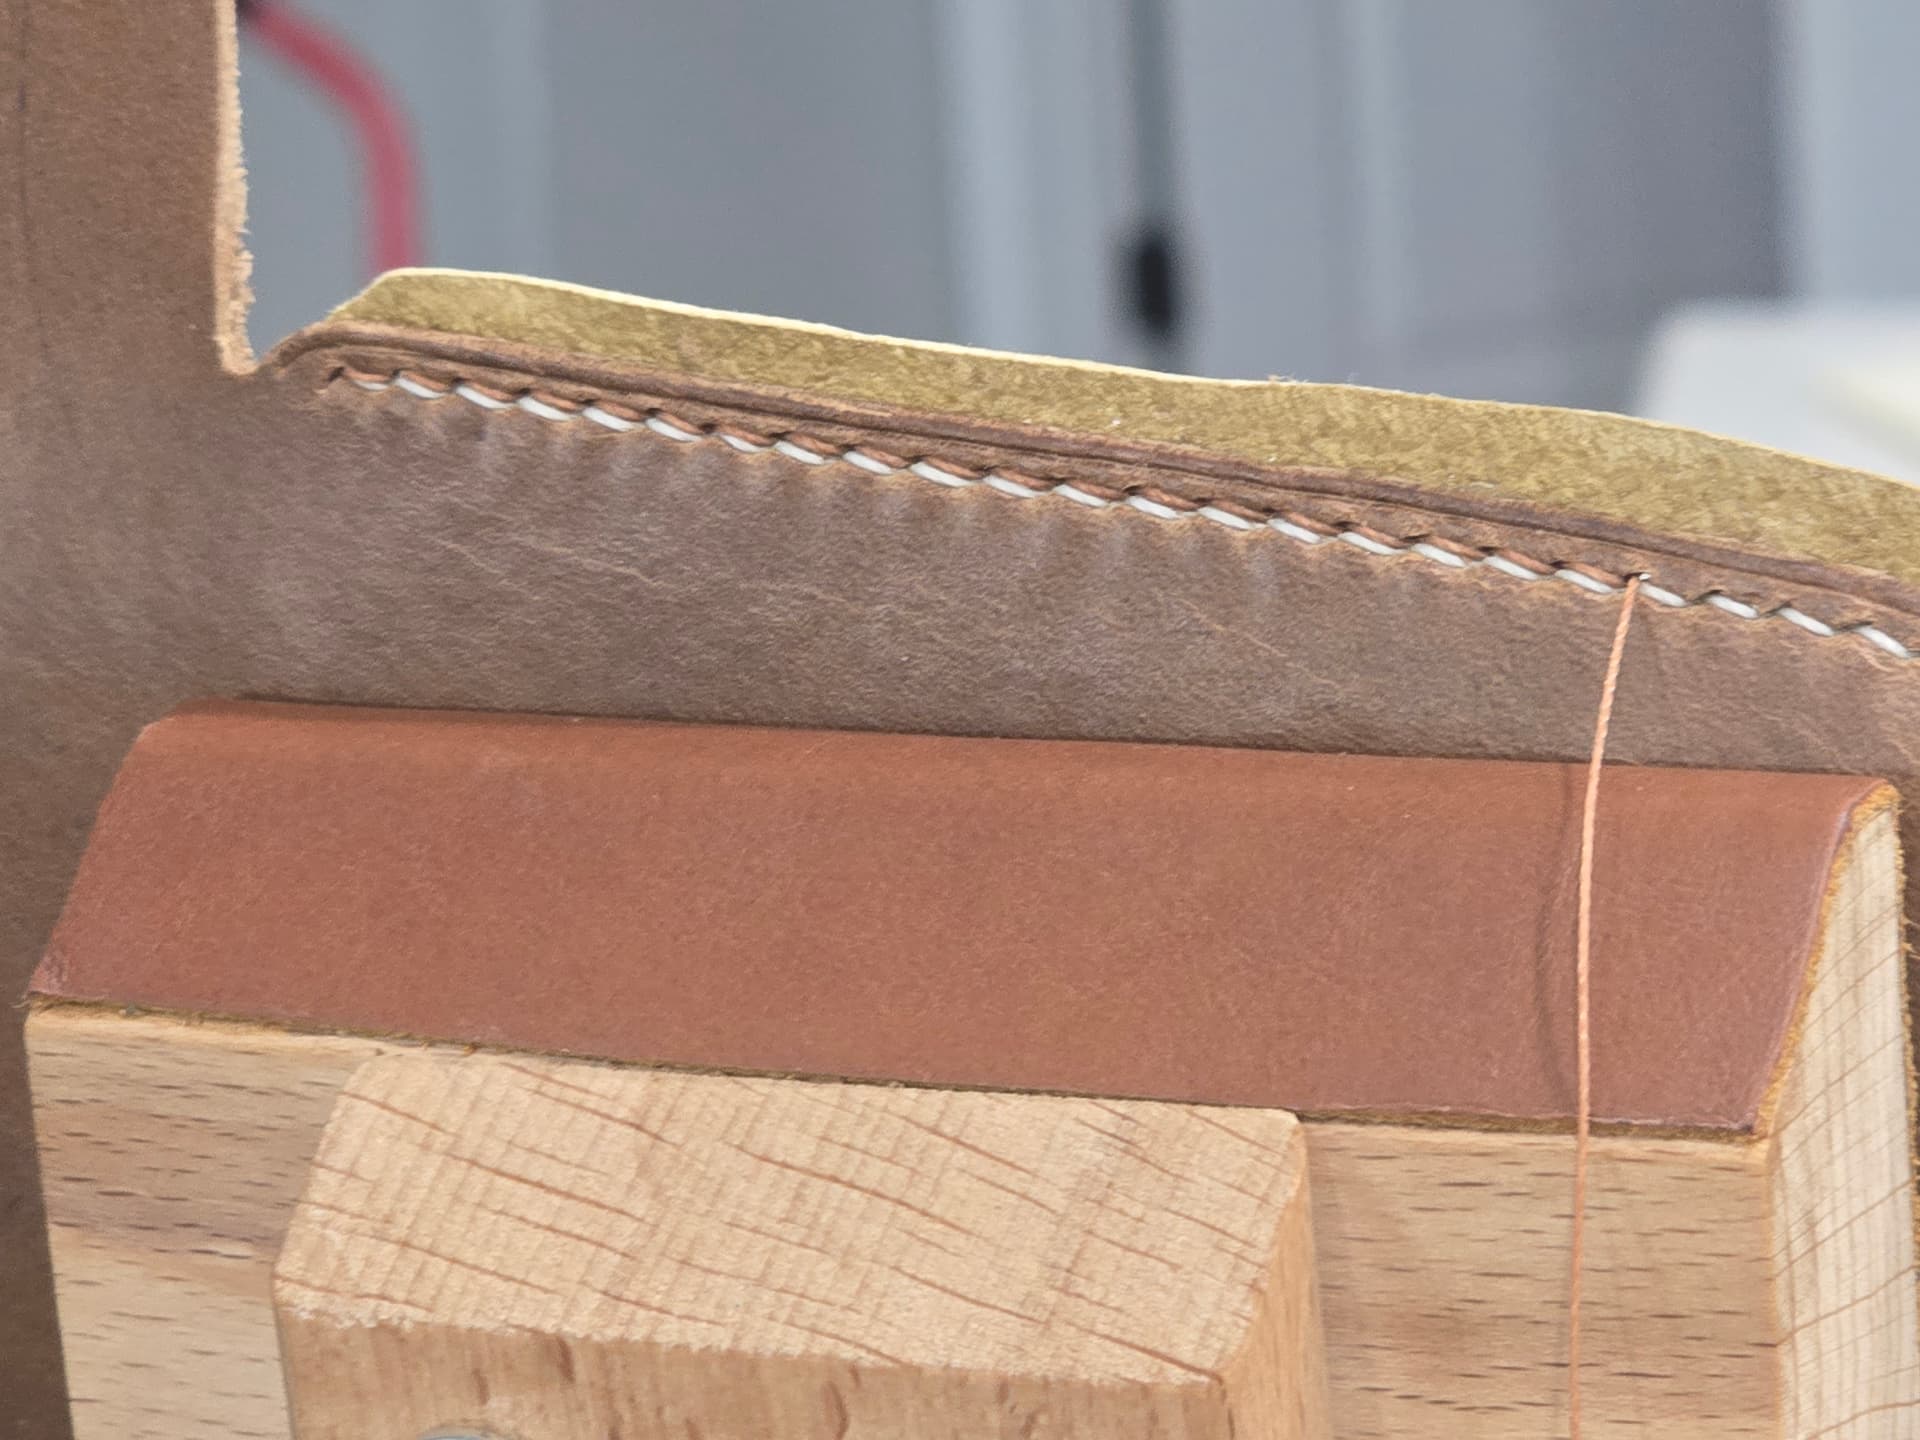
    • single threaded saddle stitch
    • double threaded saddle stitch
    • twisted double threaded saddle stitch
      AKA “Goyser”, “spinning”, “Norwegian”
    • single whipped saddle stitch
    • double whipped saddle stitch
  • many complex bar tack styles

I’d like to find some more!

One promising direction I have in mind is to riff on the theme of composite stitches. Sewing by hand, there’s nothing stopping us from looping other things in there, like beads or fibers like piteado.

Way back when, I also did some experiments criss-crossing stitches across multiple lines for Celtic knotwork-like effects. A number of these patterns met all my criteria, but none of them really caught my eye at the time.

Wow you sent me down a rabbit hole on piteado! What a fascinating artform. Learher carving combined with hand embroidery and beading in some really neat styles!
Ive heard that before that saddle is stronger than lock but never understood where that idea came from. Seems like one of those things that started as opinion and has become lore. Or has someone somewhere demonstrated that?

1 Like

It’s a great tradition. If you get a chance, definitely check out some pieces in person. The texture really doesn’t come across in photos.

I think it’s true that lockstitch can unravel in a way saddle doesn’t when a thread gets broken. Apart from that, I personally wouldn’t hold saddle out as stronger than lock as a general matter. Comparisons are possible, but only if you get a lot more specific, including about what kind of strength you’re talking. Many of the fibers we sew with now make threads so durable that they’ll readily pull or saw through tough leather if the going really gets tough.

Lockstitch is also a bit of a straw man. Most of the seam engineering references I’ve seen generally estimate higher breaking strengths for chainstitches.

My criterion about strength was mostly to exclude any stitches that would be a clear step back from machine work. Single running stitches, for example, look distinctive, but I wouldn’t expect the same durability of any kind as lockstitch.

This is something that I implemented on a recent project. In this case, I saddle stitched through the same holes three times; one run from start to finish with the brown thread, back stitching at each end, then starting the white thread at one end, stitching all the way down and back, with only a back stitch to finish. Being very mindful with the white thread to go “below” the brown thread on the way out and “above” on the way back. 4mm spaced french chisel with .45mm thread.

2 Likes

Welcome to the forum, and thanks so much for sharing here!

I’ve probably made a grand total of two whole watch straps in my life, but I still try to check out new photos every once in a while. Finish standards for straps are really high, there’s lots of competition, and each strap is a relatively small project, compared to other leather crafts. Strikes me as a great petri dish for new techniques that could be “scaled up” to shoes. On the other hand, a lot of focus is specifically on the materials, and most straps seem to have one of maybe five or six stitching patterns.

Thanks especially for mentioning the details: French irons, 4 mm spacing, and thread diameter. I’ve been trying to do this for my shoe projects, starting from my first pair, here on the forum. Sharing recipes, so to speak.

Can I also ask: Did you drive the irons through the leather to make the holes, stitching-chisel style? Or did you just prick the holes and pierce with a separate awl? Do you think it’s important that the holes be slit-shaped, rather than diamond-shaped?

I’ve only just got my first set of French irons, after many years using the diamond-shaped Japanese style. For 10 SPI, I just couldn’t find a maker doing irons that fine in both left- and right-slanted. But I was planning to prick and pierce separately, like I usually do.

I’d always assumed Blanchard awls would also be flat, rather than diamond-shaped. But it turns out they’re diamond-shaped, too. For shoes, if you stitch everything on the flat, I suppose it’s perfectly possible to just pierce with chisels.

Anyway, here are a few links and pics that ended up in my scrapbook a while back. Maybe you’ll enjoy seeing the different color combos, like I did:


https://imgur.com/gallery/how-to-tri-tone-leather-stitching-eH7Dl

This slightly different, composite stitch inspired some lines on my first, ill-fated pair of boots:

And an inspiration for the third pair:

I still haven’t found myself drawn to any candy-cane-like effects, like this. But they’re certainly possible:

An Internet shoe friend did it all the way around the inseam of a 360-welted pair recently:

https://www.instagram.com/p/DLYwW-cxzaP/

Yup, drove all the way through. I have a set of diamon-shaped chisels, but i have always preferred how the french ones make things lay, so they haven’t came out of the tool box since I started playing with leather.

I usually follow the same process on upper assembly that I do for a strap. I will sand the edges smooth, then lay out the stitch line and mark the chisel locations. Run a heated edge creaser, then bevel and edge paint/burnish depending on the leather. Once the edges are finished, I’ll glue the pieces in place then tap the chisels through. Actual stitching is the last step.

1 Like

I did a few test pieces before stitching the upper with different patterns.

1 Like

I have a big three-ring binder with poly document sleeves in it that I use to keep “studies”, mostly scraps of leather with difference thread and stitch combinations. I’ll tie an index card to each with the “recipe”, or just throw it in the poly sleeve with the work. That way I can flip through it like a sample book and replicate what I see.

My favorite stitch I’ve done so far was on the quarter seams of my fourth pair of boots. Alternating black and white saddle stitch, with every third mark skipped, repeated in three staggered rows:

1 Like

That pattern looks fantastic.

I definitely need to play around for my next project. Ill post up some test coupons when I get everything laid out. New last shows up Tuesday

1 Like

4 posts were split to a new topic: Podohub and 3D Printing Lasts

I am starting to work on my next project. As I was doing my pattern test fit, i just did a quick baseball stitch since I was going to cover the back with a decent sized backstay.

Looking at it, i like the look without the separate backstay and with an exposed stitch.

Whipped up a quick sample of a ladder herringbone stitch for the rear seam. I think I like it.

2 Likes

A variation on the same theme:

1 Like

Here is the herringbone ladder at a much smaller scale. 3mm chisels with the lines 3mm apart using .45mm thread.

Works a lot better going every other stitch when things are this tight.

2 Likes

Nice! It’s always hard to tell from pictures, but I bet the burgundy over tan-brown might look very nice in person.

I’ve some scrap studied of stitches resembling Celtic knotwork that I could share if you like. I’ve always hesitated to use them on shoes, though. I always worry that exposing too much thread on the surface will lead to snags and tears.

Definitely hard to focus. Ends up looks somewhat “western”. I need to play more with some different sizes/color combos. I think I like it more with a bit larger stitching pitch

1 Like


This is 4mm chisels with the lines 5mm apart. Two herringbones out of phase, with a back loop on the top and not on the bottom (since i punched with slanted chisels.

Makes for an interesting asymmetry.

2 Likes

Couple more for comparison.

Top is two lines of 5mm pitch round holes, 4mm between lines. Double offset herringbones. The double is nice because you can use thread with needles on each end like saddle stitching and not rely on a knot of the back end to keep the thread from pulling through.

Next is the 4mm pitch french chisel, 5mm between lines. Double offset herringbone with an asymmetric twist.

Bottom two are single herringbone with 5mm pitch round holes. Rather than the stitching being lined up, the second line starts 2.5mm offset to the right.

Of the bottom two, the top lines are 3mm separatef. Bottom are 4mm separated.

2 Likes

Doing this again today, so figured I would post a couple in process photos.

Start with the center thread

Then add the outer threads, going down and back.

Edit: I take it all back. Starting in the center and doing the two outside stripes is not the way to go.

Getting much more consistent results starting with the inner most stripe and when I tension my stitch, doing a second pull to seat the stitch as far “down” as possible, then stacking the next stripe on top of that. I will take some pictures to better explain.

2 Likes

It’s been a while since I’ve stitched this style, but that’s what I remember, too. With thin enough needles, I could put a needle through each hole on top of existing stitches and tamp them down to the bottom of the hole before making the next stitch.

Definitely stacking nicely

I have been basically putting my finger over the stitch hole as I take out the slack, forcing the thread to come down from above

And then final tension and seat down into the corner to leave room for the next layer of stitching

2 Likes